I used PLA -GF as a temp solution on a printed nut. Thing has over 2,000 hours and zero play. Works 10X better then bambus brass 
1 Like
My solution allows you to use standard parts. You can change a lead screw and nut out the top of the printer in under 5 minutes.
Not really. As the nut wears the bed is always going to fall the bottom of the backlash, and the wear is going to show up on the total backlash. The amount of total movement on a new nut is less than .2mm
You’ll only get extra wear when the load is uneven. Uneven load creates uneven wear, making the bed being able to move up and down in that corner.
Why don’t you just replace the other nuts with the gf ones rather than trying to save them?
Yes, the accelerated wear of the single rear compared with the fronts, will tilt the bed frame causing a quicker demise to all 3. I was noticing the auto bed level was taking more time and touches to start the print.
I manually leveled the heat bed and the auto level was fine again. I then measured total clearance of the lead screw nuts with an indicator and my fronts were < .2mm and the rear was .4mm at 1400 hours.
So my assumption was the initial bed level from the factory was way out from the rear nut wear that was making the auto level struggle.
Not sure with the people having repeat nut failures after the first set fails with time. I have not done mine, I have a new set of rods and bearings for when the time comes.
I am wondering if when they are replaced, that the heat bed frame is neutral and not being twisted during the installation and timing of the screws and nut/bearings.
If the nuts were serviceable from the top like MiamiJerry has done, I imagine you could position the bed frame parallel to the xy movement of the toolhead and then individually time the bearings to the bolt holes after the screws were secure with the belt under tension. That would have the bed, screws and bearings all neutral.
The way Bambu sets a “Zero point reference” is by bolting the heated bed to the bottom of the printer. It is at this place Bambu leadscrew nuts should be tightened in place. All in all, I think it is a great setup. But there could be an issue You can not tell if any of the Bambu nuts are binding in one direction as they are out of sight, so when you tighten the Bambu nut they could be binding. My setup is the same as far as using the floor of the printer as “Zero Reference”, but what I discovered is that if any leadscrew nut mount is not perfectly centered, you know it because the nut will not roll down into the mount. Kind of an alignment feedback that prevents any binding.
I like the “Zero Point Reference” because if you tram the bed right after bolting to the bottom, then you can get a acceptable tram each time by returm to the Zero point again. With my mod each leadscrew can be rotated at zero reference to remove the play out of each leadscrew nut, over and over again back to acceptable tram. But without having to re-tram.
As far as timing the Bambu nuts being a 3 hole nut, as mentioned earlier in this thread. This is not a problem, as the z axis belt install happens with all the nuts aligned.
You’ve certainly done the leg work to hopefully solve some people’s issues.
I have some Igus I180 filament nuts printed.
Maybe I’ll put them in and log the hours and wear.
1 Like
What property would make them better? Harder?
It’s unlikely that this problem is the quality of the brass nuts. There’s a mechanical issue that is contributing to the excess/high wear. We’re just not completely sure what the issue actually is. But better brass nuts will cost more and still wear out if the mechanical issue is present.
1 Like
I agree with this. I think it’s caused by misalignment either introduced during manufacturing, shipping or user maintenance/upgrades.
I think it is loading of the nuts. One complete thread of a TR8x8 nut is 8mm tall, but the Bambu nuts are 6mm tall. So the Bambu nuts have only 3/4 of a full thread for each of the four starts.
Plus, the rear nut is carrying more load and so wears faster. This tilts the bed to the rear, which further wears all three nuts.
But hey, these are parts that will wear, so 5 minute access is my answer.
Howdy all. Just commenting to join the rear nut wear club. Mine just stripped at 1,700 hours. Lucky I have a spare screw kit with nuts. (My lead screws came horribly burred so they sent me replacement when I complained incessantly in warranty!).
I’m out of warranty now.
Not looking forward to this task. I barely get 2-3 hours on weekends to myself for stuff like this. Somehow I doubt it’s a 2 hour first time job.
if you put it on a workbench then yes it should be doable within 45min as long as you don’t miss something
1 Like
do you have a model or something of them, especially the one youre using ? i run a farm too and they all start failing extremely, im going straight for the printed one since im also on one machine on the second set already. Could make a model, but when its already done and you may share it why not.
I have been working on a repair kit that will allow replacement by a 2-part nut without any removal. I am still running some tests to validate it but it shouldn’t take too long 


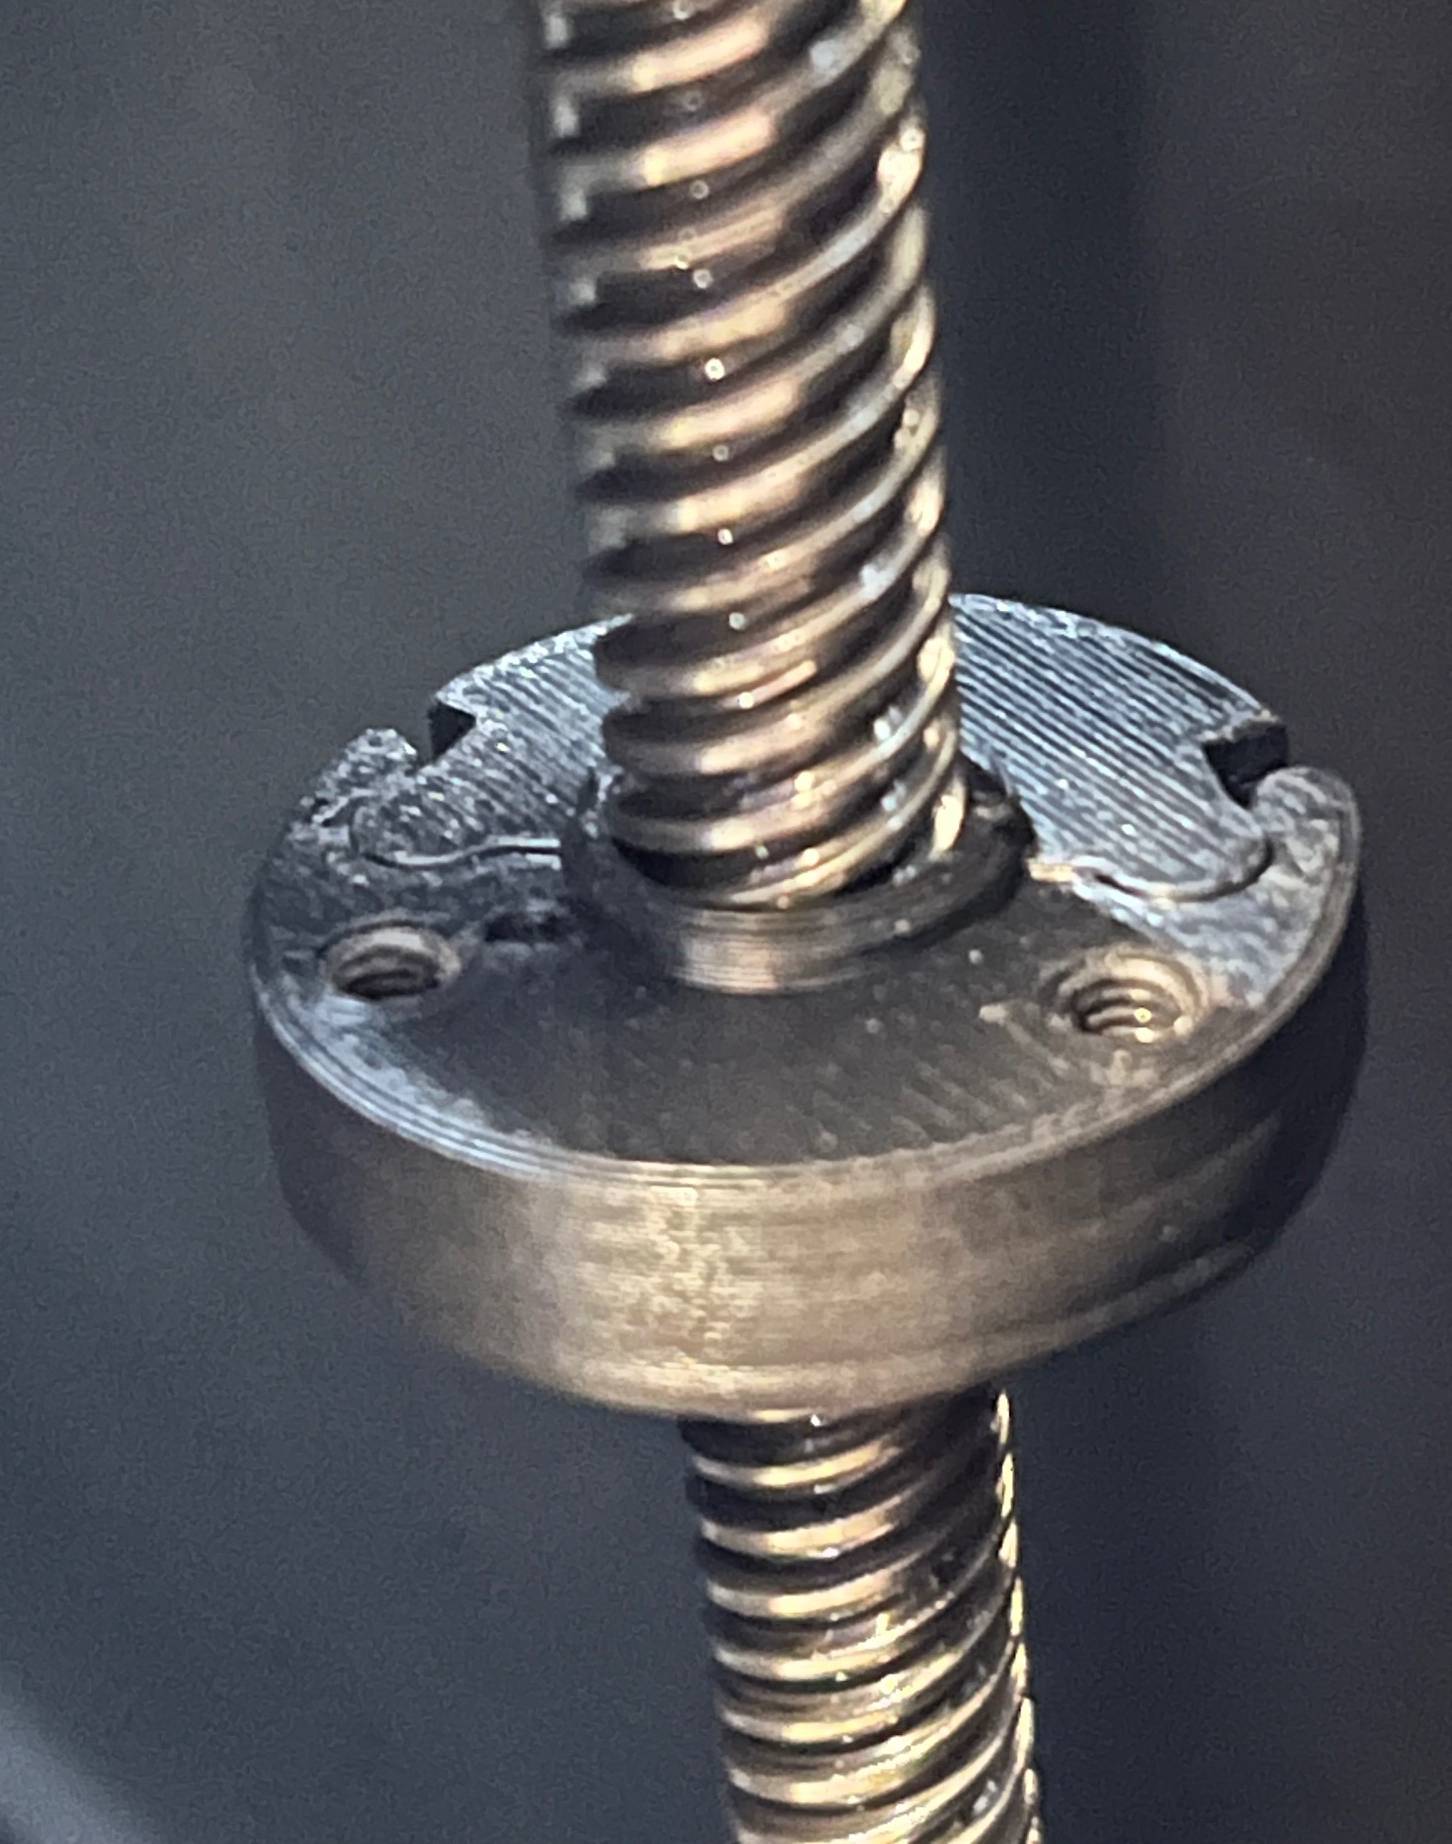
3 Likes
I will certainly do a proper topic for it but my leadscrew nut repair kit is now available on Makerworld.
It requires no disassembly, the rear nut is even possible from inside the printer (no need to remove the rear panel) and the best is the replacement of all 3 nuts requires less than 30 minutes (I did each front nut in less than 8 minutes, the rear in 13 minutes (the original screws were really tight  ).
).
4 Likes
Lovely design, and fantastic instructions too.
I just can’t get my head around plastic nuts being better than the brass alternative, I’d want to see some serious hours built up on these to prove longevity which I am assuming you/others have done.
1 Like
Prusa leadscrew nuts are POM and Igus has made a reputation in the industry making plastic leadscrew nuts. Of course, it’s not ASA (POM for Prusa, nylon or PC/PTFE for Igus) but plastic is not unheard of for this application.
How long the ASA nuts will survive, idk. I’m not a heavy printer so I may not be the first to comment on their in-servive life but given how they’re easy to replace, that’s not a big issue, they can just be replaced again in no time as an interim this time if they don’t hold just waiting for an original replacement.
Of course they can be made in other material, I just selected ASA for the reasonnable stiffness and strength and ease to procure and print. I actually have Igus filament I could try as its benefit is also to not require lubrication at all but I will leave the ASA nuts though to see how long they can survive 
I’m thinking of just building an extended gcode to the one I posted in makerworld to simulate an accelerated wear and run it overnight several days in a row 
1 Like
Reponding to my post . I replaced one of my front nut just to see how long it would take as the self tapping screws are a lot easier to remove than the loctite original metal screws and I also can now do it my eyes closed , I did replace it in less than 5 minutes
2 Likes