This is my first rodeo into PCTG transparent filament on the h2d. Looking to make a flat, thin (can be between 1mm-4mm)diffuser for an LED panel an experiment with thickness. Looking to be able to “fine tune” the amount of transparency (would love to get as close to 100% as possible) and then be able to work my way down and experiment with the best ways to diffuse/scatter the light.
I have seen really clear prints using translucent PETG and videos on how to print it clear.
A bit of polishing the parts could make them just about perfect from what I have seen,
Don’t know about using PCTG but I suppose some of the tricks would work on that material too…
You can get some starting settings and tips from Stefan:
I advise calibrating the filament; by doing so, you get to see how it performs.
If you have the time, please share your experience and results as they are likely interesting for others.
Good rodeo!
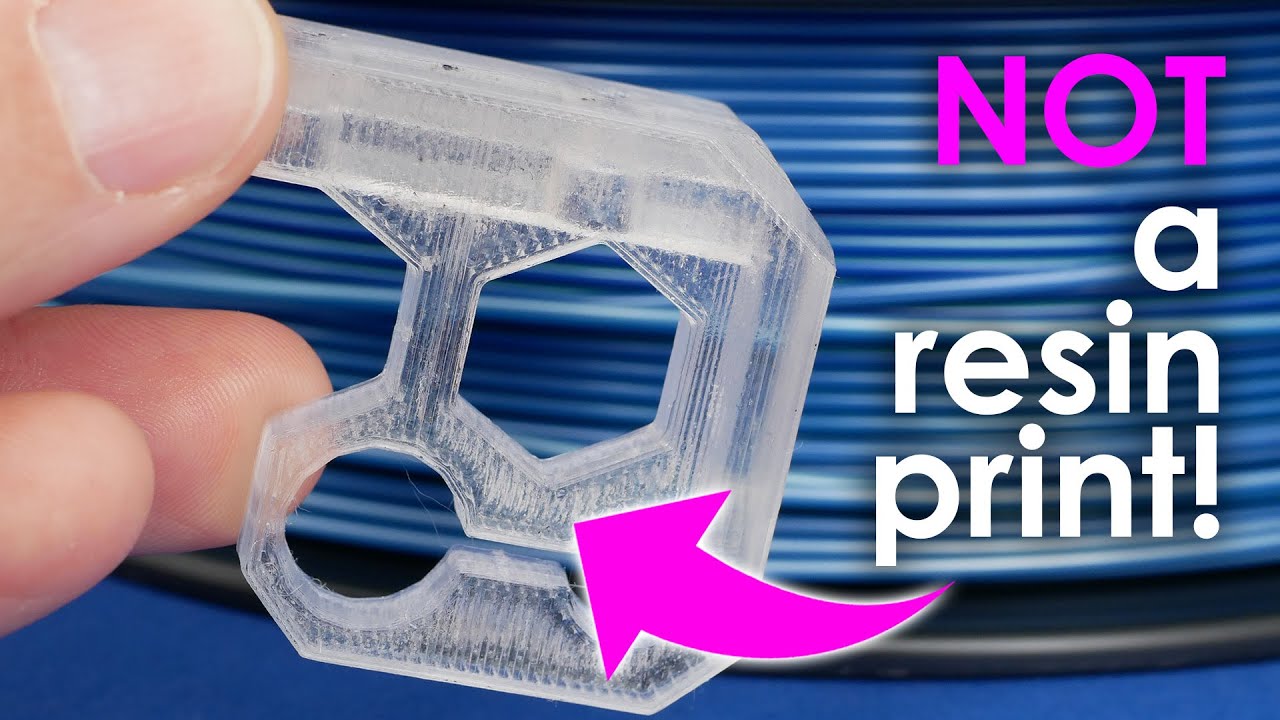
How fast are you printing? I’ve had good luck with concentric infill for less complex geometries if it’s going to be viewed from the top or bottom, but you’d have better luck on a smooth plate in general I’d think if you’re going for better transparency
I’ve printed PC Clear with near glass-quality results by disabling the cooling fan completely, printing at a very slow speed, and allowing the part to cool down extremely slowly after printing. It was a fun project, but not really practical for larger or more complex models.
I have ABSOLUTELY NO IDEA where my smooth plate is haha. The purpose is to refract the light, but what I would like to experiment with is HOW MUCH it refracts/diffusers/colours the light.
I am also going super slow. Here are my settings i’ve tried. Copied from Rygar and using the 3D-Fuel PCTG Pro PCTG.
yea cool! this is what I have tried to follow too. Unsure of how different the settings need to be going from PETG to PCTG - any ideas? I have just listed my tried settings below if you have any feedback? I may have translated the Rygar file from Orca to bambu studios incorrectly?
might be a dumb question, the diffuser IS solid, but I do not “need” infill or for the diffuser. It CAN be a hollow rectangle - which makes more sense to experiment with first? I have tried without top/bottom shelf which actually gave interesting results
Any deformation of the filament deposition will likely affect transparency.
So you can try, but if the overhang sag may hinder the goal.
Summary from memory:
dry filament → any bobble will affect the transparency;
use a smooth and properly clean plate;
remove cooling unless there is a need (e.g. overhang);
drop speed (in the x1c I use 20/30 mm/s)
infill —> if you need infill, go with aligned rectilinear 100%, and if not enough, slightly increase flow rate. Also, choose the proper infill angle to ensure each line and each layer has the same orientation.
Be careful when removing the print → if you bend, you may crack the print’s internal structure, leading to opaque spots (it’s tough when you have crystal clear print and fail to remove).
I don’t have the H2D to confirm, but these are standard settings.
Thank you for the advice. I am still getting average results, if anyone could help me trouble shoot, that would be great. Here are my current settings.
Avoid printing with thin layers — the more layers you add, the more visible they become, especially if you’re aiming for glass-like clarity.
Use slow print speeds, minimal cooling, or ideally no cooling at all for optimal optical results.
Yes:
• Layer height: Use 0.2 mm. Thicker layers reduce light scattering and help preserve transparency. Avoid going too fine.
• Flow ratio: Slight overextrusion helps. Set flow to 103 % to eliminate micro-gaps that ruin surface gloss.
• Walls / shelf layers: Use 2 walls max. More walls will trap and diffuse light. For top/bottom layers, fewer is better — 2–3 is often ideal to avoid thick opaque buildup.