We all know the hanging pinecone/artichoke lamps and I really love the aesthetics of those. This is my rendition of one and it is based around the Bambu Lamp kit!
The lamp can be fully assembled without any glue or other fasteners, but for more stability (especially when moving) glue can be applied to the core structure.
The H2D sadly can’t cut a full sheet in one go and I hate the wasted material, so I grouped the shapes in such a way that you can cut a full sheet by cutting the first group, rotate 180 degrees and cut the second group neatly from the leftover sheet.
I have orientated all leaves in such a way that the light illuminates all of them from the bottom, something that is neglected most of the times with pinecone lamps. This way the lit up lamp looks even better!
There are a lot of pieces to this puzzle, but I have added assembly steps to make it as clear as possible.
Please let me know if anything is unclear or just let me know what you think of the lamp! Don’t forget to leave a like or a download if you fancy this design!
The beauty of this board is that all black tiles and all white tiles are connected. This makes the glue-up significantly easier than gluing up 64 individual tiles!
The ‘offcut’ piece is used to cut out the play pieces and the rest is used to become the backing board (take care rotating it the right way for the glue up):
Be sure to read the manual, because you need to adjust the laser line settings to be the same as the laser cut settings to cut everything and have the order of operations correct.
I wanted to upload another model today, but because the MakerWorld website keeps either rejecting my other model or just keeping it in verifying for ages (three hours now!!!) I will upload tomorrows model today. Hopefully todays model will get out of verifying somewhere this year.
After lots more frustration with failed uploads, errors and two models in the verifying phase for over 24h I now have finally uploaded my lasercut [BAT.11] packing puzzle:
Hi Roddero, thx for the nice lasercutting and 3d printing models you share. Also the explanations are great.
Just wondering if you found out the culprit for the long waiting time for a model to be passing thru the verifying state.
Kiond regards, XiaoShiZi
To get it to work I uploaded an as blank as possible model with a lac from a model I knew would work (so not even the design I wanted to upload).
I then edit by edit changed the description, the title, the images, the cut profiles, the tags, the links, the description, the materials and so on and those all got verified quickly except for the links at the bottom of the description. Then the edit kept hanging in the verifying state. The links I tried to add should have looked like this (see bottom of description):
But in the end I opted to link to the printed version for the hints because I couldn’t get it to work in the same way (see bottom of description):
I am not sure if this is the same with you but the step by step adding to a “blank slate” already verified model really helped to keep frustration low and feedback useable.
I also had issues with failed uploads for “arrangement something” for perfectly fine working lac files, just keep changing it up but by bit until it works sadly. I now first upload the lac as an extra cut file to an existing model to test it before creating a completely new model and getting hit with a failed upload due to the lac file
Still some bugs that need to be ironed out I suppose. Sorry for the rant but maybe it might help somebody!
And back again! This time with a modular cabinet/organizer that uses lasercutting and 3D printing inside the same model:
I originally designed it as a key cabinet but because I 3D printed the sides I had a lot more design freedom to incorporate a shelf system and dividers, the box can therefore be used on its back as well as hung on the wall:
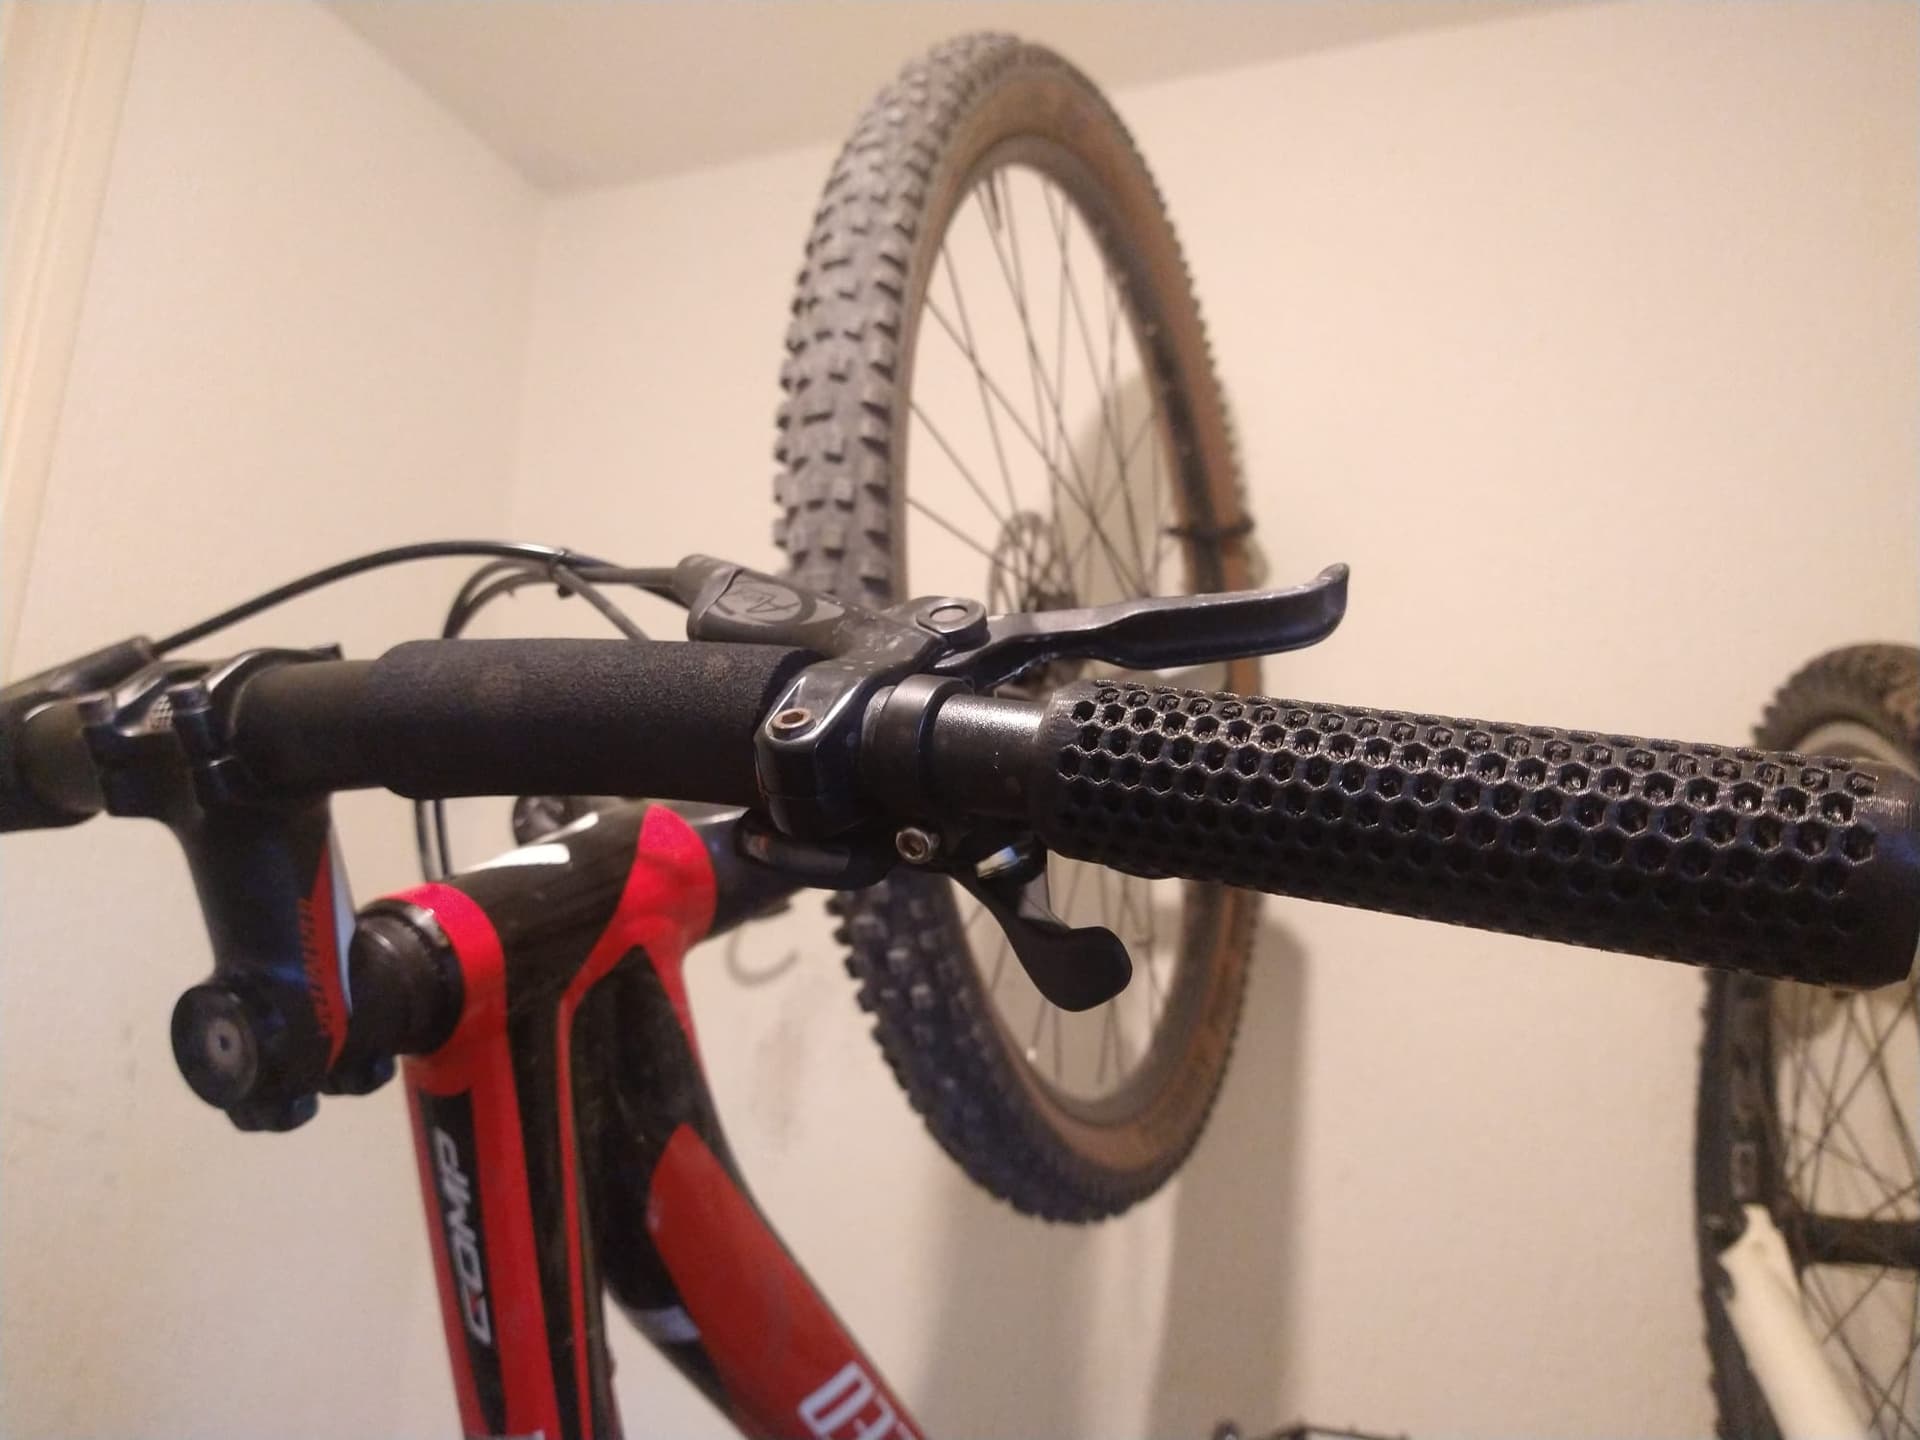
I always had issues with sweaty hands when I was riding hard and I really don’t like the extra warmth and lack of feel gloves give, so that’s why I designed these years ago in order to keep my hands cool!
They have an internal structure that makes the grips themselves comfortably squishy while having a breeze flowing through them when riding. You can see how it even disposes water from a tap through the internal structure without overflowing:
That said, they are on the bigger side at 33mm in diameter, perfect for my hands but maybe not suitable for small hands or if you prefer thin grips. The 85A TPU seems right on the money, together with NinjaFlex, but the 90A is on the hard side unfortunately. I printed the 85A successfully on my A1 but results may vary.
Have a look at the model and a like, download, print or even boost goes a long way since the “Build to Flex” contest finally pushed me to refine and publish this design
You can import your basic STL and start sculpting on top of it. Make sure to first re-mesh the STL and then turn off symmetry. Other than that just sculpt away! I highly recommend this piece of software for anybody wanting to get into sculpting, just have a play around with it
This time with a 3D printable fabric that performs better than the typical hexagonal “NASA” fabric and square grid fabrics that are mostly used for dragon scales and so on. Presenting: TriFlex!
The beauty of a triangular grid fabric is that it has three natural bending axis (where square has two and hex has none), but by allowing for much play in the links and keeping the fabric very thin you get even more flexibility:
As a demonstration, here is the fabric performing a triple fold (with most fabrics you can be happy if you get one fold in):
The use case? Not sure yet! I am currently trying to make some clothes with it, which this lends itself very well for. The big advantage of a triangular grid is that you can create any shape with triangles. So in clothes you can connect pieces at different angles and make darts. Here is an example of a hexagon and a pentagon, which you could extend to a full soccer ball:
So please have a look at the model here and let your imagination run wild. Or just print a small piece of it as a fidget of course. I should have called it a fidget. People love fidgets…
Please let me know what you think of it, give it a like and a download and thanks for your support
A compact and simple repackaged AMS Lite for on top of the A1 or A2L!
I have been using the AMS Lite for years now and it always has bugged me how much space it takes up and how little spool variation is possible.
That is why I also didn’t want to top mount the current AMS Lite. The lack of spool compatibility and the risk of them falling off on a moving printer if the friction is not optimal.
The AMS Air uses less than a spool of filament and almost exclusively parts from the AMS Lite to make it function. There are two RFID rings for the inside two spools, the outer ones need to be selected manually unfortunately
You do need extra couplings and PTFE tubes from the base to the feeders, these also function as buffer for when the feeders retract. The AMS Air fits completely within the footprint of the A1 and should also fit on top of the A2L. You can also use the AMS Air as an external spool holder for TPU as it can feed straight into the extruder
I know this is not a project for everyone and most people are perfectly happy with the AMS Lite or the top mount solution but I hope uploading this helps a couple people with a nice solution.
And yeah, I know that swapping out the center spools is a bit harder but you don’t have to retract the outer spools fully to access the inner ones. Just lifting them off is enough.
Let me know what you think and don’t forget to leave a like or download on the model: