I’ve been using a slightly modified version of the original code on P1S and X1C machines for a couple years with great success on PETG. I was having layer shift issues, so dropped the Y to Y264 and it’s been working good with the brass wiper brush mod that we also did. For adding it to the print, slice it then scroll down the layers, right click to add the custom code. I like it to wipe every half hour of print time and the nozzles stays nice and clean. Most of our prints are solid, if you have more infill it doesn’t need to wipe as much.
G1 X60 Y264 F15000 ; nozzle wipe position
G92 E0 ; zero extruder
G1 E-0.5 F300 ; retract filament
G1 X100 F5000 ; wipe right
G1 X70 F15000 ; wipe left
G1 X100 F5000 ; wipe right
G1 X70 F15000 ; wipe left
G1 X100 F5000 ; wipe right
G1 X70 F15000 ; wipe left
G1 X100 F5000 ; wipe right
G1 X70 F15000 ; wipe left
G1 X60 F5000 ; clearance
I have a H2D and needed simple cleaning routine using the built in silicone wiper - had to make my own with reverse engineered coordinates.. With a little help from AI, use at your own risk of course.
; — AUTO INSERTED RIGHT NOZZLE CLEANING TEST —
; manual test path based on measured H2D cleaning station offsets
M400 ; wait for all previous moves to finish
G91 ; switch to relative positioning
G1 Z3.0 F1200 ; lift nozzle by 3mm to avoid hitting the print during travel
G90 ; switch back to absolute positioning
M400 ; wait for the Z-hop to complete

; Move to the left side of the cleaning station
; Center is approx X160 Y160, so -75X is X85, +175Y is Y335
G1 X85 Y335 F15000 ; travel quickly to left start of rear cleaning station

; Begin back and forth scrubbing 5 times (+24mm X = X109)
G1 X109 F5000 ; 1. scrub right slowly
G1 X85 F15000 ; 1. scrub left fast
G1 X109 F5000 ; 2. scrub right slowly
G1 X85 F15000 ; 2. scrub left fast
G1 X109 F5000 ; 3. scrub right slowly
G1 X85 F15000 ; 3. scrub left fast
G1 X109 F5000 ; 4. scrub right slowly
G1 X85 F15000 ; 4. scrub left fast
G1 X109 F5000 ; 5. scrub right slowly
G1 X85 F15000 ; 5. scrub left fast and finish at start

M400 ; wait for the wiping motion to complete
; — AUTO INSERTED RIGHT NOZZLE CLEANING TEST END —
You would have to manually insert that in the G code file which is very tedious (even with AI its another step)
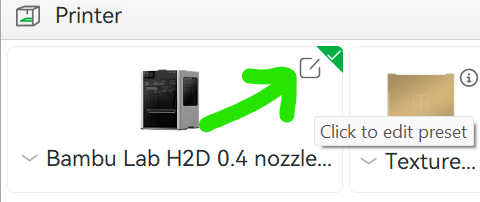
So I figured out you can put it in the layer change machine G code section and have it run every 10(or any arbitrary interval) of layers!
Since it is hard to find that setting location I made this screenshot
{if (layer_num + 1) % 10 == 0}
; --- AUTO RIGHT NOZZLE CLEANING TEST EVERY 10 LAYERS ---
; manual test path based on measured H2D cleaning station offsets
M400 ; wait for all previous moves to finish

G91 ; switch to relative positioning
G1 Z3.0 F1200 ; lift nozzle by 3mm to avoid hitting the print during travel
G90 ; switch back to absolute positioning
M400 ; wait for the Z-hop to complete

; Move to the left side of the cleaning station
; Center is approx X160 Y160, so -75X is X85, +175Y is Y335
G1 X85 Y335 F15000 ; travel quickly to left start of rear cleaning station

; Begin back and forth scrubbing 5 times (+24mm X = X109)
G1 X109 F5000 ; 1. scrub right slowly
G1 X85 F15000 ; 1. scrub left fast
G1 X109 F5000 ; 2. scrub right slowly
G1 X85 F15000 ; 2. scrub left fast
G1 X109 F5000 ; 3. scrub right slowly
G1 X85 F15000 ; 3. scrub left fast
G1 X109 F5000 ; 4. scrub right slowly
G1 X85 F15000 ; 4. scrub left fast
G1 X109 F5000 ; 5. scrub right slowly
G1 X85 F15000 ; 5. scrub left fast and finish at start
M400 ; wait for the wiping motion to complete
; --- AUTO RIGHT NOZZLE CLEANING TEST END ---
{endif}
Here is an example of the travel movements generated - they look like Z is changing, but the cleaning station is in relation to X and Y only not Z so it does not matter.
For some reason, the X coordinates were not completely right, and the nozzle was wiping just to the middle of the scrub. So I did a bit of research myself, and ended up using Bambulab’s own gcode commands G150. That uses the printer macros (kind of) to get the precise cleaning coordinates and movements.
I tried it for my H2D printing just with the right nozzle, and also with the P2S. And the same exact code works for both of them. Not sure wich other printers is this compatible with, but I’m quite confident there are a few that use the same G150 commands.
{if (layer_num + 1) % 3 == 0} ; Wipe every 3 layers
; AUTO WIPE EVERY X LAYERS - START

M400 ; wait for all previous moves to finish

G91 ; switch to relative positioning
G1 Z3.0 F1200 ; lift nozzle by 3mm to avoid hitting the print during travel
G90 ; switch back to absolute positioning
M400 ; wait for the Z-hop to complete

G150.3 F18000 ; move to cleaning area parking
G150.1 ; wiping

M400 ; wait for the wiping motion to complete
; AUTO WIPE EVERY X LAYERS - END
{endif}
From what I’ve tested:
G150.3 → Moves the nozzle to the wipping area.
G150.1 → Wipes the nozzle 4 times, and can be stacked multiple times if you need to.
G150.2 → Moves over the piece that “traps“ the poops. Not used here, but might be useful to someone.
; Nozzle wipe every 10 layers
{if layer_num % 10 == 0 && layer_num > 0}
G150.1 F18000 ; Wipe nozzle mouth
G150.3 F18000 ; Move to garbage can
M400 ; Wait for buffer clear
{endif}
added to my change layer gcode box of the printer profile and made a new printer profile just for this. My petg came out perfectly at 263c on silent mode (50% speed) i also ran flow calibration plus dried it for 24hrs at 75c
You increased the Z (z-hop) to perform the procedure, but you never returned to pre-cleaning Z height. Will it do that automatically, or do you need to restore the original Z height?
I know coding logic, but have no experience with G-Code, so I am just trying to understand in case I want to play with it in the future.
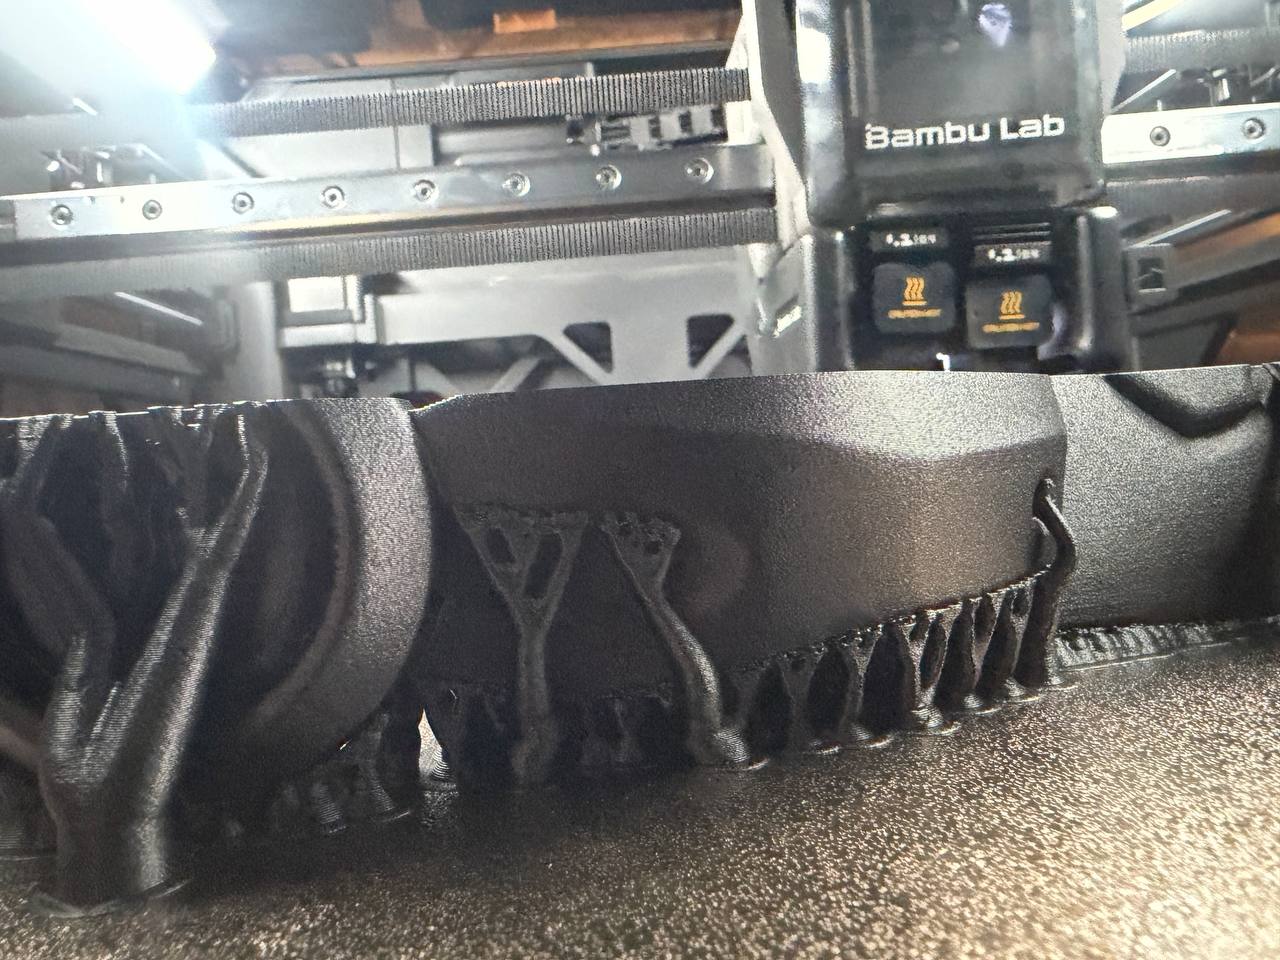
We’re on the same boat, know coding logic but not g-code expert. The code above is generated by ChatGPT . I’ve printed 20+ hours without issue, one print job was 12 hours almost 700g of PETG.
I tested the code with a primitive in Bambu Studio and changed the code to every 3 layers, my finger was on the kill switch (power switch) the first few cycles. It works nicely.
I want it to wipe after each completed object as i am using ironing and print by object.
Plan is:
Print object one
Ironing pass
Wipe
Start object two
Print
Ironing pass
Wipe
Start object three
Etc
I’ve got it to do the actual movement and wipe but I haven’t gotten it to the point where it reliably starts the next object. It moves to it and does all the movements but doesn’t actually extrude
I just tried this on my A1 - thanks for sharing! It did the normal left-right wipe, then the nozzle moved to the right of the build plate, then resumed the print. It didn’t do any cross wipe, and not sure why it moved to the right? Is there something I need to change?
I made a PowerShell script for Bambu Studio. It adds nozzle-wiping cycles after the first layer, at configurable layer intervals, and before top/topmost surfaces.
Everything is configurable through run variables in Bambu Studio.
It has currently only been tested with my P2S on Windows and supports single-filament printing, although I also added support for the A1 and P1S.
Use it at your own risk and watch the first print closely. If you try it, I’d appreciate hearing how it worked for you.
For instructions and source code, search GitHub for Serg138/bambu_nozzle_cleaner.
I ran into this exact problem a few months ago and ended up writing a tool for it, so I thought I’d share it here in case it helps someone.
It’s called Layer Rescue. It’s a free, open-source post-processing script for Bambu Studio. It’s on GitHub and PyPI. Search for “layer-rescue” (or pip install layer-rescue). Apparently new accounts can’t post links or images yet, so I’ll add the repo link and a GIF of the drone repair here once I can.




 . I’ve printed 20+ hours without issue, one print job was 12 hours almost 700g of PETG.