Bad layers at certain heights, SOMETIMES consistent

For a while, this was a rare error. But recently It’s been happening almost every print. The weird thing is that, once the bad layers happened exactly the same way with the same gcode file (I have the two prints next to each other in the photo…from two different print sessions, but the same gcode file). For a while, I thought it was something going wrong with the slicer. However, I looked at two different failed prints, from two different STLs, and noticed that both had the error at the same specific height.
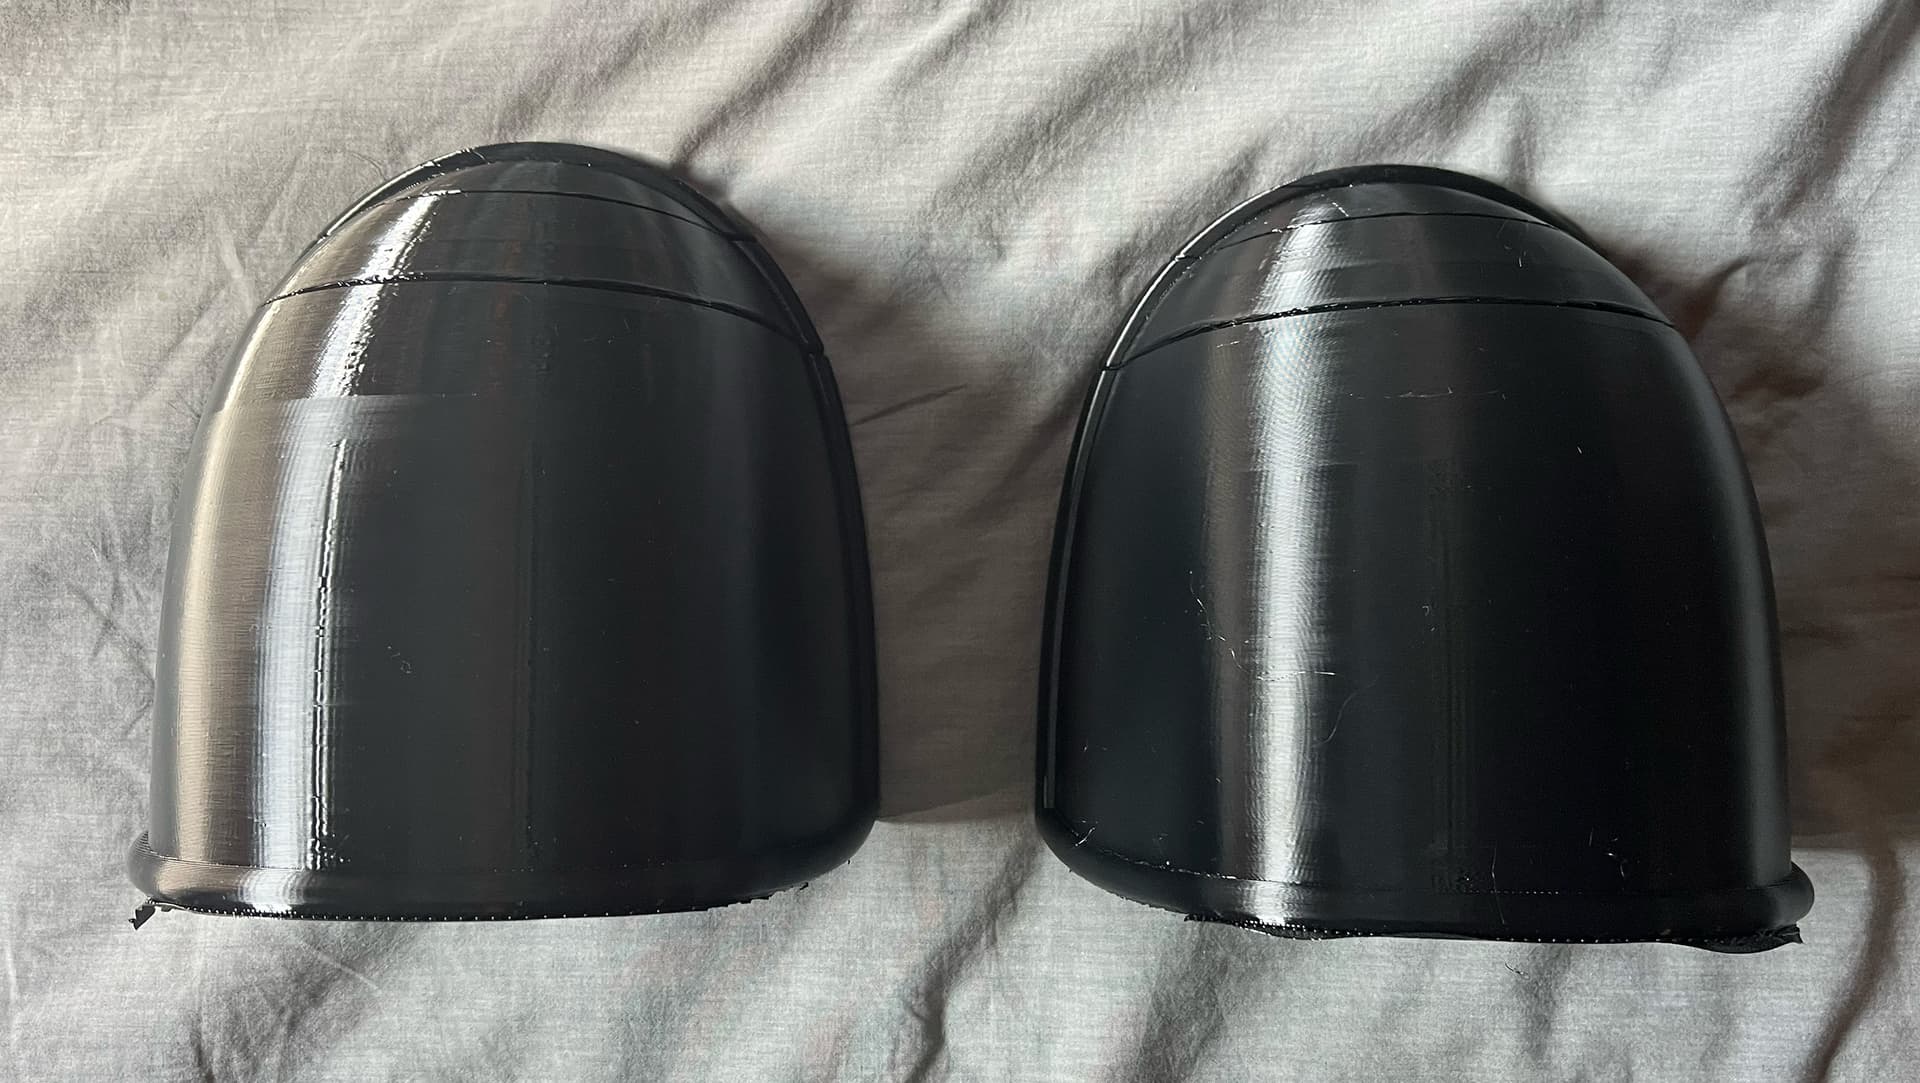
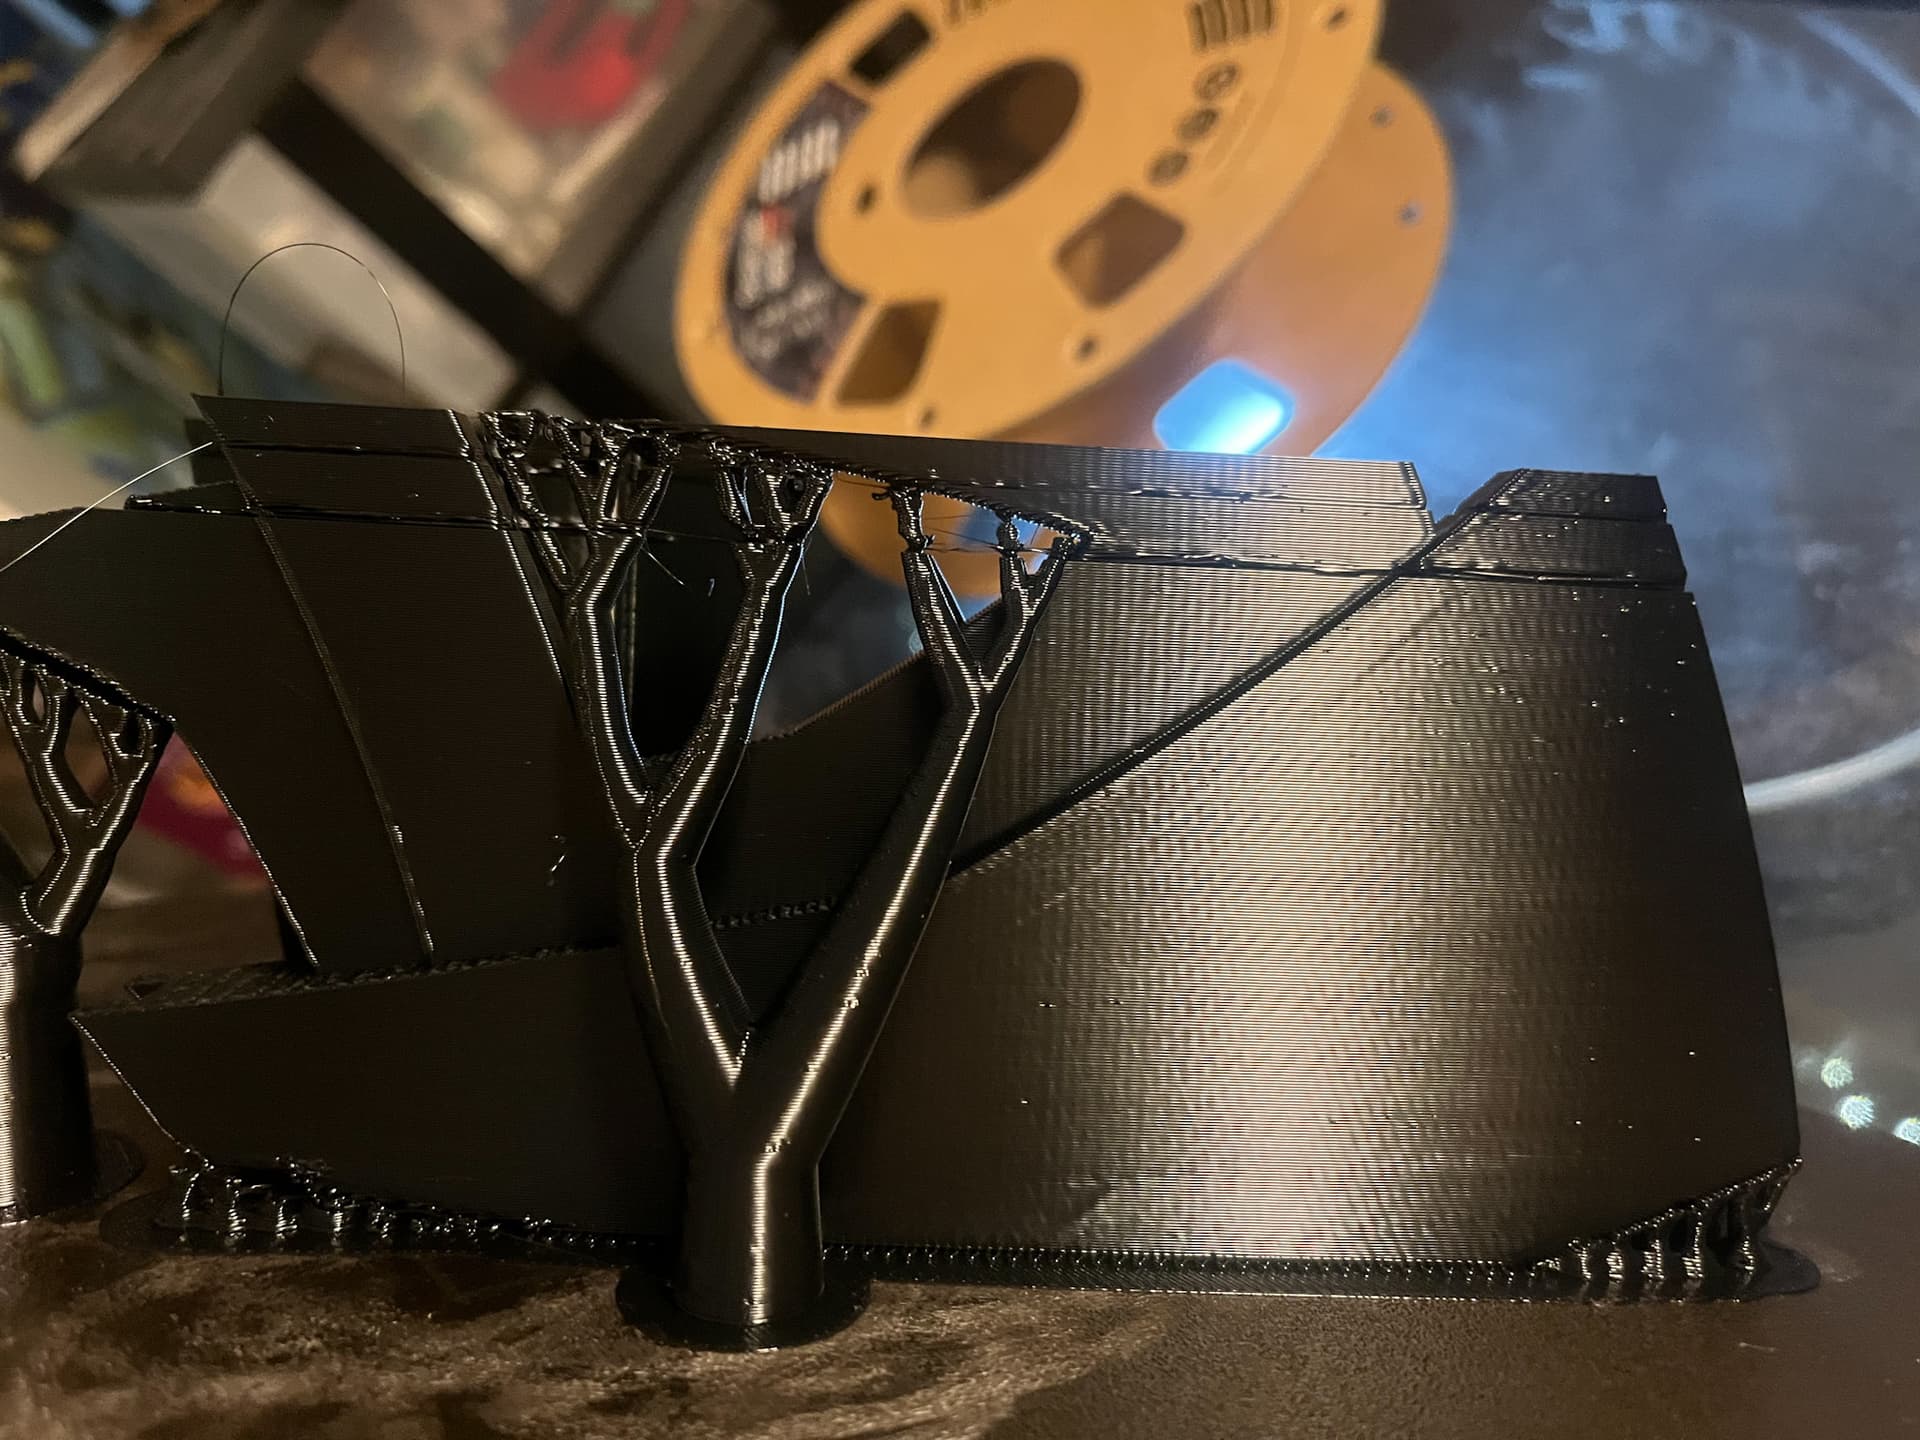
I’ve attached a 3MF file that had the error happen (weirdly not at the typical heights, but the same error):

Hawks goggle buck ERROR.3mf (857.5 KB)

I cleaned the z-axis screws, to see if something was jamming there. But the print I did right after that still had the failure. Everyone on Reddit says that i need to clean all the belts, and I will, but for the life of me I cannot understand why on earth having the XY belts dirty would cause failures at specific heights, at a semi-consistent rate (I have a feeling most of those people just looked at the photos and didn’t bother reading anything I wrote).

Also, I’ve ruled the slicer out because a gcode file that previously printed perfectly just failed (at one of the heights that the failures usually occur).

Assorted details:

  • I exported the prints as gcode to the SD card that came with the printer. My printer is too far away from my wifi signal to connect to the app, so getting diagnostic data is tricky.
  • I’m printing in PETG with a 6mm nozzle.
  • Bambu Studio is up to date
  • I’m feeding my PETG from a 3rd party heated drying box (I originally thought the filament might be jamming somewhere between this and the hot end).

This issue is well known and it generally occurs when there is a change in speed of the nozzle. One way to test it is to slow down the print using quiet mode and see if the printer behaves differently. Note that the printer speed could be at the edge of tolerance and just a slide change in model density, temperature or humidity can contribute.

This YouTube video while not directly applicable to the example you provided, does show this principle in effect. Look at his remedy at time index 2:20.

4 Likes

Okay, I can see how it appears that’s what happening. I’ll try slowing down the outer walls and see if that helps.

But what I don’t understand is why reorienting the print, or just doing it again on a different day, can fix the problem.

Also, I don’t know why it’s been happening more often lately.

It may help to imagine how the filament behaves as it transitions from molten to solid. If you’ve ever seen what happens when water hits a very cold metal surface - say around -10°C (14°F) - it freezes almost instantly, forming a frosty, matte surface. But if that surface is warmer, or if you pour a larger volume of water, the freezing happens more slowly and the resulting ice is smoother and shinier.

Filament behaves the same way. When you extrude filament too fast, it doesn’t cool quickly enough before the next layer is deposited, so the surface remains glossy. Slow down the extrusion, and it cools faster -producing a more matte finish.

So to answer your question, the tipping point between too fast can be very picky dependent on ambient temperature and humidity which can explain why it works one time and not another.

You can see this better when you run a max flow calibration test(available in Orca slicer). Each loop(layer) of the test increases the speed and eventually what was once matte at the bottom, become glossier depending on the filament.

This image is right out of the Orca tutorial

2 Likes

There is also a belt to tie three Z leadscrews together at the underbelly of the printer.

Also for PETG, the shinier surface indicates of good layer adhesion, while dull surface says otherwise.

Okay. This is starting to gradually reveal what’s going on. The one MAIN difference that’s happened recently is that I finally finished assembling a full enclosure for the P1P. So now the ambient temperature for the printer runs much higher than it used to.

I had a full enclosure for my old Ender 5, and it made no difference on print performance for PETG that I could tell there…but that Ender printed MUCH slower than the Bambu does, so that could be why nothing ever went wrong.

Also, I did do two “torture test” prints since slowing the layer speed down, and it had no problems. So, SO FAR, this seems to have fixed it. Here’s to hoping.

And thank you!

Well, unfortunately, it just happened again, so this is not a full solution. Back to beating my head against the wall trying to figure out how to fix it.

-maybe your SD-card is corrupted? try another sd-card of good quality.

-maybe it´s getting too hot in the printer and you get a partial clog?

-maybe somehow cold air meets your part while printing and causes a crack in your part?

i would start with a new sd-card and open the enclosure a bit

I sat by the printer and watched a print that I expected to fail. It took two tries (first time I was distracted and missed it when it failed), but I saw what happened right at the point of failure.

At the bad layer, what happens is that the bed drops down TOO MUCH. So that the extruded plastic can barely reach the print, so it goops up and doesn’t form good adhesion or the proper layer width.

I inspected the belts and the drive gears on the bottom and didn’t notice anything out of order. (Because I had turned the whole thing upside down in the process, I recalibrated the printer right after).

I ran the same print that had failed twice in a row (at EXACTLY the same layer between 33mm and 34mm), but on a high quality SD card that I know works fine.

And…it seems that was the problem. Because the print went fine.

A little anti-climatic, but hopefully that was the whole problem. And now I know what to do if this happens again. I guess I need to buy more PNY elite class SD cards.

2 Likes

This topic was automatically closed 2 days after the last reply. New replies are no longer allowed.