Bambo studio - how to assemble and a bug?

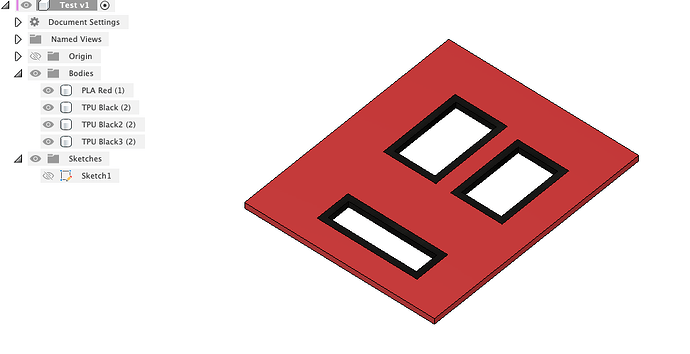
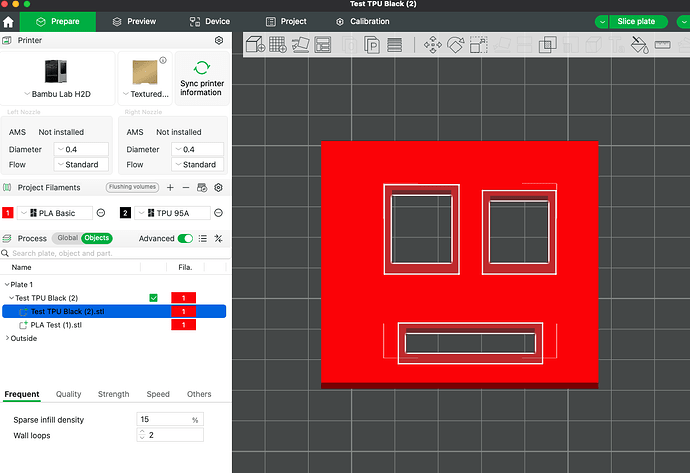
I created an object at work. It’s a solid block with some TPU insert holes.

Originally, I modeled the object as a single piece, but Bambu Studio had trouble recognizing which parts were TPU and which weren’t. To solve this, I split the model into four separate parts:

  • The main rigid block
  • The TPU inserts (split into their own bodies)

This helped with material assignment.

:jigsaw: Assembly and Fit – Question 1

For the first print, I assembled everything manually (“winged it”), and it worked fine, thats is because i didn’t know about the assemble option, and also i was too tired to check.

On the second print, I discovered the Assembly View in Bambu Studio and used “Select Face and Assemble” to perfectly align the parts.

However, after assembly, I noticed a very small gap (hard to see because studio is not made to zoom that much) between the TPU and the rigid block, even though the dimensions are exactly the same (e.g., the insert is 10.00 cm wide, and the hole is also 10.00 cm).

:question: Should I manually add some tolerance?
For example, if the insert is 10 cm wide, should I make it 10.1 cm instead to remove the gap?


:gear: Anchoring Issue – Question 2

After slicing, I noticed a strange behavior:
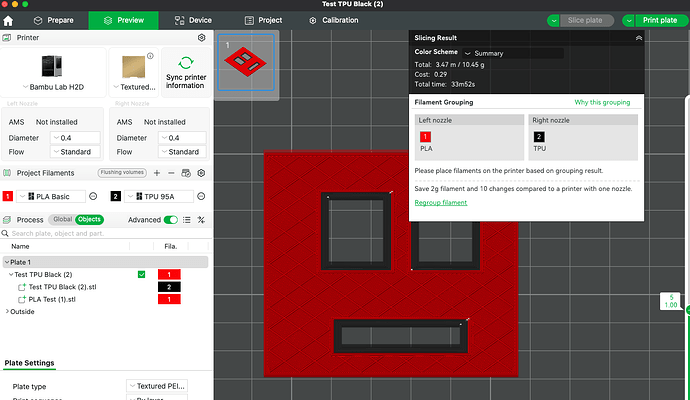
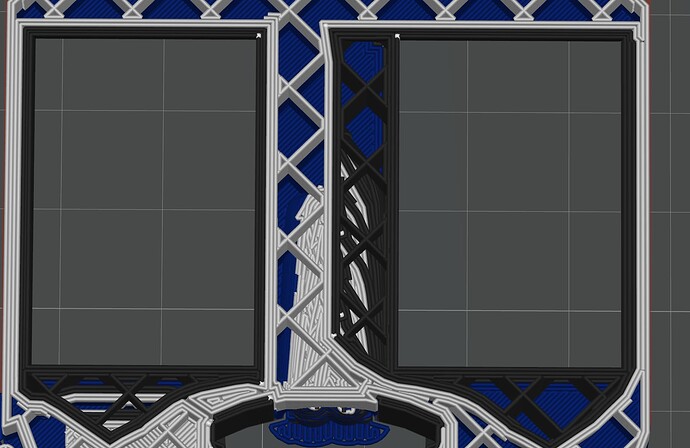
I have two identical TPU insert parts, but in the slicing result, they’re not anchored the same way.

  • One of them has 2 anchor points auto-generated by Studio.
  • The other one has none, even though they’re the same, and the area around them is the same.

I didn’t design any anchors — both TPU parts are just rectangles. It looks like Studio generated the anchors automatically.

:question: Is there an option in Bambu Studio to force or add more anchor points manually?
I don’t want to use “Beam Interlocking” because it adds TPU everywhere, including in the infill, which I don’t want.

:recycle: TPU Flushing Issue – Question 3

I’m using:

  • AMS HT for TPU
  • AMS 2 for other filaments

In my previous print, i lost a bit of TPU because it was loading and that is normal, and that was it.

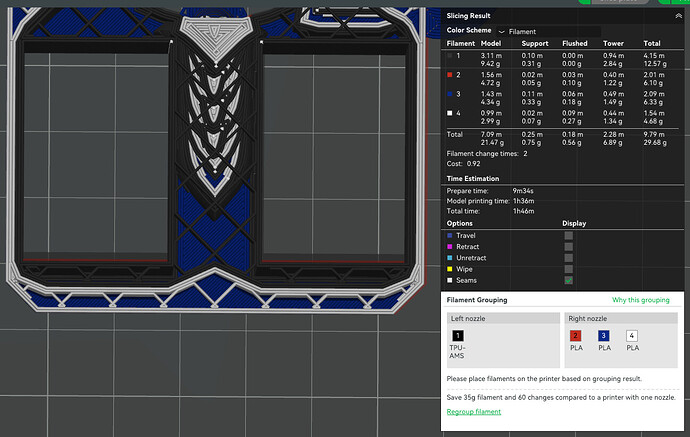
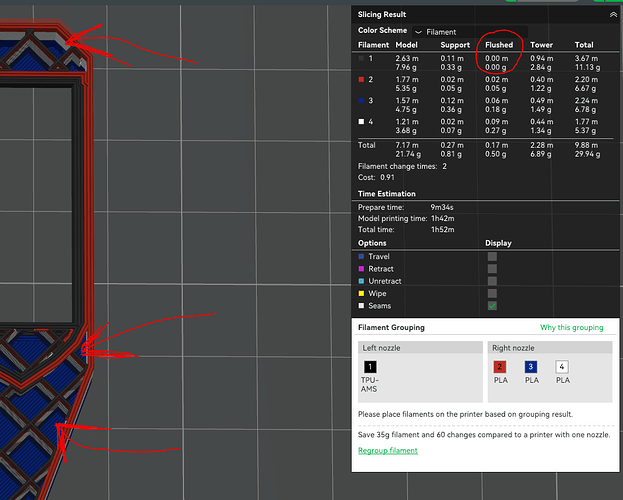
to see if i can save on the flushing on the other material i enabled flush into object infill, but now Studio flushes TPU inside the part, even though the slicing preview shows no reason for it.

you can see it is supposed to be zero since its it own nozzle.

and you can see studio put tpu in the infill, so is it a bug ?

:question: Why is TPU being flushed inside the model even when it’s not necessary?
Is this a bug, or is there a setting I missed?
Is there a way to prevent flushing a specific filament inside the model completely, especially TPU?
For question 1 -
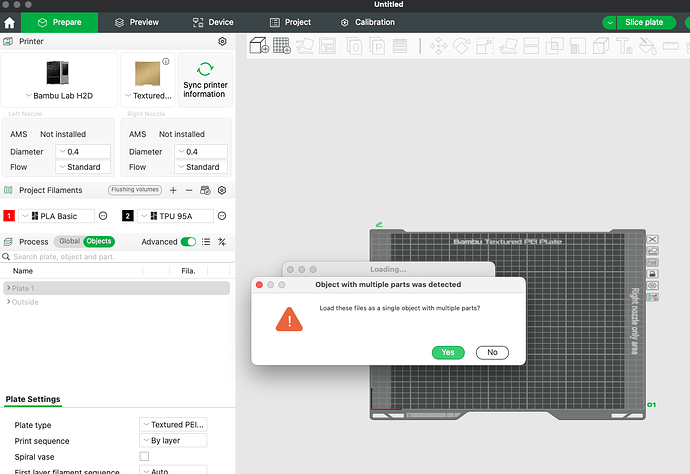
For multi body multi coloured objects - I always import all of the STLs at the same time - then select. Yes to ‘Load these files and a single object with multiple parts’

I name the STL’s with the colour/material and virtual extruder number in the name to make it easy to go through the object list and select the correct colour/material for each individual STL.

You can also if you want hide and show the different objects in Fusion as it only exports visible objects to STLs - that way you could end up with only 2 stl’s which makes the colour/material selection easier

1 Like

i do not understand, can you provide screen capture ?

Model - with 1 PLA body and 3 TPU Bodies

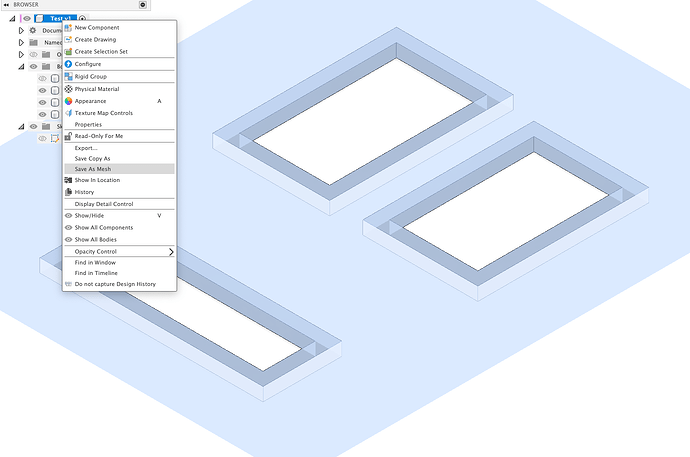
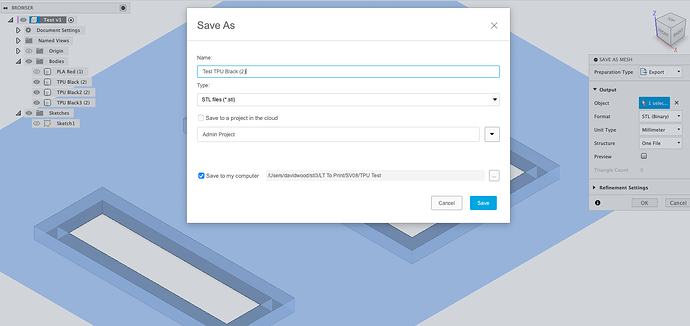
First Hide PLA (to leave TPU) - and then save as Mesh


Name the STL with TPU and Extruder number in filename

Then same for PLA - with opposite bodies visible

Now from BambuStudio - select both files when adding to plate


Say Yes when it asks about Single Object with multiple parts

Then go through the two parts and assign correct materials.


Then slice. NB/ I only did a very simple model - I probably would have modelled some sort of interlock between the two materials in practice.

2 Likes

I tried your method, and it looks promising — but I ran into a few issues.

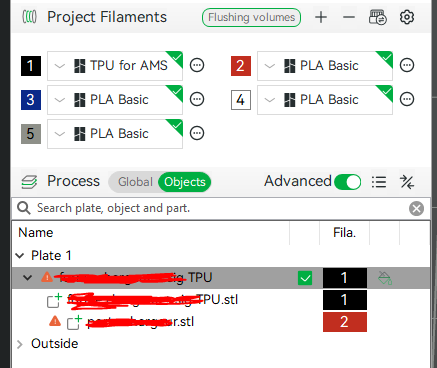
:warning: Warning Symbols on Elements

Some parts now have a warning icon next to their name:

When I click the “Fix” option at the bottom right, it messes up the part completely:

Specifically, it fills all the insert areas, so instead of having empty holes for TPU, the whole model becomes one solid block.
Do you know how to fix this?


:paintbrush: Issue with Painting Multicolor Using Height Range

I was trying to paint the outer part of the model using the “Height Range” tool in multi-color mode.

Even though the parts are not the same shape, the tool still ends up painting everything — including parts I don’t want.

:question: Is there a way to exclude certain parts when using the “Height Range” tool?

:white_check_mark: It Still Slices and Prints

Even with the warning signs, the model still slices fine, and I think i can print it.

There’s a small speed improvement — a few minutes saved.
Also, the TPU anchor points seem better now, though it costs me about 2g of extra TPU.

:thinking: Too Much TPU in the Print

However, I’m still wondering:

:question: Is there a setting in Bambu Studio to prevent TPU from being used everywhere?

I know it avoids filament switching between the two TPU inserts by keeping TPU loaded longer — but in my case, I care more about mechanical strength than saving time.

As shown here, I selected “YES” for support but “NO” for infill (in terms of TPU):

But TPU is still getting used in more places than I want.

1 Like

Note that one of the filenames you have scored out from the screenshot above is showing in the non-manifold edges message.

For blender I find non manifold edges are pretty common and it is the main reason I switched back from Blender to Fusion.

If your models are coming from Fusion - which I surmised from your use of the word Body - then are you doing some sort of Surface modelling, or Importing some meshes.

From Solid modelling I rarely get them from Fusion. You could try remodelling a fresh copy of the part - by just projecting the shape and see if that solves the issue.

Or you could trying chopping off any odd little shapes that may be appearing - I sometimes get little lines or surface bodies - which I tend to try to extrude cut away - but if that doesn’t work I create a new group within the bodies hierarchy - move the suspect bodies into it, and then set the visibility of the group off.

1 Like