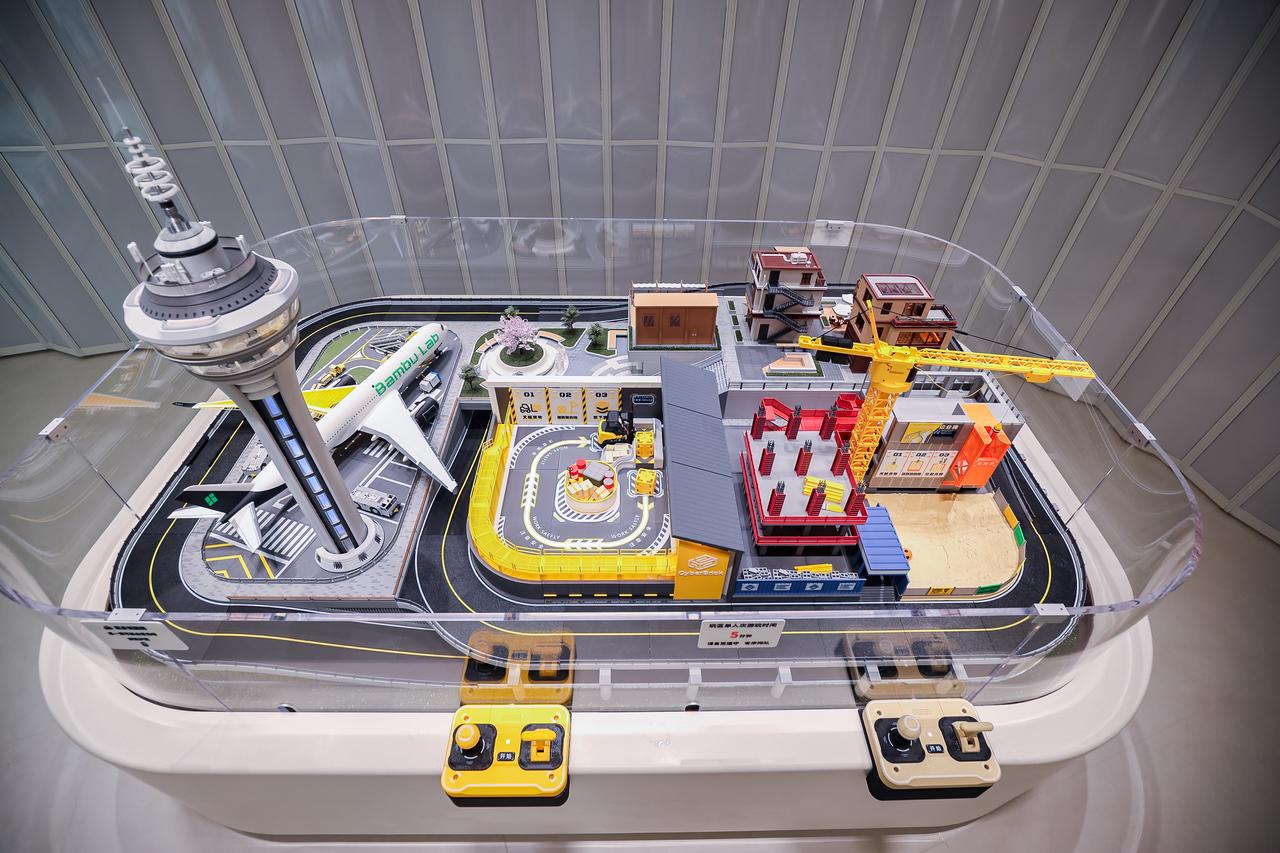
Behind the Scenes of Our Sandtable Creations
We believe 3D printing is not just about making individual objects. It’s also about bringing ambitious creative ideas to life.
One way we explore these possibilities is through our Sandtable Exhibition projects, large, intricately detailed miniature worlds created using 3D printing.
From architectural structures to entire themed environments, these projects bring together design, engineering, and craftsmanship to create visually compelling displays.
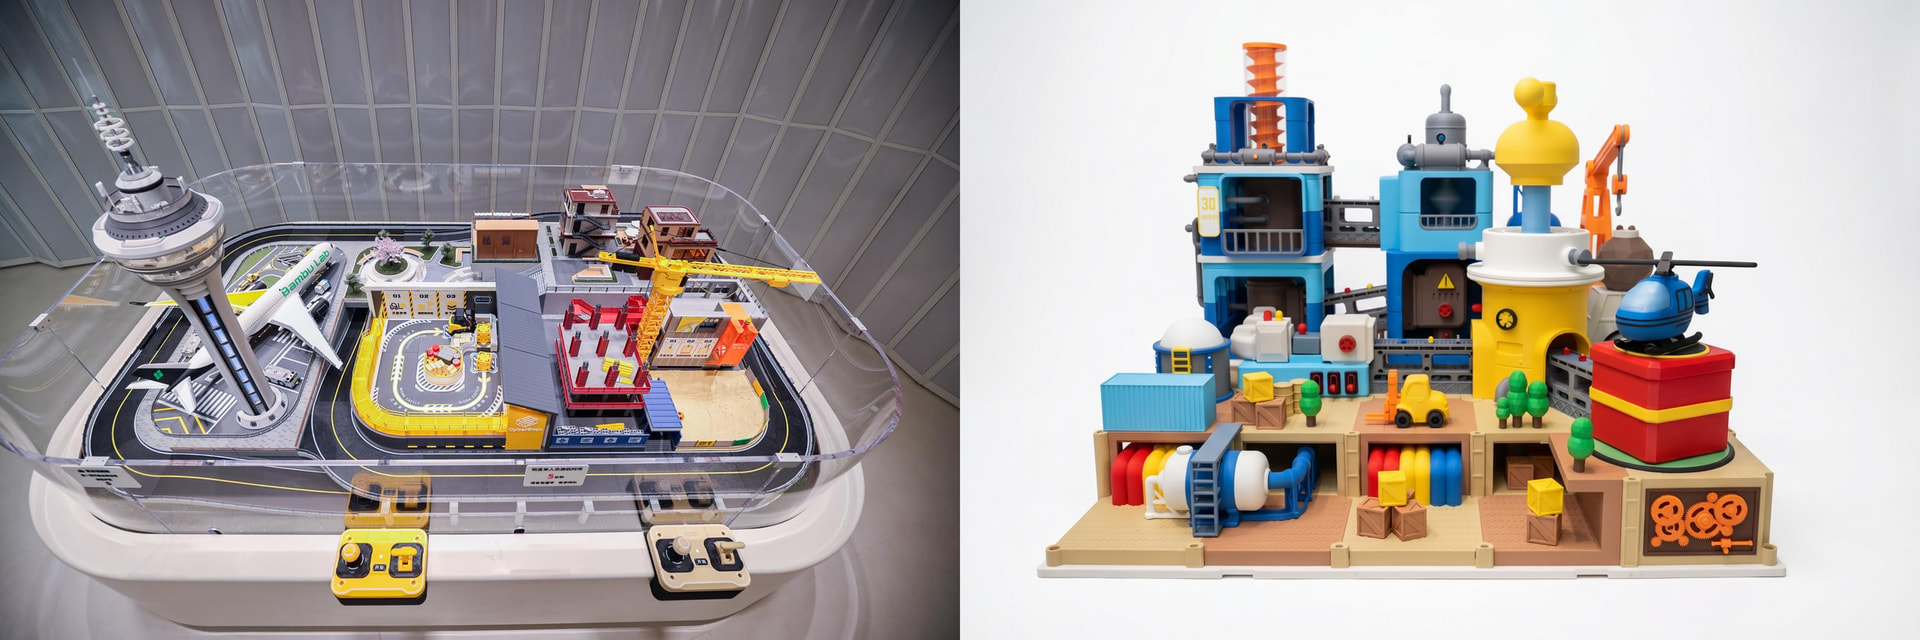
Behind these miniature worlds is a dedicated design team working carefully through every detail. From the overall composition to the smallest printed component, we continually refine our designs, solve unexpected challenges, and explore different approaches to achieve the best possible presentation.
And often, it’s the smallest details that require the most thought.
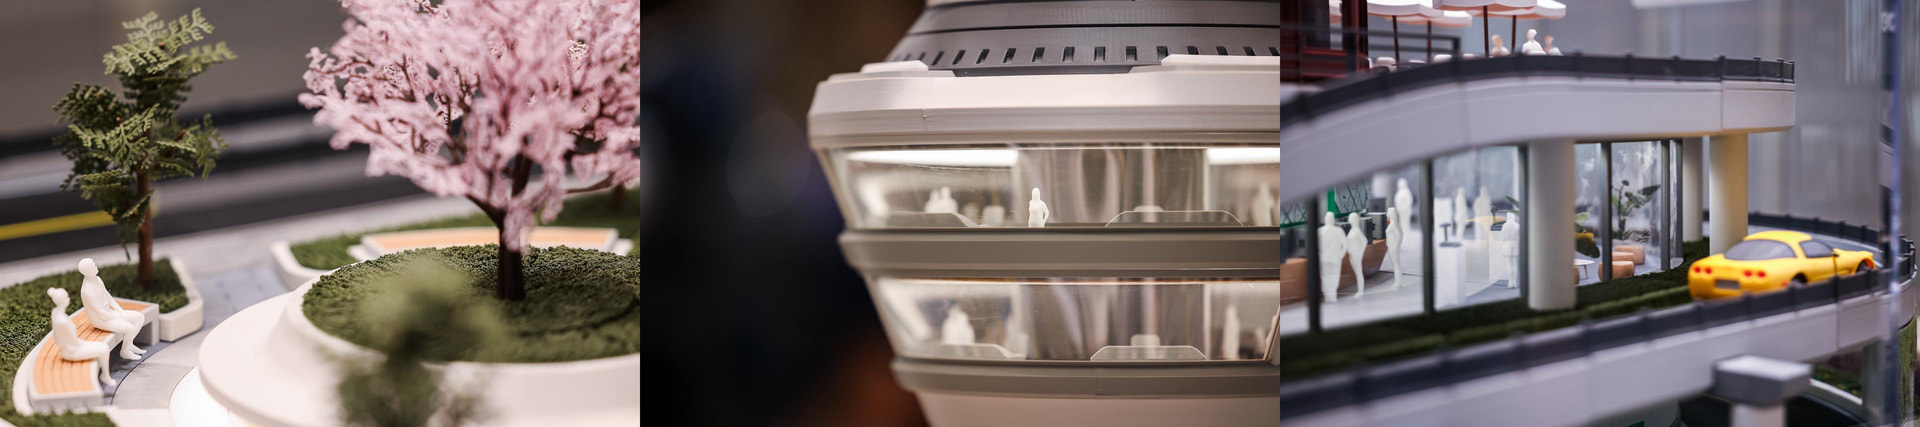
Throughout the development of these projects, we’ve gained valuable experience in 3D modeling, print optimization, structural design, and visual presentation.
We want to share that experience with you.
Through this series, we’ll take you behind the scenes of our Sandtable projects, exploring real design challenges, the decisions behind our solutions, and the lessons we’ve learned while striving for the highest standards in our own work.
Whether you’re just getting started with 3D printing or already creating complex models, we hope these insights offer useful ideas for improving your own creations and make your decision process easier.
And with every project, every experiment, and every refinement, there’s always something new to learn.
This Week’s Design Story: An Airport Control Tower
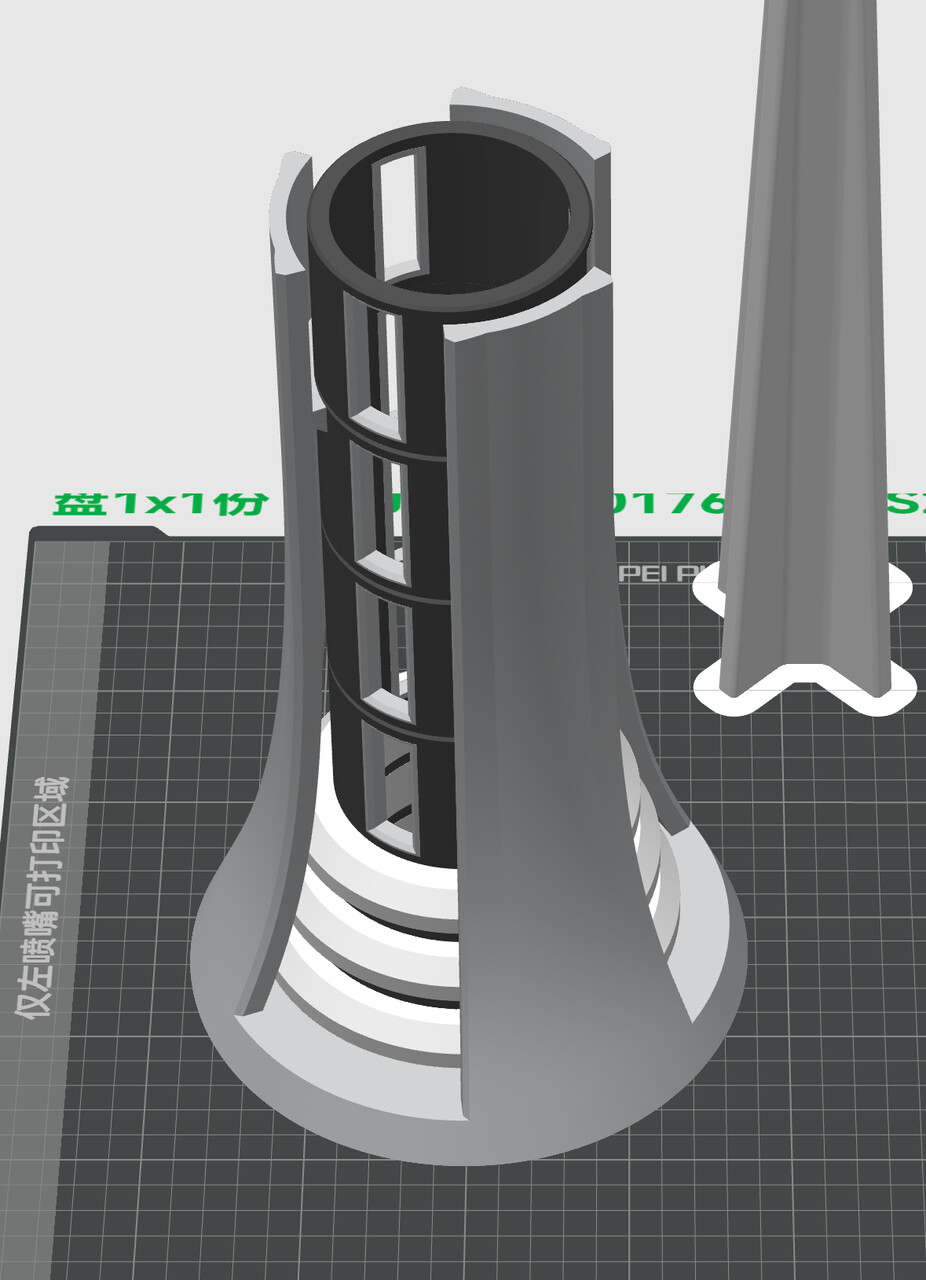
The initial Tower design.
For our first story, we’re starting with a seemingly small detail: the tall outer columns of a 3D-printed airport control tower.
Although the overall print quality was good, the white columns surrounding the tower developed noticeable horizontal layer lines. Some printed parts also showed layer shifting.
What initially looked like a print-quality issue turned out to be closely connected to the model’s structural design.
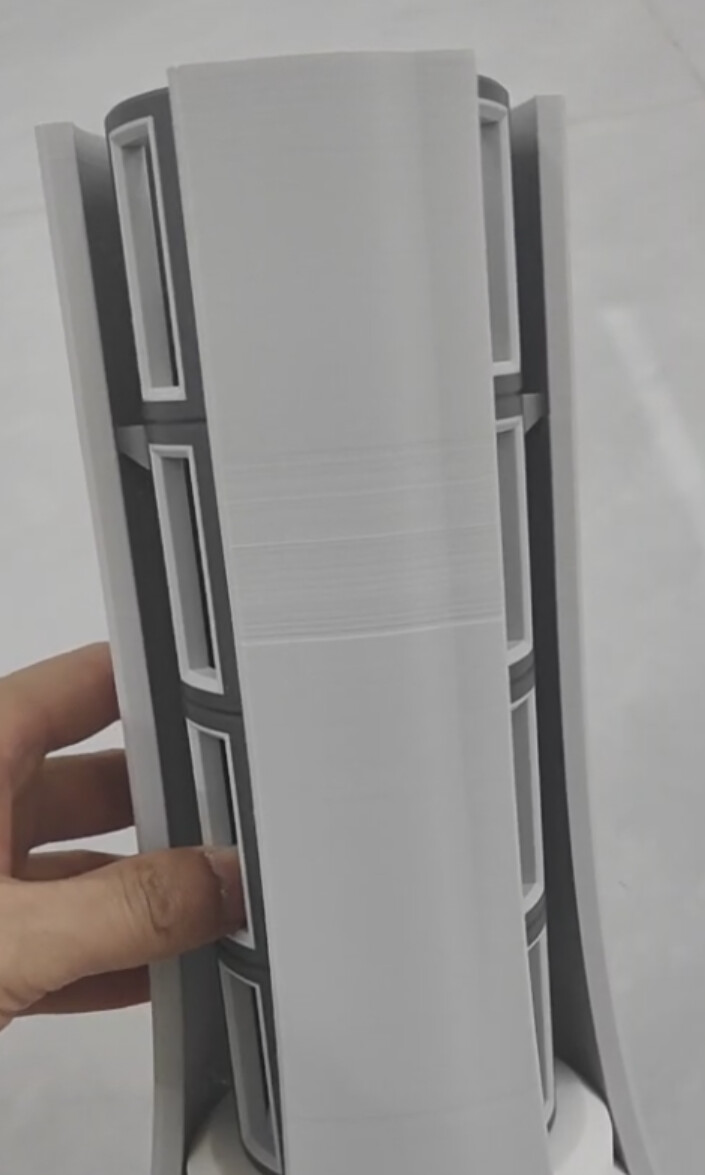
Layer lines, clearly visible on the surface
A Small Design Change, a Cleaner Print
Instead of immediately looking at the print settings, we explored whether the tower’s geometry could be contributing to the problem.
Indeed, we found an issue with the supporting connections between the outer white columns and the central structure. In the original design, these features connected only at certain heights.
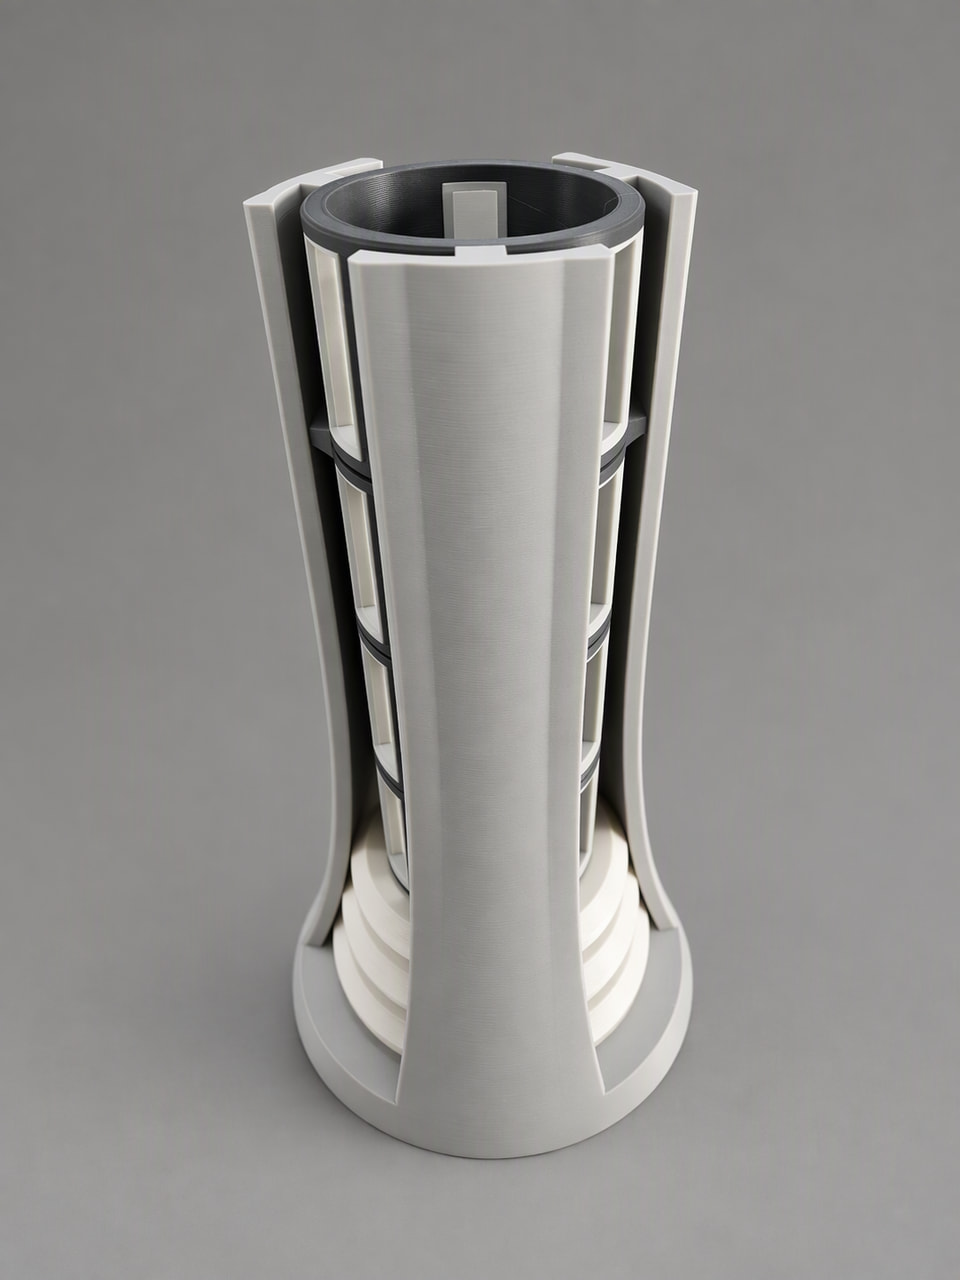
In the revised model, additional support columns created continuous connections along the Z-axis (the vertical printing direction), making the slender structures more rigid.
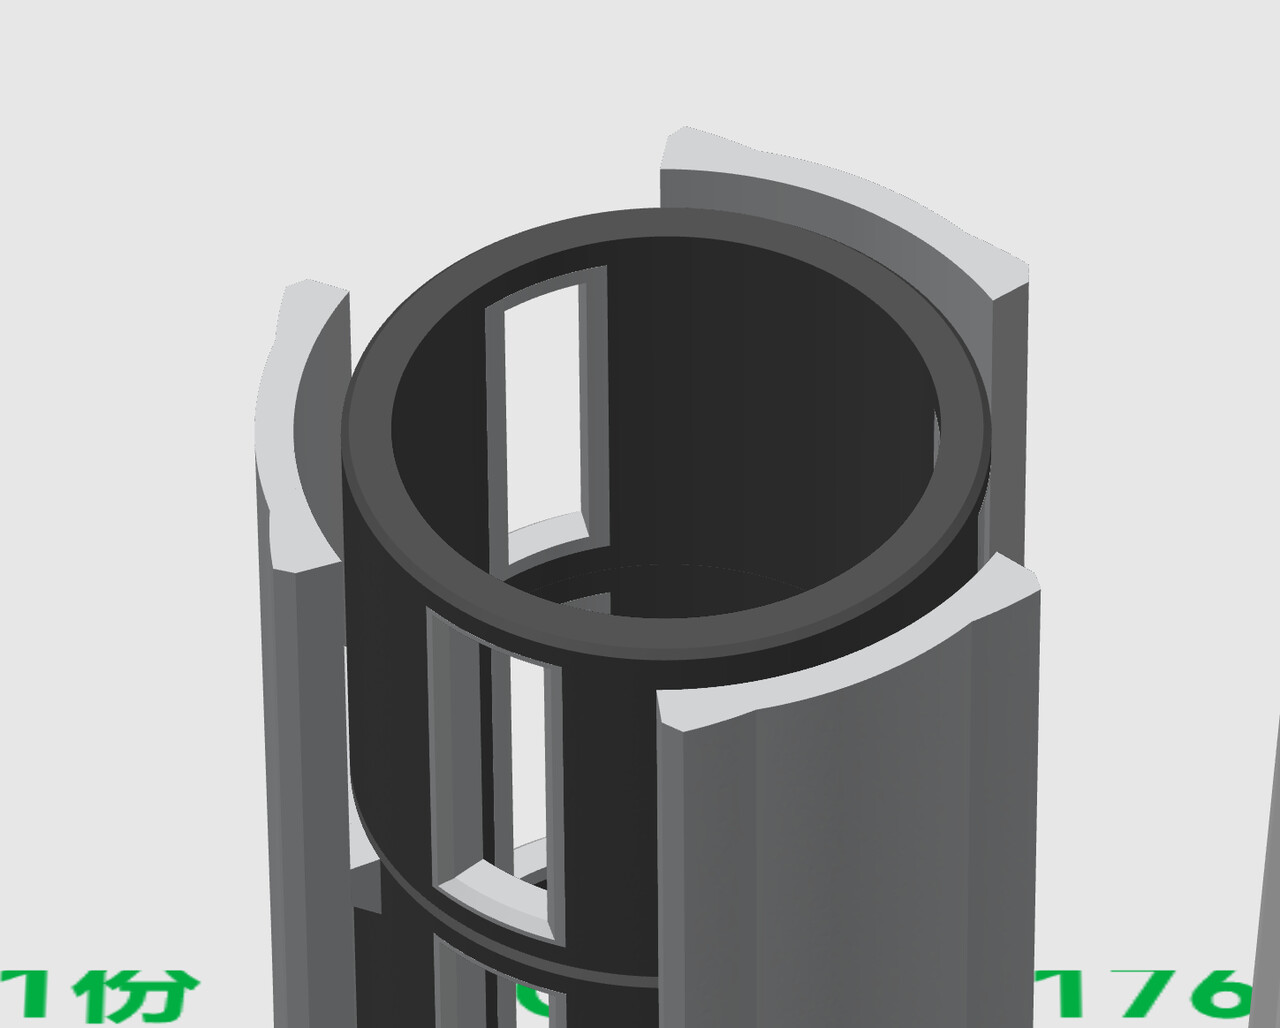
The support of the columns before the adjustment
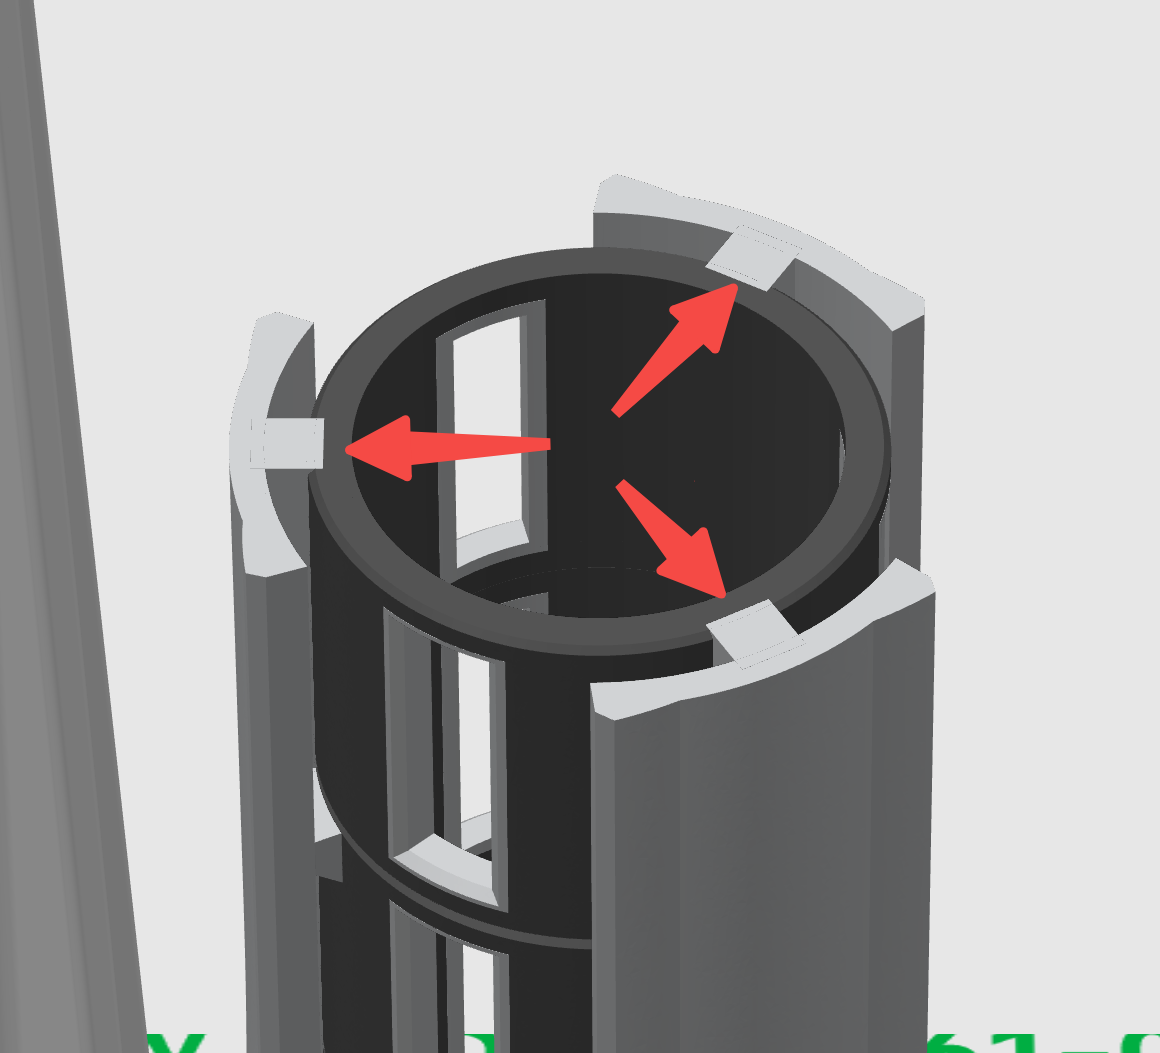
How the columns look after the design adjustment
This modification helped stabilize the outer columns without changing the tower’s overall appearance.
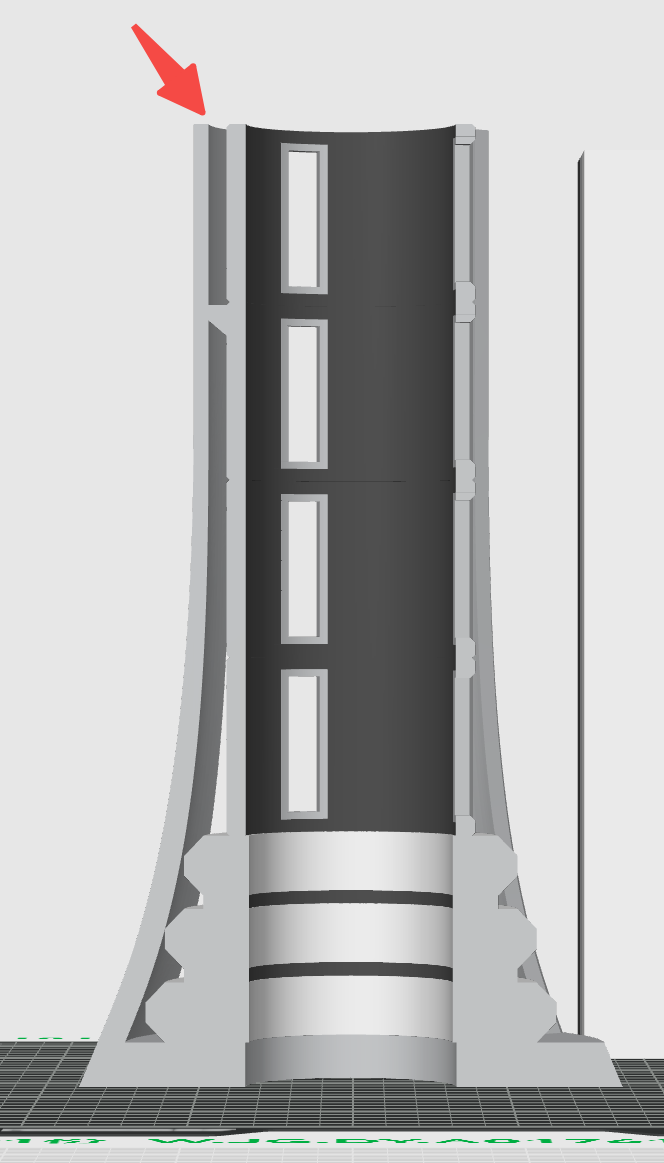
Old design: Only a small connection area
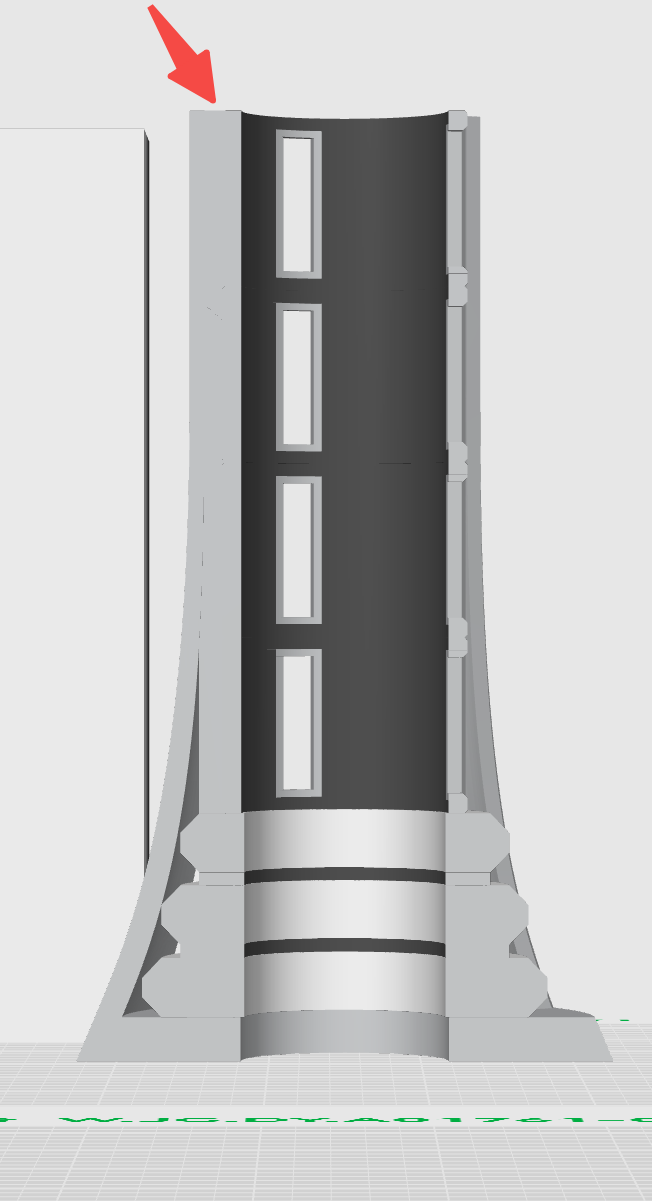
New design: the columns are connected over the full length
After the modification, the prominent layer lines were no longer visible on the outer columns in the resulting print.
But why Did the Original Design Cause these Problems?
To understand why this change worked, let’s take a closer look at the original structure.
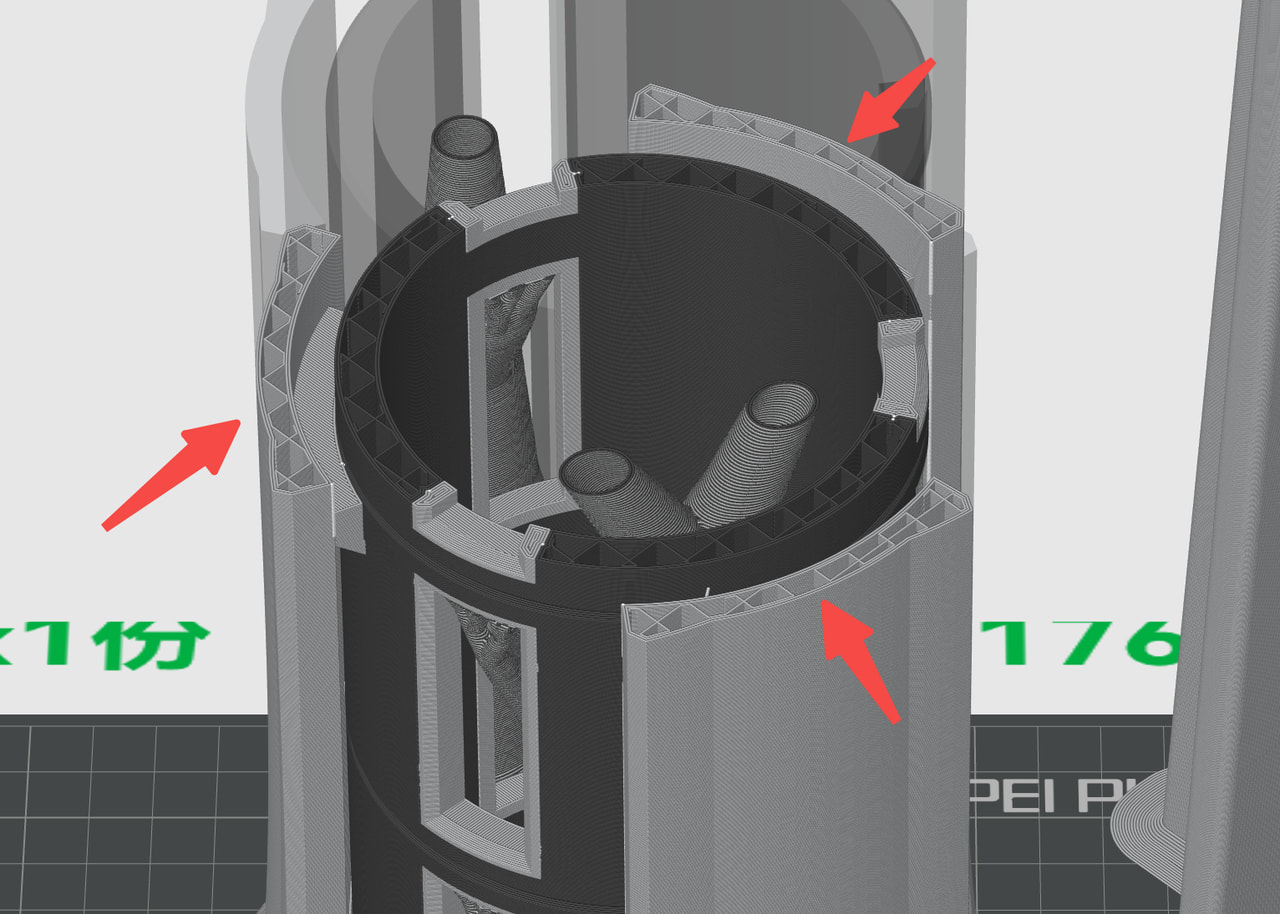
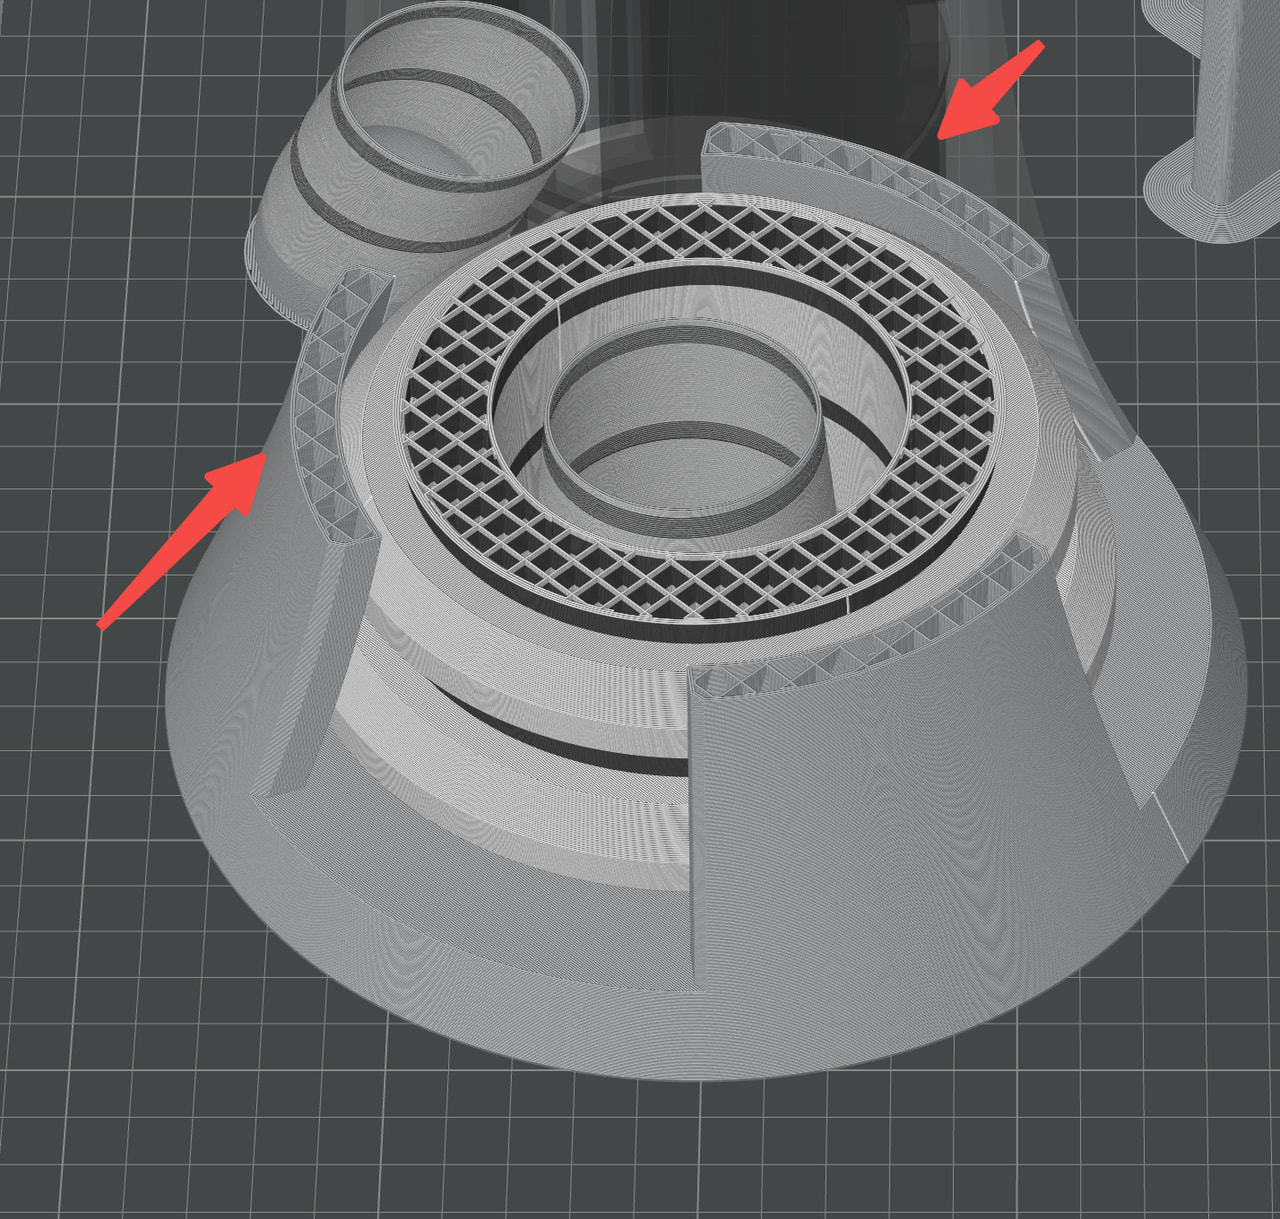
The outer white columns were tall and slender, connecting to the central structure only at a certain height. This created two potential issues.
Uneven support made the columns more likely to wobble
The base of each outer column extended outward the side rather than being symmetrically supported. Combined with its tall, narrow shape, this made the column more susceptible to movement and vibration as the print grew taller.
Structural changes between layers contributed to visible lines
The outer columns only connected to the central tower at selected layers.
At these connection points, the geometry and stiffness of the structure changed. Different sections could therefore cool and shrink differently, potentially creating deformation and visible horizontal lines.
This helped explain why the imperfections appeared at particular heights instead of being distributed evenly across the printed surface.
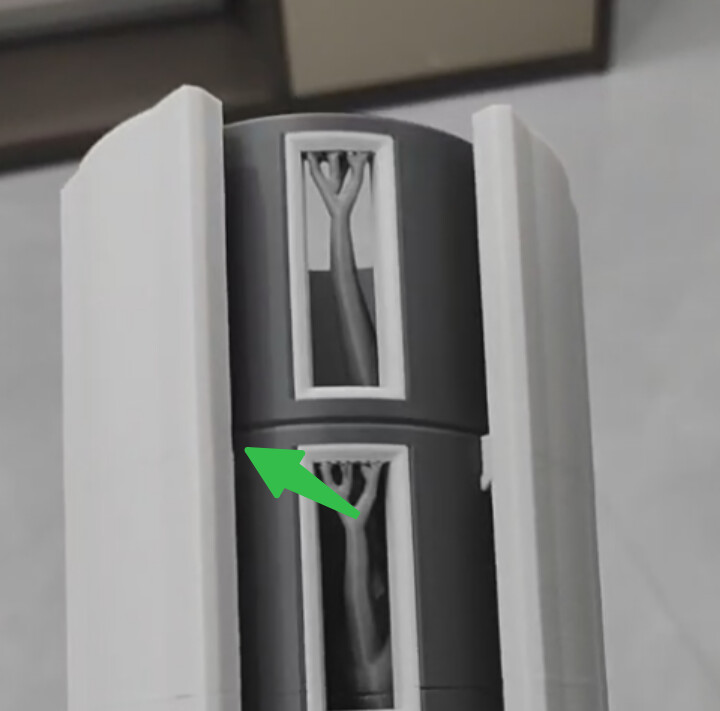
A clear visual indicator that the issue stems from the design
How Did the Optimization Work?
The most noticeable layer lines occurred where the outer columns connected to the central structure at separate heights.
To address this, we focused on making the connections continuous rather than leaving the outer columns as mostly isolated tall features.
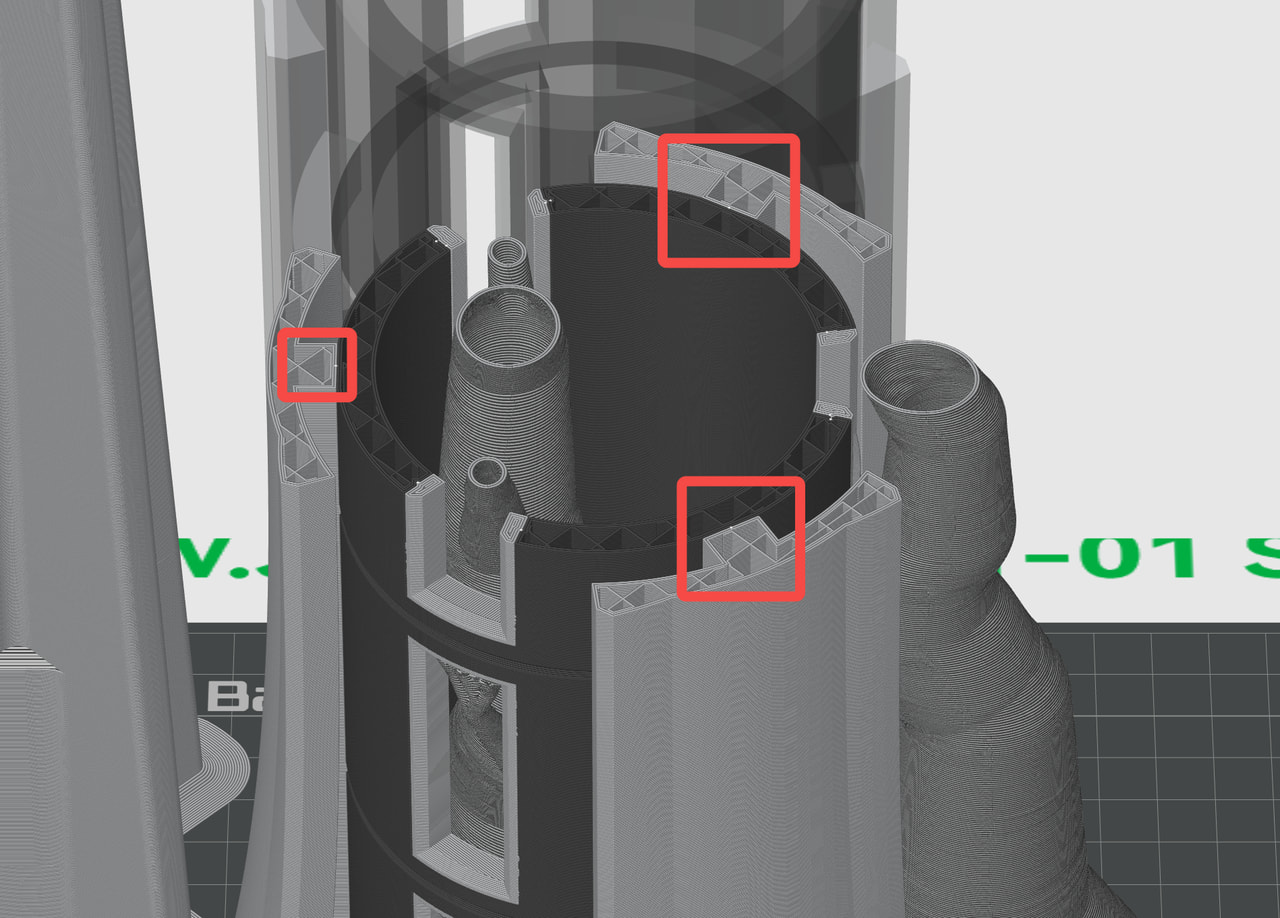
After confirming that the design change would preserve the intended appearance, additional support columns were introduced inside the tower. These connected the outer sections directly to the central structure throughout the print’s height.

Fully connected over the complete height of the model
What Can We Learn From This?
This airport control tower highlights an important idea in 3D printing:
Not every surface-quality problem needs to be solved through print settings. Sometimes, the geometry itself is the key.
When visible layer lines appear at specific heights, it’s worth checking whether the model’s structure changes at those layers.
A few things to consider:
-
Support tall, slender features. Connect thin vertical structures to the main body if possible to reduce vibration and movement during printing.
-
Avoid abrupt structural changes. Sudden differences in stiffness or cross-section between layers may contribute to uneven shrinkage and visible imperfections.
The airport control tower is just one small detail within a much larger 3D-printed miniature world. But it demonstrates how even a simple structural adjustment can make a noticeable difference to the final result.
Sometimes, a cleaner print starts with a better model.
More Stories Behind the Print
Every finished creation has a story behind it, from the first design idea to the unexpected challenges along the way.
Through #BehindThePrint, we’ll share those stories, the lessons we’ve learned, and the details that don’t always make it into the final showcase.
Have you faced similar challenges in your own projects? Share your experiences and ideas in the comments. We’d love to hear how you approach them!
See you in the next #BehindThePrint.