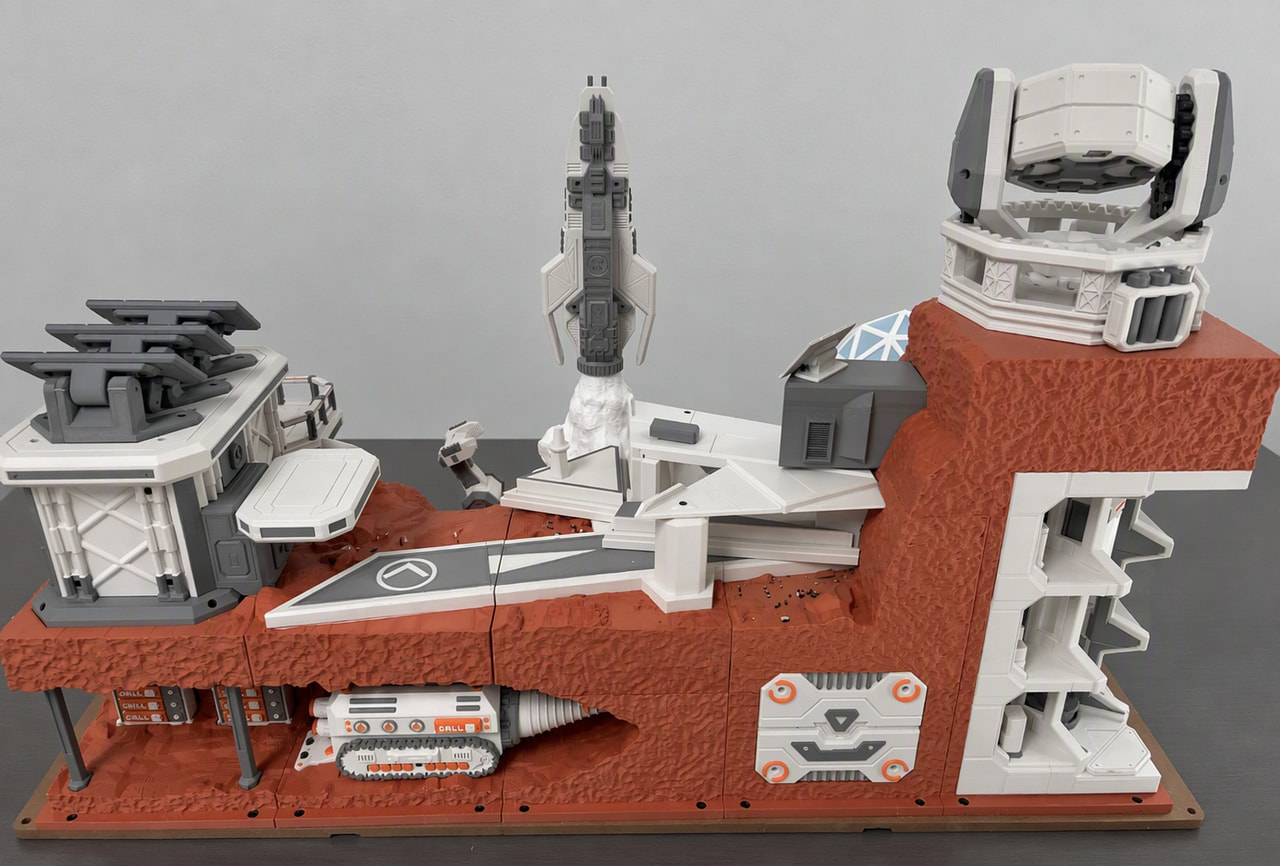
Behind the Scenes of Our Sandtable Creations
Through our Sandtable Exhibition projects, we explore the creative possibilities of 3D printing by building detailed miniature worlds. Combining design, engineering, and craftsmanship, these installations showcase what can be achieved with 3D printing.
In our #BehindThePrint series, we share the challenges, creative solutions, and practical lessons behind these creations.
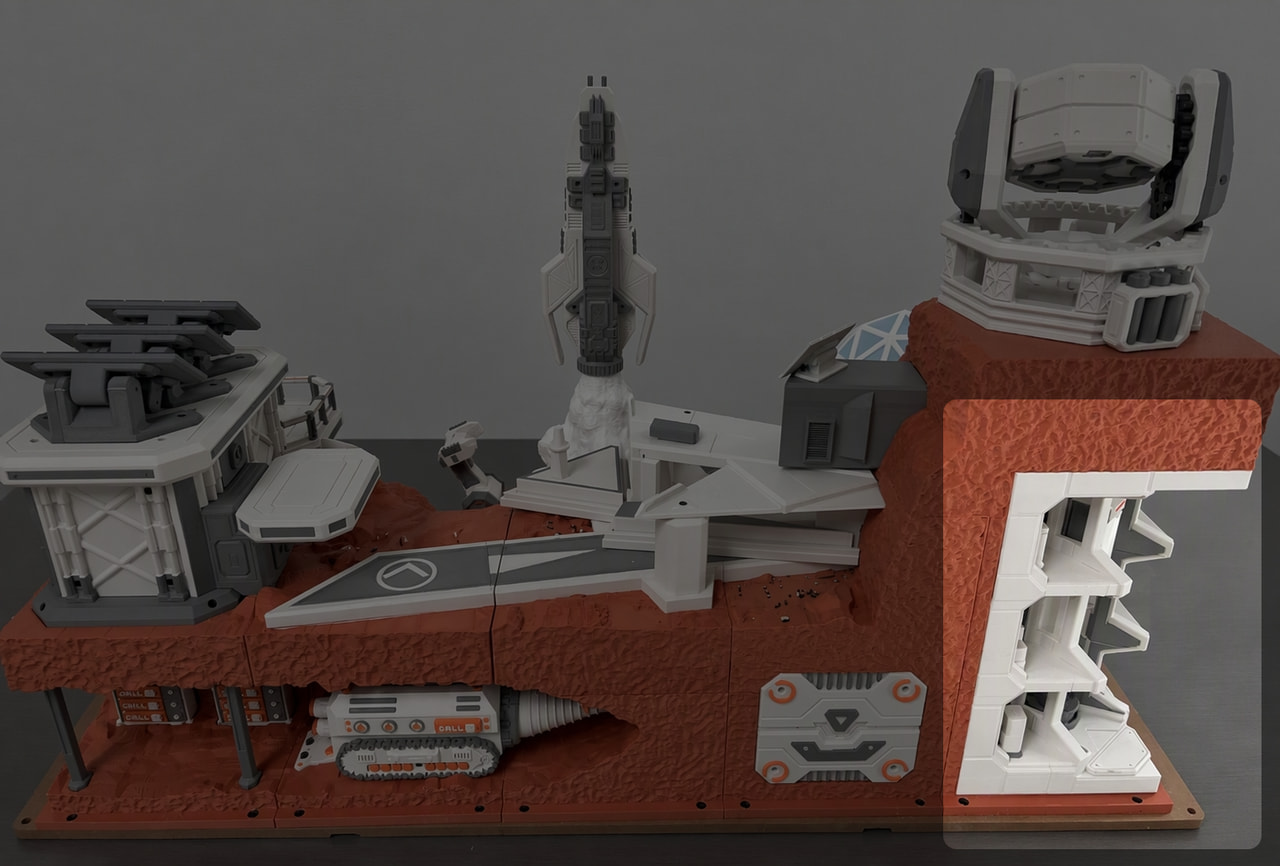
The Mars Elevator is one of the many details bringing our 3D-printed Mars Sandtable to life.
When the Light Reveals More Than Expected
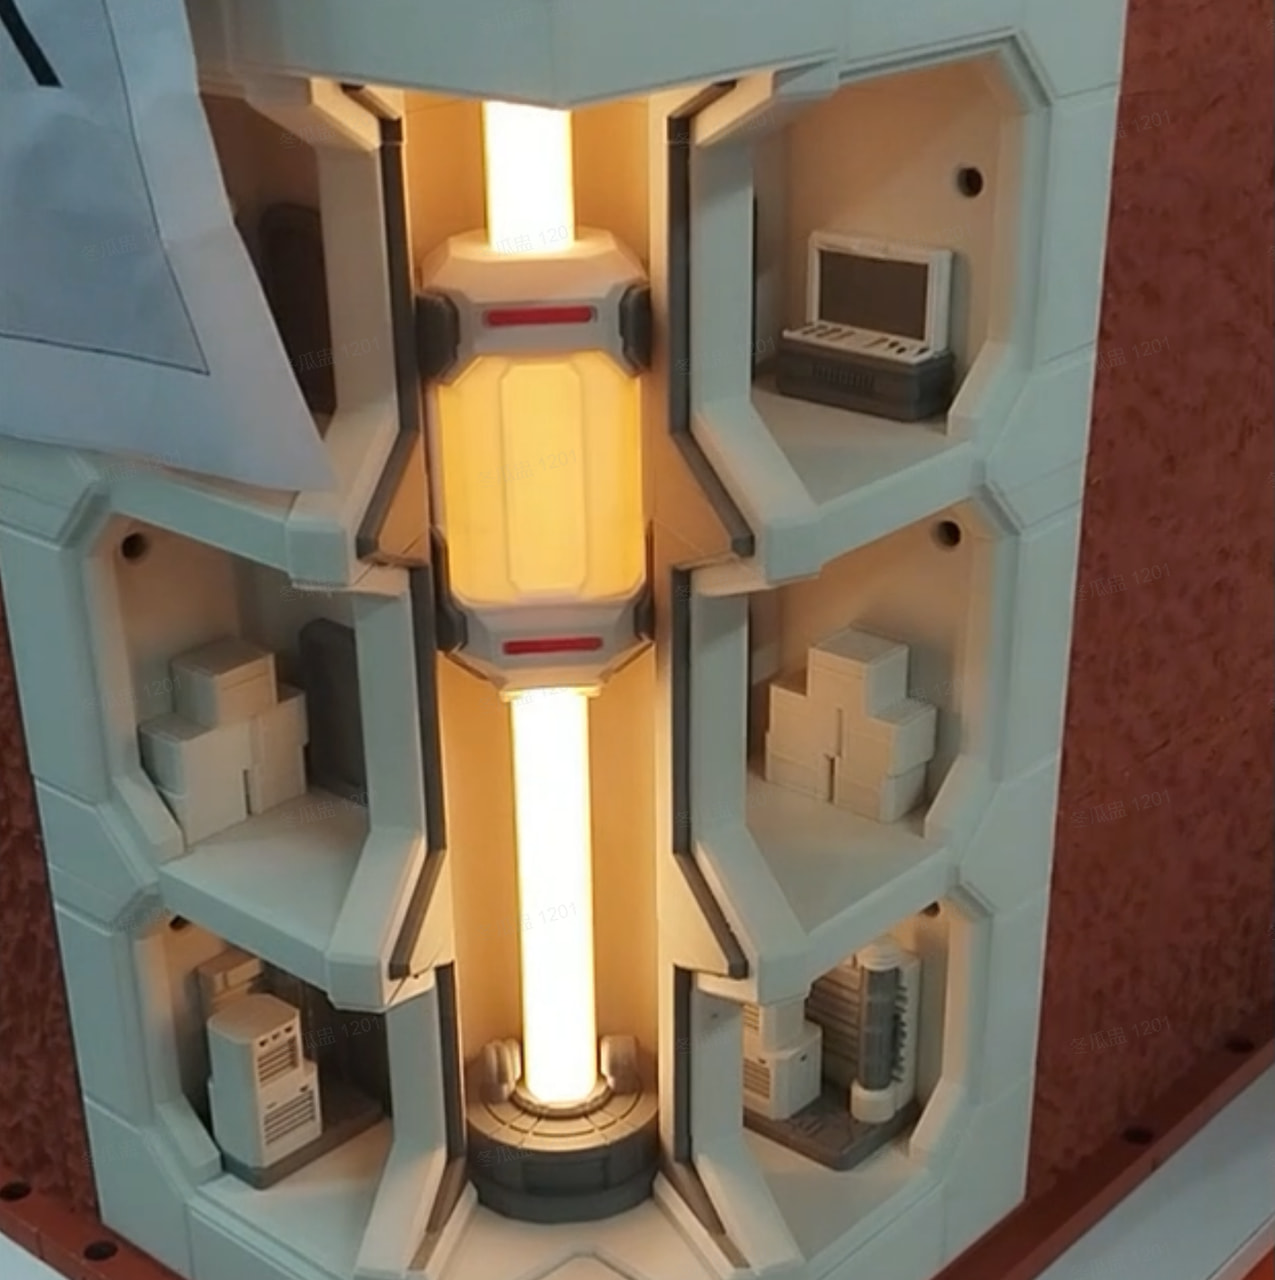
In our Mars Sandtable, a futuristic elevator structure features a glowing vertical light at its center. The illuminated element adds a warm contrast to the surrounding industrial architecture, making it a distinctive part of the scene.
But during development, we noticed something unusual.
Some of the 3D-printed lampshades looked perfectly acceptable at first glance. Their surfaces appeared relatively smooth, with no particularly obvious defects.
Then we turned on the light.
Suddenly, step-like horizontal lines became much more noticeable around the middle of the lampshade. The light passing through the material highlighted variations that had been difficult to see before.
The issue wasn’t just about how the print looked on the outside. It was also affecting how evenly the lampshade transmitted light.
What was causing these irregularities? And more importantly, could we improve the result without compromising the illuminated design?
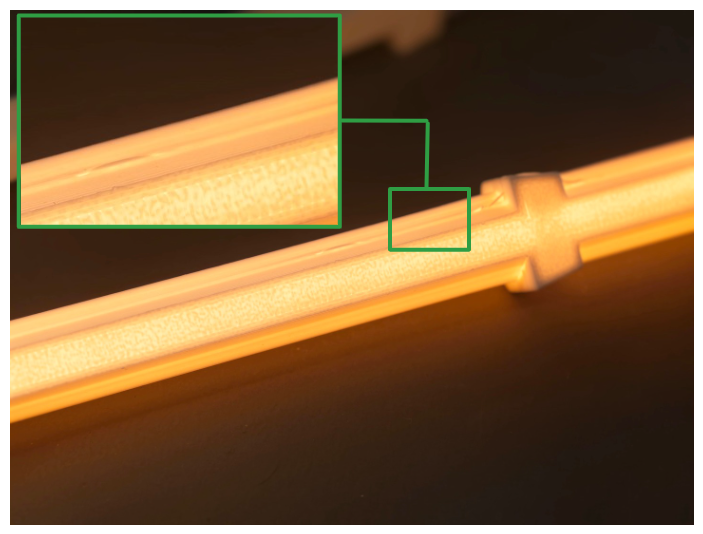
Illumination reveals surface irregularities that can be difficult to notice under normal lighting.
When a Helpful Feature Becomes a Problem
To understand the issue, we looked more closely at the original lampshade design.
The goal was straightforward: create a printed enclosure that would soften the light and produce an even glow.
However, printing a translucent lampshade introduces some interesting challenges.
When a model contains infill, the internal structure can become visible as light passes through different amounts of material. Areas with more material may appear darker, while thinner areas transmit more light. For this reason, maintaining a consistent material thickness is especially important when designing illuminated parts.
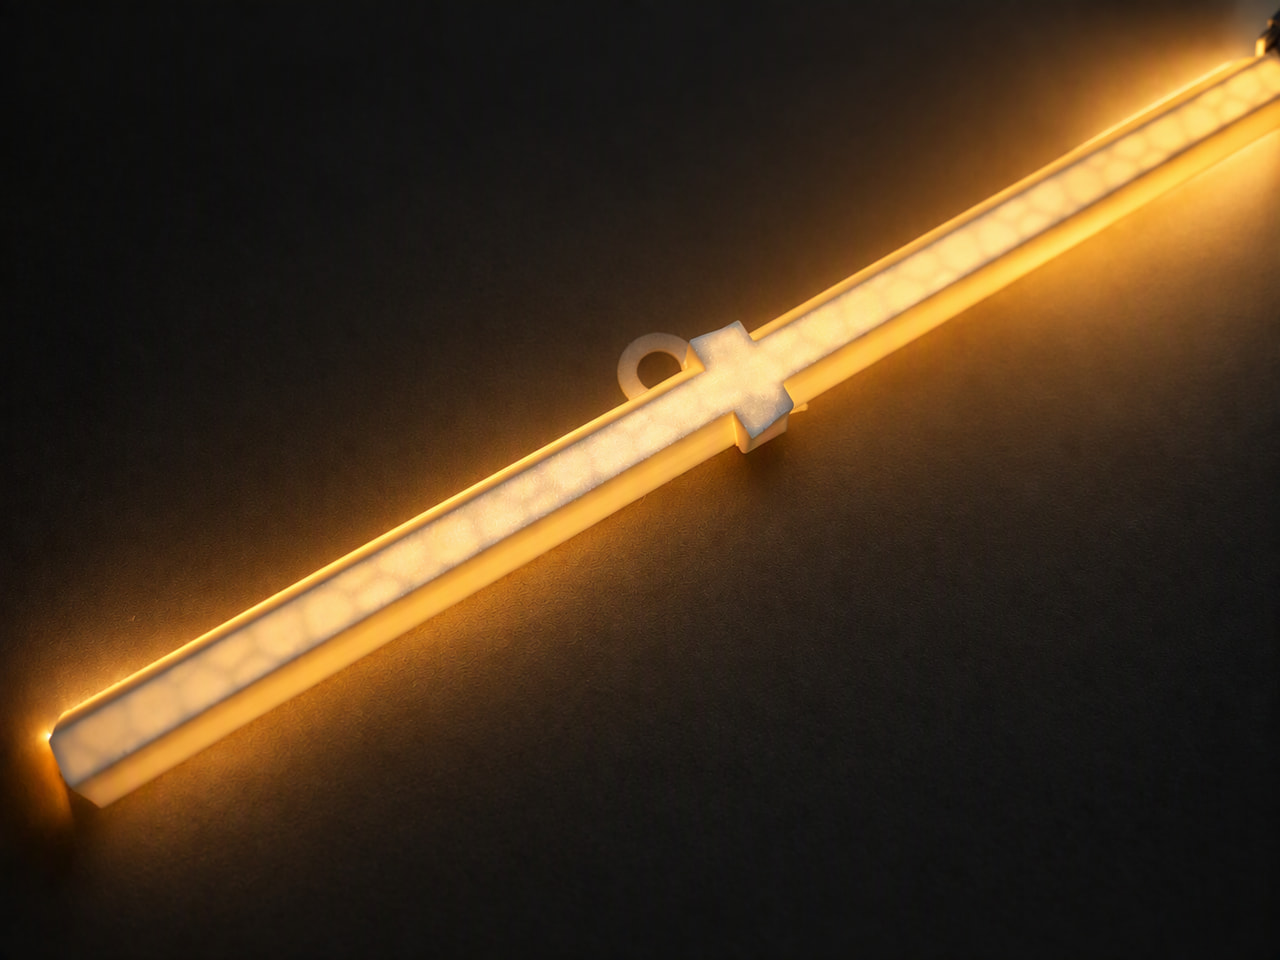
Internal infill patterns can become clearly visible when light passes through a printed lampshade.
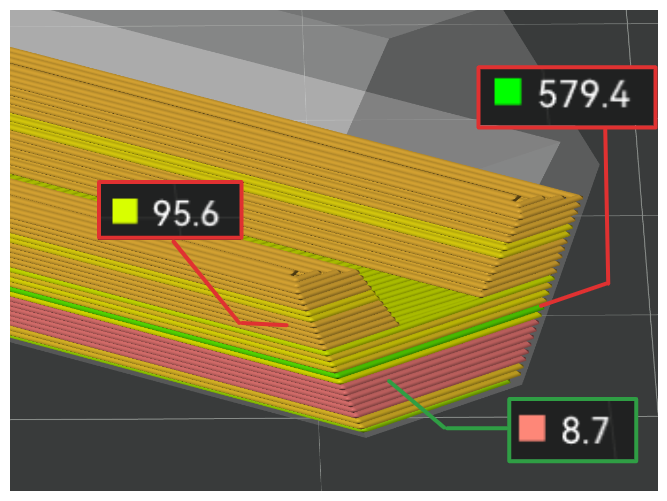
In our original design, we used a thicker lampshade structure with an internal layer intended to help diffuse the light. But when printed with 0% infill, this geometry introduced a large bridging area.
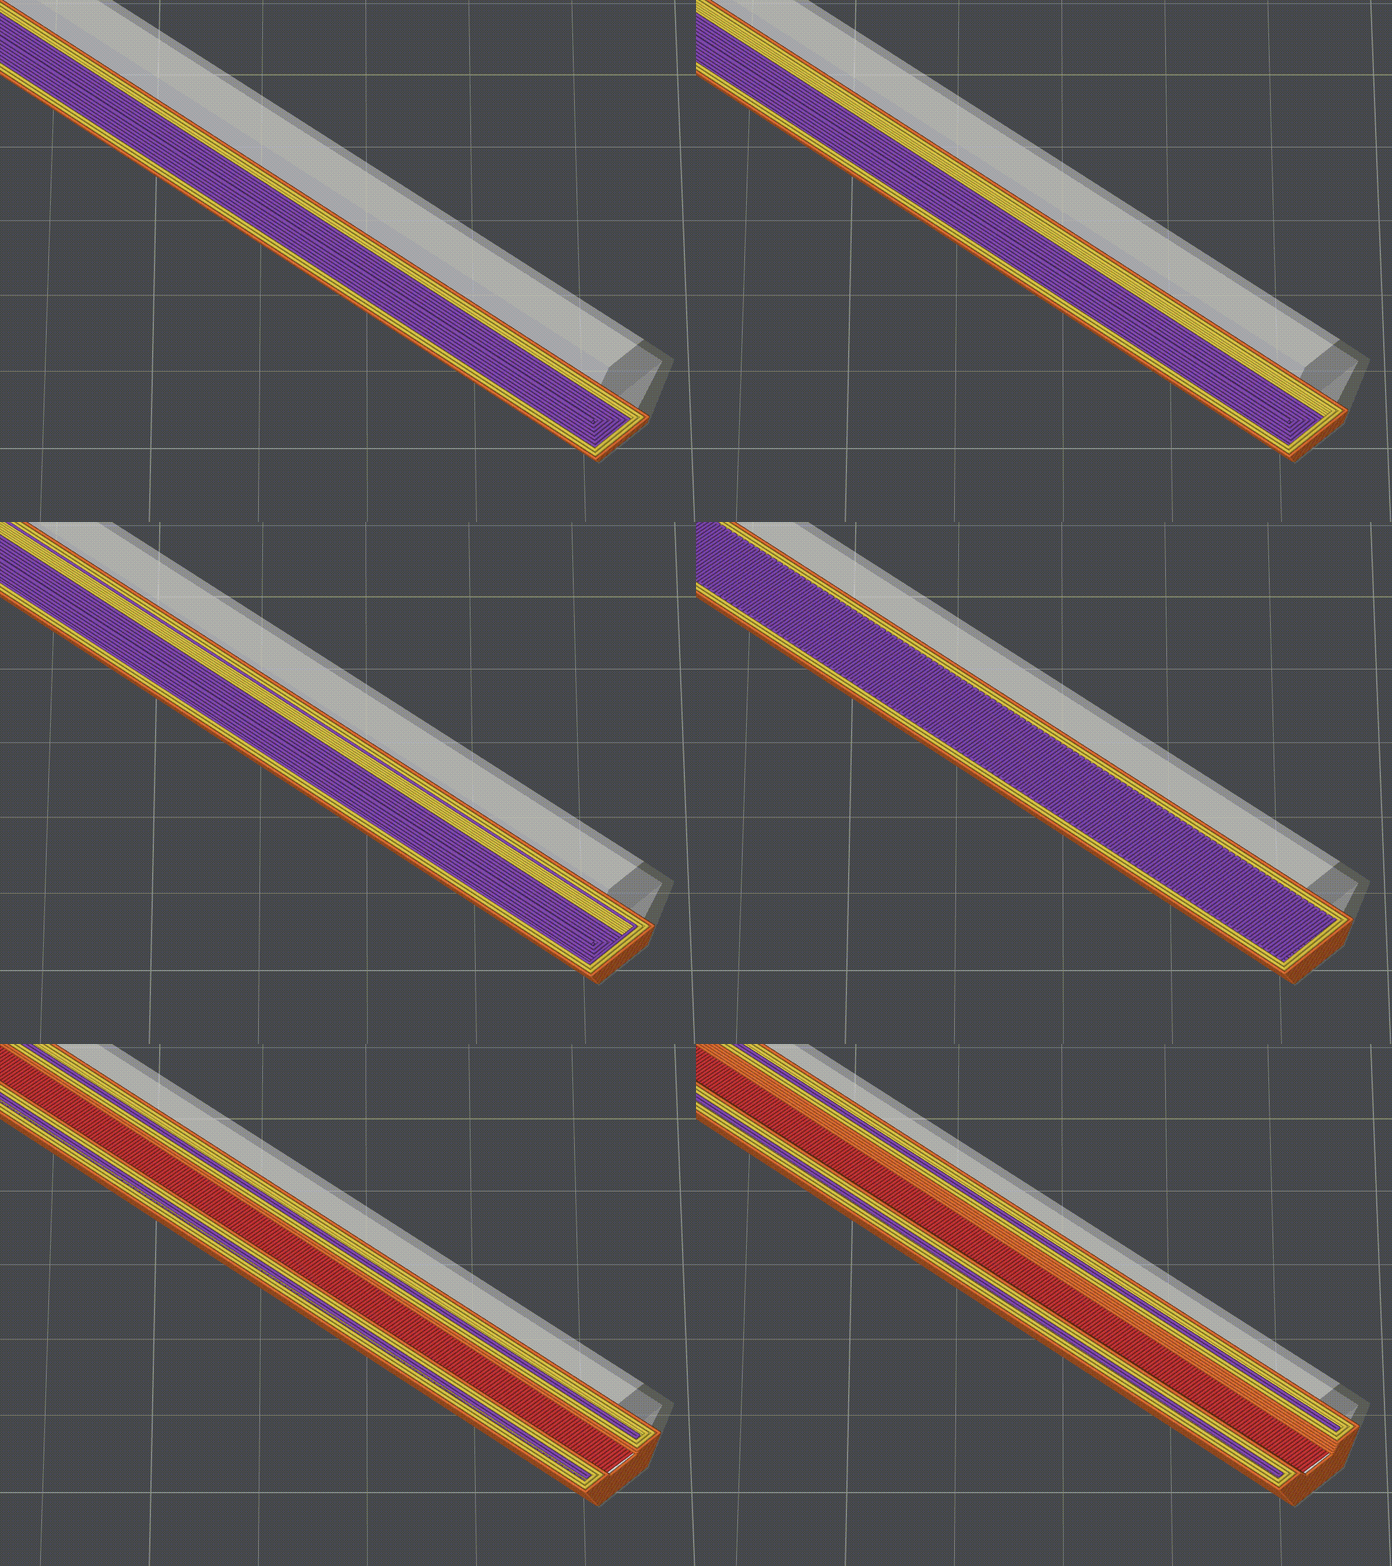
And that bridge turned out to be a significant part of the problem.
Bridging occurs when the printer extrudes filament across an unsupported gap. Unlike printing a regular wall, bridging typically requires slower printing and sufficient cooling to prevent the unsupported filament from sagging.
For a large bridging area, this can significantly increase printing time. It also changes how the surrounding material cools and shrinks compared with regularly printed sections.
In our lampshade, the large bridging area introduced three related issues:
First, longer printing time. The printer needed to move more slowly across the unsupported area while allowing the filament to cool, making this section considerably more time-consuming to print.
Second, uneven cooling and shrinkage. The different printing conditions around the bridging layer contributed to the step-like horizontal lines visible on the finished surface.
Third, uneven light transmission. Where the bridging layer connected to the surrounding walls, the material thickness varies. When illuminated, these differences could make some areas appear brighter or darker than others.
A feature originally intended to improve the lighting was ultimately working against the very result we wanted to achieve.
A Simpler Design, a Cleaner Glow
Instead of trying to improve the bridging geometry or adjusting print settings, we considered another possibility: What if we didn’t need the diffuser layer at all?
A diffuser helps create even illumination by scattering light and reducing visible differences in brightness.
With conventional LED strips, individual light sources can create bright spots separated by darker areas. How noticeable these differences become depends on several factors, including LED spacing, brightness, beam angle, and the distance between the LEDs and the lampshade.
But our design used a COB LED strip.
Unlike conventional strips with widely spaced light sources, COB strips have closely spaced light-emitting elements that produce a more continuous glow. In our case, the relatively low-brightness LEDs and the strip’s coating also helped distribute the light evenly.
This meant the additional diffuser layer might not be necessary.
We therefore removed it from the lampshade design, eliminating the large bridging area and creating a simpler structure with more consistent wall thickness.
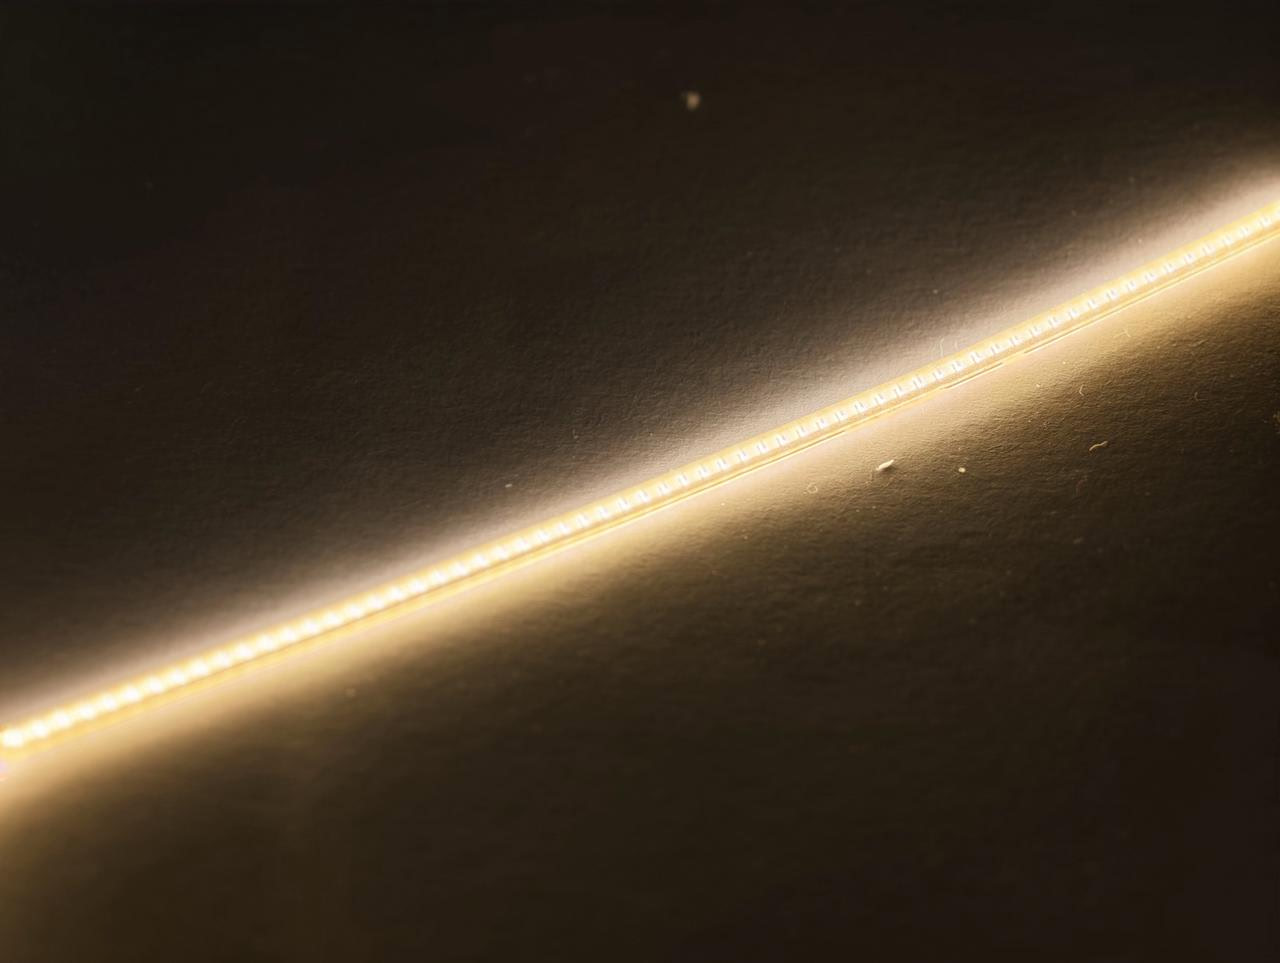
Uniform lighting with COB LED strips
The COB LED strip provided sufficiently even illumination for this design without requiring a separate internal diffuser.
The revised design produced the result we were looking for. In our visual evaluation, the prominent horizontal banding was no longer visible, while the COB LED strip still provided even illumination.
The change also improved printing time and avoided cooling challenges associated with the original bridging layer.
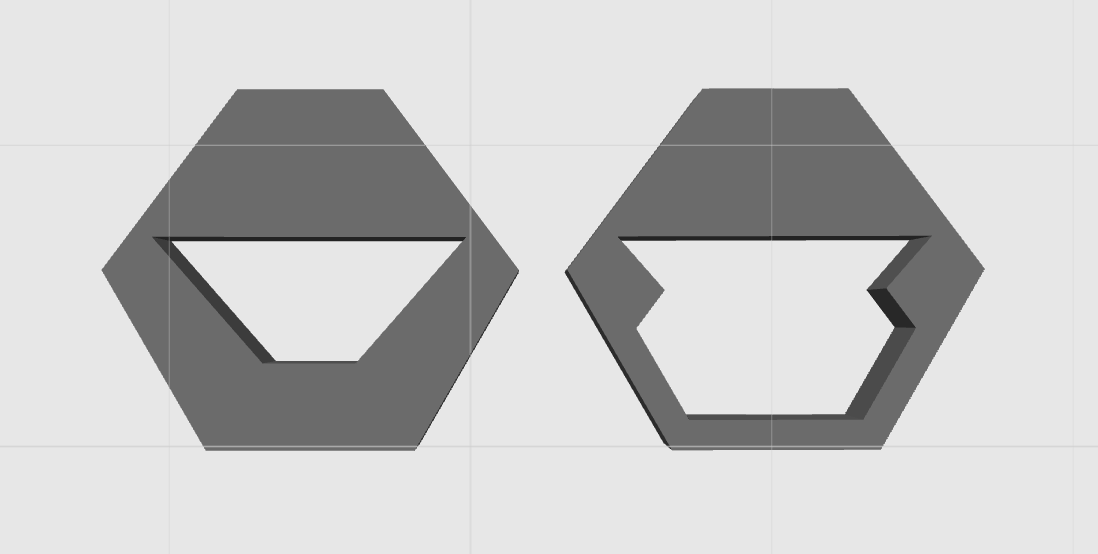
Lampshade structure: Before (Left) and After (Right) Modification
In the end, we didn’t need a more complicated printing solution. We simply needed to recognize that the light source was already doing the job we had designed the additional layer to perform.
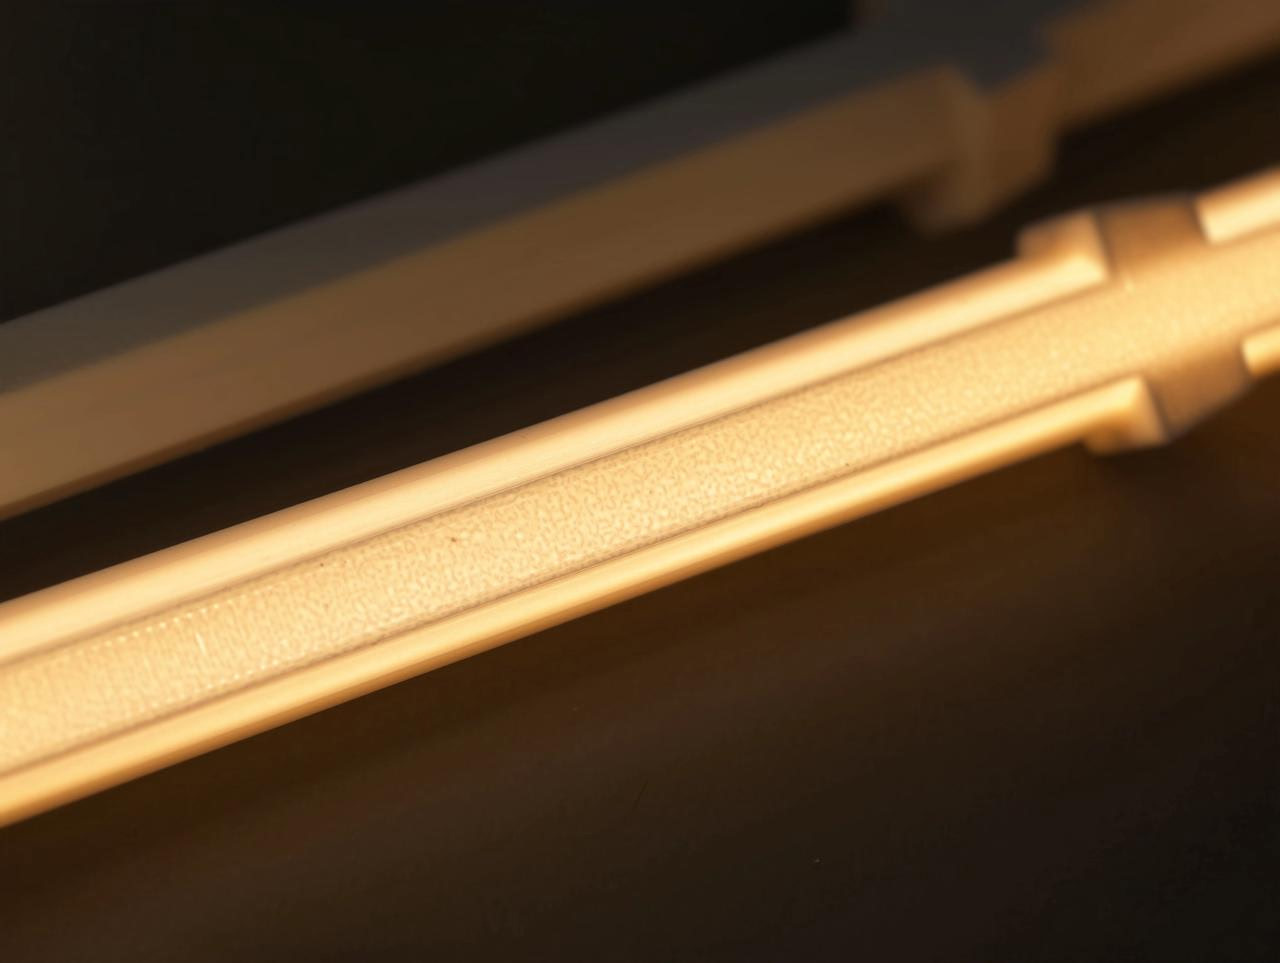
In our visual comparison, the revised design no longer showed the prominent banding seen in the original illuminated lampshade.
What Can We Learn From This?
When designing objects that incorporate light, a successful print isn’t necessarily one that simply looks smooth from the outside.
The way light interacts with the printed material is part of the design itself.
But before adding a diffuser, it’s worth considering the light source itself. Are the individual LEDs creating visible bright spots? Could their spacing, brightness, or distance from the lampshade already provide sufficiently even illumination?
If additional diffusion is necessary, printing a separate diffuser component may help avoid complicated bridging geometry. But if the light source already provides the desired effect, another layer may introduce problems without offering a meaningful benefit.
And there’s much more to explore here. LED spacing, beam angles, and light-source positioning all influence the appearance of illuminated prints.
Would you be interested in a deeper look at designing 3D-printed lampshades and understanding when a diffuser is actually necessary? Let us know in the comments. We might explore this topic in a future #BehindThePrint!
Sometimes, improving a 3D print isn’t about adding more. It’s about discovering what you no longer need.
More Stories Behind the Print
From tiny decorative details to illuminated structures, our Mars Sandtable continues to show how even small design decisions can influence the final result.
And sometimes, an unexpected problem helps us see our designs in a completely different light.
Have you ever discovered a print-quality issue only after adding lighting to your model?
We’d love to hear what you learned.
See you in the next #BehindThePrint!