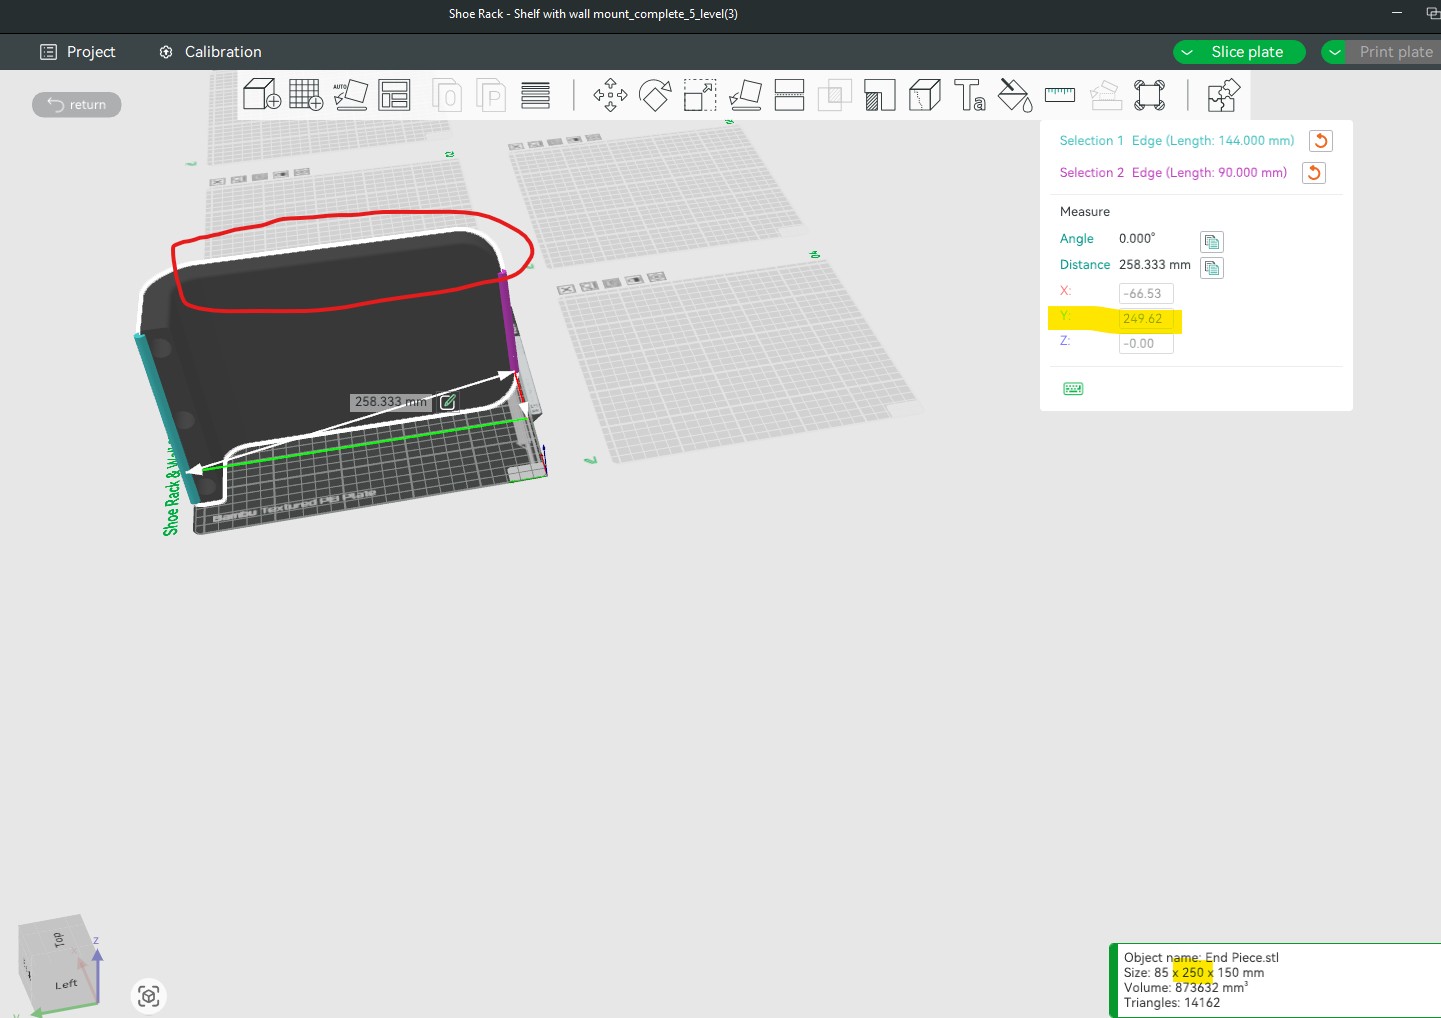
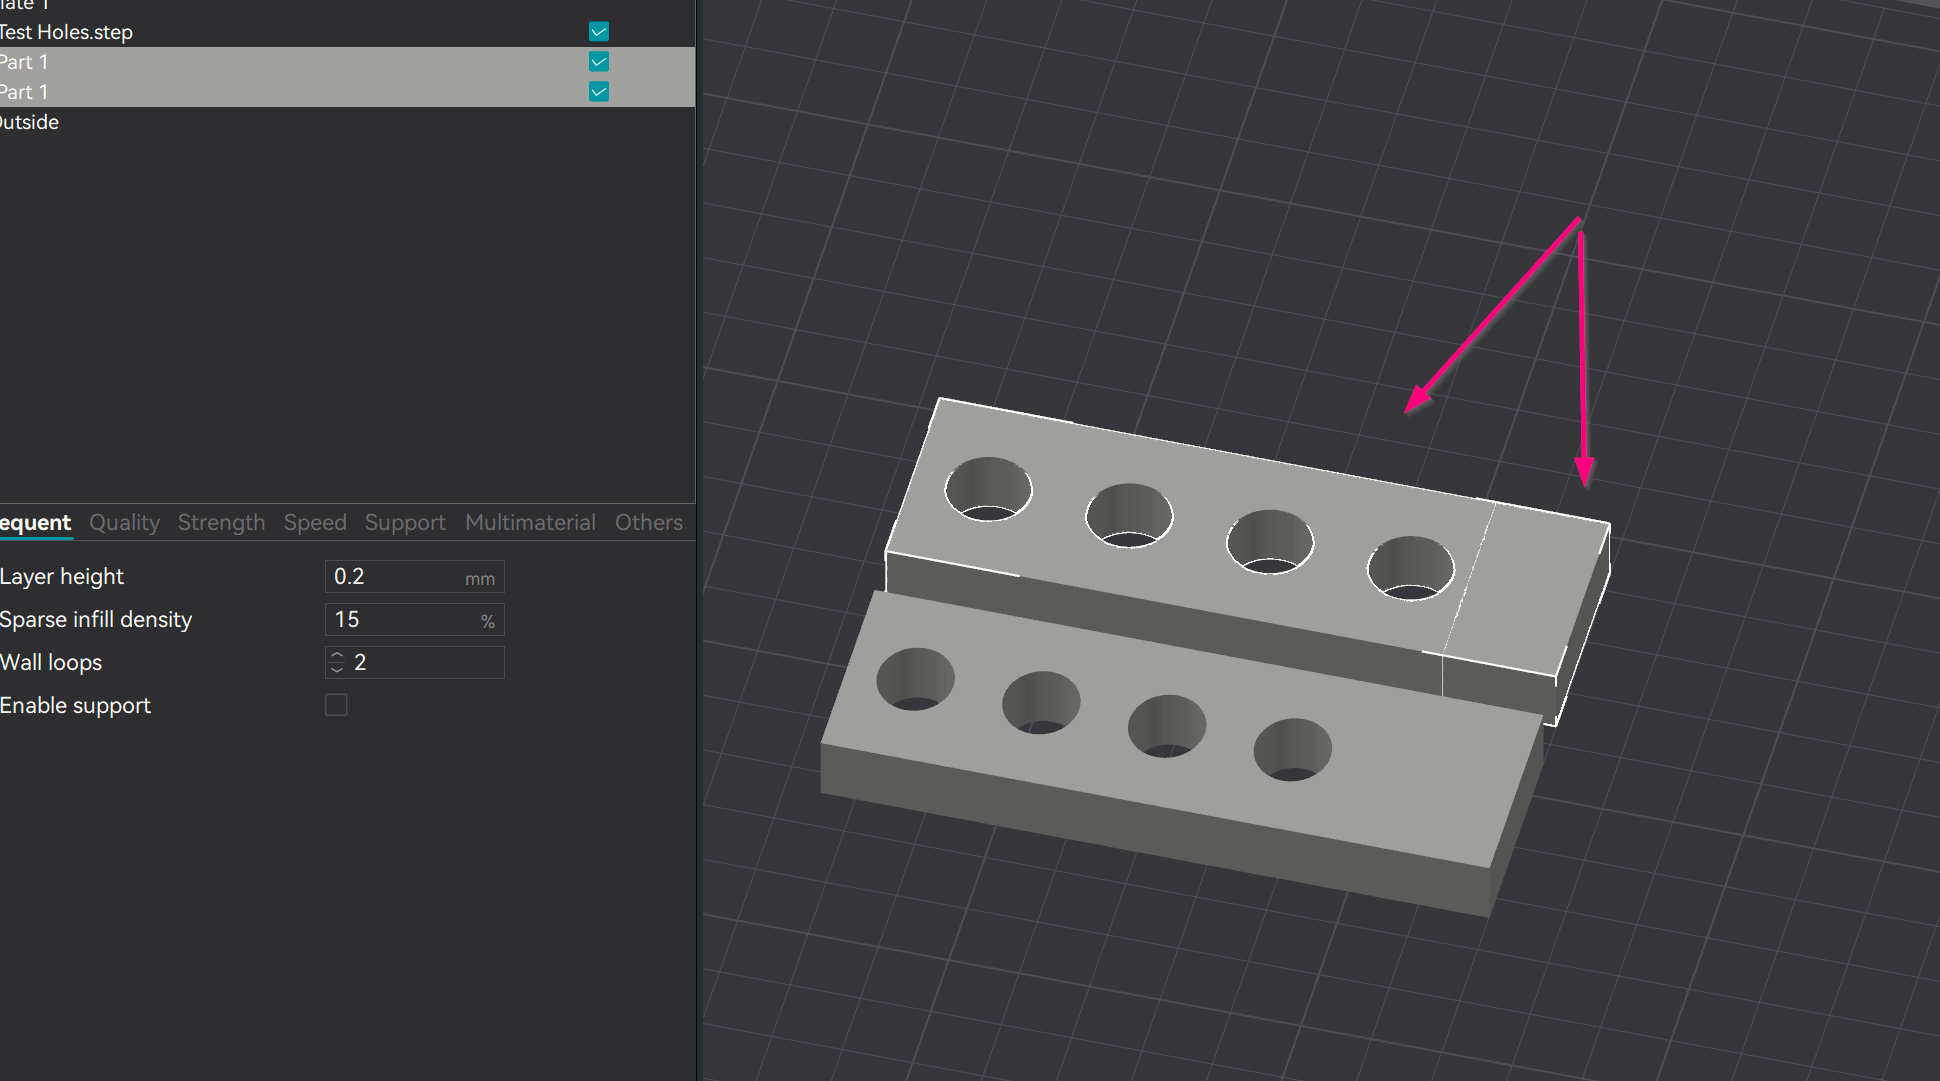
I want to ask if i can change only the lenght of the side in the red circle without affecting the size of the holes. (1st photo)
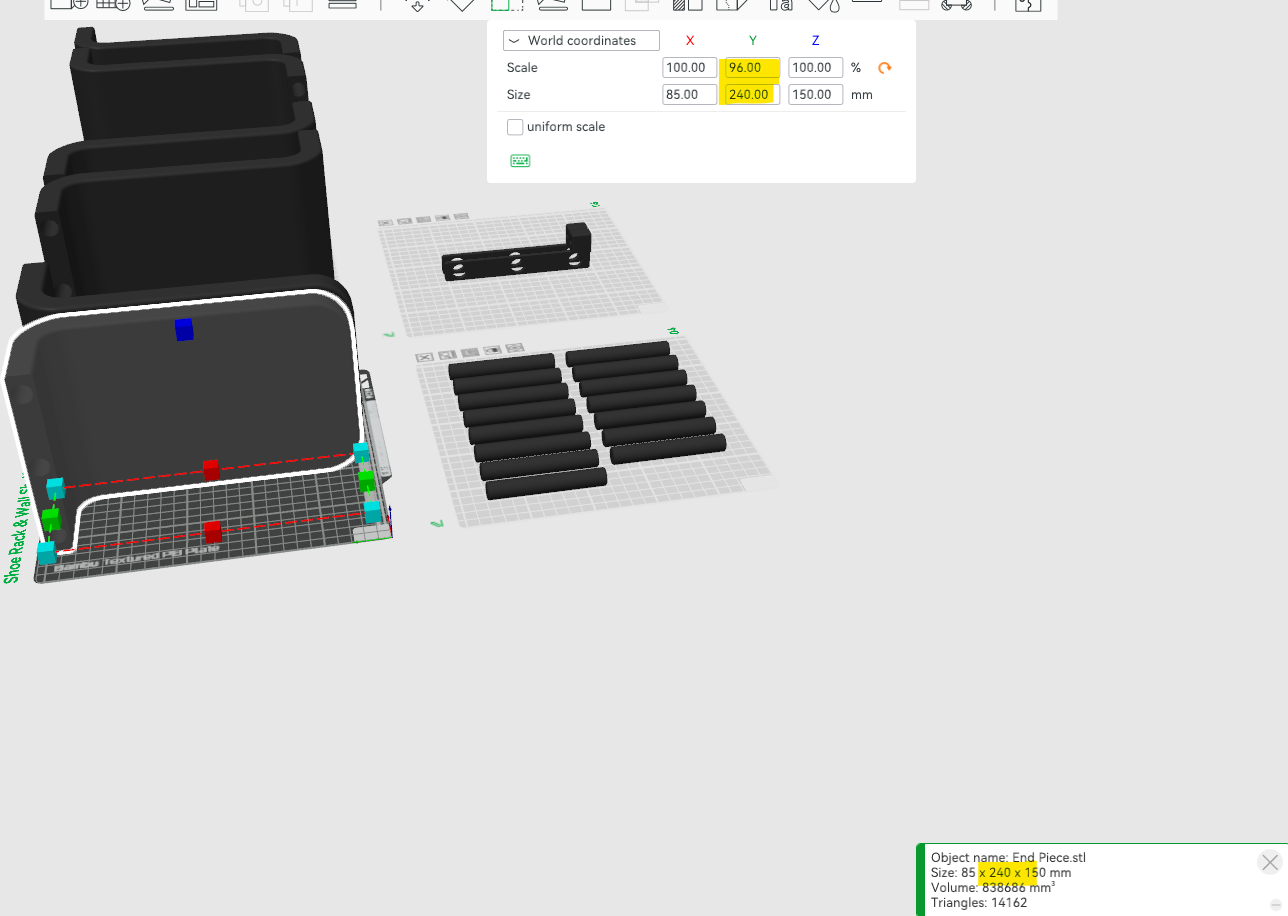
If i can’t do that, if i scale down the whole side to 96%, i must scale down the size of the pins also to 96%? (3rd photo)
Your question’s a good one—and not so simple to solve in the slicer alone. What you’re trying to do is shorten just one section of the part without messing up other features like holes. That’s not something scaling can do cleanly.
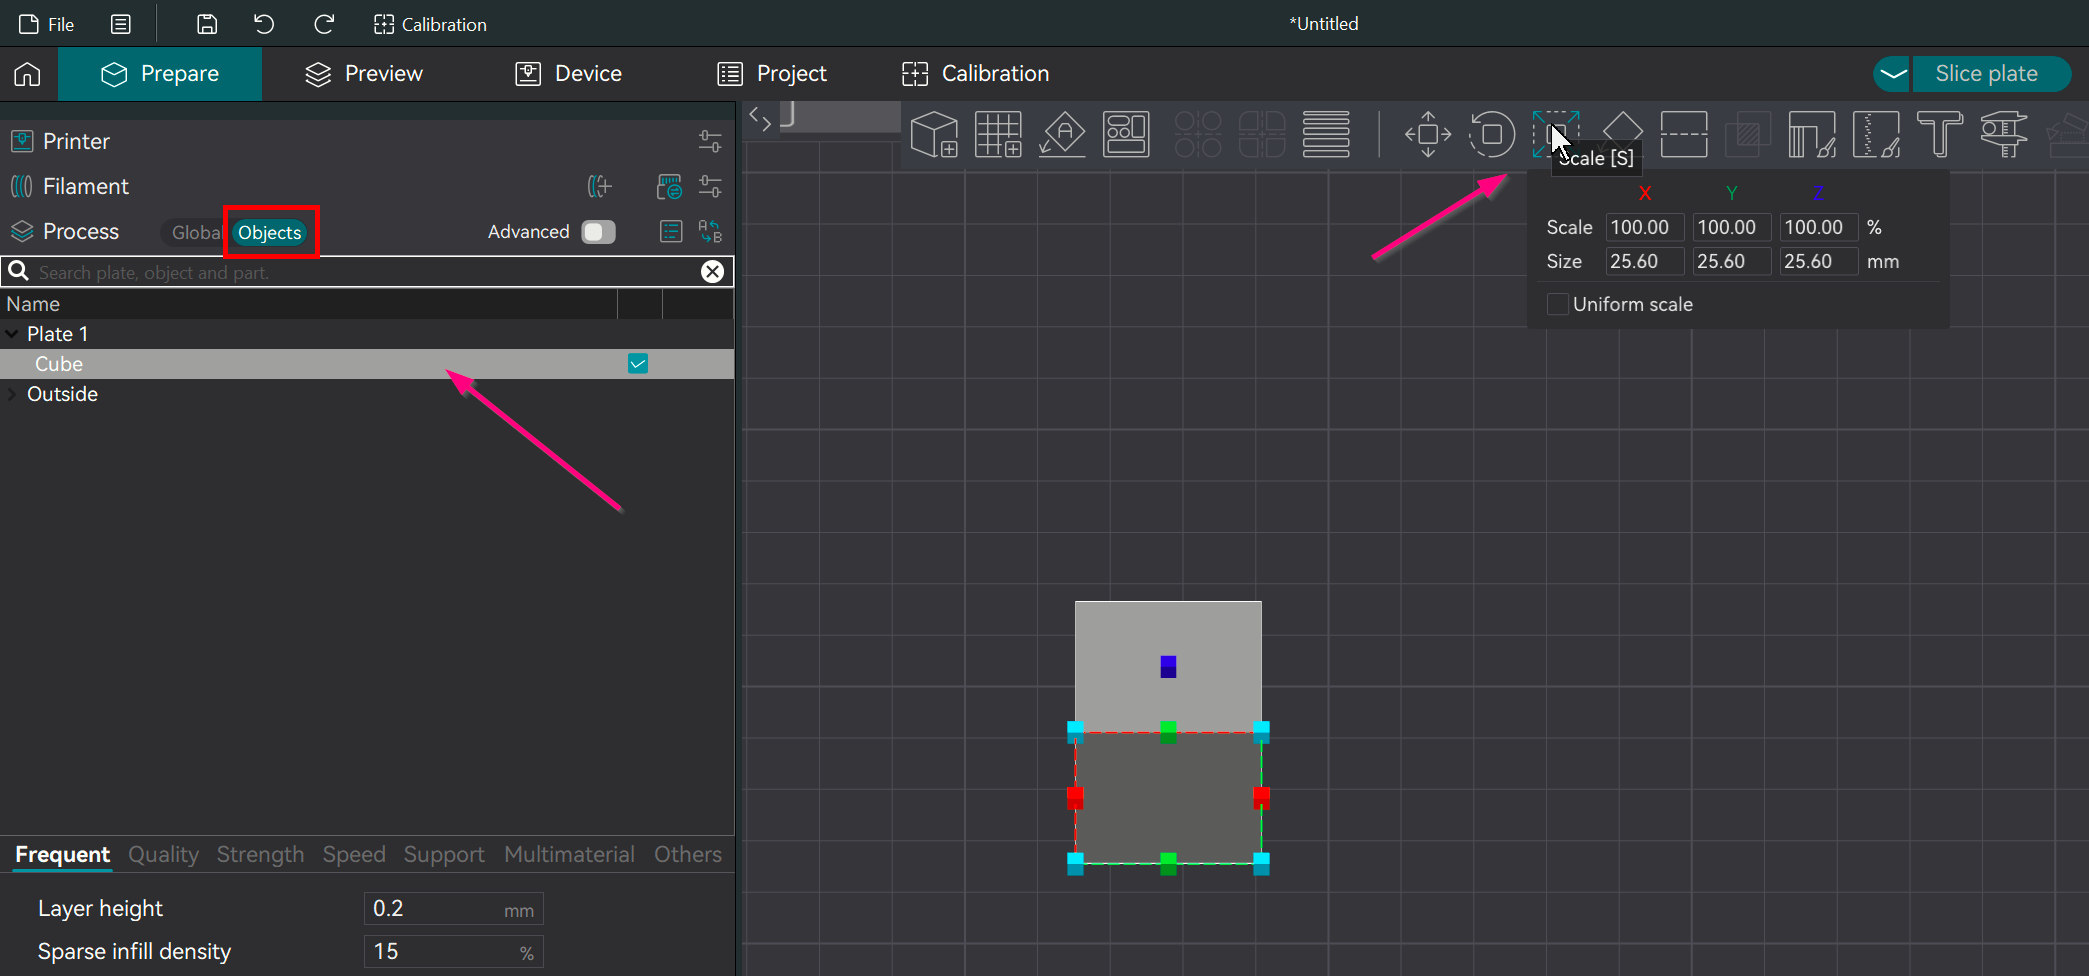
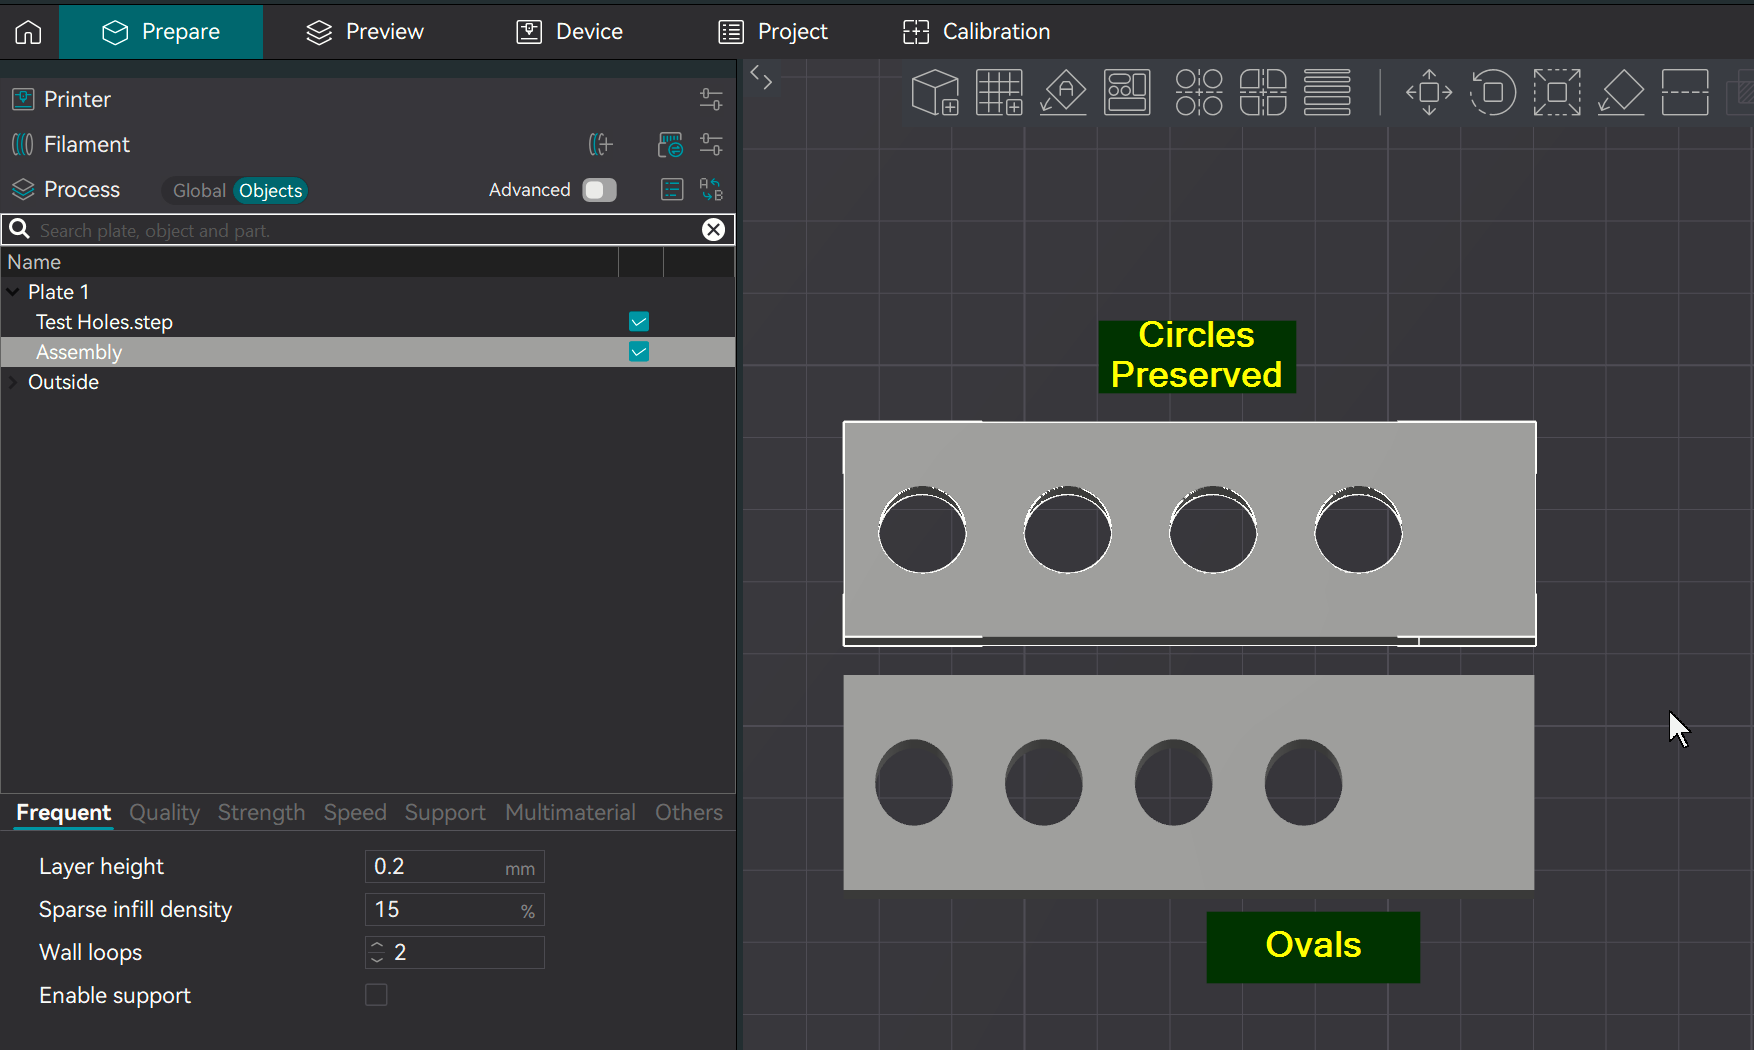
If you use the scale tool in the slicer (click on the model and press S), you can shrink just one axis—but it stretches or squishes everything, including holes. For example, scaling X to 96% will also turn any circular holes into ovals. So if precision matters, that’s not ideal. You’d also have to scale the pins by the same 96% to keep the fit consistent.
The slicer does give you a workaround: you can cut the part and remove a section, then use Boolean Union (“glue”) to join the parts back together. That way, you reduce the length without distorting everything else.
But there’s a catch—these tools only work between two pieces at a time. If the model has multiple areas that need changes, you’ll have to cut and rejoin each section separately.
There are a bunch of tutorials here and on YouTube that go over how to use these cut and Boolean tools. Just know the Boolean tool isn’t perfect—it takes trial and error to get it to behave.
Bottom line: if you can’t go into CAD, slicing + cutting + gluing is your best bet to shorten the part without distorting holes.