Painting with filament? Sounds like something only pros can pull off, right?
But with the new Chroma Canvas, it suddenly becomes easy:
No color-theory research
No complicated tuning
No giant collection of filament required
Just upload a picture — that’s it. Even if all you have are the basics, like black, white, and gray, you can still create custom prints that look almost like real painted artwork.
The customization process is as simple as editing a photo on your phone
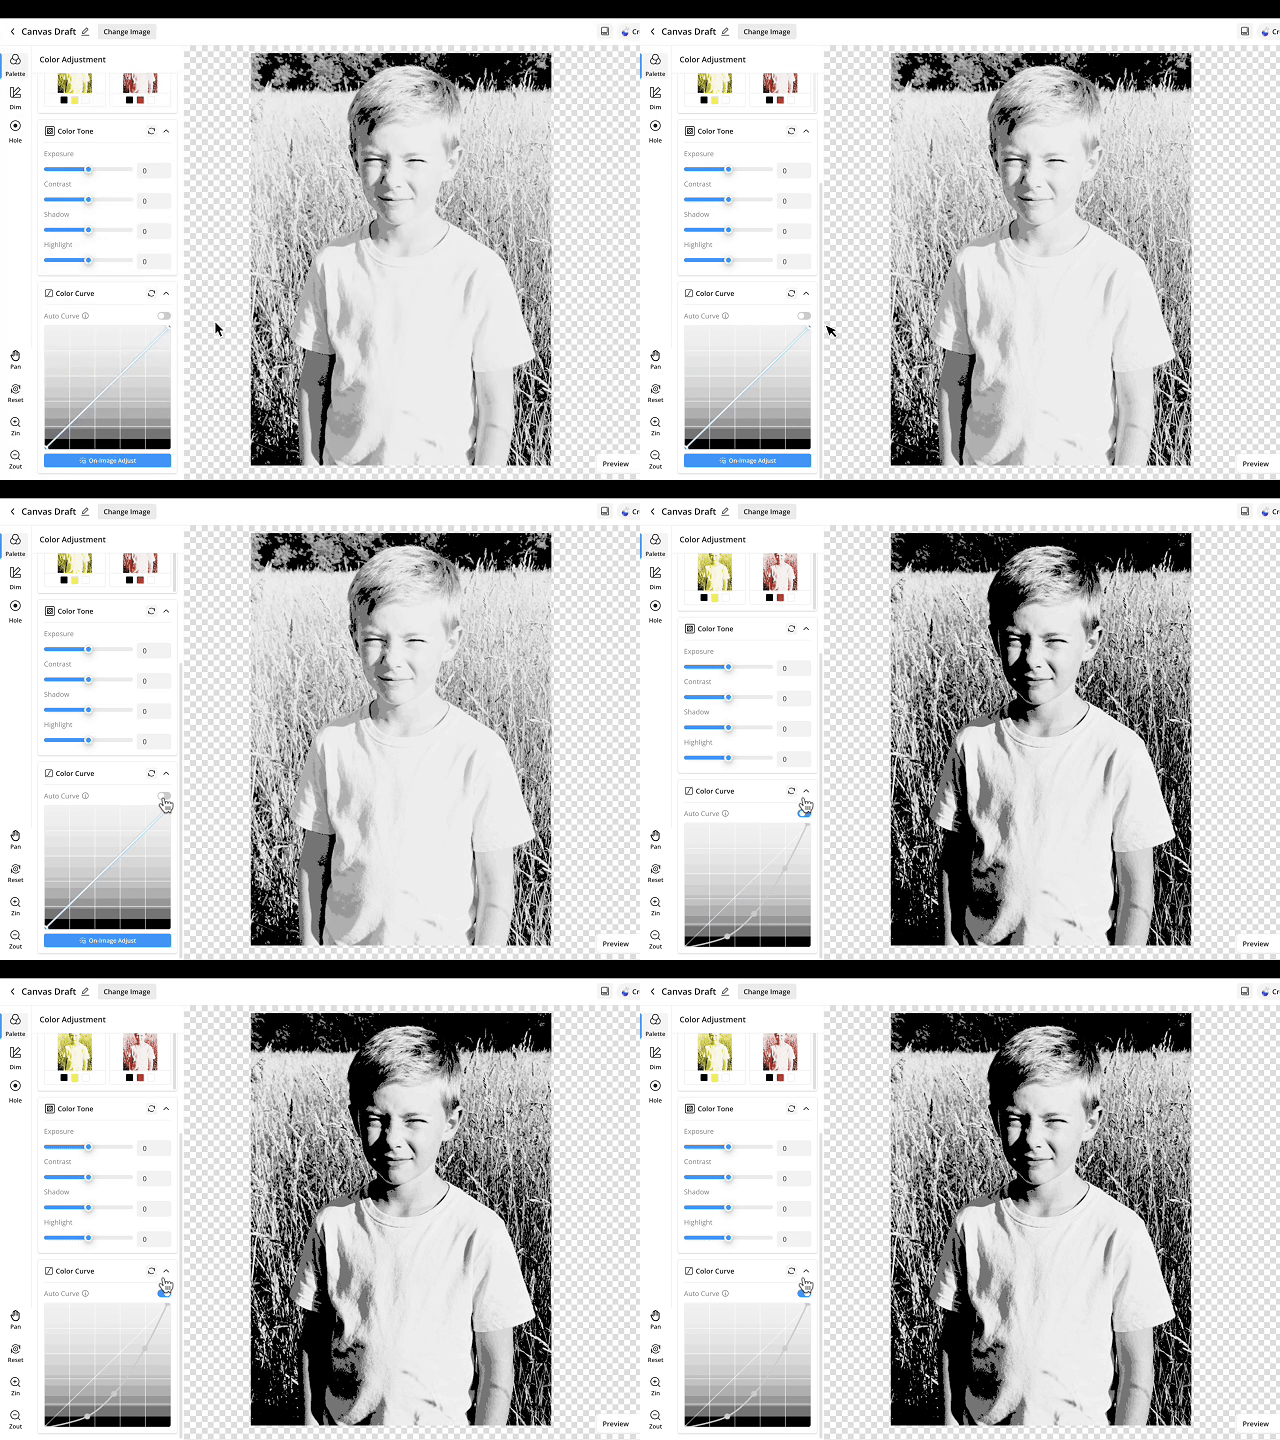
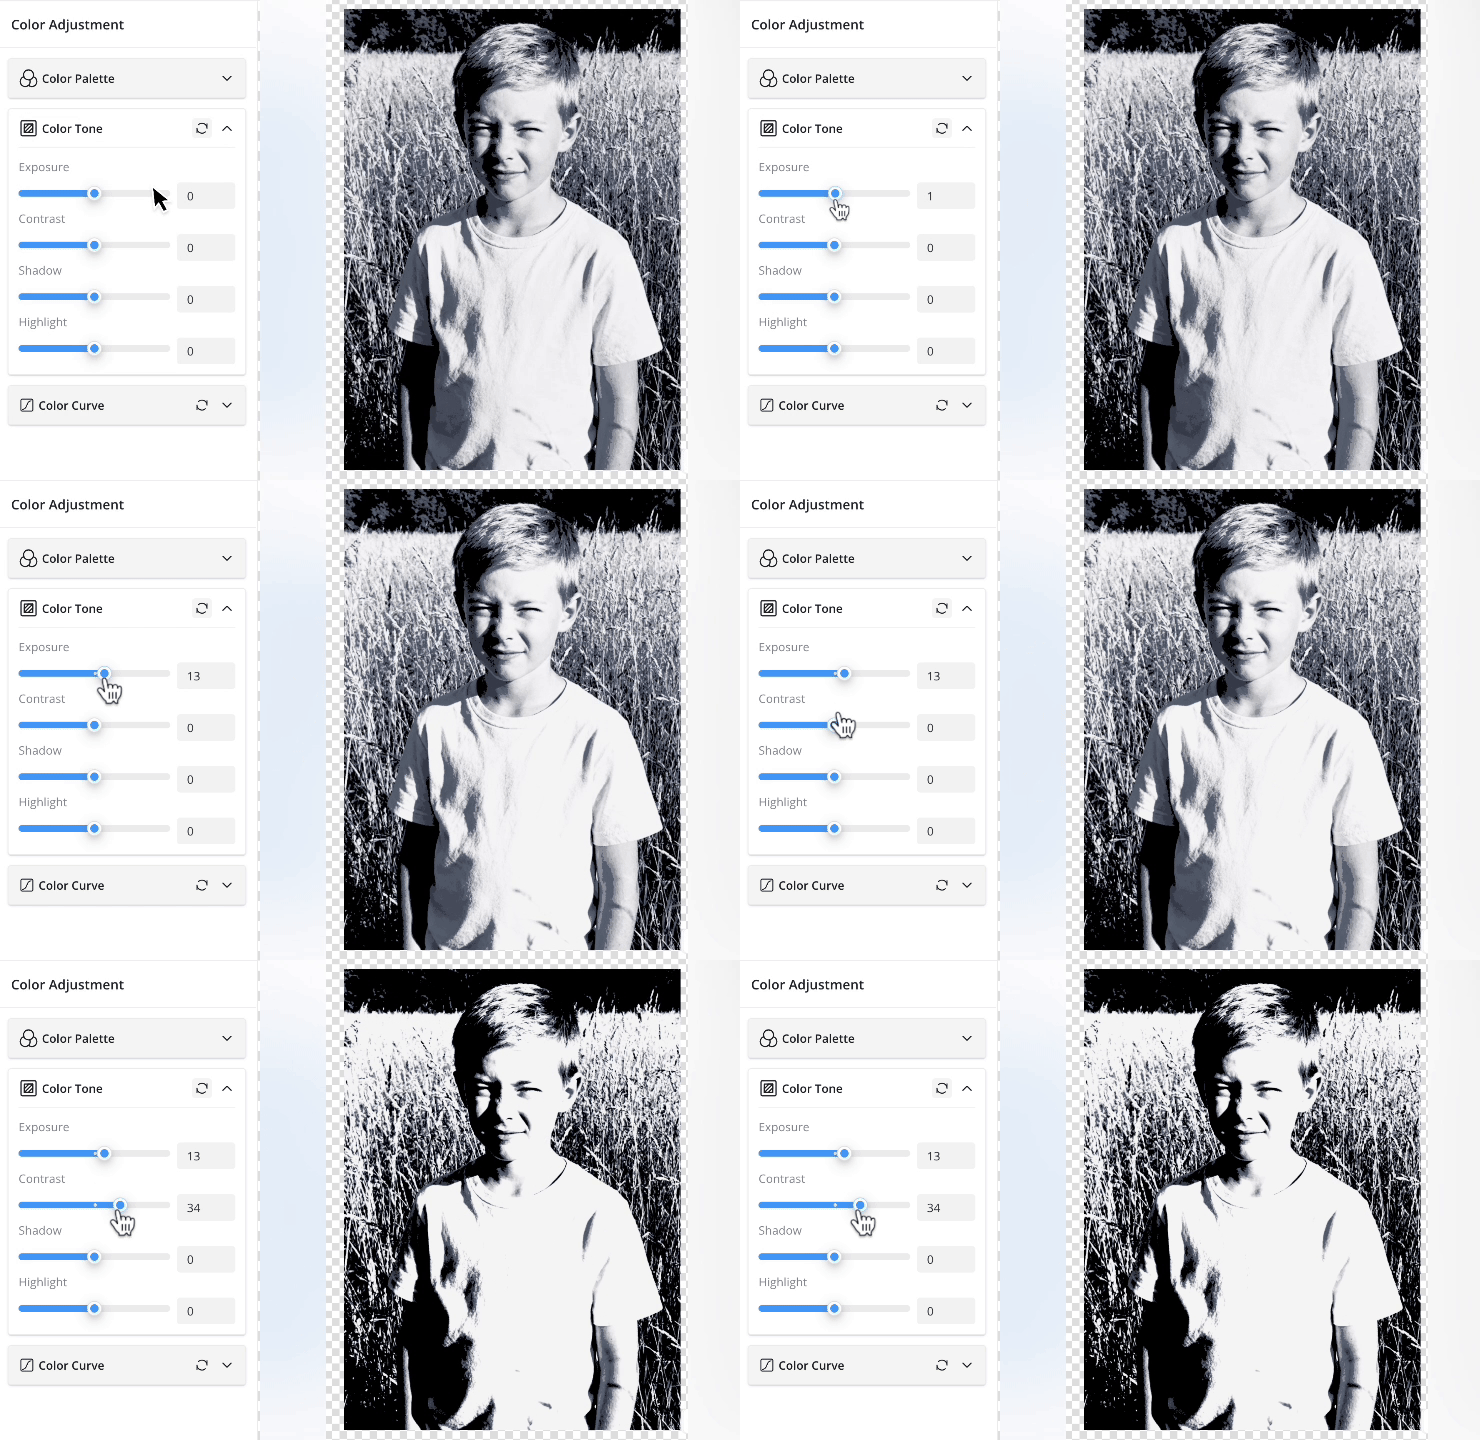
Upload your image.
Try different “color palettes,” just like picking a filter in a phone app. With these two steps, you can easily get a satisfying result.
Chroma Canvas introduces our AI image segmentation, which can intelligently detect and split an image into 2–3 separate regions.
You can apply different color palettes to each segmented area independently. This means that, in a single piece, the subject can have one color style while the background has another — giving you creative possibilities that were previously impossible.
Convenient Helper Tools
Besides the core features, we’ve also packed a set of handy tools to make your creative process smoother:
Hole Punching: Perfect for making bookmarks, charms, and other small items.
Cropping: Select the key areas of your image freely for your creation.
Rounded Corners: Soften the edges of your piece for a more polished, designed look.
These tools might seem small, but they’re all designed to streamline your workflow and make it easier to bring your ideas to life. Hueforge first brought Filament Painting to life, and Chroma Canvas builds on that inspiration, recommended for anyone seeking more professional features.
I’m not near my computer to try it, will it do color lithophanes as well?
OK, back on line. Doesn’t seem to support lithophanes. It’s pretty basic, mostly just the posterized effect of Hueforge, no color matching. Has some nice AI segmentation.
This doesn’t make much sense, Chroma Canvas would not be the one for more professional features. Guessing this is a translation error.
I have over a hundred rolls of filament that I have in my HueForge library that I measured the TD values and corrected the hex codes. Is there a way for me to upload my filaments along with the TD and HEX values? Or do I need to add each one individually?
Just looking at the image it seems like the first column represents the percentage depth. Back is 3% in from the end. Grey is 44% in and white is 91%.
The second column looks like an indicator of number of layers?
black will be 1 layer, grey will be 6 layers transitioning from black to the grey color… and finally, white is 11 layers … going from grey to the white as indicated by the top horizontal bar.
I’m just deducting by the image … I’ve never used the tool myself.
I guess you limit the number of filaments you can have in your library? Wish I knew this before spending a lot of time to get half way through adding my library. I appreciate the effort in creating this, but it is useless if we can’t load our filaments with their TD values.
After several hours of trying to create something… I concluded one important thing, here you need at least a 3D viewer where you can see what it looks like and see the structure of surface. Bamboo pleeeeeez!
I’ve been testing out the new Bambu Chroma Canvas feature in MakerLab, and I wanted to share my results and some constructive feedback. While the interface and the concept of easily turning images into multi-color 3D objects are fantastic, the actual physical output is currently struggling to match the digital preview.
I have attached four images to show exactly what I mean regarding the “Expectation vs. Reality” gap.
Context:
Printer & Filament: Both are fully calibrated. This is not a flow rate or wet filament issue; the machine prints standard models perfectly.
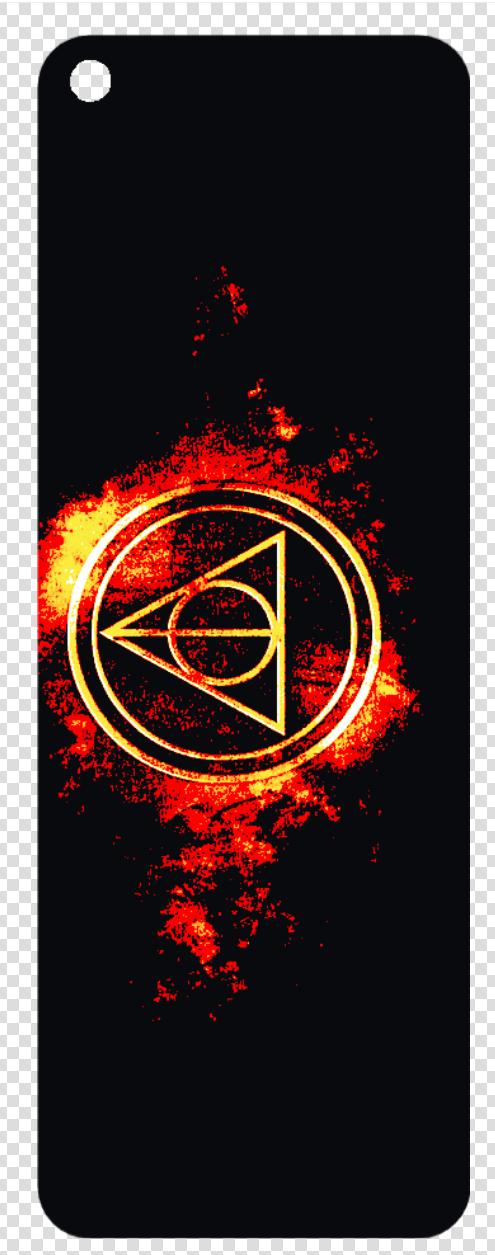
The “Deathly Hallows” Test:
The Expectation: One screenshot shows the render of a Harry Potter graphic. It looks clean, the lines are sharp, and the color separation is distinct.
The Reality: The physical print failed structurally.
Fragility: The print actually fell apart in my hands.
Transparency: You can literally see through parts of the print. It seems the software generated walls so thin (or with insufficient infill density) that they became translucent and brittle.
Definition: The sharp geometric lines of the triangle and circle are jagged and muddied.
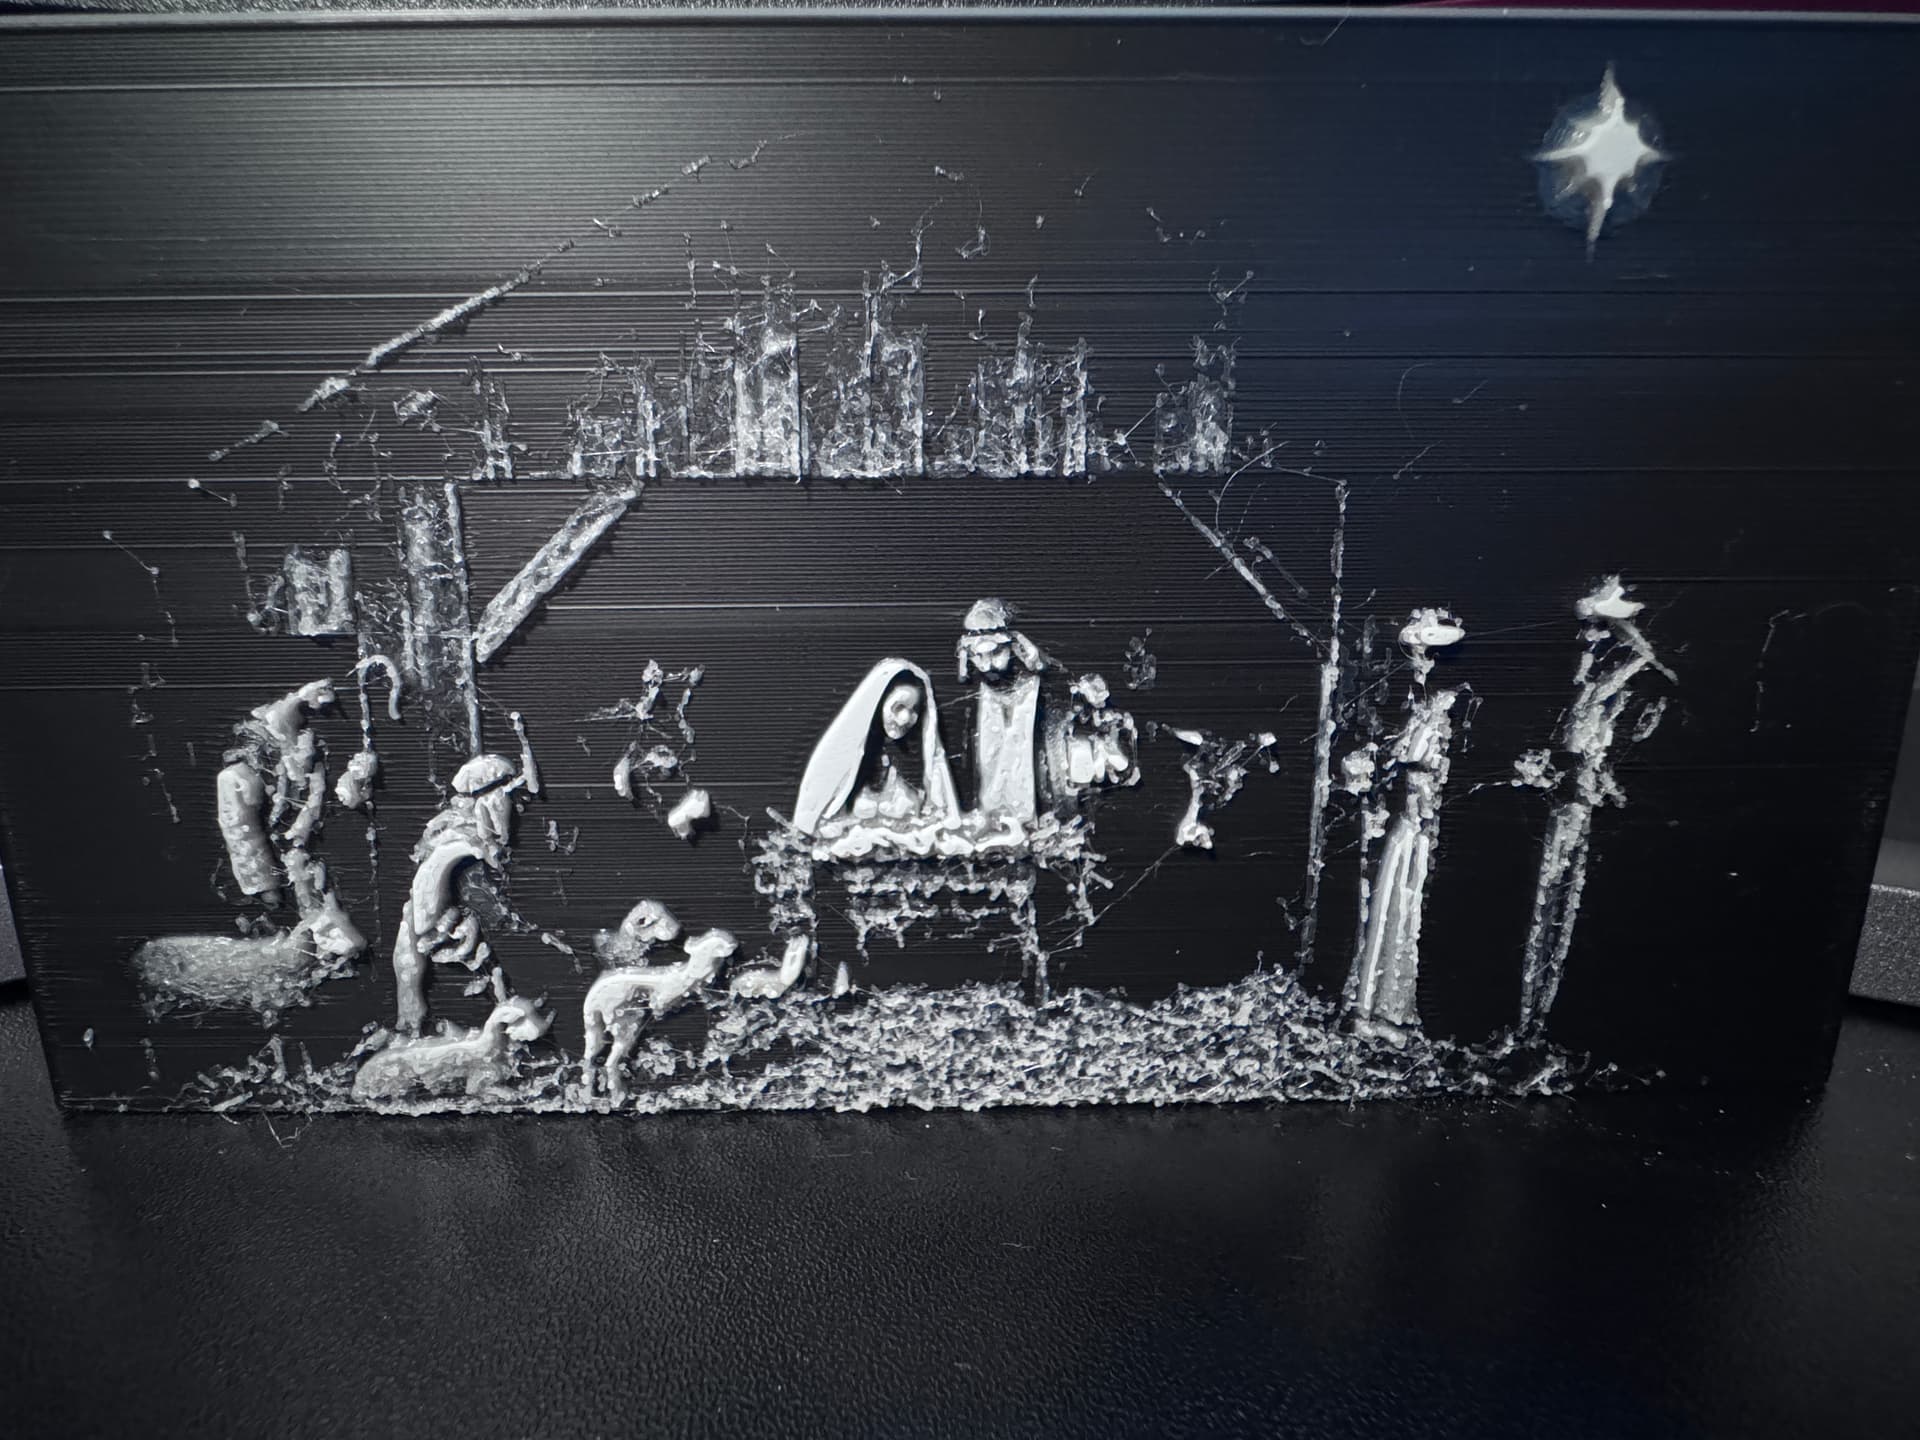
The “Nativity” Test:
The Expectation: I imported a high-contrast, black-and-white photo of a Nativity scene. In the Chroma Canvas preview (split-screen image), the software did a decent job converting the photo to a printable model.
The Reality: The final print is essentially unusable. It resulted in a black block with white blobs. The fine details of the straw, the figures’ figures, and the roof texture were turned into stringy, undefined plastic artifacts.
My Critique & Suggestions for Bambu Lab:
It seems like the software is generating G-code that is technically “correct” regarding coordinates, but it isn’t accounting for the physical limitations of FDM printing (nozzle size, wall thickness, and layer adhesion) when generating these specific pixel-to-voxel structures.
Suggestions for improvement:
Structural Integrity Check: The software needs to ensure a minimum wall thickness. Generating single-wall loops for color details makes them brittle and see-through. There needs to be a “solidify” option that ensures colors bond to the main body.
“Printability” Preview Mode: The current preview is too optimistic. We need a view that simulates the actual nozzle width. If a detail is too small to be printed clearly, the software should warn us or blur the preview to match reality.
Minimum Feature Size Control: Give users a slider to filter out “noise.” In the Nativity scene, the software tried to print tiny specks of white (straw) that resulted in stringing. Being able to set a “minimum print area” would clean up the model significantly.
Optimized Retraction/Travel: The amount of stringing and blobbing suggests that the travel moves generated by Chroma Canvas aren’t optimized for these dense, multi-color islands.
Has anyone else had better luck tuning these, or is this just the current state of the beta?
I am not seeking support. If a topic is being created BY Bambu, starting a conversation. Them not replying to the conversation they started, is considered ignoring. It’s a new product that the community knows very little about, they should provide more details than a copy and paste.
I have tried this tool a few times and got decent results by:
Use the color adjustment controls.
Use 4 or more filament colours.
Use 20 to 30 total layers.
A grey scale image (black and white) like your nativity image, need at least white, black, dark grey and light gray filaments. Layers of white on top of a black layer, makes very few gray tones before it is just white.
Make sure that there are at least 4 layers of black at the bottom.
Hello I love the Chroma Canvas and I merged it with different models to create amazing product but one feature missing is the ability to “ignore pixels with alpha/transparency” when Chroma Canvas converts the PNG into printable regions.
Could you add a **setting that says “ignore transparent pixels” or “use alpha channel as mask.”?
**
Please advise
Best
Eric “The Algar”