Does Bambu recommend customers to use OrcaSlicer? Does OrcaSlicer instantly adopt new updates from Bambu when they release slicer updates? The obvious answer is no. Bambu Lab needs to implement the compensation into firmware or give us the options in the slicer like OrcaSlicer does. How is that me saying my other printers are better than the X1C?
I simply want to use BambuSlicer with my Bambu printer without having to make so many manual adjustments and OR test prints to get proper measurements.
I said I use OrcaSlicer to use the shrinkage compensation on my other printers during the test which yields more accurate results than my X1C does using BambuStudio. I also said my X1C produces pretty nice prints while my CoreXY does not produce as beautiful prints as the X1C. Pretty clear that I do not think my other printers are superior to my X1C… In fact, I think my other printers are garbage compared to the X1C which is why this is even more frustrating.
Bottom line is the printer is only as good as the slicer is, so Bambu needs to give us better slicer options or find an automated solution on the firmware side where it will adjust for us.
They have added a compensation command, but it’s an experimental gcode command and it doesn’t have an exact Marlin counterpart like some of their other commands do. So there is no documentation and we have no reference as to its usage.
M1005 for skew compensation and M290 for XY compensation.
The problem is, filament shrinkage is very material-specific, so it doesn’t really make sense to exist as a gcode command because the printer can’t store more than one compensation factor to EEPROM. It should be in the slicer period.
It should be a calibration feature in the slicer, it should be an automatic calibration for X1C, and it should make use of the sensors in the printer however they need to make that happen. That is just my opinion though, so maybe it’s just me who feels this way.
You’re not the only one. I agree that it should be done automatically, but I’ve felt that way since Fall 2022. With BL working on a new printer, I’m afraid the best chance we have of that happening is via community developed calibration sequences. Limited RAM to work with on the X1 is one of the main obstacles there
I’m running out of patience with all the other issues I have experienced with these machines… I am getting to the point where I am ready to move on from the X1C, and just get a P1P where my expectations are much lower and I just accept it for what it is.
^^^This. 100% agree. Some amount of deviation from topic is normal, but once it goes too far it needs to split off. @PEZ3D Please start a different thread to address your particular grievances.
Have you tried turning off arc fitting to see if that helps the hole size issue? Arc fitting applies some tolerances which may be the reason for the hole issue.
On the shrinkage calibration thread @Alex_vG suggests a solution to the hole problem that requires calibration from just two different hole measurements:
Not sure whether it is a solution already worked out or whether it is an idea in need of further development.
Thanks for bringing us up to date with your the tip! FYI, it also seems to work well even on my garolite build plate–I just identify it as an engineering build plate and turn off the firmware’s confirmation feature. I’ve switched to auto mode for both “flow dynamics” and “flow rate.” It can do the “flow rate” in one pass, instead of the two for manual, so it’s a time saver as well. It produced a value that was within 1% of what I did manually, which is so close that it might even be better. By definition even second pass manual mode has 1% granularity, though I suppose you could try interpolating by eye to achieve a slightly better outcome–which is probably a good idea that I hadn’t even considered until now, now that I’m reflecting on it.
After Your comment and @NeverDie comment decided to re-try the Lidar Autocalibration today
using PLA and Hi-temp plate. Yes it has improved, but still not sure that will use auto over manual for the K
Auto Flow - was bang on 0.99manual 0.99auto . will check a few mor filaments before start using it
Dynamics(K) - 0.028manual 0.024auto - actual measured manual is 0.027 but with 0.028 get a bit better result still around 5-10% error. much better than before and more usable.
Also printed small test square with a hole inside. Much better compare to 1+ year ago when the K was not stored inside and had to be run every time, still the manual tunning print was a bit better but improvement is obvious . Apart from the corners the top surface look changes when you have holes. it shows if K is well tuned or off. More consistent look between the long extrusions and short extrusions connected to the holes more obvious with fast speeds
A bit off topic of the shrinkage accuracy , but with perfect flow and K and temp the relative tolerances are bellow 0.05mm.
2 604 / 5 000
Hello everyone,
new to the forum, I am a recent owner of an X1C combo.
I have been practicing 3D printing for over 10 years on various machines, some of which are 100% DIY…
I am completely enthusiastic about the performance of the X1C. The quality, speed and user experience are simply incredible…
However, I notice, like other users, problems with the dimensions of the parts that are too small (-0.6 mm for a dimension of about 150mm on my tests)
After trying to read everything that is said on the forum, I did not come out with a definitive answer. It seems that this is a topic that generates “lively” discussions
So I did my tests and my measurements, and here is my little analysis:
The machine is very precise mechanically speaking: when you ask for movements of 150 x 150 mm you got them precisely on the bed. If you measure a 150 x 150mm hot part on the PEI without taking it off, it is indeed 150 x 150mm to a few hundredths.
-After taking off, cooling and resting, the part decreases to 149.4/149.5 (depending on the materials). We are therefore in the presence of a shrinkage phenomenon.
when we calibrated our old machines with the Estep, we measured cold test parts, and we modified the steps by adding the shrinkage with the mechanical differences in this correction. We therefore had the impression of having more precise machines in the end, which was probably not the case… We only had to manage the small differences in shrinkage between the materials.
Bambu lab does not give access to the firmware and the Estep setting, so you have to proceed with the filament shrinkage coefficient. It works perfectly, and I recentered my dimensions precisely
On the other hand, on a belt machine, CoreXY as Cartesian, we have slight variations compared to the theoretical calculation of the gear ratio. Difference in characteristics / belt tension?
I see a difference of about + 0.1mm between my Y axis vs. the X axis on a dimension of 150mm, i.e. + 0.067%
I tested the Gcode command M290.2 Y0.99933 M500 in the Start Gcode, on the advice of bambulab support.
No action of this command on the dimensions??? (I even increased the coefficient significantly without seeing any results…)
Is there a method today to apply a corrective coefficient to the X or Y movements of the machine?
A separate shrinkage coefficient on X and Y would be a simple solution…
Note: I don’t find any skew issue with my measurement: all is perfectly squared.
Thank you for your feedback, if I have not explored the forum in enough detail
sorry if i don’t use the right topic
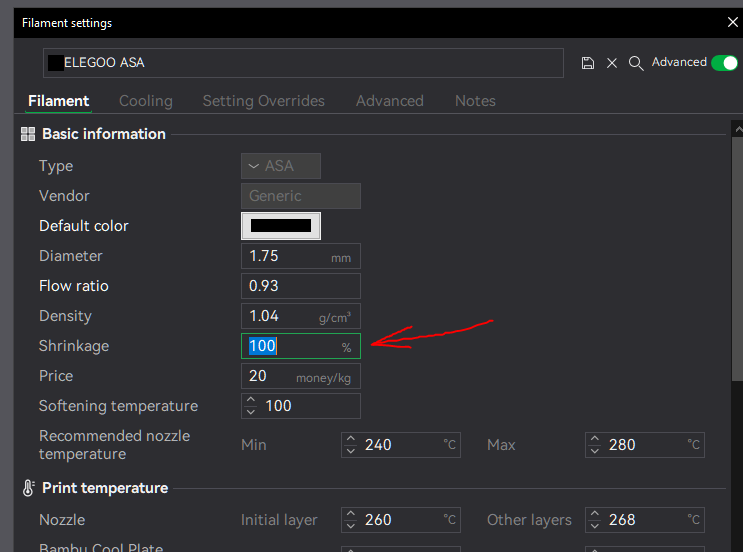
Bambu lab now has the shrink compensation in bambu studio, so I no longer have this issue and can stick with Bambu Studio as my slicer… I still think there should be a shrinkage compensation calibration on the firmware side, but the shrink compensation in the slicer is good enough for me.
Have you tried it yet? It will automatically resize your models based on the % you set per filament.
Yes I know this filament shrinkage coefficient, and I use it with success. I said that in m’y previous post. Probably too long
The only issue that remains for me is this slight difference between X and Y . I can’t find no way to correct it , as the command M290.2 Y… in start G code doesn’t work on m’y trials…
If you’re look for super accurate parts, I think your only option would be to scale the parts size X Y Z individually in the slicer before printing. I’ve done this for so long now that I don’t use the recently provided shrinkage because it only applies to X&Y. I’ve never needed to do it the way you need it to be done, as I just scale the whole part.