I’m hoping there is some way to enforce a particular order for a colour change before printing the infill on a multicolour/AMS print. The example I’m working with is a primarily white object with black inset text. The infill for layers with text involved alternates between white and black - which is normally great for only doing half the colour swap/purge/prime it would otherwise do, but black infill shows up through a ridiculous number of white walls and spoils the look of the finished piece.
Is there any way in Bambu Studio to directly control the colour of infill to avoid this?
Maybe there is a setting in orca?
I honestly dont know because i havent tried it myself.
but there is purge in infill which kinda works the same except it mixes the two colors together.
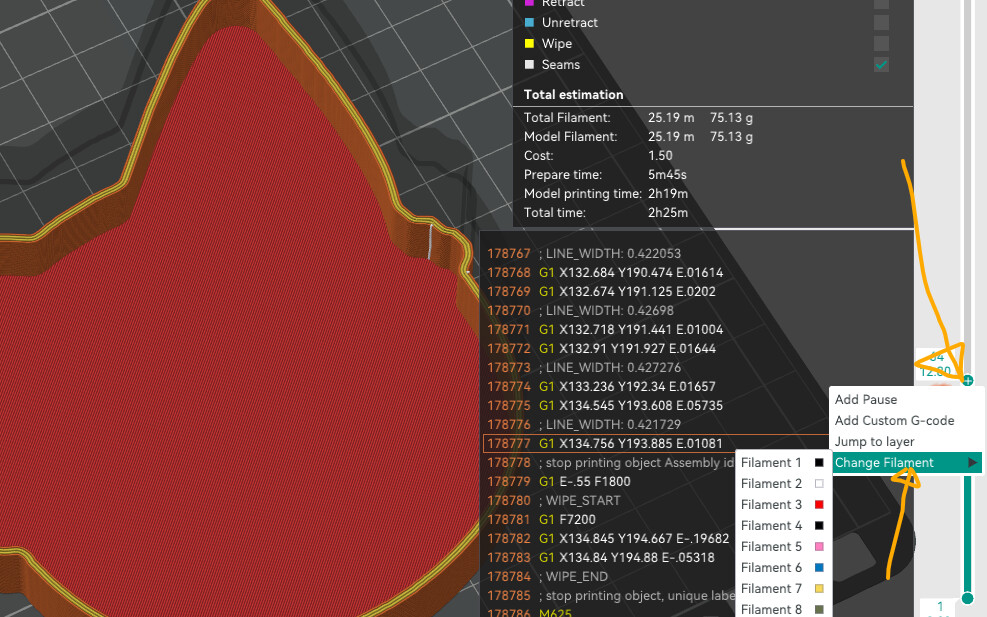
Thanks, but it’s not about purging to infill. The normal way the slicer handles colour changes is to go e.g. white layer 1, black layer 1, black layer 2, white layer 2, white 3, black 3, black 4, white 4, white 5, black 5, etc., which means 1 colour change per layer. Over the top of that there is another sequence of wall, infill, wall, infill, wall, infill - and so the infill lands in alternating colours. You can change the walls to be done first or second, but there doesn’t appear to be any way to enforce the infill to only be done in one colour (and I suspect this would require 2 colour changes per layer).
At least in Bambu Studio - I haven’t tried raw Orca yet, I’ll take a look and see.
Depending on the complexity of the model, you can achieve this with primitives or even complex model shapes turned into modifiers.
For the purpose of this example, you model is a basic cube.
Add a cube primitive as a modifier, resize and change location to match the infill portion of the model and then in the object panel set your choices for colour and anything else.
For more complicated models, create a version of your model as suitable to occupy the infill sections, add it to the build plate with your actual model, assuming you positioned it well in your CAD application agree it is a single model of parts. In the object panel, select the modified variant, right click and change type to modifier and do the stages fro the simple example.
Unfortunately this does nothing for the infill colour, just wall colour. I can successfully use a modifier component to change wall colours, but the infill doesn’t obey the colour settings the modifier imposes.
I successfully salvaged christmas by reducing the depth of the inset text colour so that it is exactly 1 layer shallower than the wall, so that there is a full white layer before the infill starts - but that only worked because I have an entirely horizontal print where that text wall matches perfectly to layer changes, there is still a need for infill colour/filament control as a feature. It would also be relevant where you have an expensive pretty filament for the outside walls, and want to use cheap basic stuff for the infill.
There’s also unfortunately no way to do this in raw Orca either, just old requests going back a year or two for Orca and Bambu Studio to add this functionality.
Text is treated as an object. So you can switch to the “Objects” view, right click the text object and then change its type to a modifier. That will have a number of advantages such as making sure that the volume of the Text is printed in the color assigned by right clicking on what is now a modifier rather than an object.
Edit: I think this also what @MalcTheOracle suggested. Sometimes you need to create one object type text and one modifier type text, for example for protruding text or special applications such as text surrounded by infill only.
There are two caveats though:
Around the modifier, the part it is emplaced in will apply its outer surface, i.e. wall number loops will be placed.
Modifiers are applied in the order they appear in the assembly. So you may need to shift their order in the build tree.
Edit 2: Bottom view of a copper Text Modifier in a marble Text Object in a marble “No top/Bottom Surface” Object
Top view
The text is not created in Bambu Studio, it’s a 3d model I create elsewhere and import. The fact that it’s text is not the core issue, and there is no infill in the text itself or on the same layers as the text, it’s all solid wall. It’s overlaid flush into a larger model, so that the eventual surface is flat but the text model with one colour is merged into an assembly with a larger object of another colour. The issue arises where there is infill in that larger object immediately after the text is finished, which takes on the colour of the text (because it is more convenient in terms of colour swaps for the slicer to do it that way). Or if there is another colour in some other object, and it’s more convenient to use that colour for the infill someplace else - infill doesn’t respect any colour instructions at all.
There’s a weirdness with the behaviour of those modifier objects. They sort of can apply colours to infill, if they exist entirely within the parent object, and can insert those walls. Which means they aren’t actually applying the colour to the infill at all, the infill just naturally inherits the wall colours when those walls get added. Applying a modifier object that completely eclipses the object from a certain layer up (like I would normally do to change infill density or something) doesn’t add any new walls and doesn’t change the infill colour.
Adding walls to achieve the infill colour doesn’t really do anything for my current case, because I already have all the walls I want on this model (and they’re already the correct colour). I essentially did this already with my single layer of white wall hack. Good to know for other projects that might run into this issue though, thanks.
Key is to have a modifier object that has the exact shape of the color modified area. It does not matter if that is wall, surface or infill (unless it is those parameters that are being modified).
In your case, that is the text. If you have created that as a separate stl, you can just import that as a modifer rather than an object. If it is already an integral part of a single stl, it gets more complex and you may need to share a 3mf to facilitate troubleshooting.
In that particular case, using a height type volume modifier is a logical approach but it is curious as to why it should keep the infill black.
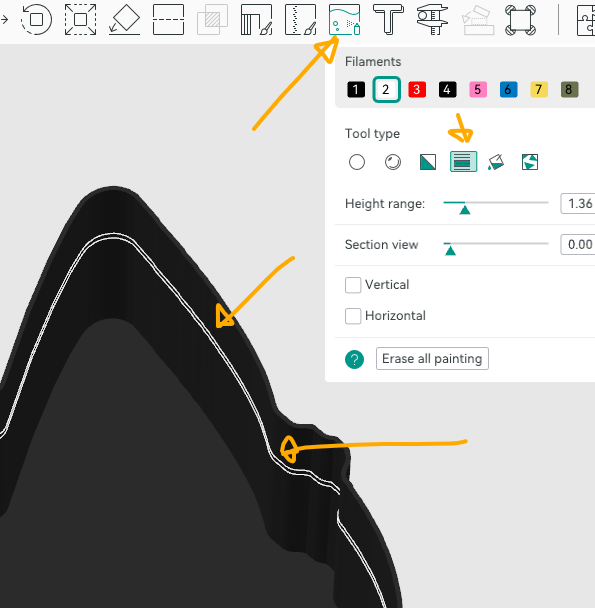
How did you apply which color before the modifier? Using surface painting? That has its own issues. And do you have a screenshot of your object tree?
I was having the same issue with different objects which as a whole formed a solid part. I had set black filament for some objects and transparent for others. And the black infill in the transparent objects ruined it all.
The objects were circles, so it was easy to add modifiers. But no change, as user_846416974 already said.
The solution in my case was to de-activate the option “flush into the object’s infill” which I usely activate when using multiple colors.
I have had issues similar to, but not exactly the same…
i have had great success modifying infill color that shows through surface layers by setting the Top and Bottom “Paint Penetration Layers” and Top and Bottom Shell layers. For your application I’d make the Top Penetration layers sufficient to hide color beneath.
This solution requires a bit of trial and error on your part but it works and solves this problem of cross colour contamination for infill layers.
First, slicer settings did not help or solve anything for me, but the infill patter can affect the path the infill takes so don’t change the setting after you try the steps below or you’ll have to start over. That said any infill can work here, read on.
The steps here cause the slicer to have to work ‘around’ intrusions. And by creating a connection to the outer walls the slicer will draw that colour into the infill area in such a way that the slicer has to adjust which colour is used for infill, with a much higher chance of it being the one you want based on the wall-colour being drawn in.
I found two ways to approach this, and had even better success combining them, so lets get started:
First is to make micro slices through the plane of the model. I used 0.1mm thick slicers mostly but you can try 0.05-0.2. The micro slice itself is not enough to affect your model (if anything it’ll make it stronger), but the slicer will ‘see’ it and try to work around it. It’s that extra work by the slicer the forces more of the colour you want into the infill area. Strategically placed these interrupt the slicers planned infill route and can force the colour you want where you want.
The second approach is to make micro pin-holes. Again I started with 0.1mm diameter holes, some all the way through, most of the time I could stop at certain layers (depth) based on the results. And in some cases they can be entirely internal and do not need to pierce the outer wall.
This is by no means an exact method, it does require lots of trial and error. What I found worked best was to slice the part, step through the layers and find where the ‘wrong’ colour infill touched the outer wall and then made inroads into the area I didn’t want it. That is where I would placed a pinhole. Rinse, repeat, rinse, repeat.
Notes:
Different slicers will potentially ignore artifacts that are too small, you should be able to use 0.05 up to 0.2, but rinse and repeat to check in slicer if it ‘sees’ the obstacle and adjusts.
the pin holes do not have to go all the way through, often just to or just past the affected layer(s) can work.
I also had success with the pin holes being completely within the model, they don’t necessarily have to penetrate the outer walls anywhere they just need to interfere with the infill pattern such that the slicer has to do some work around it.
To do all this I flipped back and forth between Fusion360 to make updates, then re-loaded and re-sliced. It does take some time but once you get the handle of it it should go pretty quick.
Happy slicing!
I’m having the same issue but I cant post pictures because I havent used the forum before.
Have there been any updates to make this easier?
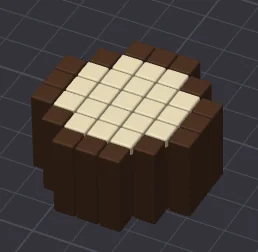
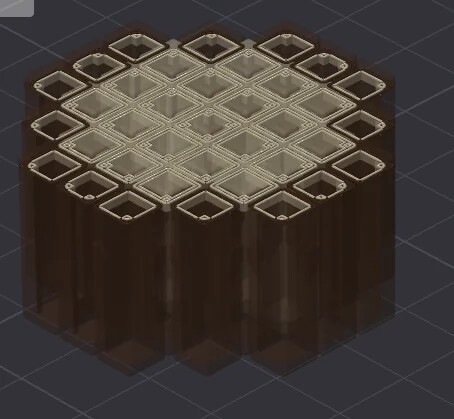
I’m printing Flexigrid Fidget Toy with custom colours, and the rectangles are two different colours, but the infill instead of being the same colour as the rectangle, is always the same infill for all the rectangles. So now in those layers with multiple colours, the brown rectangles in the area with beige infill come out poor quality in the print
The print quality is bad specifically in the area where the brown rectangles have beige infill (only some of the layers at the top, not the other layers. And the beige rectangle layers with beige infill look perfect)
Fairly old post BUT - at least with the current release of Bambu Studio you can select Objects tab, select the object under Name and then set the infill filament to whatever color you want. I had black infill bleeding into my white wall so I set all the infill and walls filament to my white spool. May not have had that option back when this post was started?