I’m running into a wall order issue and could really use some insight.
Setup is simple:
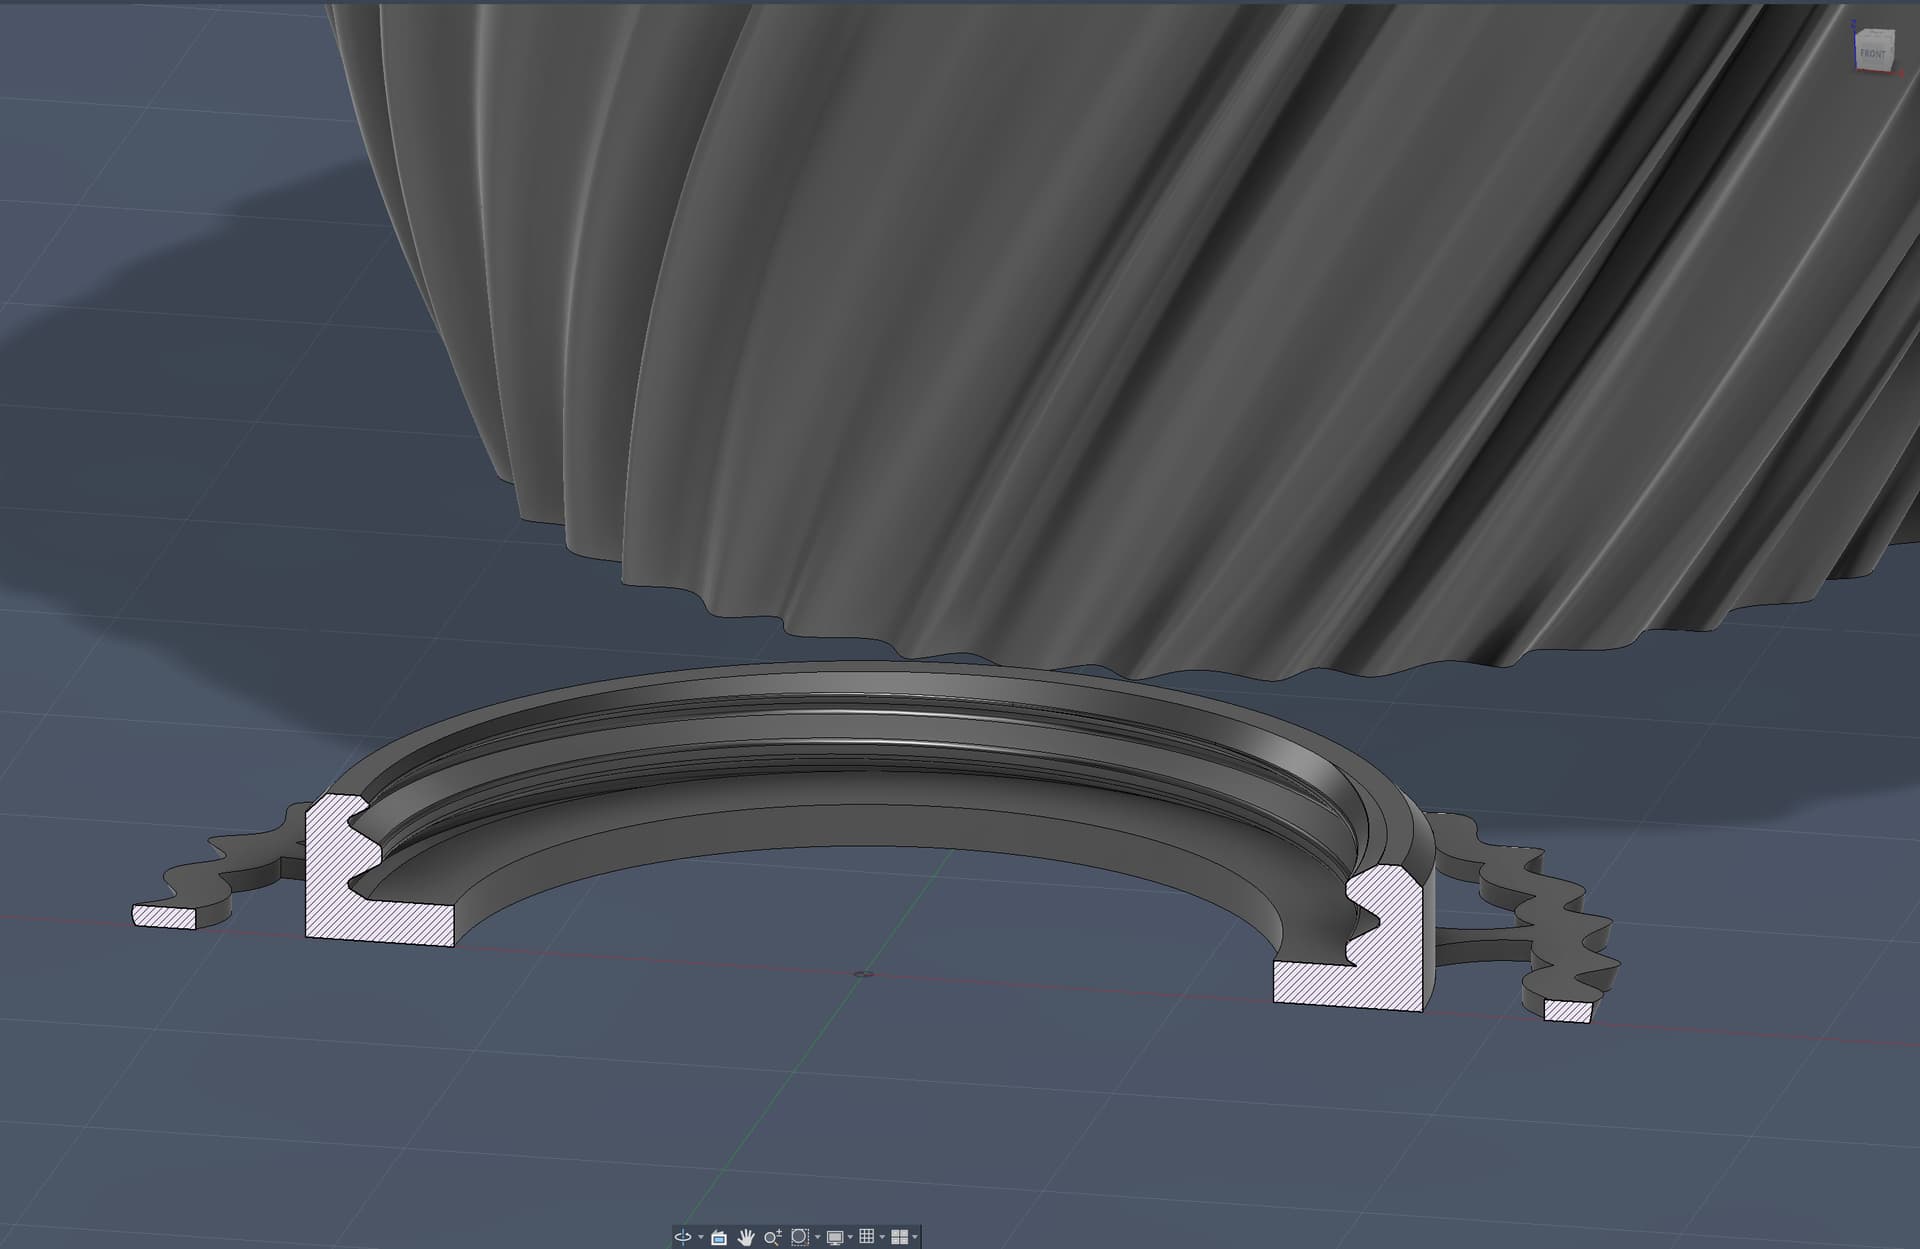
I have 1 Lampshade body and 1 Socket Support body, merged as an assembly.
The Lampshade is a full solid body
Top = 0
Bottom = 0
Infill = 0
Walls = 1
So I’m using slicer wall loops to define thickness and appearance.
The Socket Support is a separate body sitting inside the lampshade and has some overhangs.
Problem is, since it’s inside a solid volume, those overhangs are not detected at all.
On top of that, the slicer prints external walls first, and some of those walls are technically overhangs… so they end up printing into air with no support.
I want correct wall ordering and proper overhang detection for the support body.
Shelling the lampshade is NOT an option
Fusion shell is broken for this
Rhino shell works but it’s trash for precision and removes the whole point of controlling wall count and wall width directly in the slicer.
That’s why I need to keep the lampshade as a solid.
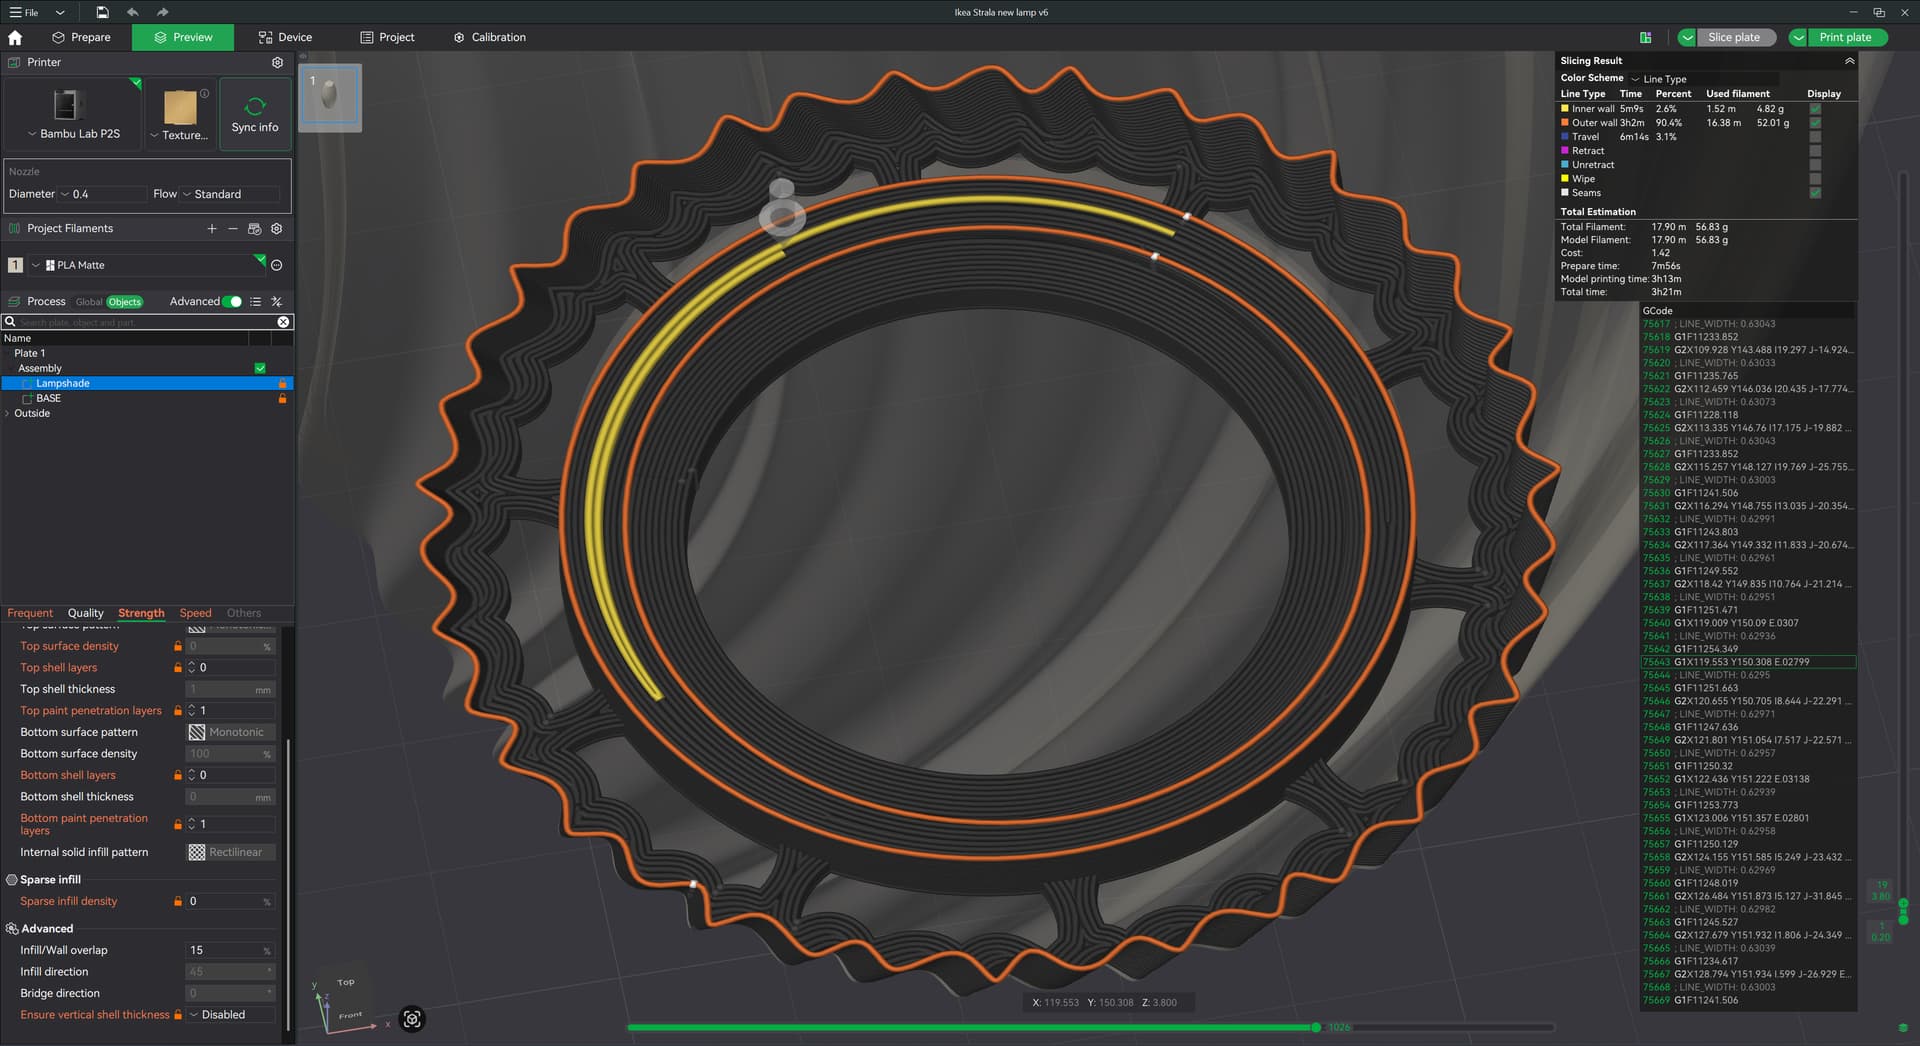
What’s wrong with more walls? According to your settings you only have 1 wall, so inner/outer or outer/inner makes no difference. You also say that you have 0 infill. Now you say it’s full solid. Your screenshot also shows inner and outer walls (orange and yellow) which is not possible with only 1 wall. This does not match. So maybe something is messed up with global and/or object settings or this is a slicer bug. Can you provide the file please?
I don’t have just 1 wall, I have 2. Look more closely at the first picture, you can clearly see the order of printing and on the top right that the inner wall is present.
I have 2 pieces, the shade and the socket base support, shade has only 1 wall, the base is printing with default settings, which means 2 walls. You can download the file and check for yourself what my problem is.
If the Base is first and Lampshade second, the Base isn’t detected at all and won’t be printed (first pic).
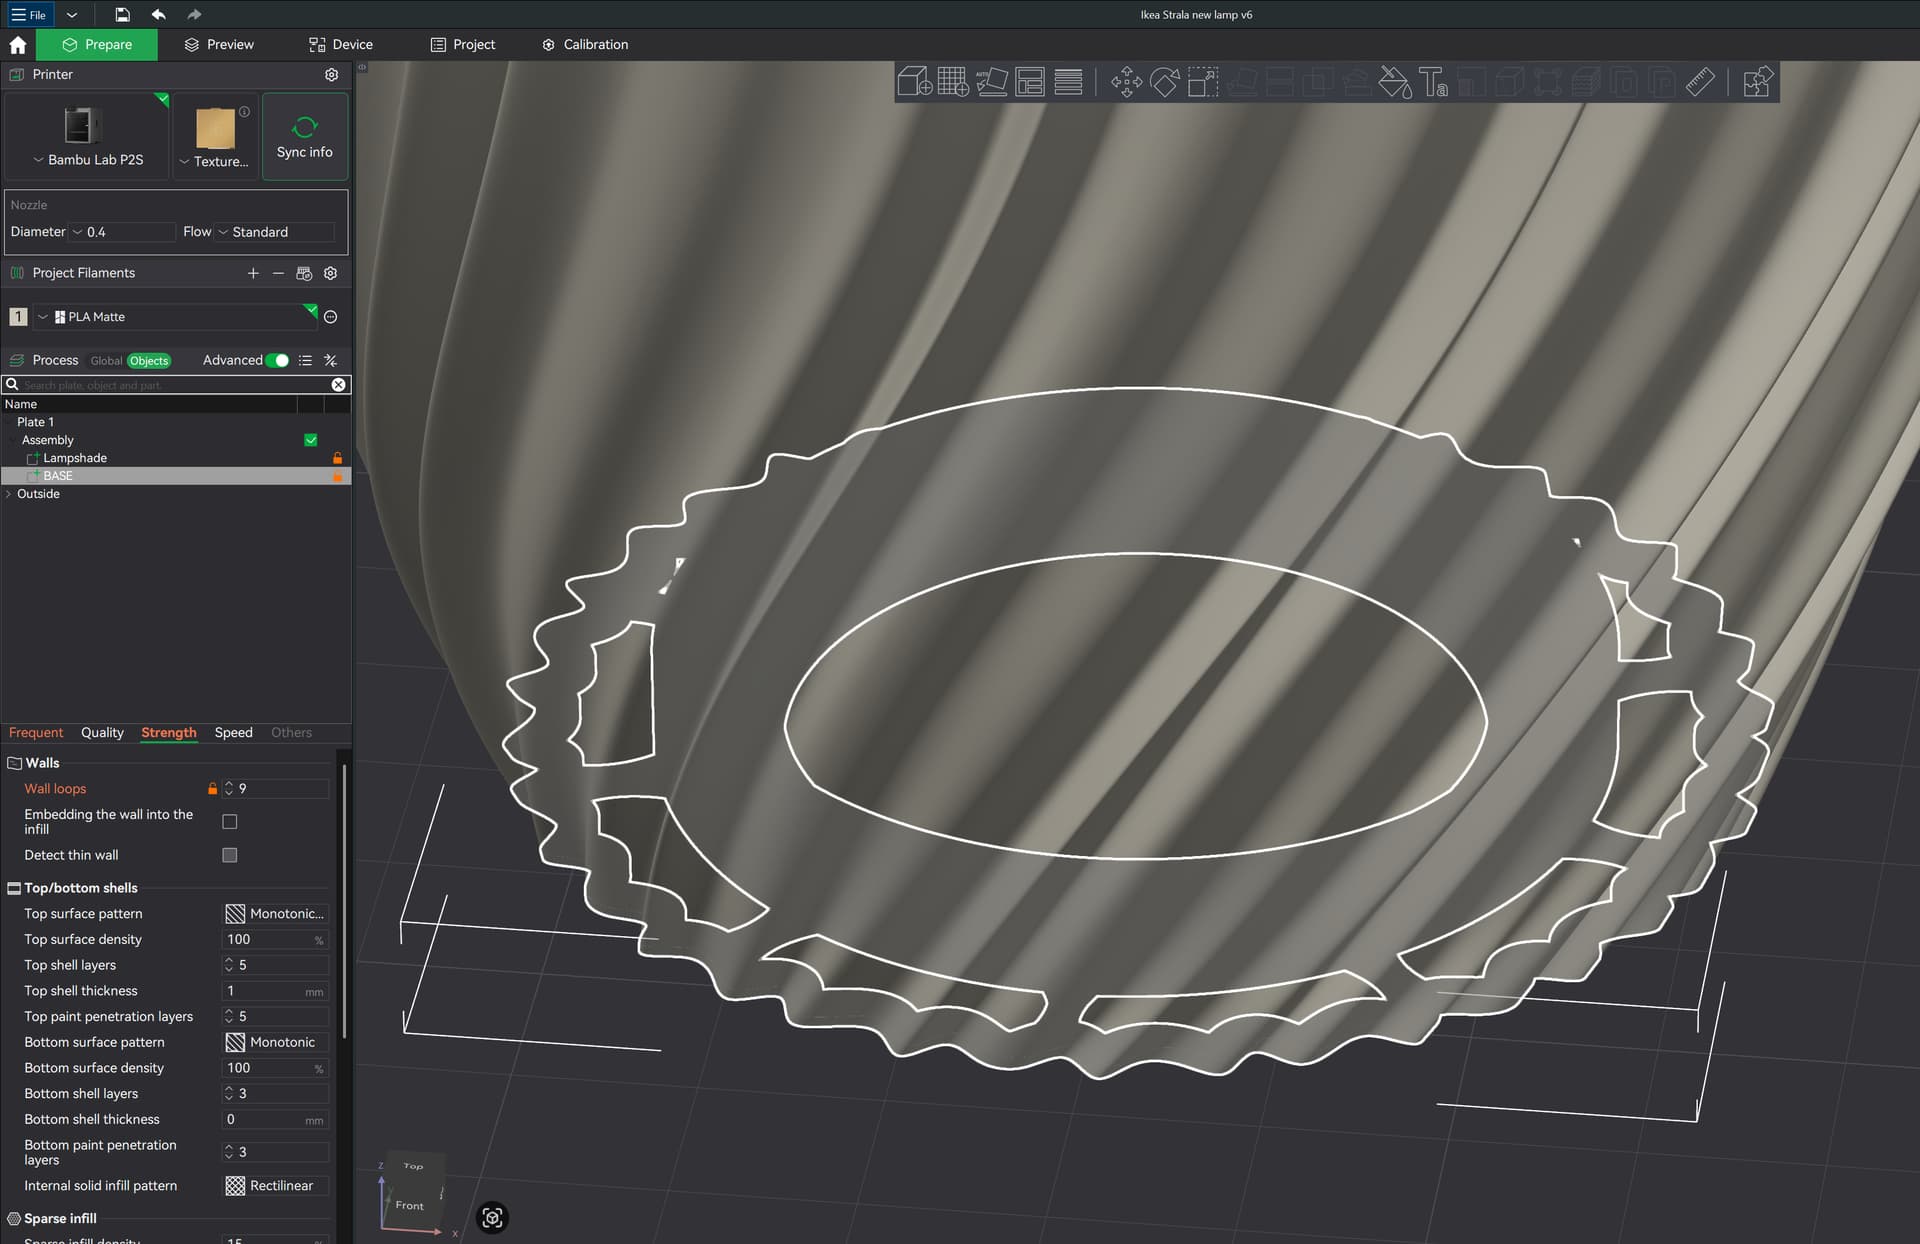
If I reverse the order (Lampshade first, Base second), it does print — but the Base gets 2 extra walls added, likely because the Lampshade is a full solid body (second pic).
Also, in this second case it prints the external wall first, even though Inner/Outer wall order is selected by default — and I need exact precision since this is a threaded socket.