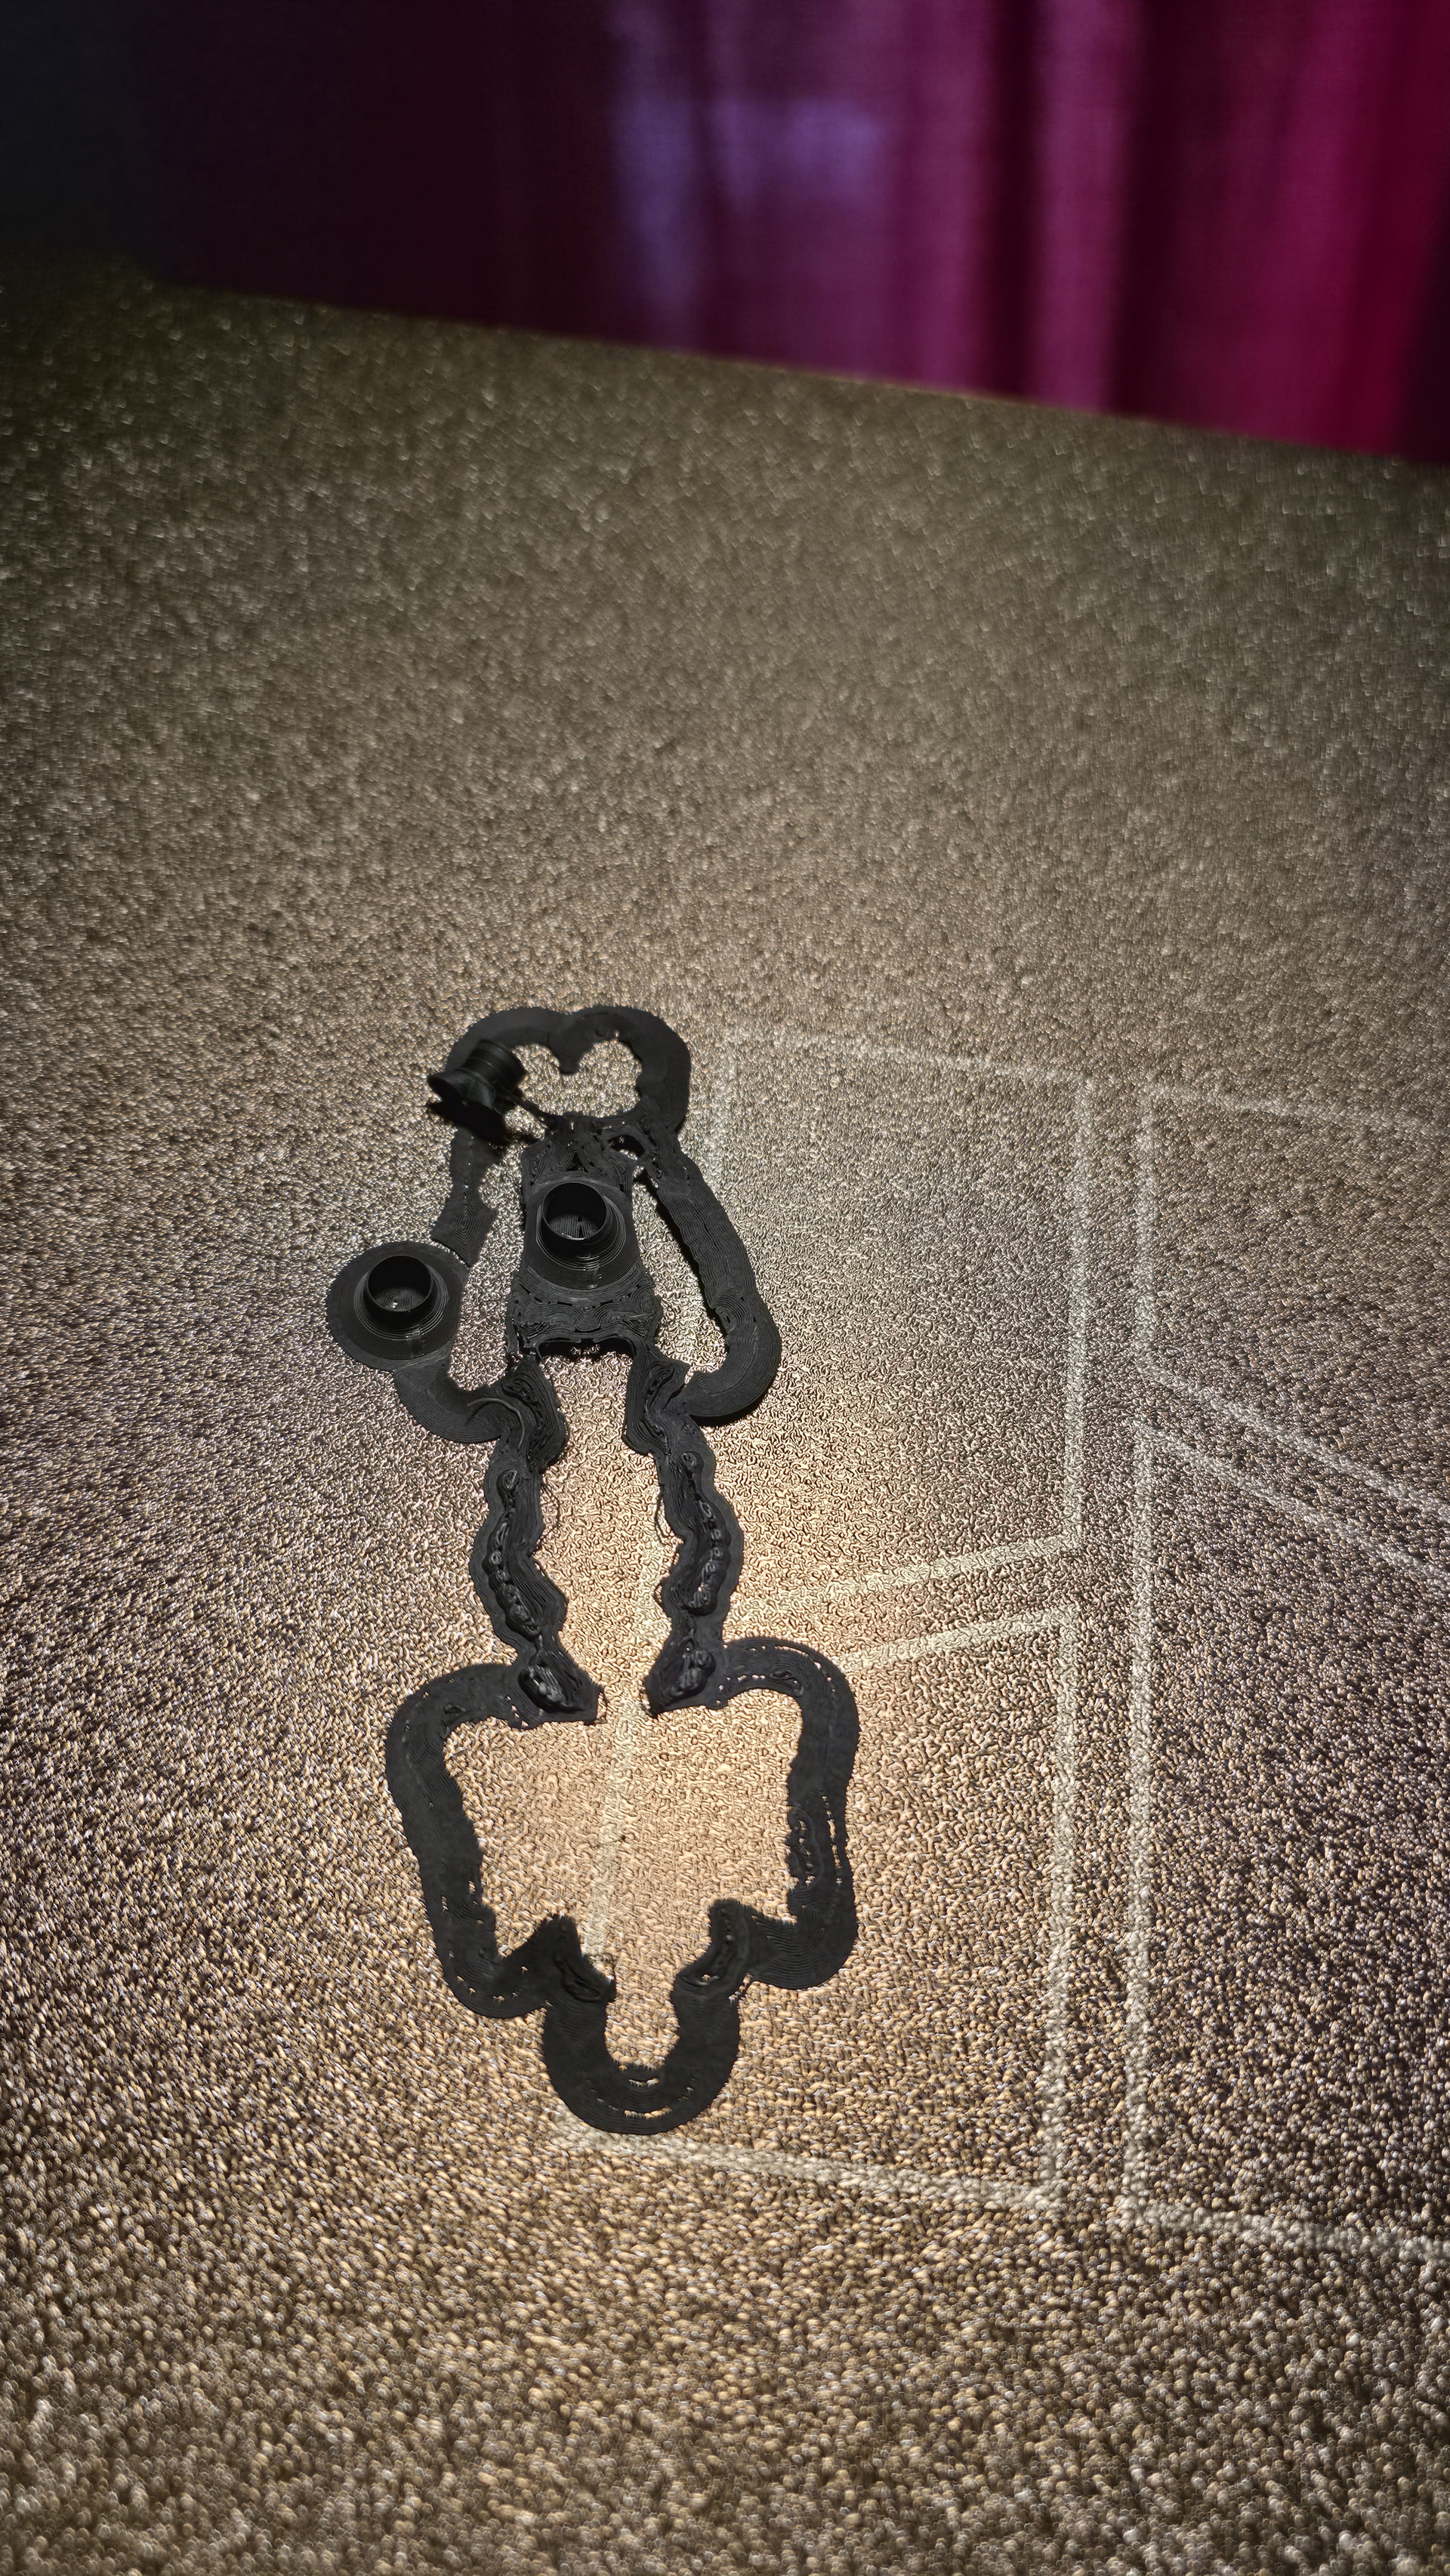
H2C: Excessive tool changes on organic mesh & broken tree supports (0.2mm)

Hi everyone,

I am looking for advice or workflow recommendations regarding multi-color slicing on an organic textured model (a figurine of my dog).

The model is predominantly black, with small grey flecks and streaks across the back and head. My goal is to keep these grey details strictly on the outer visible surface, but Bambu Studio triggers a tool swap on almost every layer, leading to excessive print times and prime tower waste. On top of that, the tree supports failed and broke off during my first print attempt.

Current Setup & Slicing Parameters:

  • Printer: Bambu Lab H2C (Dual Nozzle) with dual AMS 2 Pro units

  • Nozzle size: Dual 0.2 mm hotends (Left: Tool 10 / Black PLA, Right: Tool 9 / Grey PLA)

  • Layer height: 0.08 mm (High Quality preset)

  • Wall loops: 2 | Wall generator: Arachne

  • Wall order: Inner/Outer

  • Outer wall speed: 40 mm/s

  • Seam: Scarf seam enabled | Aligned/Back

  • Prime Tower: Enabled (Width reduced to 20 mm, Rib wall off, Skip points enabled)

  • Flush options: Flush into infill checked

Support Settings (Which failed/broke during the first attempt):

  • Type: Tree Supports (Tree Slim / Organic)

  • Threshold angle: 30°

  • On build plate only: Checked

  • Support / raft base & interface: Assigned to the same main nozzle (no multi-material support interface)

  • Top Z distance: ~0.16 mm

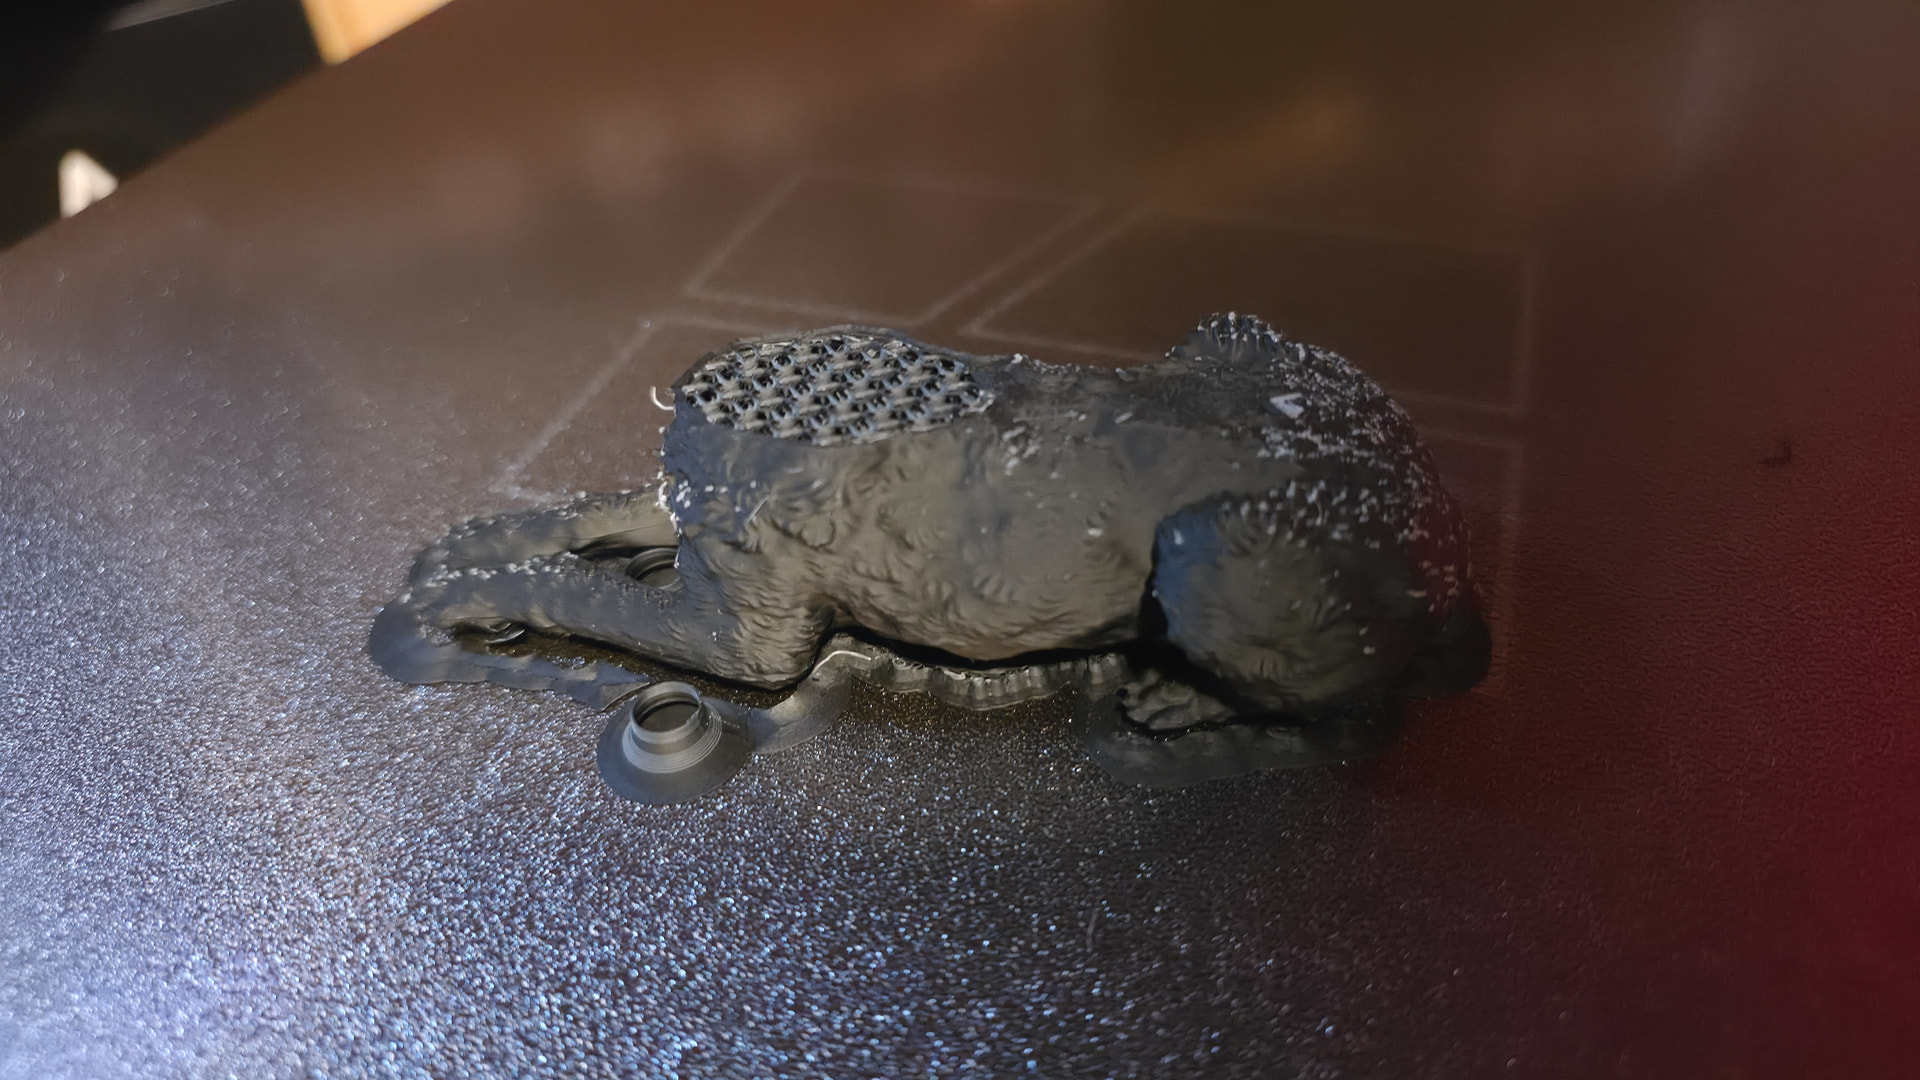
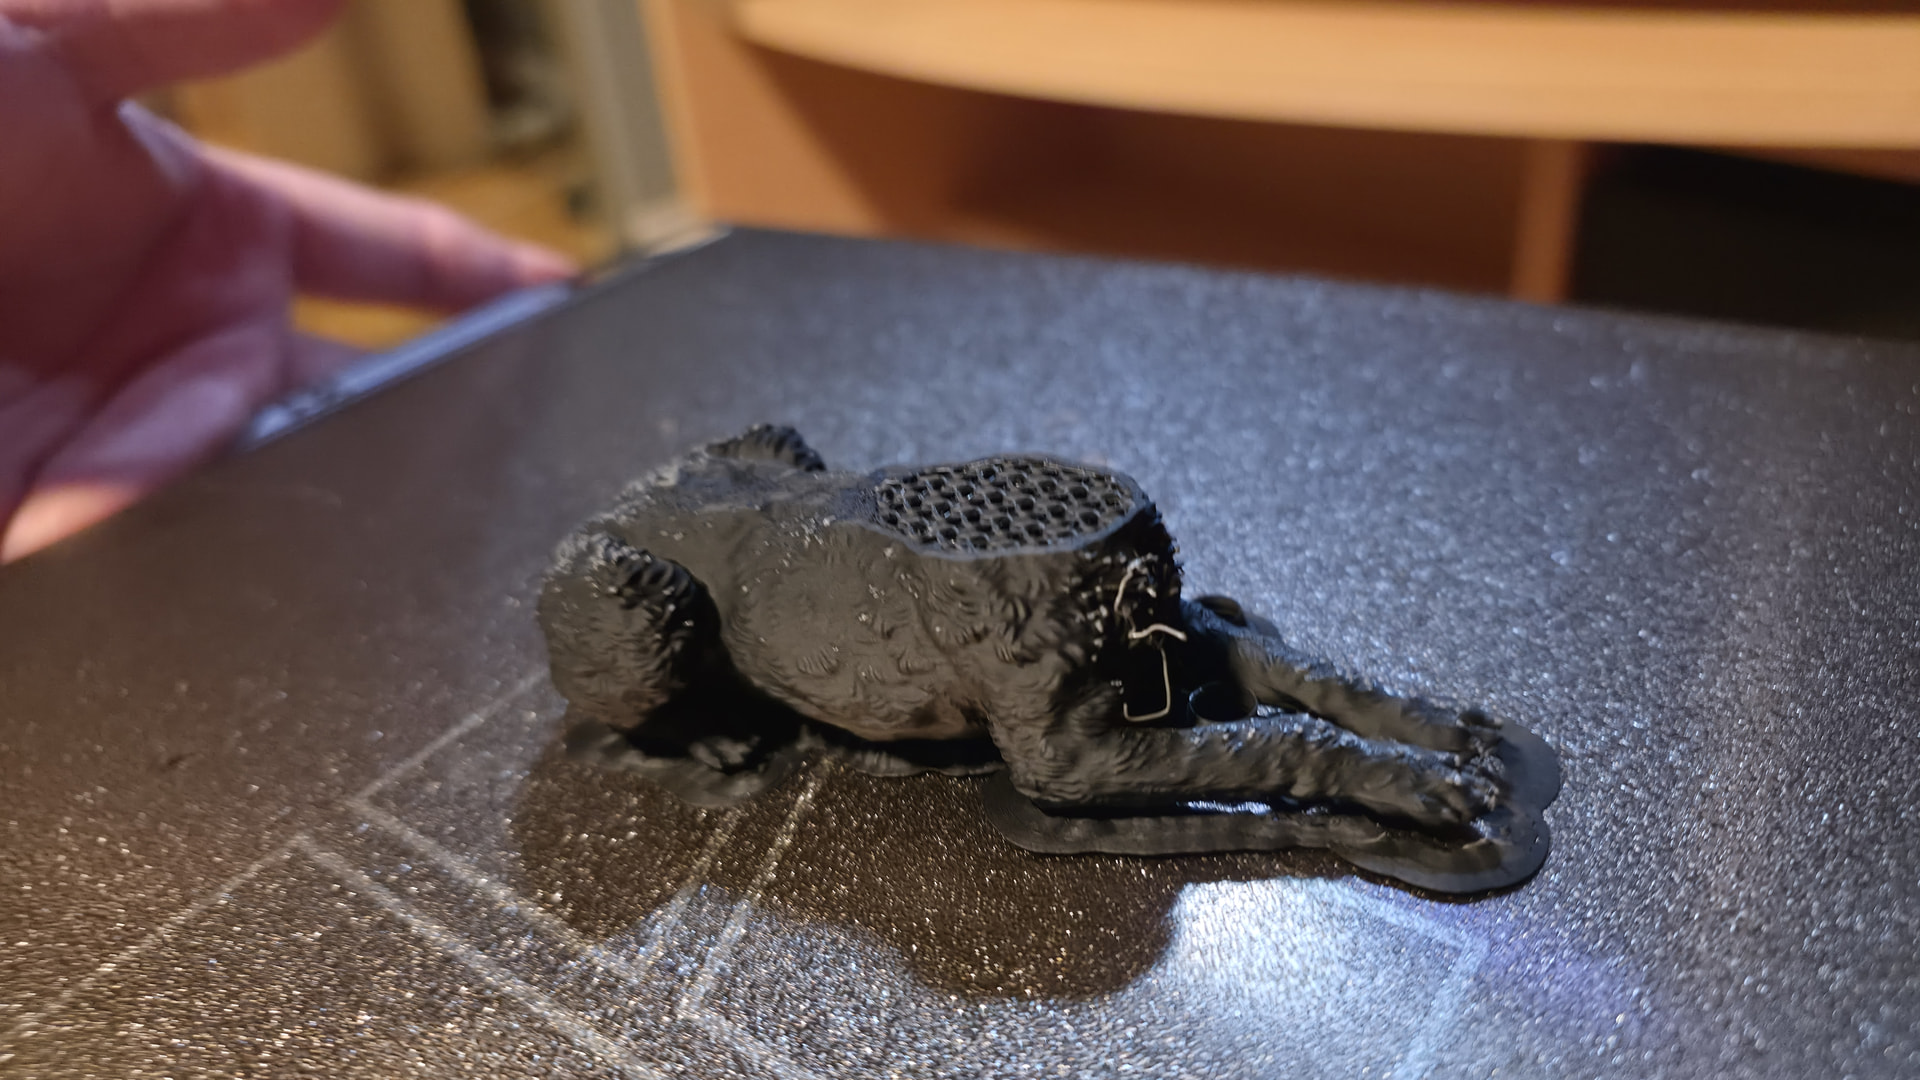
  • Issue encountered: The tree branches broke mid-print during head travels / nozzle crossings, causing the overhangs under the chin/body to fail.

The Multi-Color Issue:

  • The model itself weighs only ~17 g, but the prime tower consumes ~31 g.

  • Bambu Studio schedules 539 tool changes, adding over 5 hours of prime/swap cycles for a total print time of 12h35m.

  • Because the color data originated from a textured mesh/surface scan, the grey regions cause the secondary tool to activate on virtually every single 0.08 mm layer across the height of the back.

  • I want the grey pigment to behave purely as an external surface skin without penetrating deeper into the inner perimeter or infill structure.

Questions:

  1. Is there a slicer setting or workflow (such as penetration depth, color masking, or modifier volumes) to restrict color changes strictly to the outer perimeter or merge nearby small regions to eliminate non-essential tool swaps on every single layer?

  2. Any recommendations on reinforcing tree supports when printing with a 0.2 mm nozzle at 0.08 mm layer heights to prevent them from snapping under toolhead travel?

Any insights from users working with fine multi-color organic models on IDEX/dual-tool setups would be greatly appreciated!
Hi Benny,

Can you post your 3MF project file? This is the surest way for anyone to review the model and setup and give relevant advice.

I’m not sure if the filament is extruding properly here in the first place… looks very messy in parts, especially that first layer of supports. What brand? Have you tested/tuned both colors/rolls individually first? Did you dry it? OTOH the black on the outside of the model itself looks good… maybe it’s a speed issue (or just the photos)? But the gray is stringing all over…

Poor print quality in general is going to contribute to poor supports, and any oozing or blobs are likely to take the tree support right out. Other than that, you could always try the sturdier versions (not “slim”) and increase thickness/size of the limbs. Assuming the printer is calibrated and all that.

The color thing is potentially more complicated. It really depends on how the model is generated and how the color was applied. For example when painting in Studio on a model’s sides, it wants to paint that color all the way to the center of the model, not just keep it on the surface (for top/bottom surfaces there’s the “paint penetration layers” setting in Strength). But there are a variety of tools out there for converting to 3D and applying color… some are better than others. Hopefully someone with more direct experience here could chime in.

Having said that, I can’t tell how that model is sliced or where the colors are being applied. 639 changes sounds like a lot, but I also see a lot of gray flecks… a change would be required for each. :person_shrugging: And it “has to” (or wants to) keep the prime tower going the whole time even if there’s just a tiny blip of a different color at the very top of a model (something I just dealt with actually). One could always try disabling the prime tower entirely and see if the result is acceptable (mine just now was, tower was completely unnecessary).

I’m not sure a single layer of gray on top of the black will show up very well (PLA is typically slightly translucent)… I’d definitely test that first before trying a full model.

Anyway, not sure any of that helps, but do post your project if you can.
-Max

Hi Max,

Thanks for the detailed feedback! I’ve updated the post with the link to the 3MF file so you can take a look at the settings.

Here are the details regarding my setup and your questions:

  • Filament & Humidity: I’m using brand-new Bambu Lab PLA Basic (both rolls have only been in use for 2 days). They are stored in my AMS units, currently sitting at 23% humidity. Given the stringing on the gray, I’ll still run a dedicated calibration pass on that spool to dial in the retraction and temp settings.

  • Supports: Good catch on the tree supports. I’ll switch away from slim tree supports to standard/sturdier ones and beef up the branch thickness so blobs or slight curling won’t knock them over.

  • The Gray Patches & Tool Changes (539 swaps): The gray flecks are actually intentional they match my dog’s coat pattern! That’s why there are so many filament swaps and why the prime tower is running all the way up. My goal is ideally to keep both colors while cutting down the tool changes as much as possible. That said, the more I think about it, the more I’m considering simply printing it in solid black and hand-painting the gray spots with acrylic paint and a fine brush if the swap count remains unreasonable.

  • Opacity / Single Layer: That’s a very valid point about PLA translucency. Before committing to another full run, I’ll do a small test print to see if the gray properly covers the black or if it looks washed out.

Thanks again for the help, looking forward to your thoughts once you check the 3MF!

Nice dog! :slight_smile: Wow that’s nicely detailed, and quite a slice operation. And yea I was thinking of painting it old-school after the print, but seemed like a low-hanging-fruit recommendation… LOL.

So color-wise, it’s as I suspected, the gray spots tend to penetrate into the model unnecessarily deep in many cases (adding walls and such as well). That’s kinda the Studio MO (and other tools like MakerLab) and I don’t have a workaround for it. It doesn’t really break anything here per se, just not very efficient. As I said there are maybe better tools out there to convert or paint models, but I don’t have a recommendation off-hand (and not sure what you’re starting with… photos, or did you 3-D scan your dog? :laughing: ). HueForge, Prime3D, Layerpaint come to mind (not that I’ve used them beyond some playing). The model itself looks excellent.

So yea the prime tower is a bit ridiculous here in terms of filament usage and overall time. Disabling it not only saves the filament but also almost half the print time. I’d try w/out it (after I got the gray to print w/out stringing). Mostly the gray will go into the supports first anyway, until the head starts. There’s also the option of adding your own small disposable object (like a cube) of the same height, putting it first in the print order, and enabling supports and “purge into object’s infill” for it – basically a simpler manual purge tower.

I dry all filament before use (and many other regulars here will recommend the same). Even PLA, and even straight out of the package. I’ve also never had to calibrate any BL filament and just let the auto-flow calibration do its thing. In fact the few times I tried ended up with worse results.. YMMV of course.

I changed the support type to “Tree Organic”, enabled “on build plate only” and “support critical regions only”. You might want to see if you like that more. To me it looks like only the protruding parts of the snout really need support (where ears and jowls start), the rest are small overhangs at worst. I’m not sure all those tiny supports at the bottom are going to help anyway – the overhangs down there are small, and by the time you remove the supports it may look worse than just the overhangs by themselves. If they even do anything with that gap… and the brim is already a kind of support for the 2nd layer.

Speaking of the support gap… 0.18 is a bit odd… maybe a typo? Typically a multiple of layer height, and typically just one layer (so 0.8 or 0.16).

The slicer is barely using any support interface layer.. I reduced the “Top interface spacing” to 0.1, which helped a little, but there’s still almost none. Removing the supports might not be super clean, but OTOH most of those spots probably aren’t very visible. I was going to suggest a different material for support interface, but that would be kinda pointless here, looks like.

Anyway, careful attention to support tuning can definitely help here… but there are some option combos that look good at first but on closer inspection do some bad things like having lines start in mid air anyway. You may even wish to paint support points manually. Eg. even with above settings it insists on putting useless supports under a front toenail and left rear elbow (BTW check that elbow, there’s some stray fur there or something which could probably be removed… :slight_smile: ).

Finally… lol… you could probably save some filament + time by reducing the wall count and infill percent. 3 wall seems unnecessary (in a lot of cases the slicer is adding more solid infill anyway inside the sloped walls). And all those walls surround those unnecessary color intrusions I was talking about, so that’s a lot of extra walls and strength. And if for some reason you want to use less gray filament, uncheck “Purge into object’s infill” (hit the “revert” button if tower and checkbox is disabled – dunno why it does that while the option is still relevant).

Cheers!
-Max