I am about to give up on printing with this type of filament, but I thought maybe if I reached out here with all of the problems I have, maybe, some folks with more experience could help me solve these issues, and in-turn anyone else in the future who finds their way to this thread.
Filament - SainSmart ePA-CF (240c - 260c according to sticker on the side)
(official bambu) Textured Plate used, with glue stick
90c build plate
Pictures are from a print at 260c (first layer) and 240c (all others — 240c was the best result out of the dozen previous attempts using generic profiles, and tweaking temps)
0.6mm nozzle used
40mm/s max speed
I didn’t open the door during printing
Used standard Bambu Studio (not SoftFever)
Problems:
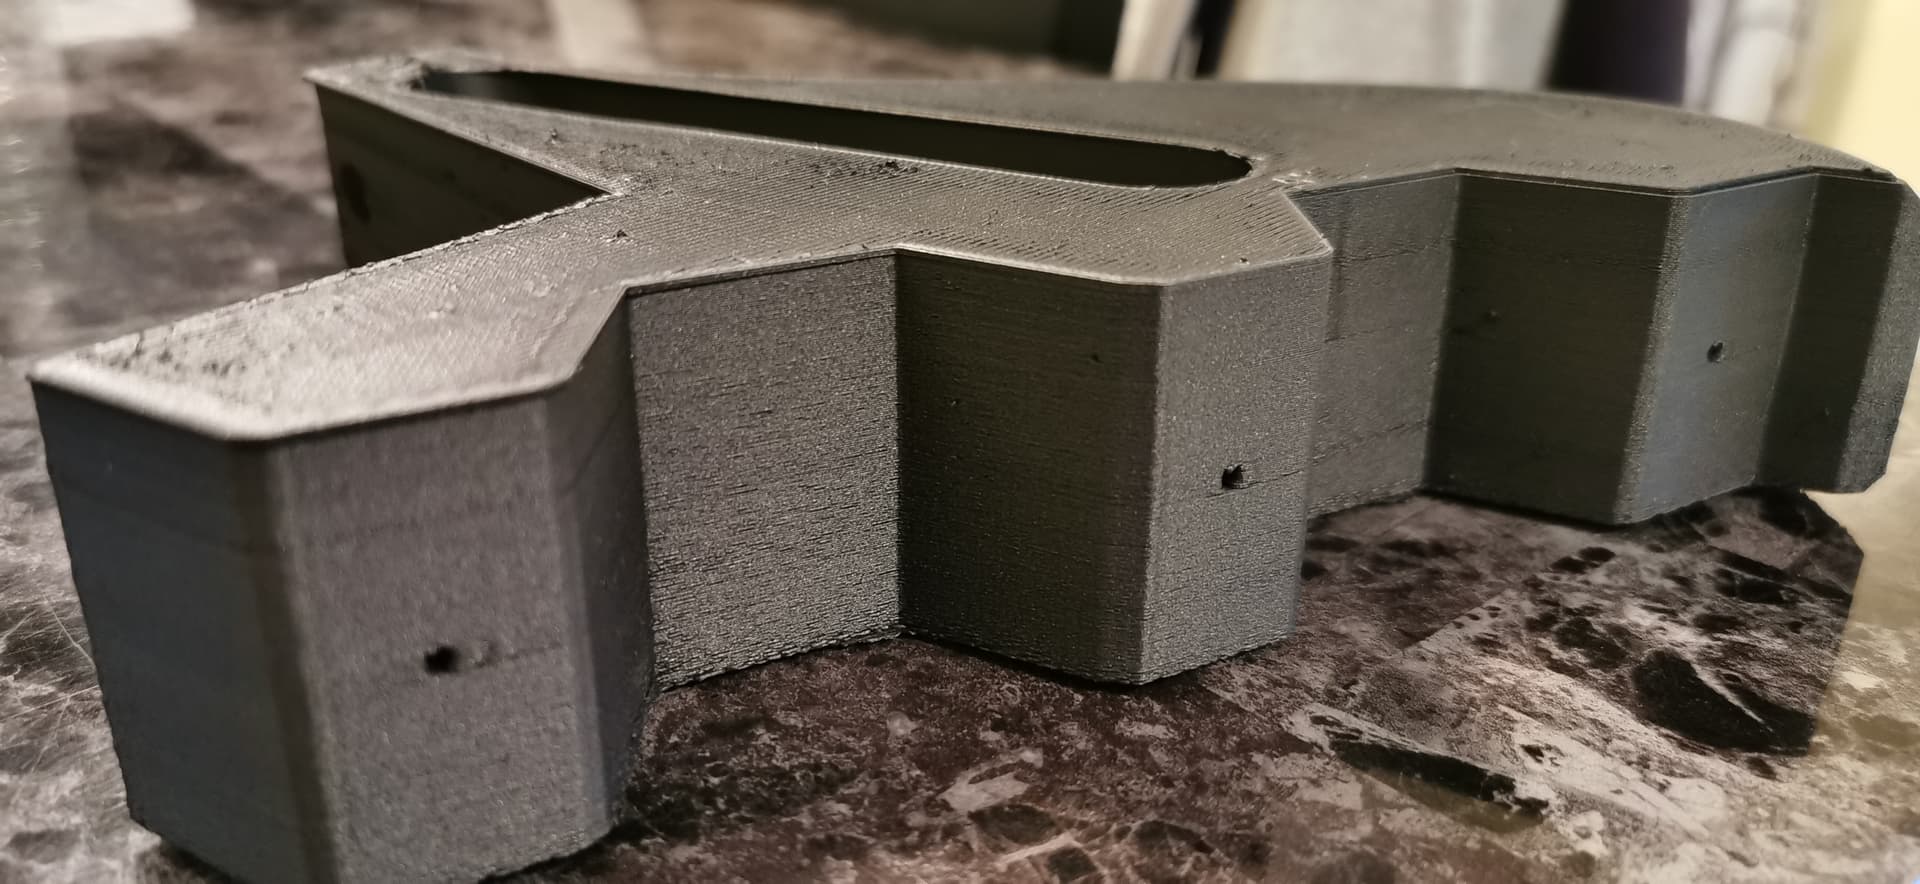
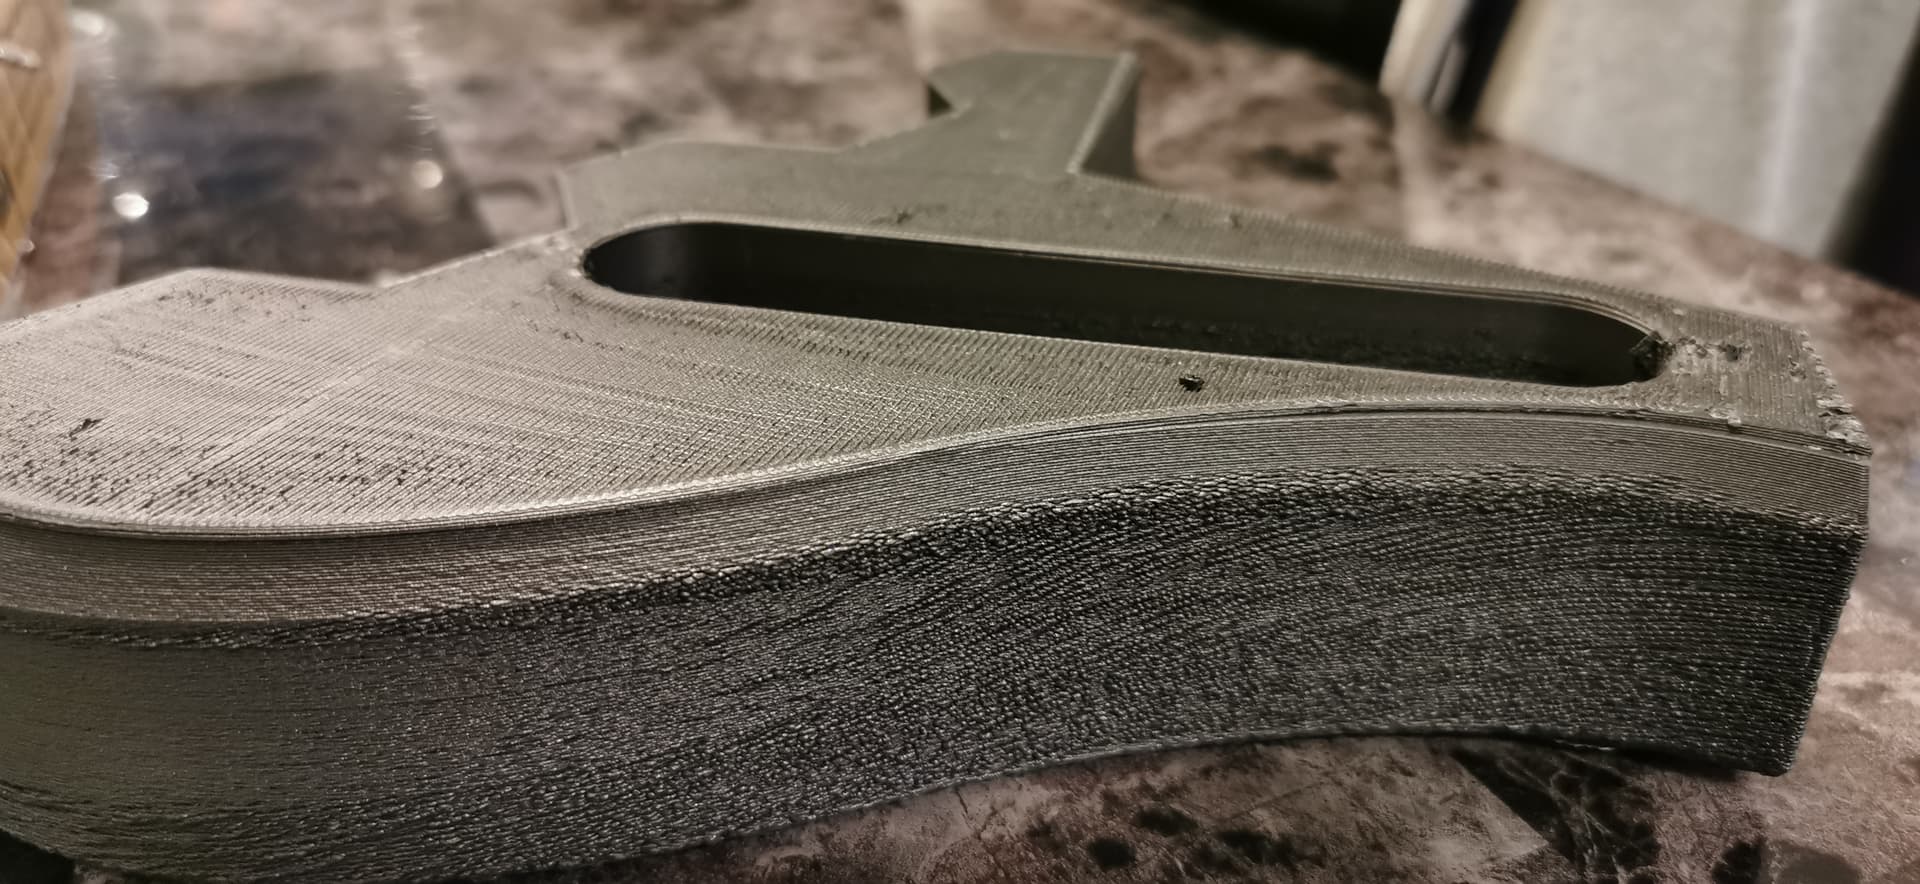
Bottom is bowed/lifted. This seems to happen no matter what I do. The pictures come from a print with BRIM, which I thought was doing its job, but holy hell…it was very bowed (convex about 2mm at each end…4mm/5mm total from one end to the other).
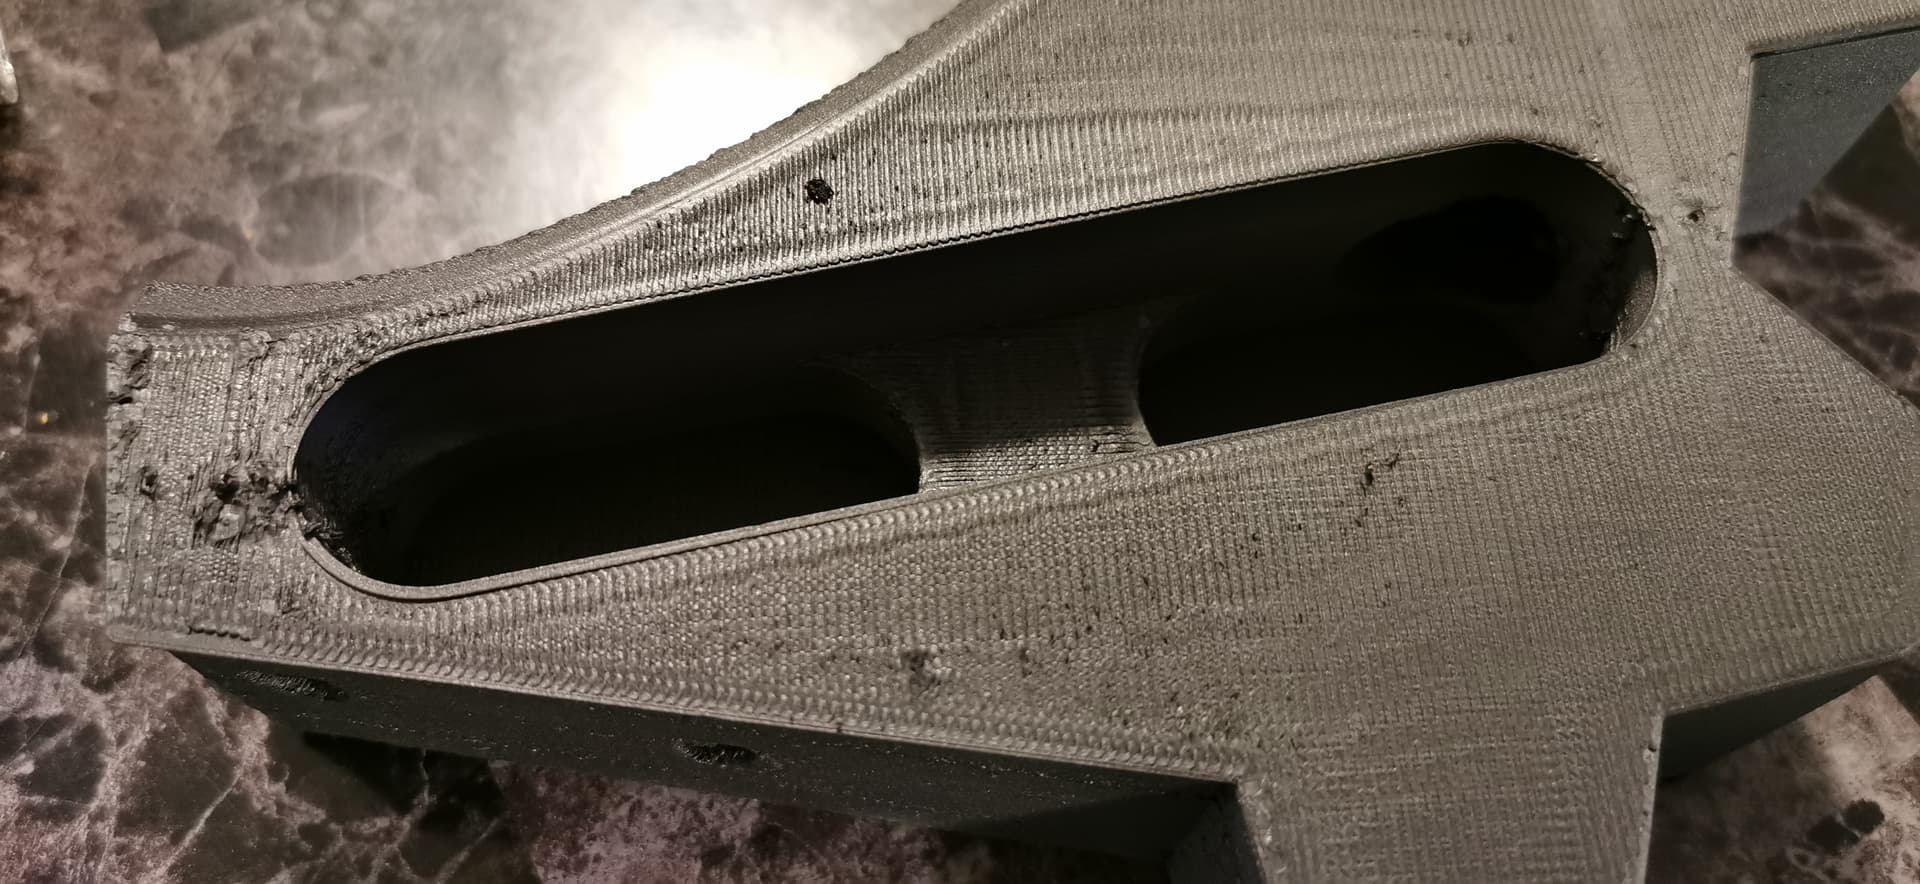
The left side is super rough, yet the left side is pretty much fine. I don’t understand how this could be, but it is very consistent.
A bunch of zit’ing happening throughout, but seemed to come and go in stages. (could have been due to the bottom lifting that I didn’t notice until after the print was done)
Bad chunk/zit near the top that caused a layer shift (unfortunate…sigh)
First layer has a wavy pattern. This seemed to happen no matter the first layer temperature. At 240c, it seemed to be the best.
Top layer looks horrendously under-extruded to me, and you can also see that wavy pattern there.
So, I guess, not having any experience with this type of material, I am not sure what to expect from printing with it, but I figured it would be better than the results I’ve gotten so far.
Any help/tips/info would be appreciated at this point?!
Welcome!
You should always reach out here if you’re puzzled, there’s a great number of people with lots of experience who are happy to help you.
Bowed usually is from low build plate / chamber temps. What build plate temp are you using?
Another thing to watch out for if you’re getting bowed prints is not opening the door a lot to “peek” while printing. You might also try preheating the chamber before printing by manually turning on the bed to 110°C and leave it for 20 or more minutes to warm the chamber, then turn down to 95° or 100°C. Leave the door closed during print.
[quote=“danny6869, post:1, topic:7285”]
The left side is super rough
[/quote] … and all the other numbers -
You may have a wrong Max Flowrate. Are you using SoftFever’s OrcaSlicer or Bambu Studio?
Flex material is notorious for being one of the very hardest to dial in. Nylon and it’s blends being another but BL got it to behave in this printer.
You should run Calibrations of the filament using SoftFever’s slicer (!!!). You’ll never have a super smooth surface with Flex, it’s inherent, but that can be better.
You didn’t mention the nozzle you’re using. Flex really prefers a .6 Nozzle or higher for best performance. A .4 will work but be much harder to dial in.
Also speed kills with flex. Sometimes the answer is switch to Silent Mode which cuts the speed in half but solves many ills. It will still be faster than 95% of the printer out there.
LOL! I just had a conversation with a guy to check the plugs on his AMS. Turns out here’s an Aerospace Engineer. Ya just never know!
In a nutshell, yes. Besides, BL Studio and OrcaSlicer are virtually identical. He’s got some additional settings, and a bunch of calibration stuff that helps.
You can run both, they both sync to your account so if you run a print on one and open the other next time your data’s there. BL Studio actually has some of his code incorporated. If they trust him you can. He’s got a quicker turnaround and has incorporated some bug fixes not out on Studio.
It isn’t even installed - you unzip and setup a shortcut to bambu-studio.exe and your done. Same executable, different folder.
Here’s the Release page (& download), read the release notes, you’ll see who he is pretty fast.
For the warped buttom area, I would try the high temp plate. At least for me it tends to stick a LOT better to most materials then the textured PEI plate, it might keep the warping and bending under control. Higher temps for the bed might help as well. X1C can raise up to 110°C, so use the leverage the printer offers.
For the top surface, lowering the max volumetric flow rate or lowering the speed and acceleration might improve the quality some. I always tried to start slow and get the quality, then start to raising speeds and see how far I can get.
Softfever Oracle gets copied to your HDD and you can save the directory where ever you want, you can have your bread buttered on both sides - You will not lose any function on your latest version of Bambu Lab
I think 4 hours is insufficient. Also, at what temperature? Bambu says 80c for 8 hours for their pacf. Im assuming other brands would have similar drying requirements. My understanding is that those type of filament dryers cannot reach high enough temperature for this type of filament.
Long edges are always difficult with a PA CF. Long edges with a very solid infill is even more difficult. Things that I like to try is a low percentage infill pattern that is less directional pattern (like gyroid) toward the first 2-5 mms. Then you can let the normal infill pattern pick back up for strength. This isn’t guaranteed to stop the warping at the plate but can help.
The idea you are trying to account for is, the bed is hot and the layers above it get cooler and cooler up higher. The difference in temps maybe 10mms off the bed is pretty significant. so those layers are cooling faster and literally pulling the layers below off the bed. So the idea I use is have less plastic to be pulled on (lower infill), and disburse the direction of the puling to more angles and not just straight up and down (something like a gyroid infill).
Ideally, you want to have the layers cool at the same rate, and keep them above the glass transition temp (around 70C for PA CF) as long as you can, but the Bambu printers can’t keep the chamber that hot. So you have to find other ways to mitigate that effect of the temps being so different.
One other thing I would suggest for this is do sectional test prints. You can slice only the long edge that keeps pulling up by cutting it up in the slicer. Print only the parts that cause you a problem (obviously as high as needed to reproduce the issue). That way you can tune the errors away without waiting forever and using up all of your filament. So for the pulling up section, try slicing it to the height where you know you get the issue and then just tune, tune, and tune it till the issue is gone.