I finally received my H2D, and I could use some help configuring support settings.
I have PLA loaded on the left extruder and PETG on the right. What I want to do is have the supports printed mostly in PETG, but with the last interface layer (the one in contact with the model) printed in PLA. Additionally, I want the support-to-model gap to be 0.
Could anyone please explain how to set this up correctly in the slicer?
I also tried to use Generic PLA (left extruder) as interface support for a Bambu PETG-HF (right extruder) Part. But with mixed results.
I followed the mentioned instructions.
That basically sets the bed temperature identical for both filament profiles to a compromise of 60 C.
And it sets any Z-spacing to zero to let both materials touch on bottom and top of the support interface.
With that the lower layers of my part and support where printed fine in PETG-HF.
Then the first layer of PLA on the support came out also fine. The same for the following 2 more layers of PLA.
But when the real part from PETG-HF should be layed down on the PLA interface it didn’t stick at all, causing spaghetti moving all over the place. So I aborted that print.
What I tried to improve with a little success was:
Disabling any cooling fan and slowdown feature in the PLA filament settings (when used as an interface support).
Make the supporting interface a bit thicker by adding 2 more layers.
It helped a bit and the part didn’t came completly loose, but PETG-HF still won’t stick onto the PLA.
Brands are Bambu PETG-HF and Creality PLA.
Any suggestions on how to make the PETG-HF stick better to the PLA support interface?
When printing, I use PLA only as a contact layer for supports, and I have to say I have mixed feelings about it. If the print starts off the support and then moves onto it, it holds fine. But if it starts directly on the support, it just won’t stick no matter what I do. For example, with this model – https://makerworld.com/en/models/1286770-ams-2-pro-saver-snag-cutter-v1-0#profileId-1316062 – it wouldn’t stick at all. I eventually just left PETG for the supports and it worked, but it’s strange.
It also depends on how organic your model is, the more rounded bottom surfaces the less surface area your PETG can hang onto. Try to pick the support with the most surface area, orient your print such that those islands get the most contact, and try lowering your speed by quite a bit.
This was the biggest issue with my stuff and I eventually got PVA to work fairly well. If these issues persist your model just might be too organic and you can try following my guide to create a mold around your part.
I have an ‘almost’ solution for me now.
Seems the PETG stays on the interface layer of PLA much better when printing with 0.4mm nozzle and doesn’t stick at all with the 0.6mm.
I now use 4 interface layers of PLA with the closed rect pattern and no part cooling in the PLA filament settings.
I have good success with that.
What I noticed is that the slicer automatically slowed down the new layer of PETG on the PLA interface - which is a good thing.
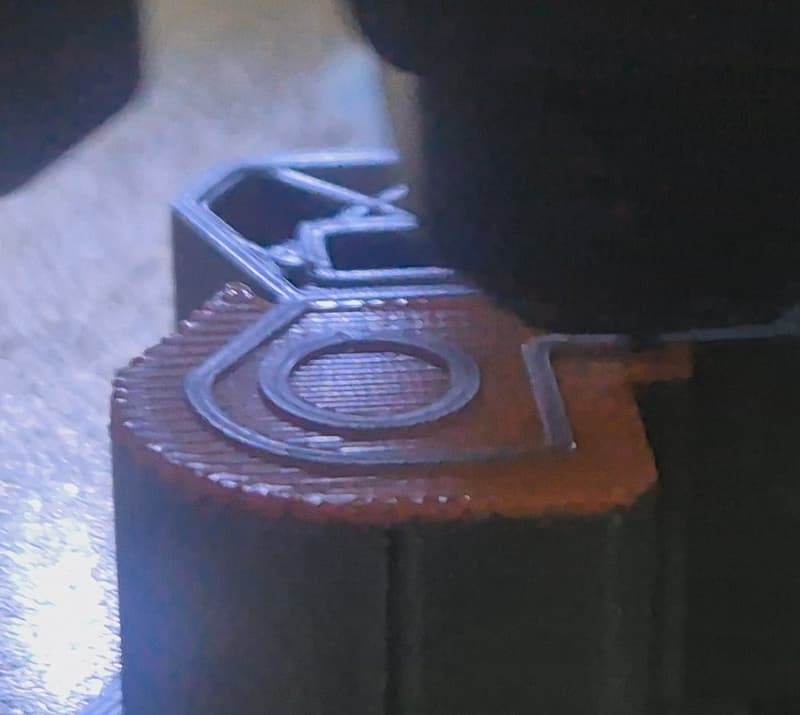
But it also starts with some inner perimeters, like a screw hole, in the middle of the interface and later printing the connecting filament line from the main PETG part onto the interface layer for the overhang:
This last part can be fixed in the slicer, to print the connecting perimeters and even some infill first on interface layers, so that there won’t be any ‘floating islands’ in the middle of the interface.