Hey guys.
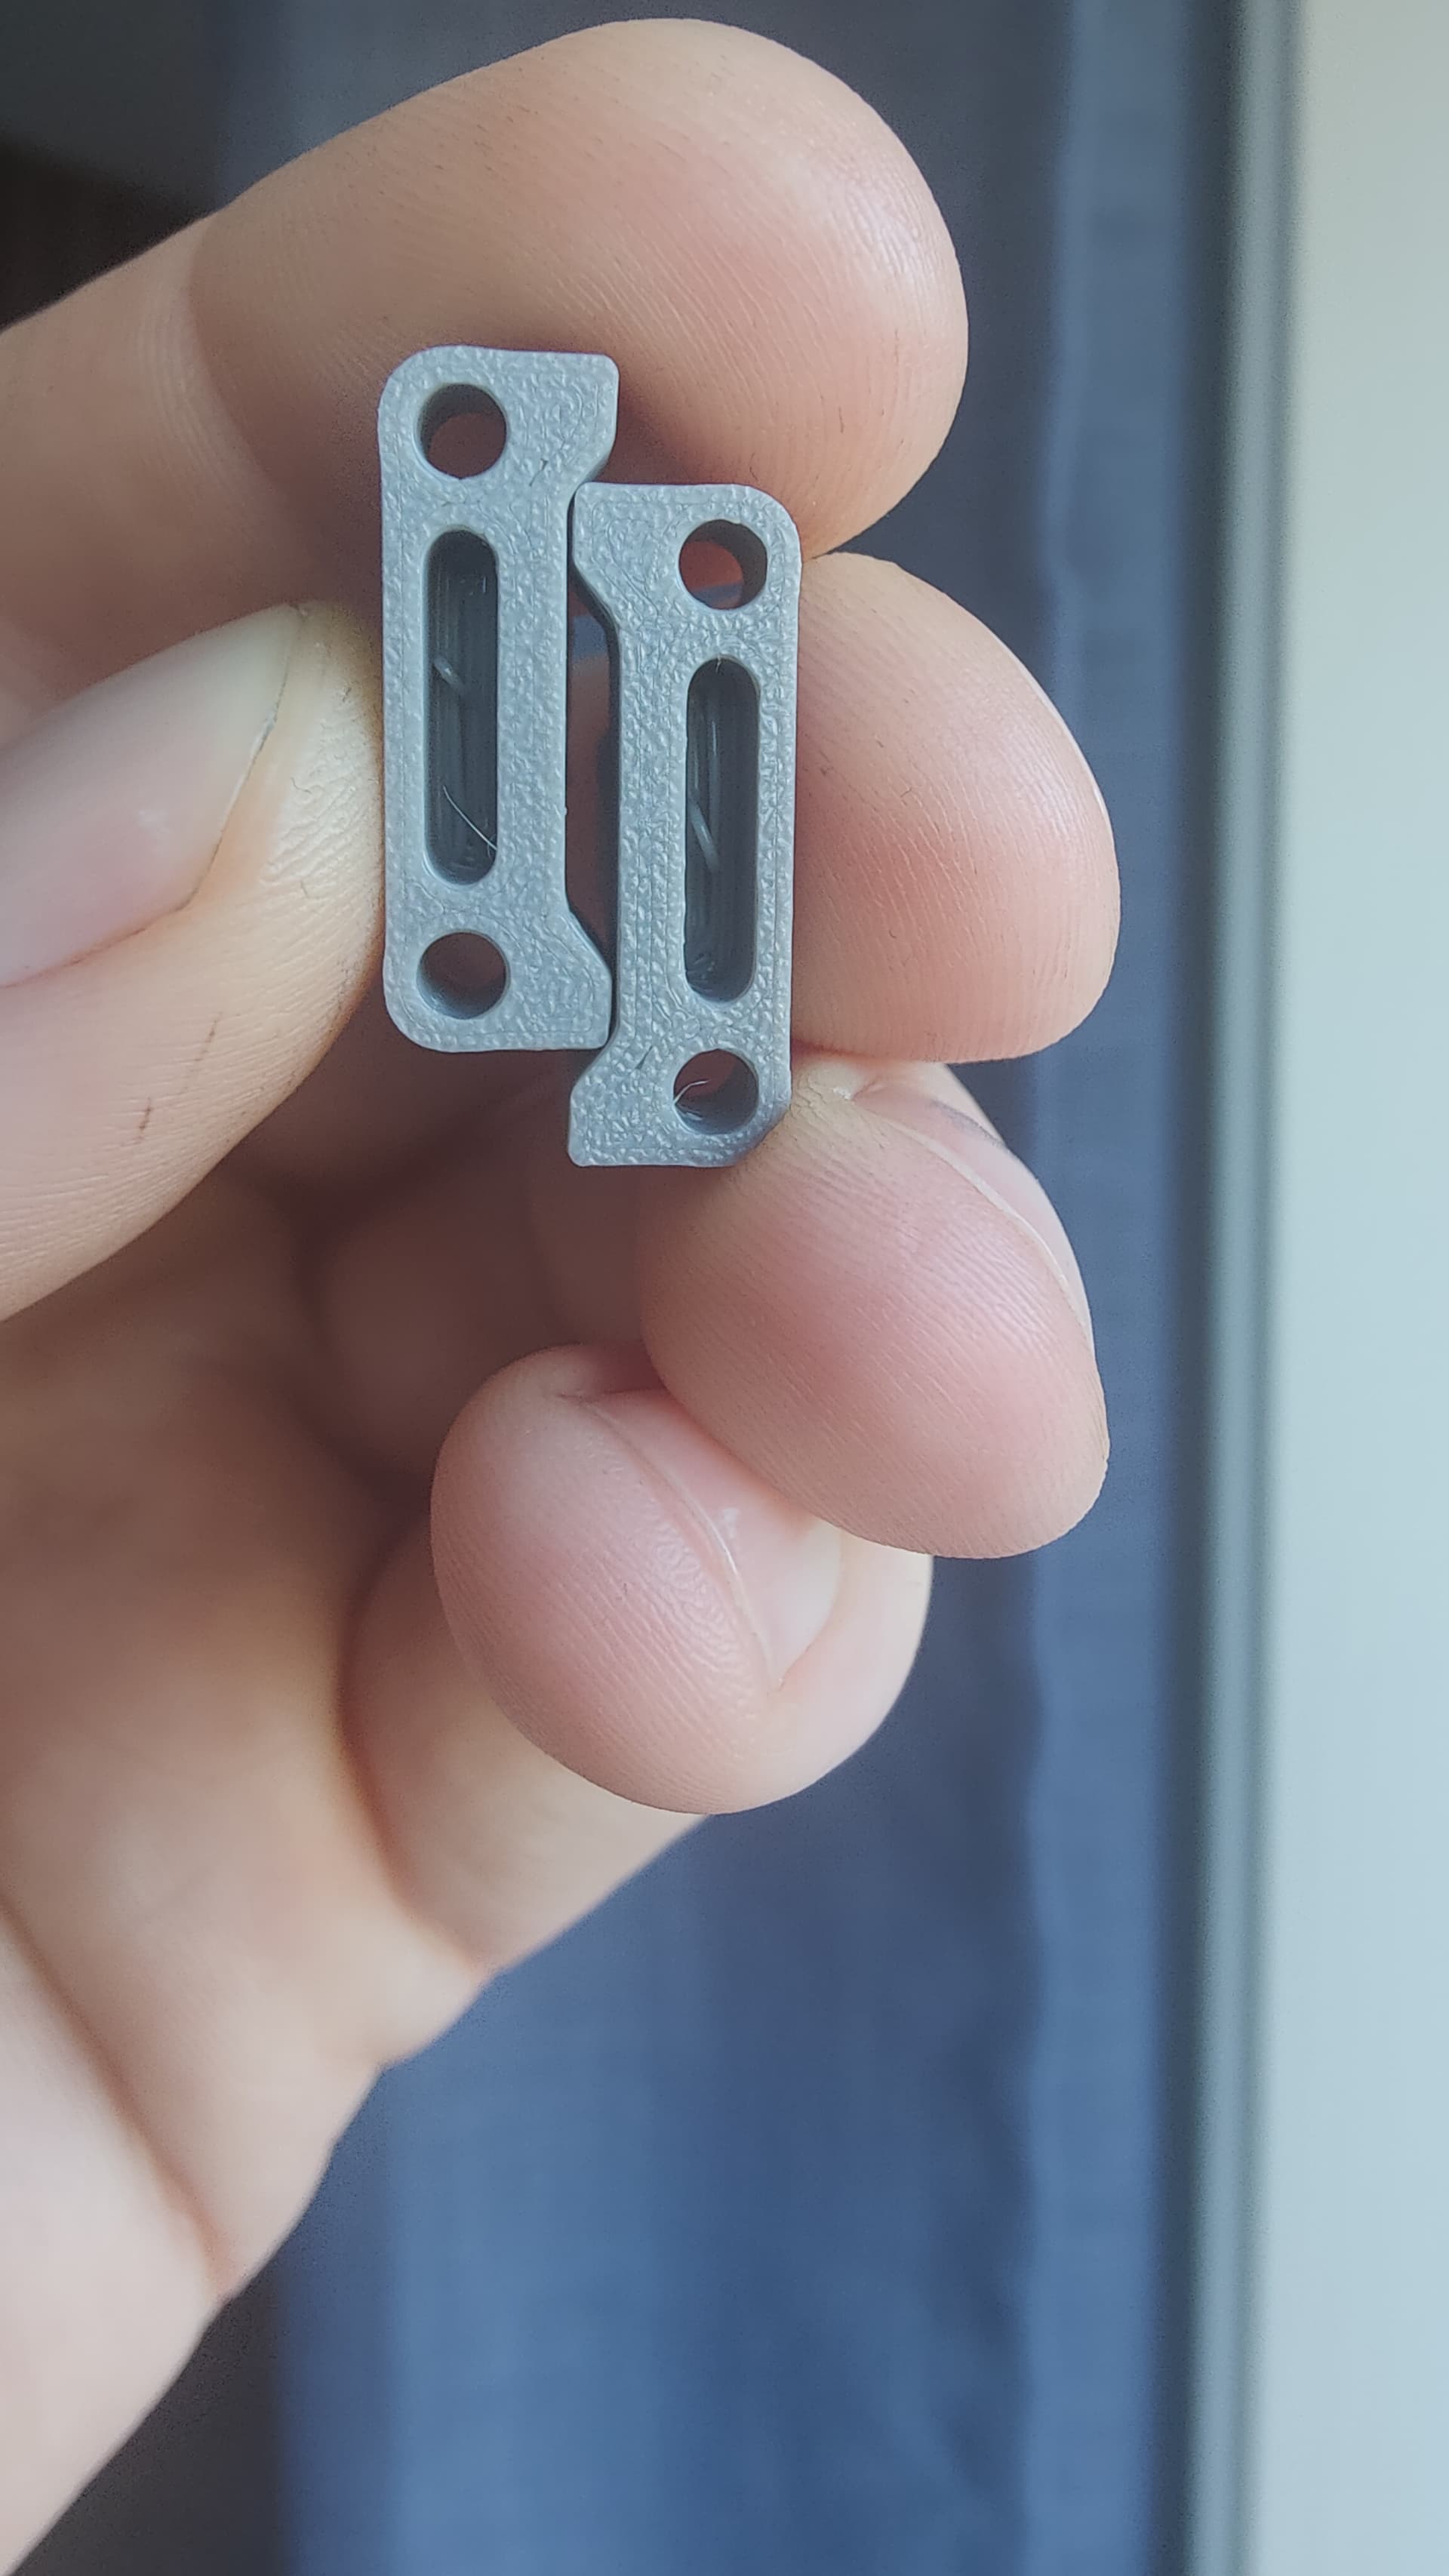
I’m trying to print a small thing in ASA, but the top of the print goes bad. It seems like it’s either not hot enough or too hot?
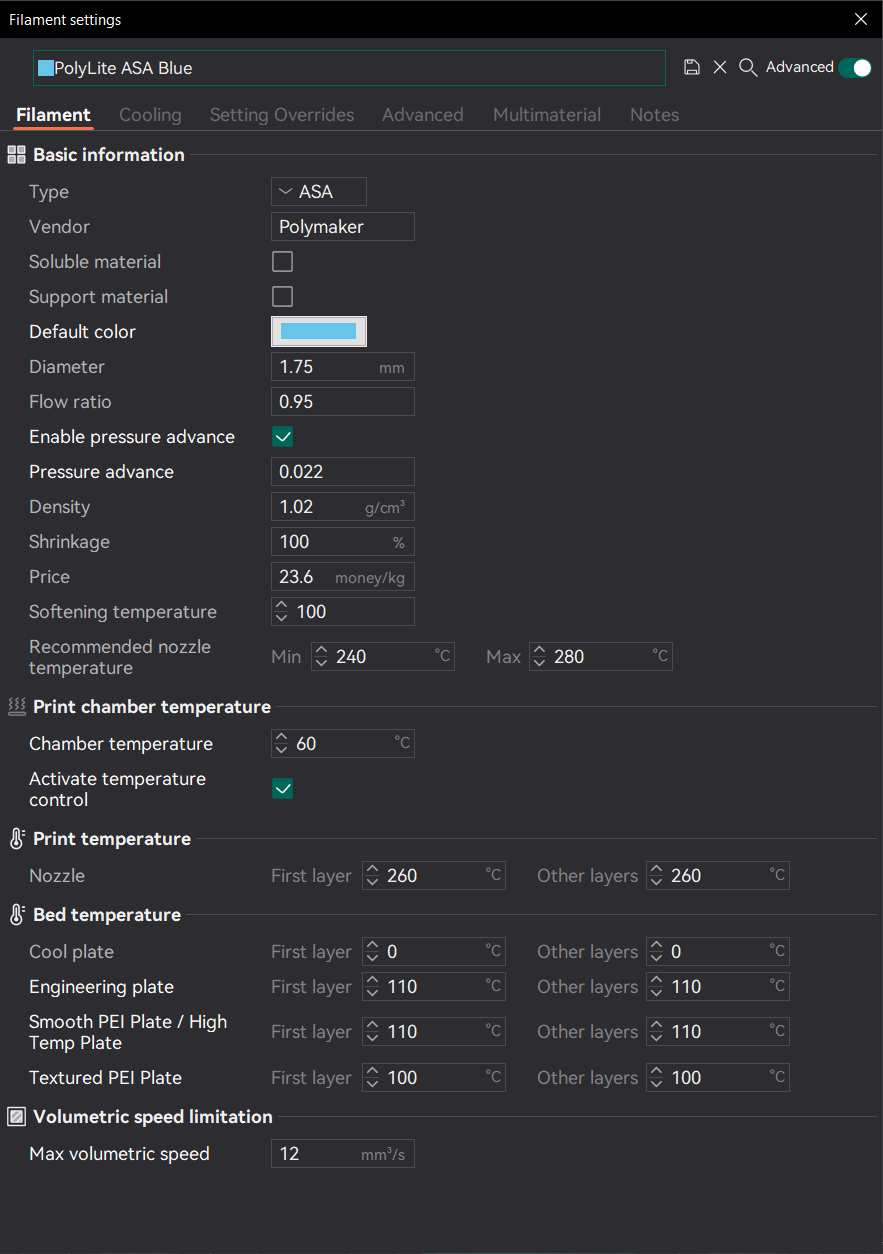
Currently using BambuLab ASA, 0,4mm nozzle on P1S with 270 degrees Celsius (recommended range 240-280).
Are you printing the part all by it self on the plate? Often adding another part will help small features print better as the previous layer is allowed to cool. There are also setting to adjust for minimum layer time and part cooling fan speed.
The bridging doesn’t look all that bad. A small utility knife will take care of any sagging sections. Post processing prints is still something that can be expected.
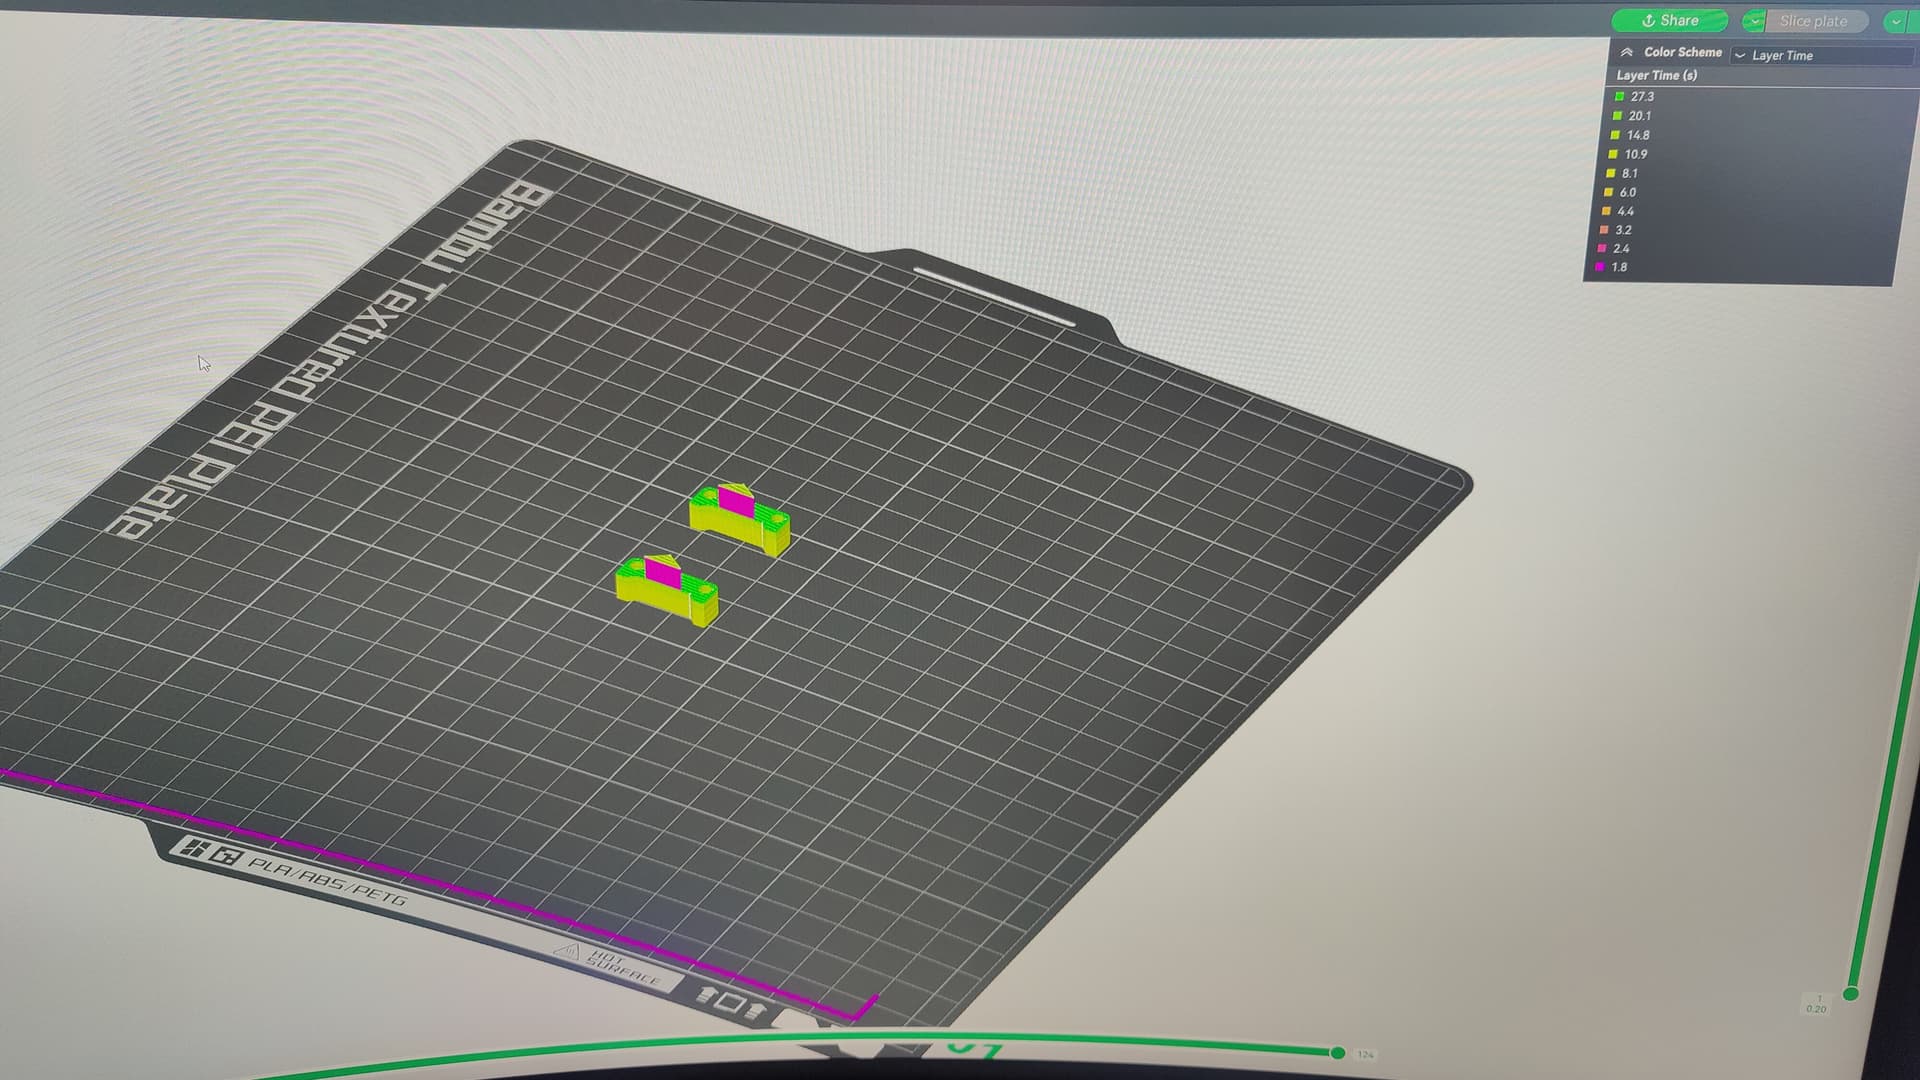
I’m printing two at the time. Tried to lower the fan percentage to 10% overall, but it made no difference. Also tried to set the temperature to 280, made no difference. It’s annoying, this always happens on prints where there’s smaller/thinner parts on top. The bottom is doing great, so I don’t understand why the top won’t print good.
JonRaymond described it already - in the filament cooling settings, raise the minimum layer time.
The layers are printed so fast that they have no time to cool down and become solid before the next layer is put on top. Happens when you have small layers.
Alternatively, print multiple parts at once.
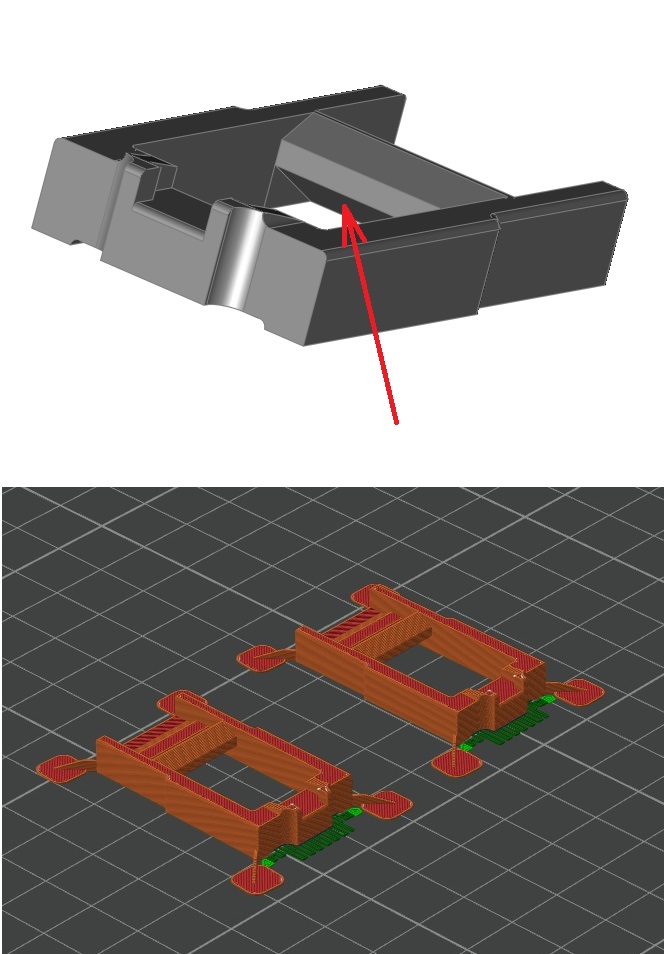
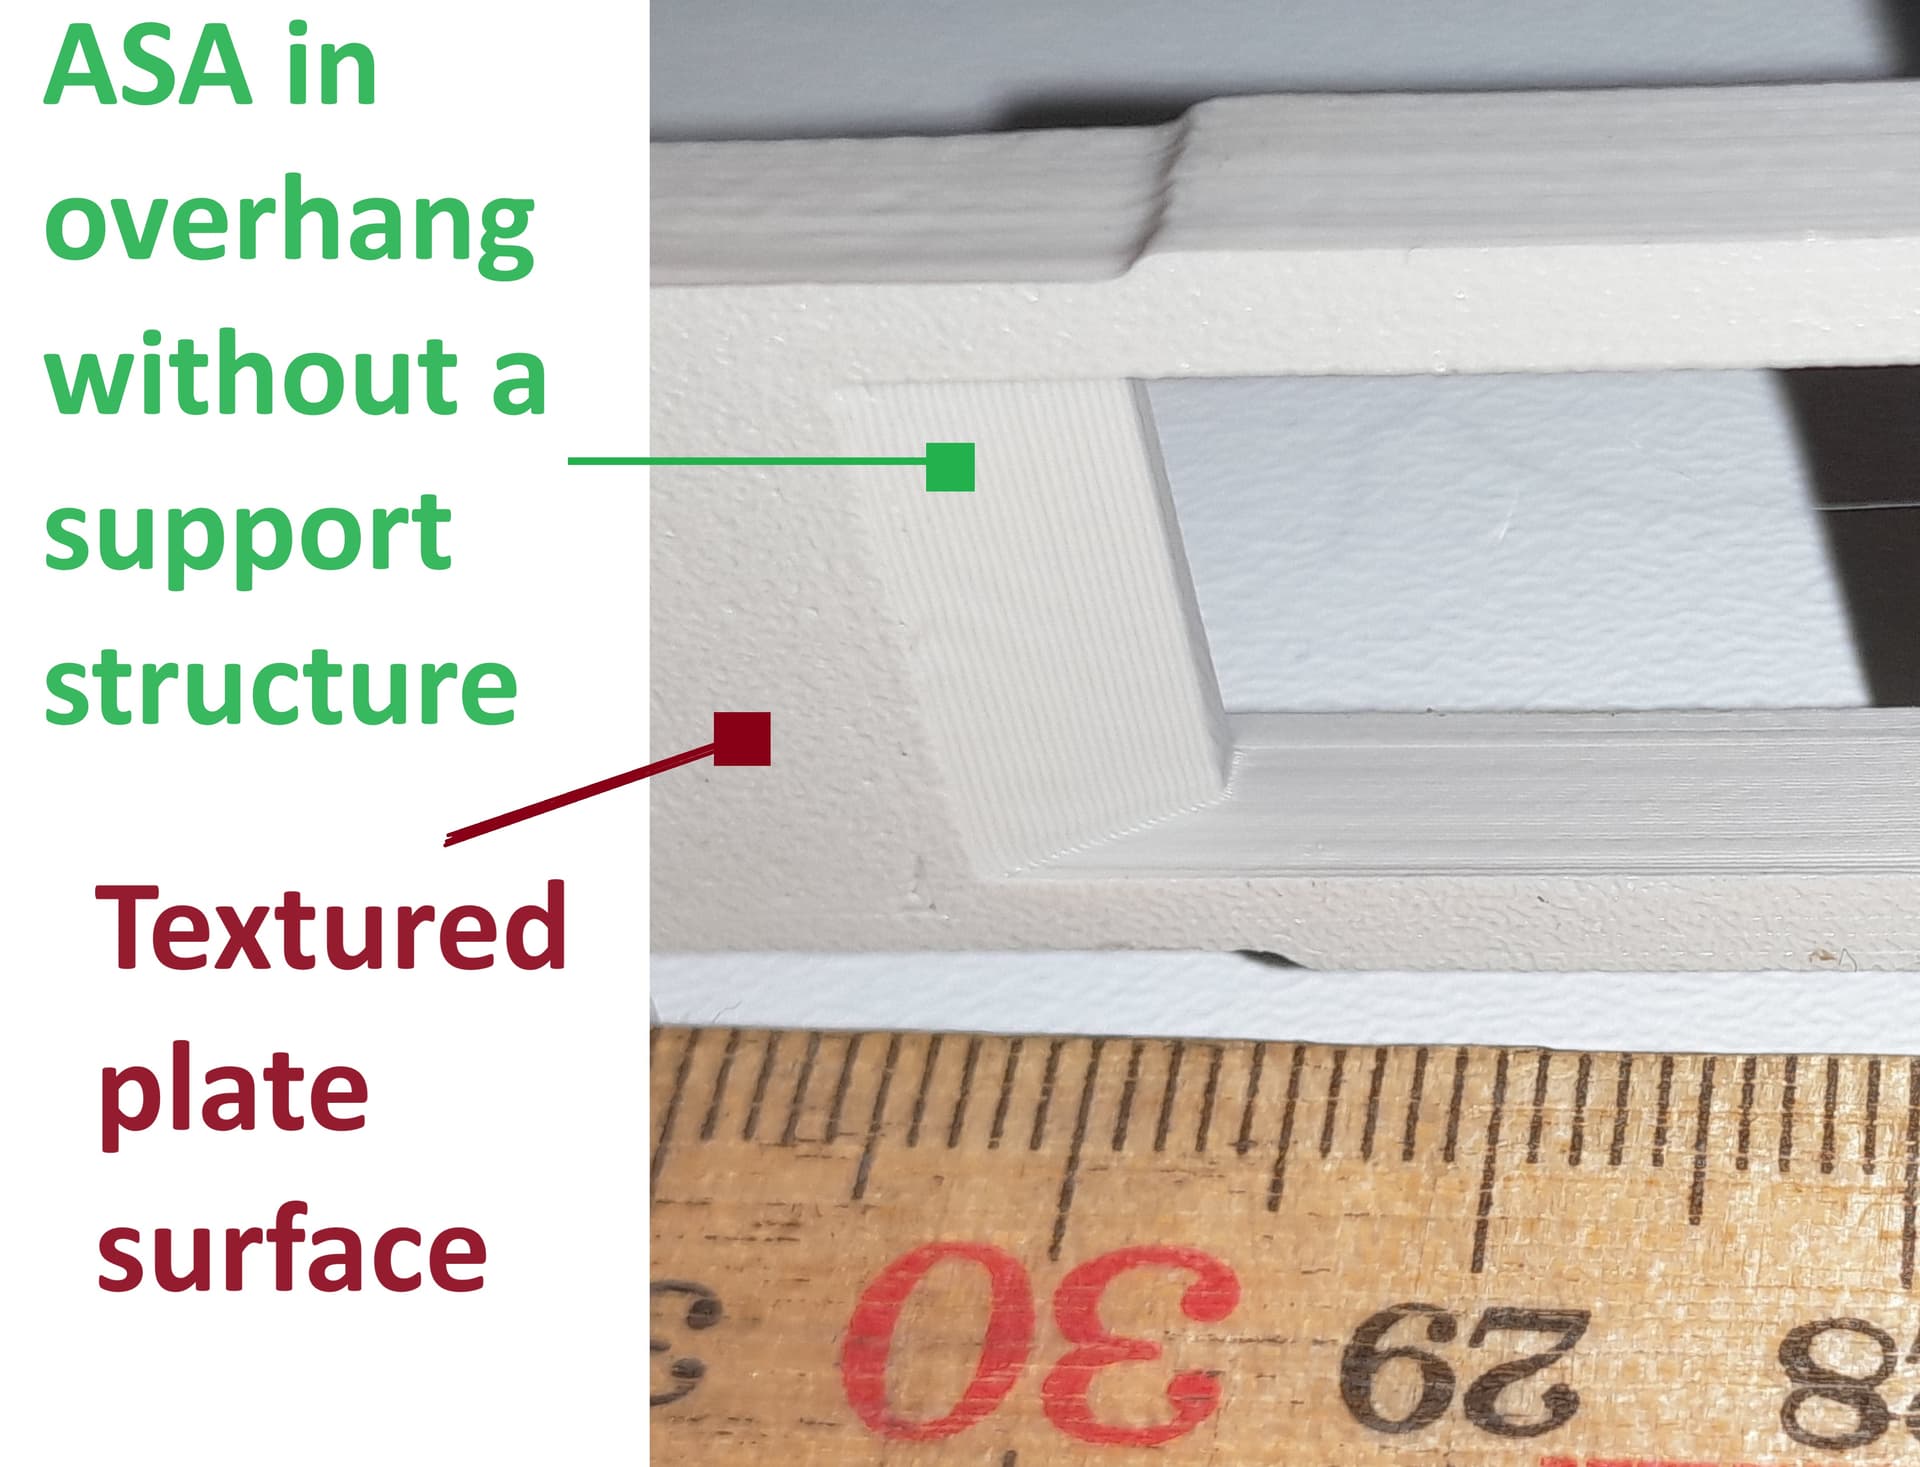
This is a very important 3D spare part print made out of ASA printed approx. 30 times.
Unfortunately I can only print 2 of them at a time. If I do more, the overhang zone with the red arrow will end in a catastrophe.
Due to the requirements of this red marked arrow zone, support structures cannot be laid - the part can also not by rotated into a different position due the part will get under load with temperature. I have to adjust the nozzle temperature by 5°C from time to time and 5°C more or 5°C less decides whether it works or not.
That makes sense. Kinda new to this process, so I appreciate all the help I can get. So thank you for being precise. I will set the parts cooling fan to normal settings and aux fan off. I also tried to set the layer time in filament settings, but it didn’t seem to do anything. Maybe changing the layer time value when part fan is 0% does nothing?
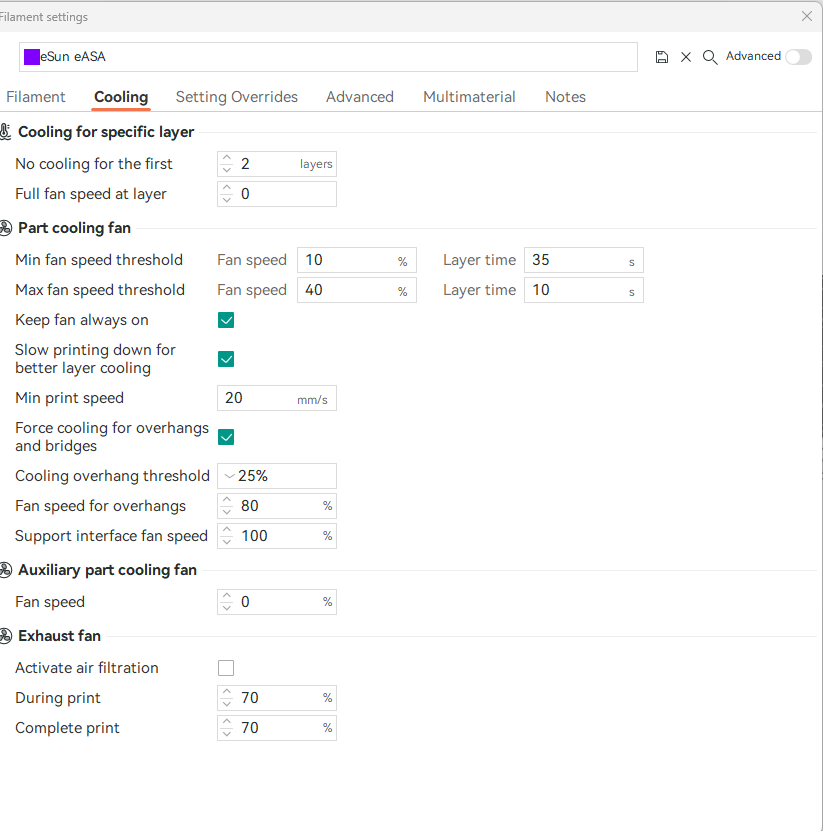
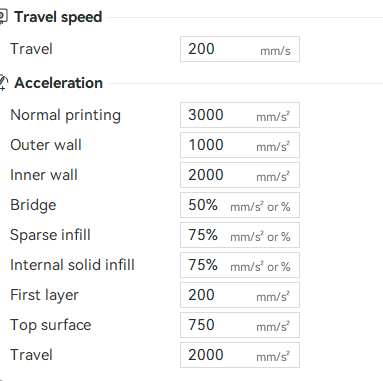
here are my print setting for more conservatives and accurate ASA
For bridging needs fan, part fan is needed a bit for most cases
preheat the chamber, and do let the parts to cool down slowly
For bridging and overhangs usually i add support in most cases for better finish, usually with manual painting the support. ASA normal support is very easy to remove with these settings. Support Interface layer 100% fan. For the bridging and overhangs 60-80% depends on the model but more often i use 80
i use higher temperature nozzle with a little fan opposite of most other suggestions , due to layer adhesion issues , i have reached to 260C , but higher becomes a problem as well.
in same cases i reduce the 40% to 30% in the max part fan speed but affects some areas in some prints
in some prints big parts these setting may incur warping , but unless the chamber is insulated and heated no settings will solve it 100% due to temperature variations around the plate and chamber. But with chamber insulation only and slightly adjusted the bellow parameters warping is minimum to no warp
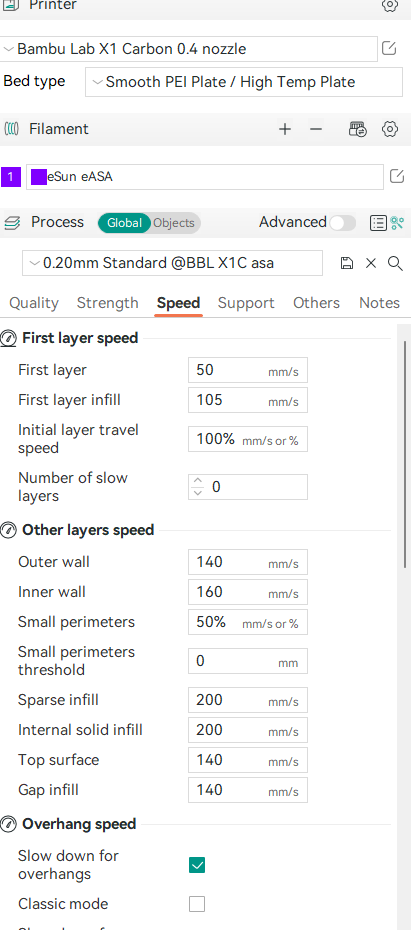
Alternative speeds for overhangs , too slow is not good aways from testing with my settings and eSun eASA found out that 25mm/S one of the best :
The other print speeds i use when do not care so much for layer adhesion and on easy models, but i almost do not use this one instead use the slow model and increase the infill in inner wall to around 140mm/S
For additional improvements on the ASA i also reduced the acceleration and max travel speed , but do not use it very often only when trying to get very good accuracy or have problem with warping then applying everything
I too think it has something to do with the layer time/speed. The are two sections in the slicer that control this. The Min Speed (right below the Layer Time section) is the floor regardless of the minimum layer time. So if you change the time value and there is no adjustment, lower the Minimum Speed as well. The default 20mm/sec seems like it would still be very fast for that small section. Try something like 5mm/sec. That should get you down to around a real 8 or so seconds for that layer if I’m guessing correctly at the area of that top feature (triangle area guesstimate), opposed to 2 seconds with the default 20mm/sec regular setting. IMO, Bambu screwed up on this profile (and that shows in the various profile layer time value differences between the last few releases).
In short, the “Minimum layer time threshold ” is limited by the "Min print speed ". And if the speeds still exceeds the “Minimum layer time threshold ”, it will not continue to slow down until you lower the "Min print speed ". In other words, it can only reduce the layer time to "Min print speed " at most.
Sorry if this gets a little confusing but its easy to see where this can be overlooked.
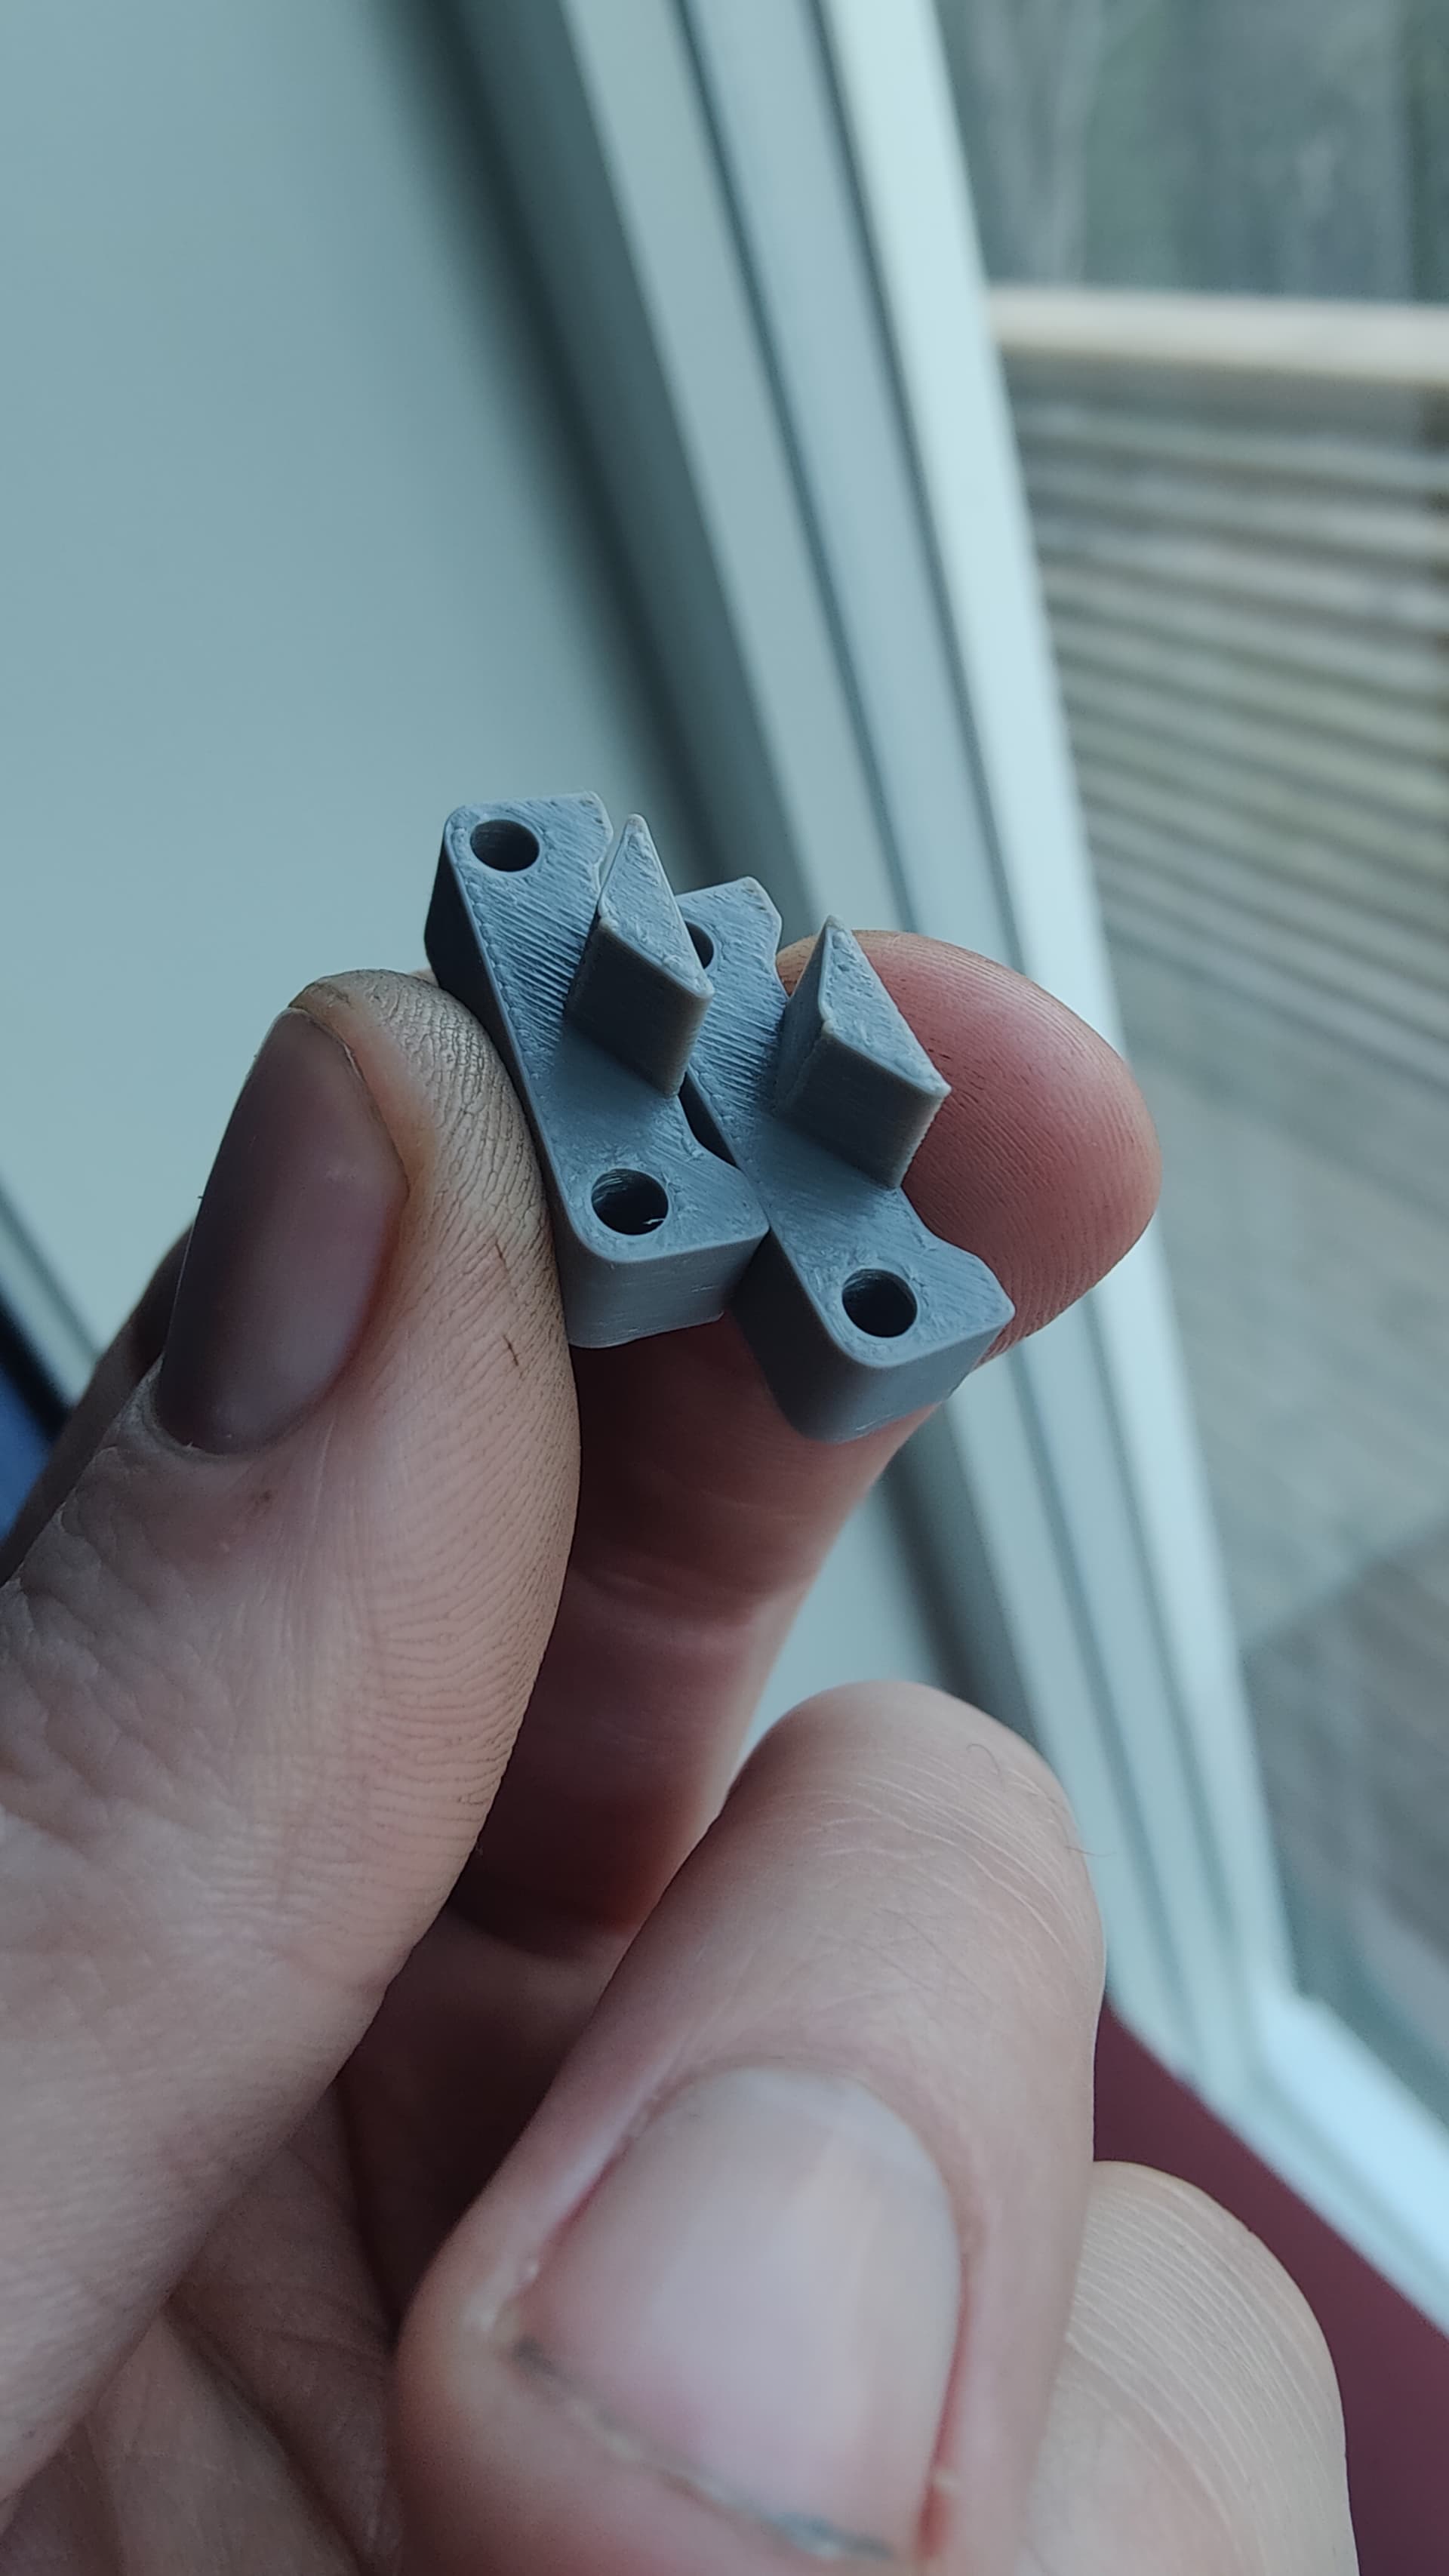
I tried to lower the minimum print speed, had to lower it to 2mm/s to be able to make it. But it worked!
Thank you all for the help, I’ve learned a lot of things about printing with ASA.
Well done , great , but there is something else as min 10-20mm/S should have printed this part with out any issue . From the last picture you showed it looks like filament not well calibrated most likely the PA(K) is a bit off or the flow needs tiny increase. But probably first dry the ASA if you have not done so as the wet one has similar output and slower printing speeds . A new filament usually is wet
In German there is a word were @just4memike’s analys is a part of. The so called “abkühlrate” which translates literally into “cooling rate”, but I don’t know whether it is used the same way in English-speaking environments. just4memike’s explanations about the slicer world were very interesting for me and thank you for that.
More tensile matirials usually, but not always, have more “power” to defrost themselves. Hence the saying: After tight comes loose no matter how. Build-up of more internal stress during cooling…
Then the distance energy in time incl. input volume comes into the game in relation to the cooling in time as well and then you get to the cooling rate.
Anyway, so far there has only ever been one rule for me that has always counted in some way: Just adjust one parameter at a time, see what happens and then adjust the next parameter and see the result again. Than more you know what happens and when, then better you can adapt it to the challenges.
vladimir.minkov parameters were also very interesting for me, a little more on the safe side in terms of strength but more sag - but if the sag doesn’t play a role these are the def. better (better connection of the layers) - at least I suspect. The unexpected often happens and in the end there is simply no longer any right answer anymore just questions. Whereby one question just follows the next and in the end nothing matters anymore It’s all just a question of which death you wishes to die and which error is the most acceptable one
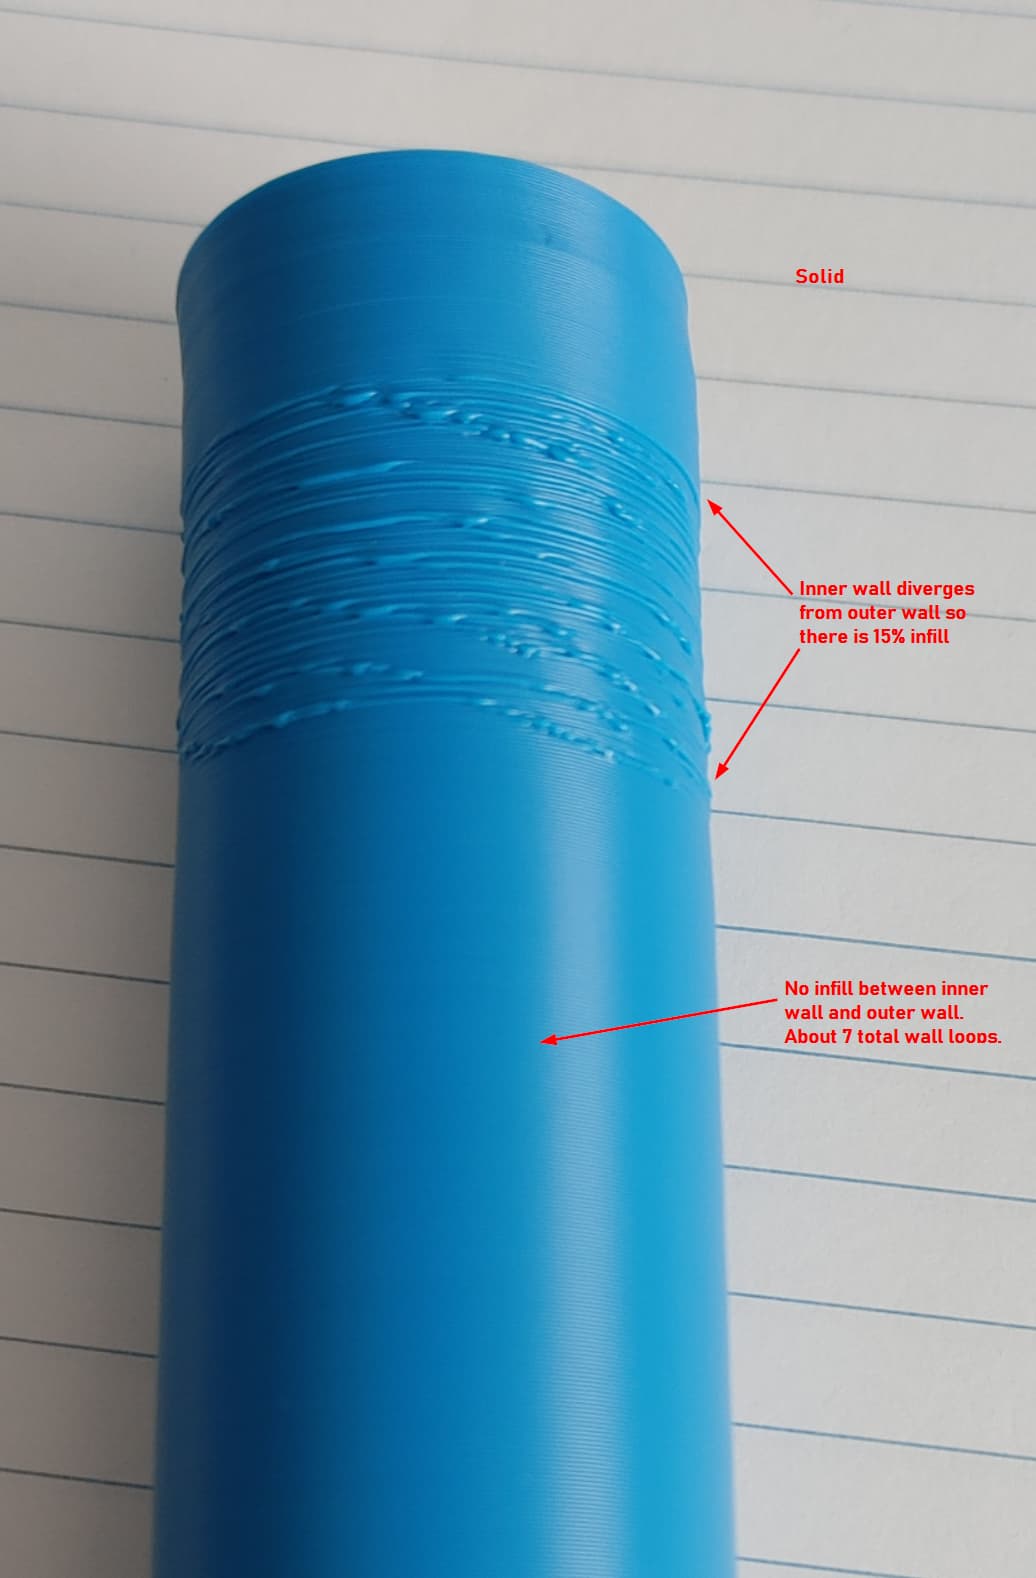
I hate to post here but since it’s about ASA, I have a strange issue. When printing with PolyMaker ASA, there is an issue I have when infill is used between inner and outer wall. See the pic. I am printing a tube that is about an inch in diameter. I originally had infill between the inner and outer wall for the whole tube. It printed with blobs along the whole tube. I added enough loop walls as to remove the infill. At the top where the blobs start is where the inner wall diverges from the outer wall, this is where the blobs start. It seems like the infill is pushing the outer wall but not sure about that. Any ideas on why this would happen?
For better quality I would calibrate the filament profile. I calibrate all filaments before printing. If you think the infill is pushing the outside wall, you can try to print outer wall first and/or reduce infill overlap and a little bit of flow rate. ASA also shrinks, and some brands more than others. I’m using Sunlu, and it’s shrinking rate for me is 98%.