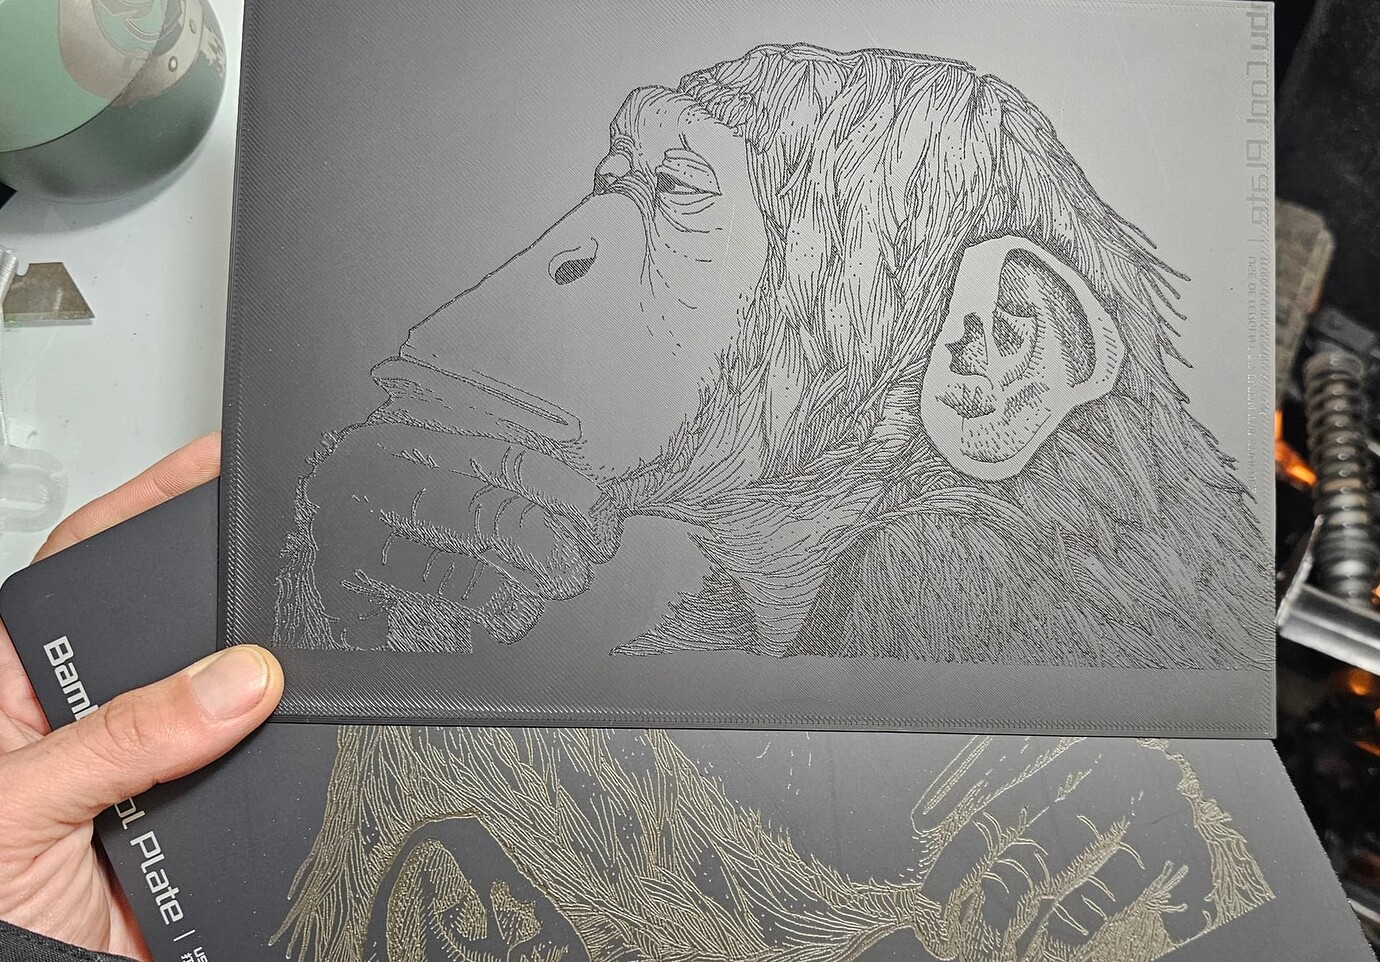
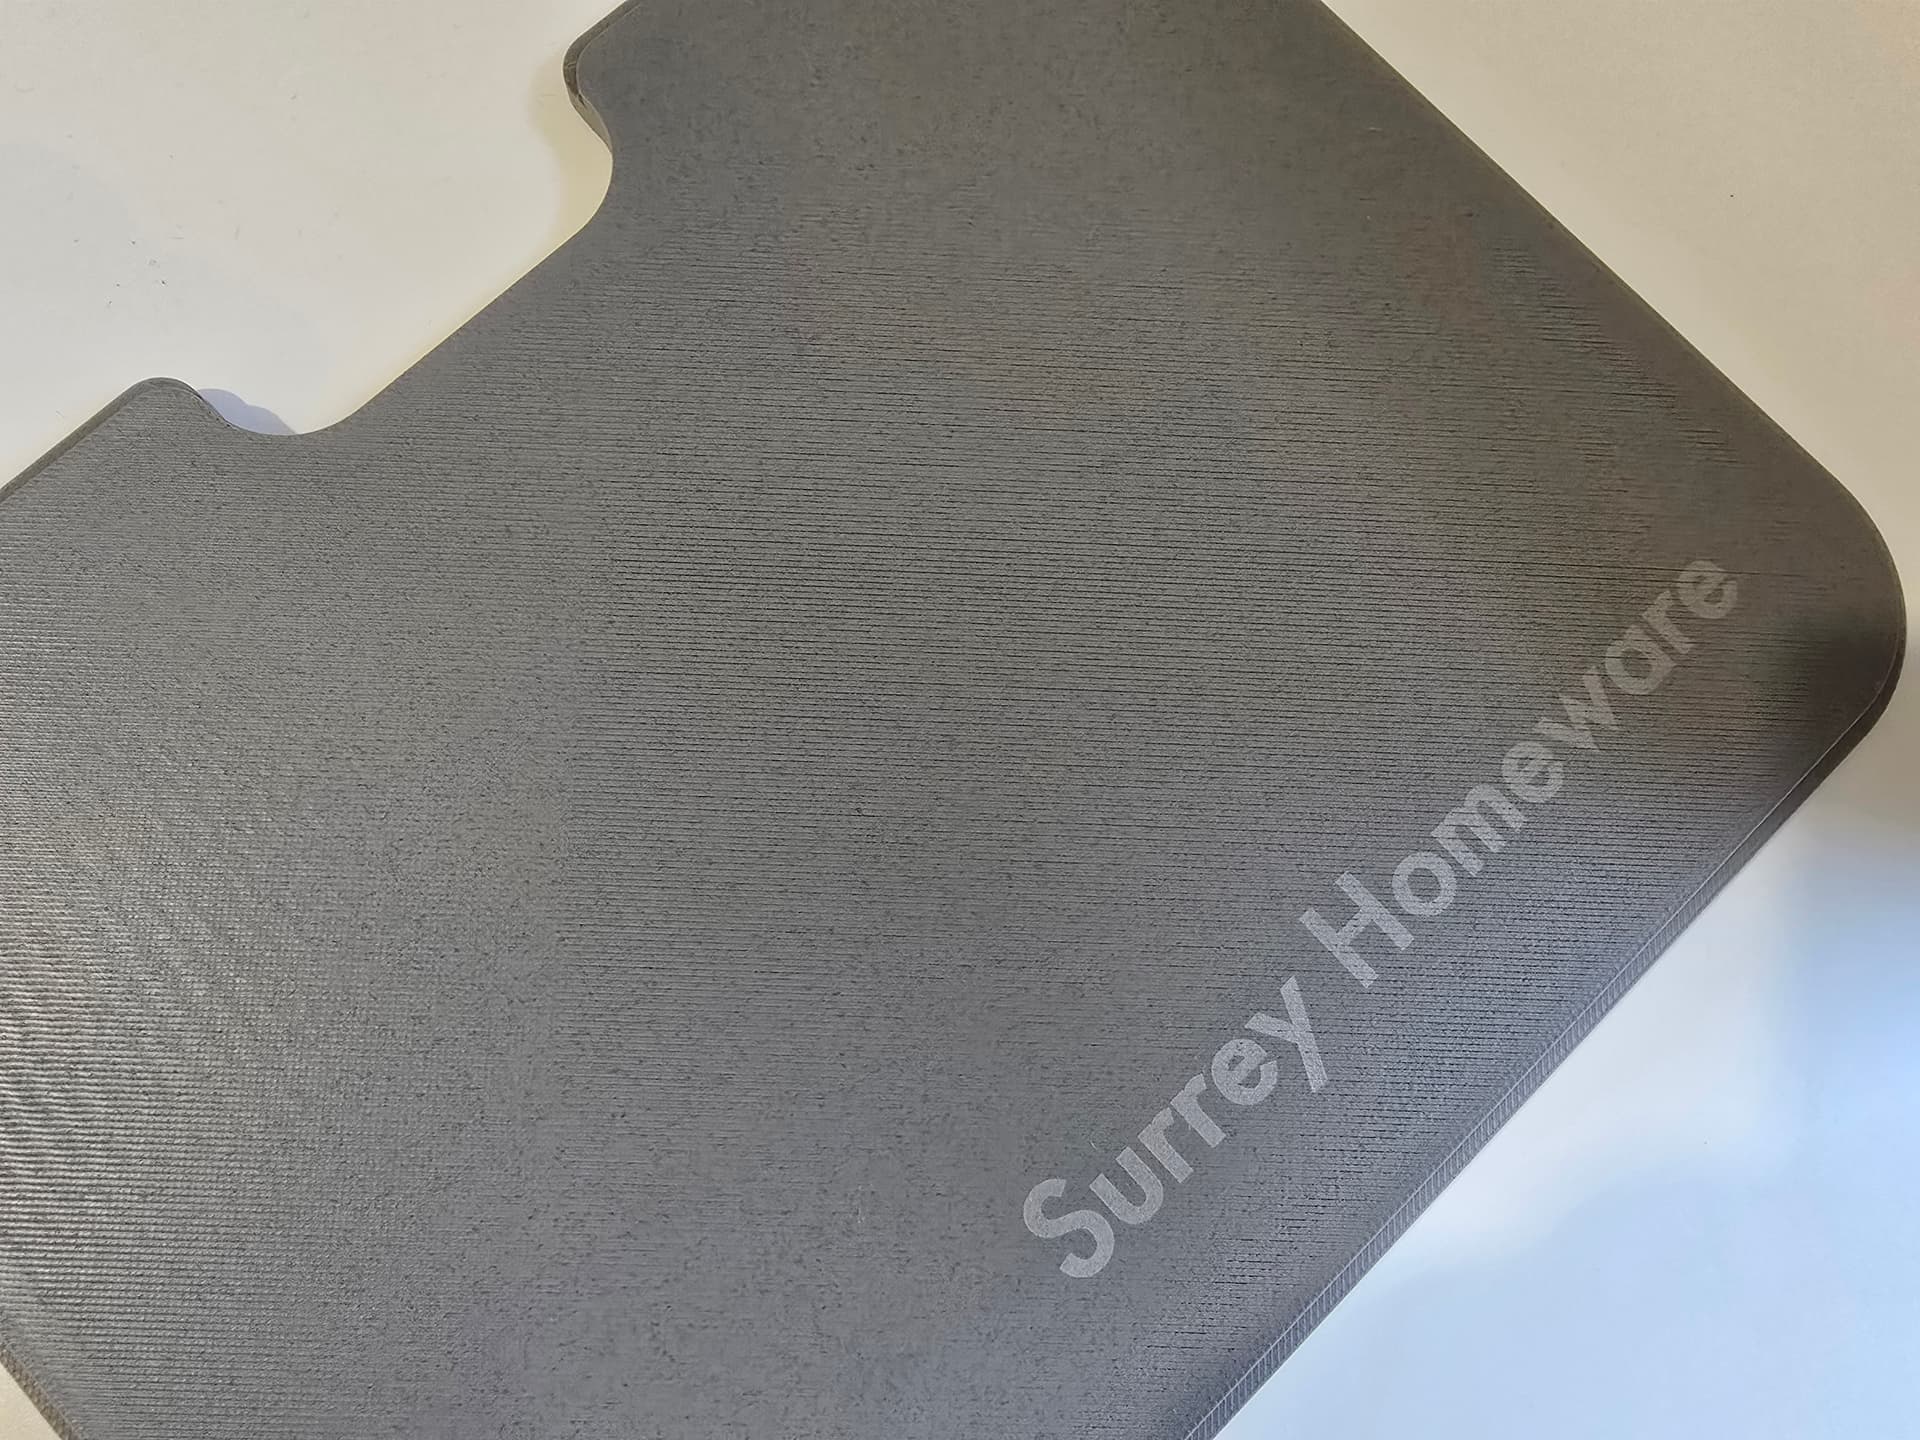
No one is talking about it, but you can directly engrave your PLA prints with your H2 laser module. It’s a fun way to add professional-looking branding, labels, or even QR codes to a print. Laser engraving is quick, so it only adds a minute or so to your production time, and the results can look a lot clear than 3d-printed text at small sizes.
The feature to engrave PLA prints is buried in Bambu Suite and is a little tricky to figure out the first time. Here’s what worked for me:
- When choosing the cutting material for your project, click on the “More materials” link at the bottom of the list:
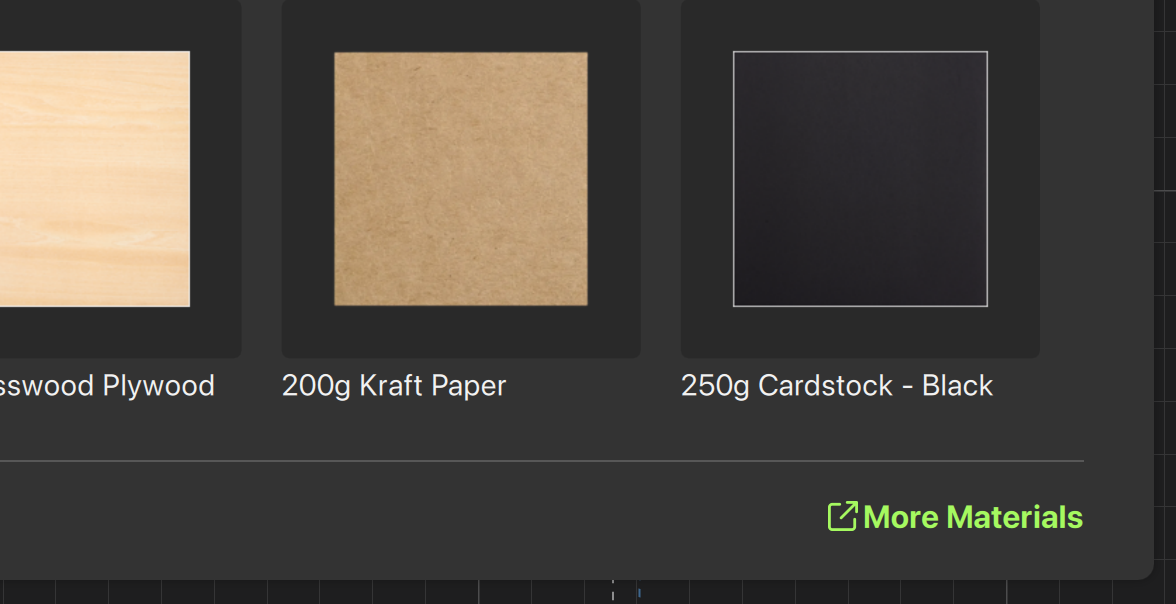
From there, click the “3D-printing materials” button, and you will be shown a list of PLA colors that are supported.
This part is really important. You can only engrave the colors listed here (more or less). Because of the wavelength of the blue laser, some colors just won’t engrave at all. So try all you want, but you are never going to be able to engrave white PLA.
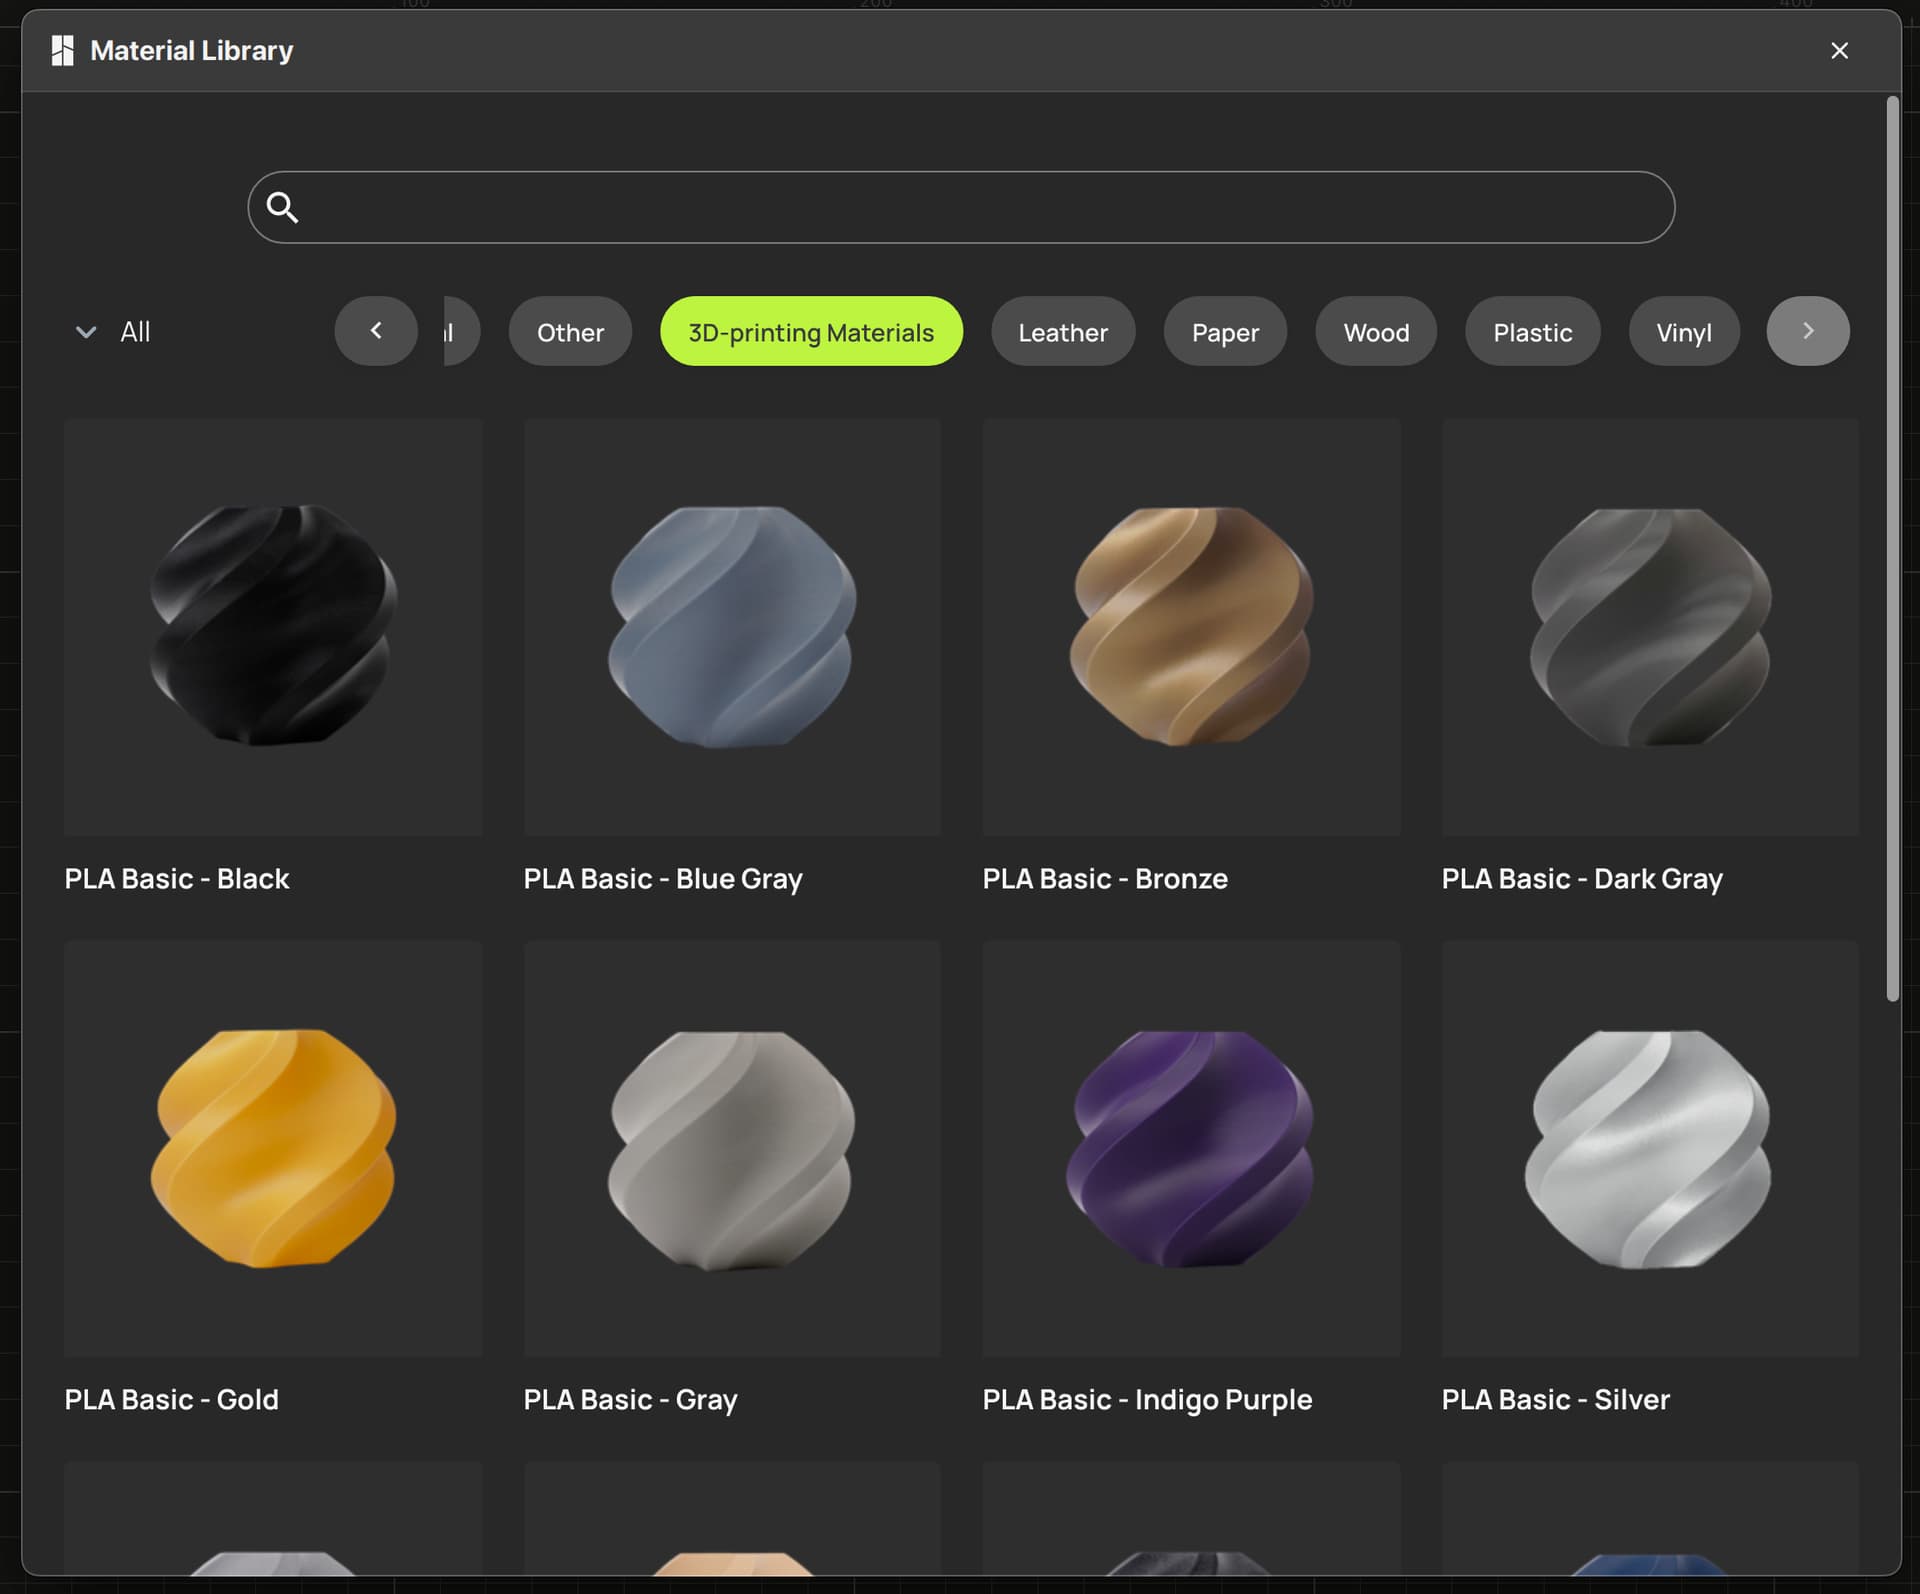
Choose the profile that matches your print’s filament. If you don’t want to experiment, use the exact matching Bambu filament for your print.
Of course you can try engraving other brands of PLA with different coloring, but you may have to try a few different pre-sets in the list to find the one that works the best for your material. For example, Bambu provides three different “gray” material pre-set that each use wildly different laser power settings. The “PLA Matte - Ash Gray” worked great for me on a Sunlu gray print, while the “PLA Basic - Gray” didn’t do anything at all.
- You absolutely must, must, must measure your part’s height to focus the laser!
If you just click “make”, your machine will assume that your PLA part is 1mm thick, so the laser won’t be focused and you won’t even be engraving in the correct spot.
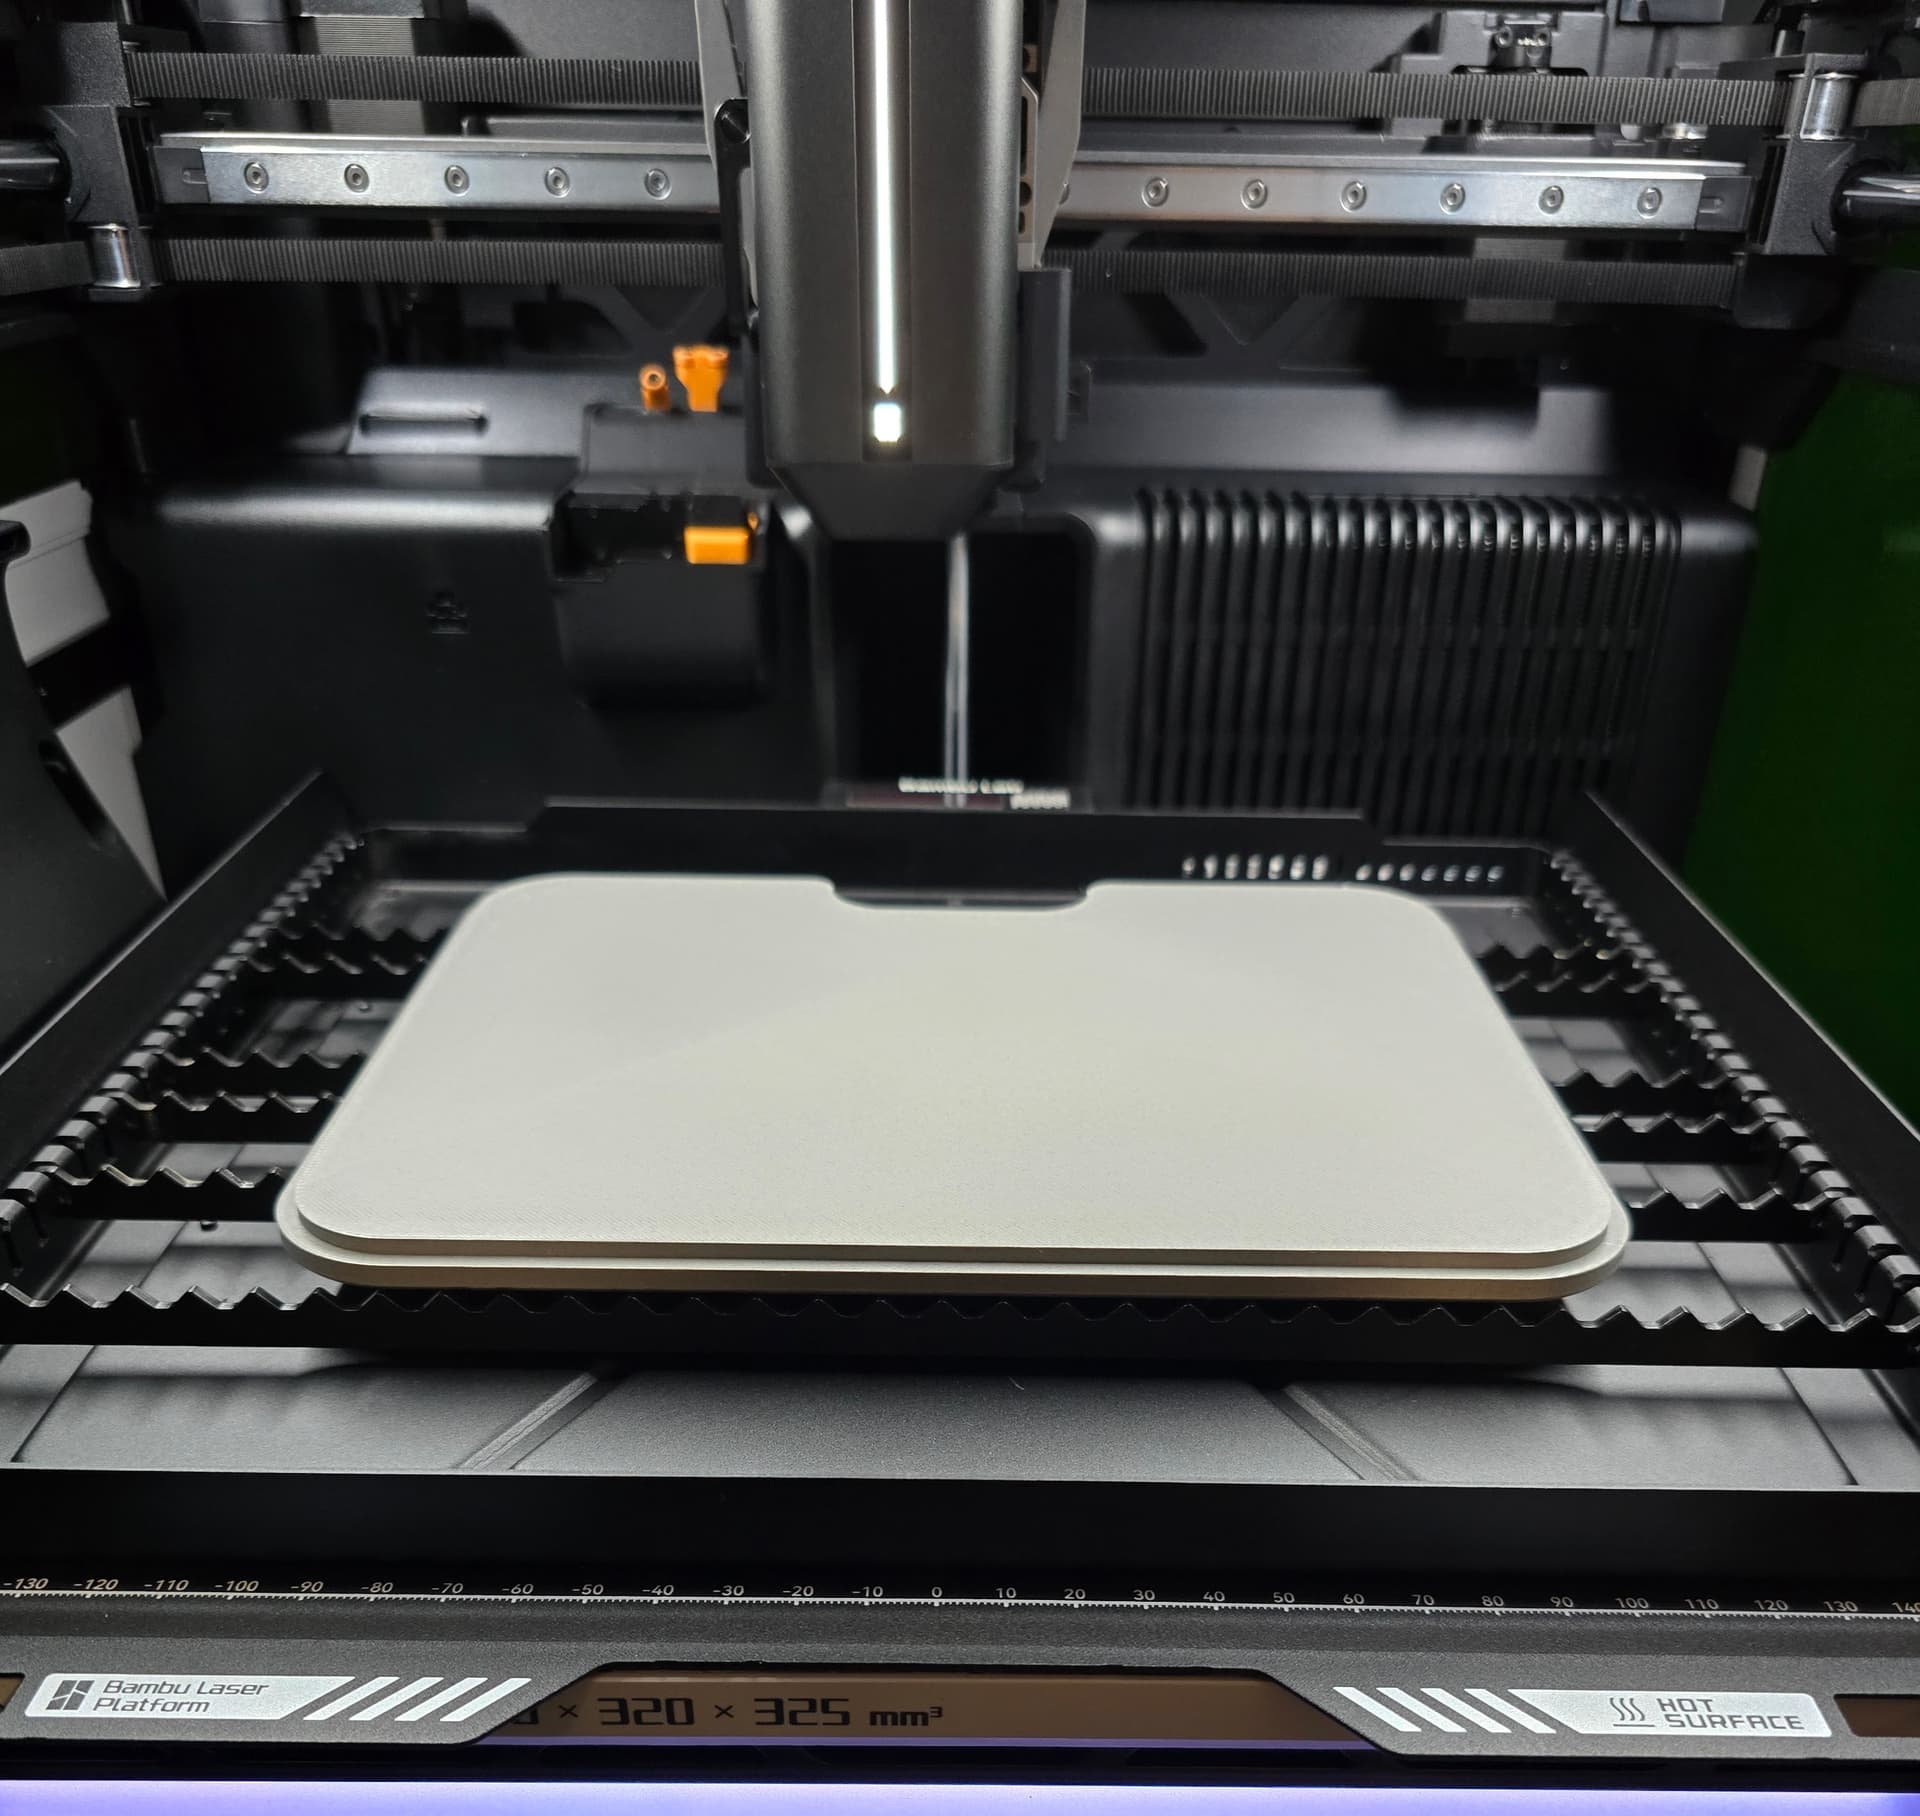
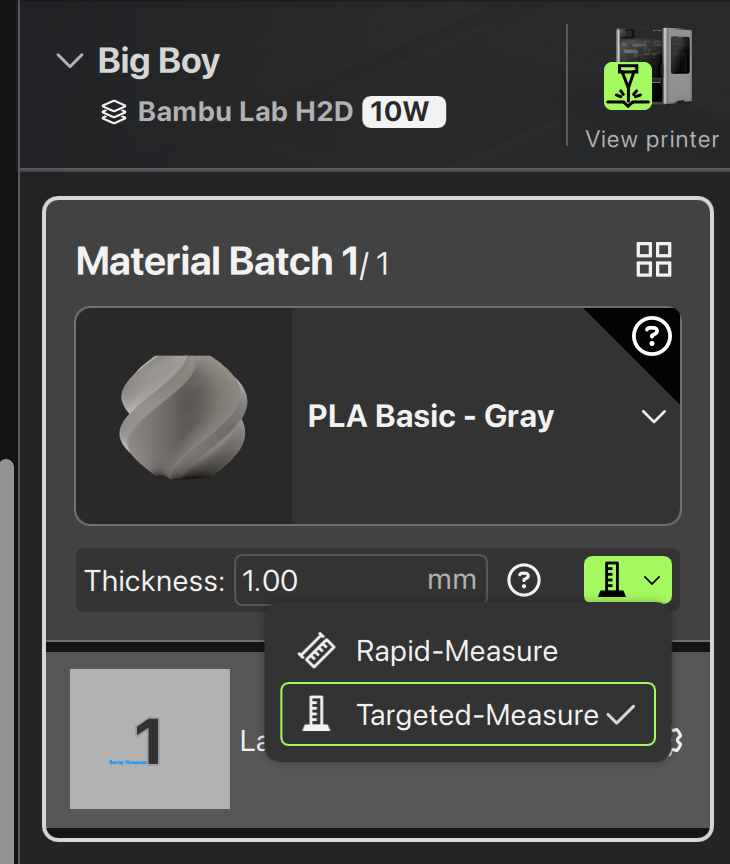
In “Prepare” tab, you need to use the “Targeted-Measure” tool to measure the exact height of the place you want to engrave. To do this, first put your part right in the middle of the cutting area. The machine can only measure in the middle area:
Next, click “Targeted-Measure” in the measure dropdown:
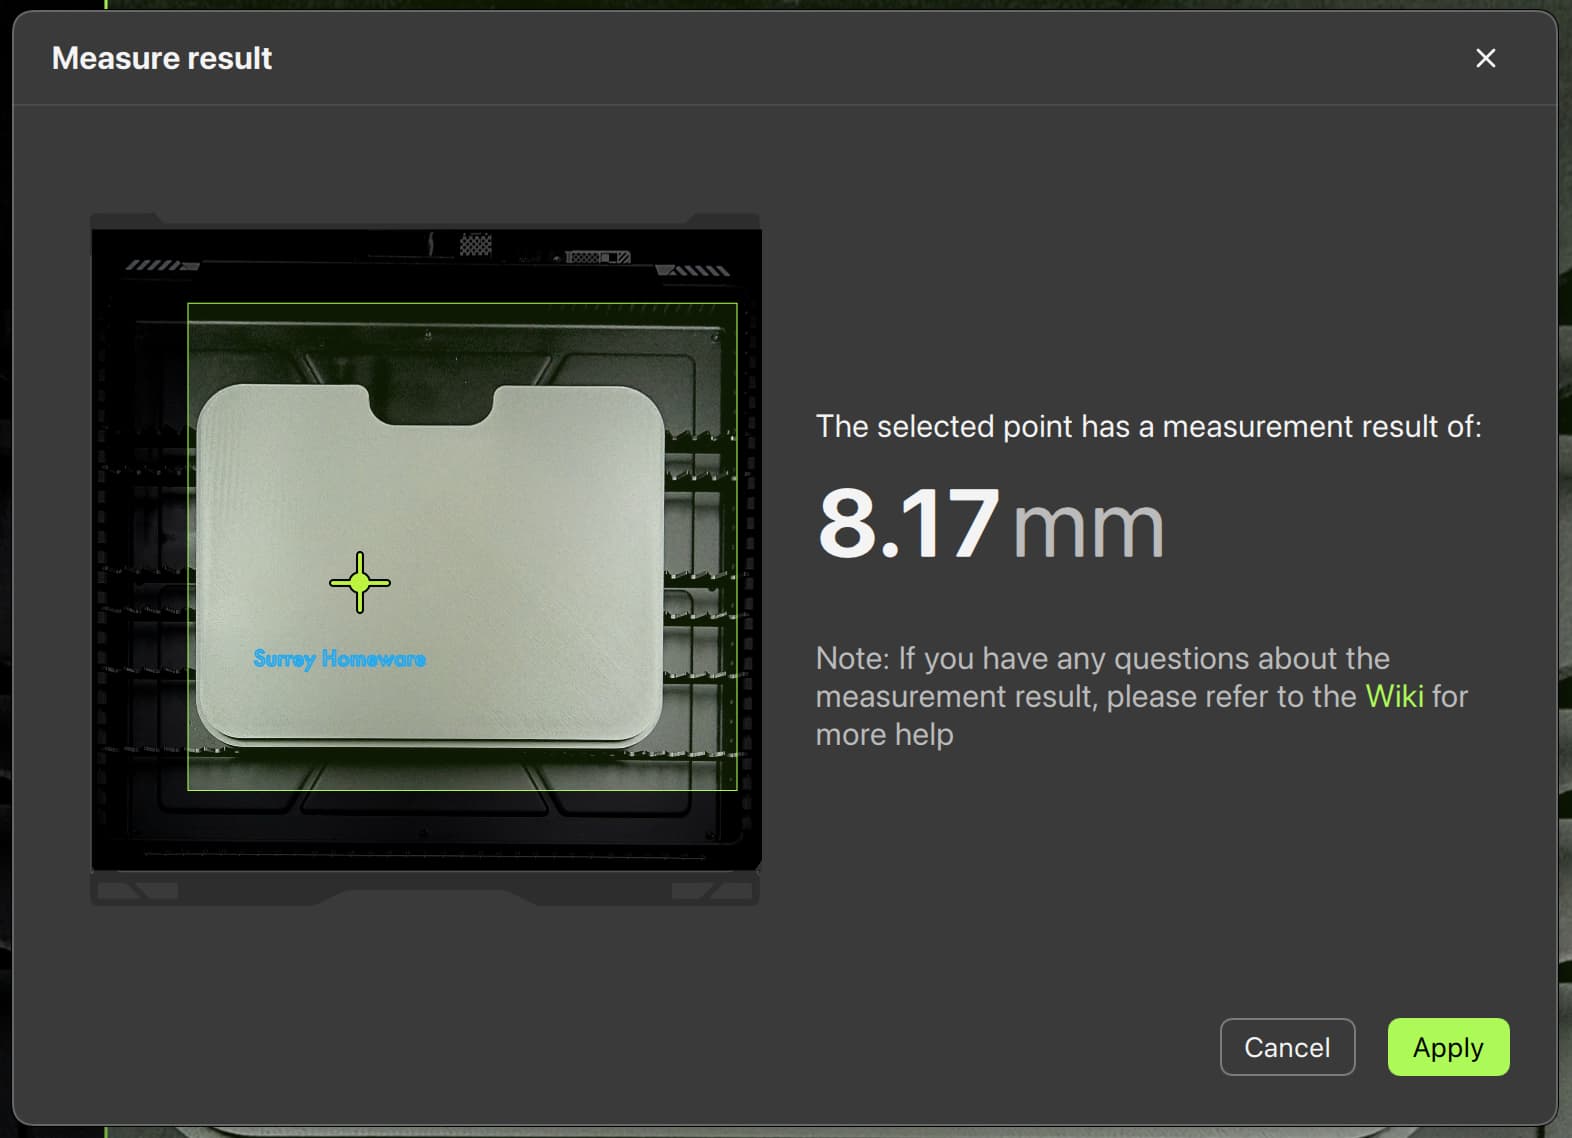
Then, choose the actual spot that you plan to engrave, and the machine will measure it for you. This will work best with flat surfaces.
Also, notice that the preview of the part will shift up or down significantly after you measure because the preview compensates for camera perspective. So make sure to reposition your engraving objects after the height is set! Otherwise, your engravings will end up too high or too low on the part.
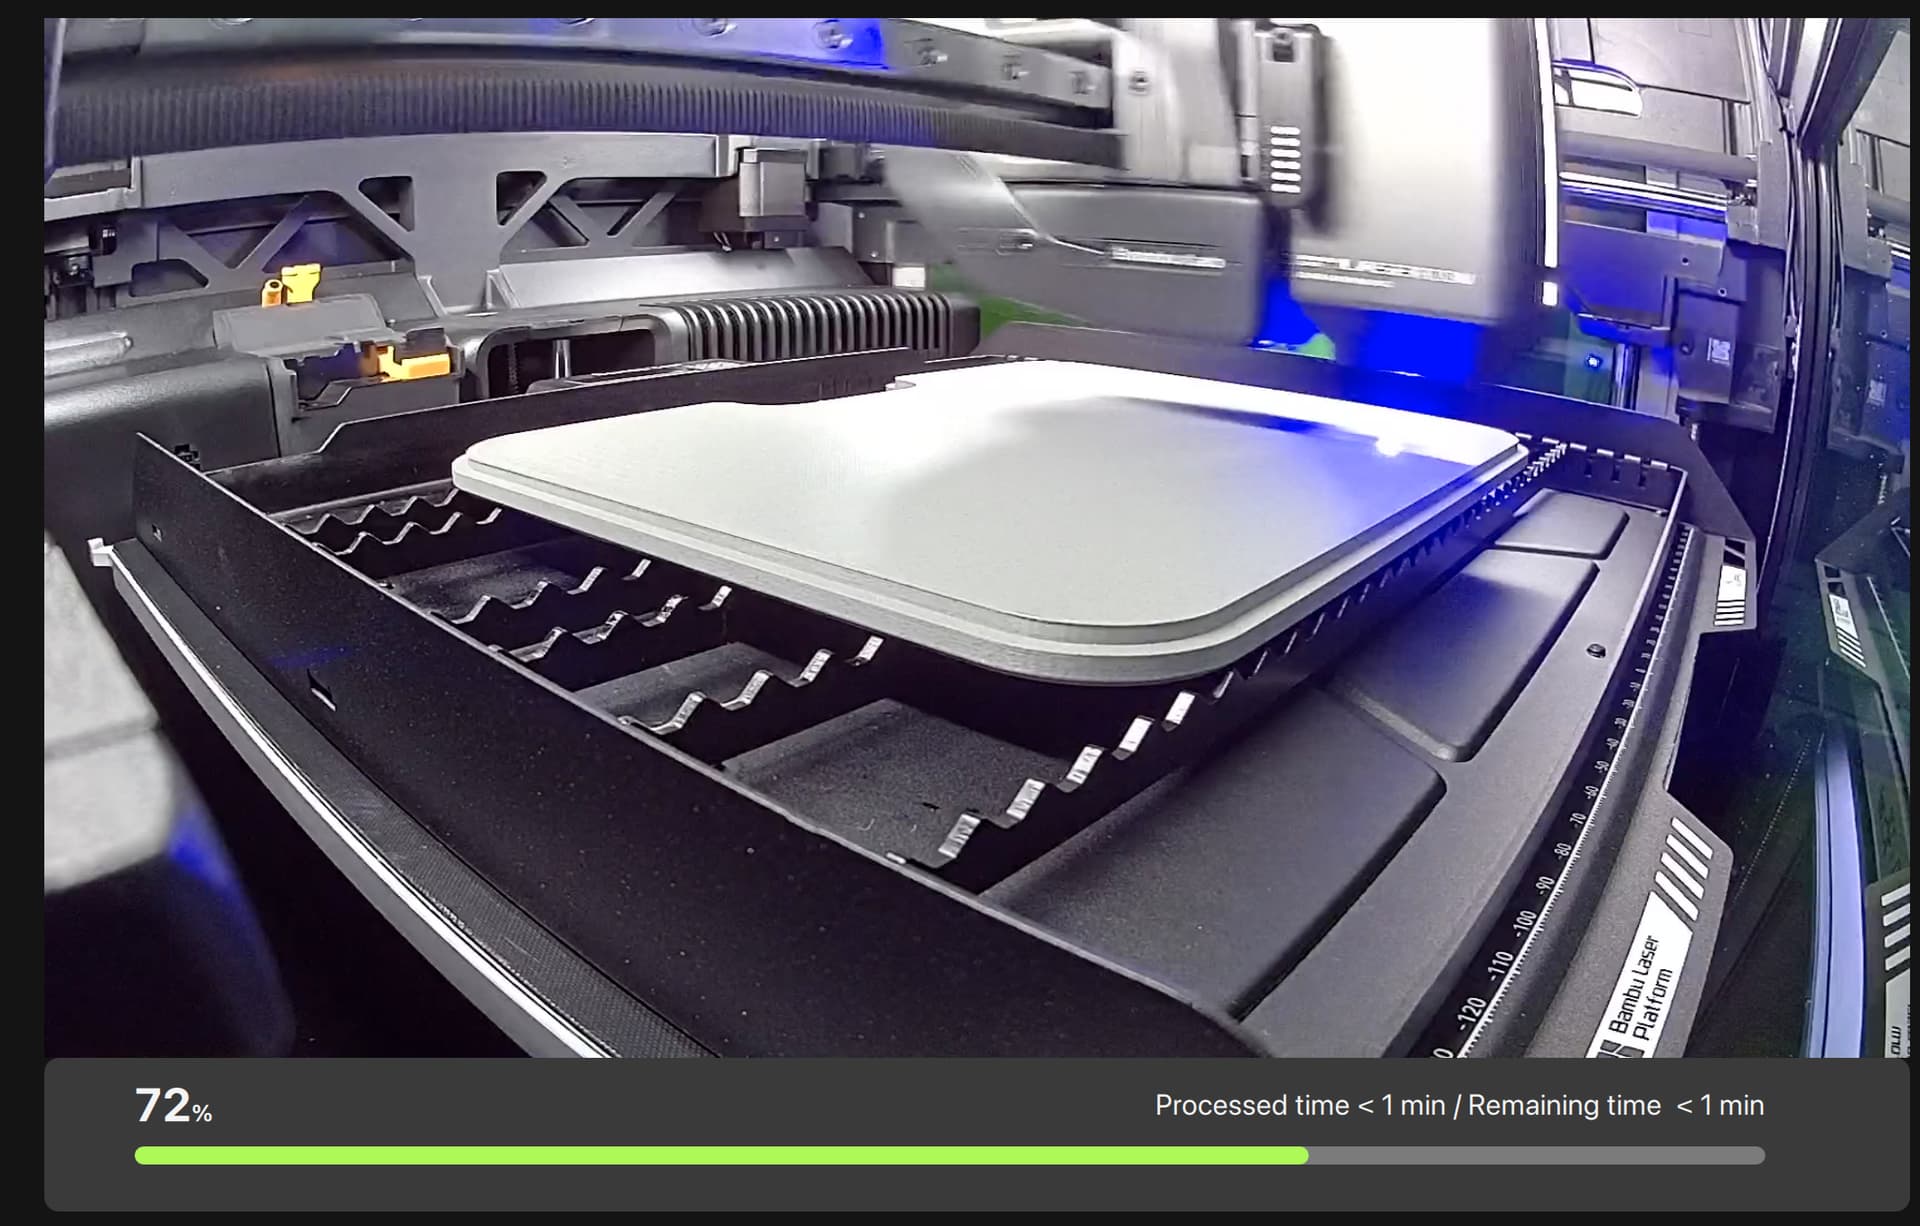
Finally, click “Make” and see what you get!
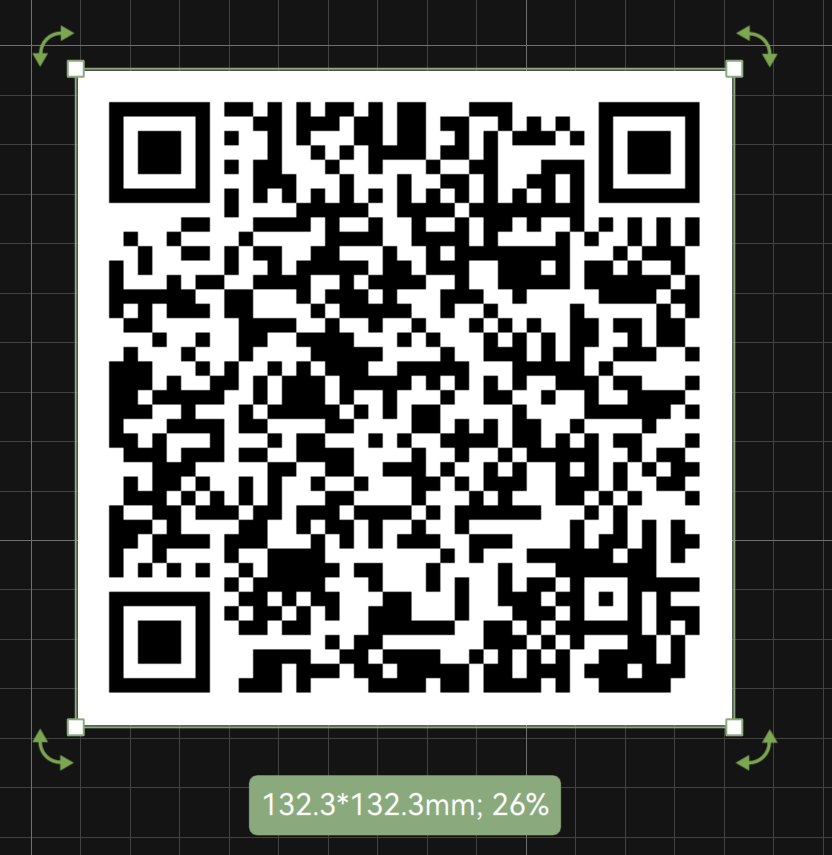
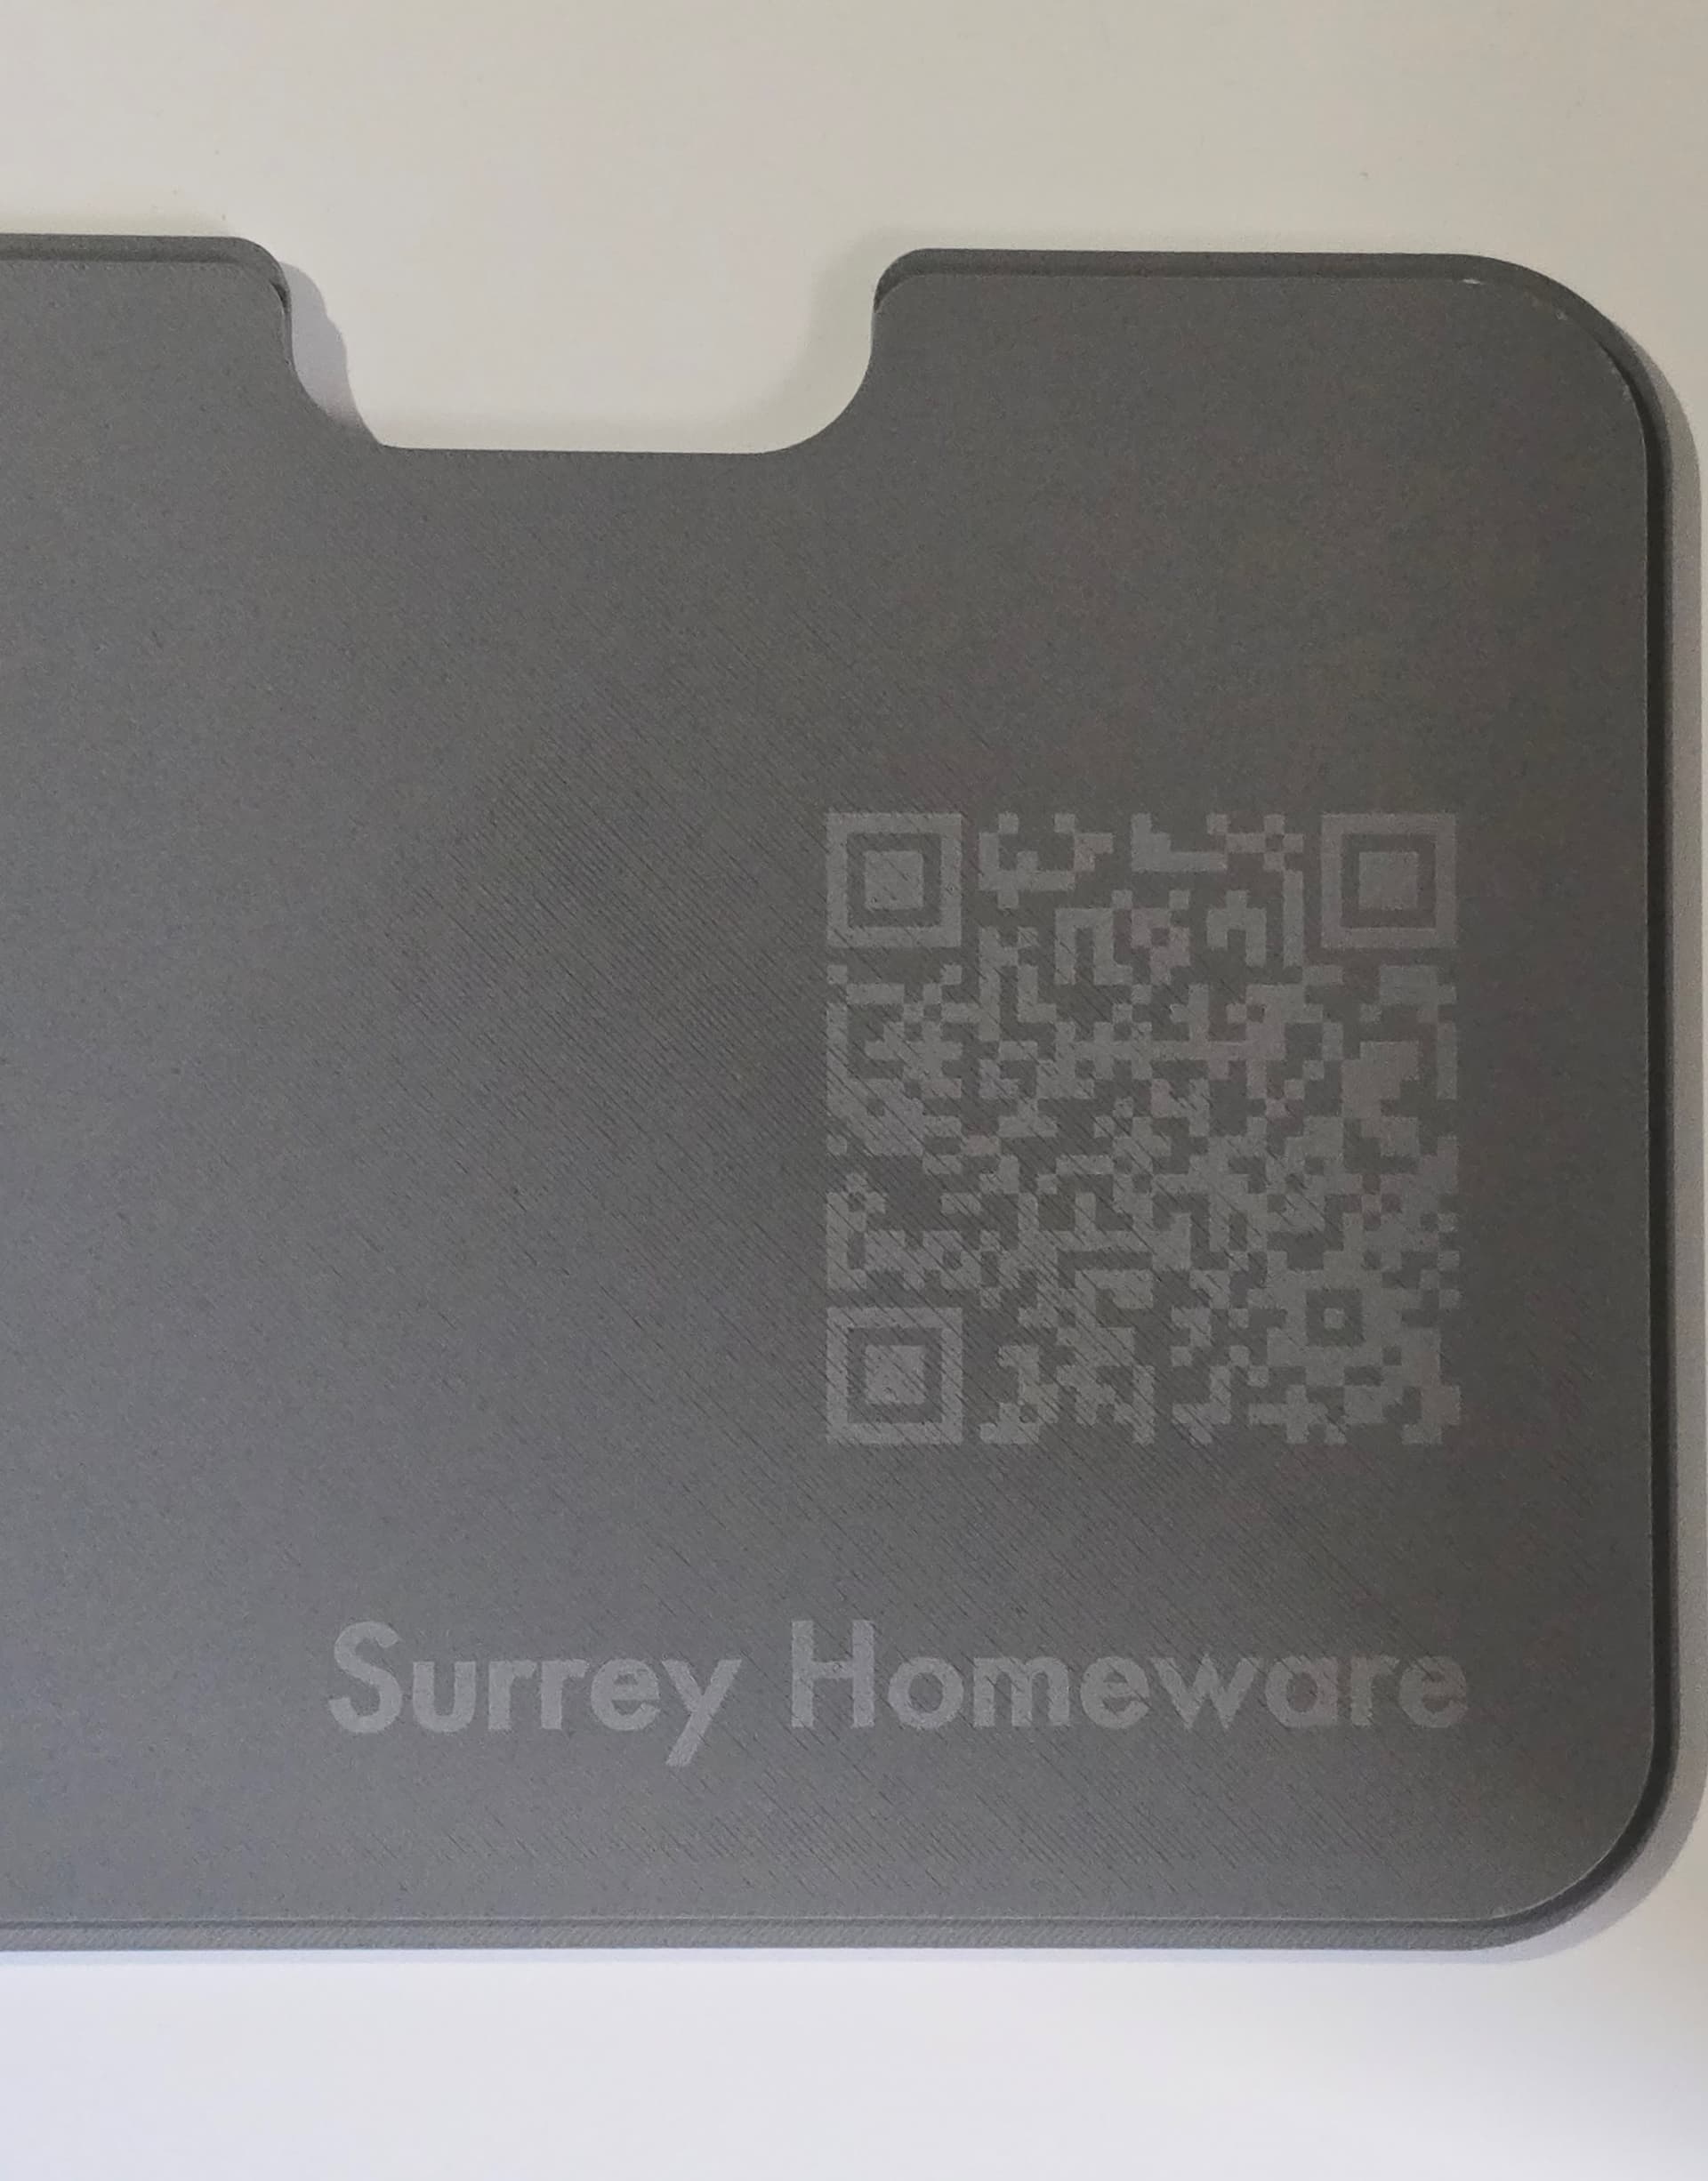
You can even use a QR code generator website to create an SVG image of a QR code and engrave that and get a scannable code:
It might take a few tries to find the right settings. But once you dial it in, you can get some great results.
These are the problems I had getting this to work:
- The engraving was in the wrong place or not very visible because the height of the object wasn’t measured before cutting.
- The engraving was not visible at all because the power settings were not strong enough for the color of PLA or because the color of PLA wasn’t one that a blue laser can etch. Play around with different settings or stick to the offically supported filaments.
- Etching on very dark colors like black or etching on a print surface that came off a textured print bed gave mixed results. I got the best results with darker colors and smooth surfaces.