How to Prevent This "Hump" and Stair-Stepping on Crown of a Helmet?

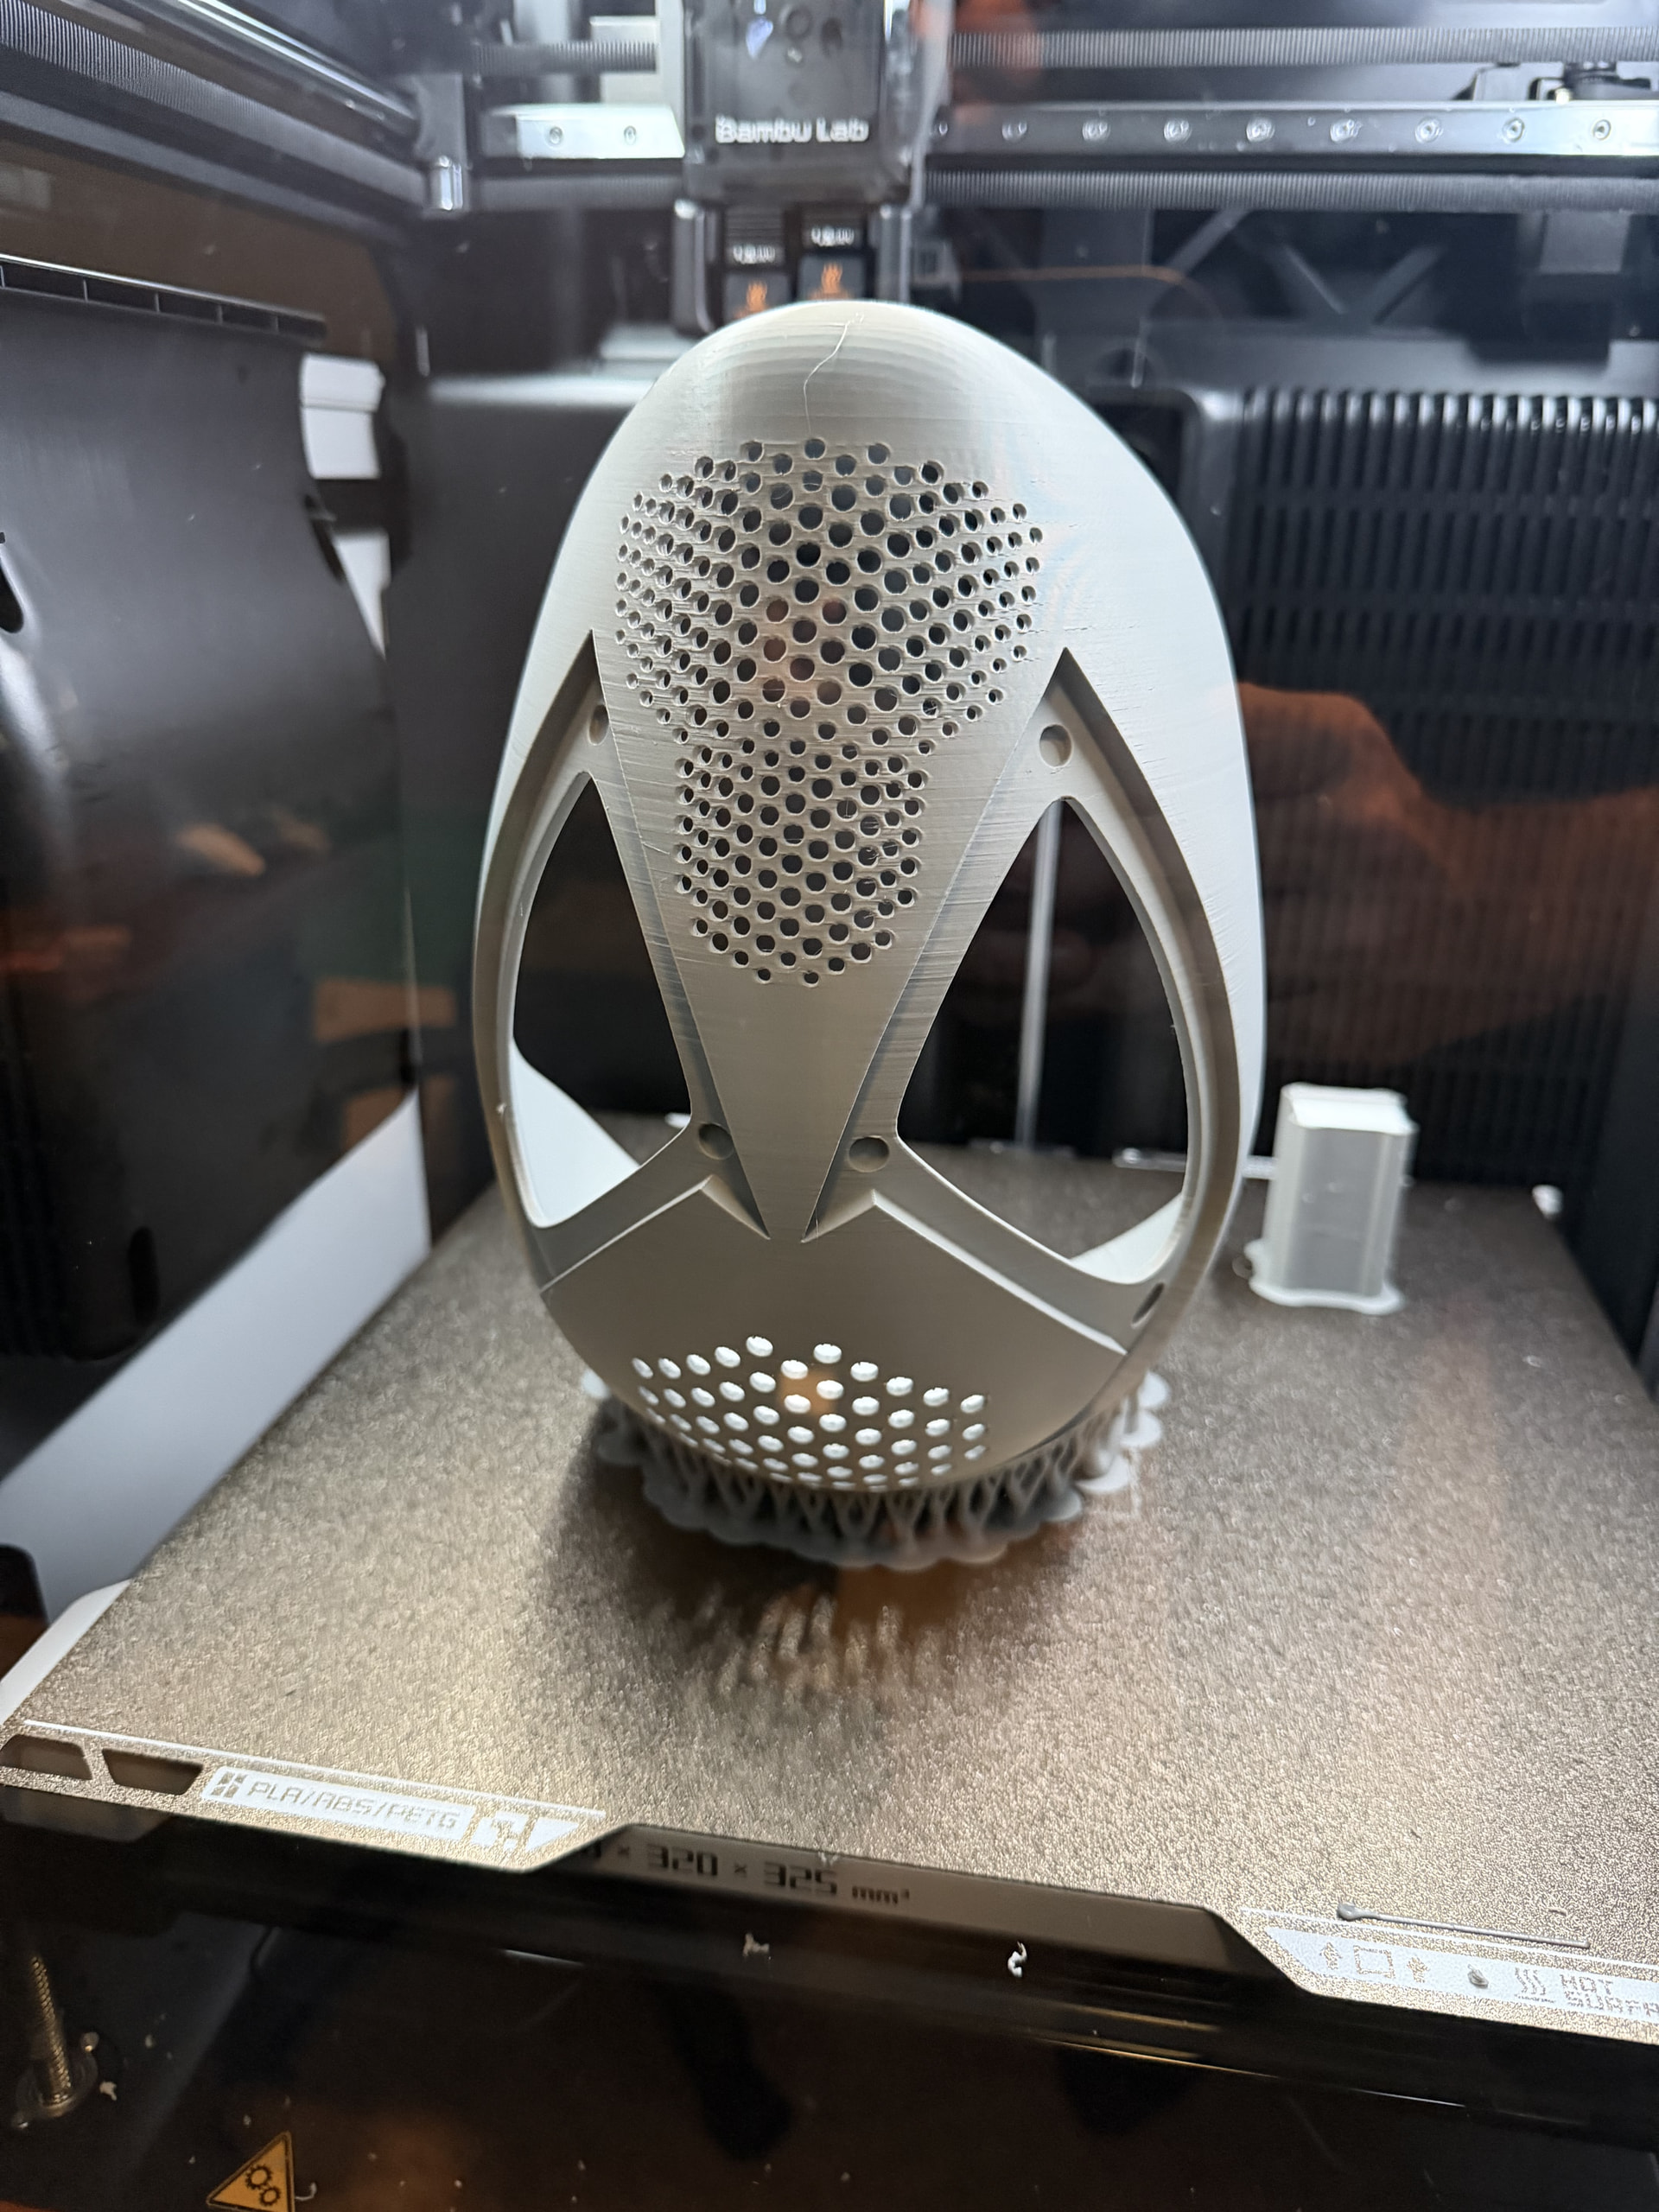
I recently printed a Spider-Man faceshell on my Bambu H2D. Overall I’m really happy with the print and plan to keep/use it, but the crown is giving me two issues I’d like to work on improving to prevent this in the future.

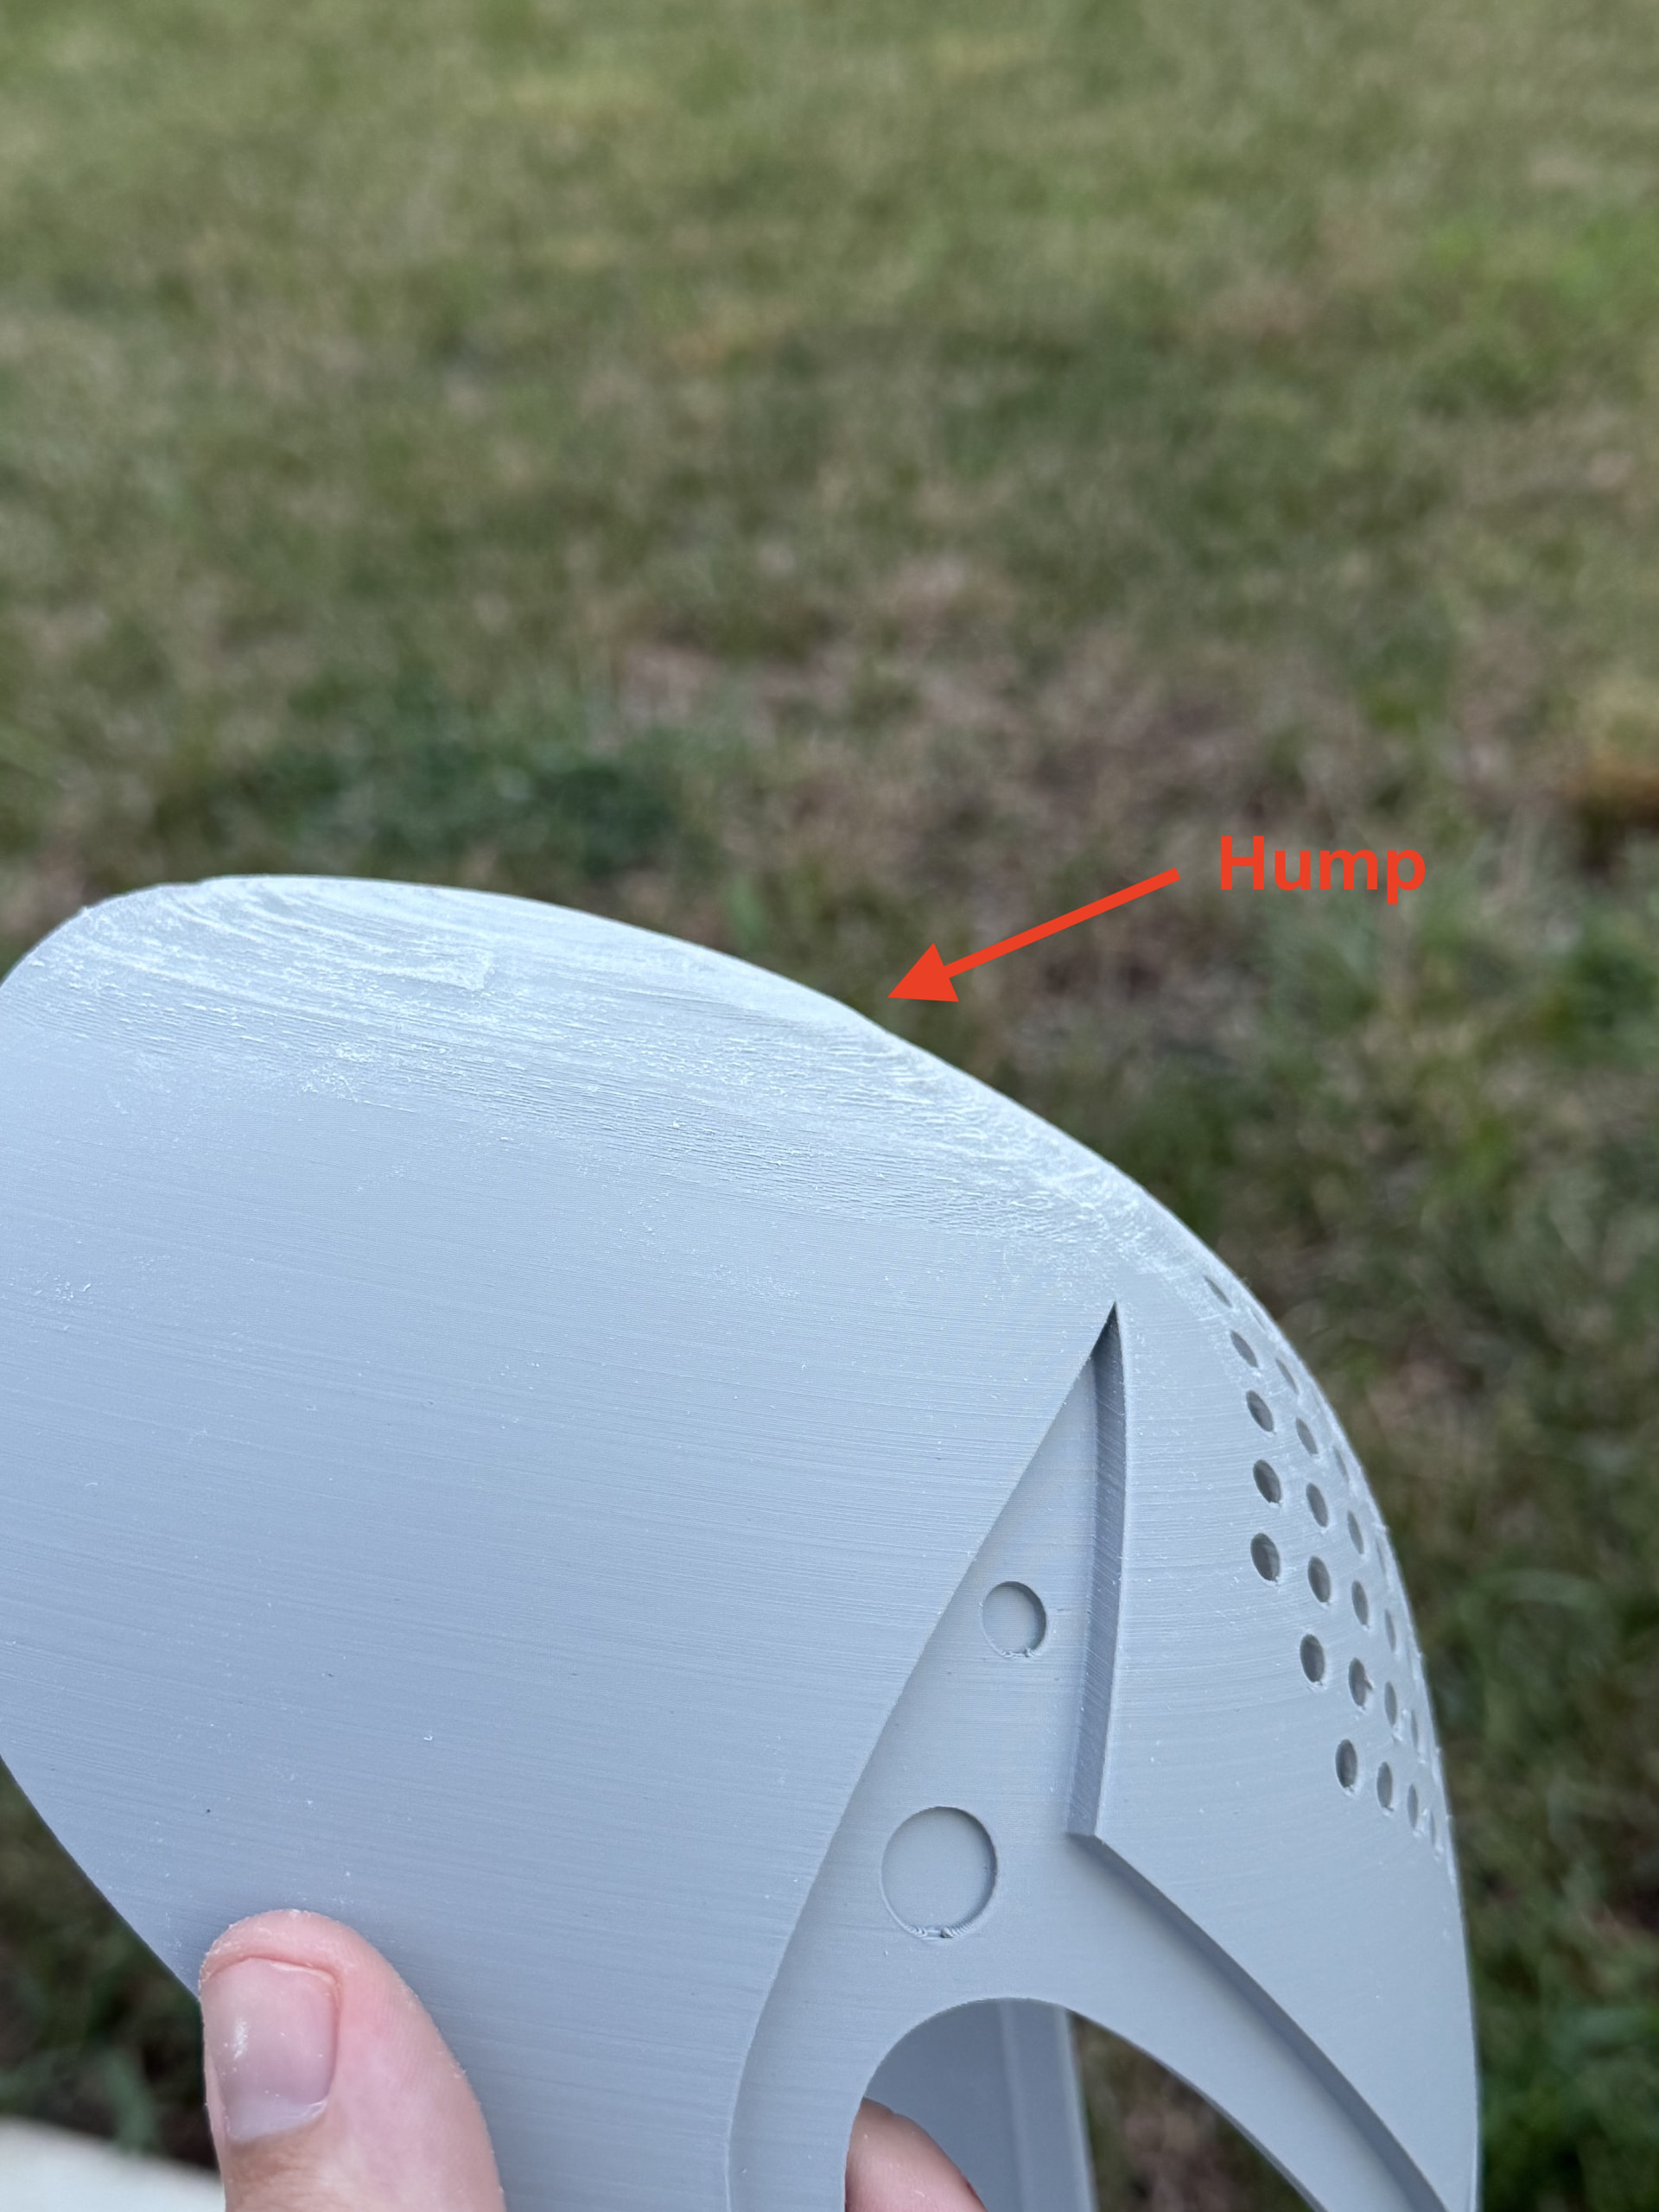
  1. Very noticeable stair-stepping/ribbing around the crown
  2. A broader raised “hump” where the crown transitions into the smoother part of the shell

I printed it chin-up / crown toward the build plate, with supports concentrated only around the crown. The rest of the shell printed extremely cleanly, so I like the orientation overall.

Current setup:

  • Bambu H2D / 0.4 mm nozzle
  • Bambu PLA Basic
  • PLA support body + Bambu Support for PLA interface
  • 0.20 mm first layer / 0.16 mm layers thereafter
  • 3 walls
  • Arachne + Precise Wall ON
  • 5% Gyroid
  • 100 mm/s outer wall
  • Tree Manual / Organic / Build Plate Only
  • 0.00 mm Top Z distance
  • 3 interface layers
  • 0.00 mm interface spacing
  • 6 mm outer brim

To address stair-stepping, I plan to use variable layer height next time with more layers on the crown. I feel pretty good about that, unless you have other suggestions!

What I’m really curious about is the raised hump. It’s not just layer ridges — the entire crown transition seems slightly raised compared with the intended smooth curve. Since this crown was at the beginning of the print and was sitting on the support interface, I’m wondering if this could be related to the support/interface transition, cooling, deformation of those early supported layers, orientation, or something else entirely.
(post deleted by author)

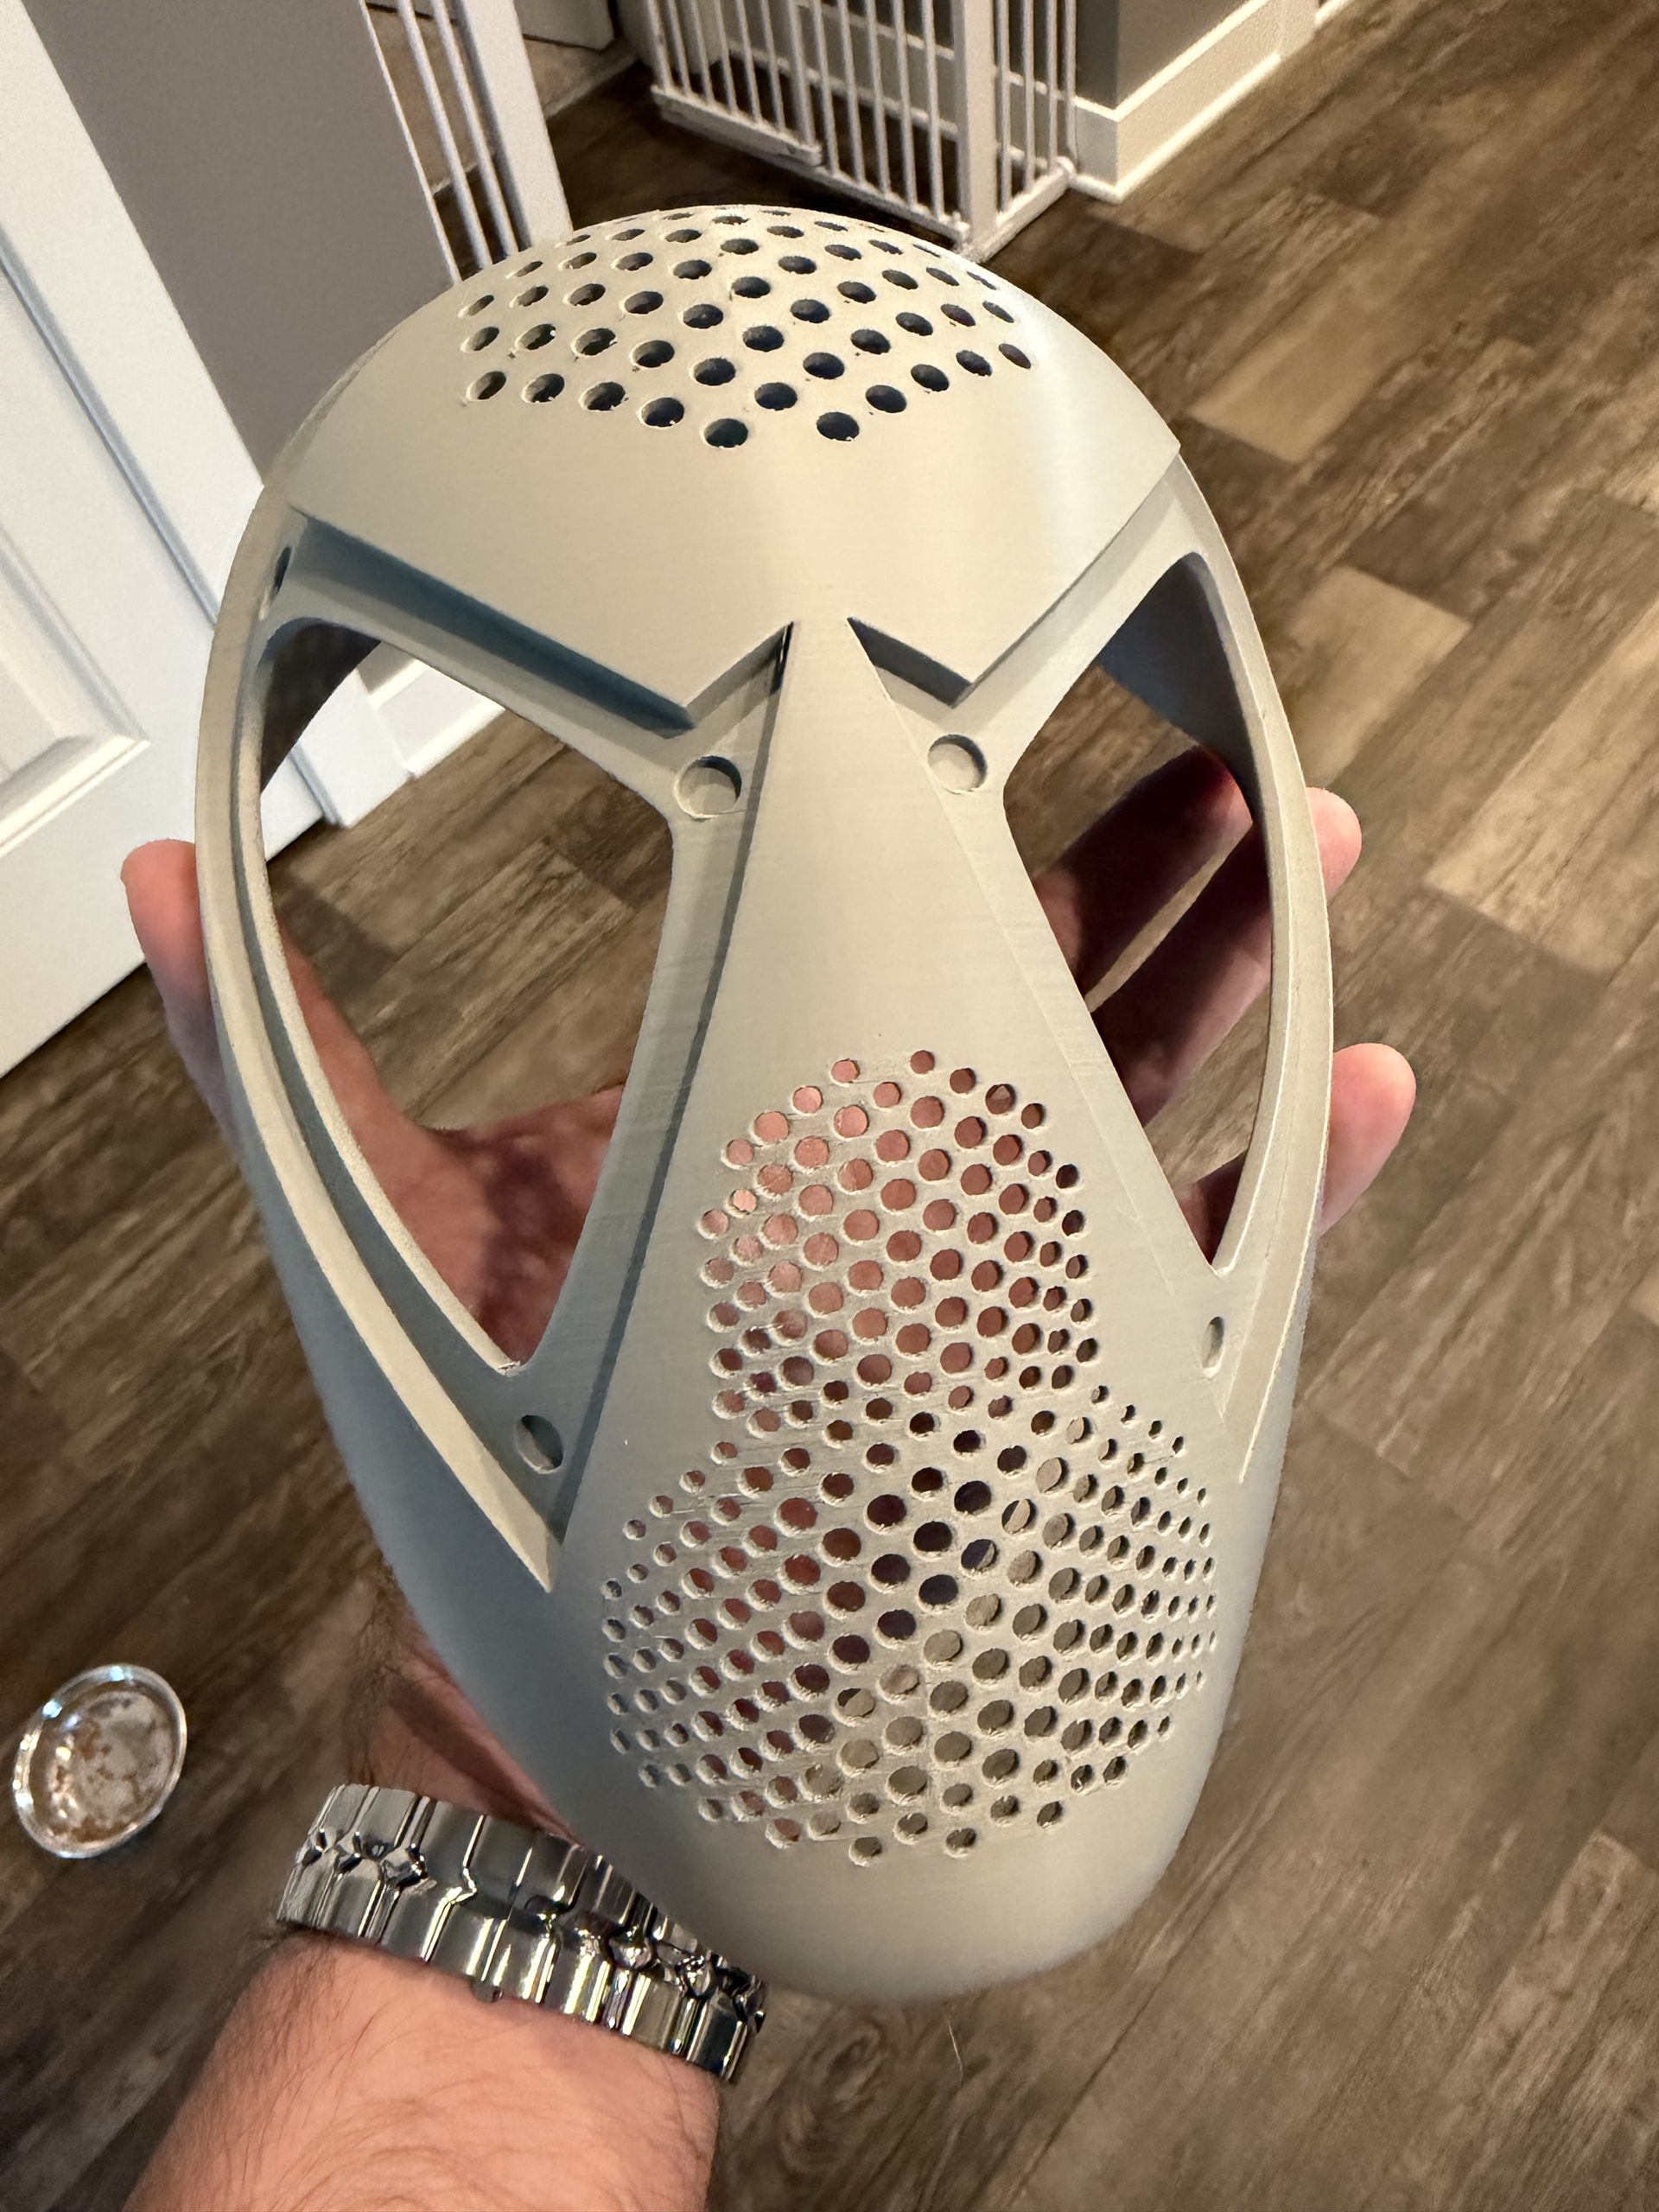
Change the orientation to picture 4, take the cost of a reprint in support, if the gap/angle between layers is to wide it will continue to leave steps

Yes, variable layer height and support for the top. Maybe not really applicable for this object but adding a minimal amount of fur helps to hide steps on top of round objects as well.

Since the mask is kind of flat, printing it laid down might help too, the steps will be distributed over a larger area and using variable layer height will work better.

Hey! Thank you so much for the thorough reply! Can you elaborate on it having no supports? The area with all of stair-stepping and hump are localized exactly where I did put supports! Unless I’m misunderstanding? The chin printed out fine (for my standards), it was the crown where all of the supports are at the bottom that has the hump/stair-stepping. Again, I may be misunderstanding what you’re telling me though! I am new to printing, if you can’t tell already lol. Appreciate the feedback, truly!

When you say to change the orientation to picture 4, are you talking about the one where I’m holding it in my hand? So print it where the face is face-up on the hotbed? Do you foresee me having any other problems if I re-orient that way? Thanks for the suggestion!

That is an opinion , its what i would try , with an added benefit of, any ugly marks would be inside the mask and easier to post process with a heat gun

Apologies, I got confused about the orientation. I thought you had printed it with the trouble spot pointed upward.

I’ll try again.

Supports work by placing material “close” to where the printer is going to be printing an extreme overhang, so the overhang isn’t able to fall before the extrusion cools and hardens sufficiently.

When supports are the same material as the print, there is a need to leave some space between the support and the part, otherwise the support will be permanently joined to the part. How close you can get is a matter of tuning, the default settings are generally safe.

When you use a interface material, the support goes right up to the part, and when hot there is a slight bond between the part filament and interface material, but it will always break free once cooled.

All of this assumes sagging, which is usually what’s happening with overhangs, but there’s another overhang issue - upward curl.

In some conditions, usually very thin layers, large perimeters, and extreme overhangs, the overhang extrusion can actually curl upward instead of sagging downward. This is related to the tendency for materials to shrink as they cool, where they’re restrained on the bottom and not on top they’ll shrink more on top and that causes a curl.

That’s what happened here. I bet the printer sounded awful when it was happening, too.

To fix this…first, make sure your filament is super dry. You may want to use “Support for PLA/PETG” instead for your interface, i find it has better temporary adhesion and may help reduce cooling. Increase chamber temp. Also, counterintuitively, very thin layers can make the problem worse.

Okay! I’ll give it a try, you’re not the only one to make that recommendation!

I do have a follow up question. In my VERY limited experience - I’ve historically gotten “smoother” faces on the vertical Z axis, which I think is why the faceshell itself mostly looked pretty smootH aside from the crown.

If I orient it flat on the bed, will it run the higher risk of falling victim to the “stair stepping” that was seen on the crown? And maybe I could address some of that by using variable heights but then I couldn’t two different materials/prime tower if I do that.

Sorry for the back-and-forth but I appreciate the feedback!

Ditto… 25 chairs …