Hi all , im trying to put text on a ring, but after i slice only the LH nozzle is showing filament. Can someone give me a tutorial to sort this thanks


Hover over the slice button and select custom, drag each filament to the nozzle you want.
Each filament will need to be in an AMS that’s connected to the correct nozzle, or if externally feeding each will need to be pre-loaded to the correct nozzle prior to print.
Once the Filament Track Switch is enabled for the H2D the first option goes away and a single AMS or AMS2Pro can feed both nozzles.
Hi, did you assign a filament to the text part(s) in the slicer, or paint the letters? Is the model actually using both filaments?
Unfortunately I don’t know anything about how SketchUp exports things these days (haven’t used it in a decade or so). Is the text a separate body? In some cases you can r-click on the imported object in the slicer and break it up into “parts” which can then get filament assigned to them. But it really depends on how it was structured in the 3D design and exported.
Anyway it would be useful to see the object list of that project, or perhaps attach the 3MF project file here if it’s not a secret.
-Max
PS. Oh, I see a snippet of the object tree in one of the photos with some orange filament applied… are there part(s) still using the gray? Must be, I guess…
One possibility is that the gray part(s) override anything set to orange because they’re later in the object tree. You could try re-arranging the parts within the parent object (drag/drop).
If you look at the 3rd picture, its set to custom and a filament for both nozzles
OK, but what’s actually orange in the model? I see a pure grey part, Studio is going to treat this as a one-color print if there are no discrete features set to orange.
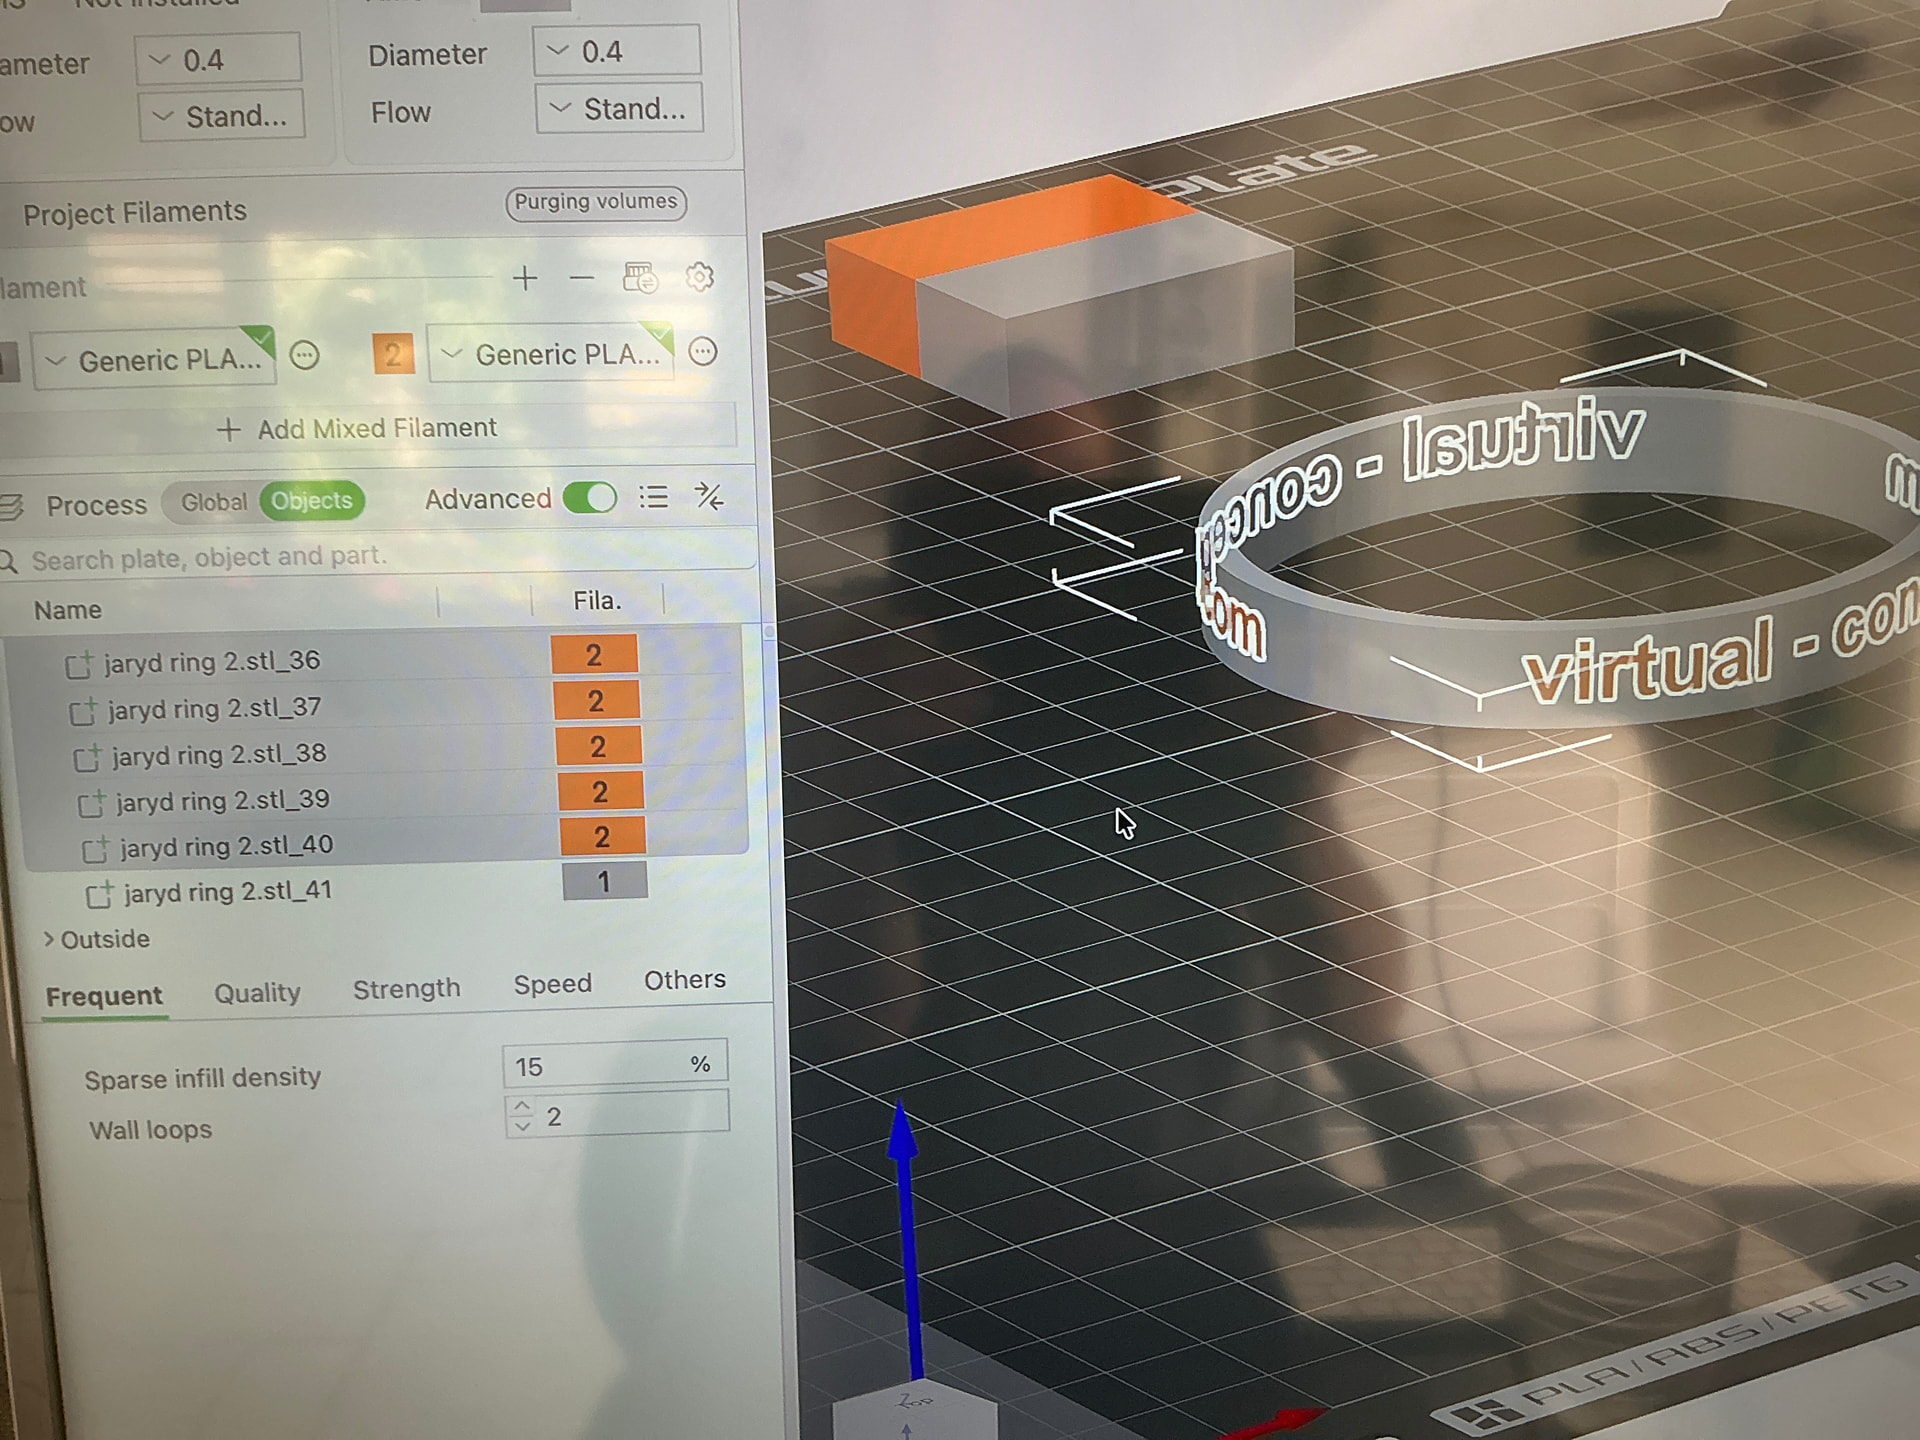
Everything seems ok , I slice it and it goes to custom and silver LH , gold RH, but when i send it only the LH shows up
Does the sliced version, in Preview tab, show the filament colors correctly if you select the “by filament” color coding? Does the orange show up there?
The information window should also show how much of each filament will be used.
If not, try dragging the last gray part all the way to the top of the parts list, so it is first after the parent object.
Another question is how thick (deep) are the text objects? If they’re too thin, eg. just 0.1mm on the surface, the slicer may be ignoring them because they’re thinner than a single line width. To fix that you could reduce the line width, but probably better to make them thicker/deeper in the first place.
HTH,
-Max
Are you slicing with Classic or Arachne? The lettering looks really small and the slicer may not be detecting it.
The letters are embedded in the ring 0.3, and extruded 0.6, the letters the e and c for example are 5mm high. Printing (or not) with a 0.4 in each nozzle
It says Marlin or legacy, cant see how to change to the other 2

So what do you recommend and is there much difference
That’s it , 0.3 is too thin for a 0.4 nozzle!!!
I changed to 1mm inside and out of the ring and it seems to be printing ok. Obviously a 0.4 cant make a 0.3 line
If that 0.3mm line is between 2 beads that have been printed before that, it will work perfectly.
But in most other cases it is definitely not preferred.