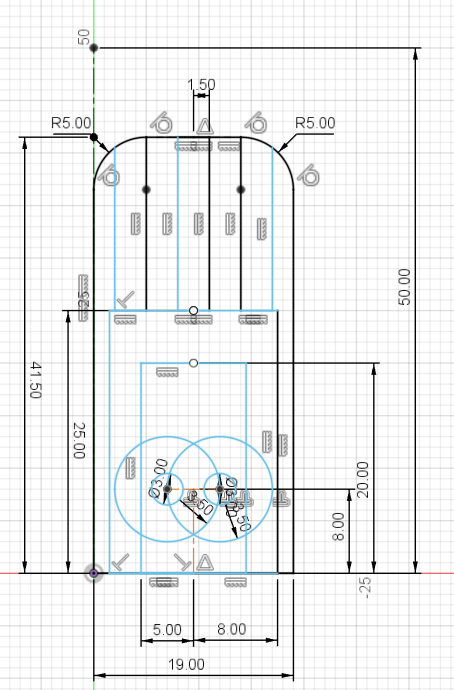
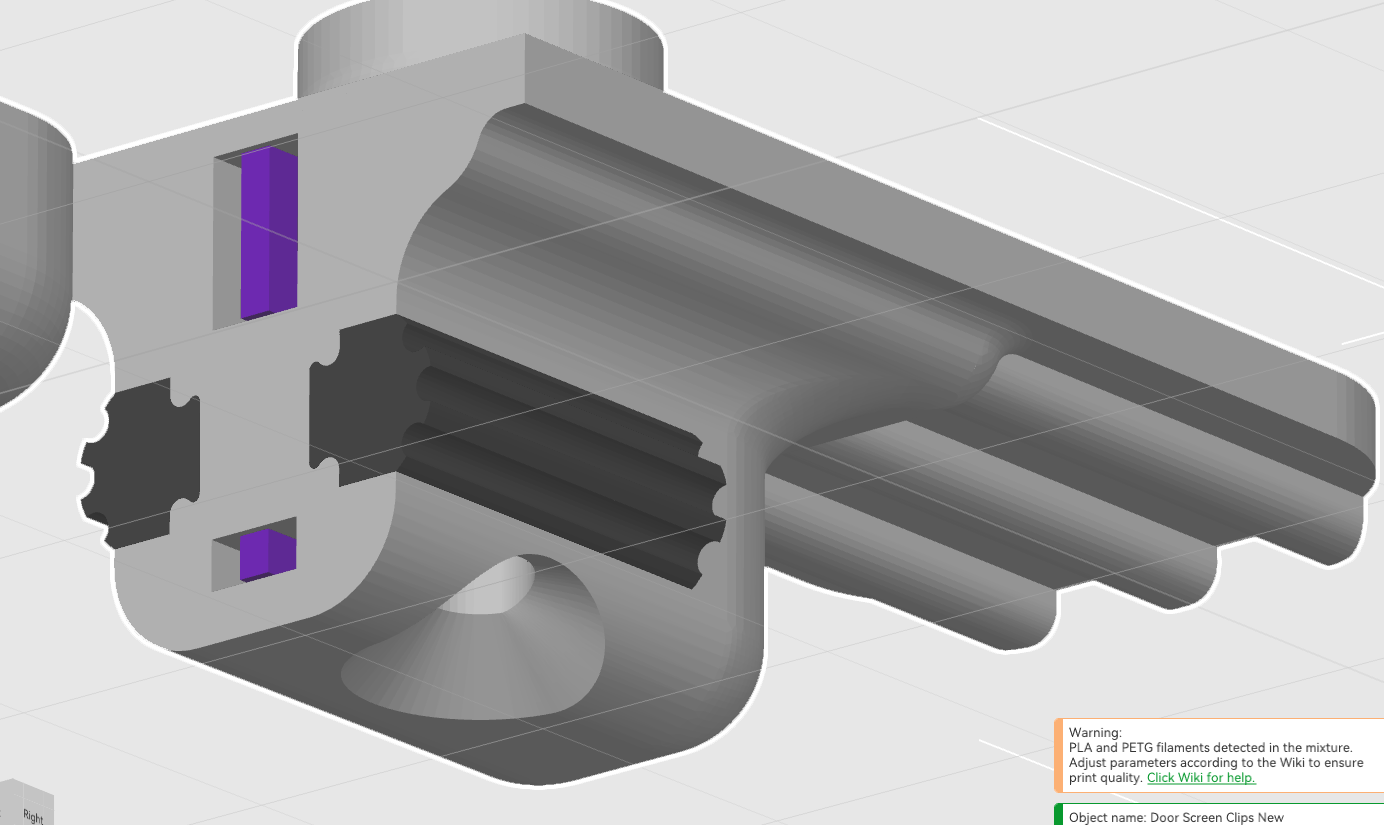
How would you optimise this print?

Hi folks,

Anxiously awaiting the arrival of my H2D. :scream: New to 3d printing and I’m planning the attached to be my first print. Its 1 of 10 door clips for my back door screen.

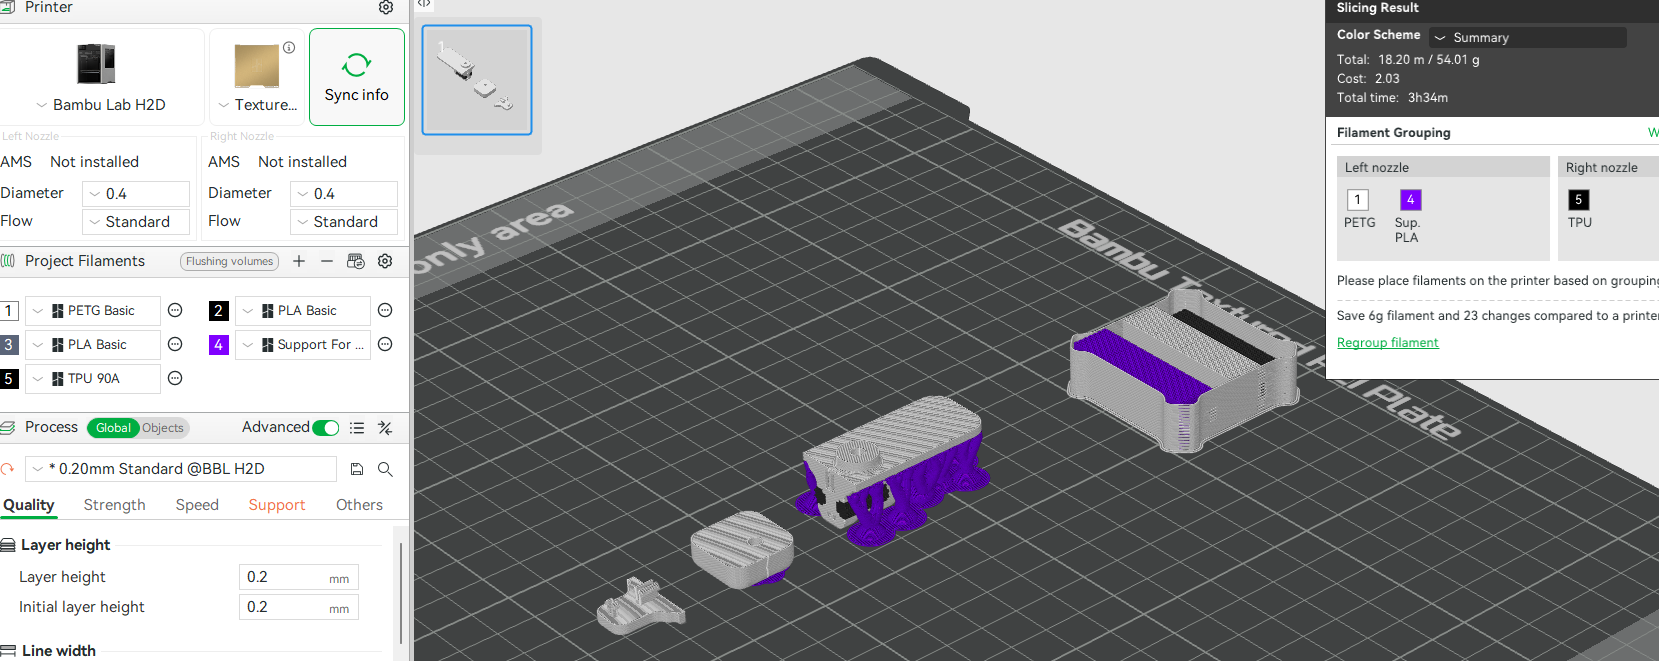
Because I like a challenge…its multi-material with Bambu PETG, Bambu TPU 85A/90A and Bambu Support for PETG…which may go horribly wrong since I have no idea what I’m doing! :laughing: Need to figure out how to do the TPU through the right nozzle and everything else through the left with AMS…but thats a future me problem…

Notes:

  • I’d love to print it with a 2mm nozzle because its so small, but I guess 4mm is needed to facilitate the TPU grips.
  • I have oriented it so the faces where I want a nice finish are on the bed, and the bolt holes dont need support.
  • There are two tiny vertical supports in the back side which I designed in manually to remove with a needlenose pliers, I think this will be easier than removing the default support from these tiny slots.
  • Bambu slicer settings are default - apart from ignoring the prompt to optimise the support with 0 gap etc. when TPU is detected. Because most of the areas needing support are not TPU. Just a guess on my part.

Anyway, its looking like 3hr 49min and 2.18 cost for a print and I’m just trying to align my expectations.

Does this seem about right? What would you do to reduce the time/optimise the print? :thinking: :upside_down_face:

Thanks for any advice!


1 Like

As I always say when someone asks about optimization, it’s better if we can get the project file.

Is it possible that you can share the model?

But as a start, if planning to do the grip in TPU 85A you must use 0.6 nozzle or hack your printing process. TPU 85A is not available for 0.2 or 0.4 nozzles.

1 Like

No problem, thanks. Here it is.
Door Screen Clips New BS.3mf (293.7 KB)

Note: When you open it asks if you want to use mm. Select 'no.

I think .6mm will be too big for a nice finish on such a small part, but maybe I hsould print the grips separately anyway. Thanks for the advice.

Either my Studio is interpreting the project incorrectly—when I open it, every part is set to PETG Basic.
I assume you want the grips in TPU (with a defined Shore hardness) and the rest in another material.
I’d stick to PETG + TPU plus the appropriate support material. PLA does not bond reliably to PETG, so if you mix those two, account for that in the design to keep the final part durable (e.g., use mechanical interlocks or avoid placing the interface in tension).
Also, printing TPU with a 0.2 mm nozzle is more trouble than it’s worth—expect clogs, unstable flow, and poor layer fusion. Use 0.4 mm for TPU unless there’s a hard requirement for 0.2 mm.
I’ll be away from my desk for a couple of hours; if no one else has replied by then, I’ll pick this up and continue.

1 Like

Siraya Tech TPU Air—and other variable-Shore (“varishore”) filaments—are fully compatible with 0.4 mm nozzles, should you choose that size.

1 Like

Strange, I painted the TPU and selected the support material before saving. When I reopen it the 3 are already specified. But what you said is correct, grips in TPU.

Thanks, I came across that a few days ago online and it looks really good. But probably a bridge too far for my first shot, with a lot of variables already to manage. :slightly_smiling_face:

Forgot to mention, I have a roll of Creality PETG filament and a roll of Bambu PETG HF on the way with the HF nozzles. Not sure if that makes any difference, setting the left extruder to HF in the slicer doesnt result in any increase in print speed.
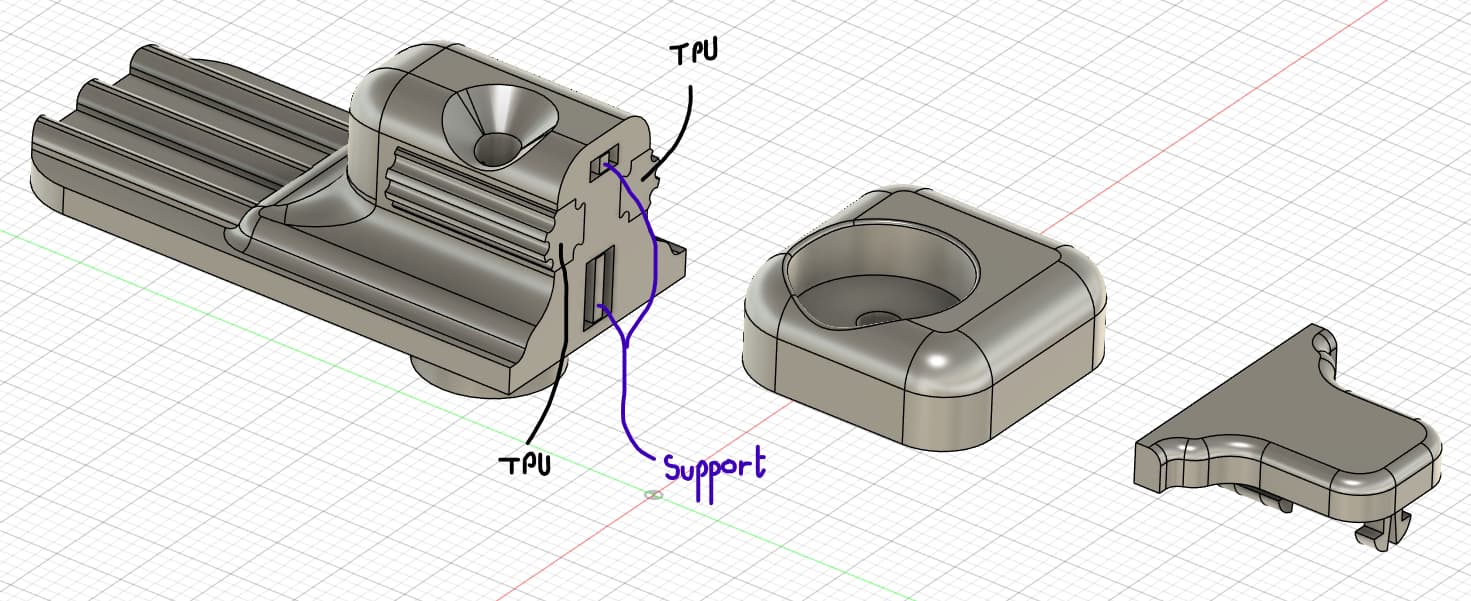
First of all, I wonder what the need for the endcap is.
It feels like you had this designed so you could insert the TPU. Since you want to print this in assembly, I don’t see the need for this to be a separate component.

If you really need the separate parts, I would have a look at the connection you have designed. there is no clearance between the parts, and one slot is 1.5mm high while you might end up with a layer height that not fits those layer heights.
And the clip construction will probably break when you try to insert it.

For surface quality I would try to turn the part over and place it on the large flat face. I do not know your exact design constraints, but when you could remove the boss, and make it a separate ring, you would have a perfect print without the need of support material.

Same for the center part. Your radius will look a lot better when you flip it around.

1 Like

Thanks a million, those are great suggestions. The ring can actually be separate, for some reason I didn’t think of this because I had a picture in my head of that as part of the component. But that large flat face will be flat against the door, so its unseen anyway. But if it will improve the appearance of the rounded radii on the top (Currently positioned underside) that would be great. I’ll break off the ring and flip the piece the other way up.

Re: “you might end up with a layer height that not fits those layer heights.” if for example my layer height is .2mm should my heights all be an increment of that? 1.4mm 1.6mm etc.

Thank you!

You can consider to use optimized layer height, but I always try to take the layer height into account in my design.

Do you really need that end cap as a separate object? Otherwise I would merge it into the main body.

If you can’t, consider a different mounting of the 2. I guess it will be mounted against a flat face, so you might slide it in from the mounting face. No stress on clips then.

With 3D Printing you need to let go of certain design thoughts that would be fine for injection molding but not for printing.

Also keep in mind that the 2 tiny supports in the slots are most of the time not needed because an FDM printer can bridge certain distances (depending upon the filament) very well.

In general 0.1 to 0.2 mm is a good clearance, so expect that you will need some test prints to check the fit of your connection function if you need it.

1 Like

Thanks. The end cap was originally to allow me to print the TPU separately, then I thought it would be easier to print it all at once, but I left the end cap in case it doesn’t work out well and I need to print the grips separately after all. Also gives me an opportunity to try out clips.

I would use regular supports instead of tree. When you have a long flat object to support and are using dedicated support material they will give you a cleaner print.

Also the long piece is better printed vertically. Not sure what kind of loads you have on it and what direction you need it strong in, so this is a blind suggestion.

2 Likes

So my H2D finally arrived and I have to say, this is an absolutely awesome machine!!! :smiley:

I decided to try printing it in different setups to see how it worked out.

  • Printing the TPU grips was a disaster. But I made some changes before printing them integrated.

  • My TPU 90A is not getting pulled out of the spool holder properly, there is too much resistence. But when I pull out enough and leave it hanging it works fine. So I need a lower resistence solution for soft TPU. I guess a top mount with the glass cover off.

  • My clips when I had the separate back panel were much too weak. But good learning.

  • Fuzzy skin worked great.

  • I made some design changes and overall I’m super happy. Printing a full set now! I can see some great things with multi-material in my future. :muscle:

  • I had one failed print with petg parts not sticking to the Frostbite plate. I think my petg absorbed moisture during the day, because I dried it again for a few hours and it is back to performing perfectly.

  • I havent used any support yet apart from a tiny bit printing the TPU grips separately, but they were so tiny it was kinda pointless. Glad to see I dont need support for everything.

Now available on maker world after a few improvements. They are a bit of a unique (Weird :upside_down_face: ) item, but who knows, they may be of use to someone!

1 Like

Hi,
Im not sure why that is, Ill check it first thing in the morning. There are 4 plates. Two of them have PETG with TPU grips and two plates have only PETG for people who dont want to or cant print multi filament.

I just opened in Bambu Studio from the maker world link and its working fine for me.