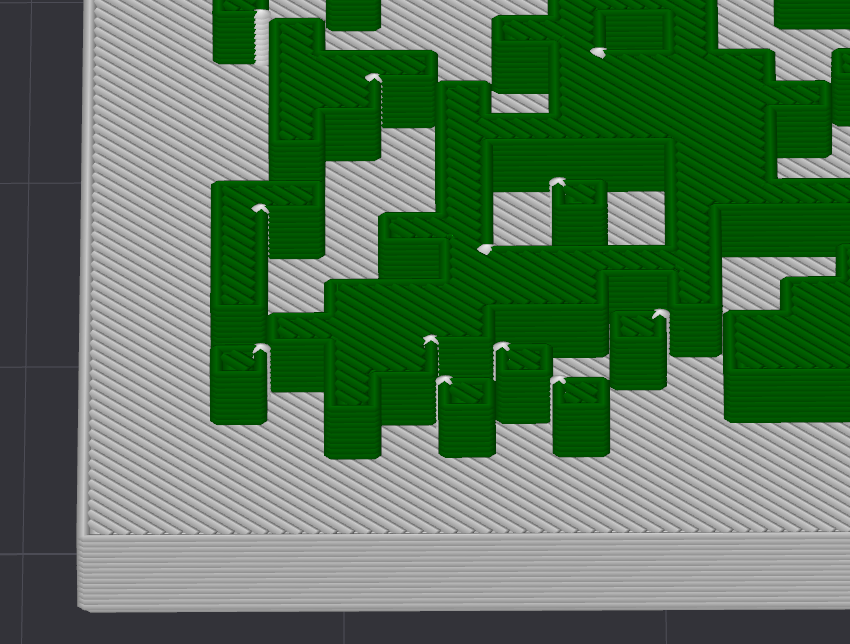
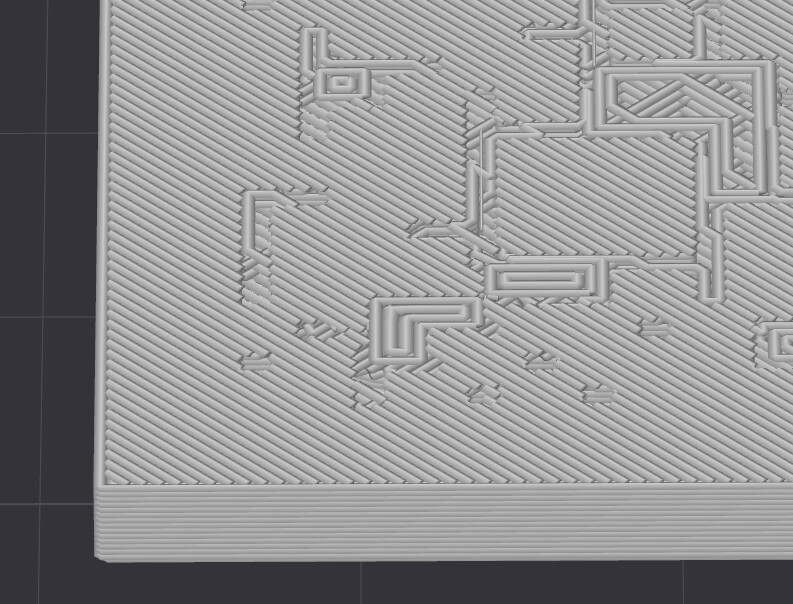
Does anyone know how can I get rid of this holes and make top layers smooth? I’ve been searching through options in bambu slicer for 100% top layer infill or something but no luck.
All my setting are default for bambu studio.
Its the top layer where its smooth, it’s not the top layer where its not smooth LOOKING, its still smooth, its still the same layer, same Z height, its just a different line pattern because it is not the top surface, green will go over it.
Just go for it dude you are way over analyzing this.
Unfortunately there are holes in this layer and as you can see other color is small and those holes are disrupting print quality. I wouldn’t even bother to post if there was no problem.
Well, you should evidence that with a picture or something because the slicer view looks fine to me, I’ve had similar artifacts where geometries meet a top surface. But in my case there is no effect on print quality, its perfect as always.
Again, the slicer view looks like that because the white areas that will be a top surface have a monotonic line pattern but the parts that looks ‘holy’ have a different pattern, just walls most likely so they look concentric.
I suppose this could have to do with the layers. Let’s say you are using 0.20mm layer height and your green starts at 2.1mm, not cool, not sure how the slicer would handle this, but I don’t need to worry about it because I design accordingly.
The “holes” you are seeing are just the way the layer underneath a colour change gets ready to support that colour change. Those aren’t holes you are seeing, the are the start and stop of filament being laid down to better merge with the material that will cover it, the second colour.
As already recommended, you need to print something to see what it looks like. If it goes wrong, share a photo. It looks like you are seeing something you do not understand rather than something that will fail.
One other thing that came to me by perusing another post:
You could try upping the number of walls on the strength tab, looks like you are using 1 which when coupled with a standard 15% infill would leave this look you have on that final white layer.
Again, not sure it would matter much in the final output, these things generally sort themselves out, but those are some very small green details you have there.