Hi,
I recently ran into an issue with a print that neared the Z-axis limit. Like a moron, I did not take a video for the support ticket. I have since reset all settings and run all the diagnostics which all have checked out okay.
I’m looking for a print that prints at/near to all 3 axis limits as a test print. Kinda like a 3 dimensional “+” sign that does not use a metric ton of filament.
Any suggestions are greatly appreciated.
Thank you!!
Chris
right click → add model → cube
scale cube to 1.6mm x 255mm x 255mm
copy paste it twice, now you have 3
rotate one flat on the plate, one standing up on X, one standing up on Y
To add lightness you could negative-part a big sphere in the middle but it might lose stability without something more mesh-like
donezo, good luck!
1 Like
If you do have you heart set on the giant plus sign here’s one fresh from Fusion. It’s about 255.778 X 255.778 X 255.778. Just rename it to an .STL.
Big-Plus.3mf (2.2 KB)
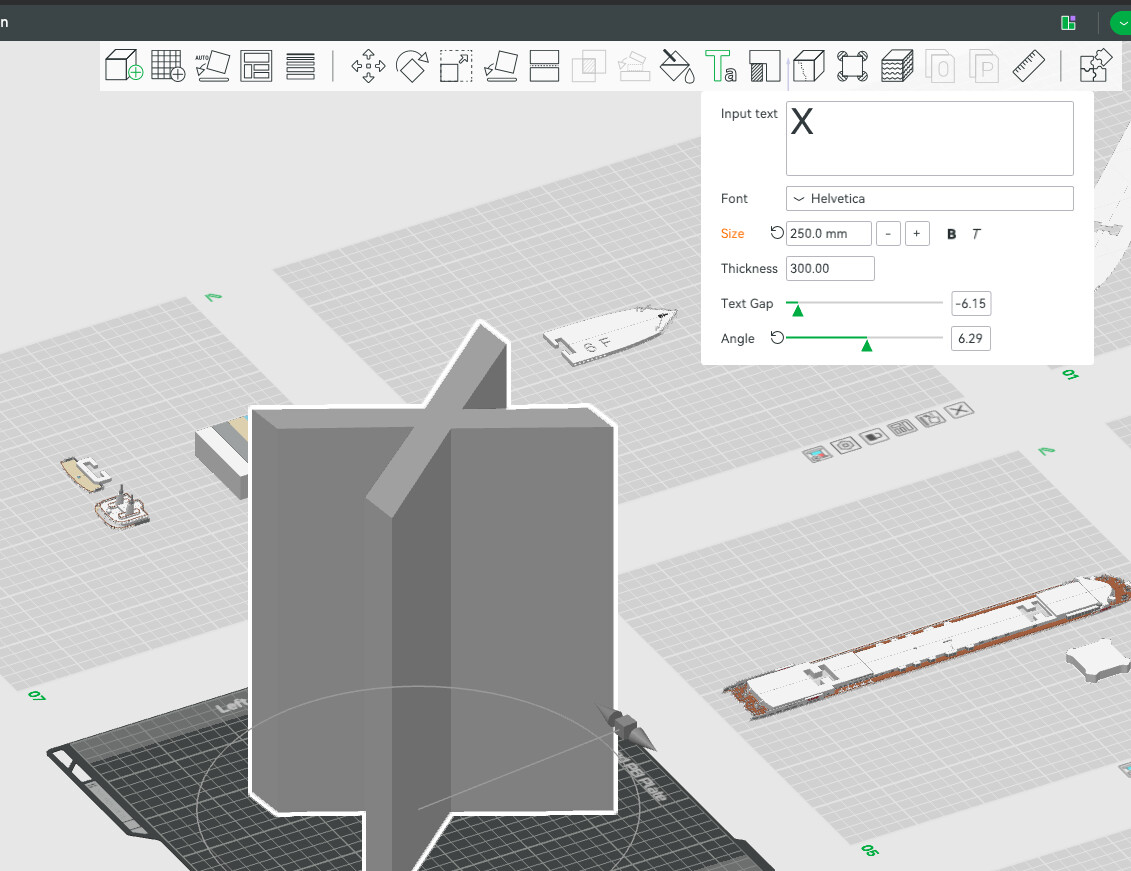
Or within Bambu Studio you could just add a text shape ‘T’ key - and set it to X and make it really big.
3 Likes
Hah, i really like this text scale, clever
Traveling up 255Z is gonna take some filament, no matter what you do. You can’t just print a 0.4 wall and hope it doesnt fall over 
1 Like
I wonder what it would look like in vase mode? - might be of some use if you print a few more letters the same size;)
2 Likes