Minor errors in printing with PETG

Hello everyone,

i am new in the Bambulab Community, with the P1S Combo.
First, im Impressed of the Printer in comparison with my old one.
Such fast, good Prints, impressive.

But i have only a few minor issues with my prints.
I print almost only PETG. With PLA i dont have such problems.

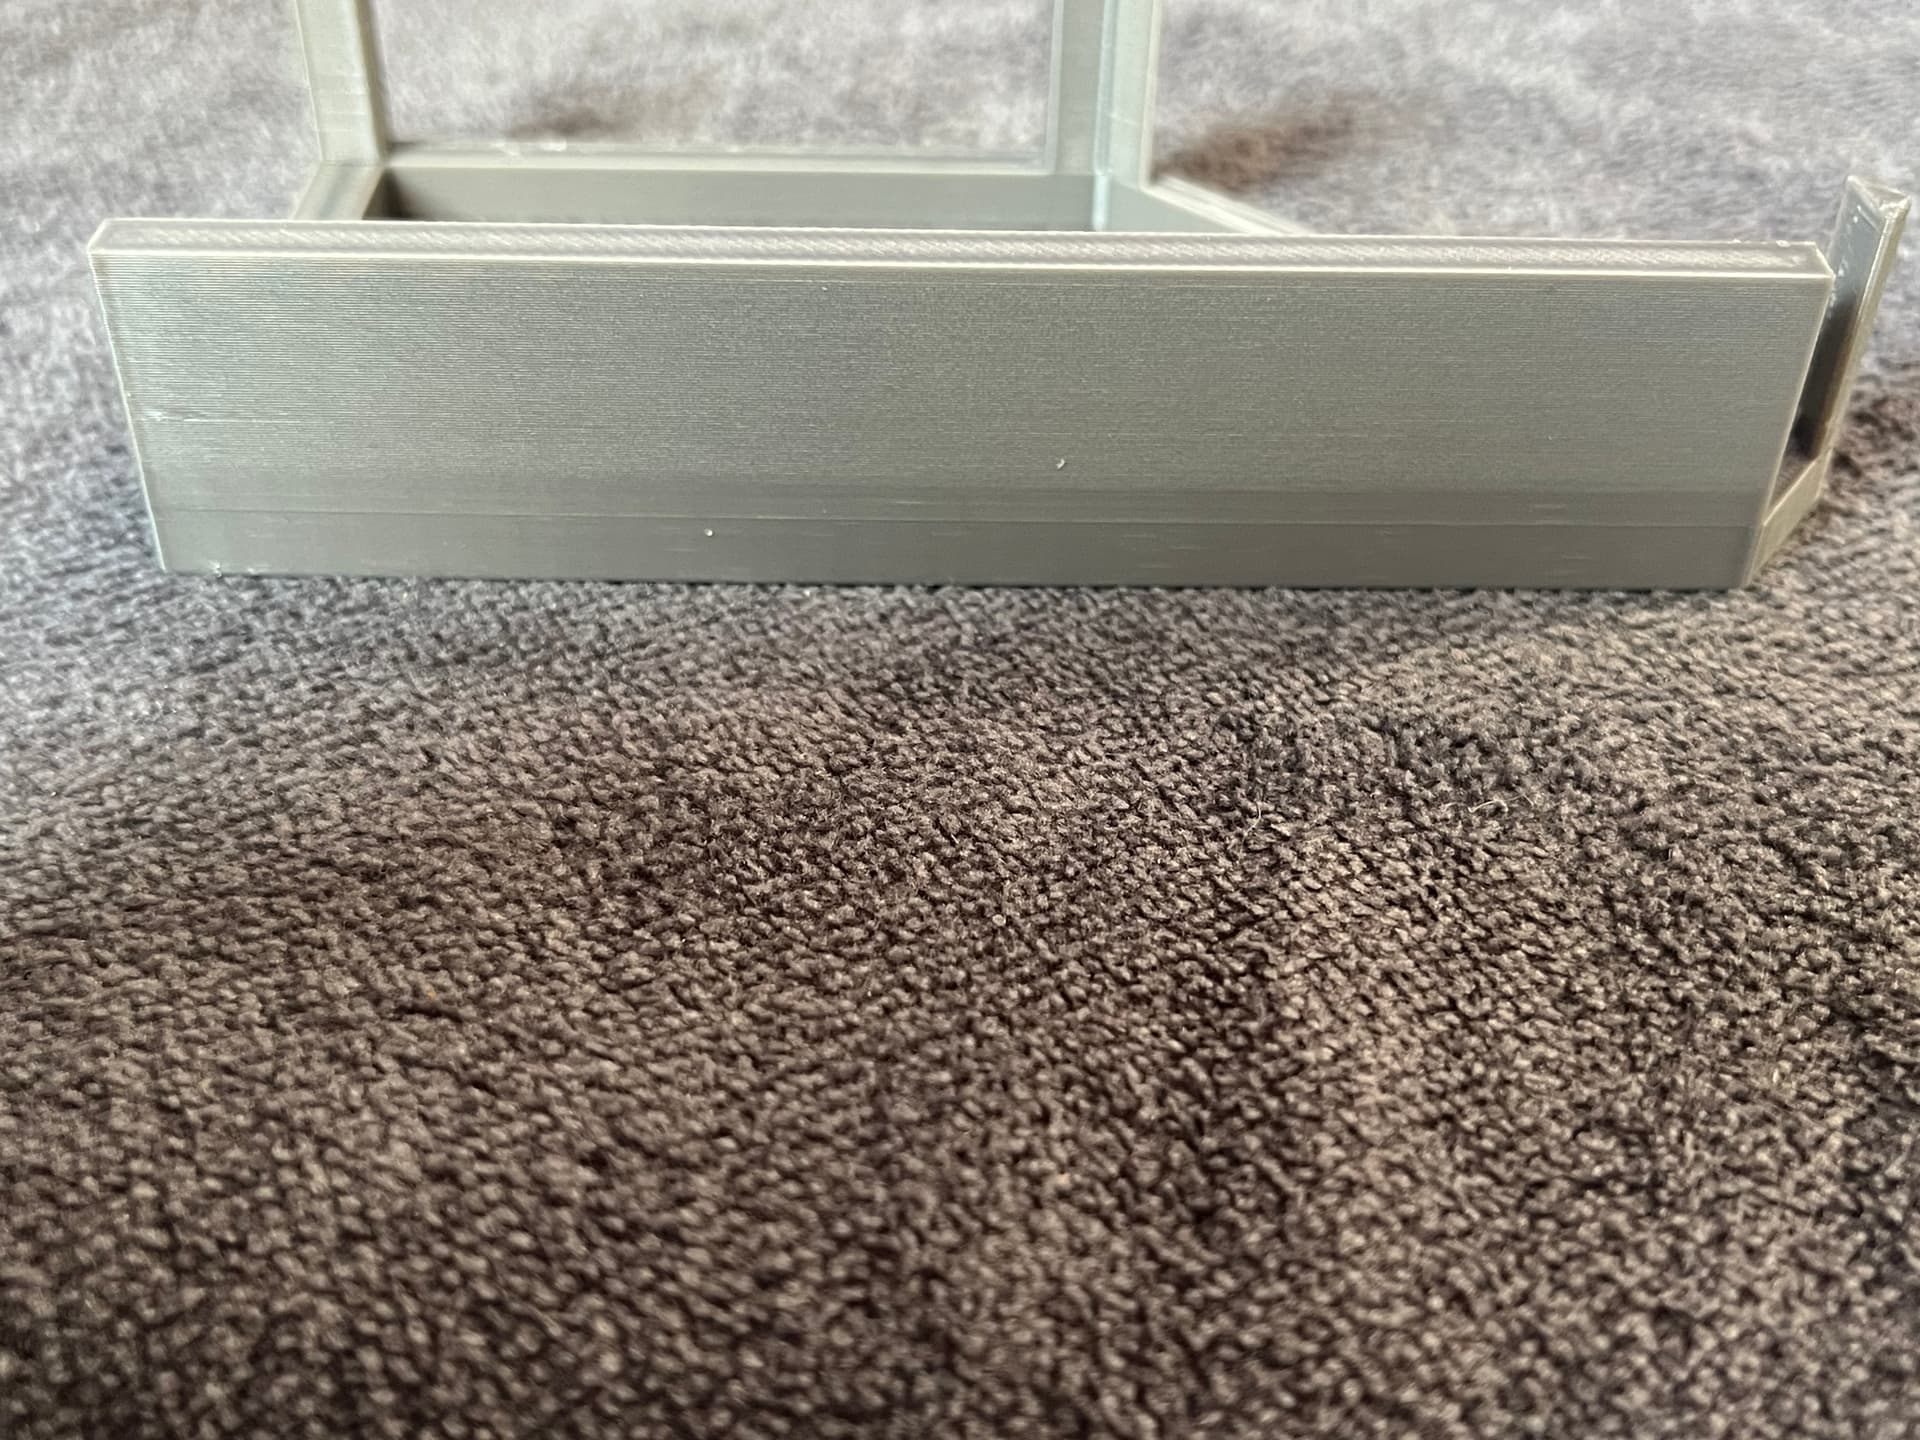
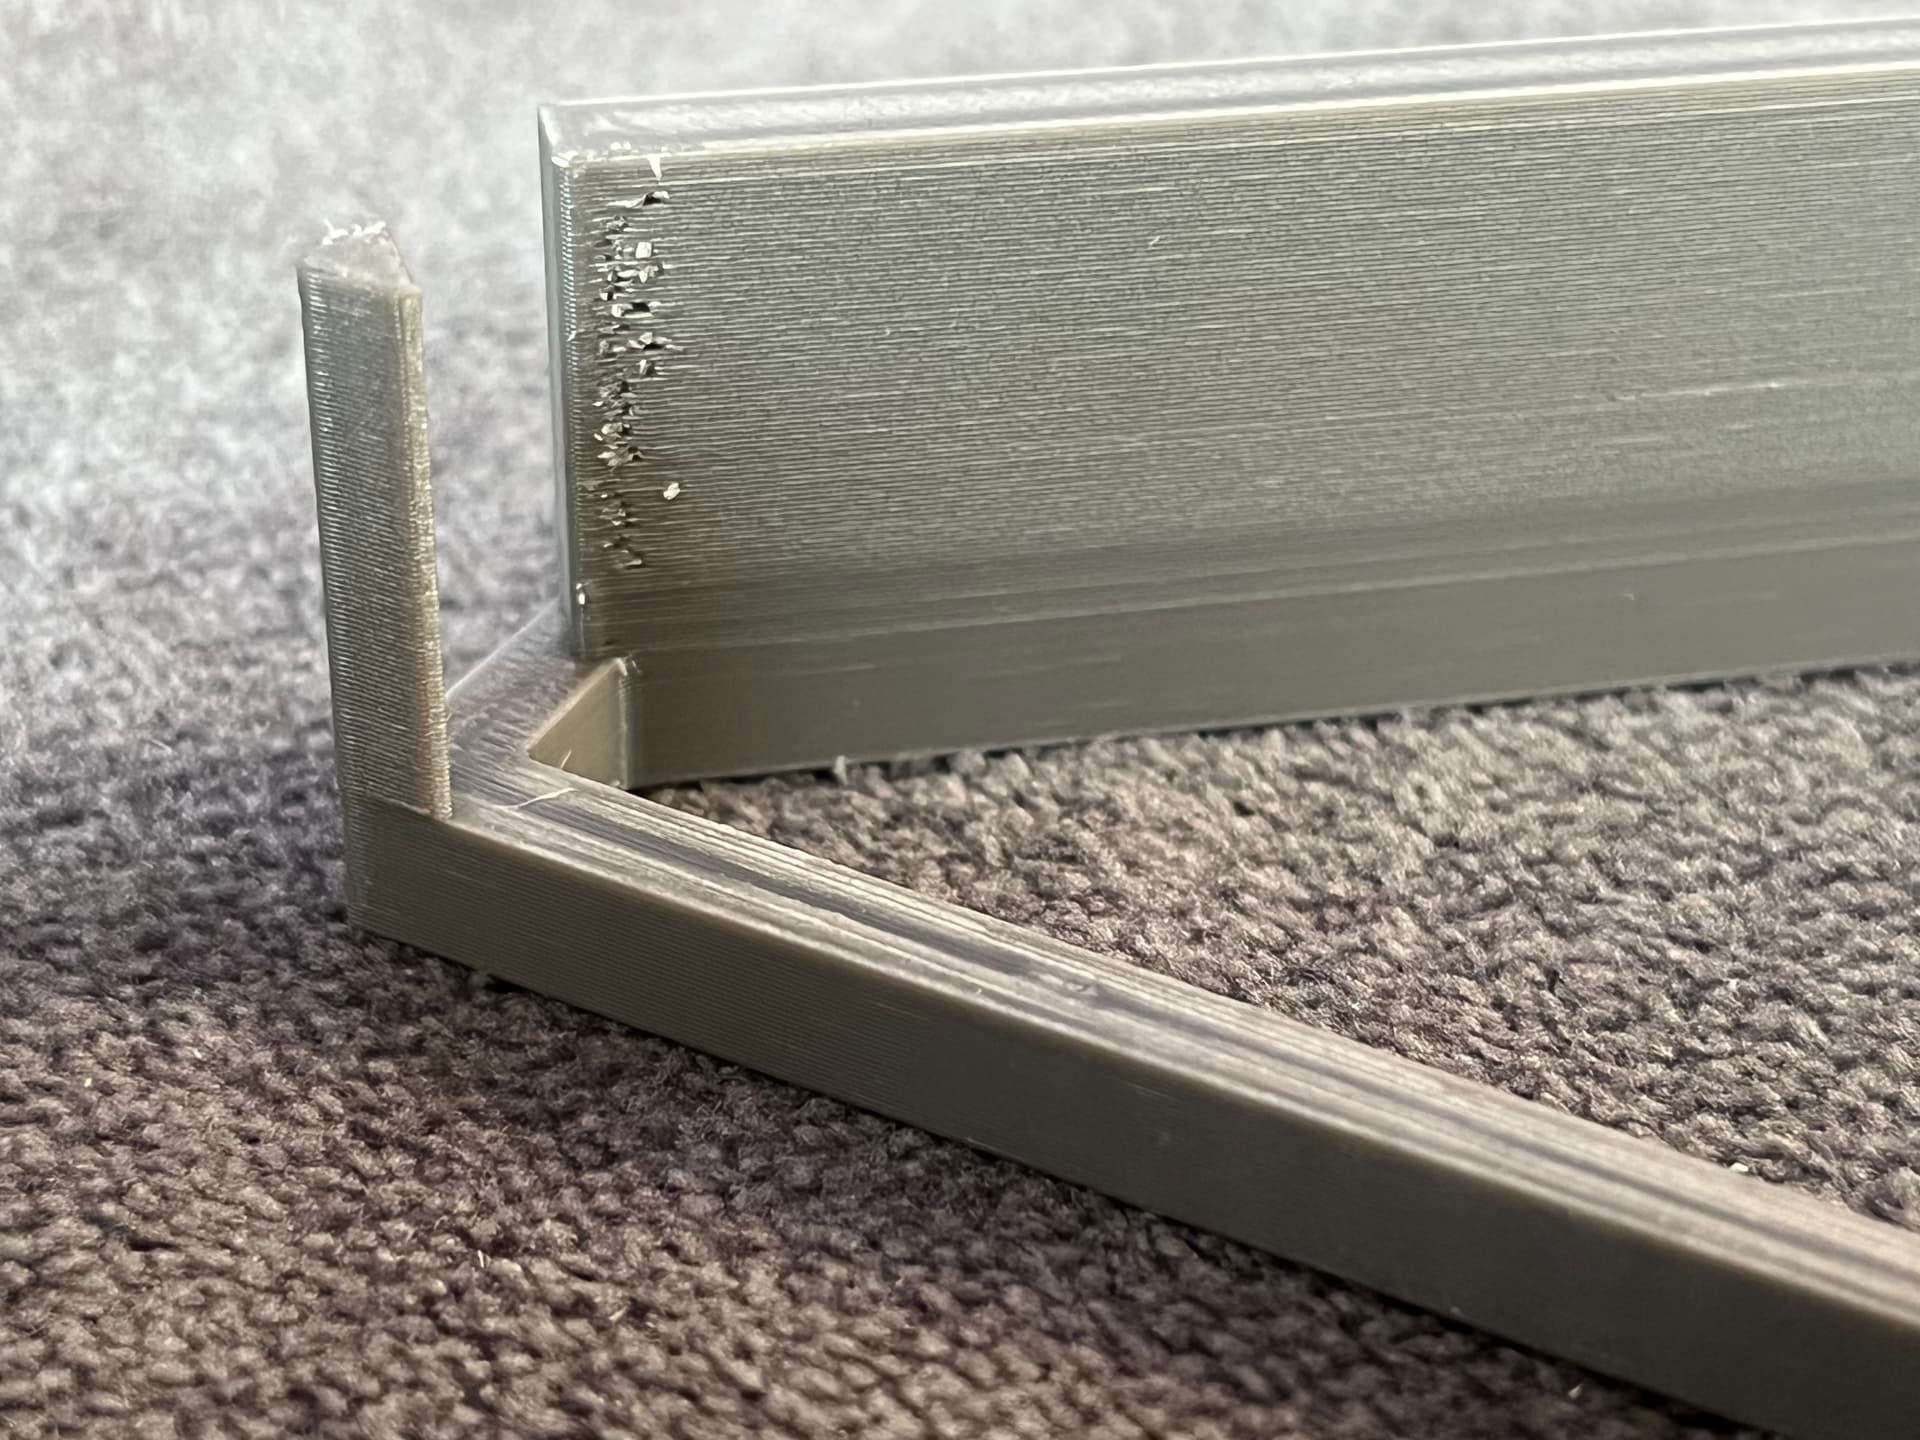
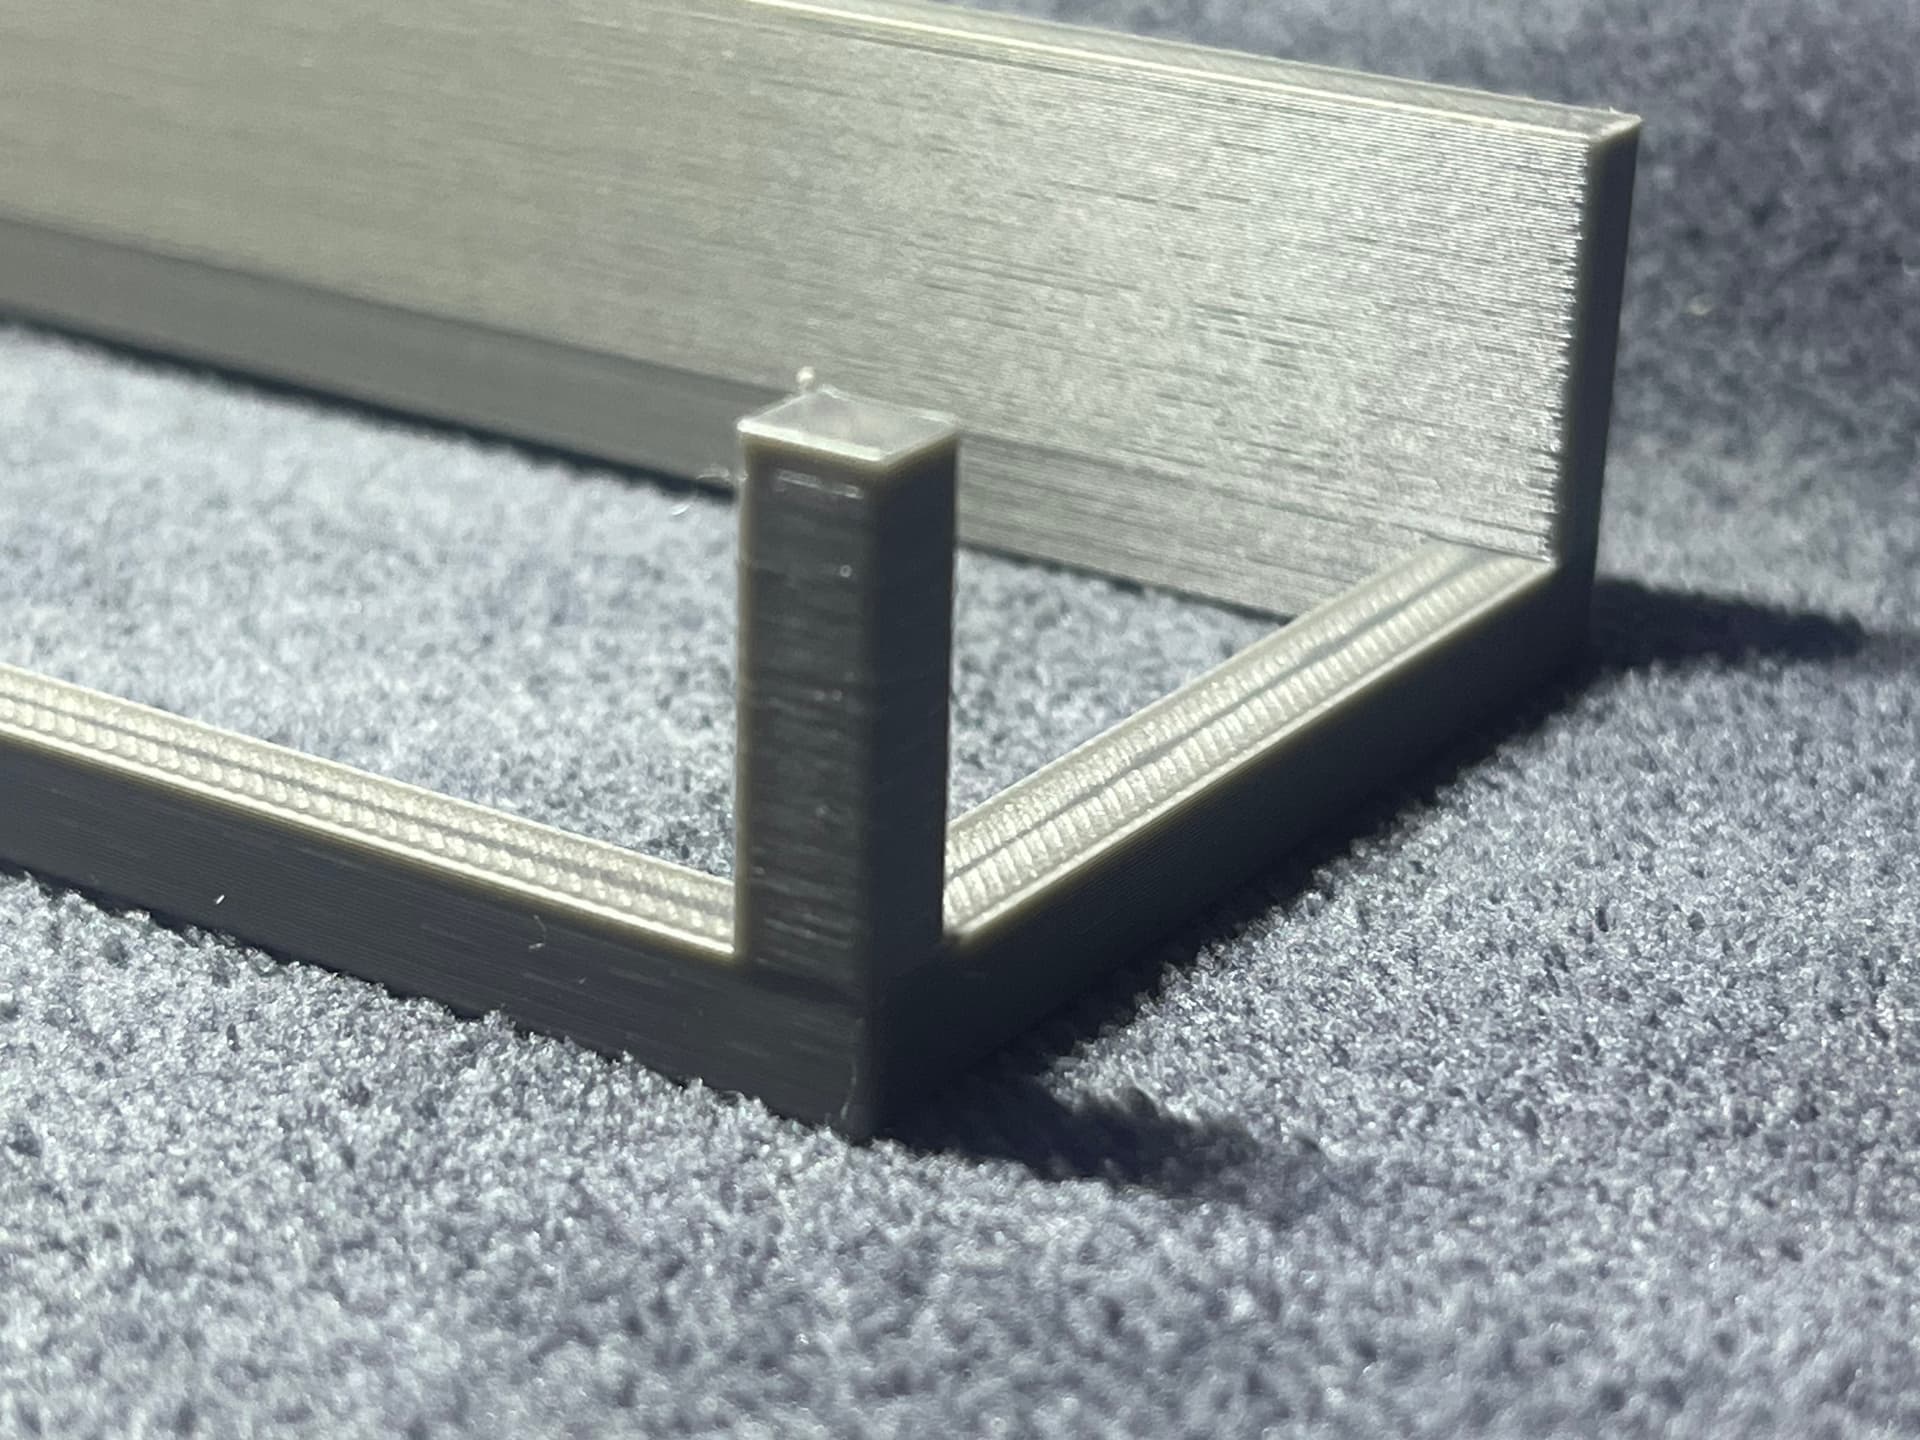
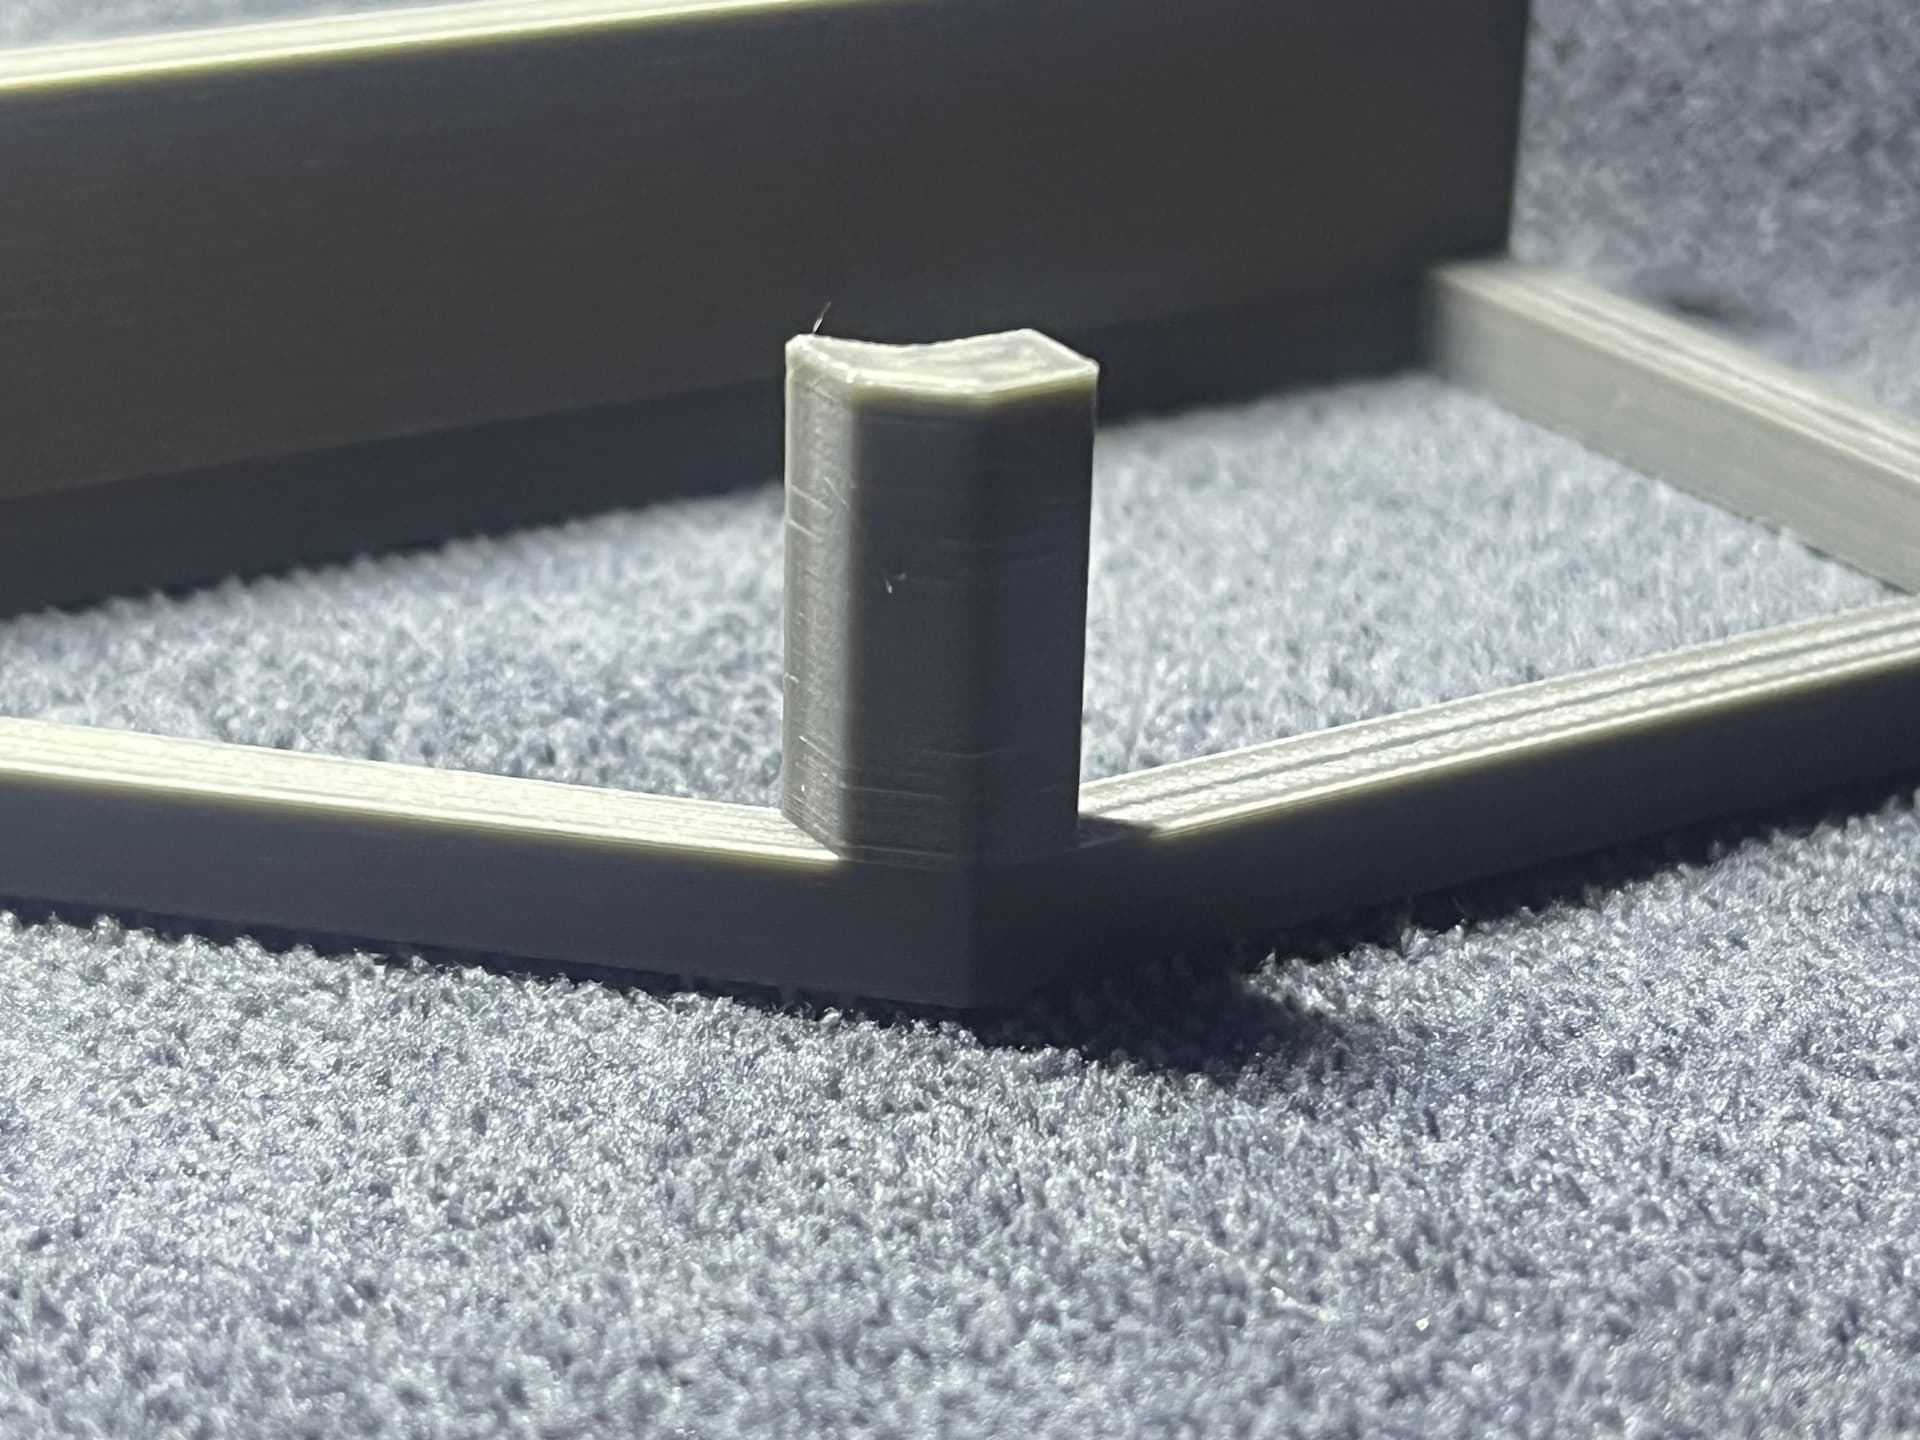
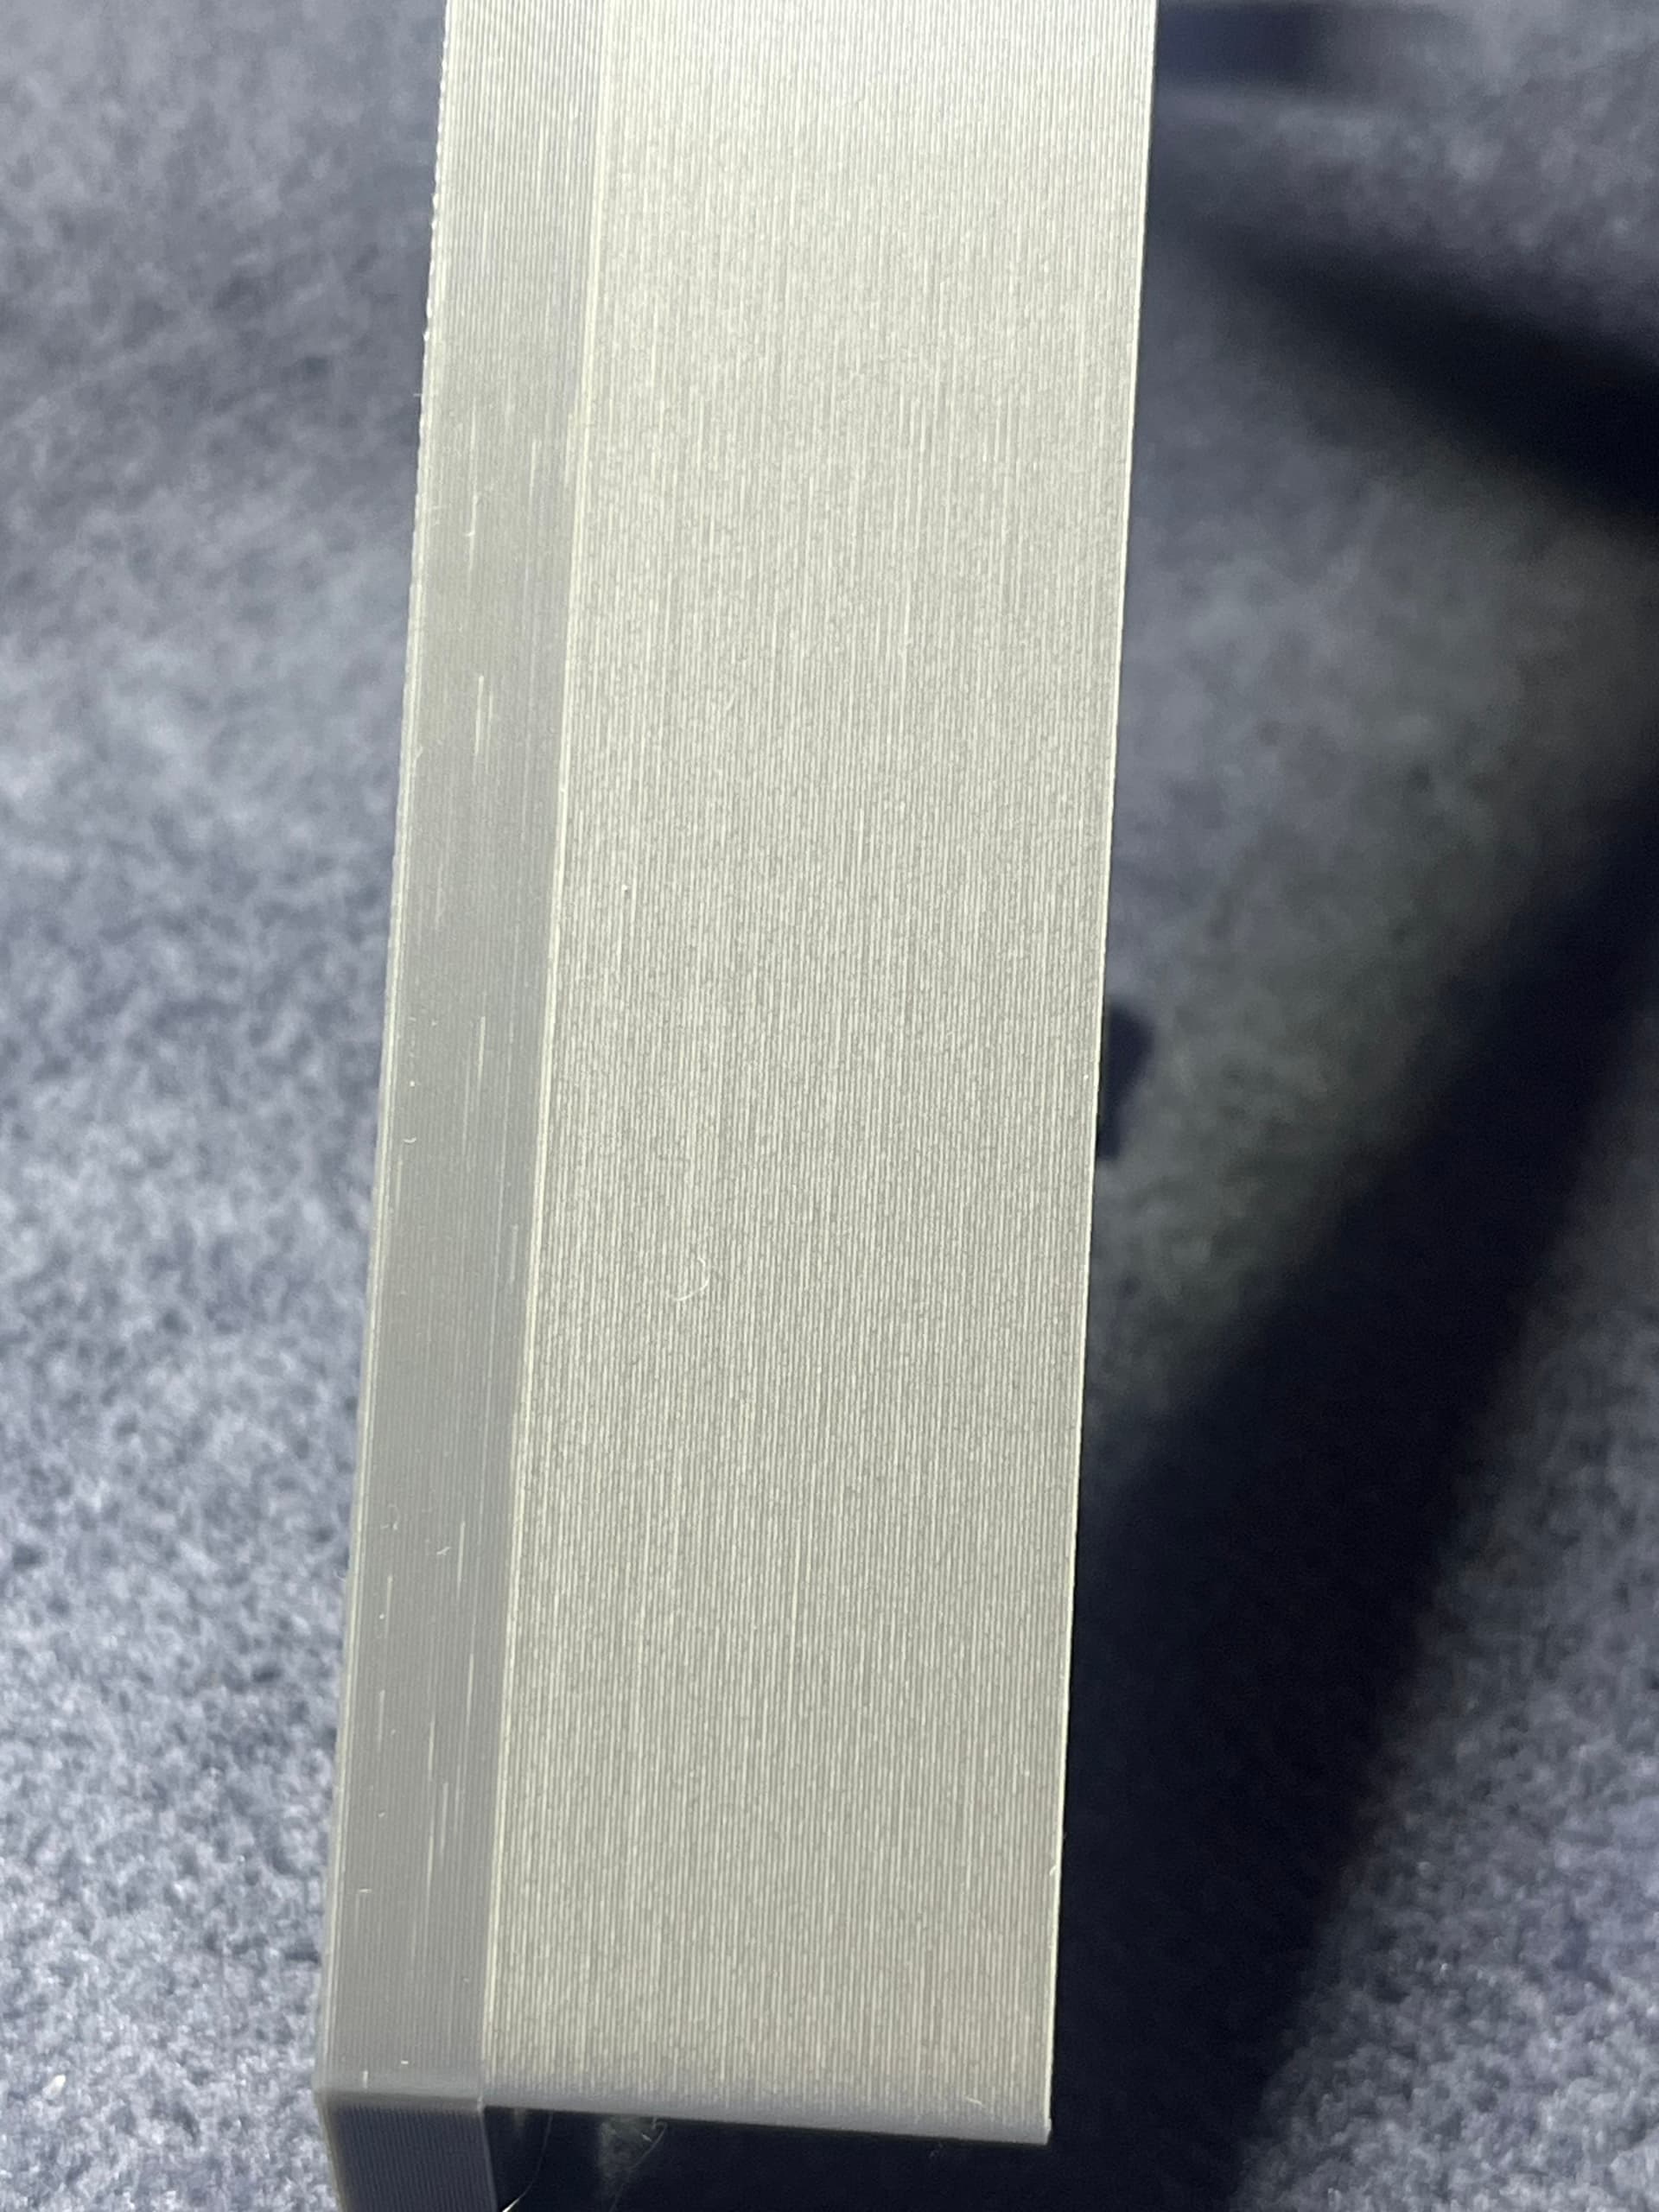
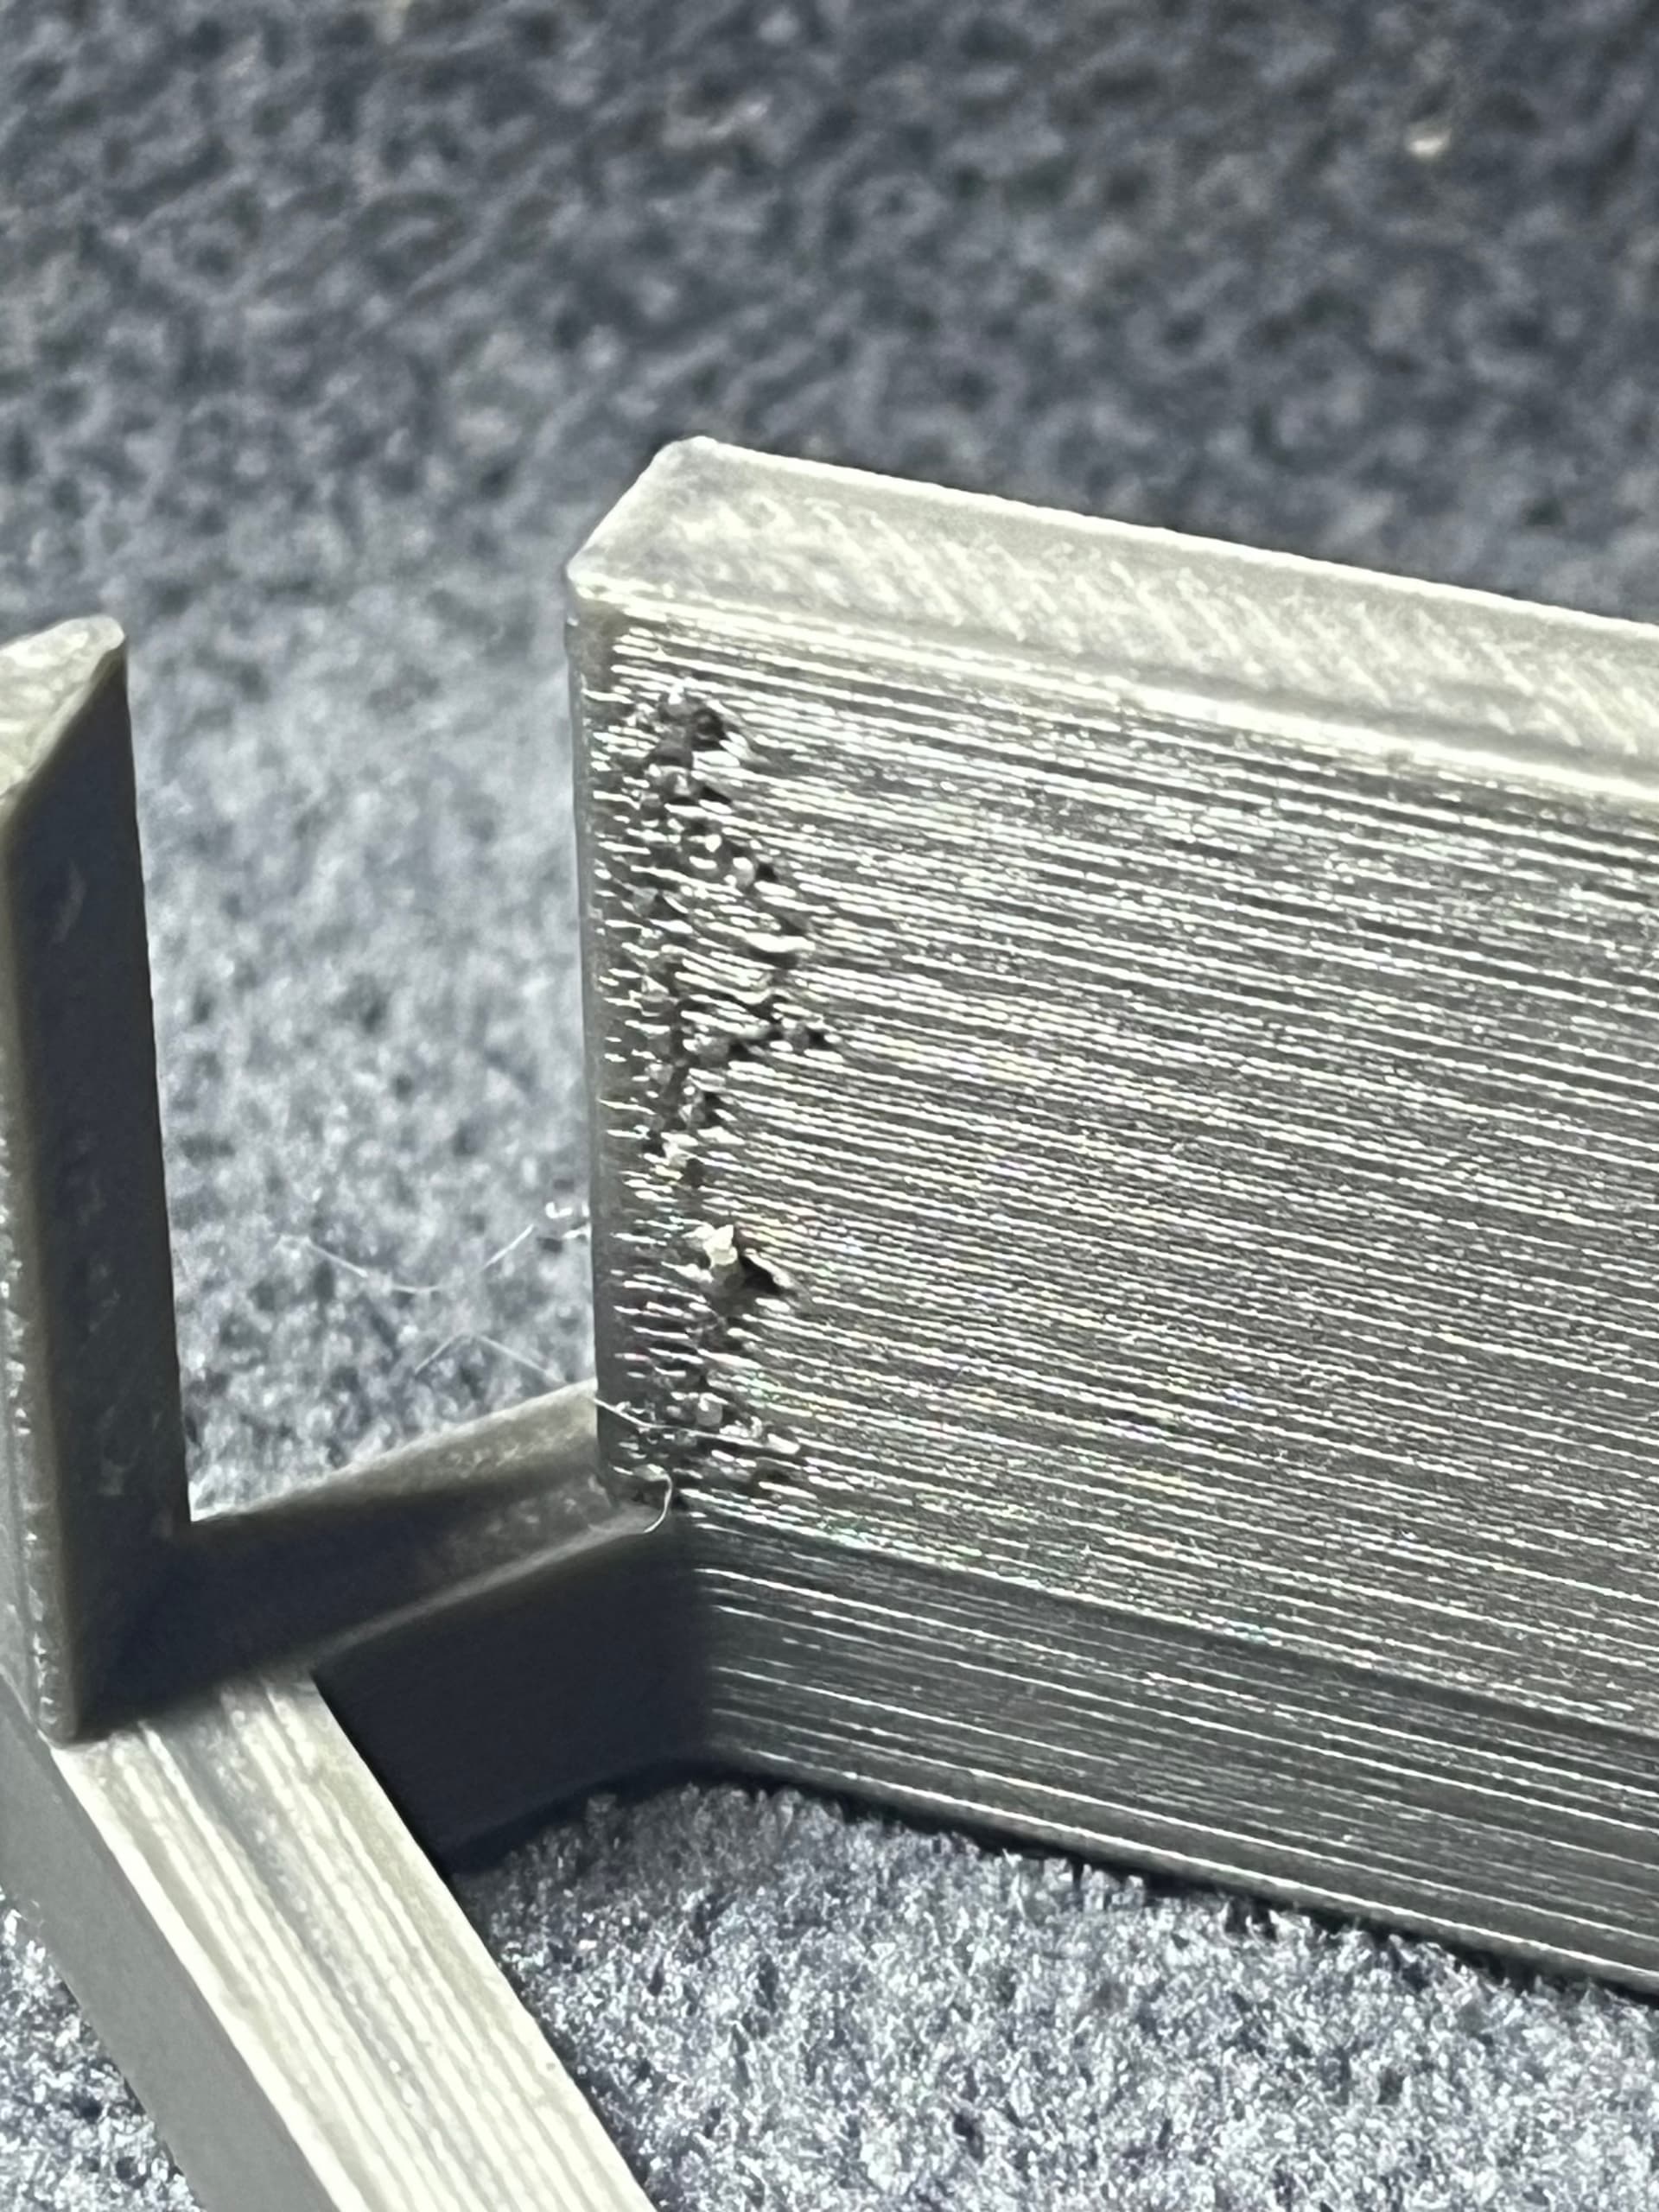
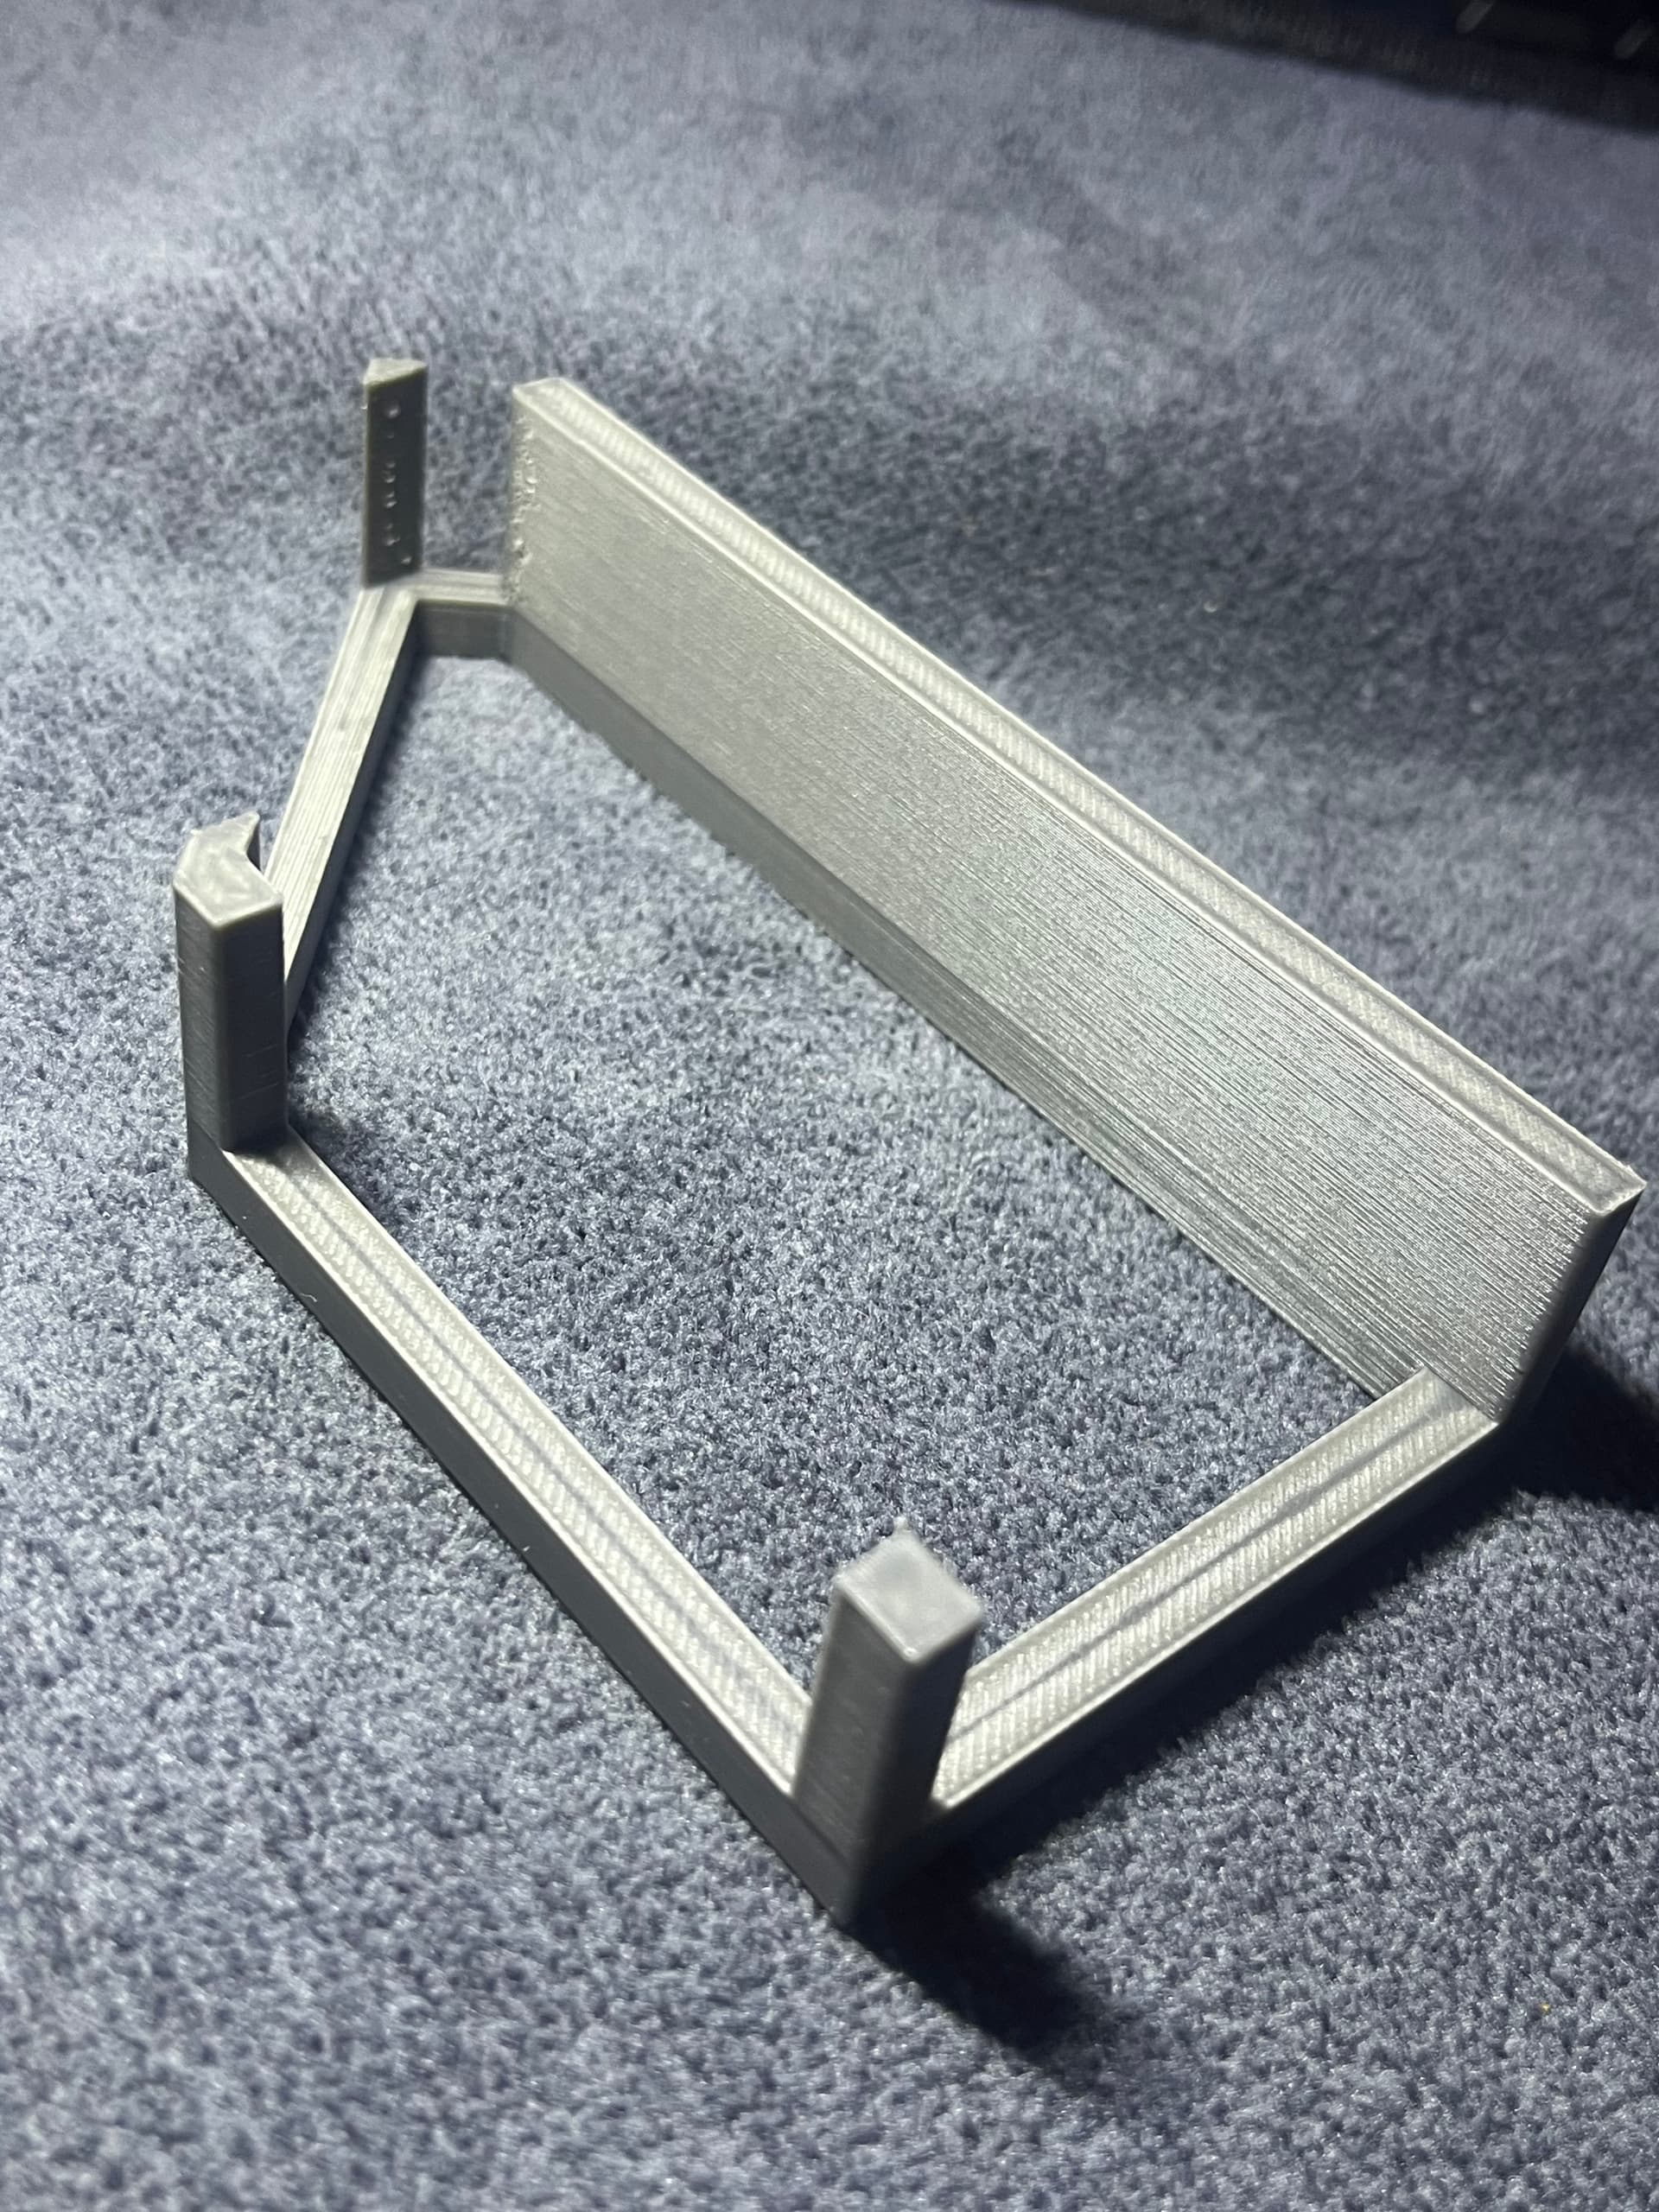
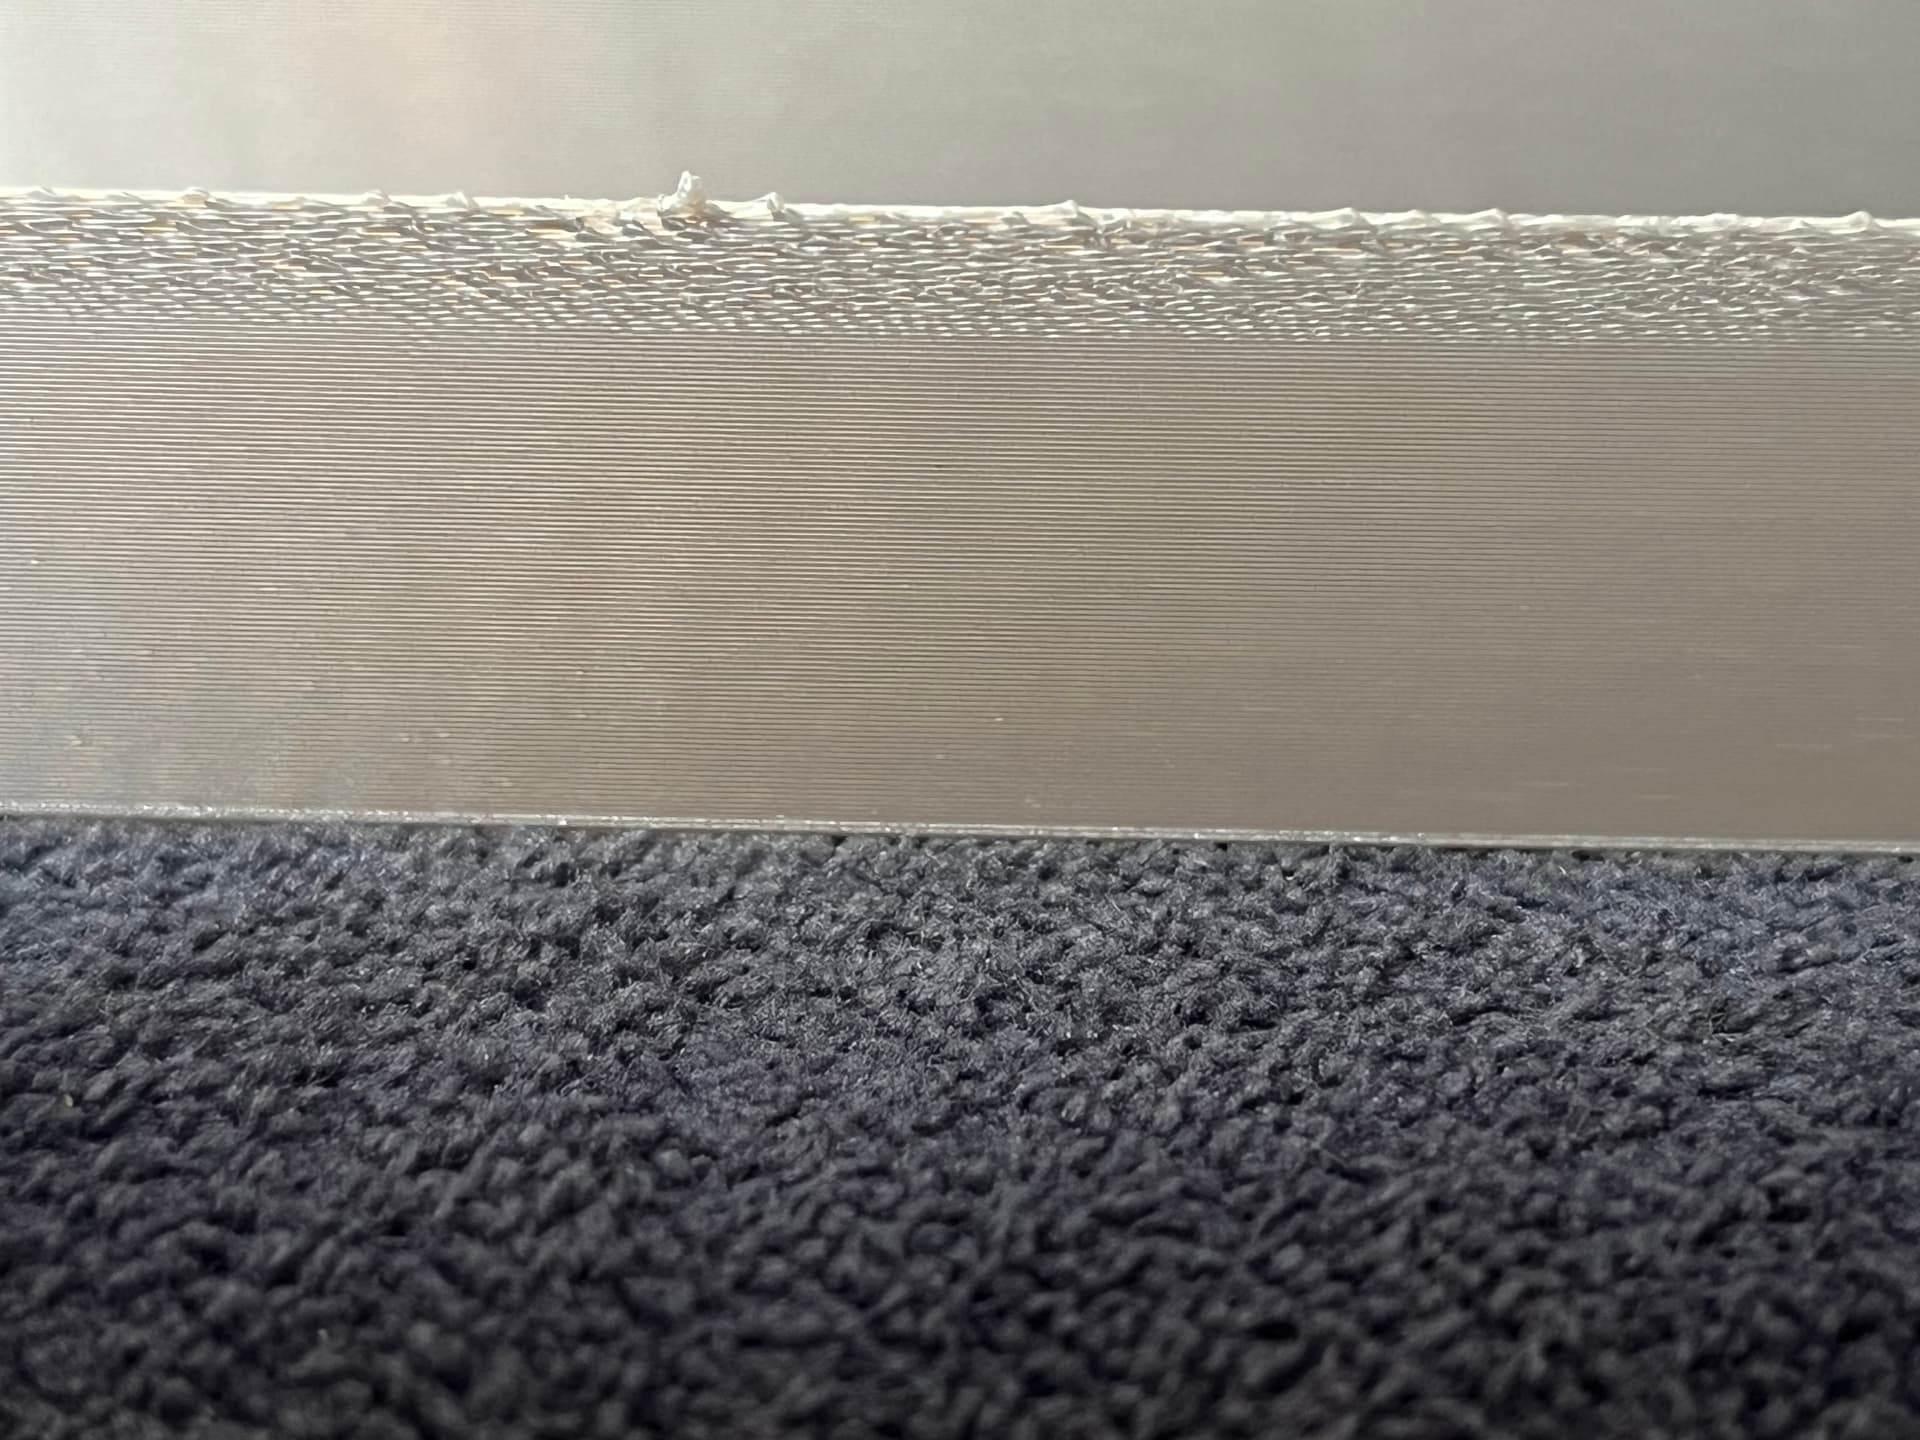
It seems like little gaps or some type of too little flow of material, or maybe too much?

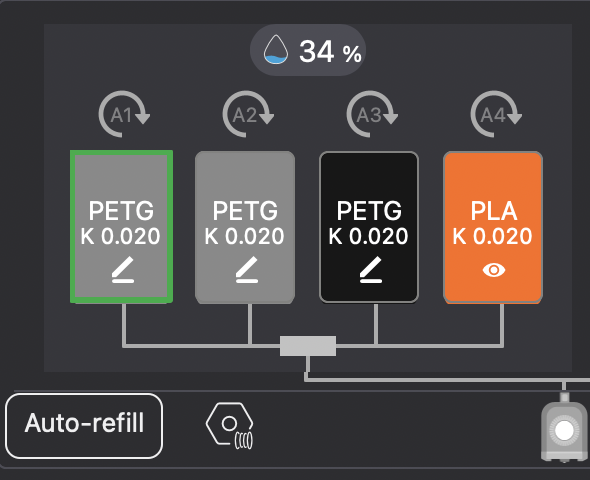
I had already done the calibration, currently i have a K-Factor of 0.020.
In the calibrations it says more like 0.030, but with this settings the print do not stuck on the plate anymore.

In my opinion the print is not that bad, but i am sure this could be get better with improved settings…

I put some pictures of it in this post, i hope someone could share some ideas/settings down here, that i could try.

The filament that i use: SUNLU Rapid PETG

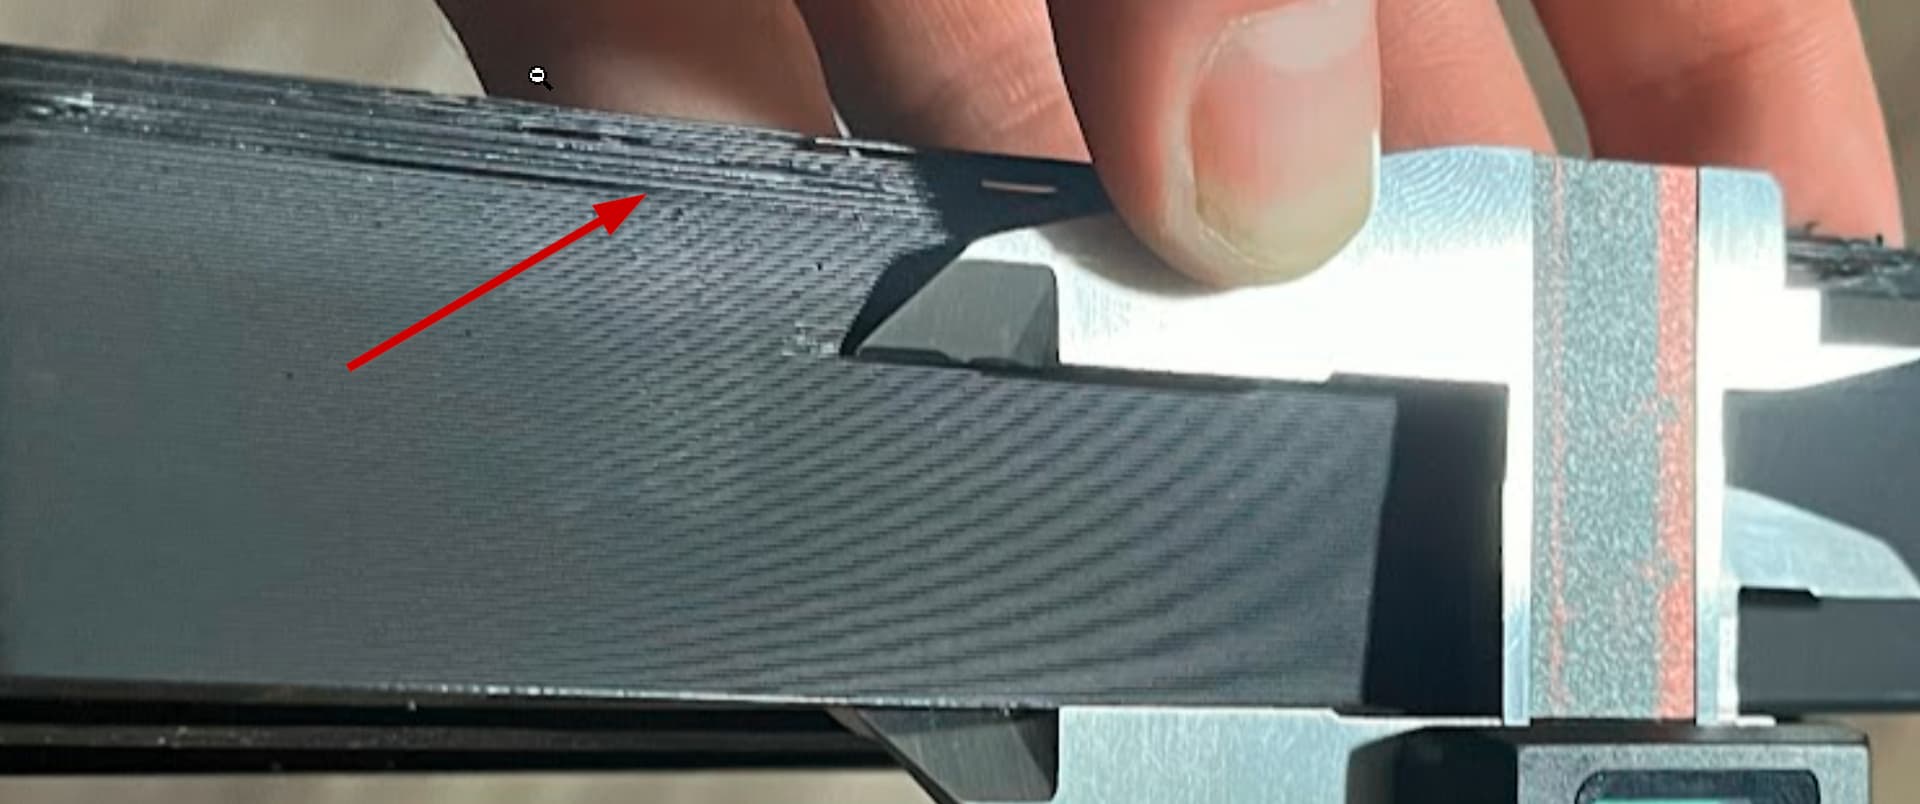
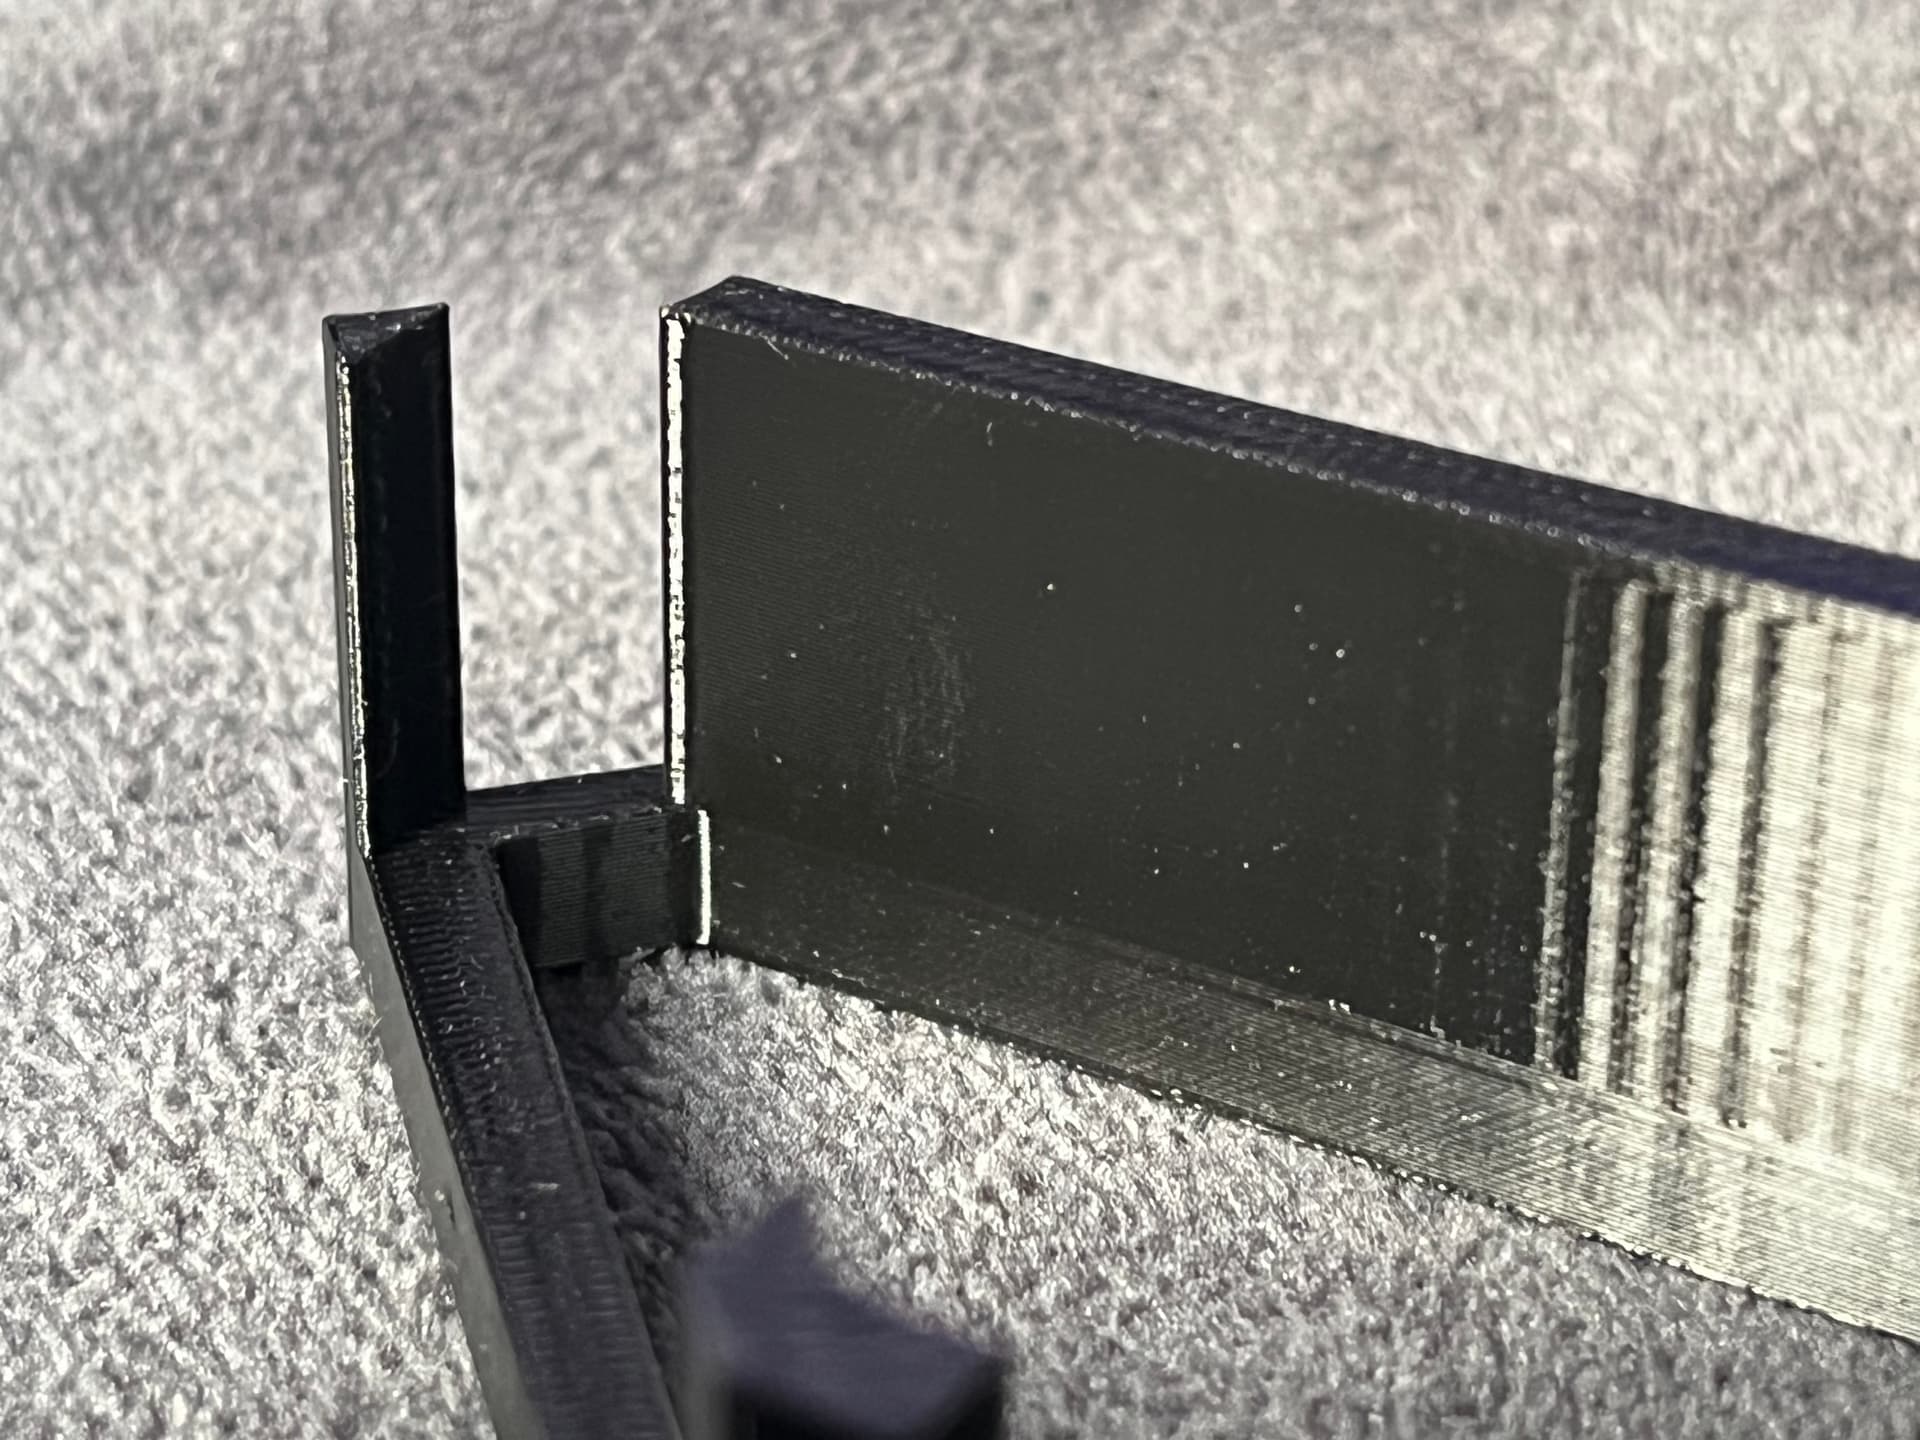
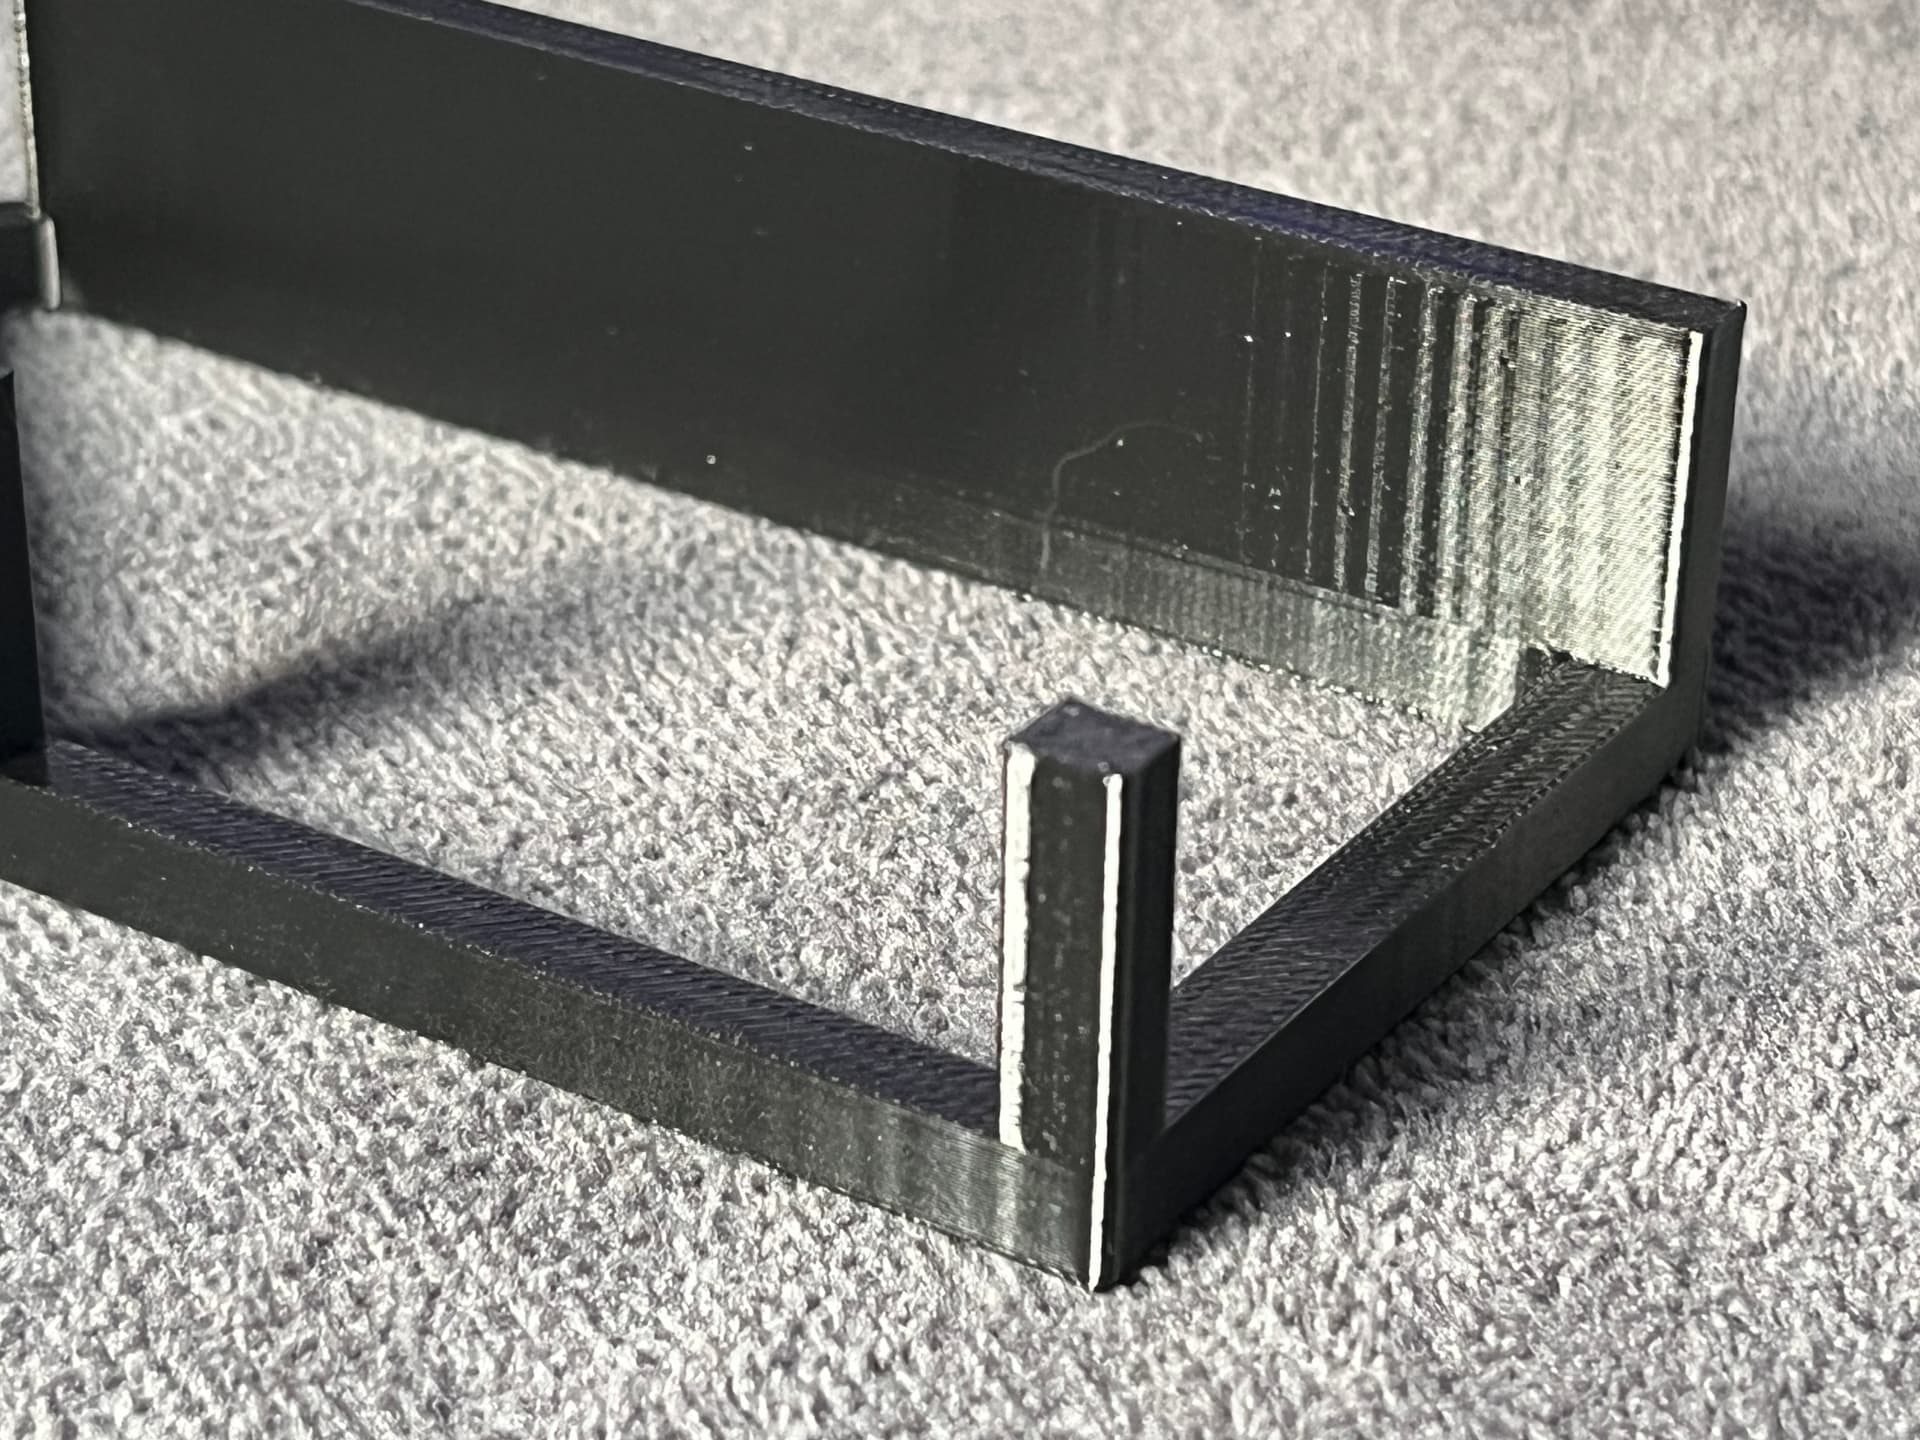
The Picture with the black object was printed with some Creality PETG, i would say this could be slightly better… It happens more with bigger objects.

By now i only set the upper shell layers up to 7 and the infill to honeycomb. The other Settings should be original.

Thanks for your help,
Alex


ah i see. i have no idea what to do because i am new too. Good luck with it!

PETG is one of the harder filaments to get to print well. It like to “string”, and the stringing tends to build up on the nozzle until it eventually gets deposited on the print someplace. If where it gets deposited is wall, it will leave a visible defect around that blob.

Need to do manual flow and PA cal, possibly also a temp tower cal. And I don’t see anything about drying the filament. Any of these things might explain the problem you’re seeing. You’re going to have to work through them all to see which.

In addition to @RocketSled recommended, you may need to slow things down a little. PETG does not like to print as fast as PLA. I have not used SUNLU Rapid PETG so I don’t have any settings to recommend. I usually start with a Generic PETG profile and perform pressure advance and flow ratio calibration (in that order).

Okay, thanks guys. Ich will try to do some calibration again.

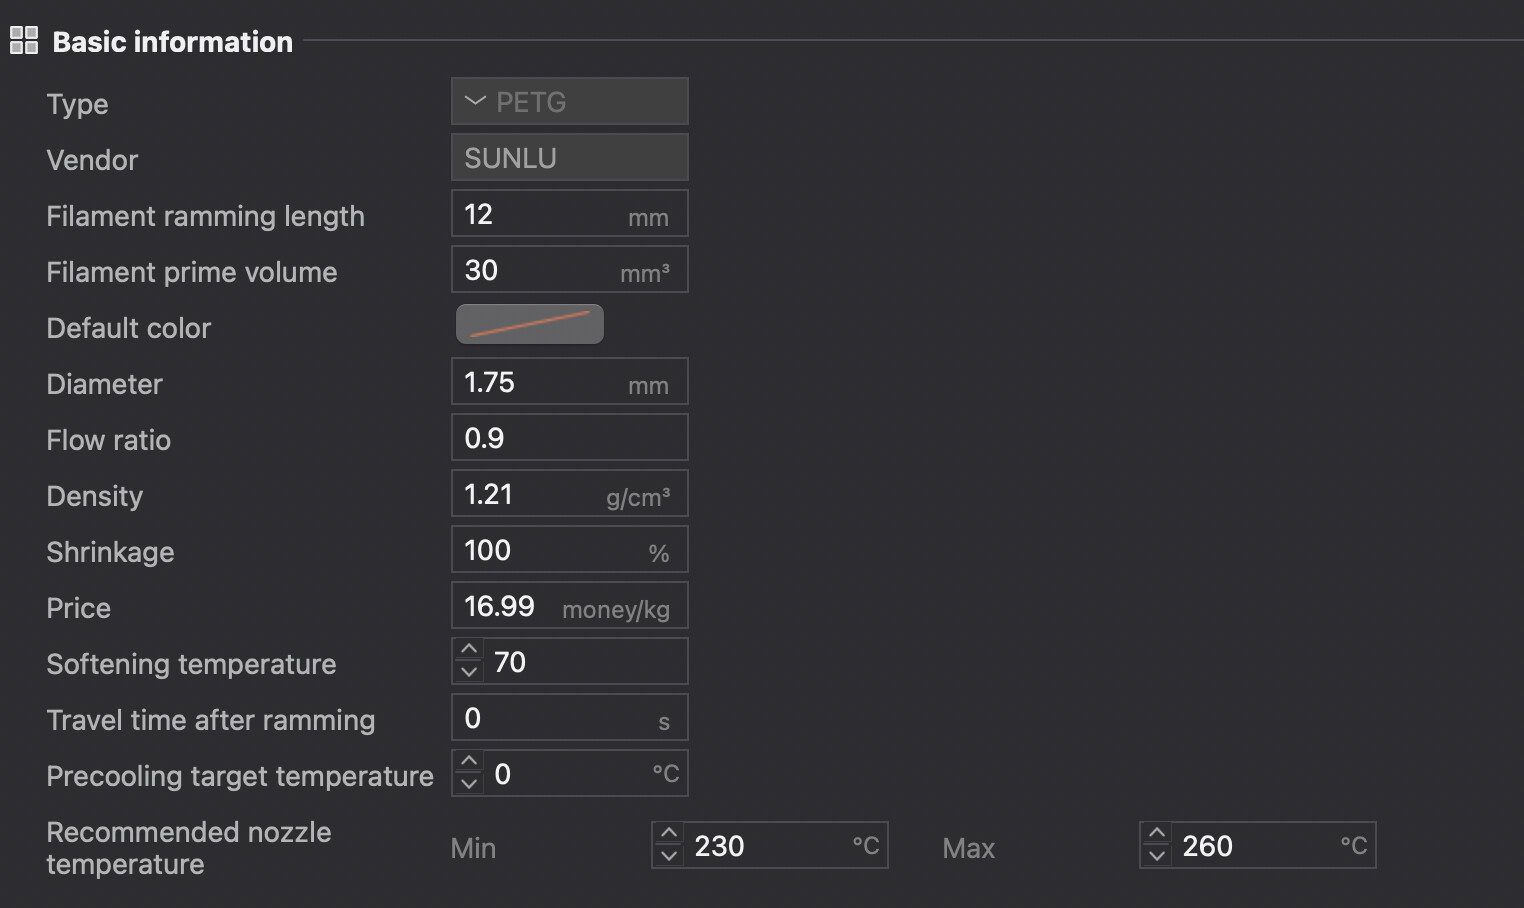
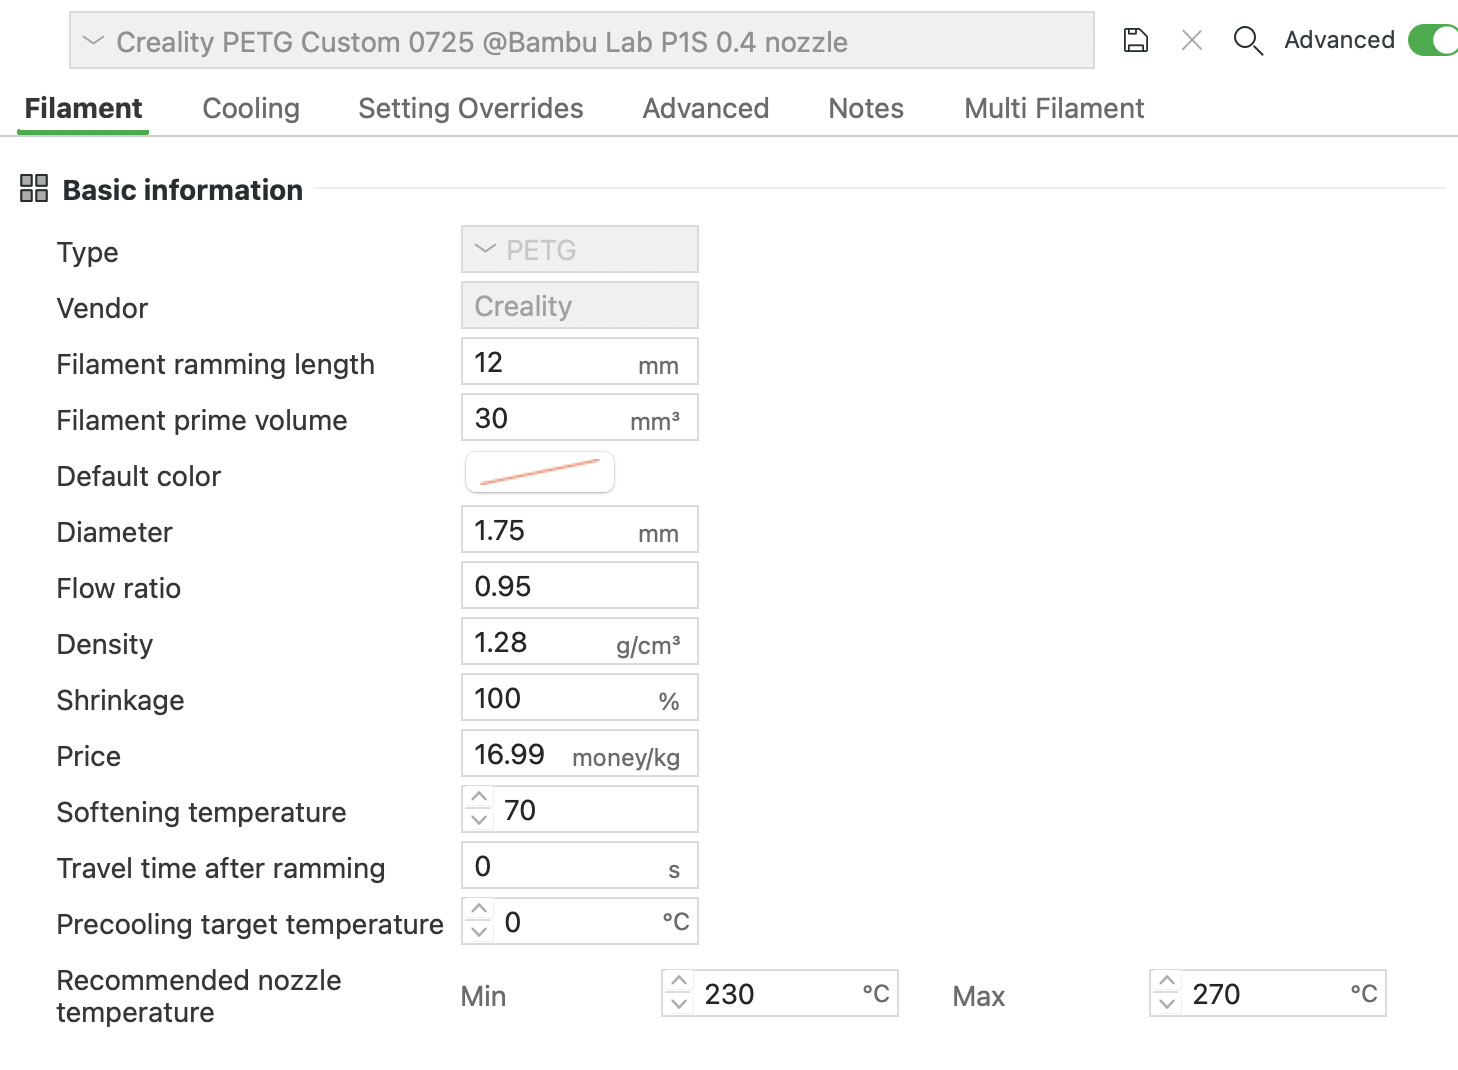
I took the Bambulab PETG HF profile, changed the temperature to the Sunlu recommend and renamed it.

With the “Generic PETG HF” Profile the Printing was very slow, more than twice the time than with the Bambulab profile.

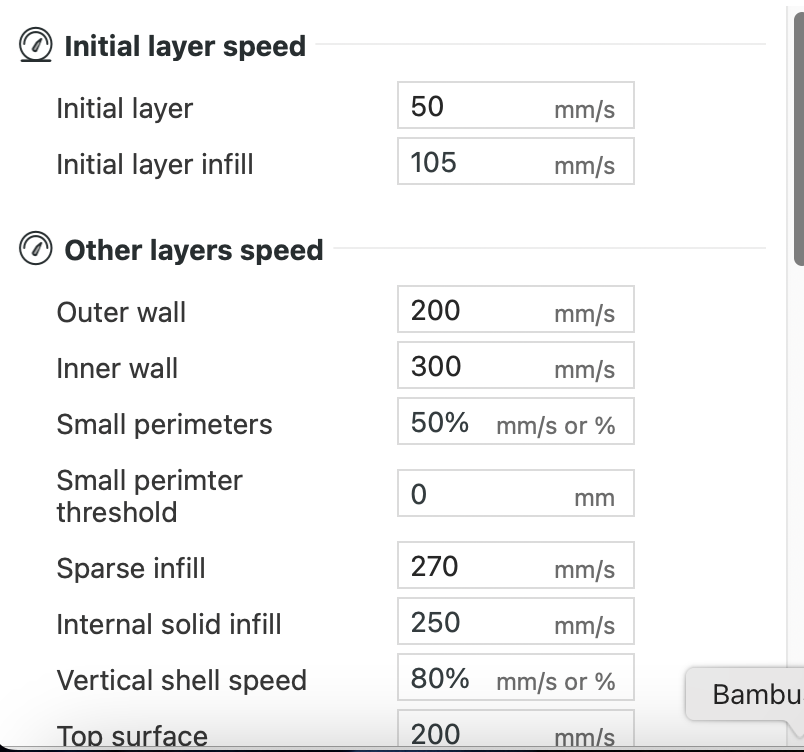
I thought it would be maybe a settings issue, the Speed was identical with 200mm/s in both profiles.

I could not figure it out, why this profile is that slow.

I do not dry the filament active. It sits for a few days in my AMS.

Maybe I will take this heating box from creality to dry it active in the future.

For now I will check your tips and do some testing with the flow, speed and calibration…

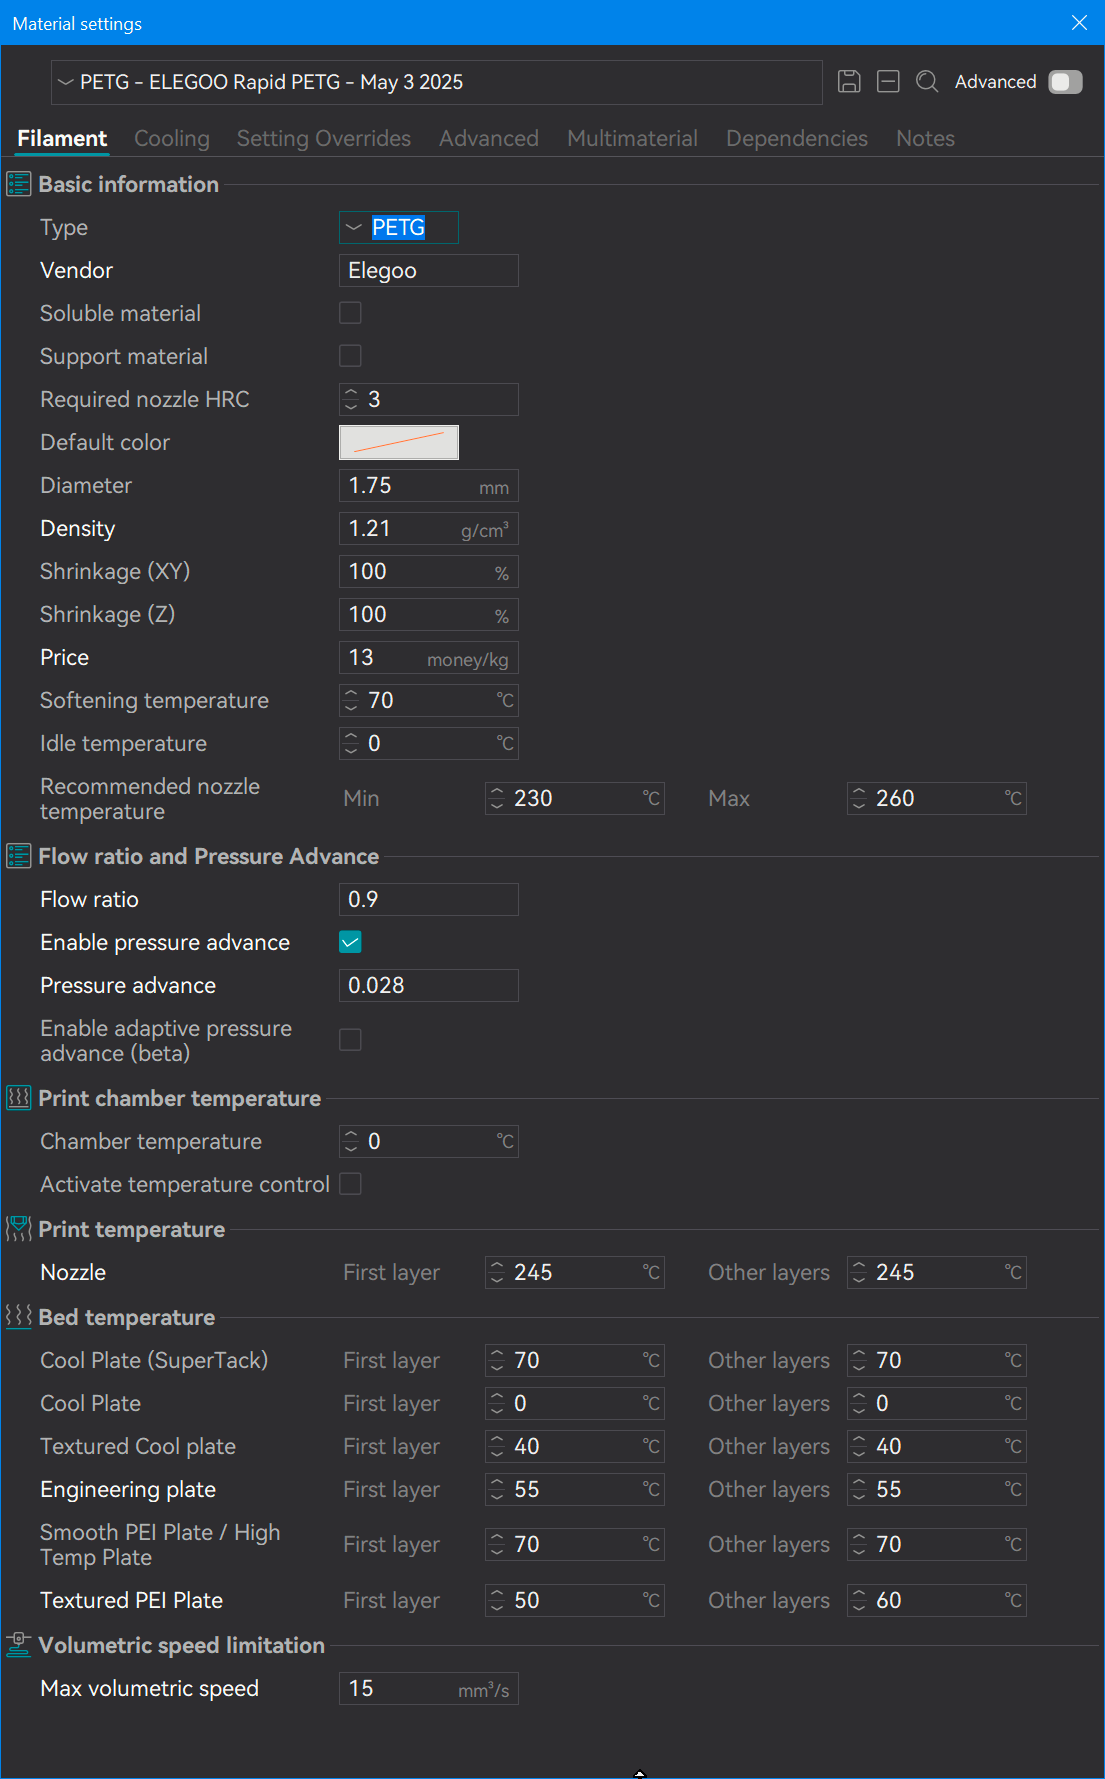
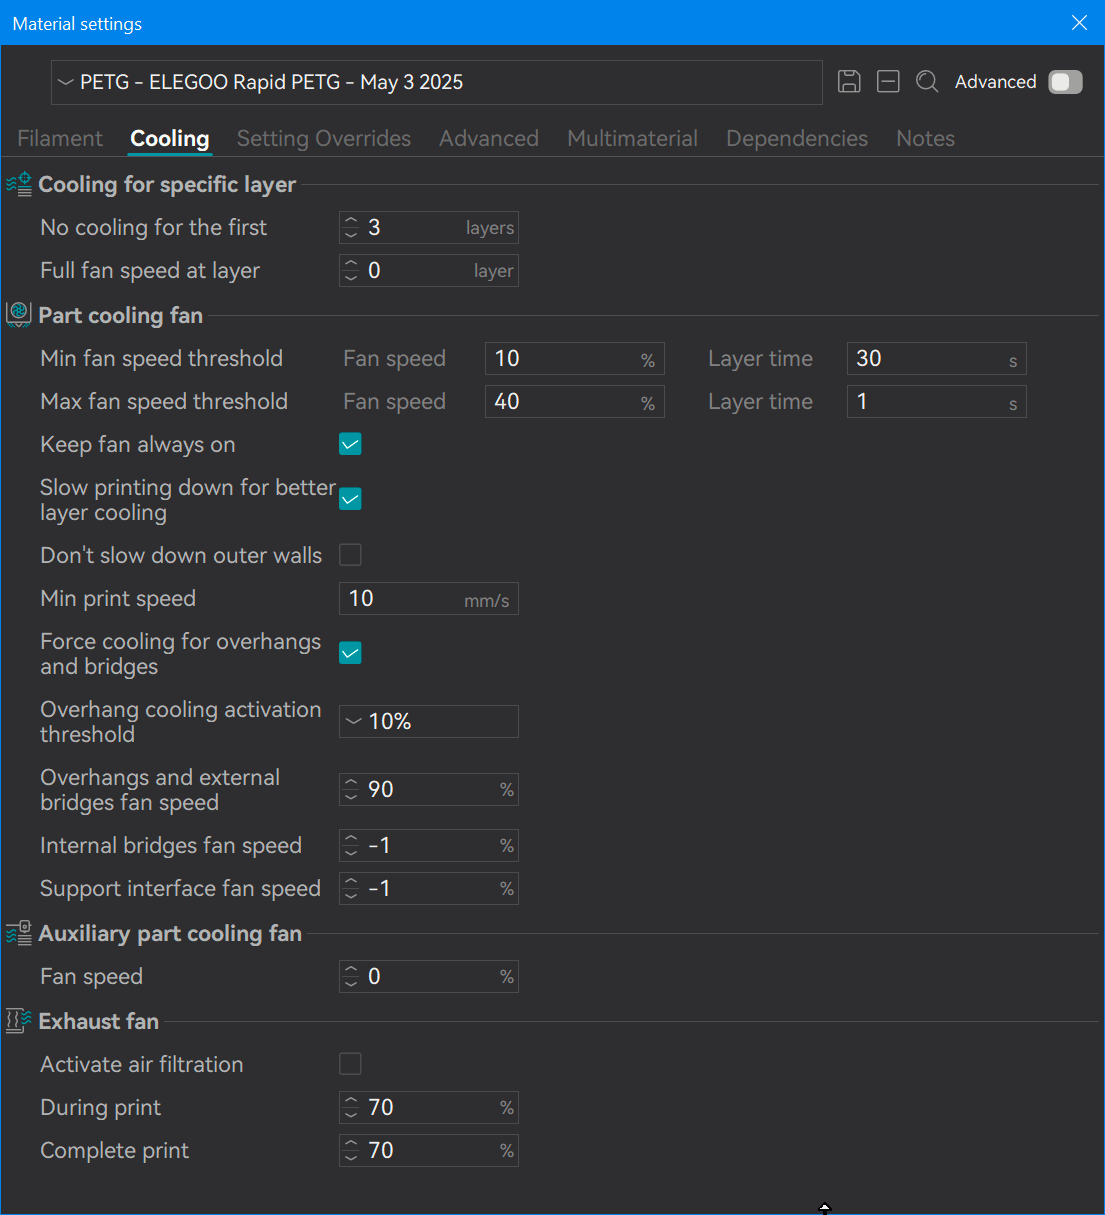
I see several issues with your output. For now, try these settings I use for Elegoo Rapid PETG and share your reprinted samples so we can help further. While optimized for my purposes, interchangeable parts - they may not suit your preferences.

Thank you for the profile! Which speed do you print with?

I will print the same object again and post new photos!

I perform all my calibrations with standard speeds.

Hello Again :slight_smile:

I tested the profile from @Olias.

I would say its way better now, thanks for that!

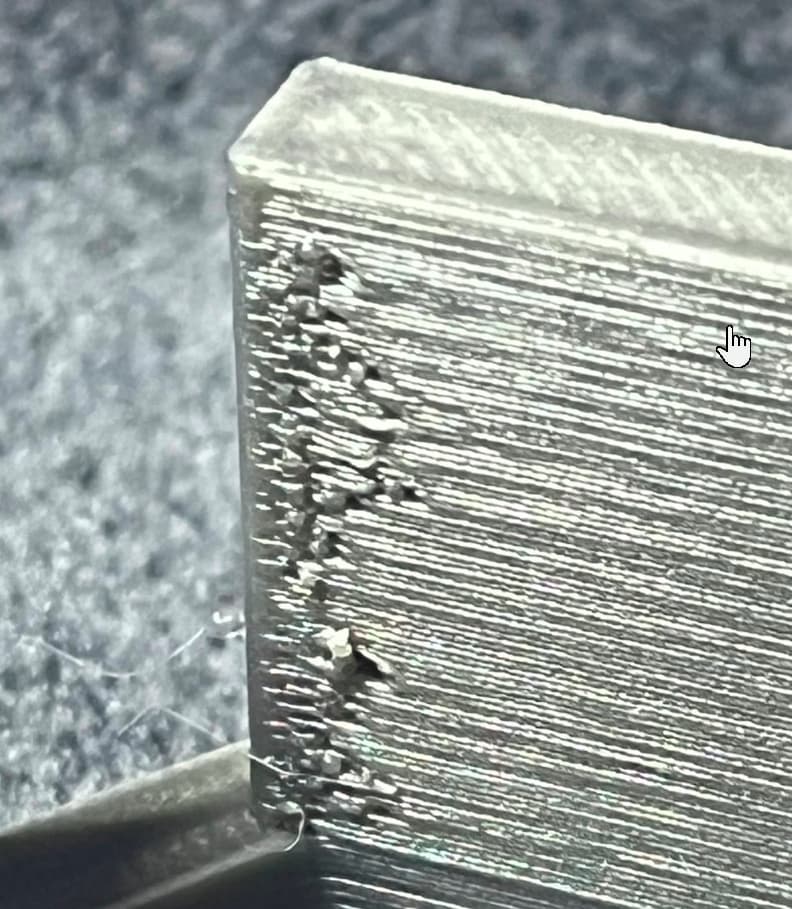
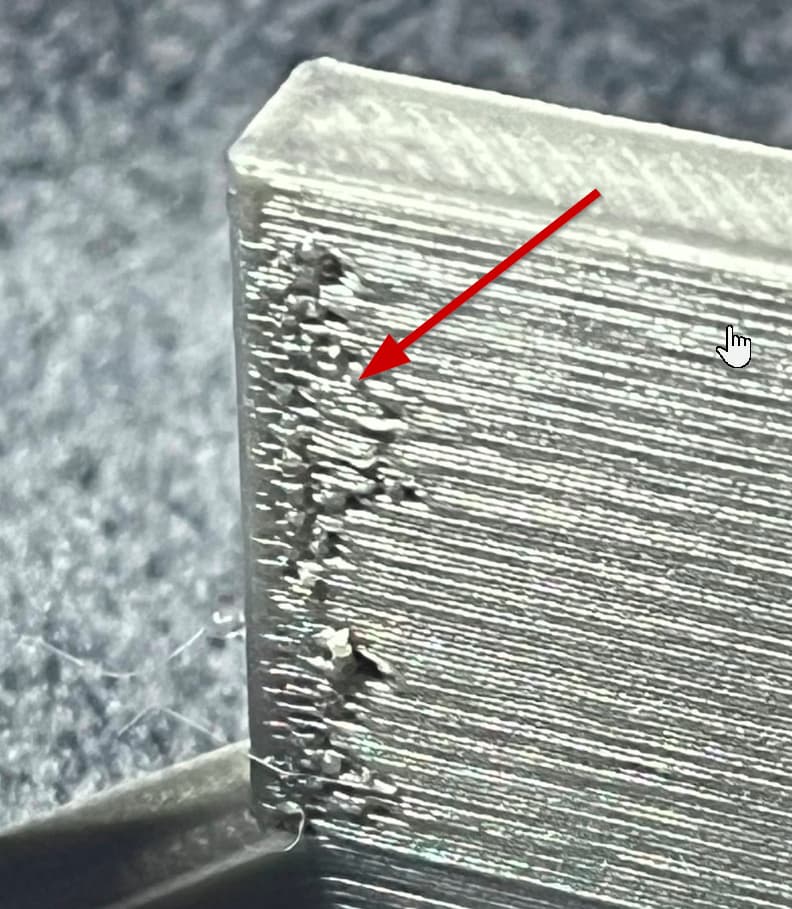
But this one corner is still the same, any ideas?
The top layers are good enough i would say.

I will try another Print later, where i increase the K Factor a bit. Maybe 0.025, 0.030 was too much.

Thanks. :slight_smile:


If you’re referring to this segment, my guess is that you’re exceeding the max volumetric flow for your filament. Moisture in the filament is the most likely culprit but you can tweak the profile to get some - not a lot - but some relief.

I’m assuming you either don’t use Orca or aren’t on Beta 2.3 of Bambu Studio. Orca has had built-in calibration tools for over a year, including max volumetric flow. BS just added this in Beta 2.3, but I moved to Orca permanently and deleted Bambu Studio after Bambu’s January stunt with Bambu Connect and their forced privacy compromise under the false flag of “security.” Orca has always been five or six steps ahead of BS anyway. Here’s where that Calibration tool that will help you calibrate max flowrate in Orca, I believe I also saw it now in BS Beta 2.3:

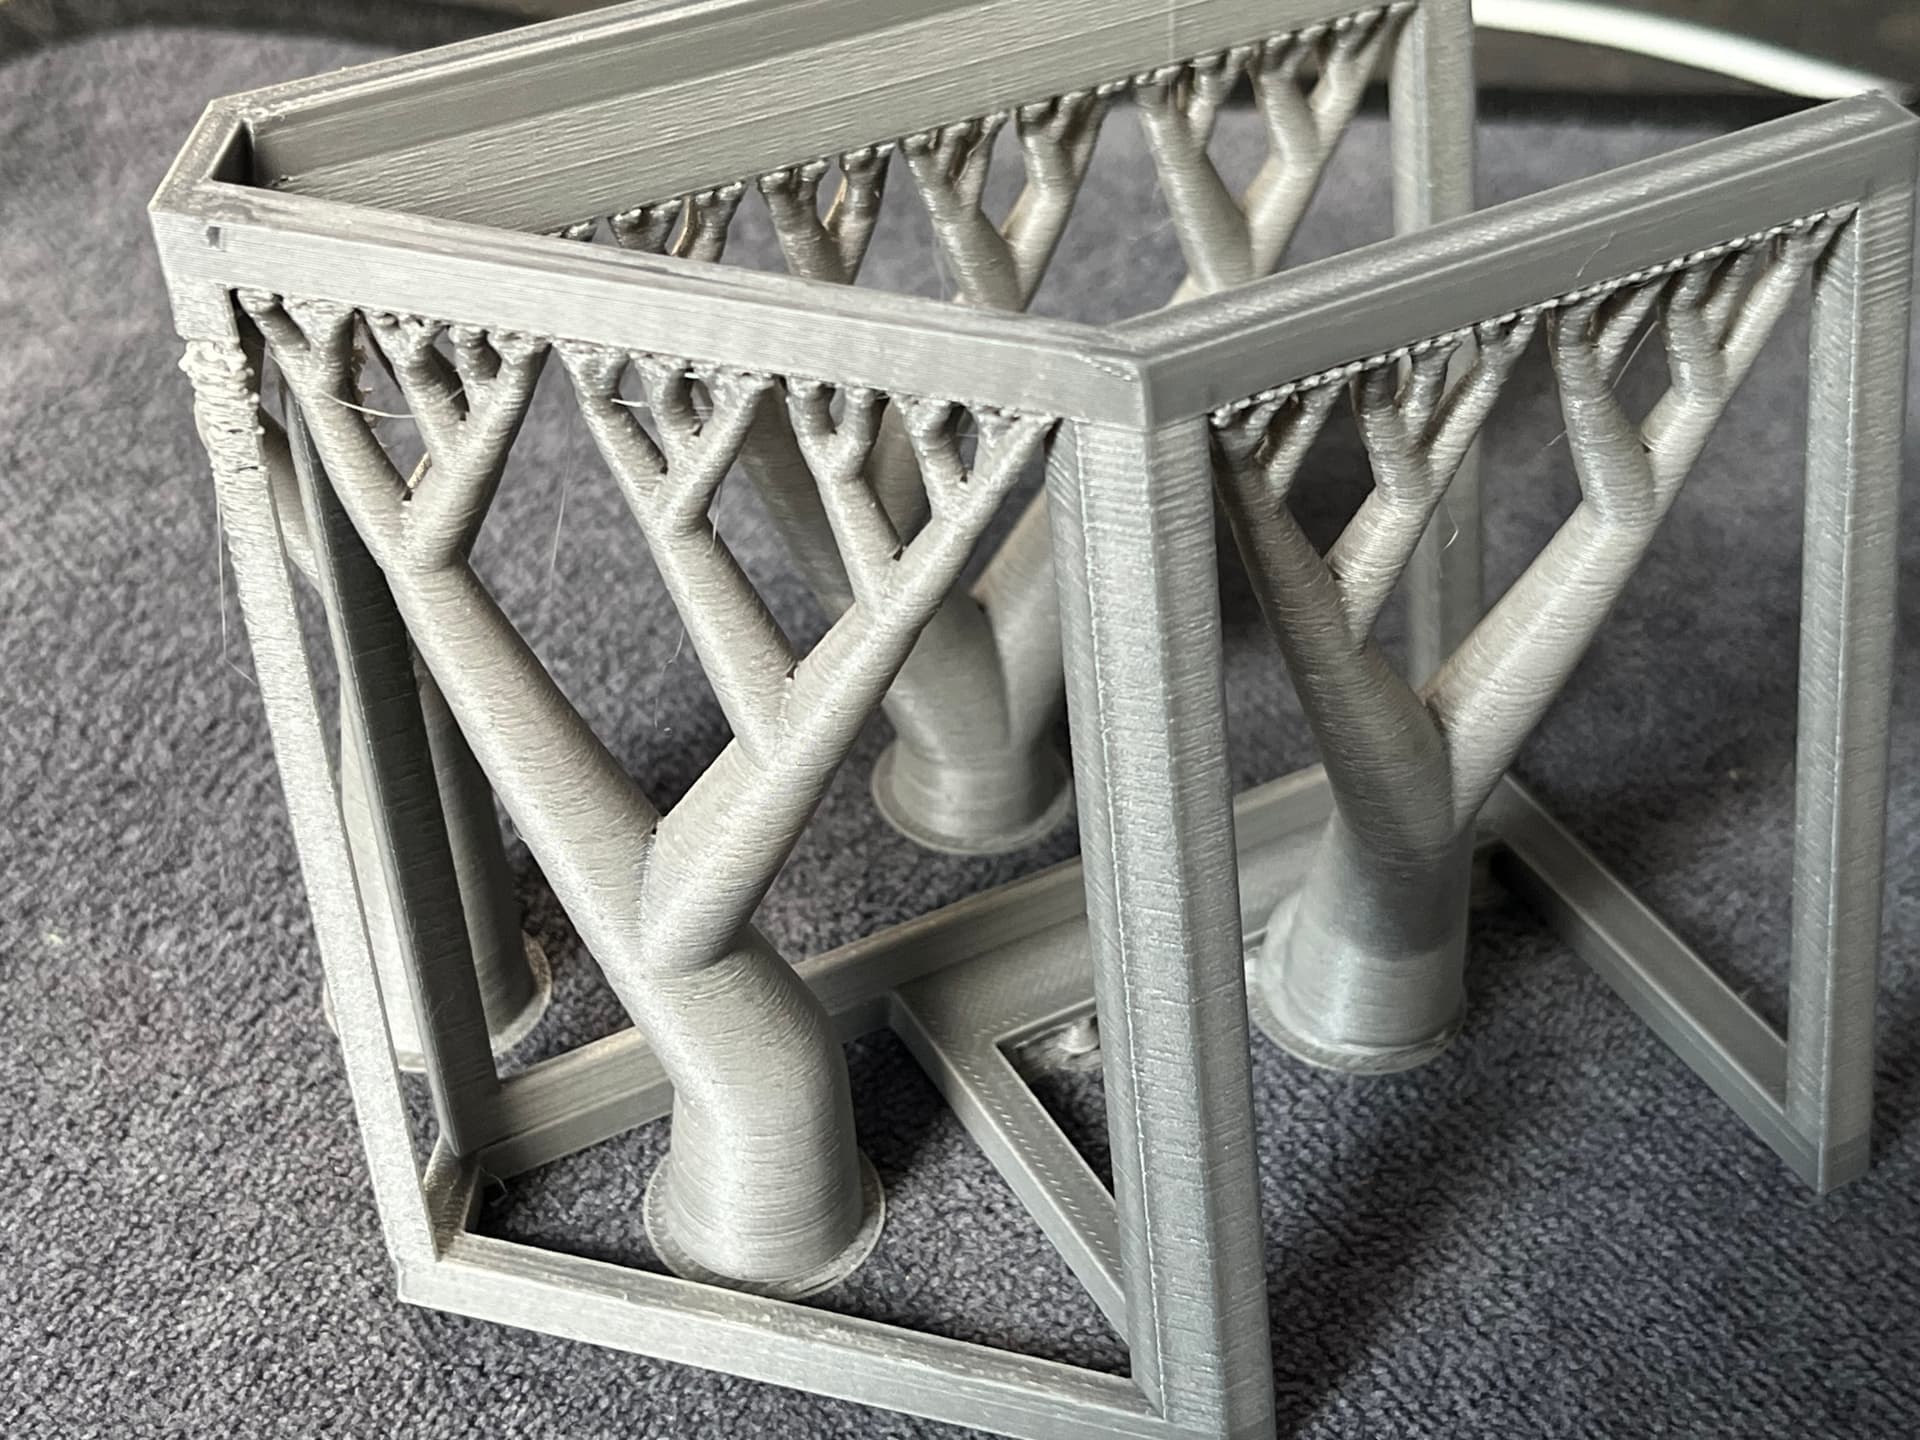
That tool generates this model:


Tutorial: home · OrcaSlicer/OrcaSlicer Wiki · GitHub

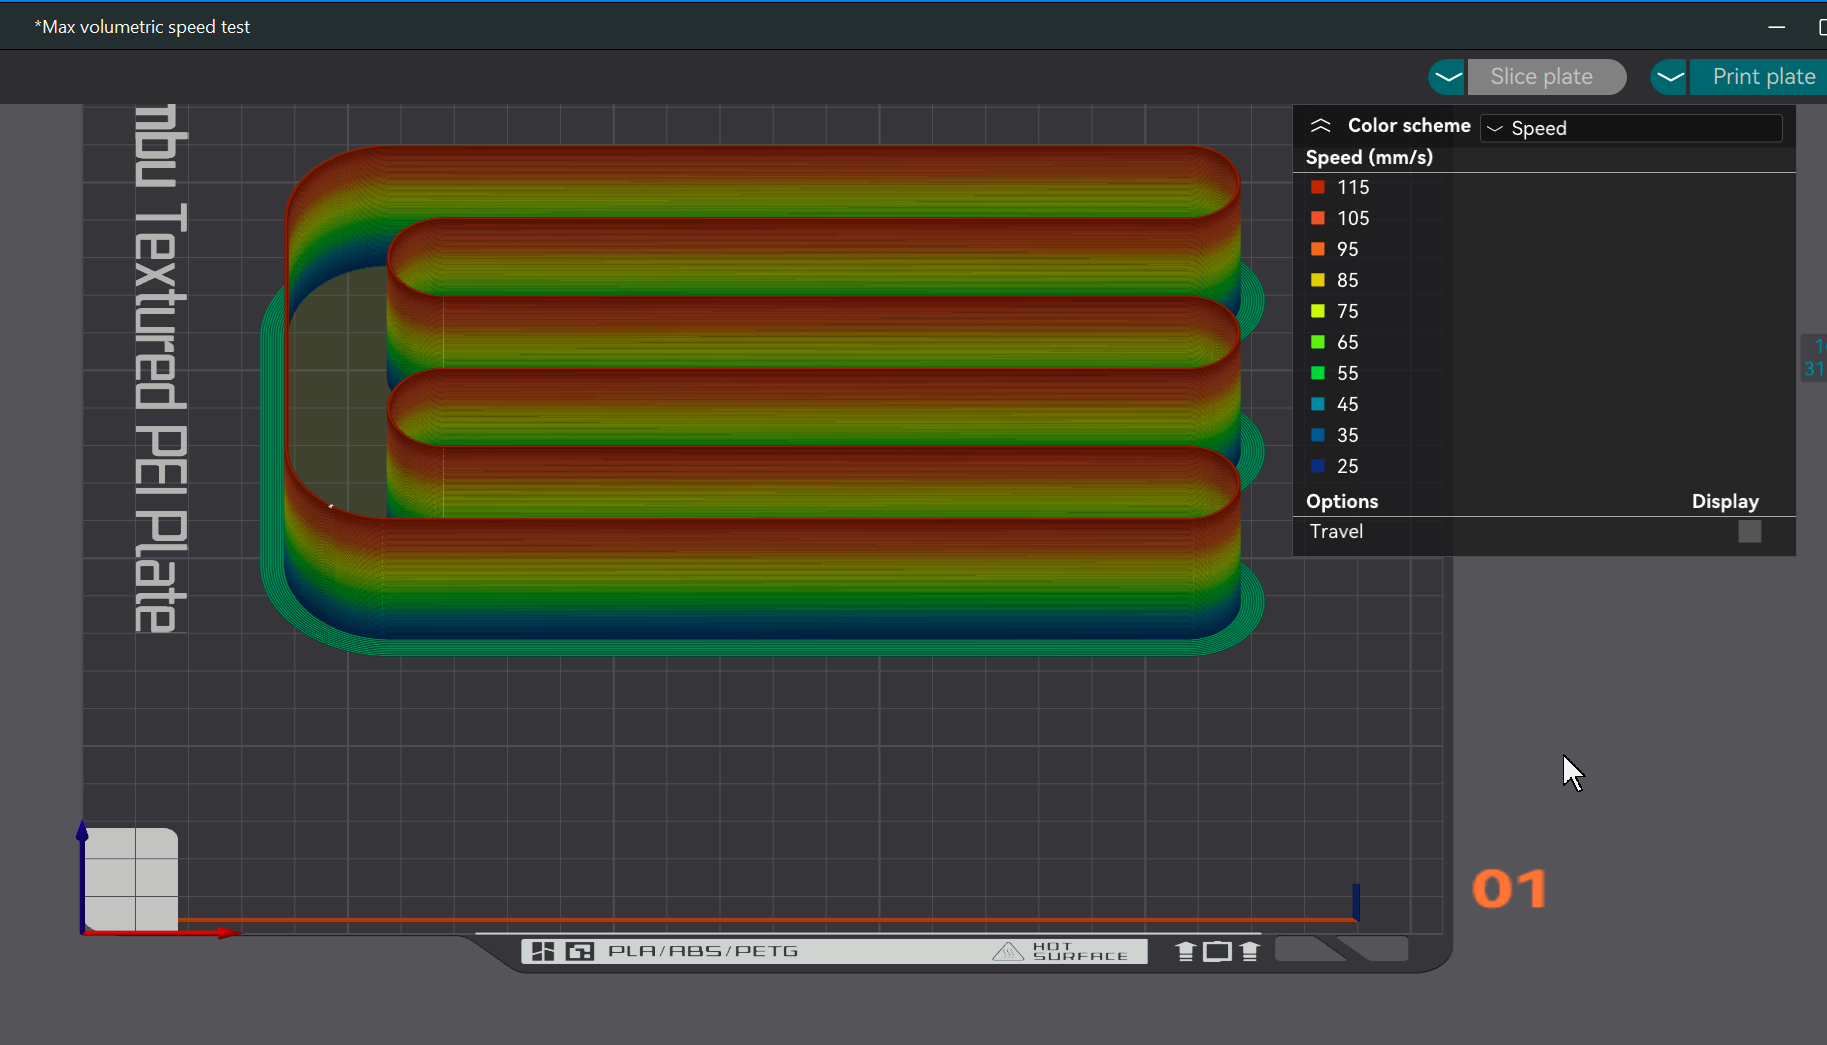
Max volumetric flow (unlike flow rate) measures how fast filament can flow at max temp and max nozzle speed. The rainbow effect in the above picture shows increasing speeds. You know you’re exceeding flow when it looks like this and that measurement point is what you want to put in the filament profile:


Or, in your case:

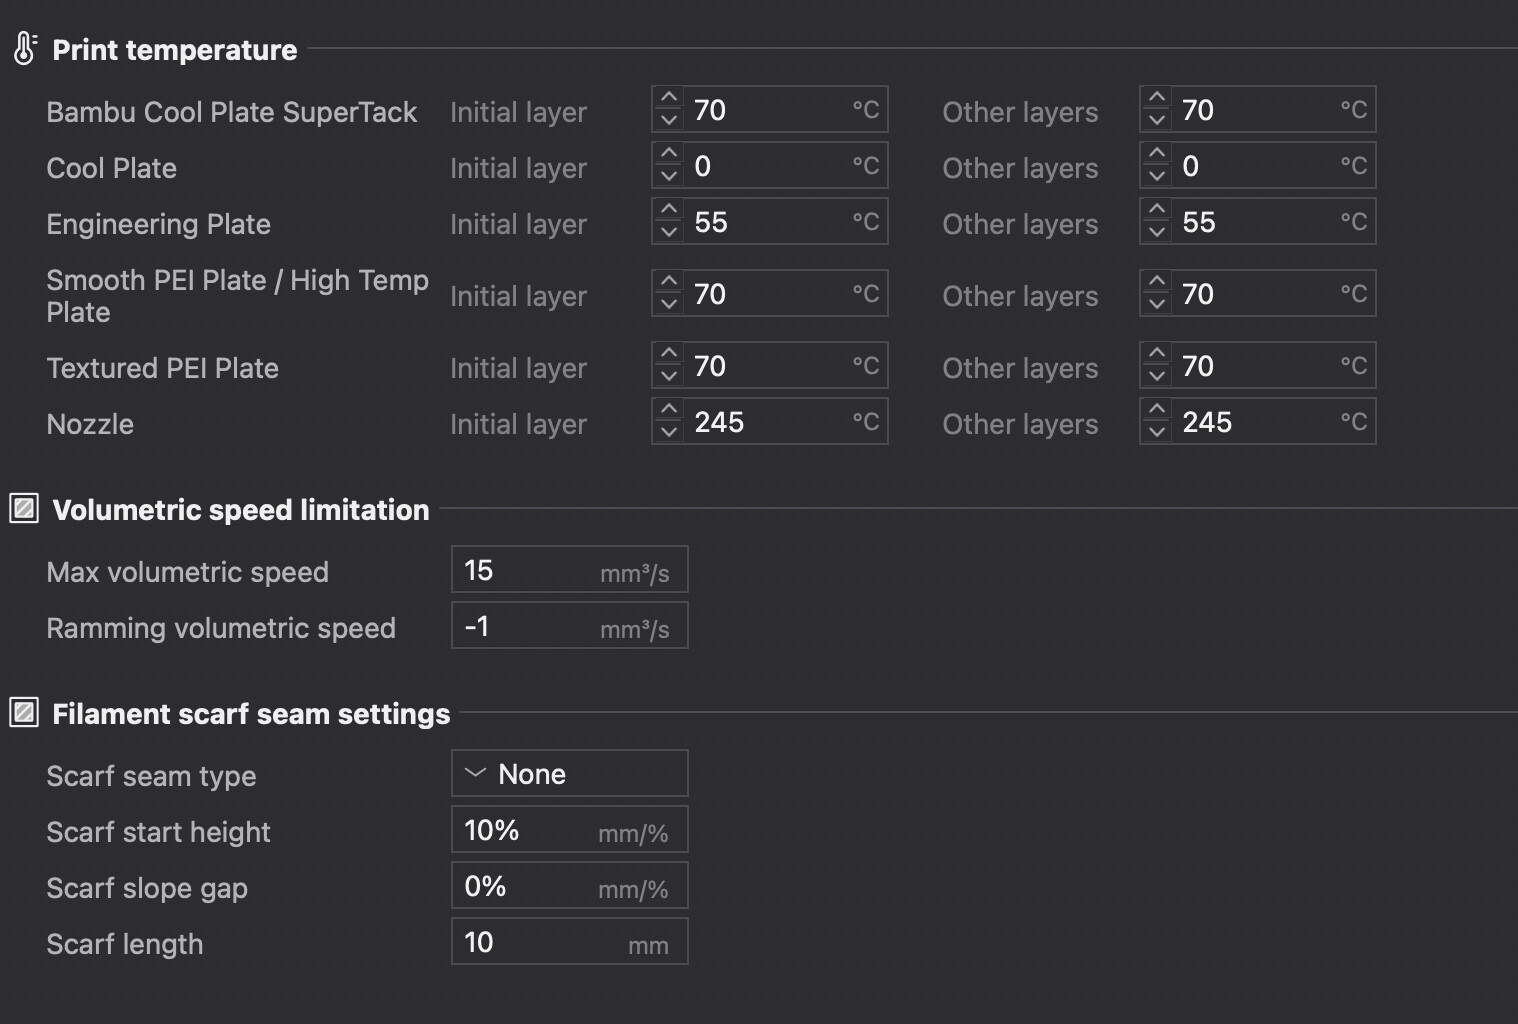
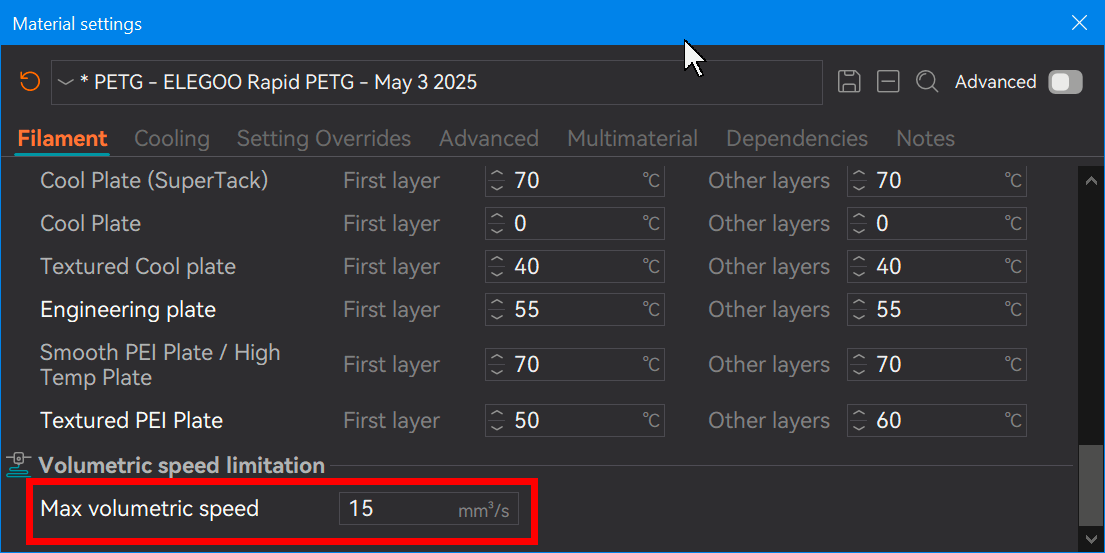
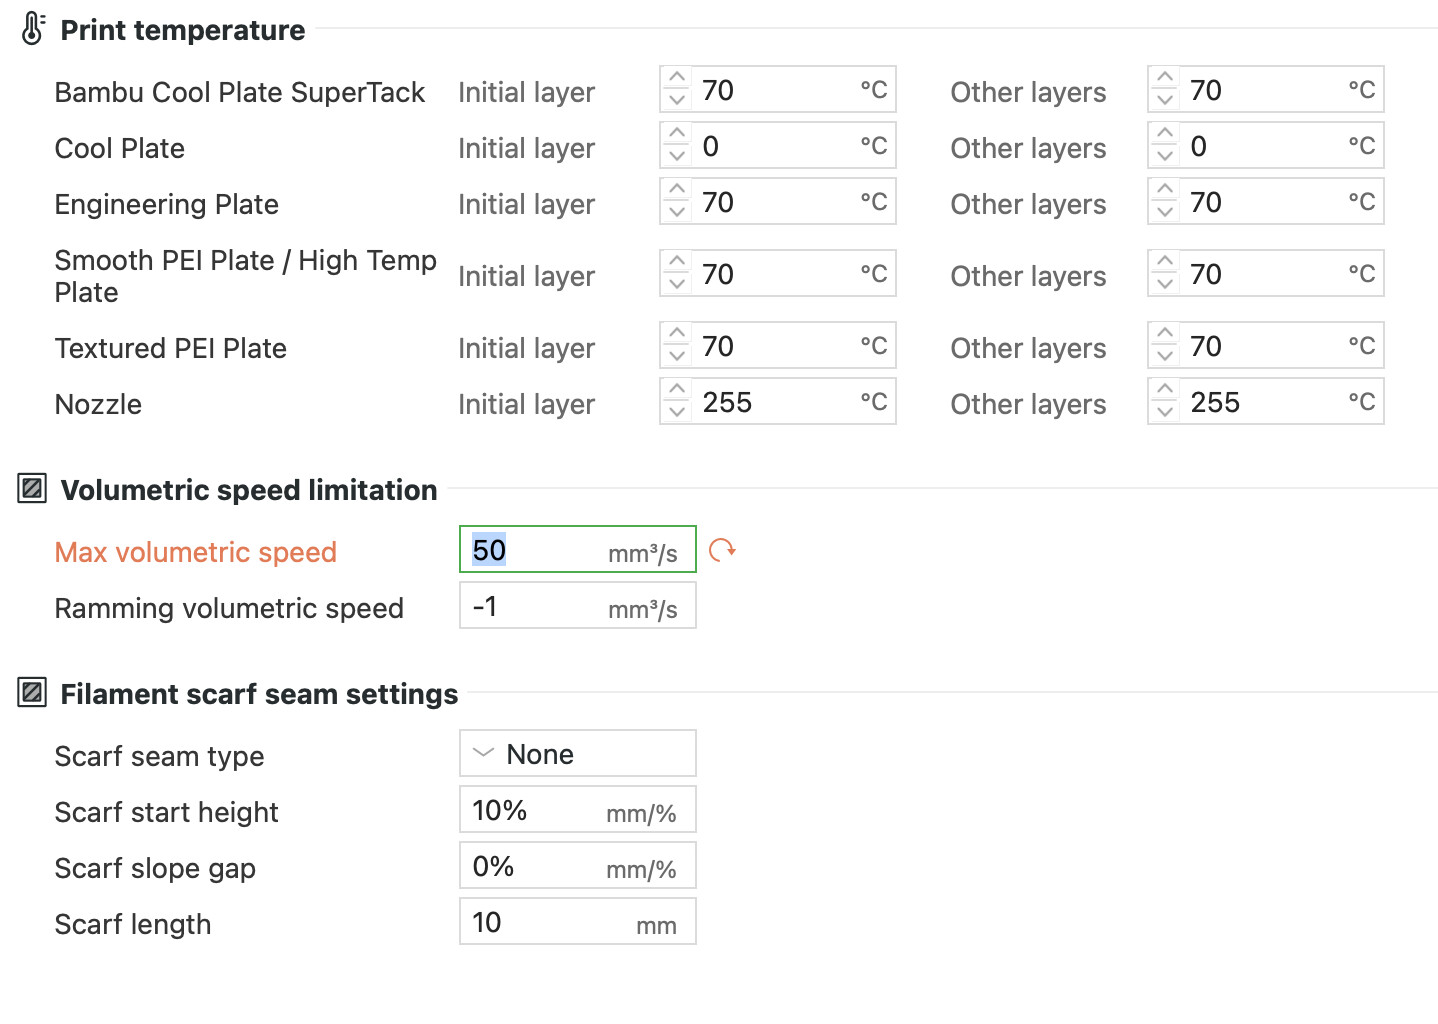
Once determined, enter that number here:

If you don’t use Orca or BS 2.3, try this MakerWorld test model. It varies G-code speed similarly:
https://makerworld.com/en/models/85600-bambu-slicer-max-flow-test-tower?from=search#profileId-91491
(I haven’t tested it since I use Orca.)


NOTE: Calibrating Max Flow Rate is not a substitute for drying filament.

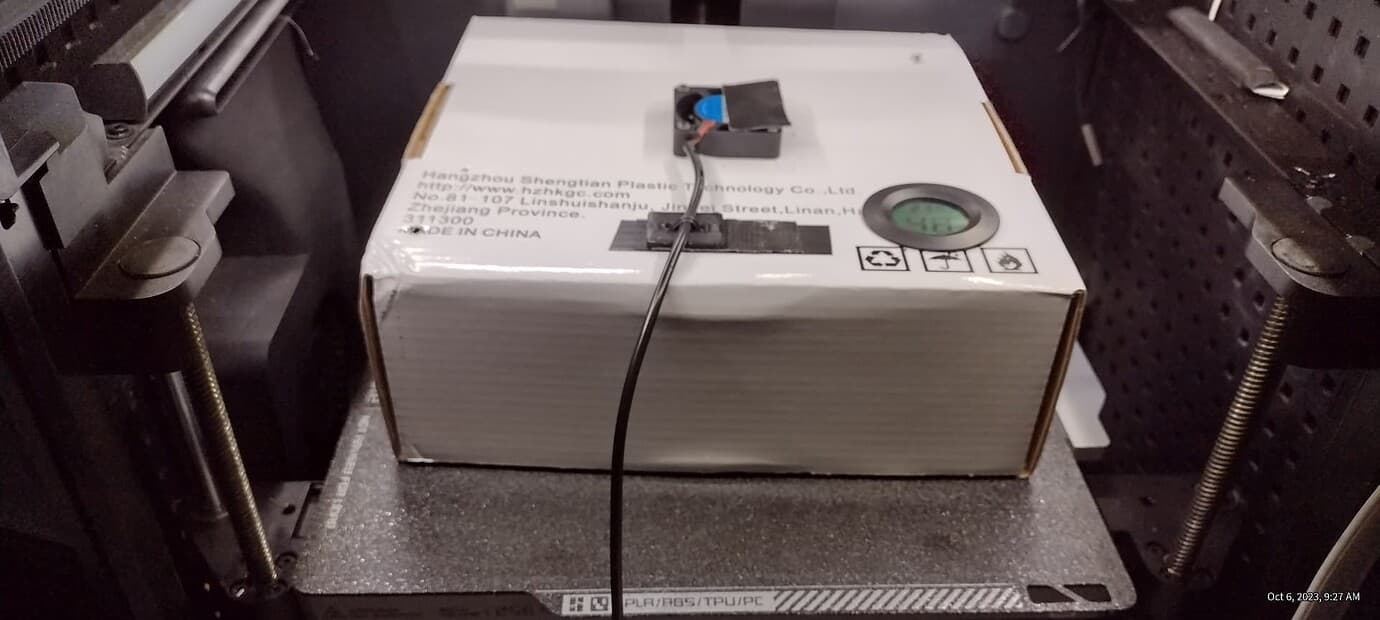
Even if this helps with corners, dry your filament. No dryer? Use your build plate and the cardboard box it came in:

Here’s my P1 setup (yes, I overdid it with a fan and hygrometer):


Weigh your filament before and after drying.

Moisture may not be the cause, but weighing confirms it. Elegoo PETG’s cardboard spool alone can hold 4-6g of water. If you lose 6g, it may have been the spool, but now you know it’s dry.

How to confirm: weigh every 4-6 hours. Flip the spool every 12 hours over 24 hours using the printbed method (≈60°C). Closing the box can increase heat but risks warping one side of the spool.

Thank you @Olias for this long Post, it helps a lot to understand how print with PETG works :slight_smile: in the future, i will dry my filament first and weight it.

I have a few new photos, i printed a few more test objects.

First, i had done the normal calibration again and get the same Result, between 0.020 and 0.030 is the best Square.

So i tested 0.025 and 0.023, but it do not change much.
The same object, the identical result. only this one corner makes problems.

Then i tried another object, which is higher.
(I need this things anyways, this is not an random model)

But one corner looks even worse:


Then i tried to print the flow test from makerworld, like @Olias said.

I changed the flow to 50, like in the picture.

It prints well except the last few layers. Since the speed is way over 400m/s, i would say the good result ends over 200mm/s or not?


Am i printing the thin parts where my problems are maybe too fast?

Should i change the speed to 150mm/s or something? Or is there an intelligent option where the printer slows automatically down at such positions? I cannot find such an option. But my walls seems fine, slow down for the complete model makes the print much longer and is not necessary i would say…

I will try the model from yesterday with a dry filament. (its really dried)
If the filament is not dry, i cannot imagine why its only one corner where the print fails.

Maybe someone in this board could interpret my Flow test more than me.

Thank you guys,

Alex
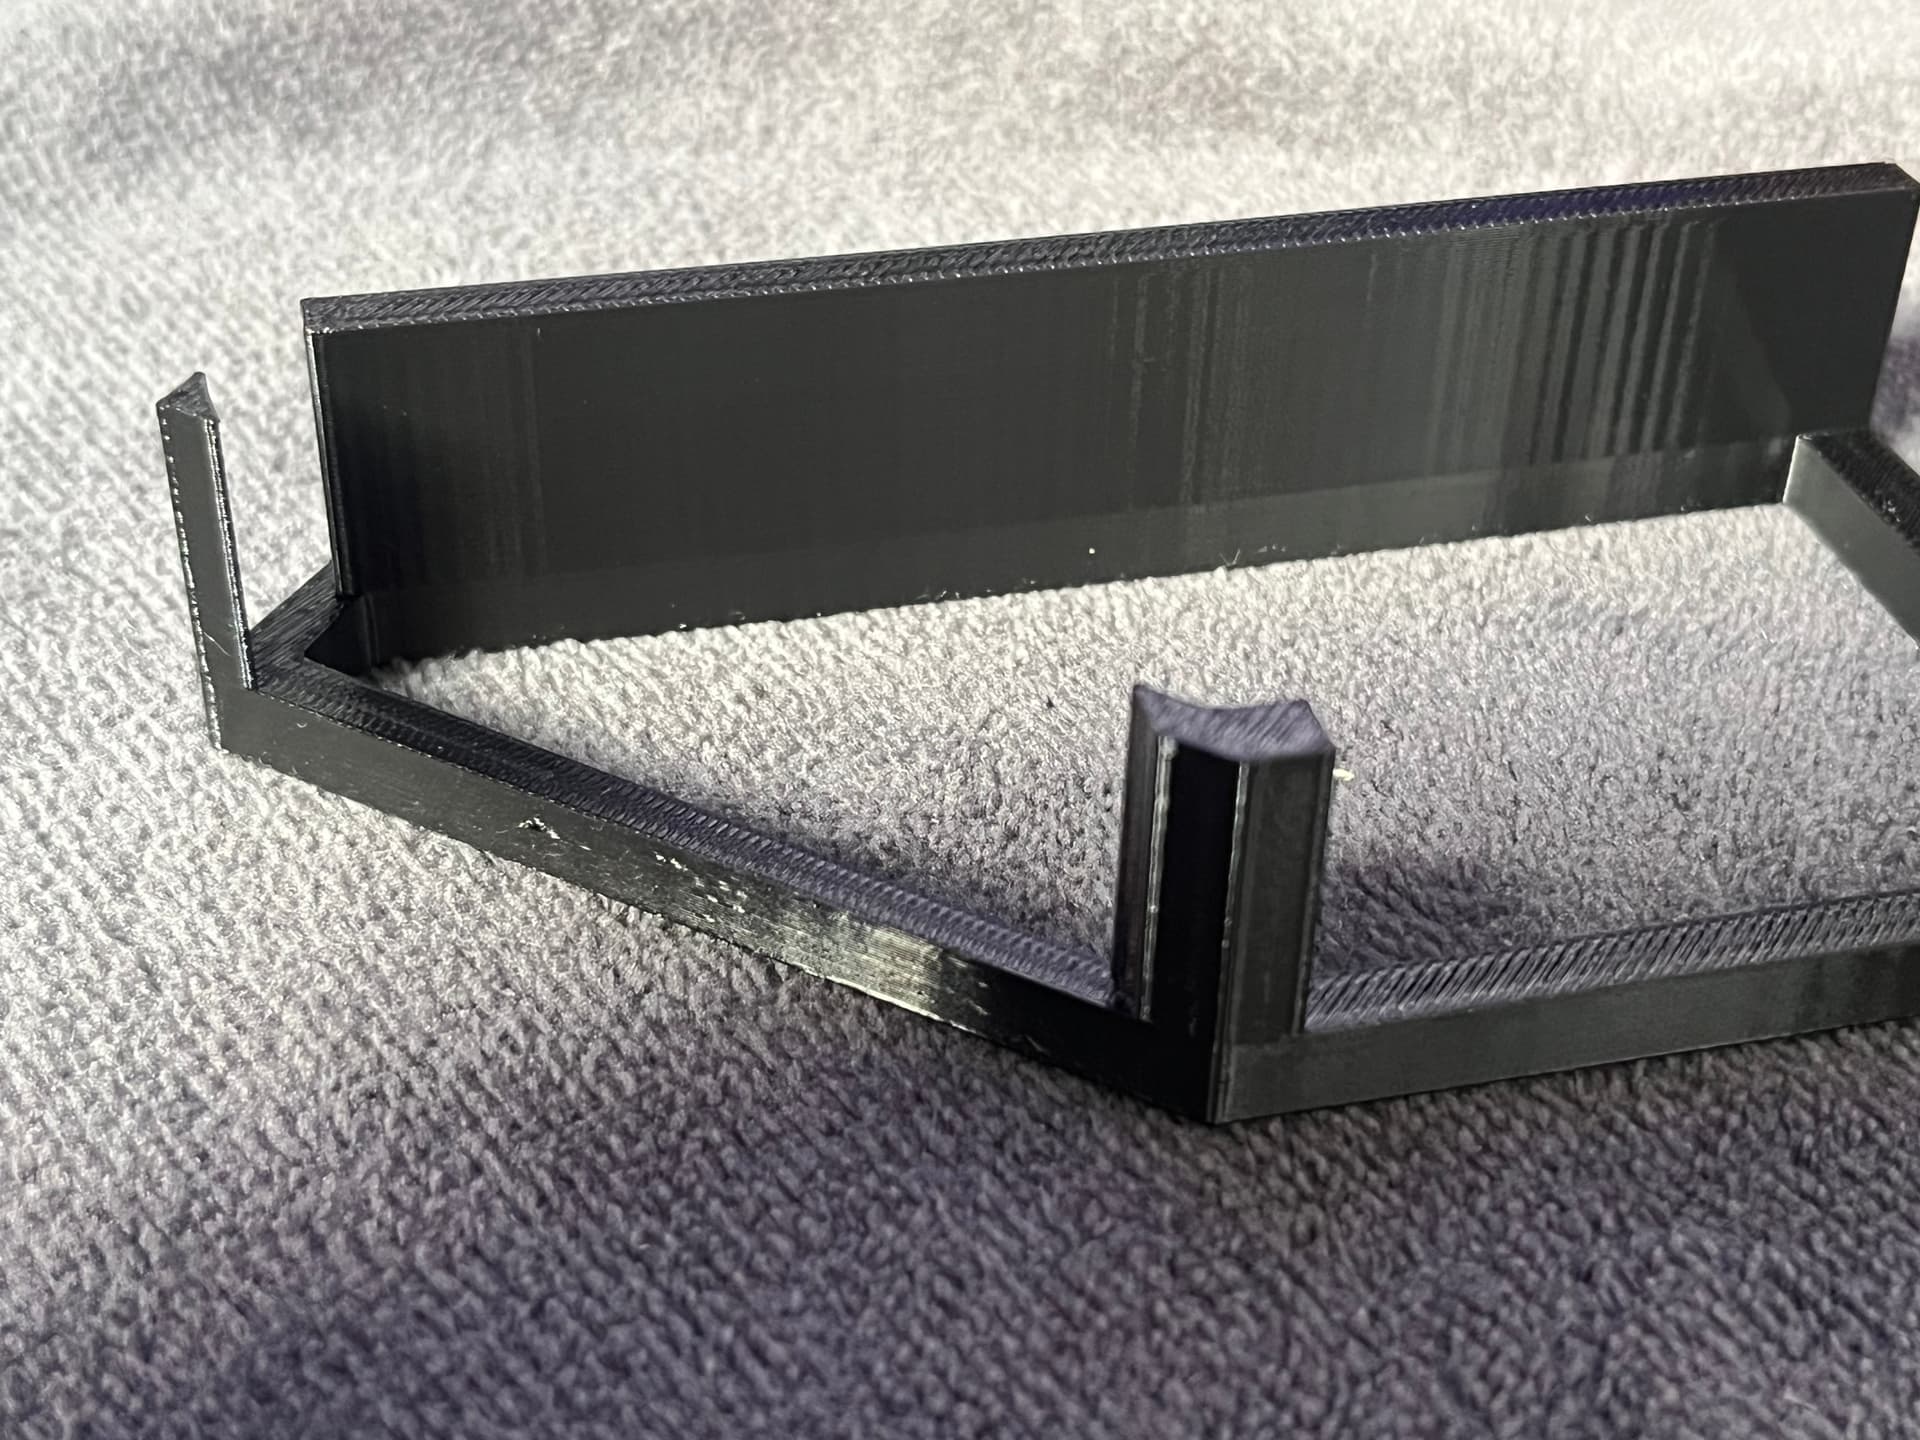
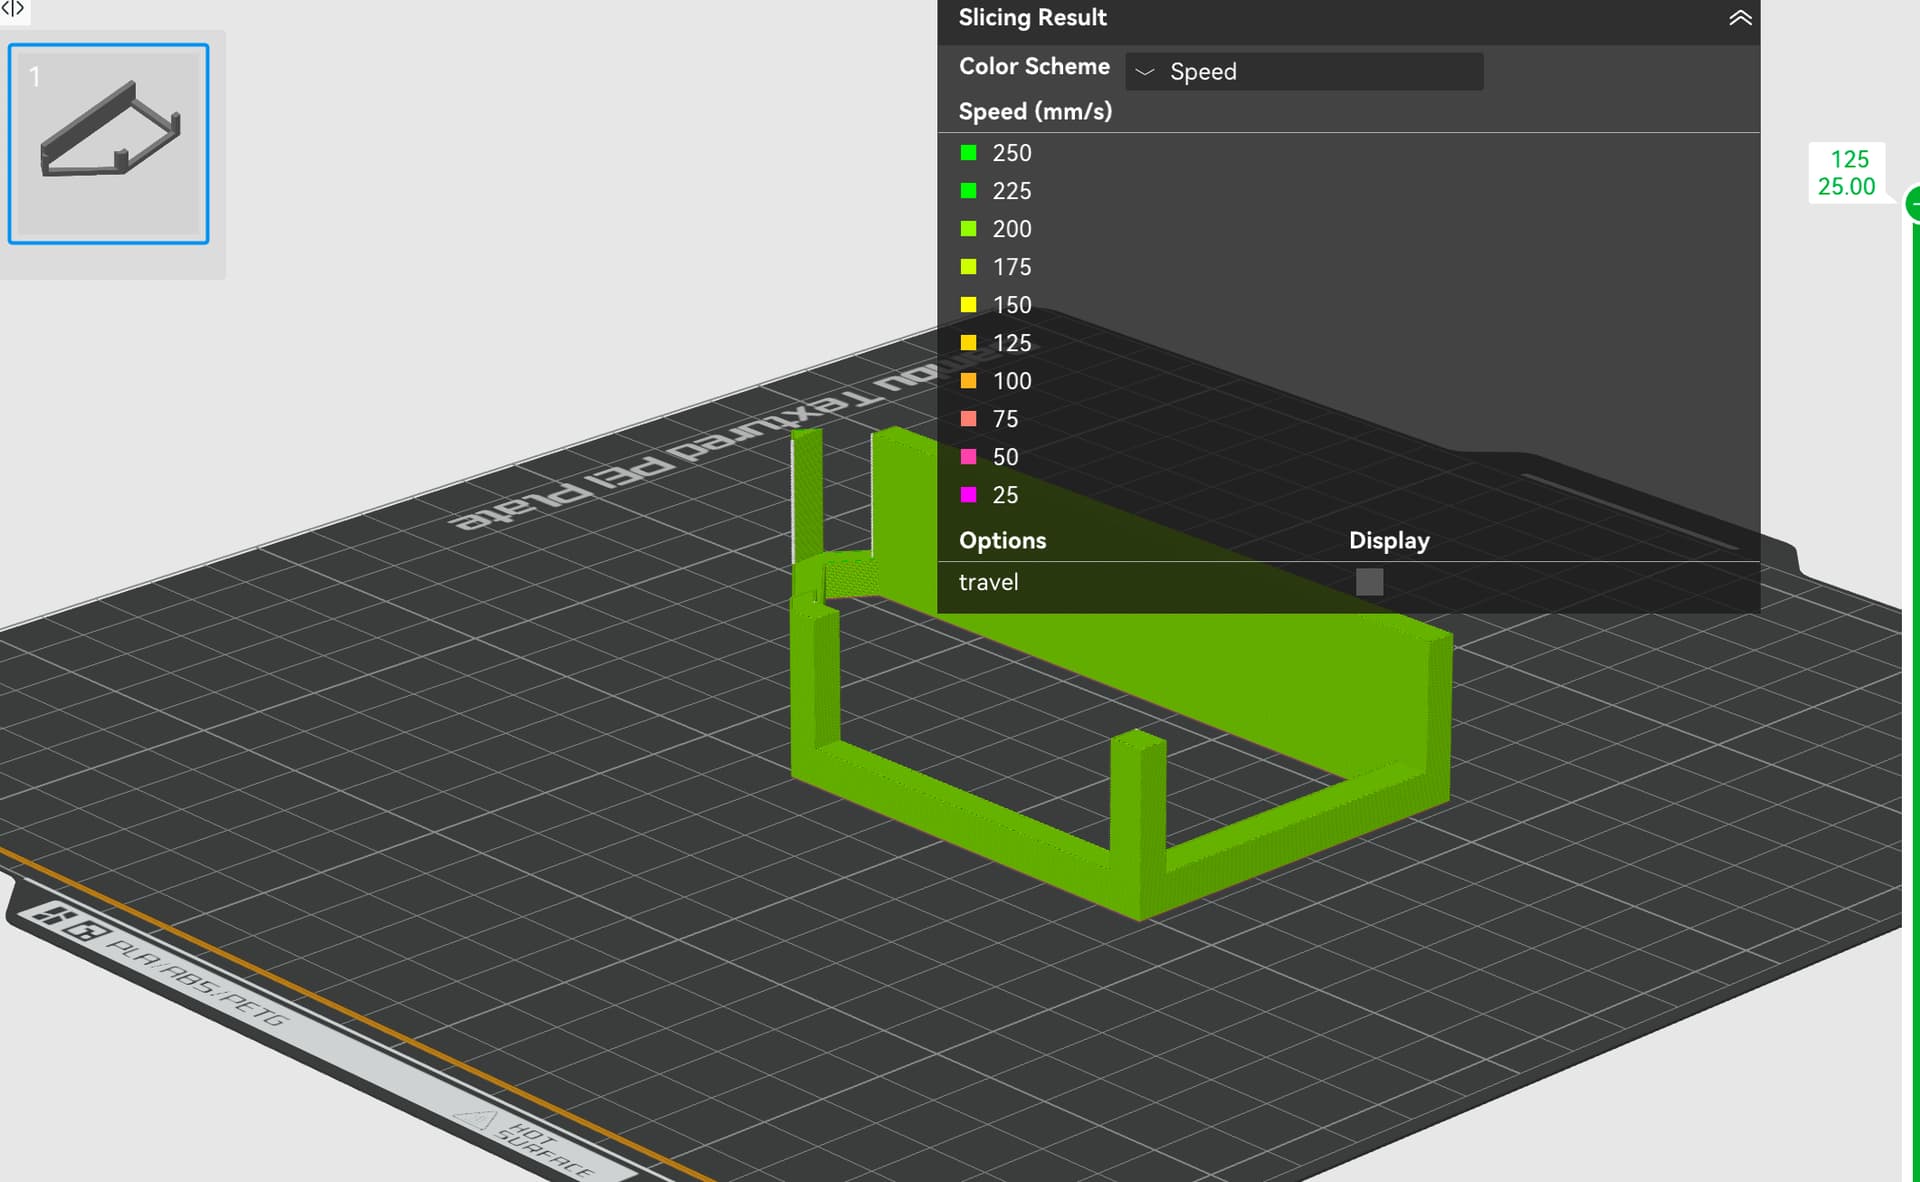
addition to my last post, i printed the same model with my dry PETG and a new Profile.

And its better i would say. There are only 2 little spots in the front, but the wall in the back is now fine. I think this are minor setting adjustments?


I wonder, why my Sunlu Profile is that fast, maybe the new Profile is the solution?

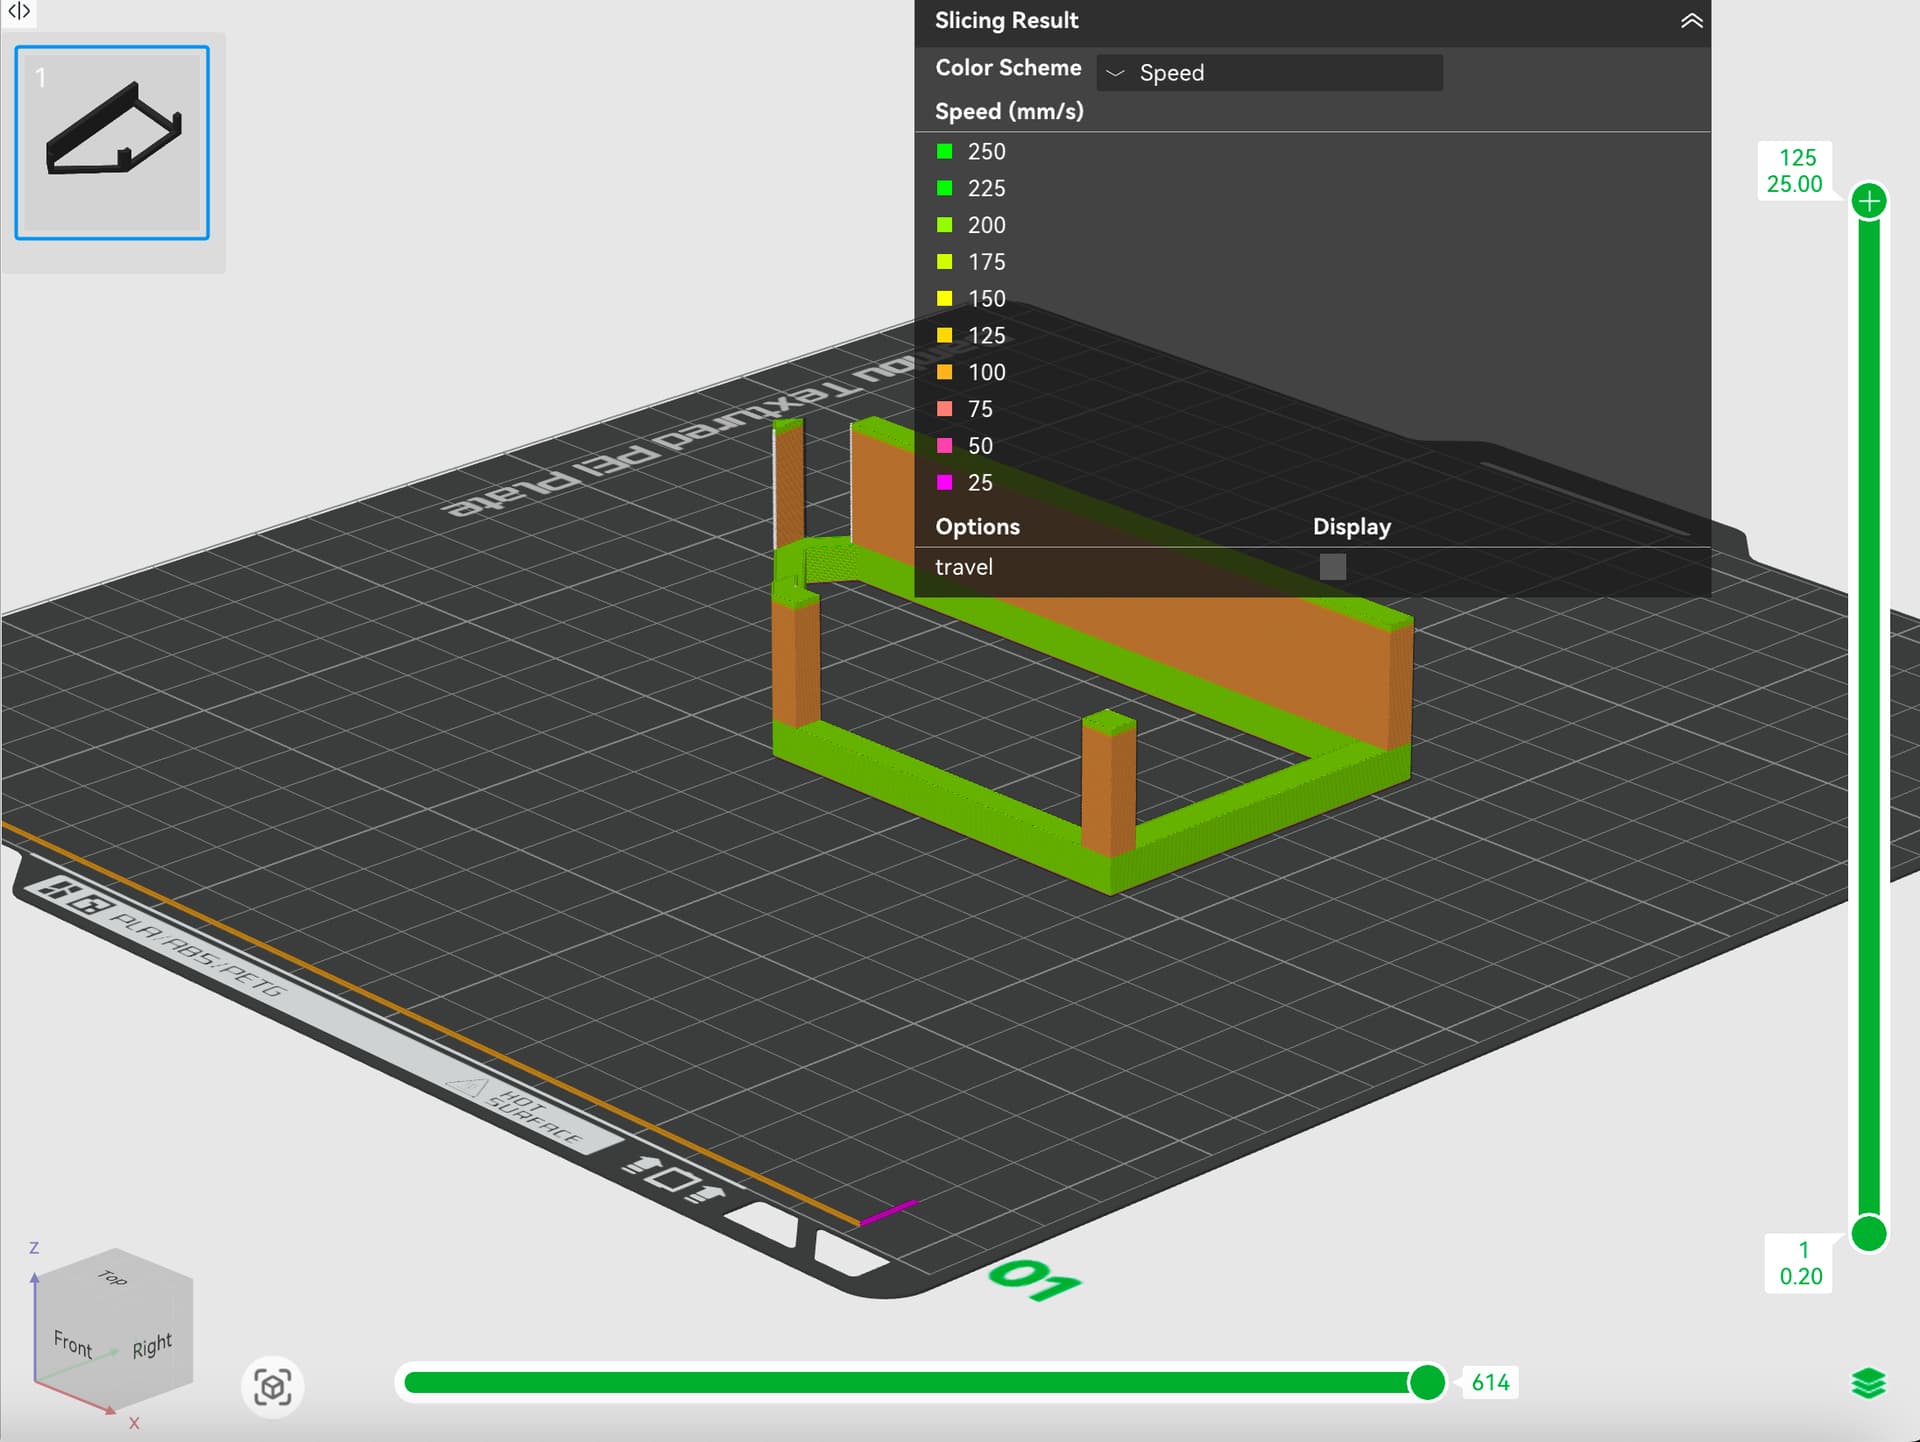
We can see, the speed is on the thin parts much slower, not like the first profile, where all layers are the same speed.

Maybe my copy from the bambu went wrong?
But i can not see mayor differences between both.
Why is the speed that decreased?
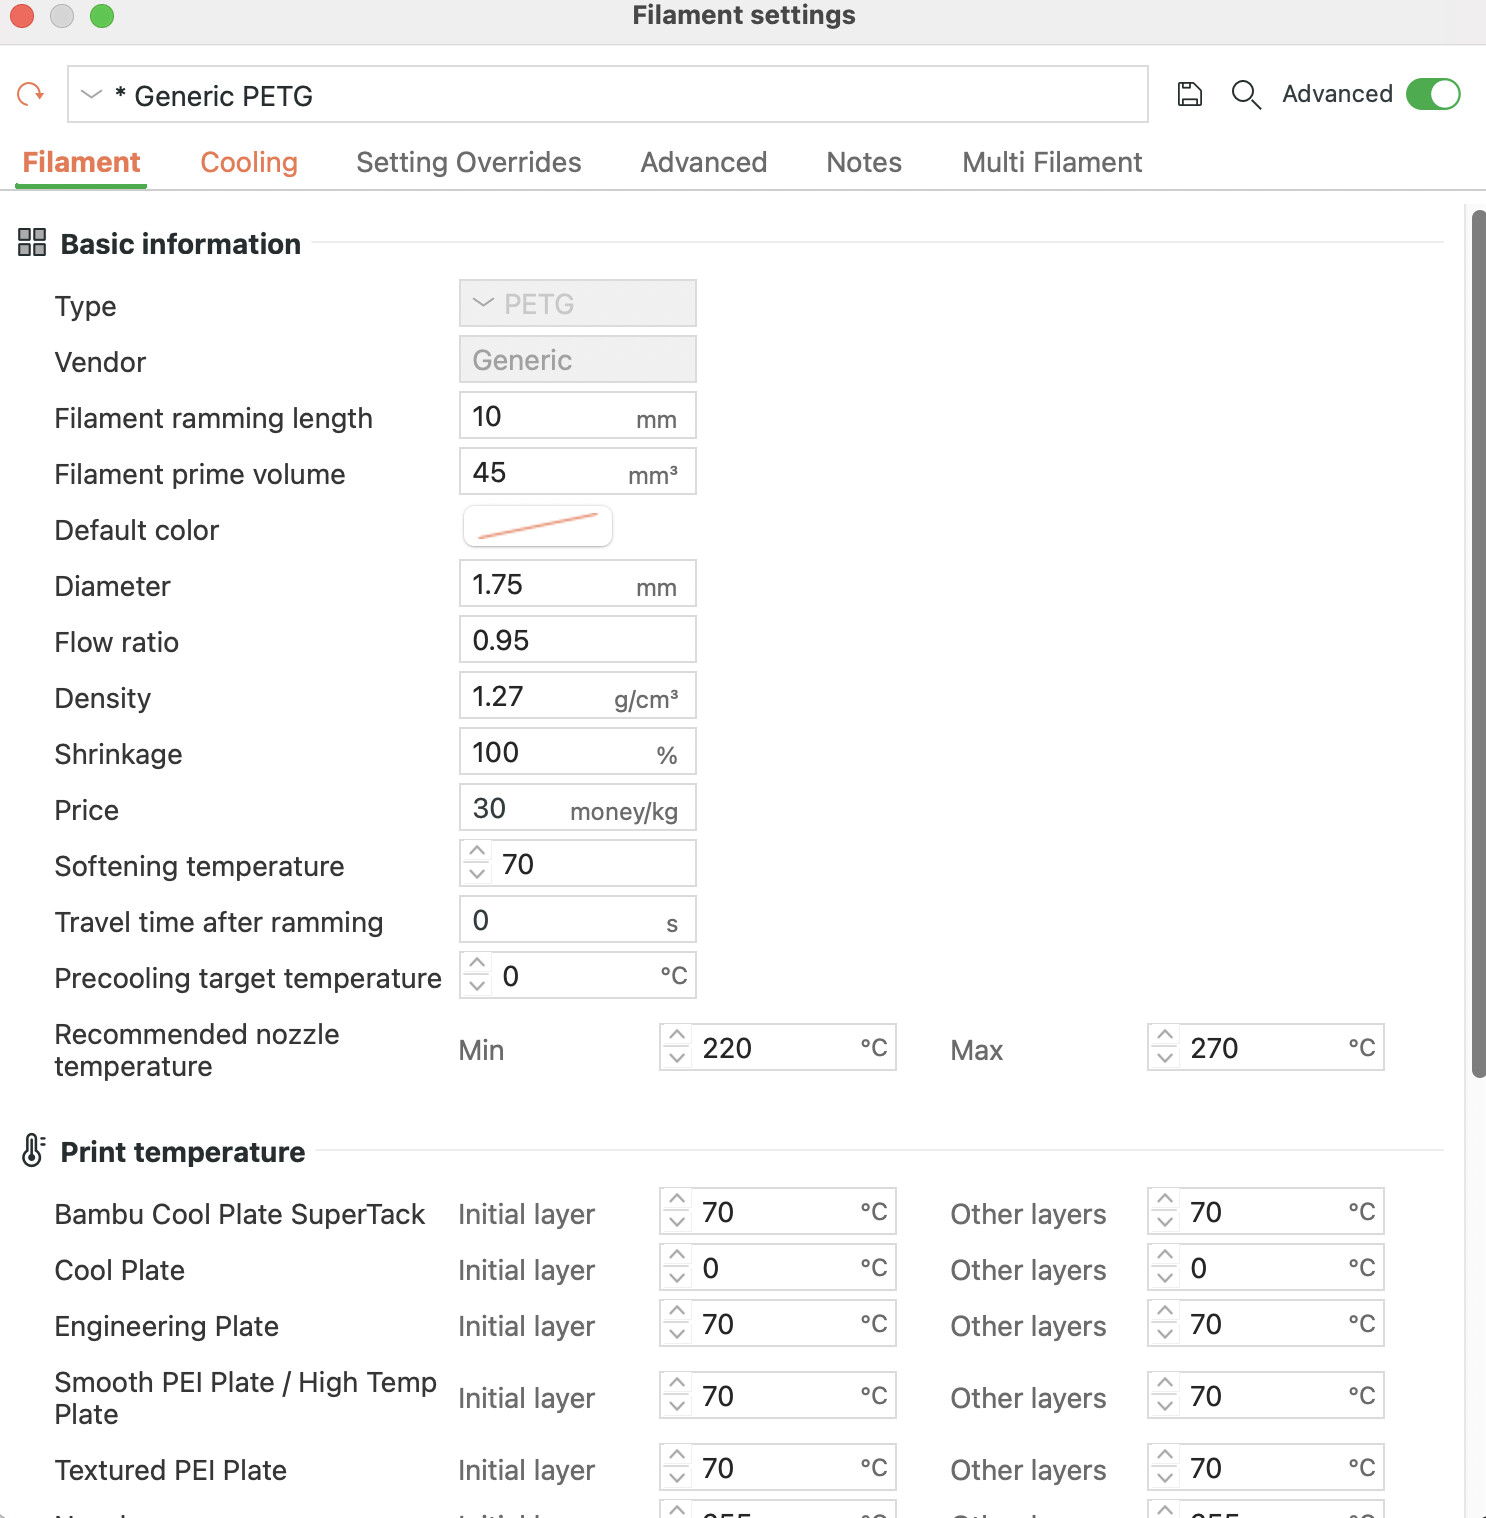
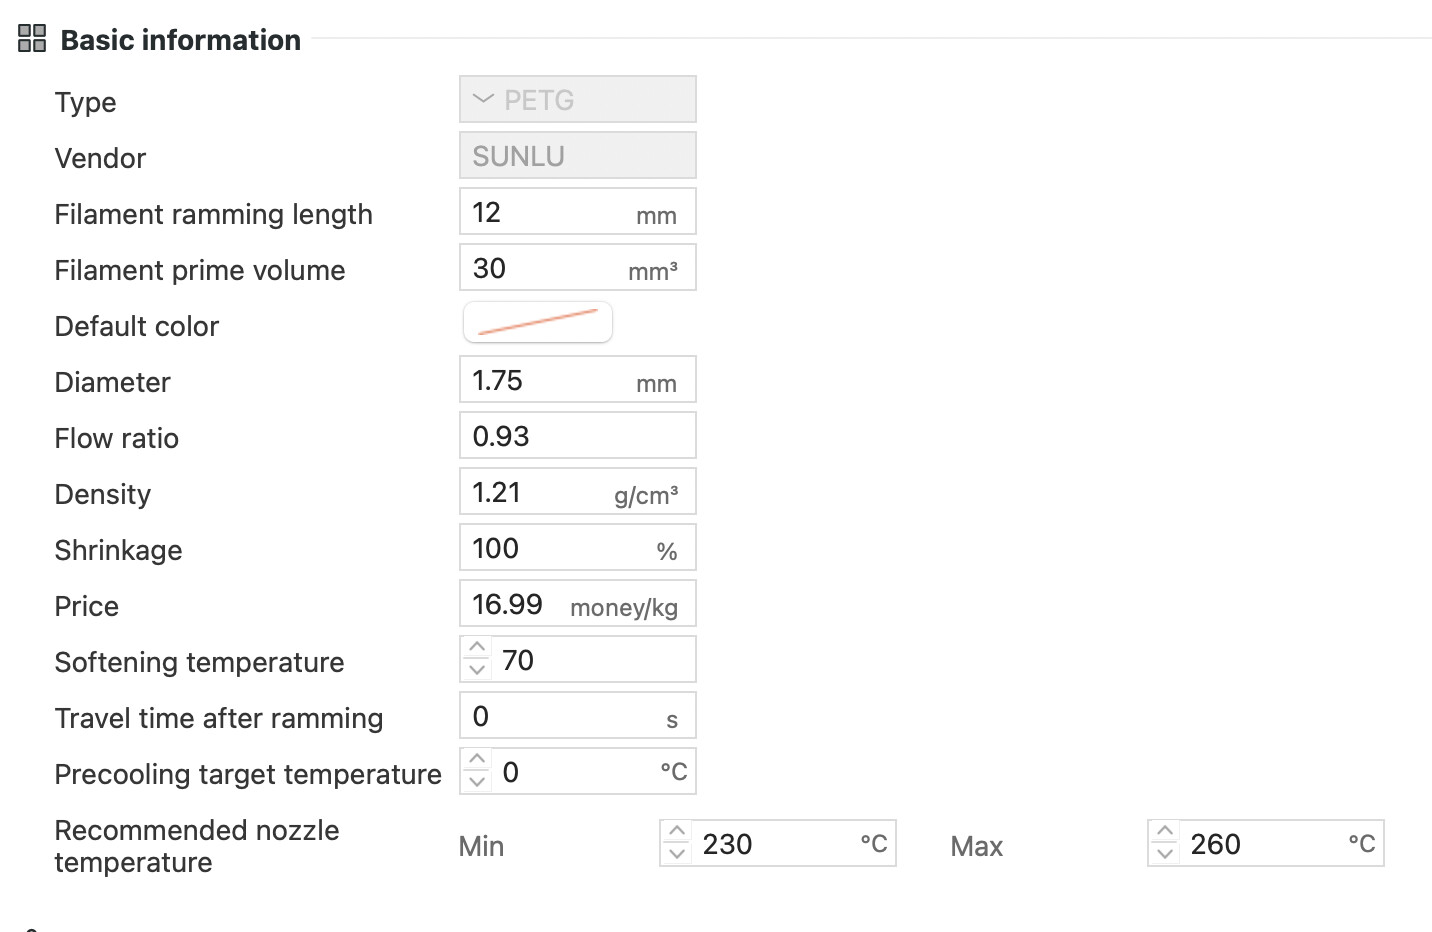
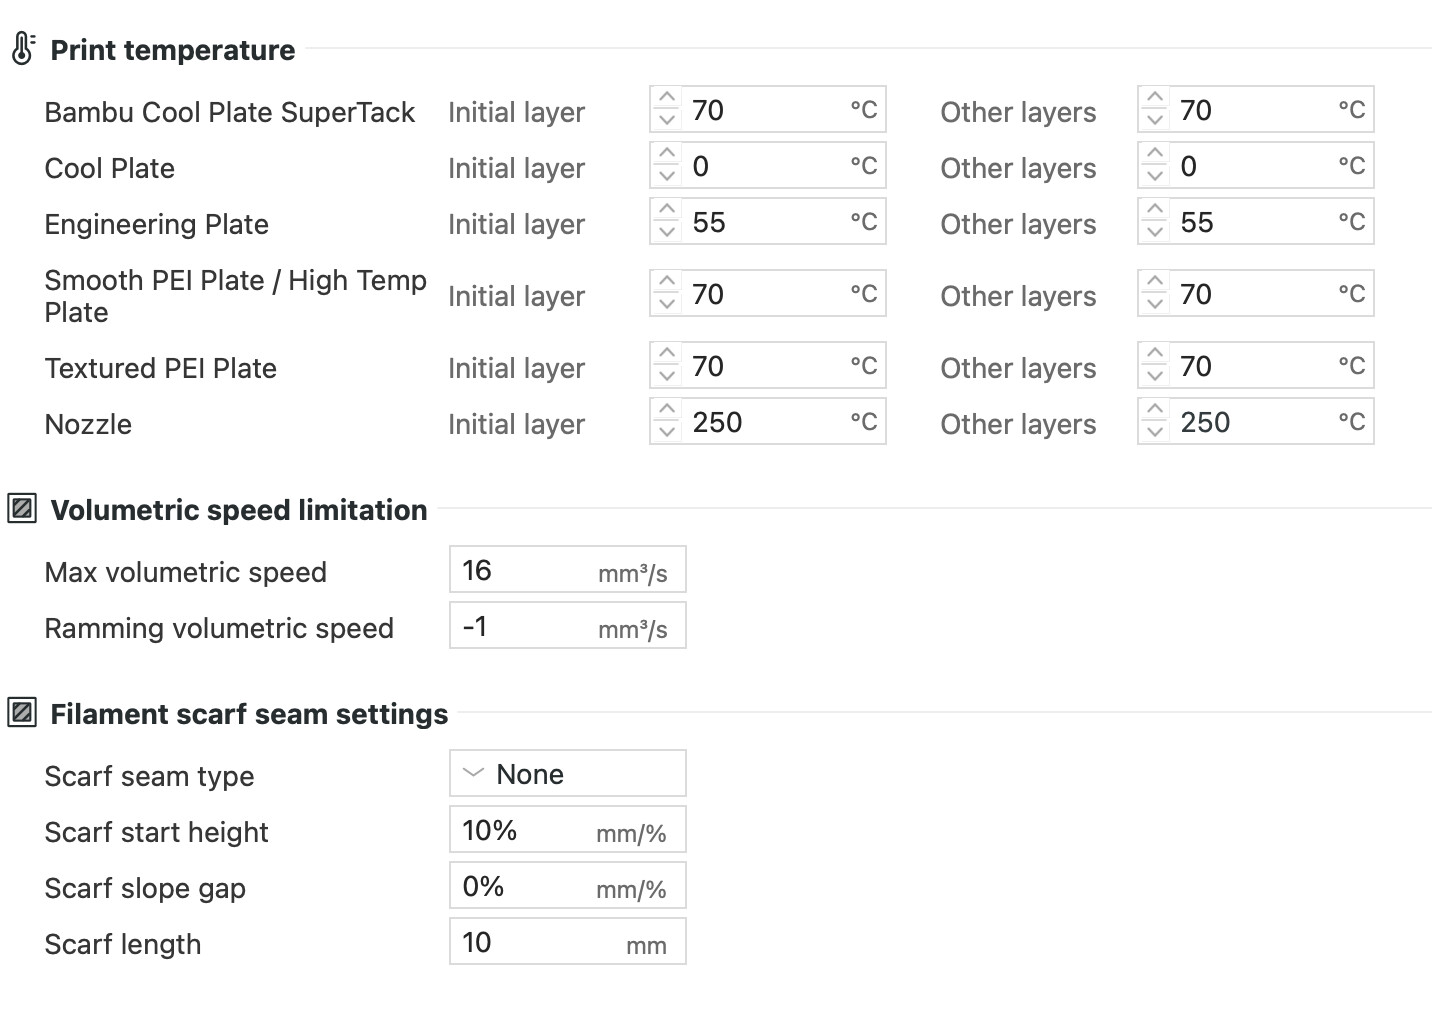
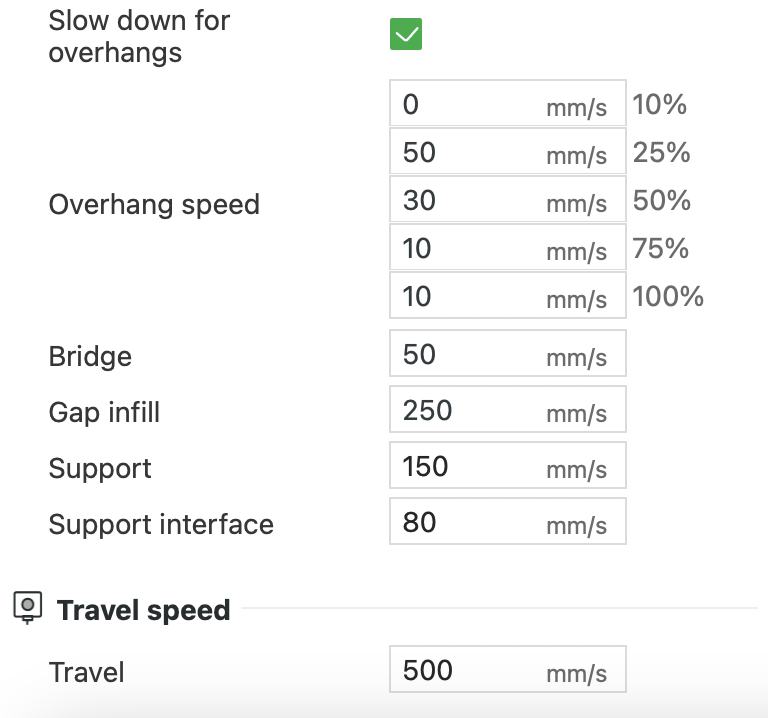
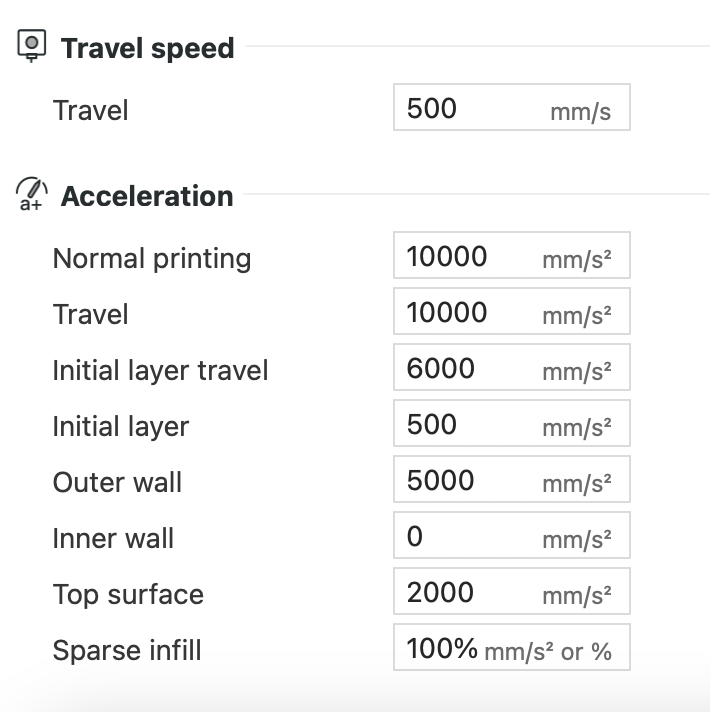
Here the Sunlu Profile based on the Bambu:


And here is the second Slice with the Creality filament:


Are there differences that would explain why this is slower than the other?

This Settings are for both the same:


For now, i will take the new Profile and try it with the Sunlu material again.
But maybe someone has an explanation for this?