I have a tool design that’s best made in PETG or ABS in two halves and glued/screwed together. Users have indicated that they’d like part of the tool to have more “grip” - and solved that in the field by wrapping it with duct tape.
Now that I have an H2D I thought an appropriate solution to this problem would be to print the area that should be grippy in TPU, but either the software works differently than I think it should or I’m just not getting something right.
I created ridges on the tool so that I could color the area using the fill tool - that worked well. I have set anywhere from 2 walls/layers to 6 walls/layers with anywhere from 1 to 3 layers of paint penetration and I get the same result - instead of printing a thin layer of TPU over a PETG shell, I get mostly TPU, resulting in a part that’s too flexible.
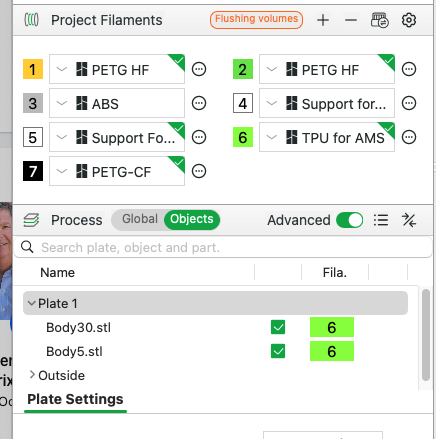
Here ae some screen shots - from the top, from the bottom showing that there’s no paint on the bottom surface and you can see the thin black shell, and then how it comes out in the slicer
How can I get a thin layer of TPU printed over the PETG and why doesn’t the slicer work as the settings would leave you to believe?
I’ve had people suggest I shell the part, subtract the shell, print the shell in TPU and re-assemble it in the slicer, but the part is too complicated for Fusion to shell.
Thanks. I’ll give your first suggestion a try. As to the second, been there, done that, got the tee shirt. For whatever reason Fusion will not shell the part of the model that needs the TPU layers. I’ve tried going backwards in the timeline to where there is less complexity and still no joy.
I did find a compromise - printing the whole thing in TPU for AMS. That material is sufficiently hard that it doesn’t compromise the utility by making it too floppy. I enhanced the grippiness by using fuzzy skin in the areas I did in softer black TPU before. it has the advantage of being essentially unbreakable. When you have one of these on a 20 ft pole the leverage is capable of breaking a near solid PETG or ABS part.
However, gluing pieces of urethane can be a challenge. I might give all the edges a big chamfer and then use a 3d pen as a welder to do the seams on top of using gorilla glue (another urethane) to hold it together. I’m running an experiment to see if the textured plate provides enough surface area for a good bond or if printing without the bottom layer and allowing the glue to interlock the infill is a better option.
Unfortunately, my version of the slicer does not have the option to select a different filament for the sparse infill. When it gets done with the print I’m currently running I’ll have to see if there’s an update.
Third screenshot, after selecting one of the bodies, selected the others tab, scrolled down to advanced, it has the first two items in your list but no option for infill.