I regularly print multi-color models with numerous colors on each layer.
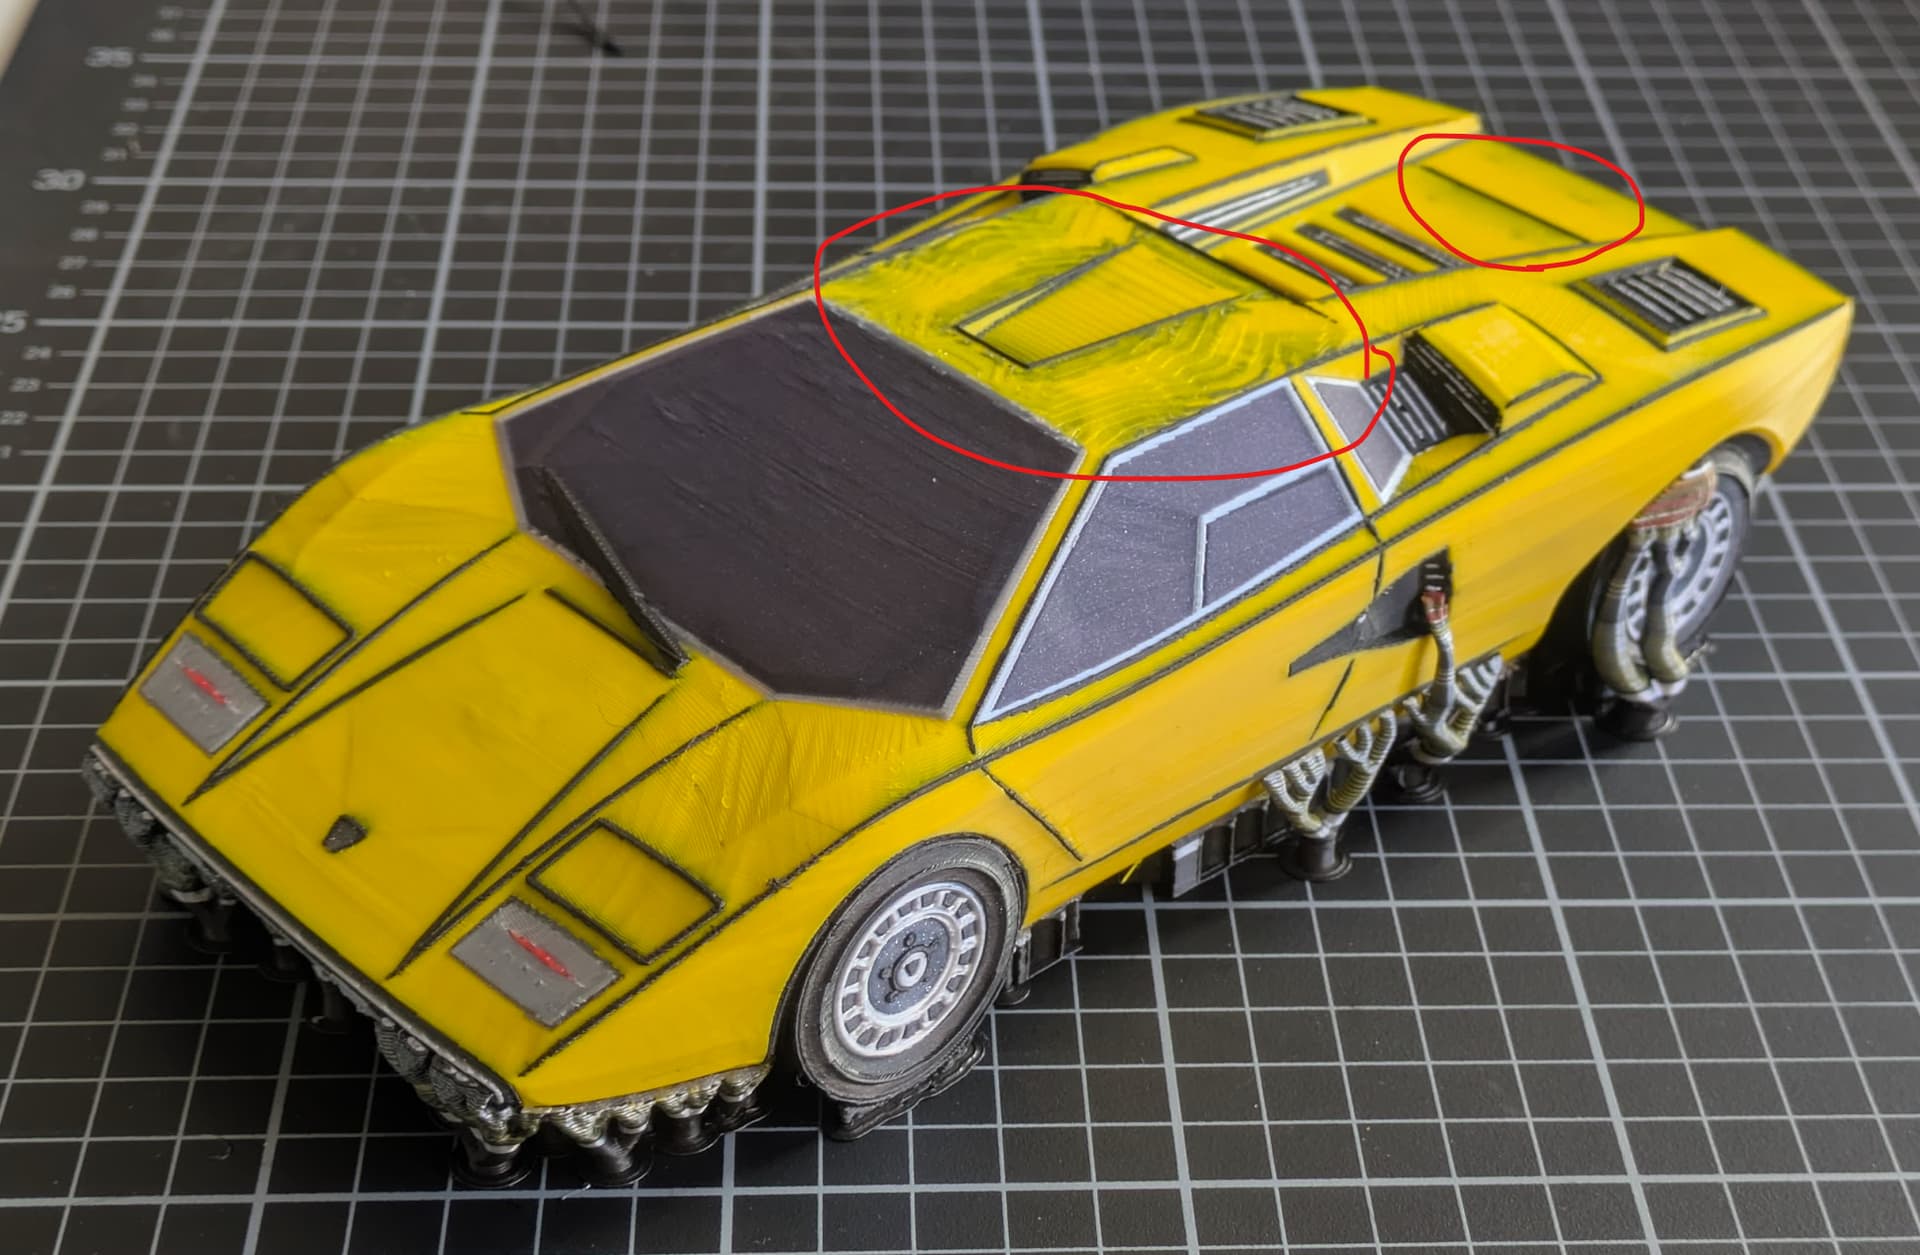
However, on horizontal surfaces with slight curvature in both directions, I’m seeing significant color bleeding because of how the slicer distributes colors:
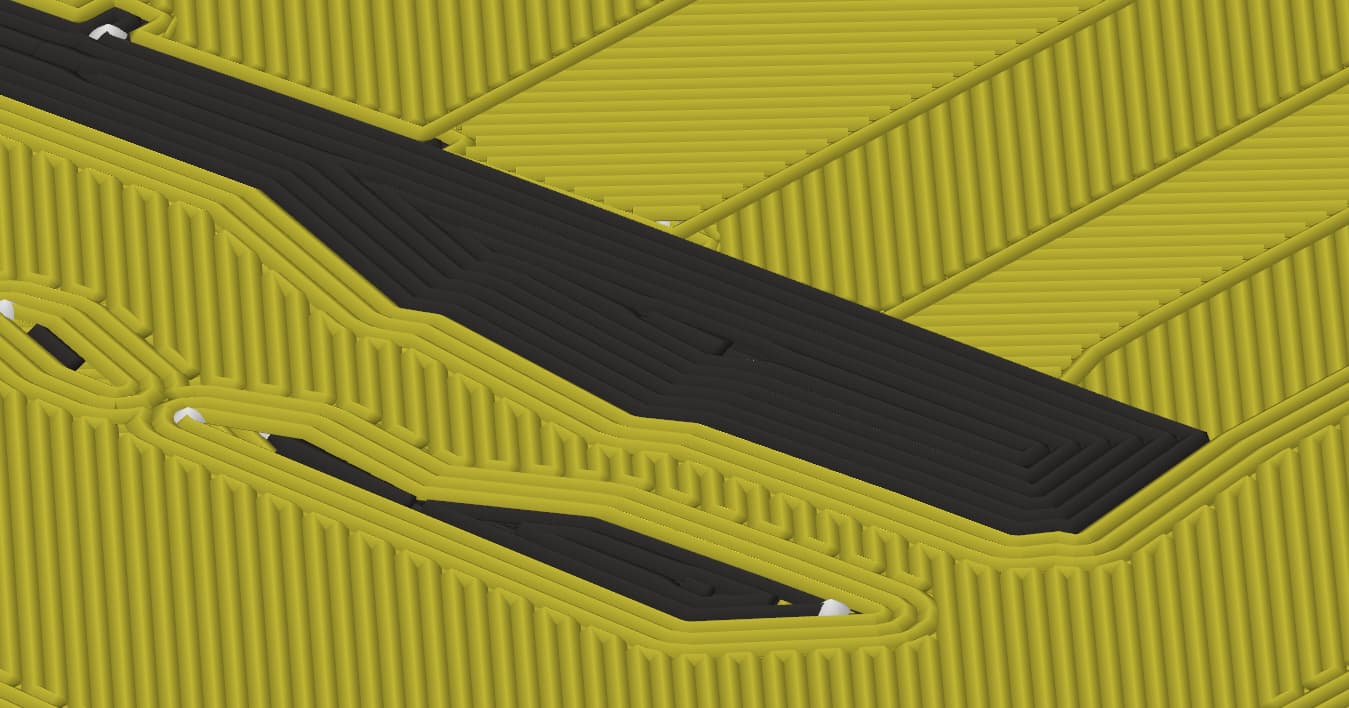
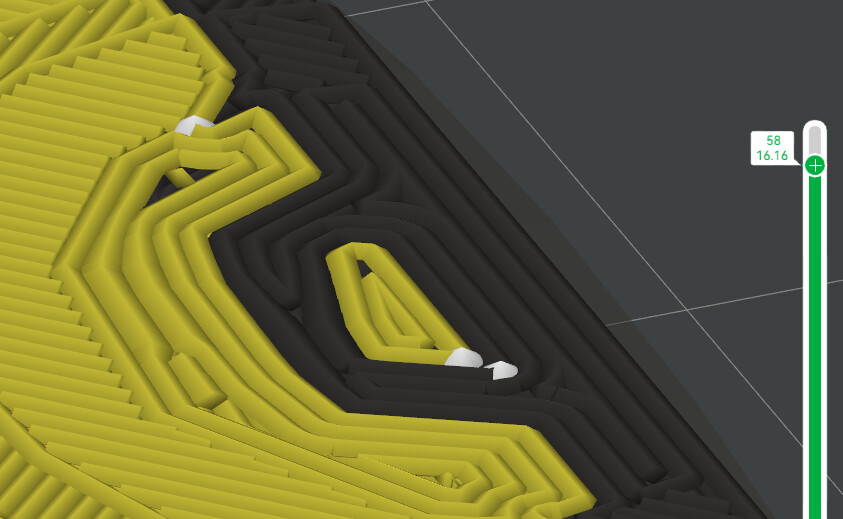
This is how it looks with with the example of the sphere section (I already added a support structure for the next step):
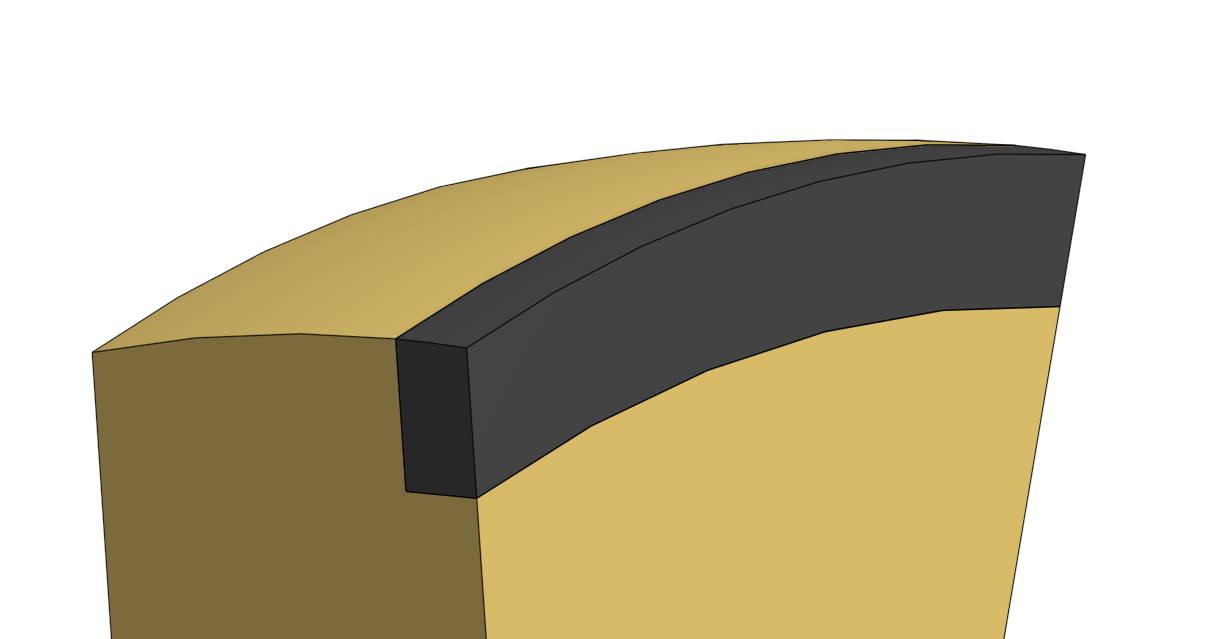
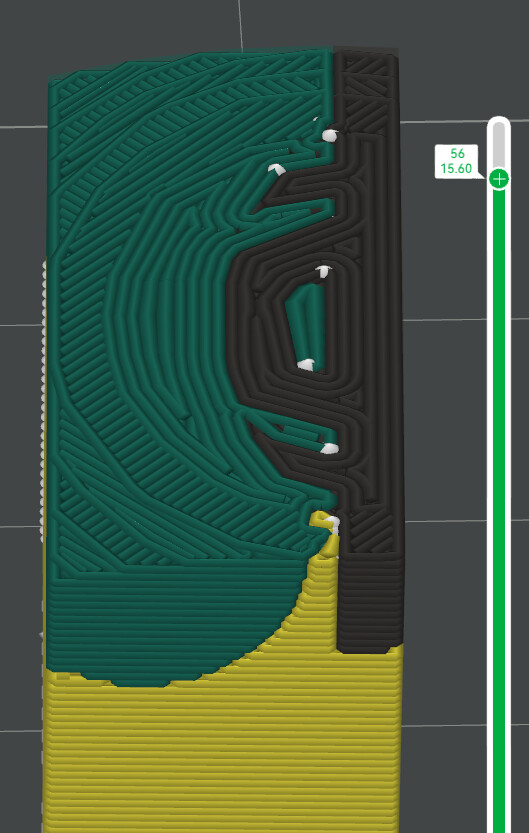
And here is how it look like after separating to objects which is normally not an option for me but it shows how I expect the slicer to distribute the colors:
So the issue is fairly simple but not easy to fix.
I am the user from the post that you mentioned.
The multicolor option in the bambu lab slicer is not great. Especially for a model like you have with contrasting colors. I have noticed that the slicer “optimizes” be creating as much thickness in the color as possible to minimize the amount of bleeding.
This works on simple flat models with simple angles and large ish surfaces. The issue that you could be running into is that the model has it’s faces on a angle where the slicer is unclear on the thickness. You could try to angle the model in a way to see if the roof area still results in a color mess with the slicing. This is not a fix but could help to shead some light on the situation.
[Edit: I have also always seen a preference for the slicer on the horizontal plane that colored areas that are on the vertical planes have a priority that seems higher then colored areas that are more horizontal]
The design is all about high contrast, so this is nothing I am willing to change.
What do you mean by lack of layers?
Changing the layer height does not help at all. In the slicer it looks a bit like it since you have more layers of the dark material, but since these are also thinner, the result is pretty much the same.
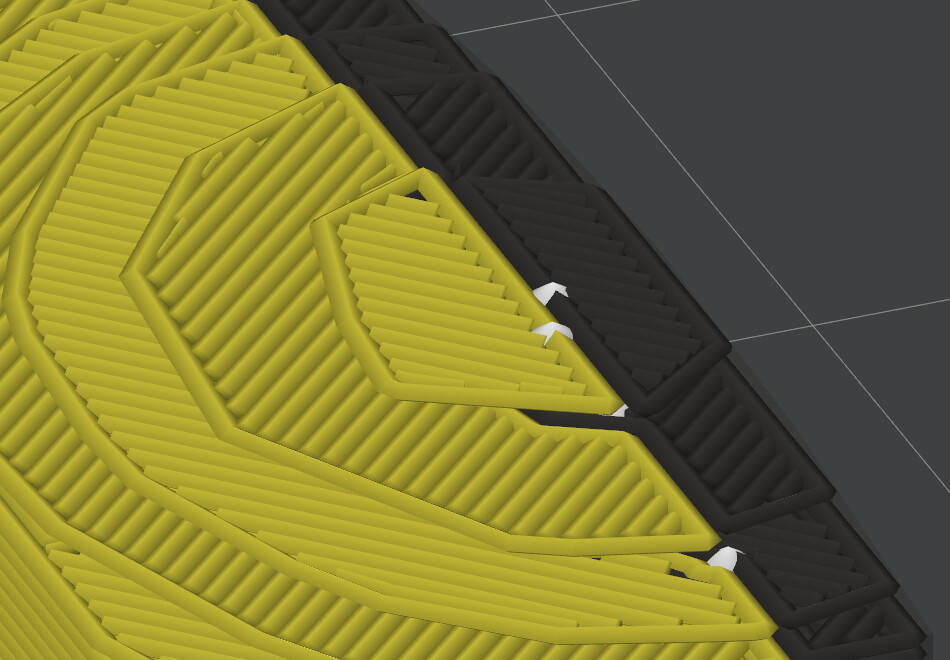
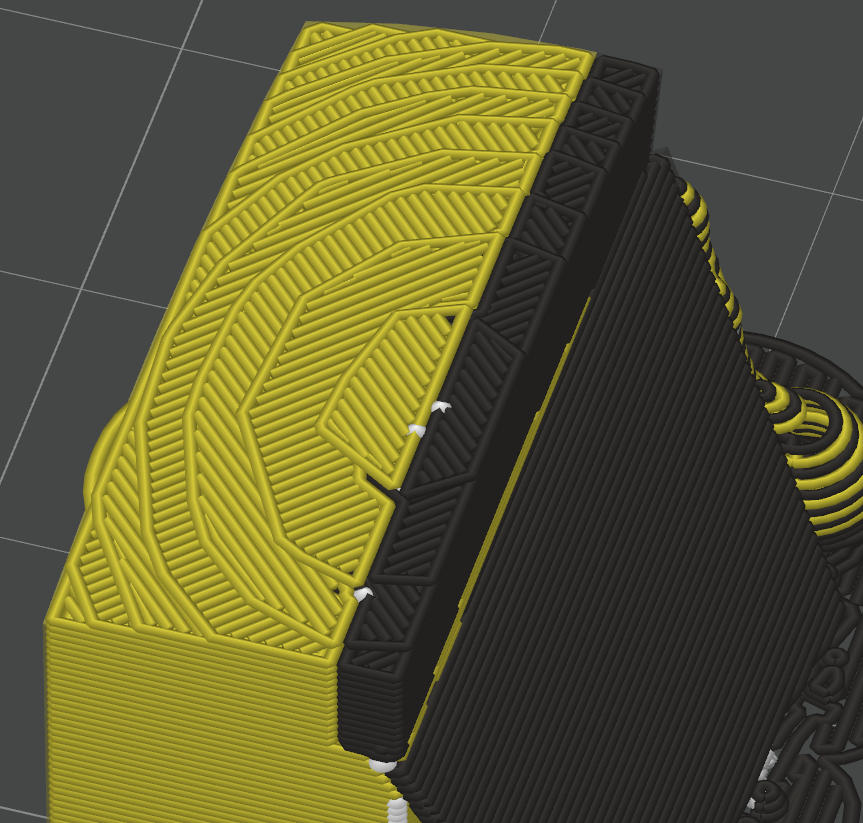
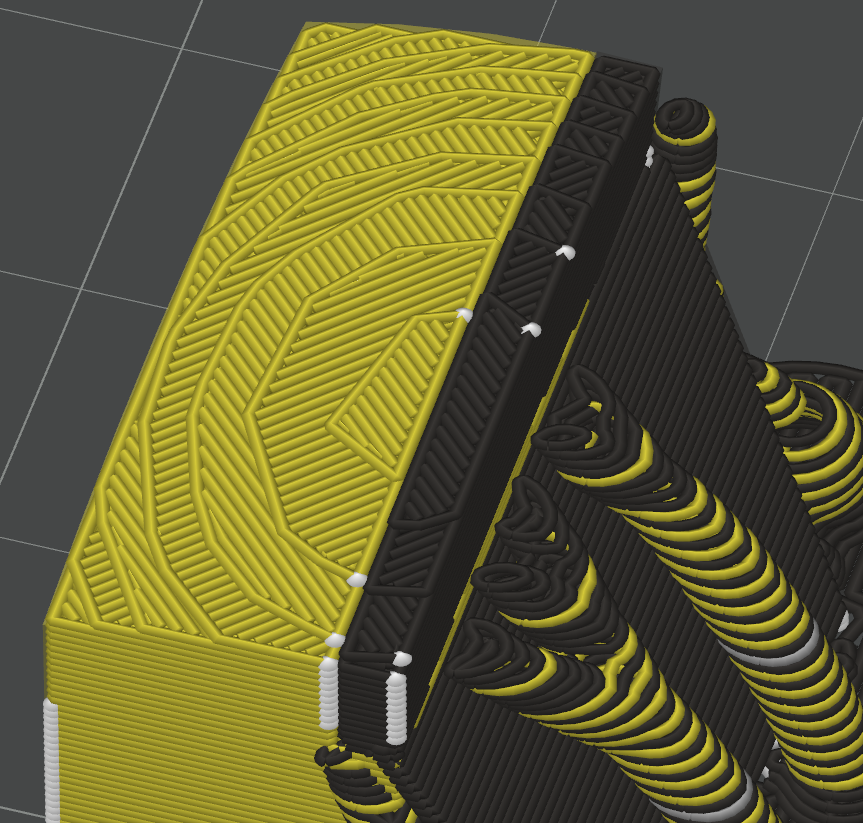
Here is the same with 0.08mm layer height:
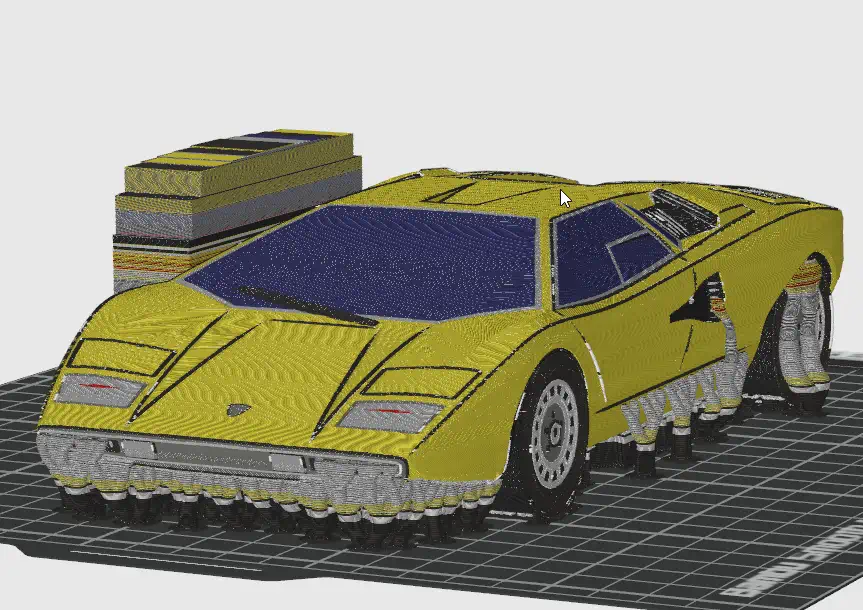
FYI: the photo of the car shows 0.08mm layer heights, the other images/animations of my first post show 0.2mm
Notice a lack of colour bleeding in this model , also using flush in to object
if you put it through the slicer you will see how multi colours bind themselves to a print / model so the are not seperated , on models that have very few layers at 0.2 you will see an opaque effect until it builds up layers
your model is built up with black (dark) and yellow which is very light
the roof of your model appears to be built up of very few layers on top of the dark colour hence it will show
That’s a nice print are the eyes printed as well @Neiljt ?
My print is actually quite massive! It has about 500 layers so this cannot be the issue here. I also had exactly the same issue with even larger prints (~1200 layers).
BTW: the models is one single closed volume, so there are no small parts etc.
In general, my second post shows clearly that this is in principle a solvable issue. However I’d have to split the object into one object per material and make sure that the slicer does not move every split object onto the ground. How can I do this if there’s no other solution?
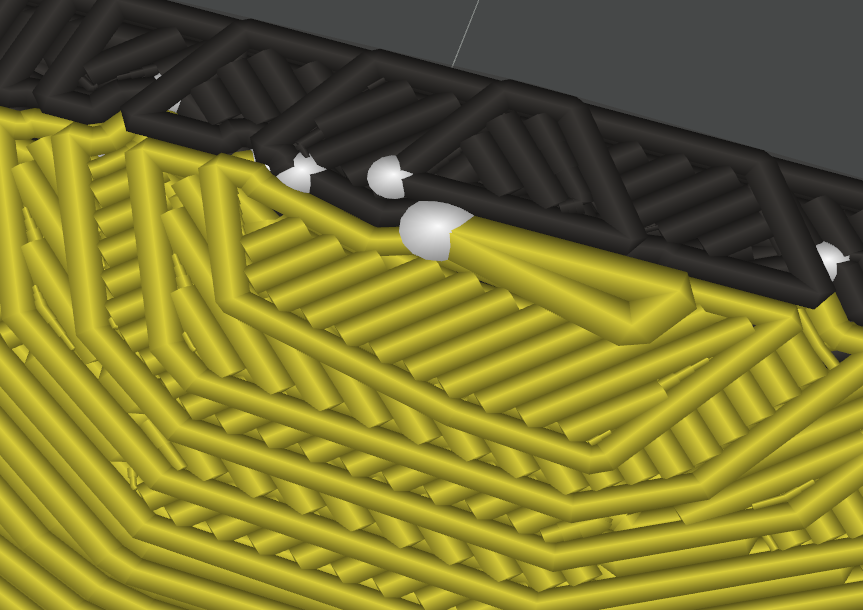
Here you can see a bit more in detail the actual print: The top layer is yellow but almost everywhere on the roof the second layer is black (0.08mm)
Hey there, thank you so much for your response!
It’s a pity that you didn’t find a ‘proper’ solution.
Printing in another angle is not an option for mu unfortunately (it looks weird for car models, if the layer lines are not horizontal). Anyways, in most cases I’ll have the same issue on another spot in the end
I know it’s not a solution it’s just to check if it would change the behaviour of the slicer.
Anyway, so I do now do something for my multicolor prints that does seems to usually fix the issue, even with very complicated models.
I split the object in the seperate colors without touching any of their locations so it still looks the same in your modeling software (for example fusion).
Then you can export all of the objects of the same material as one object.
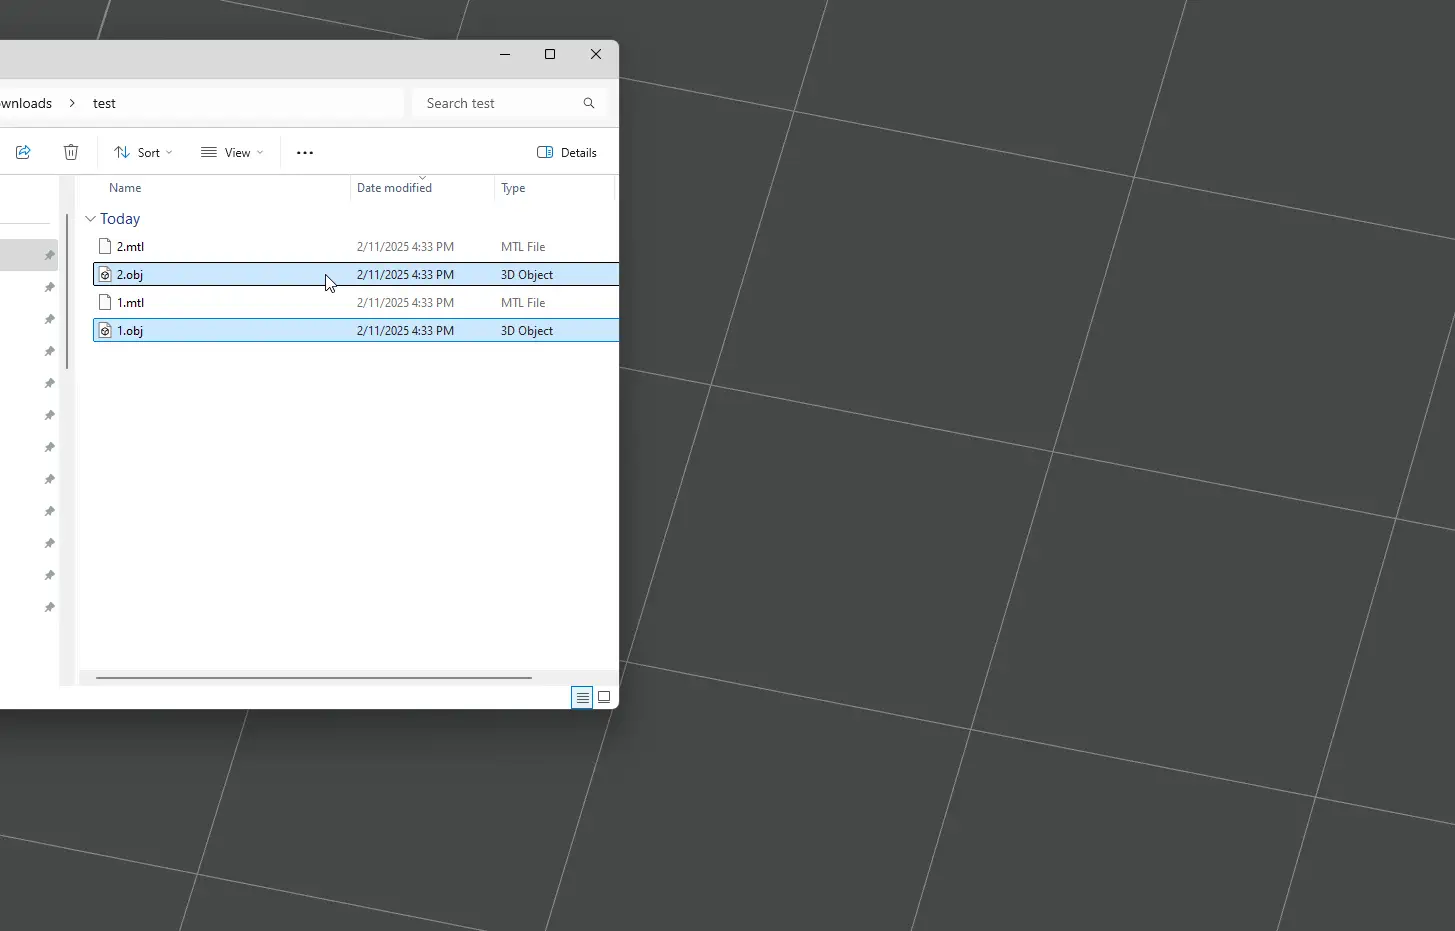
When importing just select all the objects in your file explorer (for a 4 color model that should then be 4 models).
When you drag them into bambu studio it will prompt something like “do you want to import these objects as a single grouped object” selecting yes will group these with the correct location that you had in your design software so everything is lined up and grouped so nothing will be moved. Even when using the auto arrange feature.
I hope that isn’t something you have already tried. It will fix the issue but it is tedious when designing.
I forgot to mention, for enyone using fusion360 the steps are the same but making all the objects with the same color one STL can be a bit annoying if they are not touching. Usually this is a pain because you need to right click on an object > save as mesh > export. But you can’t do this with muliple bodies.
To export with multiple seperate body in one body STL:
Make sure all the objects of the same color are visible and ONLY those are.
Then go to export > STL (near the bottom of the dropdown menu)
and export.
Generally No but it can be rather finicky with quality/accuracy of the imported data generated by the export converters from the originating design software and in some instances it generates an unwanted interlock between colors as a “non customizable feature”.
Have you tried to export it as a STEP file instead?
Dear @Panamon_Creel
Thank you so much for your feedback. I have tried STL (one file per color) and obj (both one or multiple colors per file). I don’t see a difference in the results. Up to now the only thing that heels is making one manifold volume per color and having a small gap in between those.
Doing this it actually turned out that you can stay with one single .obj file and don’t have to import every color separately.
The issue in my case however is that the original file is one manifold volume consisting of 10-20 submeshes/colors. Separating these I have multiple non-manifold volumes that I have to manually extrude etc. making each manifold again. it’s a pain in the butt.
That car model from above took me 2 hours to sketch/model and then 2 days to prepare the print data. Quite frustrating since we never had this kind of issues with CJP printers.
Thing is the colors of an OBJ file are translated into painted colors when imported and the colors then end up with rather odd color interlocks some way down.
Try running “fix model” after importing the OBJ file into bambu studio after that split it to parts, remove all painting from the resulting assembly of parts and then assign filament colors to the individual parts in your assembly. I guess you will end up wit a ton of parts with such a model but it may help with your issue if the fix model tool got the boundry layer between the parts corrected
Thanks again!
“fix model” messes up the model. For example fixing the yellow (car paint) part leads to the windows (glass material) become yellow paint as well…and many more issues…
In blender there’s a “make manifold” function which works 1000 times better, but still not very optimal.
We’re working on a script that automatically generates manifold parts since you’re right, it’s in the order of 1000 pieces per model, so no way to do that manually efficiently.