Hi everyone,
I’m using an existing UNO card game box and wanted to customize it in Bambu Studio. I imported an additional “FLIP!” logo into the existing project.
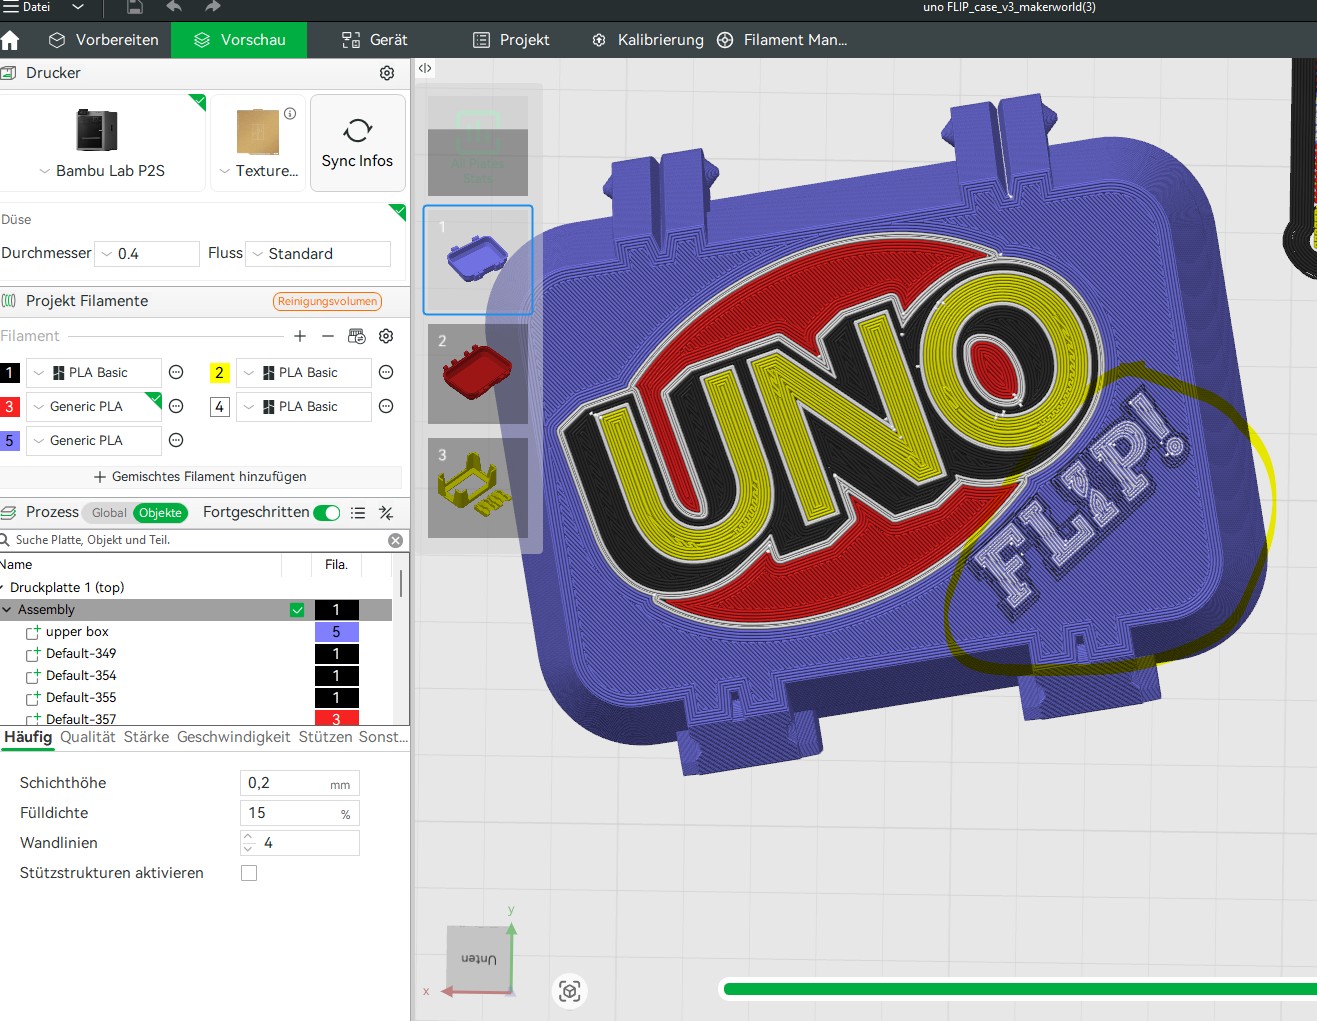
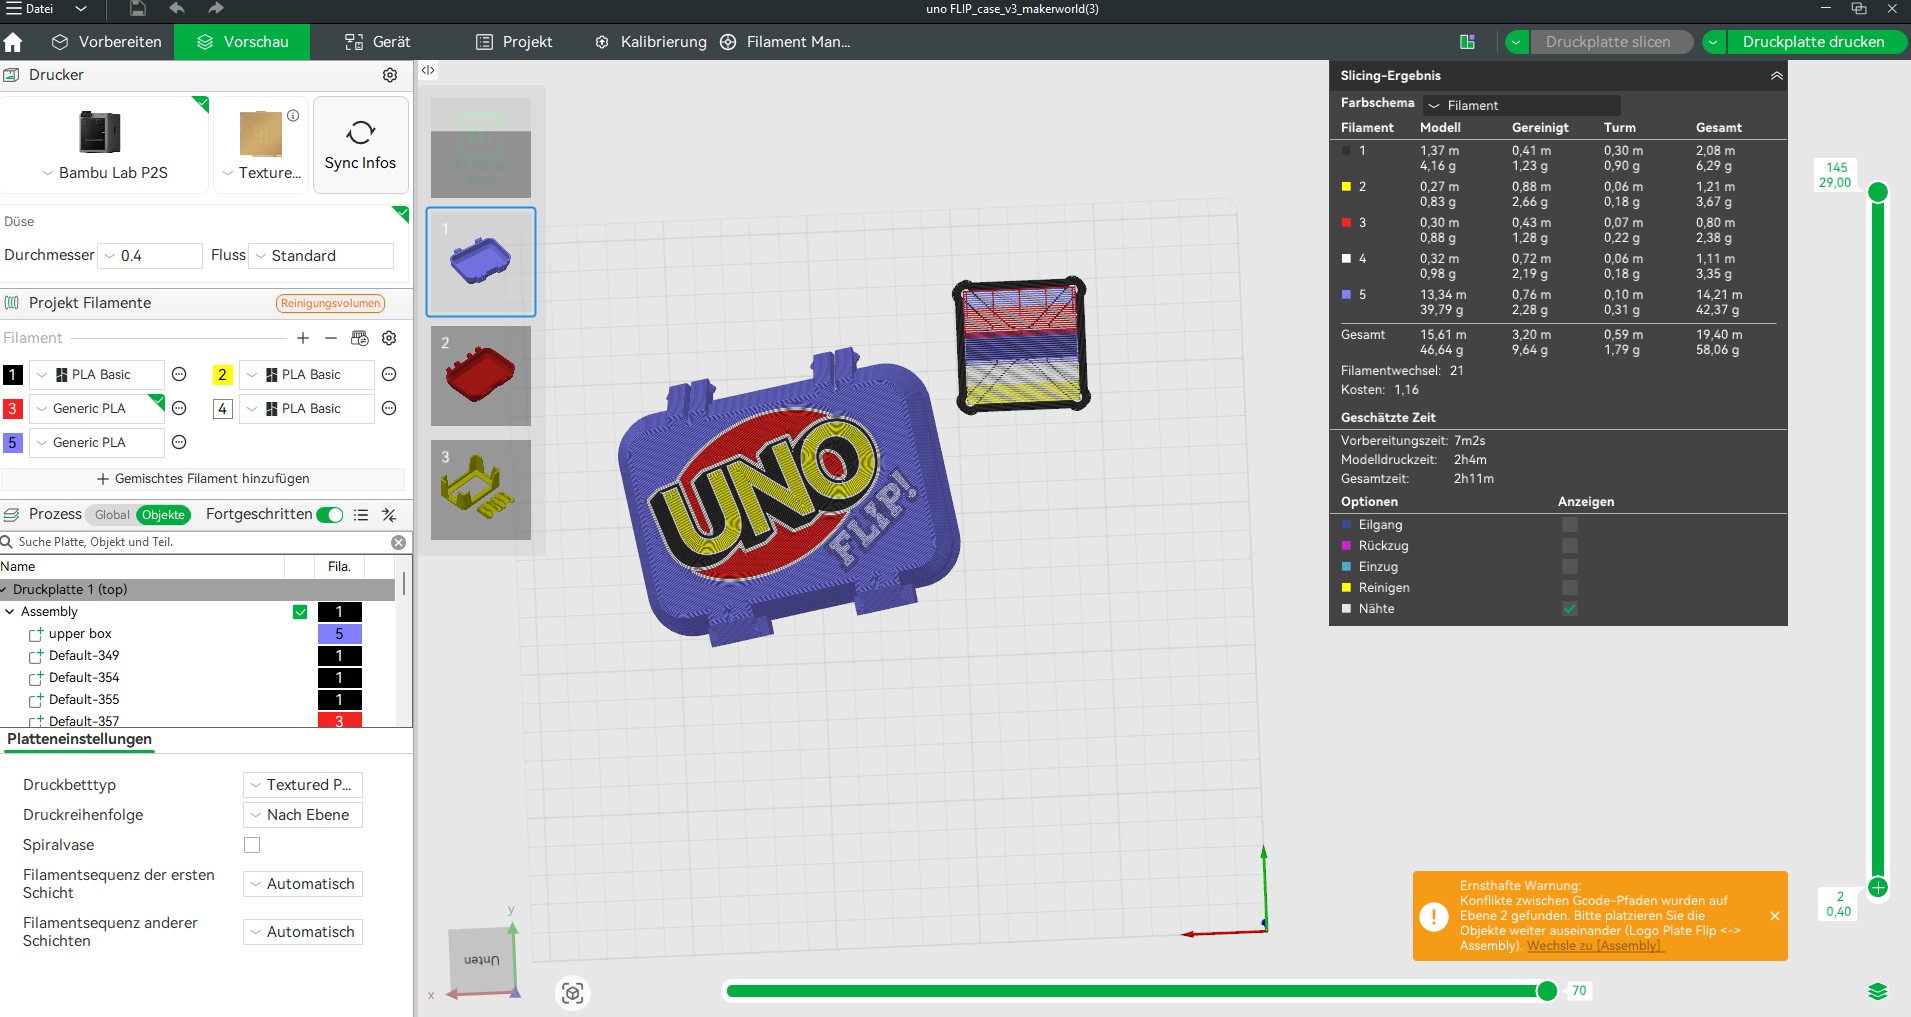
The logo should be printed white with a black outline. However, when slicing and in the preview, the logo is not displayed/printed clearly. Instead, the colors seem to blend with the color of the box, making the logo difficult to recognize.
Does anyone know what could be causing this and how I can get the FLIP! logo to print correctly in white with a black outline?
I can provide the project file if needed.
Thanks in advance for any help!
Welcome to the forum 
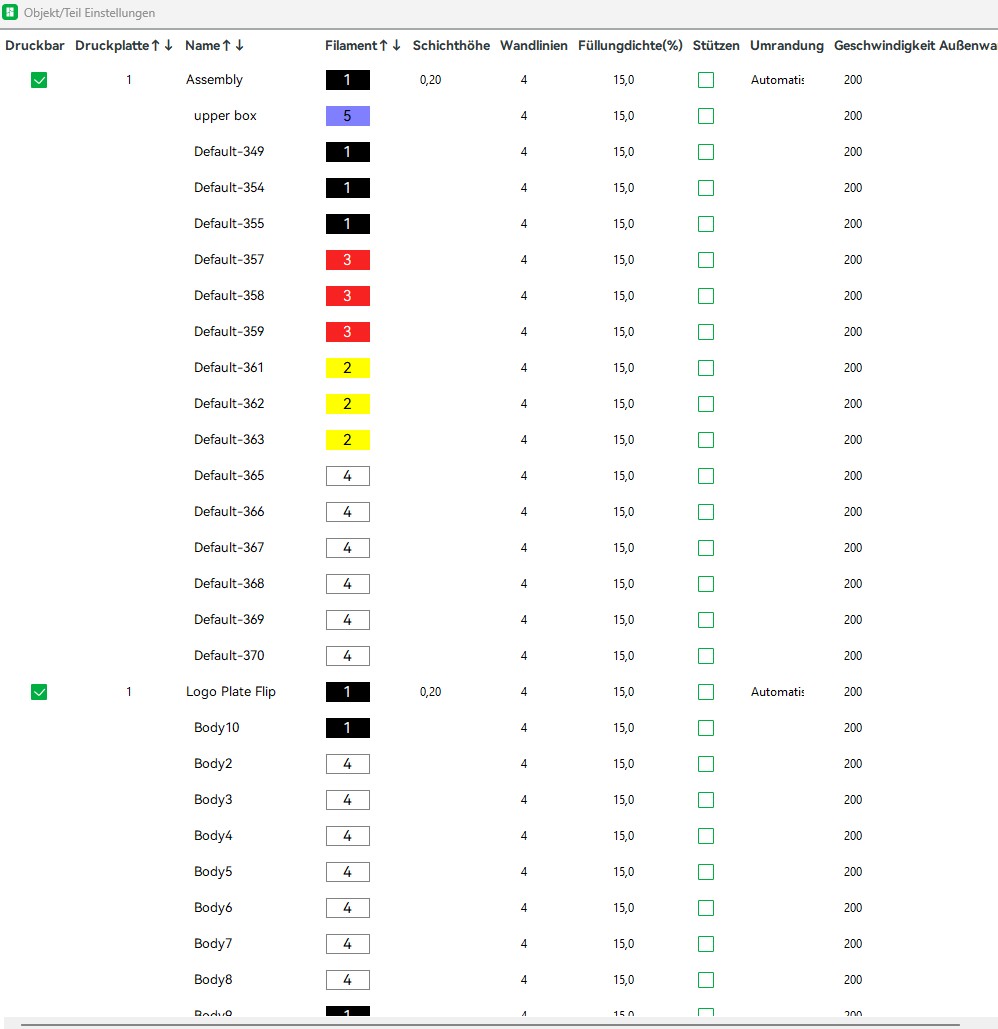
A screenshot of the problem and the object tree would be helpful to narrow down on the issue quickly.
 &
& 
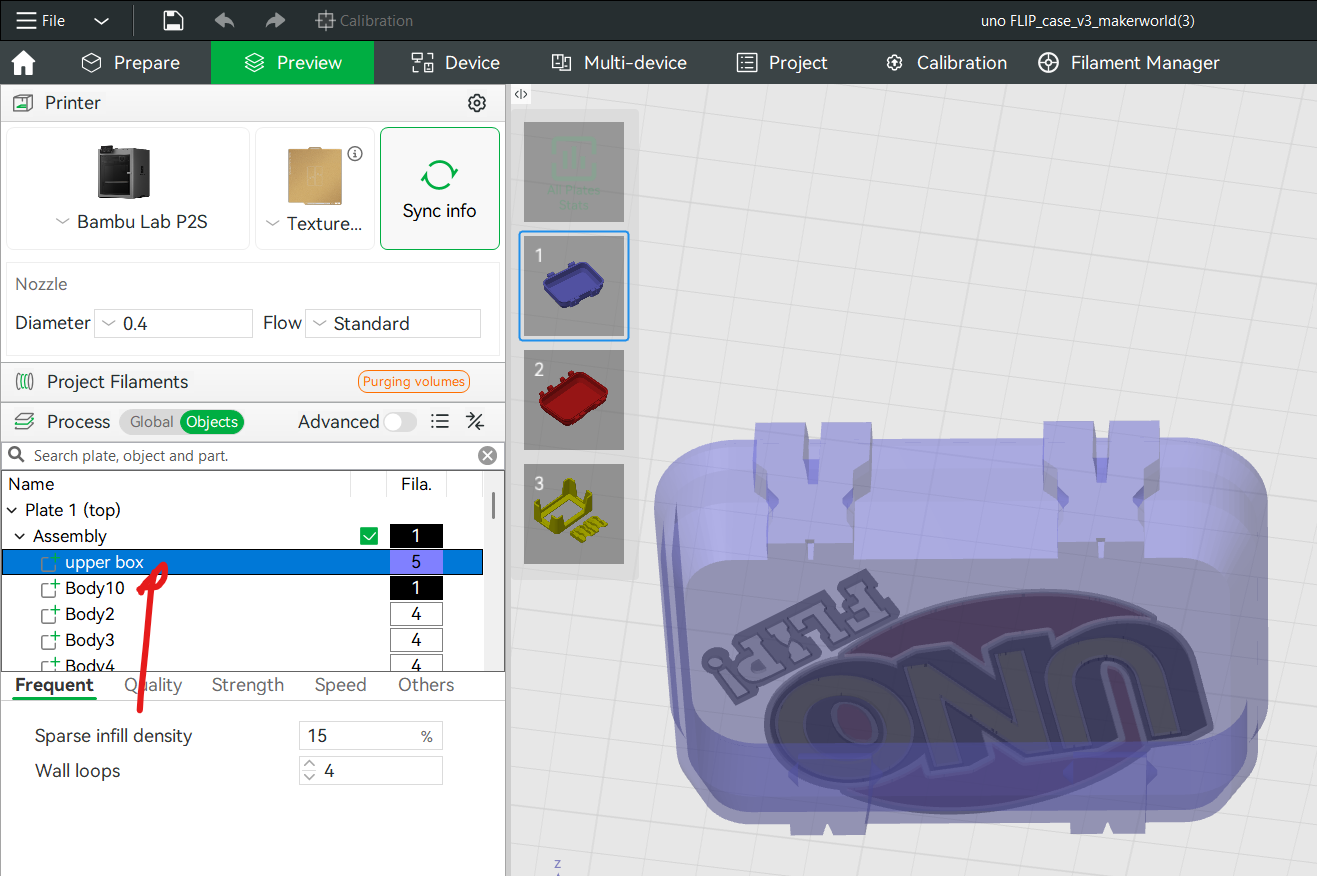
Attached are two screenshots: one showing the problem (see the yellow highlighted area) and a separate screenshot of the object tree.
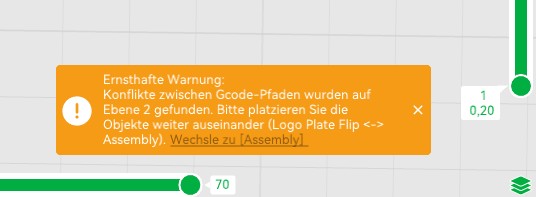
Additionally, I also receive the following warning:
That helps to better understand the problem. You are concerned about the darker purple outline of the “Flip!” which you’d like to have as black right?
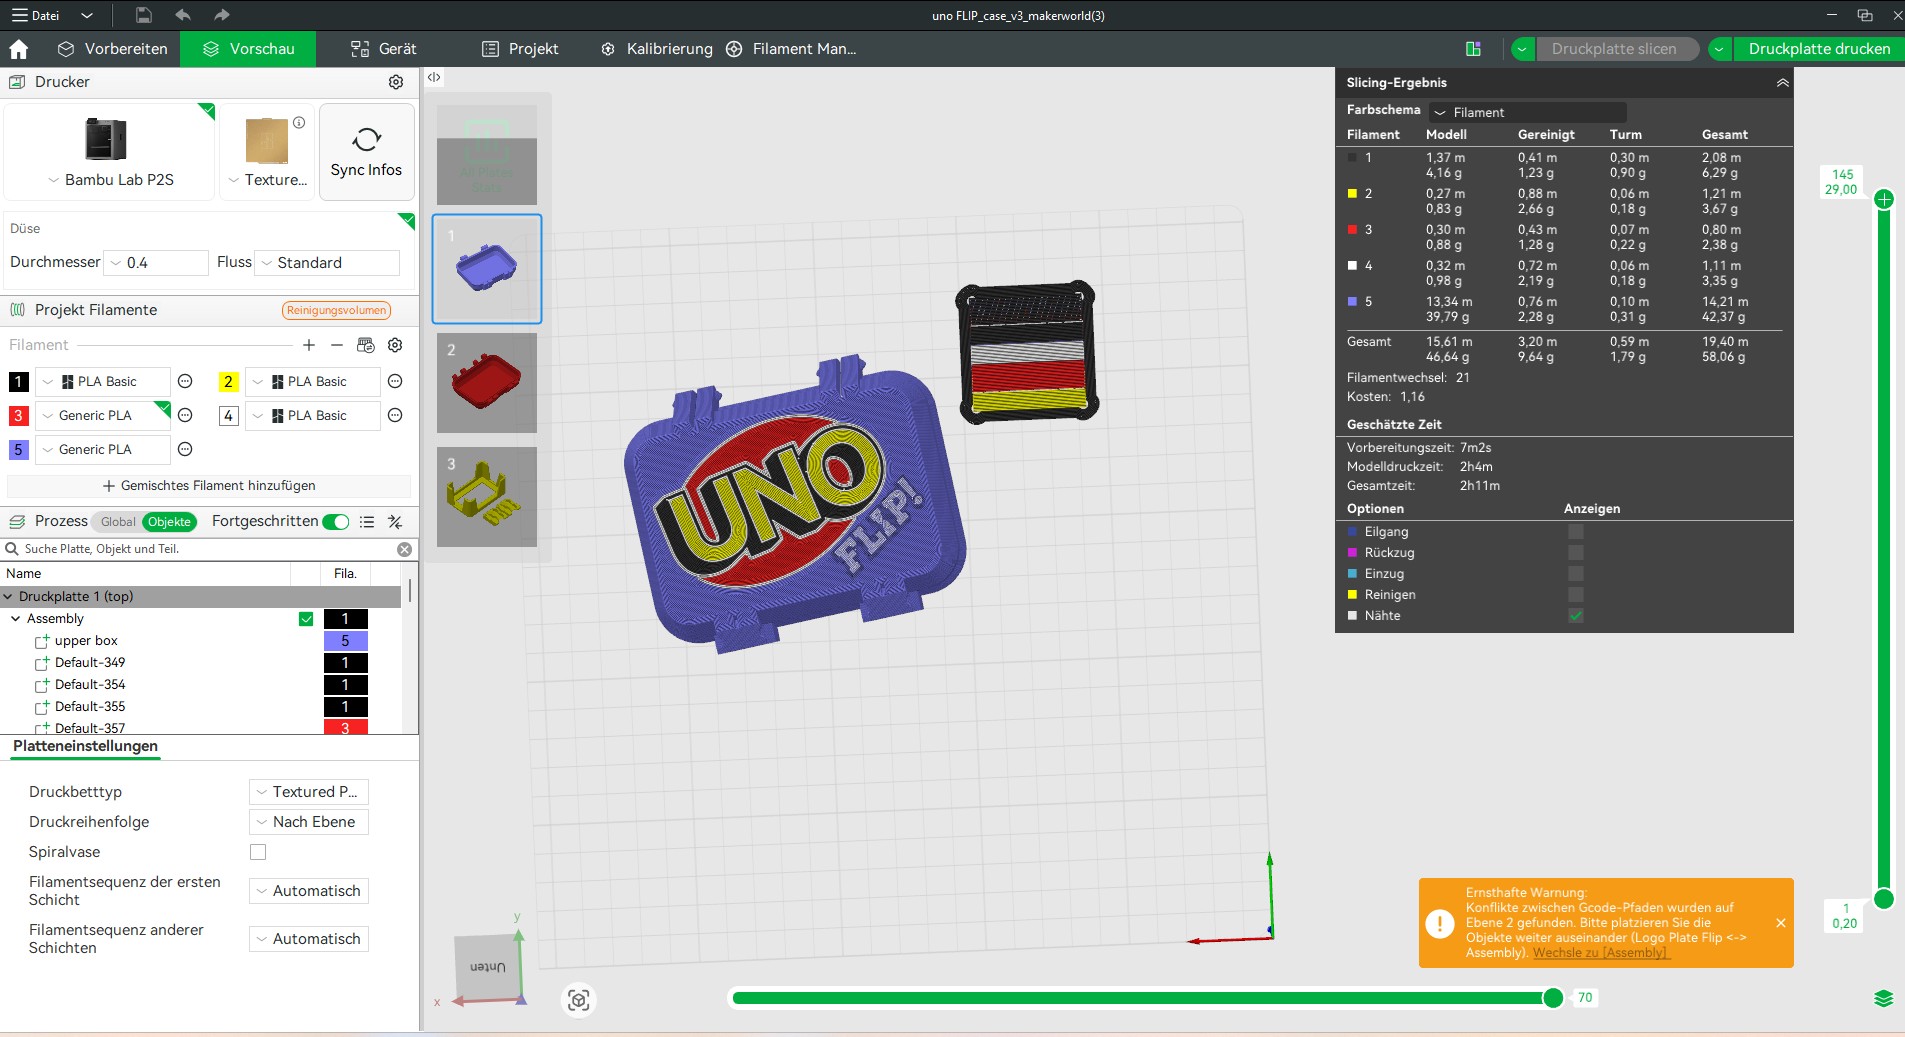
Can you also show the legend to the right as well as not only layer 1 but also layer 2?
I am trying to determine if the color-“mixing” feature is active as there’s no reason for the slicer to show colors that are not loaded in the filament preview. Using the bottom slider may also help with this as color-mixing splits a single layer into two.
&
Yes, the dark purple-looking border around “Flip!” is supposed to be black.
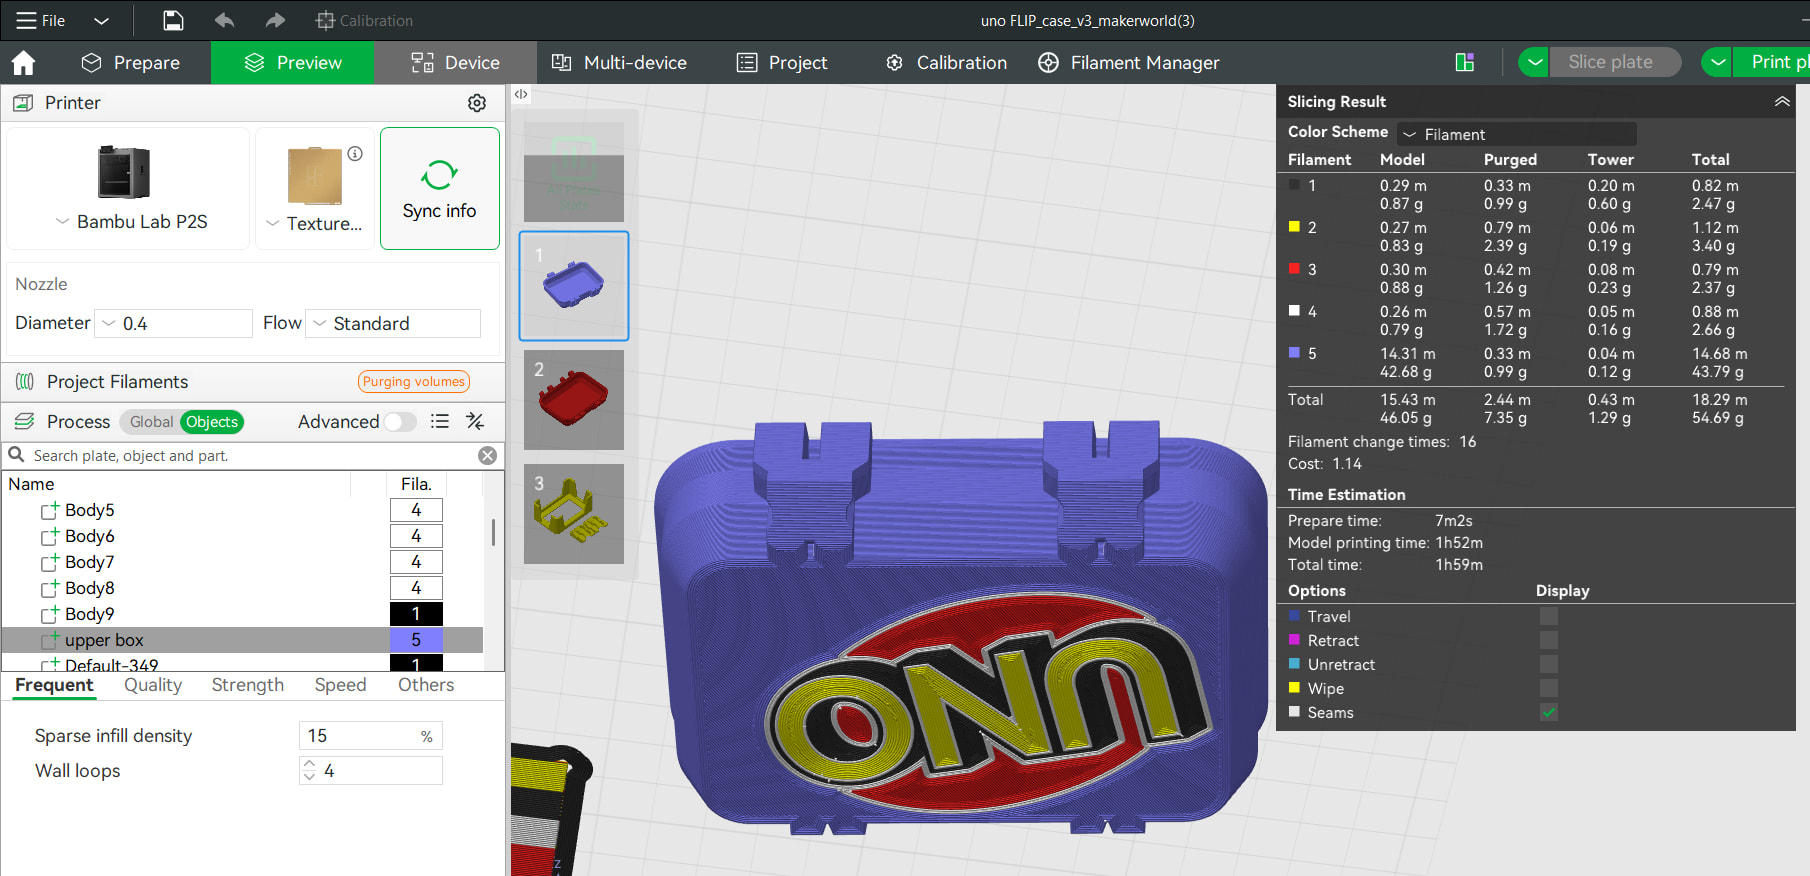
I’ve attached the requested screenshots of the legend on the right side, Layer 1 and Layer 2. Hopefully this helps identify what is causing the incorrect color assignment.
OK, that is strange. Especially since you have not defined a mixed filament.
A few more things:
- Your Assembly consists of added parts. For color changes, I usually try to change their type to “Modifier” using a right click in the object tree. It can be tedious, but it avoids common errors such as slightly elevated text, etc.
- As you move the bottom slider to the left, can you identify when those draker lines are printed?
&
I tried changing the added parts to “Modifier” as you suggested.
However, I noticed the following:
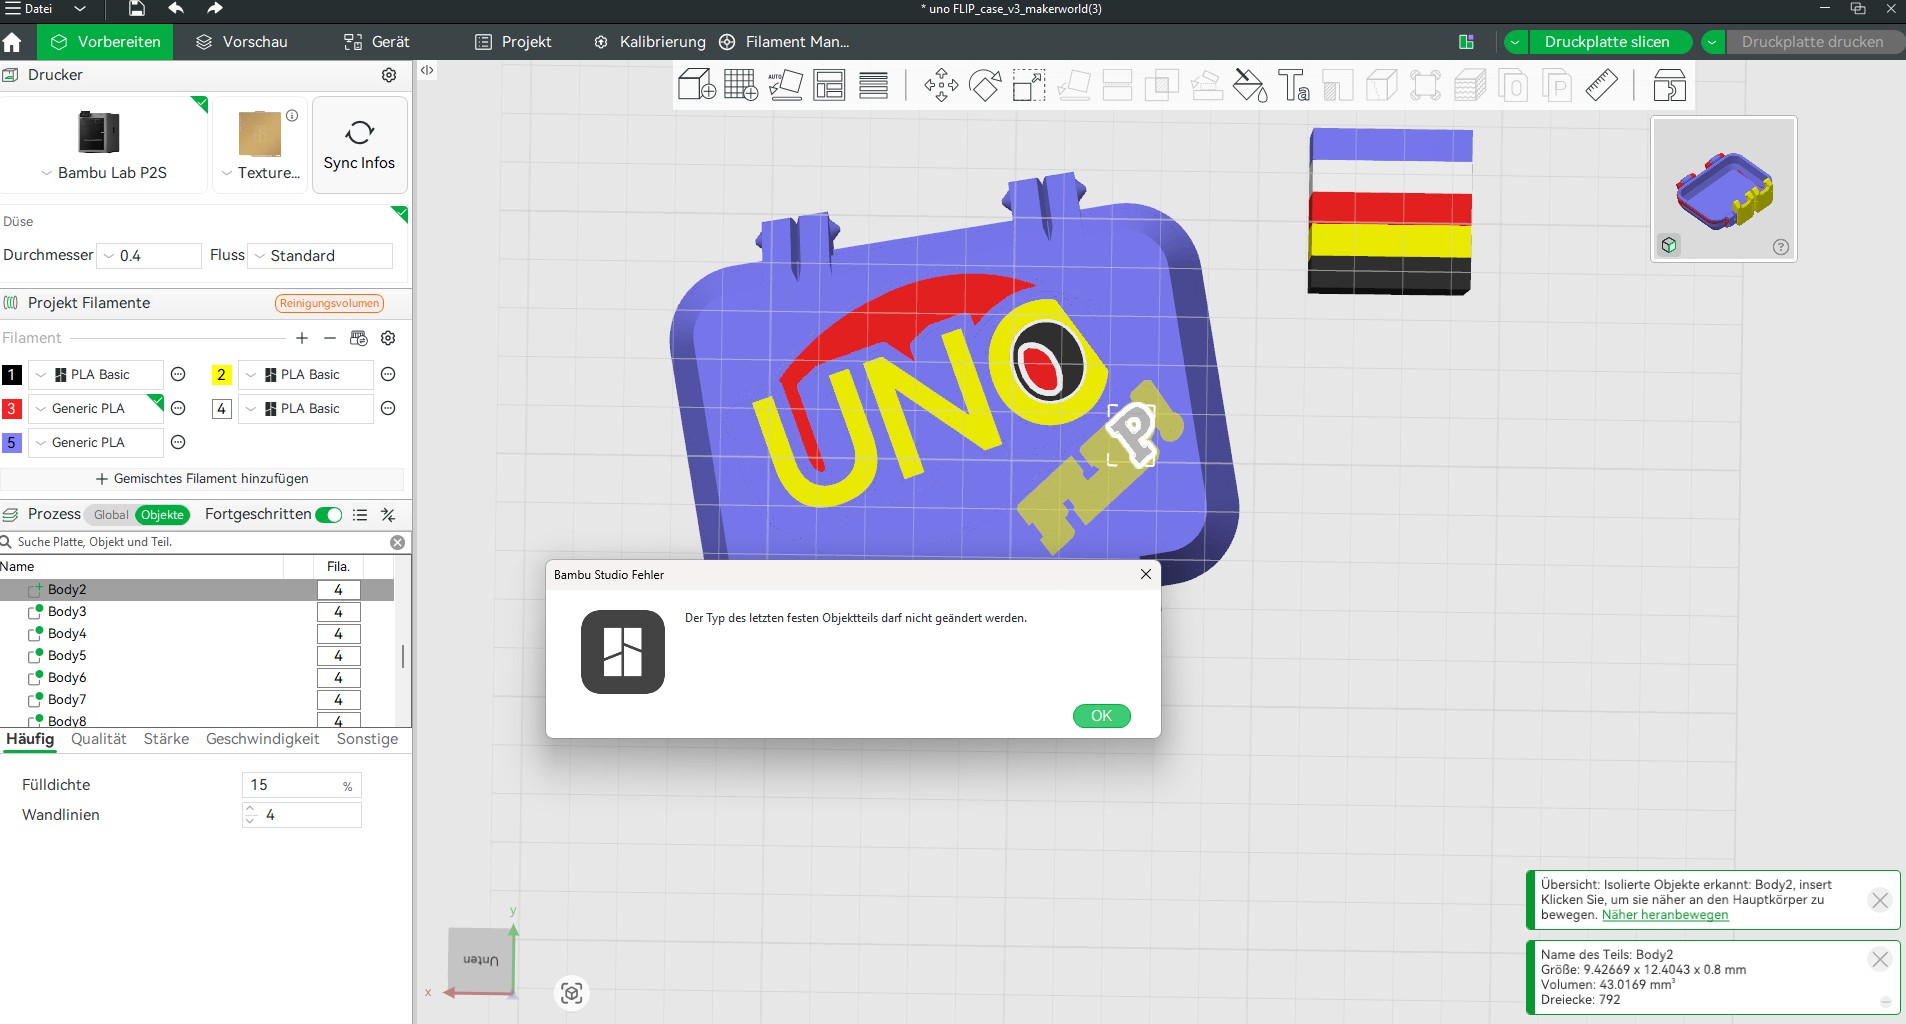
- When I change all but the last part to “Modifier”, almost the entire Flip! logo disappears. Only the last part remains visible.
- The last part cannot be changed to “Modifier”. Bambu Studio shows an error message when I try to do so.
- I’ve attached a screenshot showing the error message.
I’ll also upload the 3MF file. I think it may be easier if you can take a direct look at the file and see how the objects and color assignments are set up.
uno FLIP_case_v3_makerworld(3).3mf (4,5 MB)
There needs to be at least one non-modifier part which should be the case itself.
But I’ll have a look myself in a little bit as it is a bit of a puzzler…
&
Mystery resolved:
- Two different assemblies occupy the same volume. That is probably also why you get the path conflict warning.
=>
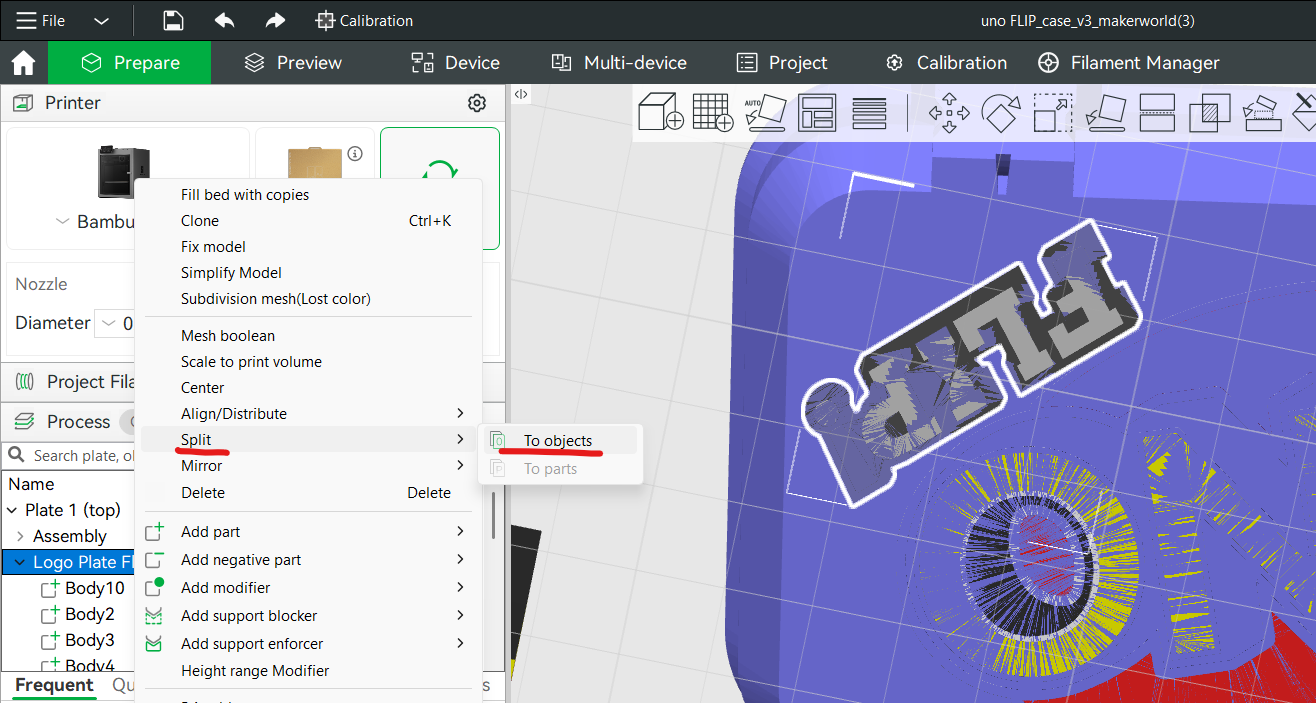
- Right click the Assembly to Split into Objects. Do this for both Assemblies
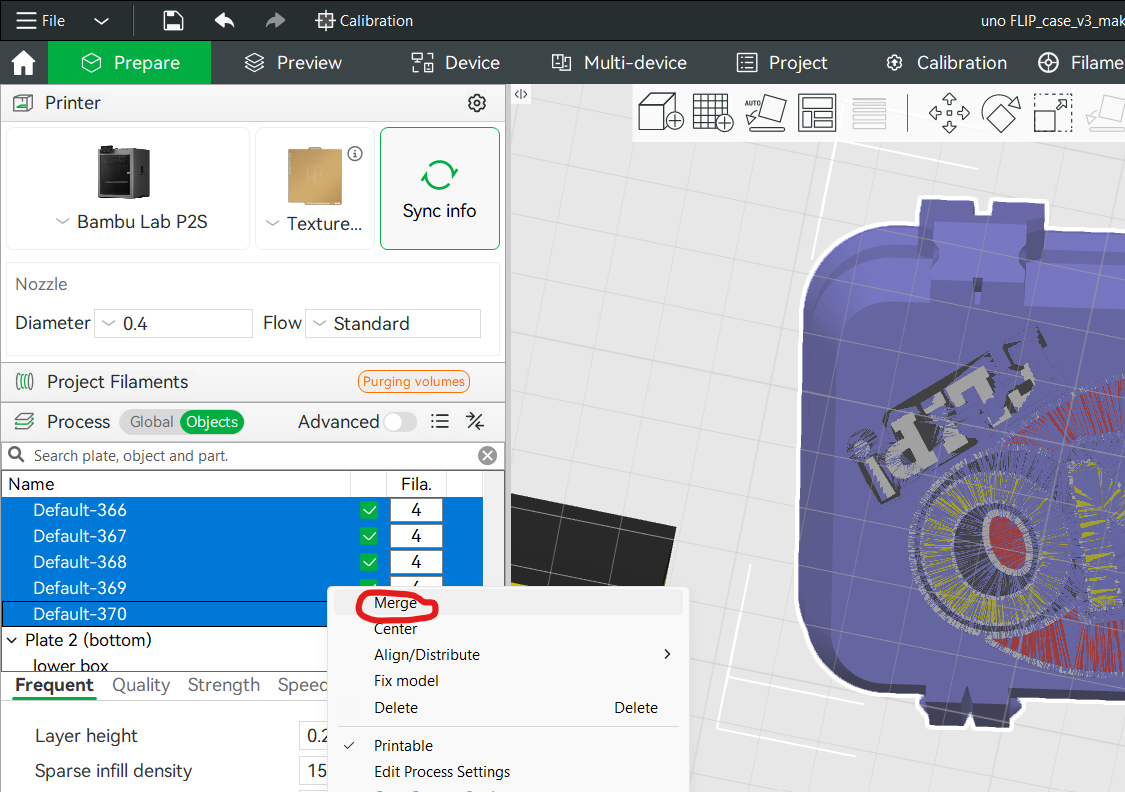
- Select all objects from those two assemblies (select the top object in the tree, hold shift, select the bottom object in the tree), right click and “Merge”
=> Be surprised that the “Flip!” is now completely gone… 

But not to worry:
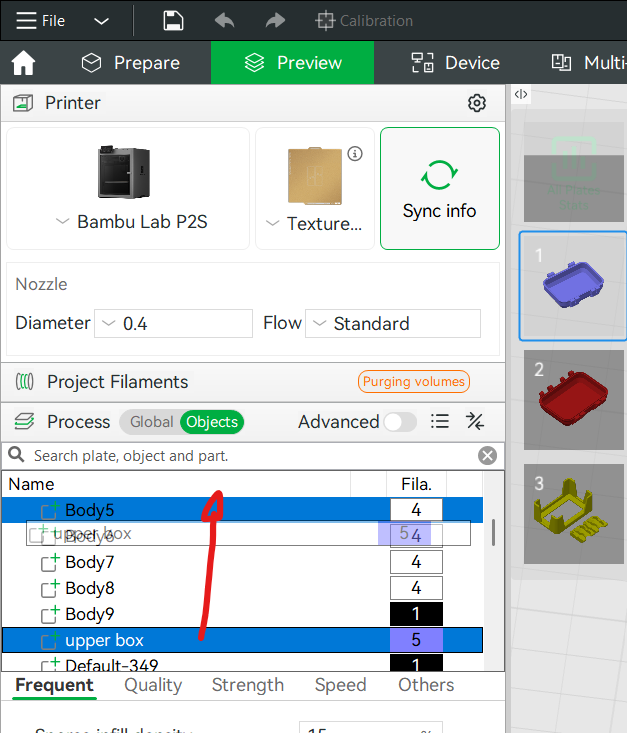
- Stuff happens in order of the object tree. So anything above the box object will be swallowed up by it.
- Drag-and-drop the box object all the way to the top. You may need to do that in stages.
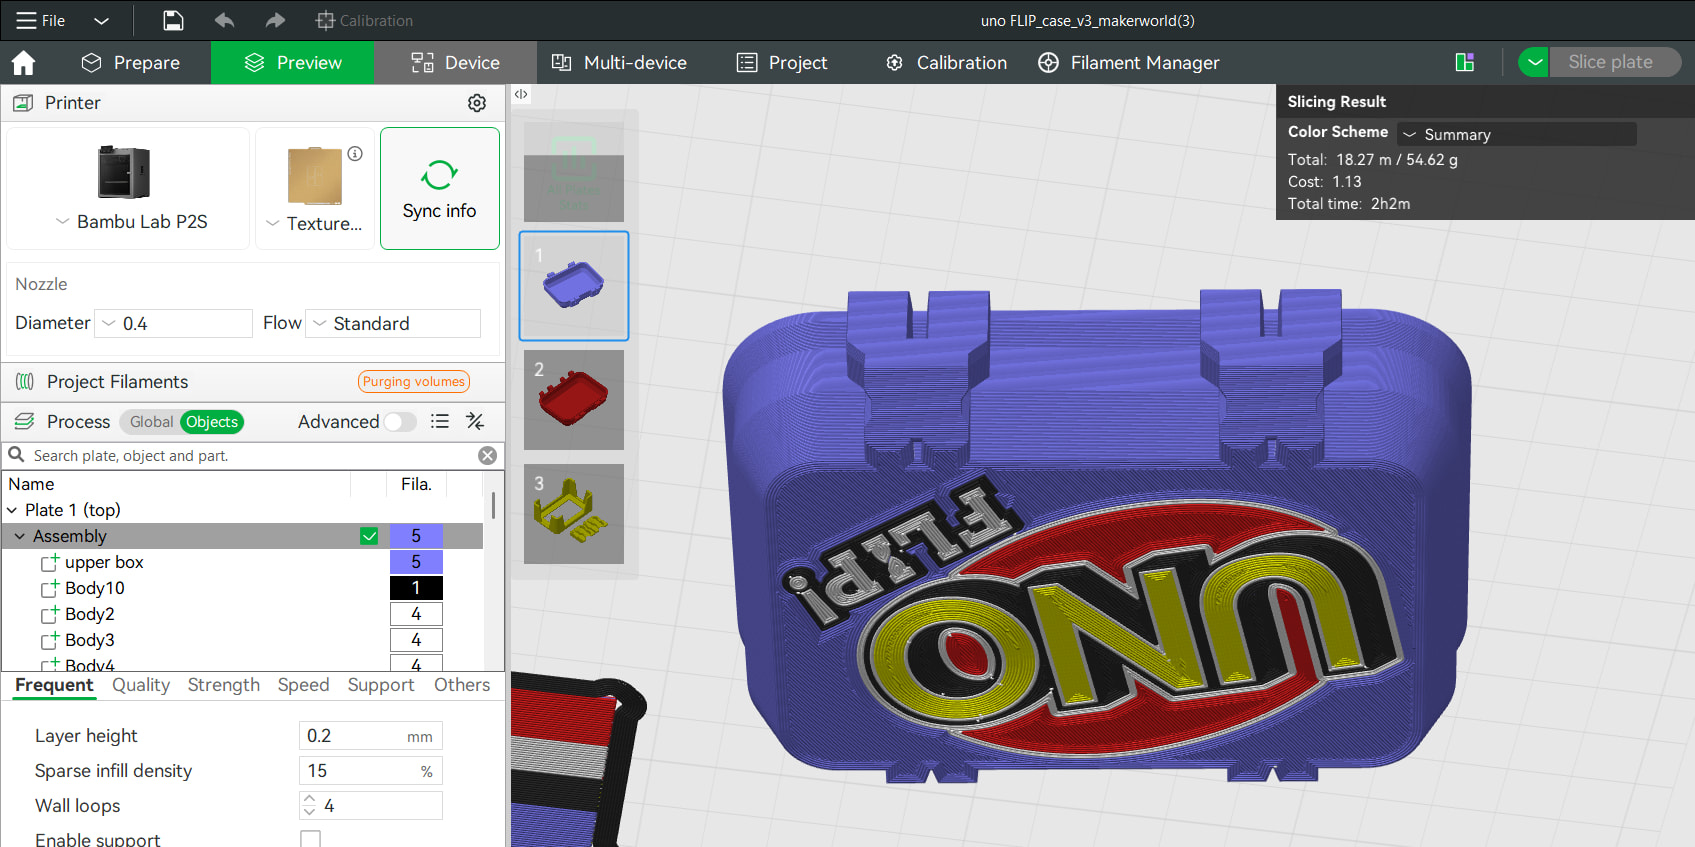
=> Slice again…
Looks good now.
uno FLIP_case_v3_makerworld(3).3mf (4,5 MB)
When not using the Modifier Type, it can happen in this approach that individual objects have a tiny difference in bottom surface height. This can ruin such a print quickly which is why I prefer the Modifier type for this.
But it is a bit tedious to change the type individually when there are multiple objects.
&
You’re awesome! Thank you so much!