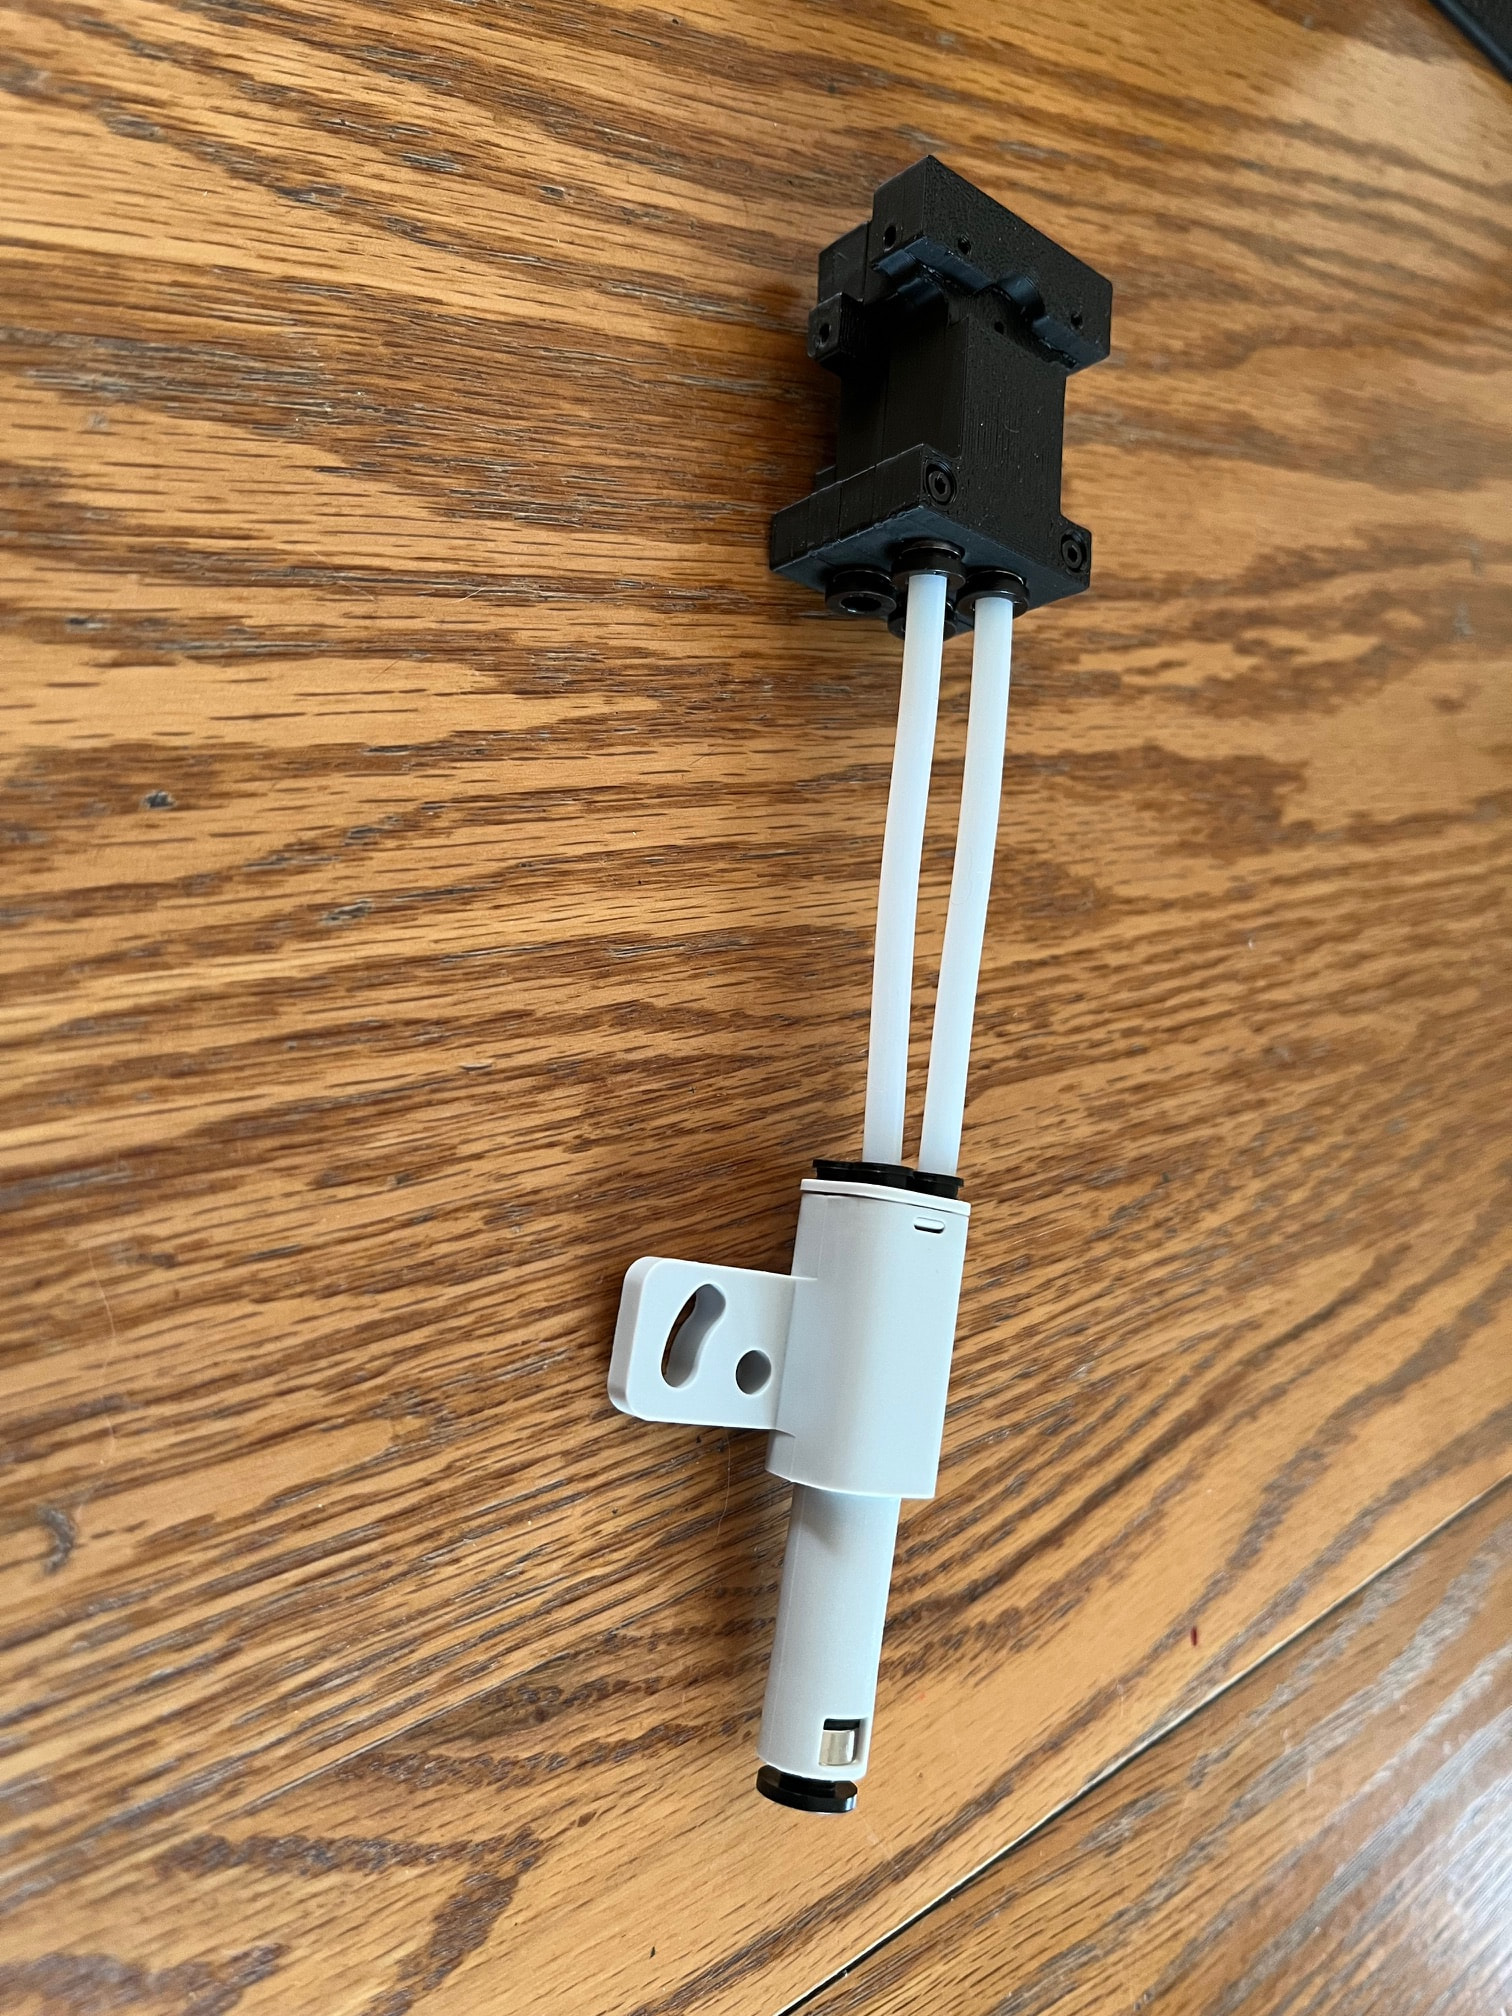
My many modification attempts to the Filament Track Switch to reduce drag

I’ve made a lot of experiments on the filament track switch in an attempt to reduce its friction. These are the results of everything I tested so far so you don’t have to :wink:. I dismantled the switch so many times I now can disassemble and reassemble it with my eyes closed

Some of the changes had some effect, some had none, some have just resulted in so slight improvements that it was not worth the pain.

I’ve started by changing the orientation of the switch to make it vertical so that it could adapt to the positions of my AMSs (on top, below and on the left side). This has been the best change I made but although the filament would flow without triggering any warning, I was still not fully happy as I could still feel some resistance.

Although I initially determined the main culprit seemed to be the switch lever part of the switch, I did not find an easy way to improve it so I proceeded instead to try to improve the 2-in-1 track part of the switch by making then longer and curved smoother. The result was worse than the original eventhough I printed them in PTFE filled filament from Igus.

I then thought, if longer tracks do not work, why not try to make them shorter and straight pushing the 2-in-1 farther from the switch. This gave a visible improvement but too minor to be worth the trouble.

I then attempted to reduce the pressure from the magnet/hall sensor. For this I tried different spacers between the magnet spring and PCB. I tried different thicknesses (0.6mm, 0.8mm, 1mm). 1mm was too thick and the hall sensor was not triggering, 0.8mm was not reliable, 0.6mm was perfect. I cannot say it improves the friction or not, some tests seem to make it better, some seem to make no difference. I also tried some softer springs with same result, again not worth the trouble.

The only thing remaining was to finally take an other look at the lever part. Checking it more closely, there is a restriction around the lever shaft where the width of the track is smaller there which seemed it could be improved. I then gently filed the exit corner of the lever track to increase the width and reduce the length of the lever contact. The improvement was significant and the friction was greatly reduced (I may be exaggerating but the improvement was substantial).

If you want to do that, do not overdo it to not risk the filament hitting the plastic corner behind it at insertion. I may have done that on one side of one lever and I could hear sometimes the filament blocking somewhat before getting through again.

This was really the only mod that made sense although I wouldn’t really recommend it as if you do it wrong the filament may get stuck there and render the switch inoperable and certainly no (or difficult) way to fix it. I bought a second switch to do all this so I didn’t care if it was bust in the end

I also experimented again with my switch mount as during my many experiments I was sometimes too lazy to mount and dismount the switch from its support and when it was free to move just kept in place by the PTFE tubes, the flow was better. I then just designed a small rotating adapter between the switch and its support to allow the switch to sort of self align rather than constraining the PTFE tubes to a forced orientation and further improve the flow.

This adapter can be installed on any mount, bambu’s or alternates.

In the end, my final configuration is (until I find more things to tweak):

1. Vertical support on the left and down from the printer inputs to keep a certain length and nice curves

2. Filing of the switch levers on both sides

3. Rotating adapter between switch and support

I’m now satisfied, the filament now flows freely (at least I’d like to think so) with only minimal more drag than without the switch.

Thanks for reading :grinning_face:

7 Likes

Care to post your mounting bracket somewhere? I have an H2C coming with the track switch and would like to set it up right.

Thx

It’s available here

Thank you. I will be downloading it shortly.

I wonder if there was something that could be printed as a shim/guide to drop in there to guide it past that? Filing it down is probably the best fix but I would consider polishing it as well which might be out of some peoples reach. Thats a fix they should implement at manufacturing right away.

They could but I guess a lot of thinking went into that switch and the way that lever is designed is to make sure it works everytime whatever the curve of the filament at entry and the shape of the tip. My mod may not be this compliant so certainly takes a risk it can render it inoperable in some instances, I would not risk it if you care about having to purchase a replacement…

For bambu I don’t think it’s the solution, they might want to come back to the drawing board to completely redesign that part of the switch but I think it’s too late for that now, wéll have to live with the current config

1 Like

I currently have one Track Switch replacement under warranty. The Input-A random jam or won’t let filament through even during the Automatic AMS Setup.

I am thinking this could be the plastic corner you were talking about that end of the filament get caught.

This is funny as it happened to me this morning. I blamed it to my mod so I replaced it with my brand new untouched one and same happened (I had tested it before and it had no issue).

I believe it was due to my different load/stop/unload tests last evening which may have cut the end of the filament at a weird angle or the multi gear marks at the end but coud not determine what.

I got fed up with the switch and just removed it :rage:. I did not even troubleshoot it (cut the filament to leave untouched end and retest, I was too upset with that thing that I don’t actually really need :slight_smile: )

For your issue on a brand new switch, it could be what I suspect happened with mine but also can be the coil support that is slightly rotated and is closer to one side of the permanent magnet than the other (the coil support has locating pins but it has some play hence the locating gizmo bambu provides in the wiki) and then prevent the lever to fully seat which could then catch the tip of the filament

If it is not too much trouble, I would open the FTS up and see if there is any residue filament stuck in the switch. I run into these arbitrary issues with the FTS while doing prints and eventually shut the printer off, disconnect the track switch, turn the printer back on and then reconnect the switch.

I’ve had to do this twice recently because the printer and the switch somehow get confused. In any event, when the message asks to resume the print, I click resume and the print continues.

I’ll be honest, the FTS has been a hassle with respect to dialing in the PTFE tube lengths to minimize the resistance but I’ll say that, when it works it works.

I purchased a couple of the FTS units to have while the firmware was being tweaked. I have been monitoring the “tension” warnings from quite a few users here. I’ve suffered through those warnings with the BL 4-in-1. Fortunately a member here showed me the printable solution for that. I’m in no hurry to relive that again. So the FTS units await installation until I personally feel the units are ready for prime time. I have not installed them as of yet. I did the firmware update and now I am getting the “tension” warning on my H2C. Not on the H2D, oddly enough. It was fine PRIOR to the update, but now is an issue after the update and recalibration. The FTS units will stay in the drawer for now. This PTFE dance sincerely lacks the joy that was promised on Prom night.

1 Like

Bummer, I was thinking about getting the FTS soon, guess I’ll wait awhile to see if this gets fixed.

I slightly modified the left side mount, mostly because I don’t have to much space around the printer, flipped it 90, tilted it upwards and made it able to rotate horizontally. Also added mounts for the h2c 4-in-1 at the best input angle I could get.

I also removed the wiping pad thingy from the 4-in-1s. I’m tinking that with all the extra stuff the filament is going through after that adapter, there is plenty of opportunities for particles to come loose anyways, have to wait and see with that one.

I have only had one error so far after around 30-50 prints since it was installed, and that was actually due to one ams ptfe tube being Ina weird angle cause I had twisted it too much.

One thing I noticed after manually testing resistance from the adapters all the way into the printer is that the angle of the ptfe in the outlets can be picky, if it’s slightly angled the wrong way, there’s a higher resistance, what that wrong angle is though will likely differ from user to user.

Hi, many thanks for the detailed explanation. I think I am in need of more clarification regarding exactly where I should be filing and how much. Did you file the metal part of the lever ?

Be aware that you can ruin it if you go too far

2 Likes

Excellent , many thanks, I will be easy on the lever. I hope Bambu irons out the issues before H2D support is released. I won’t install it until they remove restrictions on TPU.

Ignore

Weird, it is normally Americans annoyed at drag.

Also, it refuses to do anything on my A1 mini or any of my P1S printers!

I haven’t used it much yet, but I haven’t received any warnings about filament jamming or excessive resistance.
I did notice, however, that when the filament arrives at the FTS, the loading speed halves, for any input or output. This happens precisely when the filament is inside the FTS. Could it be the firmware, detecting the filament’s position, slowing down loading?

1 Like

No, it’s purely mechanical, filament dragging inside the FTS

1 Like

This looks very clean. Will this mount with the FTS above the filament inlets? My AMS units are above the printer on a shelf and I need to minimize the ptfe tube length.

I think its intentional, its a very obvious slowdown exactly as it hit the FTS input sensor.