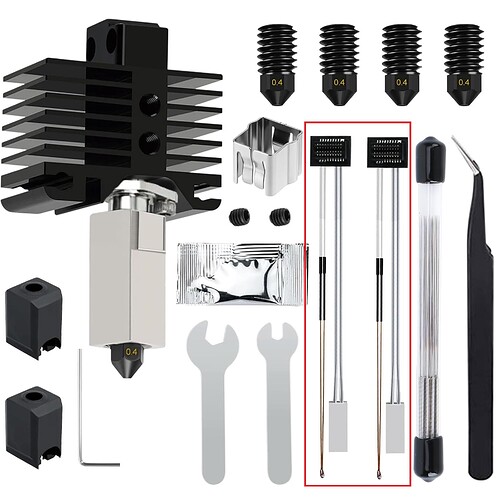
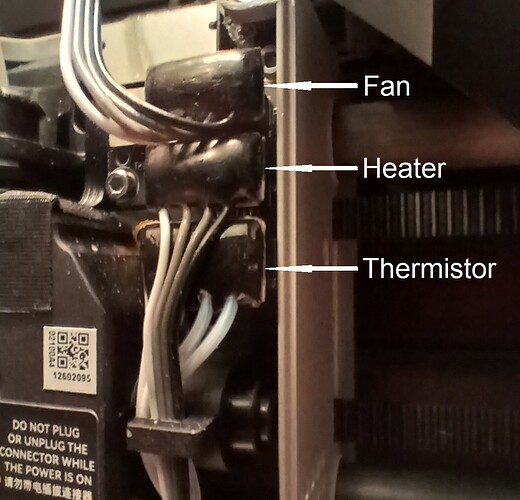
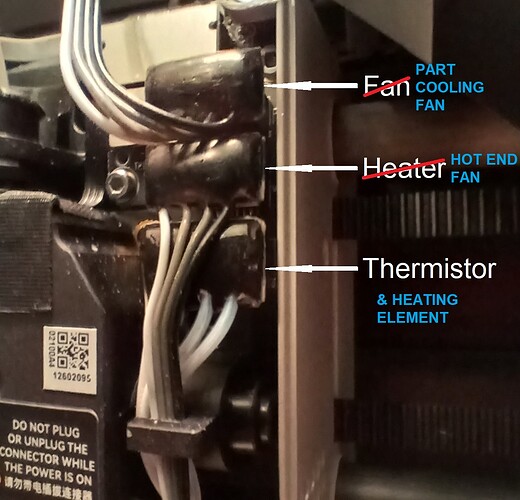
When did Bambu labs change from a two connector P1S heater and thermistor to a single connector. I’ve had my P1S since March of last year, and over the weekend I decided (for various reasons) that I wanted to change my hot end to one with removable nozzles. The one I ordered says P1 (P1P, P1S) series compatible, but I’ve noticed that the heater and thermistor are on one connector, whereas my P1S has two (one for the heater, one for the thermistor). At the top of the Bambu Labs Wiki page for replacing the P1S hot end, it shows a picture of a complete hot end, with the fan connector and a single combined heater/thermistor connector. The video however shows them unplugging three separate connectors; fan, heater, thermistor. The Bambu US store only shows the combined version for sale. Before I go beyond the point of no return (to be able to send it back to Amazon) has anyone tried plugging in one of these new, single, combined connectors onto an extruder that has two (plus the fan)? I’m including a picture of my extruder and the hot end I bought. The heater/thermistor provided is in the red box. It’s the same thing that Bambu Labs is selling on their site for the P1S. Any ideas, thoughts or suggestions?
Yes, you are absolutely right. It didn’t dawn on me until I had it off the extruder and in my hand. At the moment, I am smacking my palm against my forehead, in my best Homer Simpson voice, saying “Doh”. Thank you for your gentle correction, in the face of my stunning ignorance.
Since you were so kind to help with my last issue, I’ve been trying to find an answer for preheating and re-tightening the new nozzle. This new hot end has a 0.4 nozzle pre-installed. They recommend heating to 220 degrees and then snug it down a bit more. I’m trying to find out if I should leave the sock off during this procedure, or get it up to temp, turn the heater off, remove sock and then tighten. On my old Ender-3 I had to worry about thermal runaway. Thoughts?
I think I would heat the nozzle up without the sock and tighten the nozzle tip. I don’t think you will run into any thermal runaway issues doing this.
Running an aftermarket nozzle on a Bambu printer can be difficult as you don’t have any control over tuning the PID loop. Often people who have tried them revert back to a stock nozzle.
All that the sock does is speed up how long it takes to get to temperature.
They want you to put the assembly through a thermal cycle.
Heating it up is all that matters. Wear your socks or don’t. ![]()
Thanks for the tip. I inadvertently bent the original hot end, so I needed to replace it anyway. It wasn’t all that expensive, so I thought I’d give it a try. If I have to put the spare 0.4 back on, I will. I do appreciate your help and advice.
Those with the removable tips are knock-offs.
Understood, I didn’t want to sink a bunch of money into what might end up being an experiment. The hot end is no longer bent, I ran a full calibration cycle and so far the test prints look good (a little better than they have lately in fact), and I have the OEM spare to fall back on. I’ve put about 450 hours on this machine in the last year, so you can see I don’t do a lot of 3D printing, it’s mostly toys for my grandson and such. We’ll see how it goes.


