PETG Printing - Surface Scars

Evening All

I’ve been using my x1 Carbon for almost a month now. Loving the quality (on the whole, but I’ll come to that) and the useability of it. I have done multiple PLA prints, using mostly the stock profiles and the speed and quality are excellent.

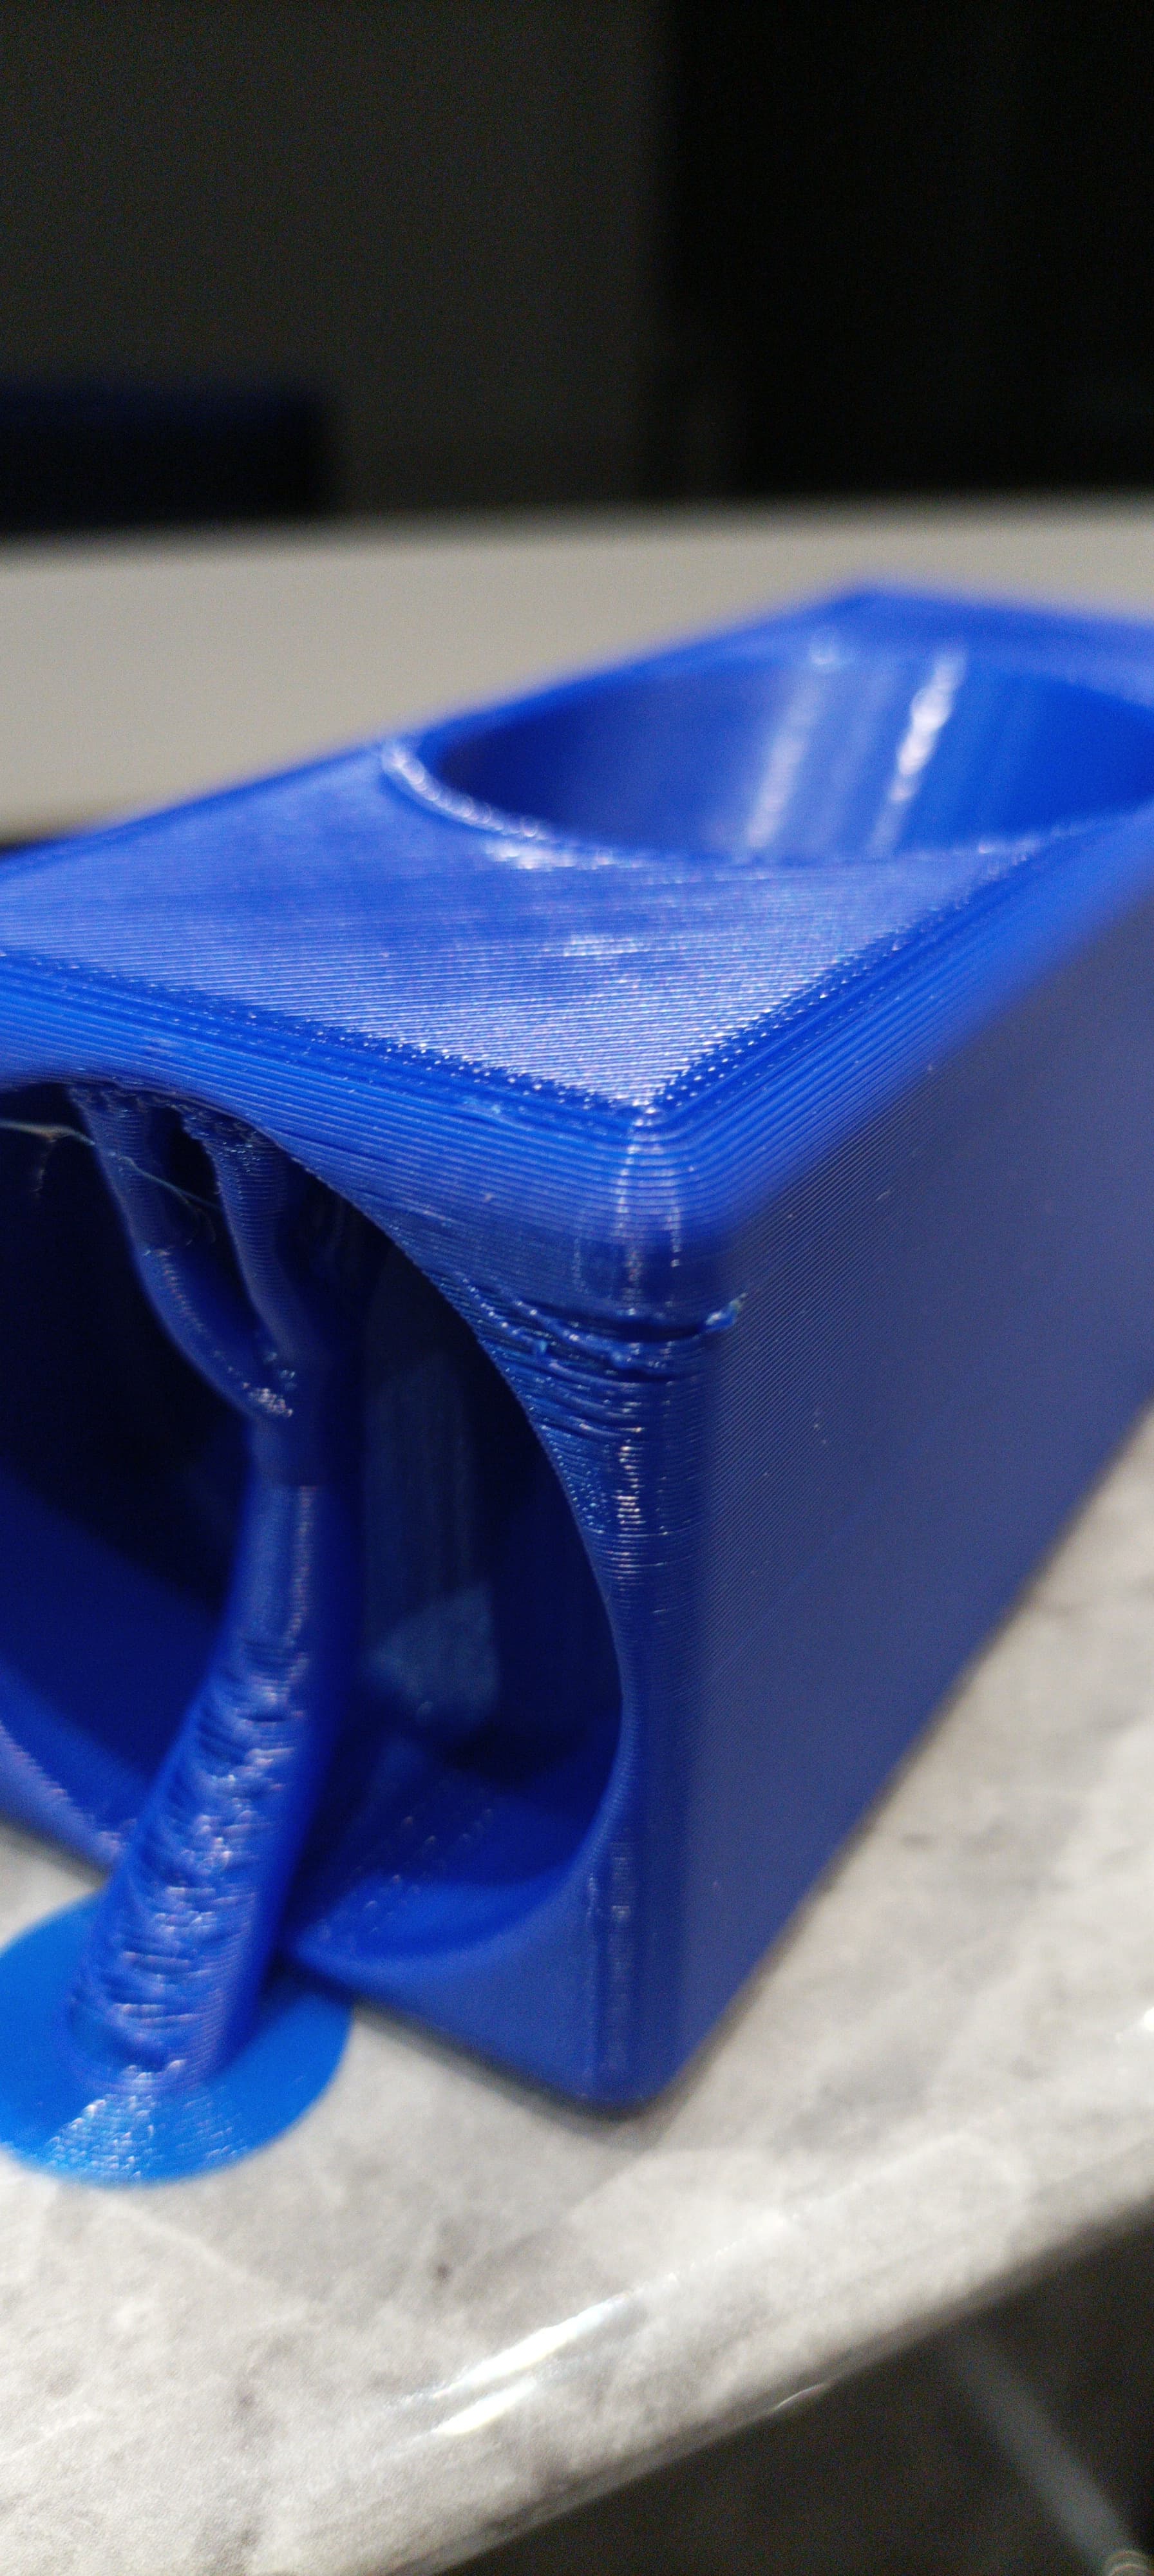
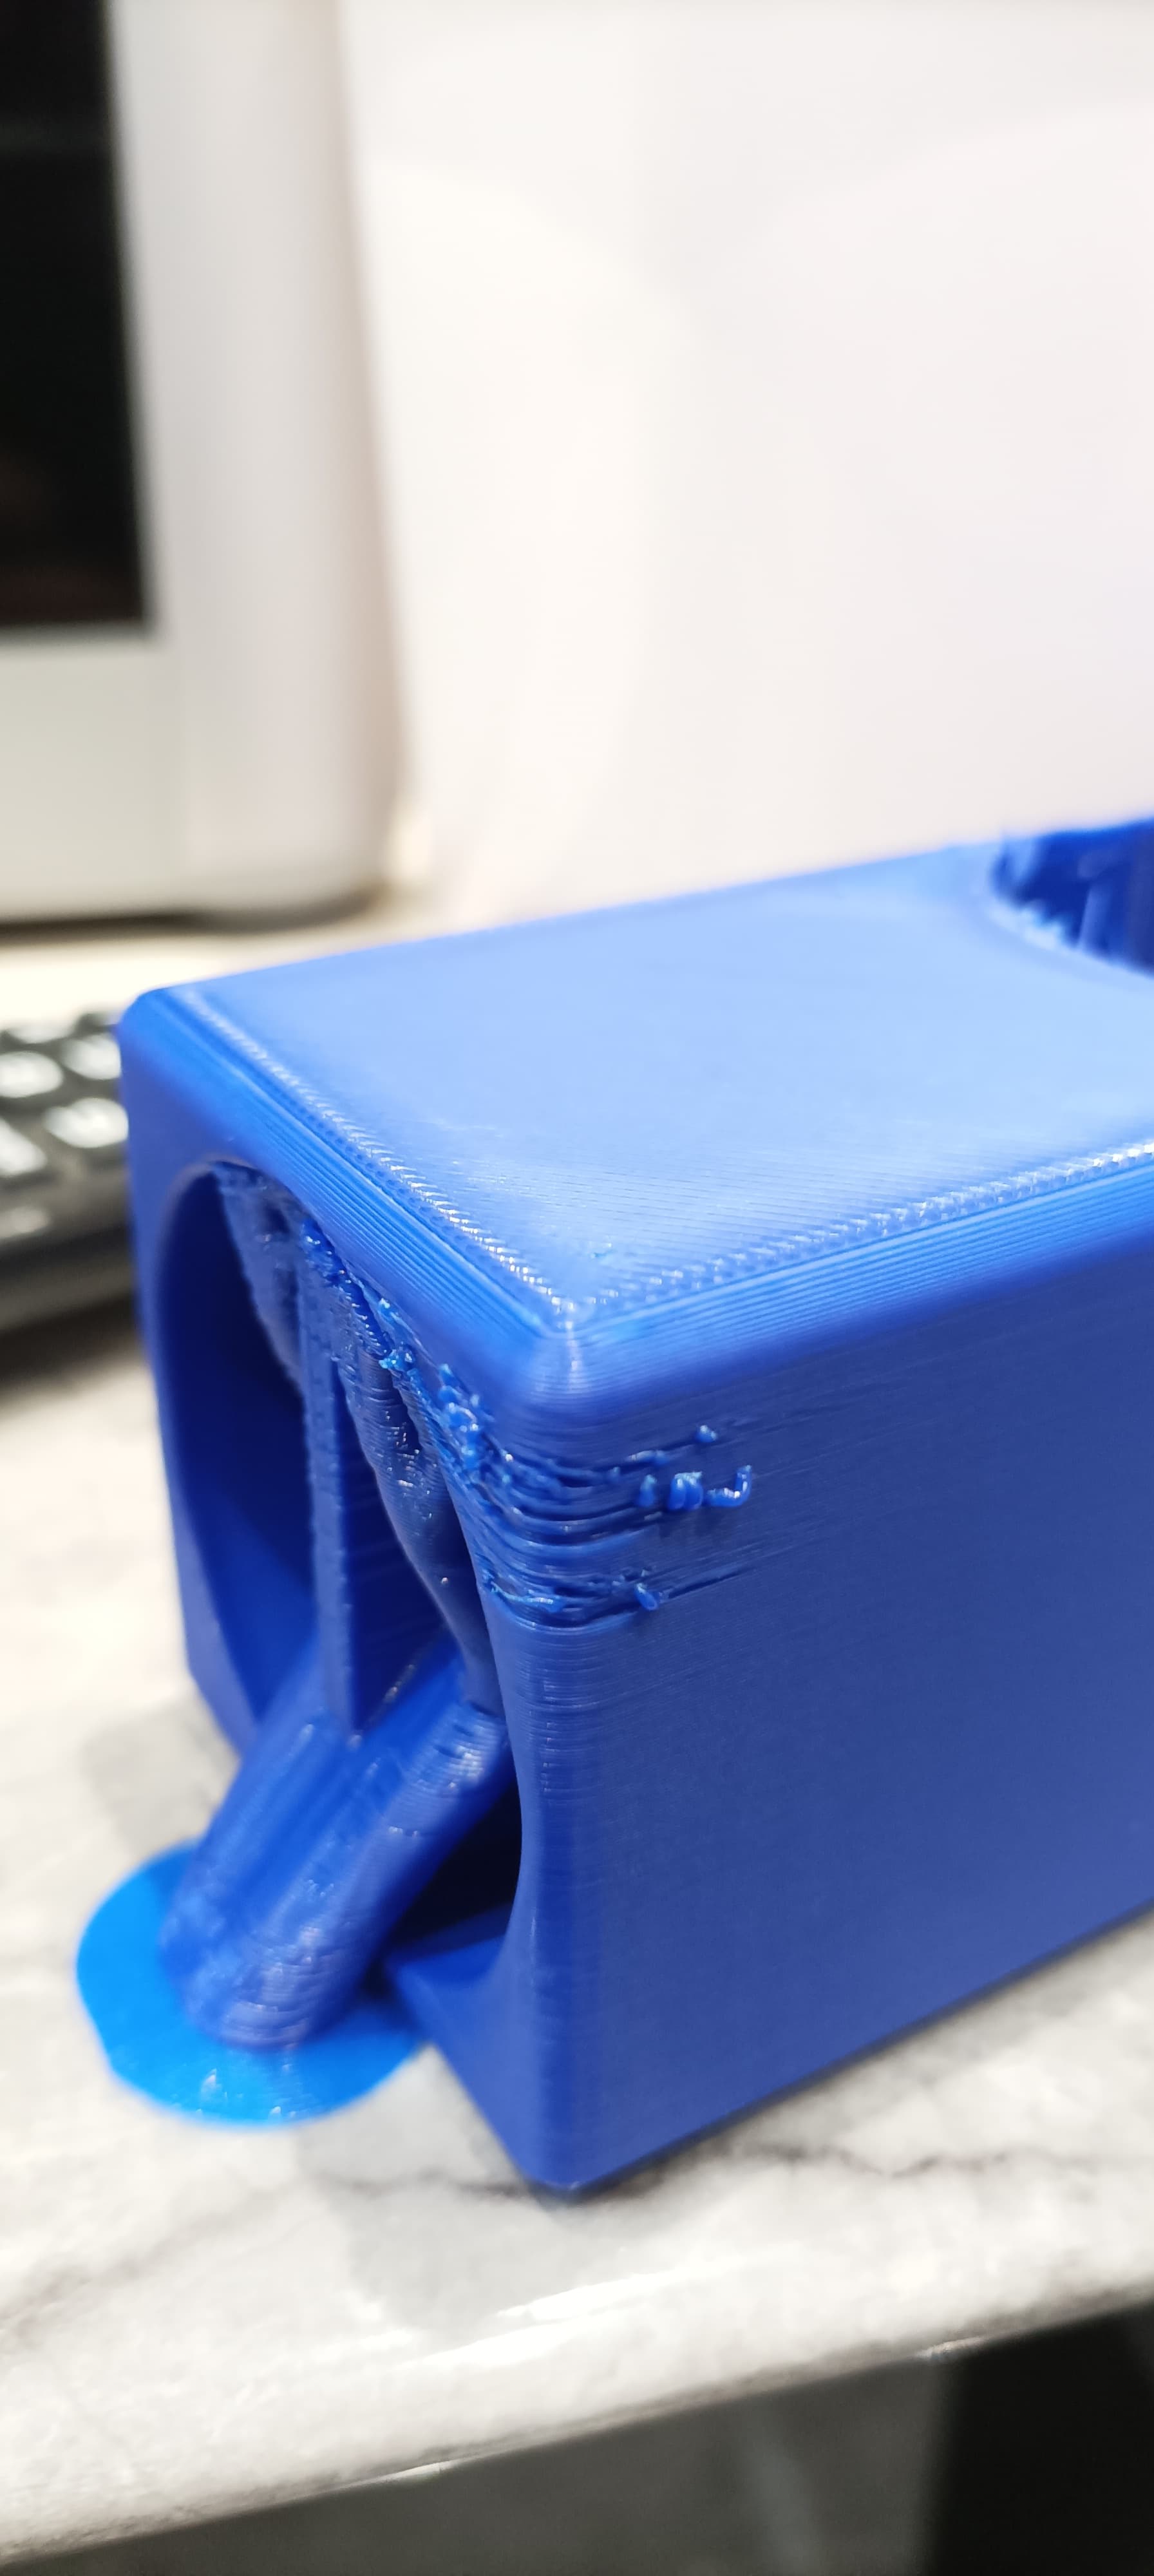
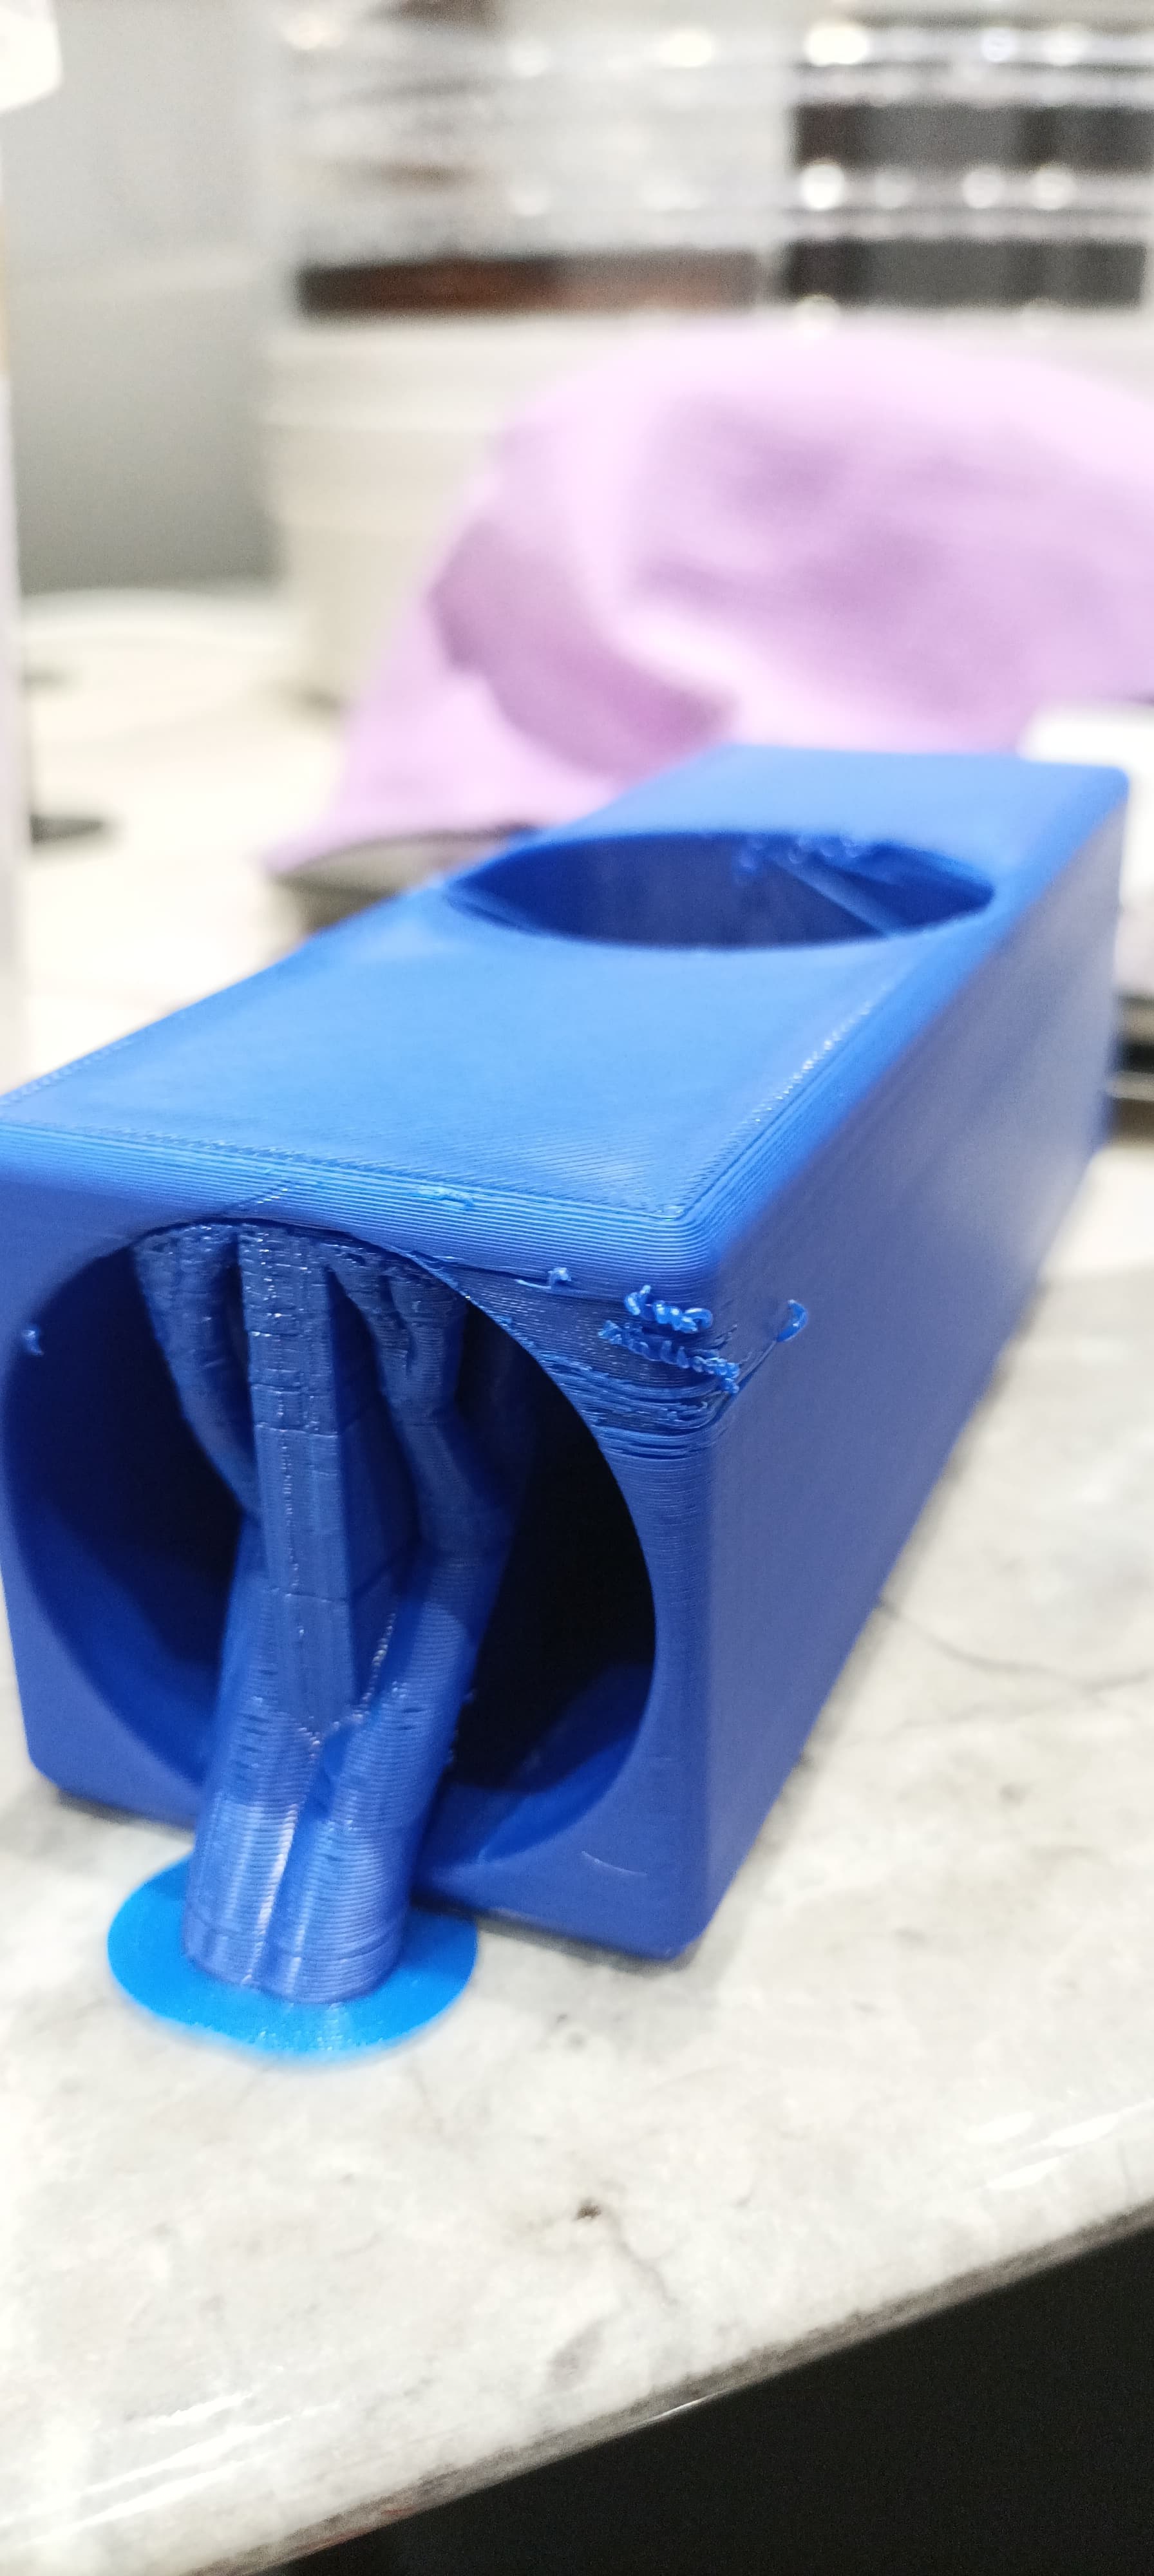
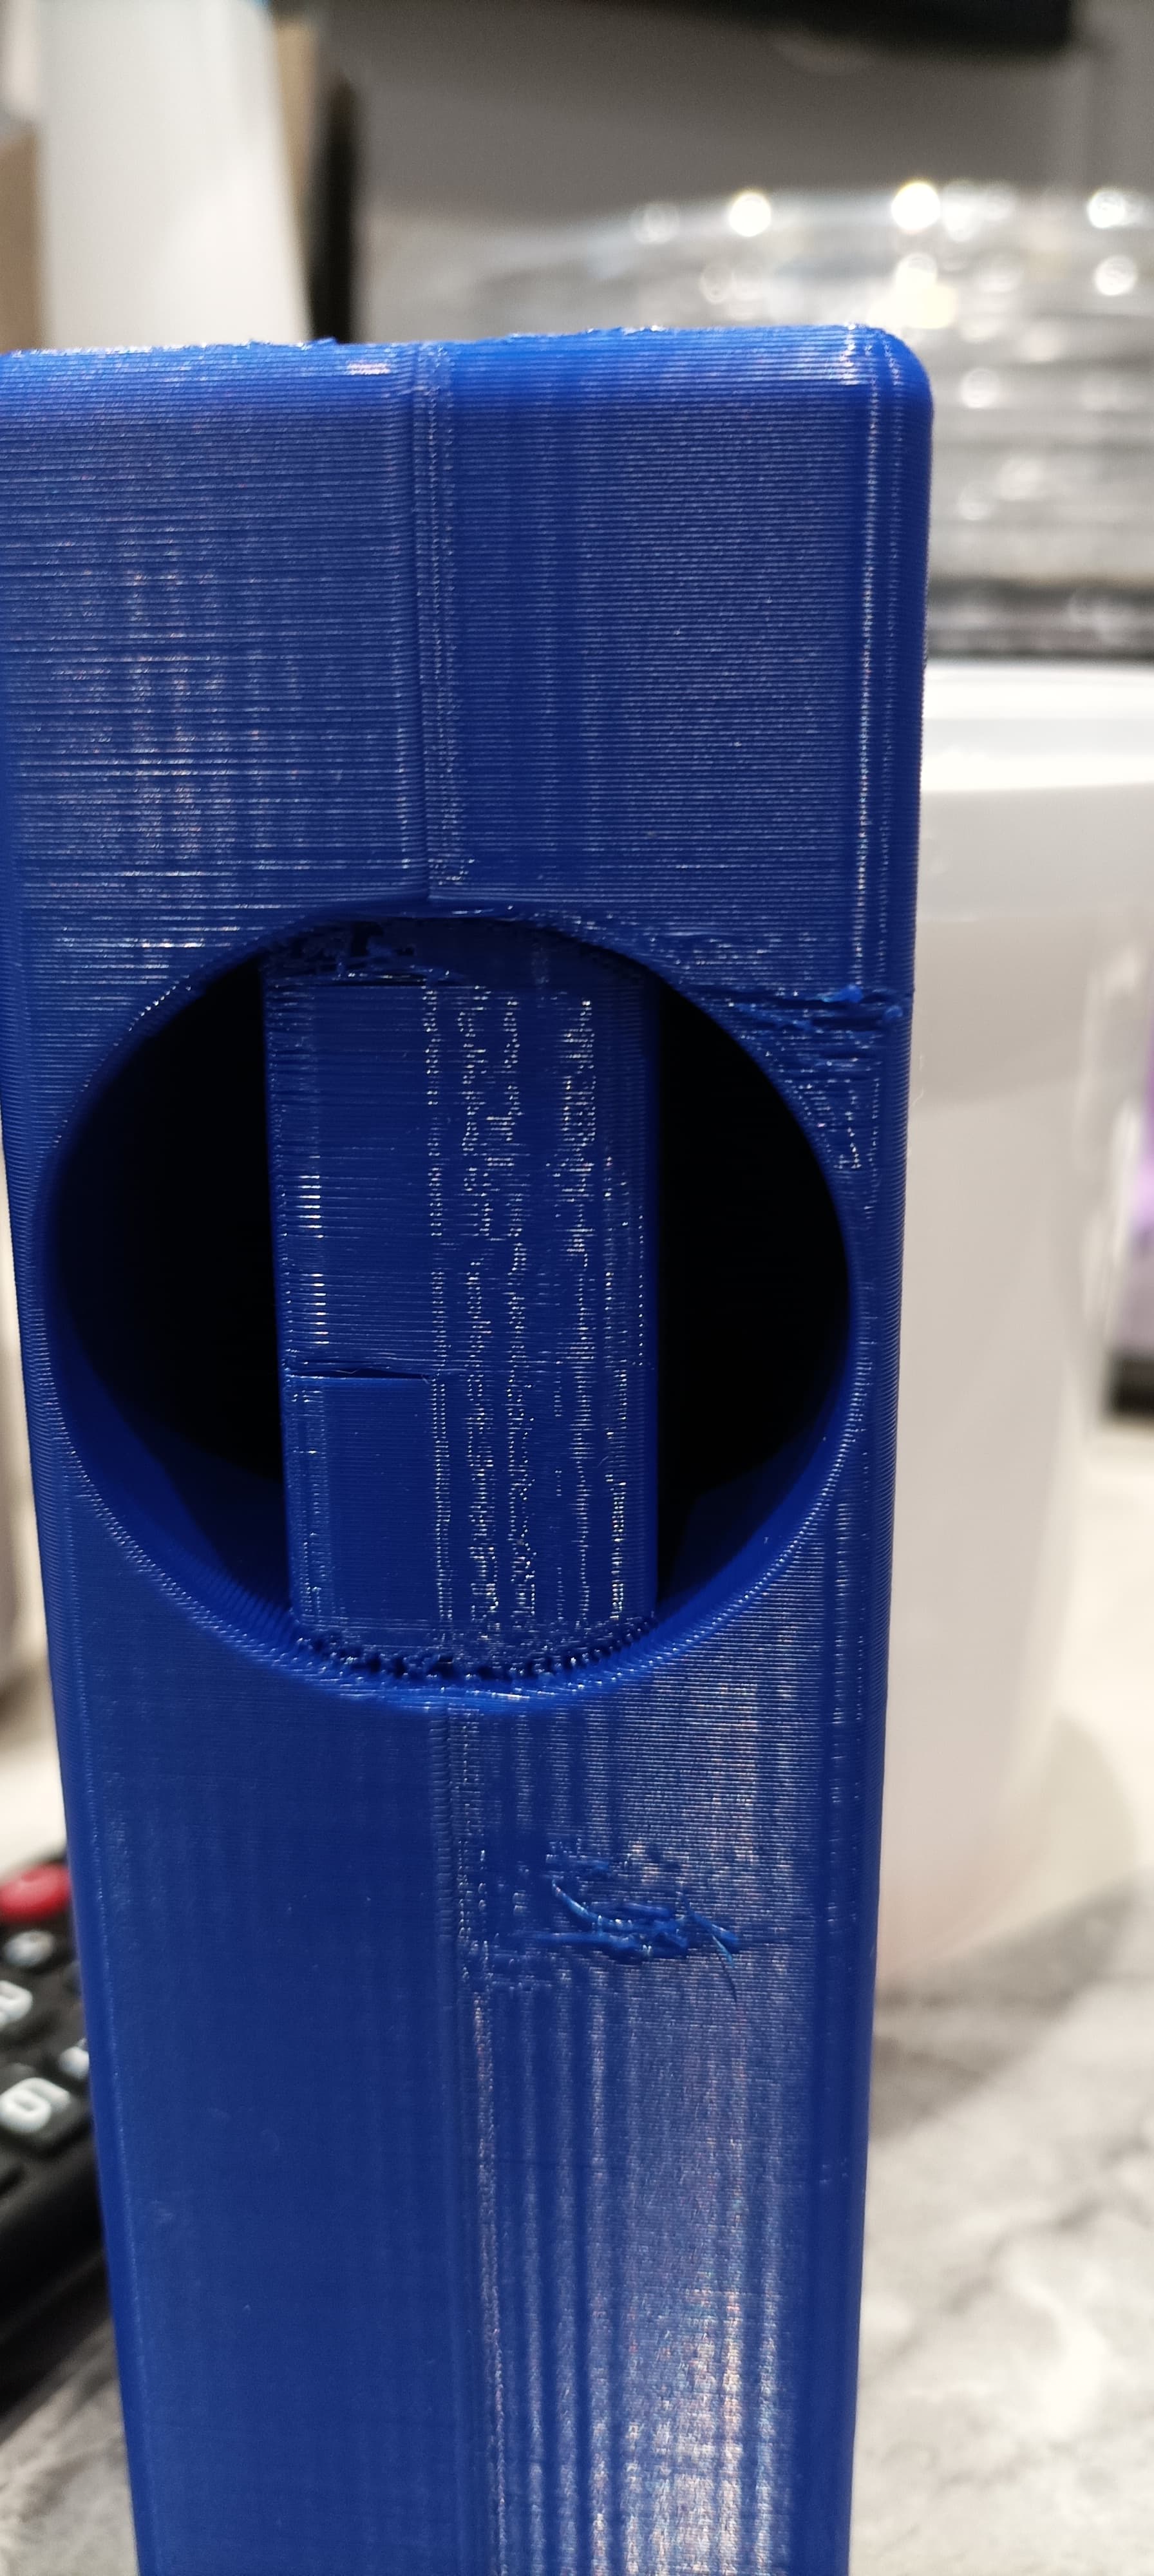
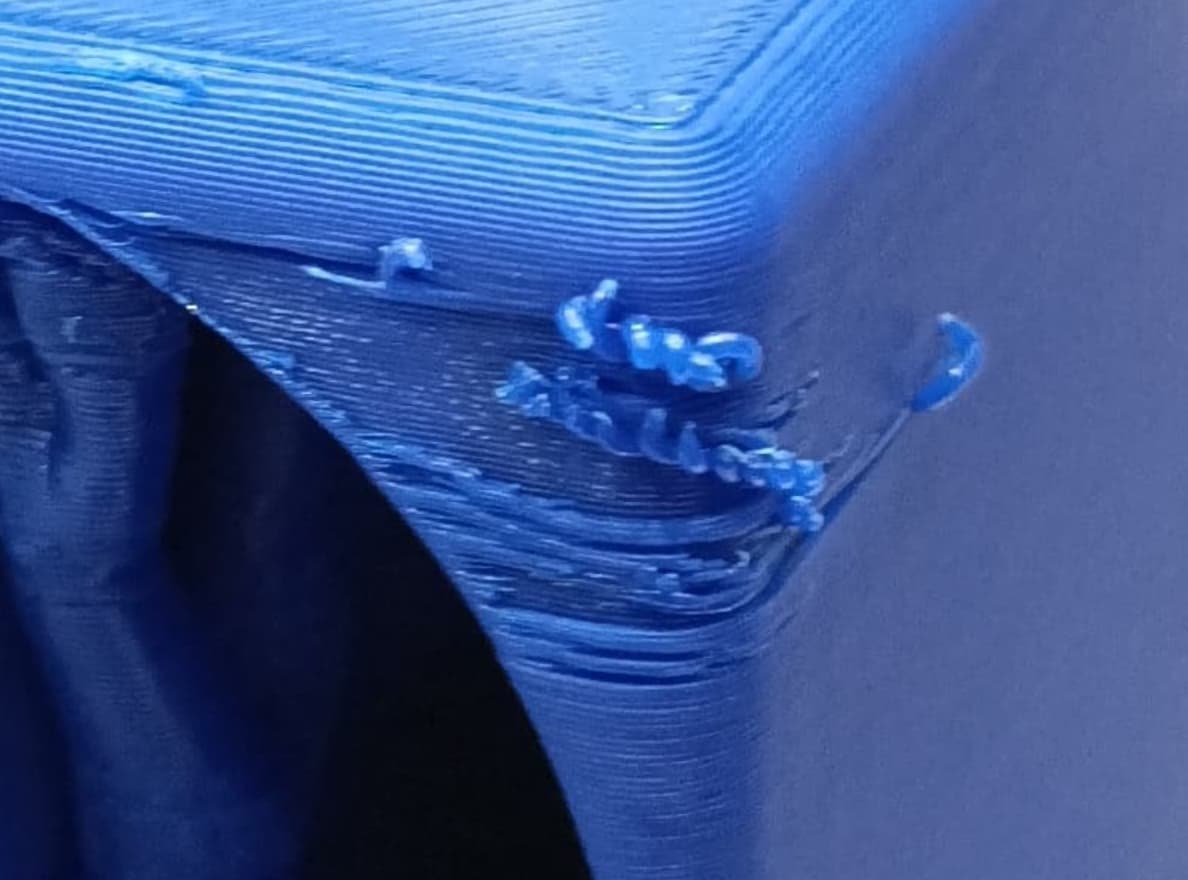
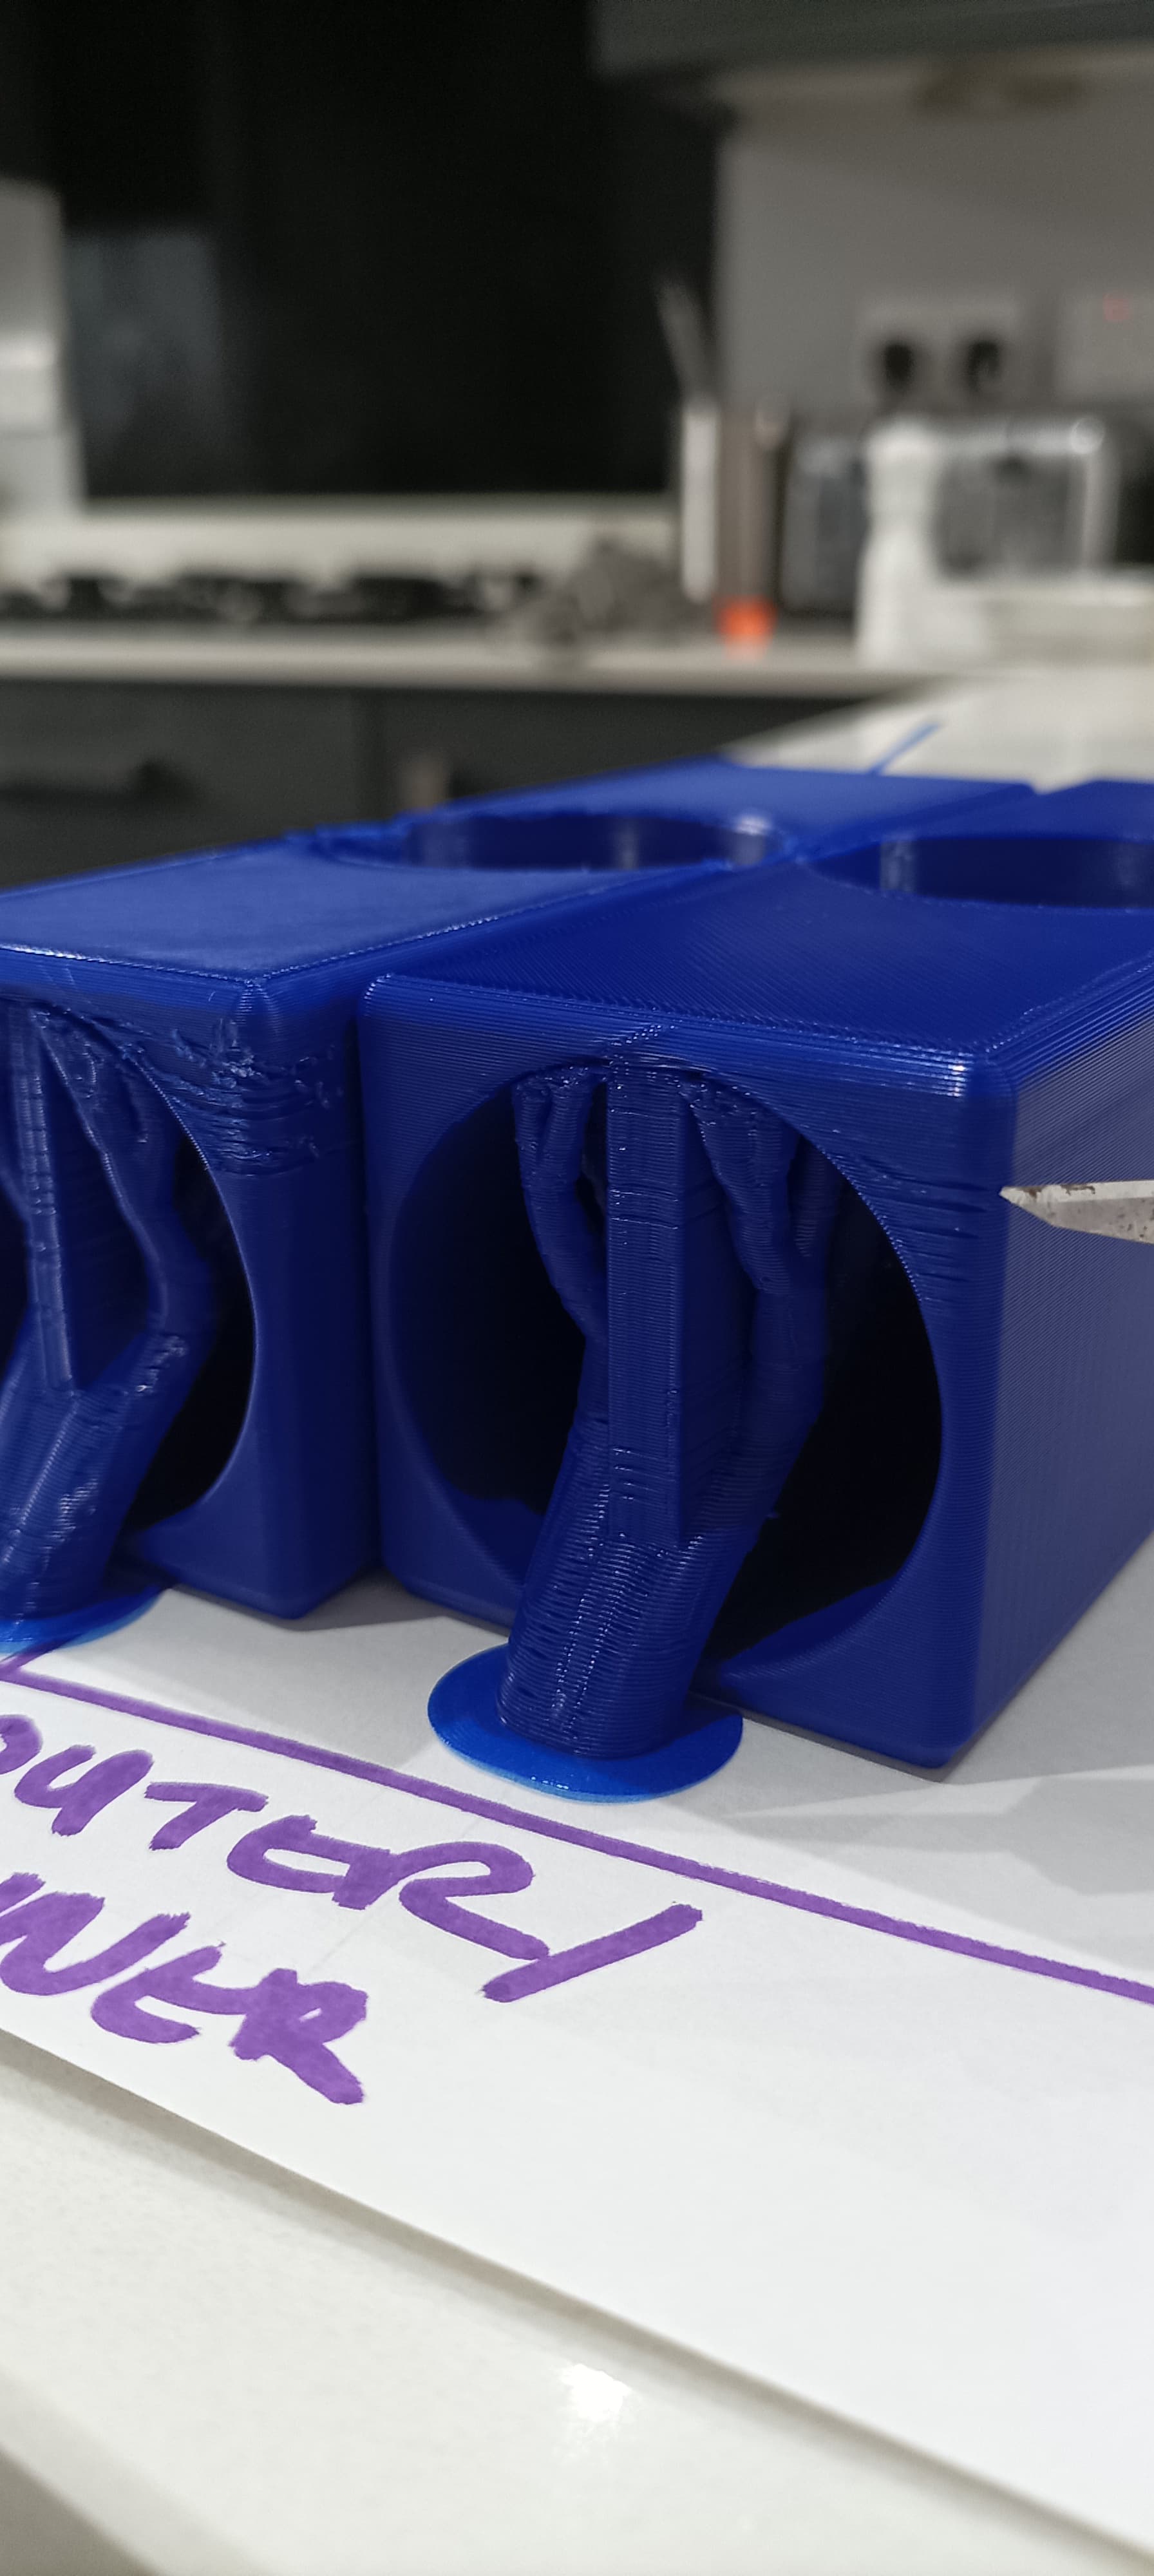
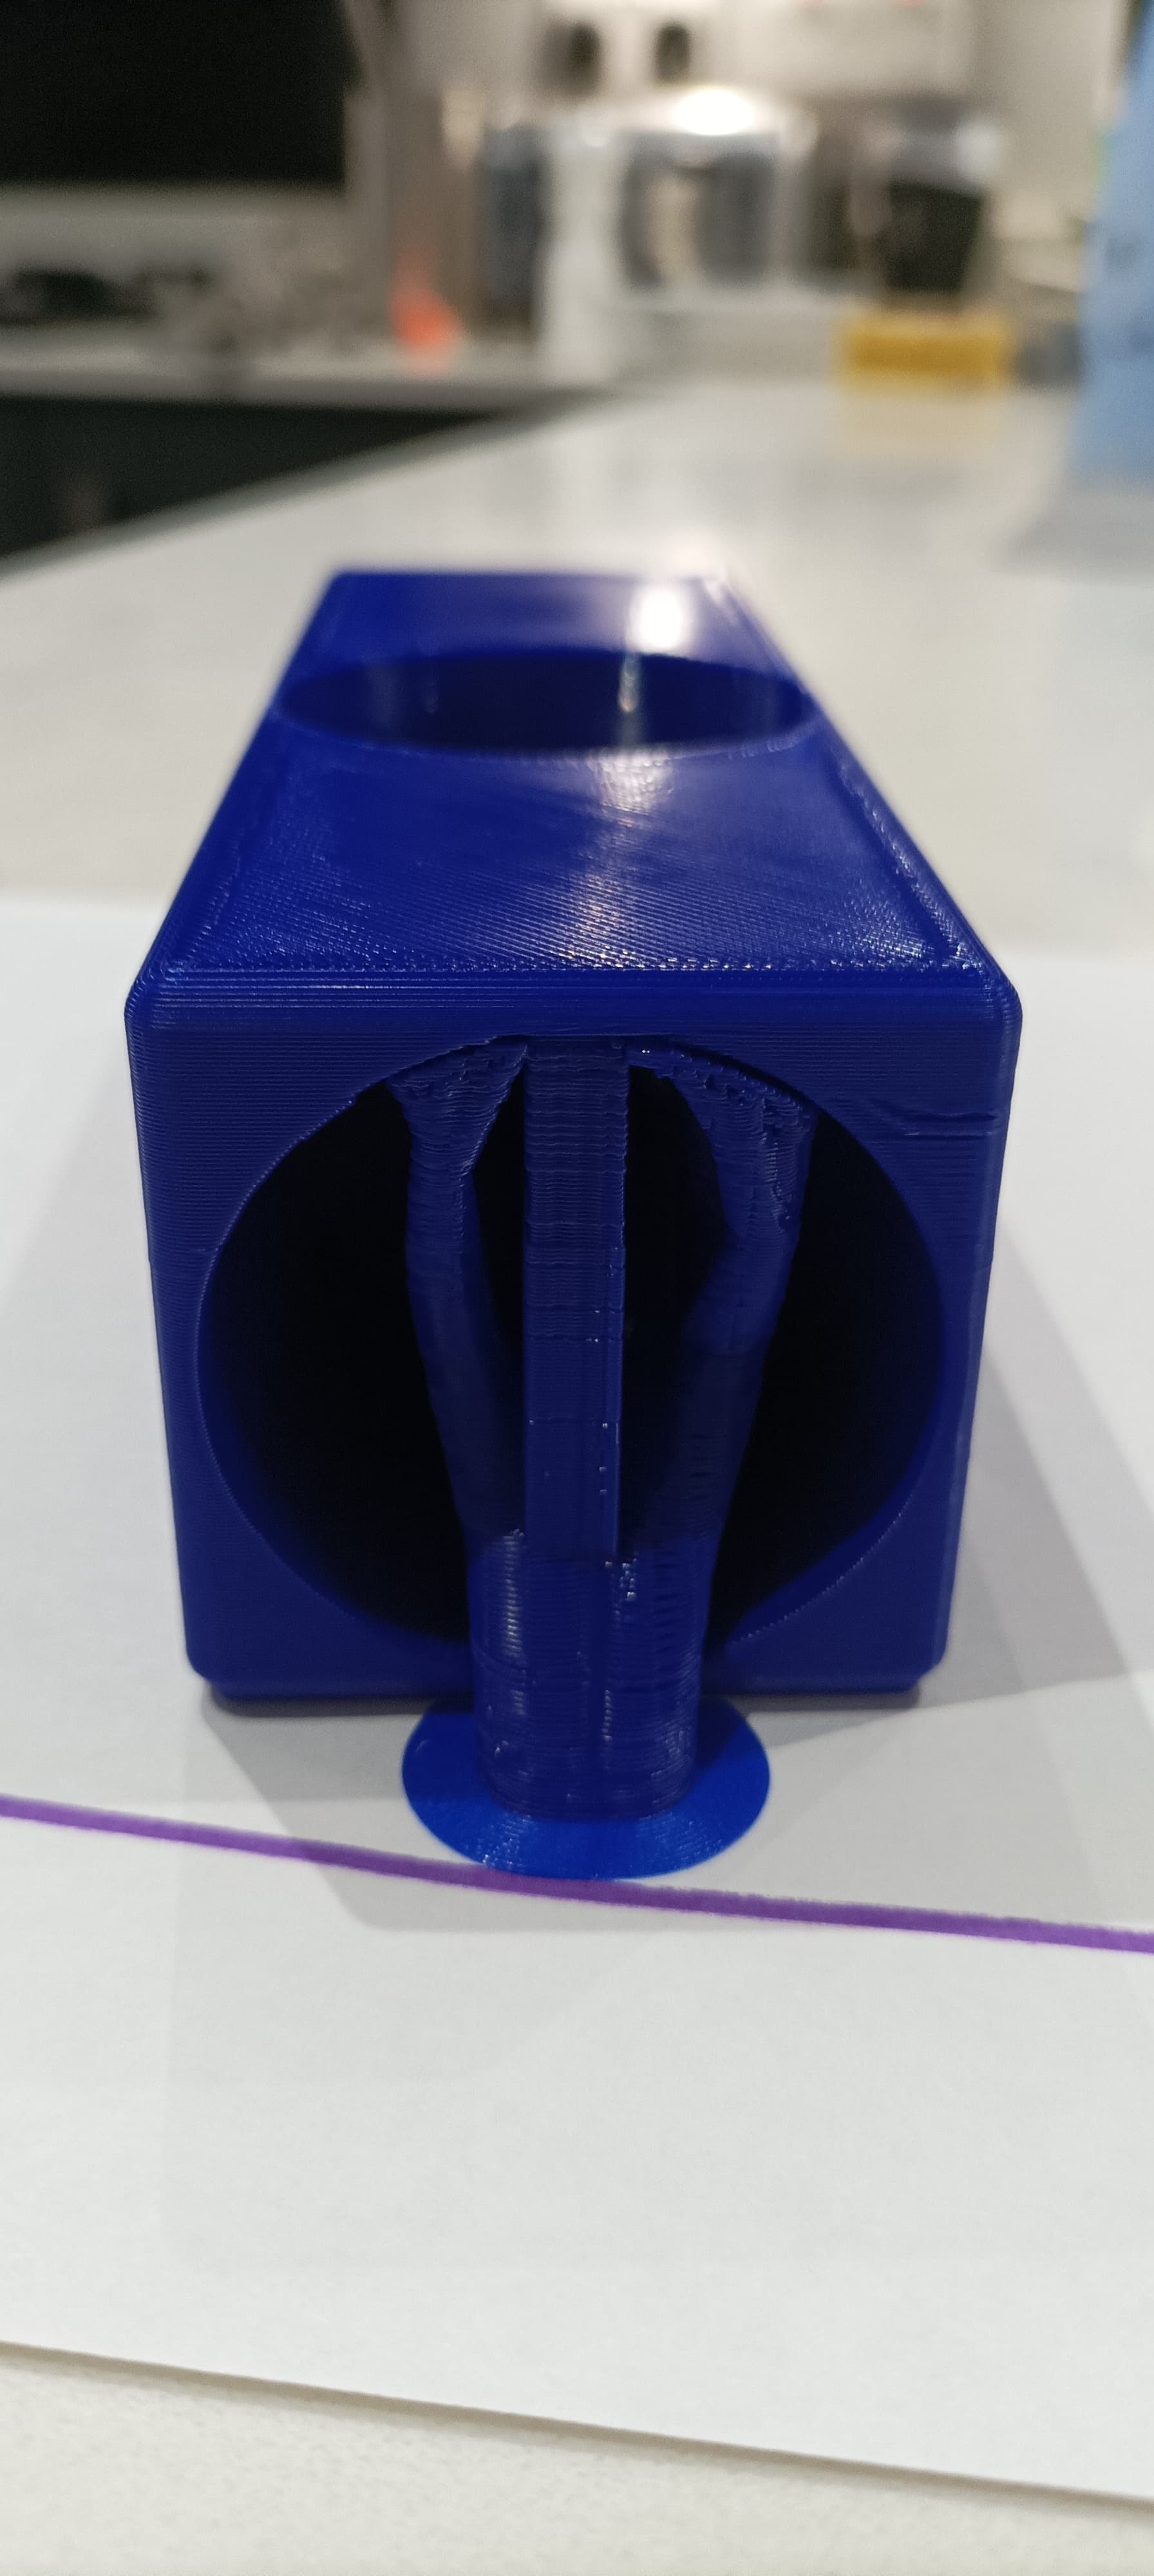
Onto my PETG prints. I’ve attached some photos of my parts, for reference, the hole you see is approximately 45mm in diameter. The parts are printed in the orientation shown. The photos are using Bambu PETG basic filament, and the stock “Extra Draft” profile. With the exception of the supports, the setup is as the profile.

I am getting what I can only describe as surface scarring. It looks as if its down to an accumulation of pickup on the nozzle, which eventually gets deposited or "ploughs through the print. In 99% of cases, it occurs at a corner, the corner you see is a radius of approx. 4mm.

I have not done and dynamic flow calibrations for this filament (my understanding this is not required for Bambu filament).

However, this is the troubleshooting I have done so far.

  • Bambu filament using the “Draft” profile (0.2mm LH): same indications.
  • ESUN PETG Filament, uncalibrated using the Generic PETG profile: same indications.
  • ESUN PETG using automatic dynamic calibrations (in the setting AND prior to print): same indications.
  • ESUN PETG using manual dynamic calibrations: same indications.

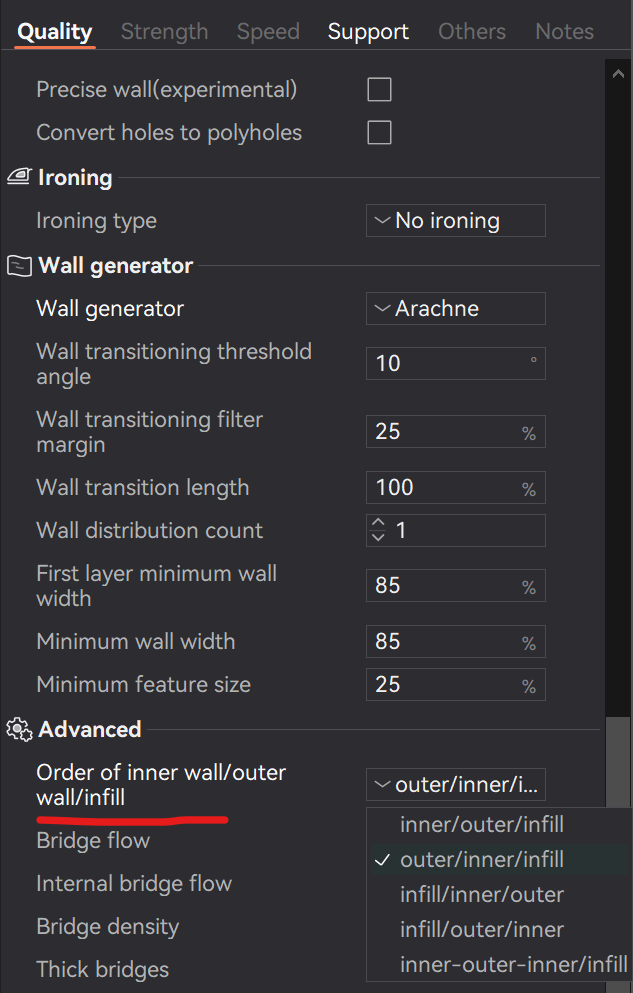
I have trawled the community, and although I have not found excactly my problem, there was a thread talking about the “Reduce Speed For Overhangs” setting causing issues. Does anyone have any experience of this?

Has anyone seen issues like this before?

I might be completely missing a trick here by not calibrating my Bambu filament - if so apologies.

Many thanks for sticking with it to the end!!!


That was going to be my first question until I read through your post a second time around. Whereas it may be claimed that it is not necessary… trust me, it’s only unnecessary if you want to leave yourself to the mercy of Filament variation quality and temperature. I would do neither.

Long answer for “Tune you filament profile as a step 1”

Yep, although I have done quite a bit of printing over the years on my little old E3V2 and holding it’s hand every step of the way, I back at the bottom of the learning curve with this.

My only point would be is that I calibrated my ESUN PETG Filament, and still got the same indications, at similar positions across prints (I have printed multiple versions of the same part during my trouble shooting).

Did you use Orca or an external method for your flow calibrations? I’m asking because I’ve found external G-code methods to be less reliable. For instance, when adjusting temperature towers, you often have to manually edit the G-code, and even then, it doesn’t consistently behave as expected. Another example is the Ellis PA Pattern Calibration tool, which I’ve tried multiple times without success in producing different speed patterns. However, in both of these cases, Orca’s built-in tests consistently yield the desired results for me.

A good point I neglected to mention.

I’m using Bambu Studio and it’s calibrations. The PA is a series of lines, although there is an option to use the Ellis Corner Pattern. The flow calibrations is a series of squares with varying flow ratios, then a second “fine tune” pass.

I did this for the ESUN but not the Bambu. Both had similar indications.

Gut feeling would be if it’s a fundamental problem with the setup i.e PA or flow I would be seeing it on other corners and at other positions. I am only seeing it at certain positions, but consistently across prints. Reading that back It sound really confusing!!!

Also consistent across filaments, calibrated or uncalibrated.

Consistently inconsistent eh!!!

I’m nearly at the end of my Bambu roll and have another roll of ESUN which I will be using to print another batch. My intention is to calibrate it for PA and Flow using the manual functionality in Bambu Studio and print using the same setting I have used. I don’t want to change too many variables at once as you will never know what solved the problem!!

Failing that, I will “fiddle” with the “Slow Down for Overhang” setting.

I’m still coming back to the filament build up on the nozzle over a period of time. I used to see this a lot on the Ender. I’m just surprised this would result in indications at the same point in the print and at similar features.

Ok. These are only suggestions and YMMV. The first thing I would do is ditch Bambu Studio. Unless your really wanting to use it for MakerWorld downloads, there is zero and I mean zero upside to using it. If you haven’t tried Orca, there is no penalty in loading it side by side with Bambu Studio and you can do a bake-off and judge for yourself. They can coexist on the same or different systems. What’s more is that they are based on the same code so you would be forgiven for not noticing a difference at first glance.

Why am I so adamant about Orca? Because after Studio 1.6, BL practically abandoned us in pursuit of the POS site they called Makerworld and it was clear that they made a concerted effort to put all their enhancements in promoting themselves and delivering on features that nobody wanted or asked for. Whereas after 1.6 the 3D hobbyists at Orca continued to innovate and produce quality of life functionality that we all wanted and many of them features we didn’t even know we wanted until they were there.

The biggest feature in my mind is the baked-in calibration routines. You won’t find this menu in BL Studio.

image

We might eventually get to see this added into BL Studio. BL dropped some hints when they payed Homage and nodded to some features that they included from Orca but that was back in 1.6.6 and frankly, it was not nearly enough. I don’t even know why they bother with their calibration tools and you might wonder the same once you experience Orca.

OK. Rant over. ranting


Back to your question.

(All this below was done in Orca BTW.)

If I look at this corner, it looks to me like you may have a combo of issues possibly including adhesion, layer delaminating and last but not least, max flow which it sounds like you could use more time validating your max flow or just simply cut it below 13mm³ for PETG. BL has their’s set for 13mm³ but that doesn’t mean you have to keep yours there.


You can also as a quick check, put the printer into quite mode which reduces all movements by 50%. You can do that on the fly and change it back mid print from the console. If that fixes it, then you know that it is either Speed, which can be experimented with in the Speed tab or it’s max flow rate. Since the rest of your print looks OK, I’m wagering it has to do with speed not flow rate although addressing flow rate may improve speed too.
image


And if you haven’t tried changing the wall order, from the default of inner/outer to outer/inner, that will also make a big impact since it will print the outer wall first which is where that corner picture above shows issues. Truth be told, I haven’t found a use-case for the default inner/outer yet and in all my prints where I have dimensional accuracy issues, that setting is in the wrong position, so I permanently set it to outer/inner.

And you know what? Now that I think about it, I also never have any external layer issues anymore either and I use PETG and PC for more than half my prints. :thinking:

You’ll have to check the advanced mode to see this menu but I suspect you’ve already done that.


I have some other thoughts on the “consistently inconsistent” results you reported😊 but these suggestions above would be the one’s I’d try first. If you do try them, let us know how it works out so that others may share in your discovery.

Hi there, thank you for the comprehensive response. I’ll address the Orca point you made initially.

I will certainly look at getting Orca. I currently use my works computer to model and slice (it’s very convenient) so I’ll have to ask nicely to see if they will install Orca too. If not, I’ll put it on my personal laptop.

I took the part in the photo and did a bit of dissection. You are right, the outer layer hasn’t adhered, and the layers essentially curls away. Good in a way that this means it is not the nozzle build-up and “ploughing” I’m so used to seeing on the Ender.

Onto the investigation… All of this was still done in Bambu Studio.

I changed the setting to print outer wall / inner wall / infill. I printed the same part you returned in your reply. I kept an eye on it when it began to print the problem bit, and I could see the indications begin to appear. At this point I switched the printer to “Silent Mode”, as you say, reducing speed. See below side by side by side comparison. THe part on the left is from the photo you returned, the one on the right, is as described above. THe scalpel blade shows the approximate height at which “Silent Mode” was triggered. You can also see the surface sheen is different (which I have read about, but this is a second order problem).

You can see the problem is almost completely mitigated after the switch.

So, the conclusion from this is (correct me if I’m wrong).

This is speed related, or more broadly, dynamic.

My plan now is to calibrate using the Bambu Labs manual tools (I still respect your point about the Orca calibrations, but in the interest of not changing too much at once…). I’ll calibrate pressure advance and flow.

Then reprint the part.

On a more general point… I am struggling to understand why (considering this single part for a moment), that the issue only occurs at two positions, when there are four positions that are (by design) identical. See below either end of the same part, with the same feature at either end. Would we not expect the issue to occur on each side of the hole???


Thanks again for your continued support with this. It’s very much appreciated.

You’re spot-on with limiting the number of variables in the trouble shooting process. As the saying goes, Rule #1 of trouble shooting; “Change only one variable at a time”.

It looks like you at least made some good progress in narrowing down the potential cause. I would agree with your assessment that it sure is looking like a possible smoking gun for speed as a culprit. But also don’t rule out that it may still be remedied by a myriad of triangulating solutions consisting of speed, Nozzle Temp and Max Flow.

Now on to the mystery of why one corner but not the other. It would help to see the image as it appears in the slicer but I would like to know, do you have the chamber fan on? If so, you may be experiencing that momentary imbalance in cooling. There are two ways I can think of to test this theory. The obvious first test is to verify that the chamber fan is set to off. For the default profile, I believe it is supposed to be off but it doesn’t hurt to check. The other thing you can do is to change the angle of the model just slightly by perhaps 20° off the X/Y plane. if the problem moves with the model, then it’s not the printer but something to do with the model. However, if let’s say one corner moved 20° put’s it into the -X/-Y quadrant and now the model experiences similar behavior where the corner used to be in the previous print, that would have me looking for some time of temperature differential within the chamber. Unfortunately, that is a bitch to chase down without a thermal imager. I can recommend a crude one that I use for electronics, it’s not great but it is under $100. https://www.amazon.com/gp/product/B0BNQHB229

If I were sitting there, my order of attack would probably be in this sequence.

  1. Run a Max flow calibration and see how far off the native value is from the value that the calibration is. I had a PLA filament just last week that worked fine on small models but when the nozzle had to race across the plate, I got really bad artifacts. I hadn’t run a max flow test on that particular filament and oh boy was I far off. I had the filament using the Bambu PLA out of pure laziness which if memory serves was 23mm³. My calibration showed that this garbage filament had no business going beyond 13mm³ which is where PETG is typically operating.

  2. I’d do a quick study of the nozzle movements in the slicer software. This is turned off by default but it may provide some insight into what the head is doing when it gets to the trouble areas.

The steps look something like this

  1. Uncheck all the lines that aren’t giving you trouble AND check the box that says “travel”
  2. Scrolls the slicer bar down so the area of focus comes into view.
  3. Slide the sideways slicer bar to watch the head travel and scroll through the G-code.
  4. Observe where the head is so that you can slide back and forth to look “inside the slicer’s Mind” and try to follow the logic. You may have to temporarily check back some line types to view certain behaviors.

There’s three more steps I’d cover but this post is already too long. Let me know if you want me to post those thoughts too.

Thanks once again for your time and suggestions.

This test part was AFTER doing the manual calibrations for PA and flow in Bambu Labs. For reference PA came out to be 0.04 (I have no comparison to the stock profile). Flow Rate came in at 1.0136 compared to 0.95 Bambu stock profile for their filament. Remember this is the Bambu PETG Filament I am using. I didn’t calibrate max. flow, this is still at 13mm^3/sec,

See below photo, this is the same file with the exception of the calibrations.

So my very important takeaway point from this is trust your gut. I was kind of expecting to just throw models and filament at this printer and it be able to cope, this is coming from someone who has gently held the hand of his E3v2 for a few years now and tuned it nicely.

Although I am not counting my chickens yet, as my Bambu filament has now run out, I will be moving back to ESUN, which I will be calibrating for flow ratio and PA first.

If the simple calibrations are the solution, which I am fully expecting them to be, I’ll be putting this one down in my big book of “User Errors”. I’ll put my hat on, and go and stand in the corner to think about what I have done!!!.

In all seriousness though, it’s been an interesting exercise for me, not to take your eye off the ball, otherwise you will get bitten. When I first got the Bambu my goal was increase speed and consistency. Speed is definitely there inherently, consistency will take a bit of learning!!!

I’m kind of kicking myself with this one… I compared the original part with one of my PA calibration models from the E3v2. It looks almost identical to an untuned PA. I really should have engaged brain before emotion.

Anyway, thanks so much for your help with this, it’s nice to have a supportive community rather than a toxic one, trust me, there are plenty toxic ones out there…

I’ll be back in touch with some progress reports when I print out my next batch, with my ESUN calibrated filament!!!

We may then move onto the perceived accuracy of the automatic calibrations the X1 claims it can do compared to the manual.

Regards

1 Like

So the point is…run a manual PA flow calibration on the Bambi PETG to save ourselves some headaches

I’m waiting to receive my spools of Petg so I’ll heed your suggestion

1 Like