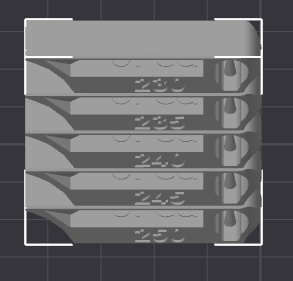
That is indeed alarming. Particularly this pictures. This should never happen at the beginning of a print. It really points to a filament flow problem.
While that could be the extruder slipping, I’m going to lean towards moisture in your filament. You should never have gaps at the beginning of the max flow rate test.
Always start a new project for every new test you run, this clears out all settings!
CTRL-N will always start a new project but you’ll be prompt to save the test project, just hit ESC to get past it because you don’t want to save it. Then on the blank plate start the next test.
It might help if you looked at the sliced version of the max flow rate test as the slicer sees it using speed. It should be noted that the the max flow rate test is a script which injects GCode directly into the model before it’s sent to the printer. This is not under your control which is why it’s a great test. It should also be noted that you should never save the test as it can interfere with the GCode on reload. Here’s what that looks like, you have to use the pull down menu and scroll to the bottom and click on speed.
So you can see in this example, the filament is flowing at it’s slowest speeds at the bottom, precisely where you’re seeing a gap. That obviously points to another problem which you have to correct first. I suspect moisture.
Here’s another example of a test I ran yesterday before and after drying PETG, in this case I was looking for stringing but instead I found voids similar to what you are seeing. The voids were caused by a lack of layer adhesion and the head was dragging the filament along since it wasn’t sticking. Now note I went and cleaned the plate again and moved the location just to verify that the lack of stiction was not the plate and the problem moved with the model indicating a flow issue. Now compare it to the after drying photo.
This post is already too long so once you get the filament drying issue fixed, then I can walk you through how to interpret the max flow rate tower.
Likewise on your temperature tower. This is how the slicer sees it.

But I can also see from your model that you may not have repaired the open manifold. Here’s what you likely saw after you sliced.

And at the bottom right of the screen you saw this:

That means you have a hole in your model that the slicer doesn’t know what to do with. We can see that in your model.
After you click repair, you model will look like this:

On the subject of PETG temps.
PETG likes it hotter than PLA. Don’t be afraid to go up to 265c. Your test tower parameters should look like this:

On the subject of drying your filament
Yes you probably want to at some point invest in a not too expensive dryer box. But did you know you already have one? Check out this video for how to turn your plate and an empty spool box into a DIY dryer. I just posted to this thread on that topic. Just watch the YouTube videos and see my comments in that thread so that you don’t make the same mistakes I made.
I can attest to the fact that you can make a really cheap dryer that works. No need to get fancy. In fact, I would say that using your print bed as a dryer when you’re first starting out will let you know what you like and don’t like. Just remember that you should not let the plastic spool come in contact with a plate over 50c for extended periods. As my post in that thread will show, the plastic spools will melt so you need to raise them a bit off the bed if you keep the bed above 50c.
Note: slow cook is better than high temp fast cook.


