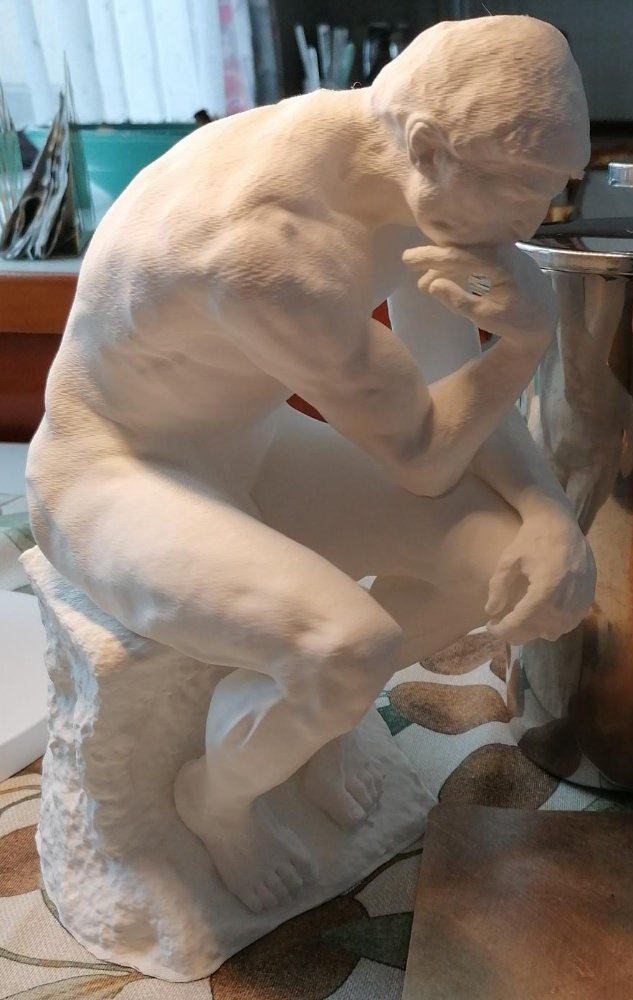
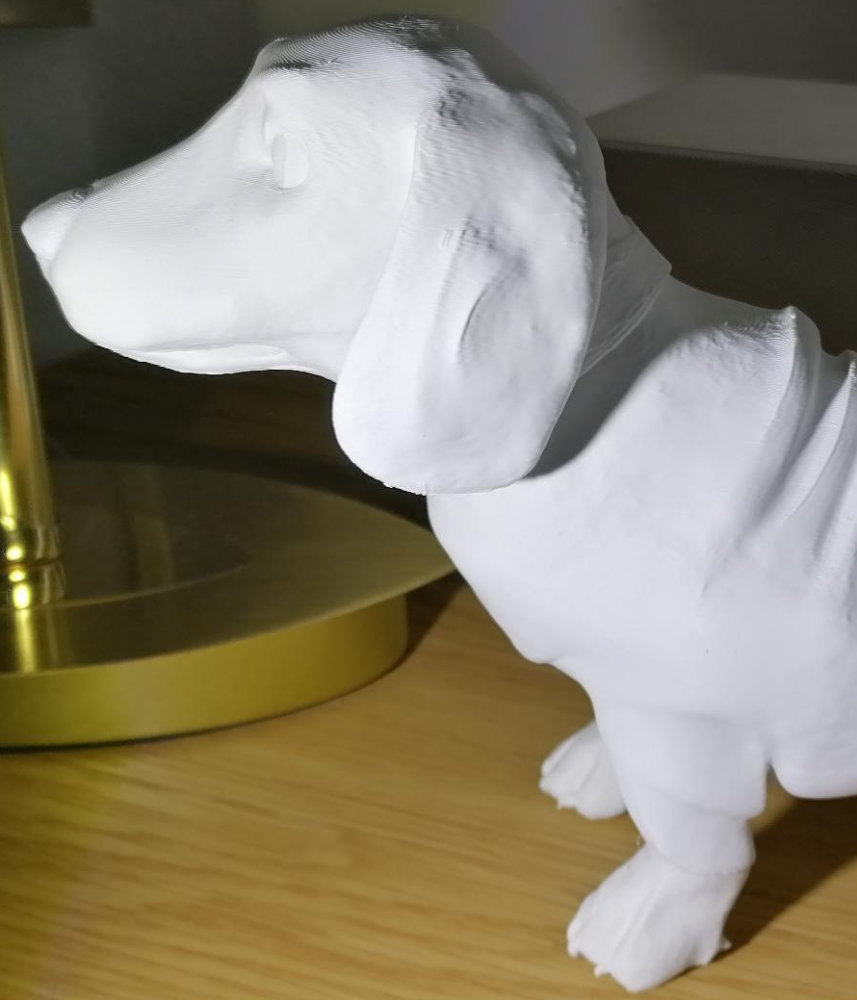
I’m printing some large models that get quite heavy (300+ grams) and I’m getting vibration artefacts later in my prints as the printed model is getting heavier.
In the attached pictures, the bottom starts smooth then more ringing starts to show up higher in the print.
I suspect it’s the A1’s heavier loaded bed not matching the vibration calibration values anymore, which was done when the bed was empty.
I’m already printing quite slow, but this is probably something I have to accept when using a bedslinger, but my idea for a solution is: Would it be possible to get a firmware option to redo the calibration maybe every 50-100 grams?
I did. Everytime I move the printer and once every few days. The calibration even works nicely for the lower parts of the models so my idea was to repeat it in regular intervals like the xy mech sweep at the beginning of each print (if that’s possible technically)
Given the large amount of weight your models end up being, have you considered slowing the print process the higher you get?
3kg being flung backwards and forwards is going to be a challenge for any printer and the resonance the higher it gets with an increasing weight is obviously going to cause problems.
Try adding some layer height modifiers and reduce the speeds for each range as they get higher.
If you have not done this before (or for anyone else reading)…
Select the model
Right-click it to see the context menu
Under the add primatives, there is a layer height modifier option, select that
It adds a new option to the model in the objects panel (on the left)
You can add as many modifiers as you need, select ‘layers’ and enter the ranges in mm at the bottom, adding or removing ranges as you require
Select any of the ranges you created below your model in the left panel
You can now tweak almost all the settings you could globally
Play with speed, reducing it as the model gets higher and/or heavier.
I was thinking about that too but wasn’t super happy with that solution because the prints are already taking a long time to print with 100 mm/s.
Another thing I was thinking about is doing the initial calibration with ~150g of filament already printed so the calibration midpoint would be about half way up in my 300g models (Would have to be careful though with what I’m printing as the 150g weight to avoid collisions during the calibration)
Ideally the printer would adjust the vibration compensation parameters slowly. Maybe with an additional option to do the vibration compensation with a 300g model. Then for the following prints, the parameters would transition between these two profiles as the print builds up. I think this would be better than my initial idea of doing regular calibrations during the print.
Pre-weighting the calibration will likely only move the issues to the start.
Big, heavy prints will take time, it is the nature of the beast.
Bed-slingers will introduce issues not applicable to core x/y printers. I have both types.
Some prints simply can’t be done on a bed-slinger, but, they are few and far between.
The motion caused by moving it back and forwards so quickly makes it like balancing a jelly on a tray, the slightest movement will be felt at the top more than the bottom.
My guess is you will only get satisfactory results if you introduce the gradual slow down as the height increases.
Might well be the vibration compensation isn’t able to compensate a 300g weight. I’ll give the pre-weighting method a shot though and do the step down as a last resort, maybe a combination. Thanks for your suggestions!
I think, it is not the speed that you should reduce but instead the accelerations, because acceleration is what introduces vibration. For big models, this probably doesn’t have too much impact on the print time.
Good point.
I wonder if there is any therotical chance the built in vibration compensation+a firmware upgrade (one which could do such a light-heavy input shaping profile transition) might be able to fix this too
it should modify the Y acceleration so it’s unchanged (divided by 1) when at the bottom,
and divided by 5 when at the top (where layer_num=total_layer_count)
Haven’t tested it yet - I’m not seeing any speed changes in the preview, want to get that fixed first (any reason why this could happen?)
Good tip thanks, I have since made a new default printer profile for large prints Bambu Lab A1 0.4 nozzle - for large models that contains the layer change script above.
First attempt seems promising. On a 400g model that would normally had artifacts in the higher regions, no more artifacts and only 1 hour extra print time (21 instead of 20 hr print)
I wonder though why no one else has (is bothered by?) these artifacts, I’m not printing particularly fast actually, slow even.