When printing there’s a spot on the slicer for which filament you’re using and also on the printer you can edit the filament types.
Does one overwrite the other? Like if the slicer says Silk and the printer says Matte?
The slicer takes priority because the slicer sends raw g-code to the printer.
Setting it on the printer isn’t overly useful unless you intend on printing from the app and/or for you to remember what’s actually loaded in it.
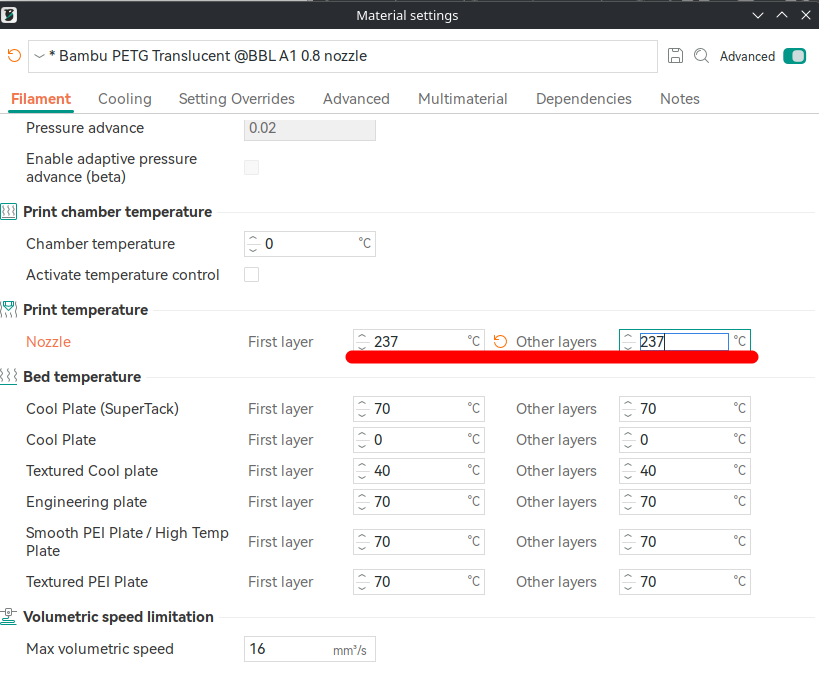
You can test this by editing the filament in the siler and having it do a weird between number (say your filament prints at 220 to 240C; if you edit the temperature to “237C” like in the image below you can just check your printer and see its printing at 237C).
1 Like
These are there for two different reasons, but are used in concert.
You tell the printer (device) what filaments it has, the type, sub-type and colour.
BL PLA Basic Red
Generic PETG
eSun PLA+ Green
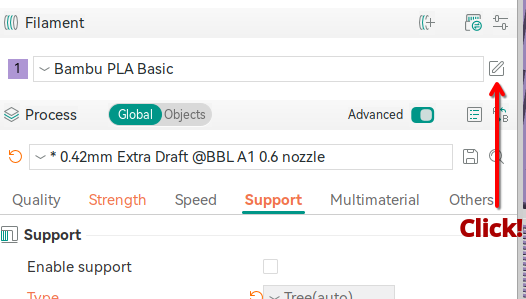
The prepare tab is where you set up the things you are going to print or use something someone else designed and it has their filaments listed.
When you go to print you match the ones in the prepare tab to those in the printer.
These do not need to match, but they should be as close as possible so the sliced model knows the correct temperatures and speeds to use.
You will be stopped from mismatching PLA and PETG, but you can define Silk and match it to ordinary PLA. It isn’t smart though as they may have different properties that cause unknown issues like jams.
1 Like
Ok so that’s how you change the nozzle temperature. The only way I figured out how to do it was to wait for it to start printing and then change it at the machine. This is much smarter ![]()
“Slicer says silk, printer says PETG”
By the time it emits gcode, slicer says neither, and just says “LOAD FILAMENT #1” and has fully encoded all the temps, cooling, and other parameters into the printable file. The slicer always wins. It could be pla, polycarbonate, hot glue sticks, chocolate, etc. Those labels are for you, the meatbag ![]() There are “user safety” checks that vendors implement to remind the meatbag of various potential config problems but in the end, just send it and it’ll do what its told
There are “user safety” checks that vendors implement to remind the meatbag of various potential config problems but in the end, just send it and it’ll do what its told
//it actually might be 0-indexed instead of #1 lol but you get the point
How does ‘K’ factor factor in? In the slicer, on the device page, the AMS shows the K factor for each filament and you can set it on that page. The Preview filament settings don’t list K factor (at least I haven’t seen it). Which setting overrides which?
The K factor is part of the sliced process.
This is why setting up the printer with the correct filaments is important, as is doing so in the Project Filaments.
The idea of telling the printer you have a lower melting-point filament and the Project Filaments you have a fast one means the sliced GCODE will print too fast for the printer filament and is liable to cause jams, blobs of death and more.
Learning why the Project Filaments are used with the project and why they should match those to the values set for the printer. Ensure you correctly set the printer filaments to those installed on the printer.
For those suggesting you can ignore presenting the slicer with the correct information, this only introduces the likelihood of print failures and printer damage.
Imagine you have a slow filament that melts at a low temperature, yet you set the slicer to a fast filament that melts at a much higher temperature. The slicer will run the filament through the printer too fast and hot, causing damage.
Reverse the scenario with a filament that requires a higher melting point, and the slicer thinks that value is 50ºC lower, causing more damage to the printer.
If the two are not too different, you are lucky each time, not a genius.
There are times you can use existing filament profiles in place of the real ones; this is when they share the same values. Overture TPU 95A HF can use the BL TPU 95A HF profile, as the settings are sufficiently close to each other.
I found on my H2D that if using non Bambu rolls, I have to set the color at the printer and sync Studio before it shows the correct color. If I try to do it in Studio, it errors when trying to sync since the printer sends back an unknown color or filament. On Bambu rolls, drop it in, feed it and close the cover, the printer does the rest. Might be different on the other models, but so far the only way to use non Bambu rolls is manually via the printer display.
I’ve just been telling the AMS that I’m using Bambu filament. It’s the only preset temps for most filament types.