I keep getting these layer shifts on my prints for any substantial print on the H2D. The offsets don’t effect the entire layer just a subsection. I’ve had this happen on PLA (black) and TPU (blue) [haven’t tried other materials yet].
It’s weird because the offset doesn’t impact the rest of the print. It’s very localized. My H2D is essentially brand new. I have recalibrated it as well and tried the right and left nozzles.
Any ideas on how to improve/mitigate this? The H2D wobbles soooo much. I have it on a dedicated desk that is sturdy with nothing else on it. The layer offsetting happens sometimes on my X1C’s but it’s rare where as I can almost guarantee it will happen on my H2D.
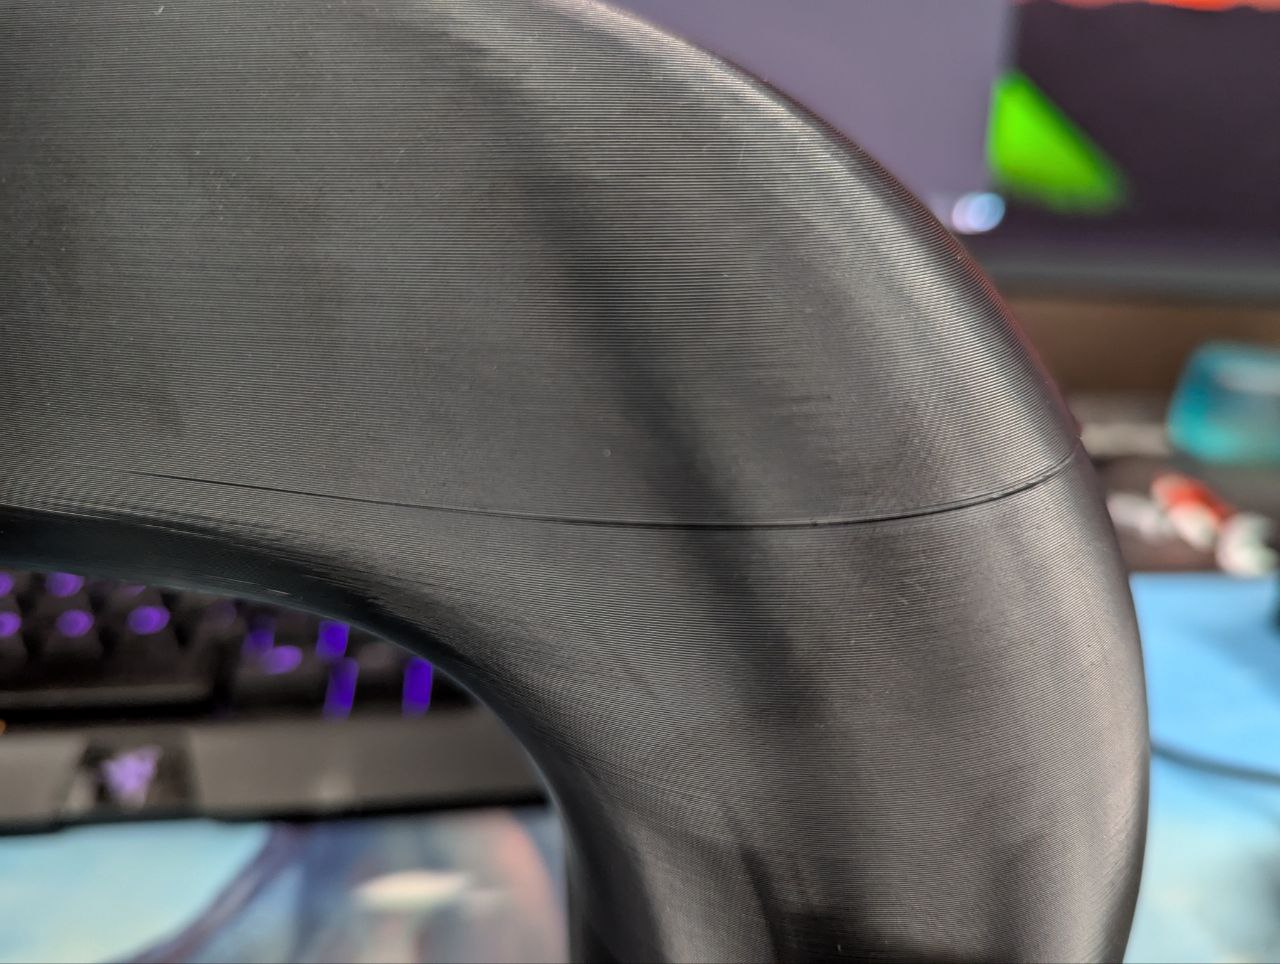
your layer separation corresponds to the seam placement. Each uneven line only happens with a new seam placement, with the previous seam blobs blocking the extrusion path.
I don’t know how to fix it with TPU, it’s very hard and complicated already for “harder” filaments. Would be quite a lot of filament tuning work to do to make TPU extrude as smooth as other stuff. Especially when you’re printing in 90A. But even Zellerfeld cannot make it perfect.
Understood. This happens on my PLA prints too (the image of all black lid is Creality pla). I use the default settings from the 3mf file I just linked.
It’s a bit hard to understand the issue from that image, isn’t that just a glue line…? I generally have very positive results from Hyper PLAs and I genuinely believe that they’re better quality controlled than bambus… with these filaments at least
Would be great if some more images can be posted and better quality!
That black line isn’t glue or anything else. That’s what it looked like after coming off the print bed. I printed the part on its side so that line/layer was not close to the bed.
I’m noticing a pattern that might just be coincidental for now but it seems that these shifts are happening at layers where the geometry changes. For example, in the all black bed frame lid, the shift seems to line up with the bottom of the “birthday” text - well for some of the letters. The print orientation was with “Birthday” upside down.
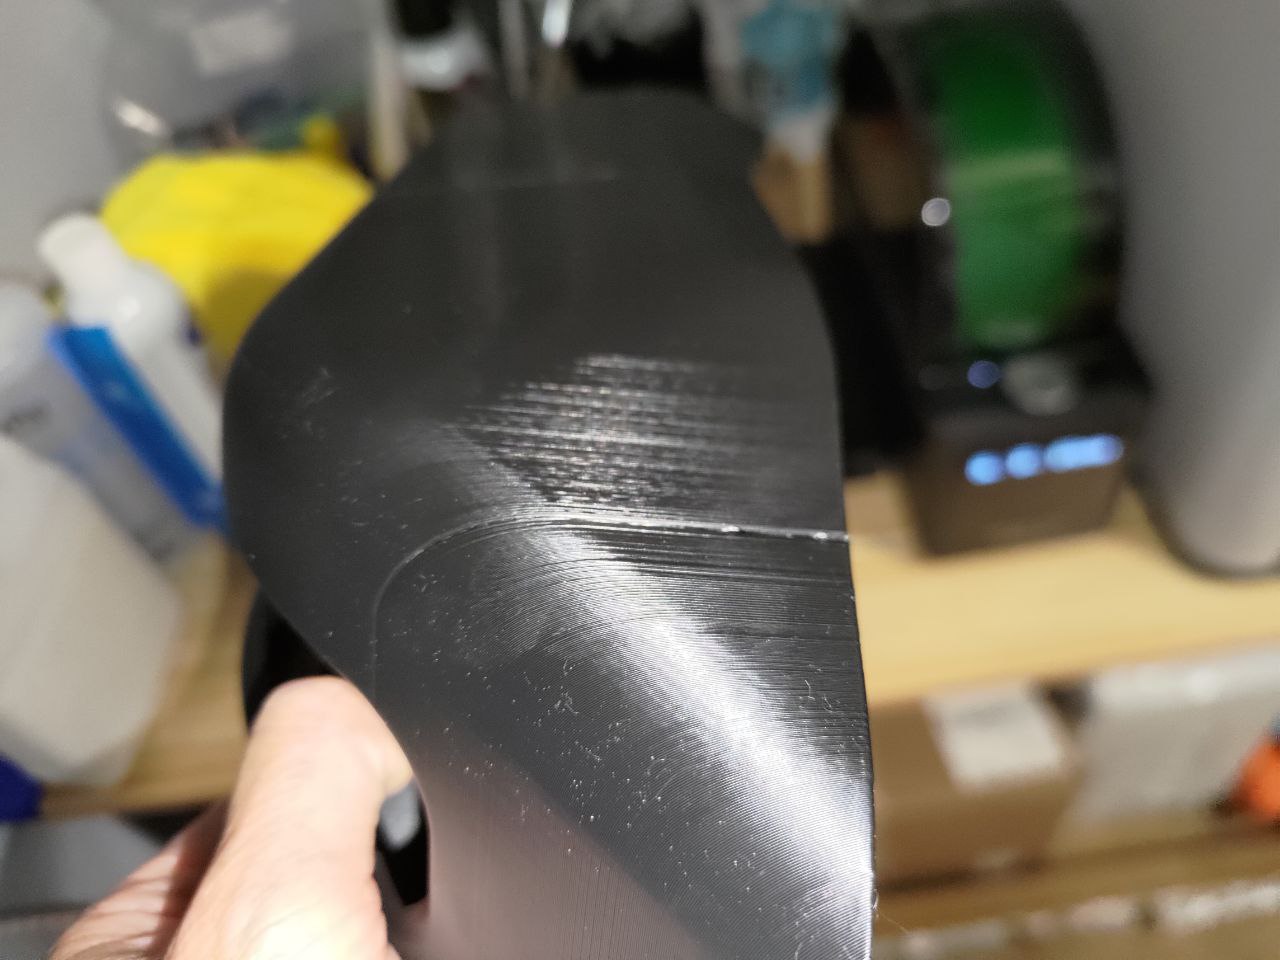
For the brown ams hexagon wall shelf 9000 the layer shift seems to occur around the apex of the fillet.
I wish I had more prints to share right now. My other big parts I’ve covered in suede and screwed into my bed frame.
Thank you, now I can clearly understand what’s the issue of the print. In fact it’s not random, this is happening because of the overhang area and bridging. And I’m sure the model would have such defects and artifacts on almost any FDM printer, without lots of slicer tweaking and using expensive fibre reinforced filaments.
The chance of it happening would increase with the part grows taller, and with more overhangs/bridging/separated parts connected later on.
For example, your beige/wood model, the kickstand part and the main body part are not firmly connected with eachother for a very long time and for a lot of layers. This means that any uneven shrinkage and warp (even very minor), can cause a very visible layer line. There’s not much we can do about it without introducing a lot of cost either timely or financially.
Then, for your black part, it’s even worse becasue it’s bridging (circular holes underneath), and it’s also trying to overcome the deformed layers underneath (because of the circular hole, the layers other than the top most layer are severly overhanging and can cause extrusion issues), and it’s also having the emboss text to fight with…
I’ll keep an eye out for that pattern. Thank you for the information.
I do feel like this effect is more pronounced on the H2D and I am surprised it only happens on a single or a small subset of the overhangs/bridging.
But it does make sense and the layer at which this occurs isn’t always the same. I’ve made 4 of those black lids and if I recall correctly the layer shift was at different heights each time.
yes, it’s accumulating the chance… and the higher/more overhang it has the higher the chance. The motion system is very accurate, but not so much with the molten plastics. All other walls are easy to print, but every time it goes through the challenging part it’s like gambling.
One other reason I can think of is that due to the change in cross sections on the next level, the time between 2 layers at a particular point is so short that the previous layer hasn’t cooled enough.
This is absolutely an H2D issue, not a ‘every printer would have the same issue’. I talk about(and post pictures) about this issue in a couple different threads. Nobody knows the cause. It’s also completely random, which is frustrating.
I CBA to get up and grab my USB drive and pull the most recent time it happened, but here is one that happened somewhat recently.
check your belts. If you see them worn out already on the edges , with hair sticking out, check your Gantry leveling/belt path. Move your toolhead around and check the belts as you do. If the drift up/down on their rollers that is NOT normal and WILL cause quality issues.
Refer to this thread Normal wear? Black specks building in back left and right corners if you want to know more, I have posted a detailed text about this , what causes it , what it causes etc.
Im propossing this because if the nozzle thinks that it is in one place but its in another, it might collide with the model and result in that shift you witness. Or if your belt doesnt run straight on the roll but grinds against the lip, again it might take the nozzle away from where it should be, even so slightly for these to appear.
Yours results are different cases than OP’s, yours might actually be a hardware issue unless more images and 3mfs can be shared. I’ve never met these issues myself printing ABS-GF. However I don’t print PA6/12 So I have no experience on that. For OP’s issues I had them myself and I can fix it with slicer tweaks. But your issues don’t look like they can be fixed by slicer settings
When I need a perfect part, I print it on the x1c if its not cf or gf. This is 100% an h2d issue. If anybody says different, ask them how many printers theyve owned.
Do you have a x1/p1 to try print the same model with same filament? Try it.
I am not sure if there’s a support structure on the green abs-gf part. In general it’s common to have darker lines (due to the shrinkage) for gf parts but it should NOT be this bad unless there’re some geometry related things, e.g., a support structure failure or something like that.
But about the black abs part, have you tried to print the same model and filament on another priner? This really should not happen unless something is making the filament shrinkage more pronounced.
Anyway, definitely share the part 3mf to wetransfer.com . I would try print it on my machine as well