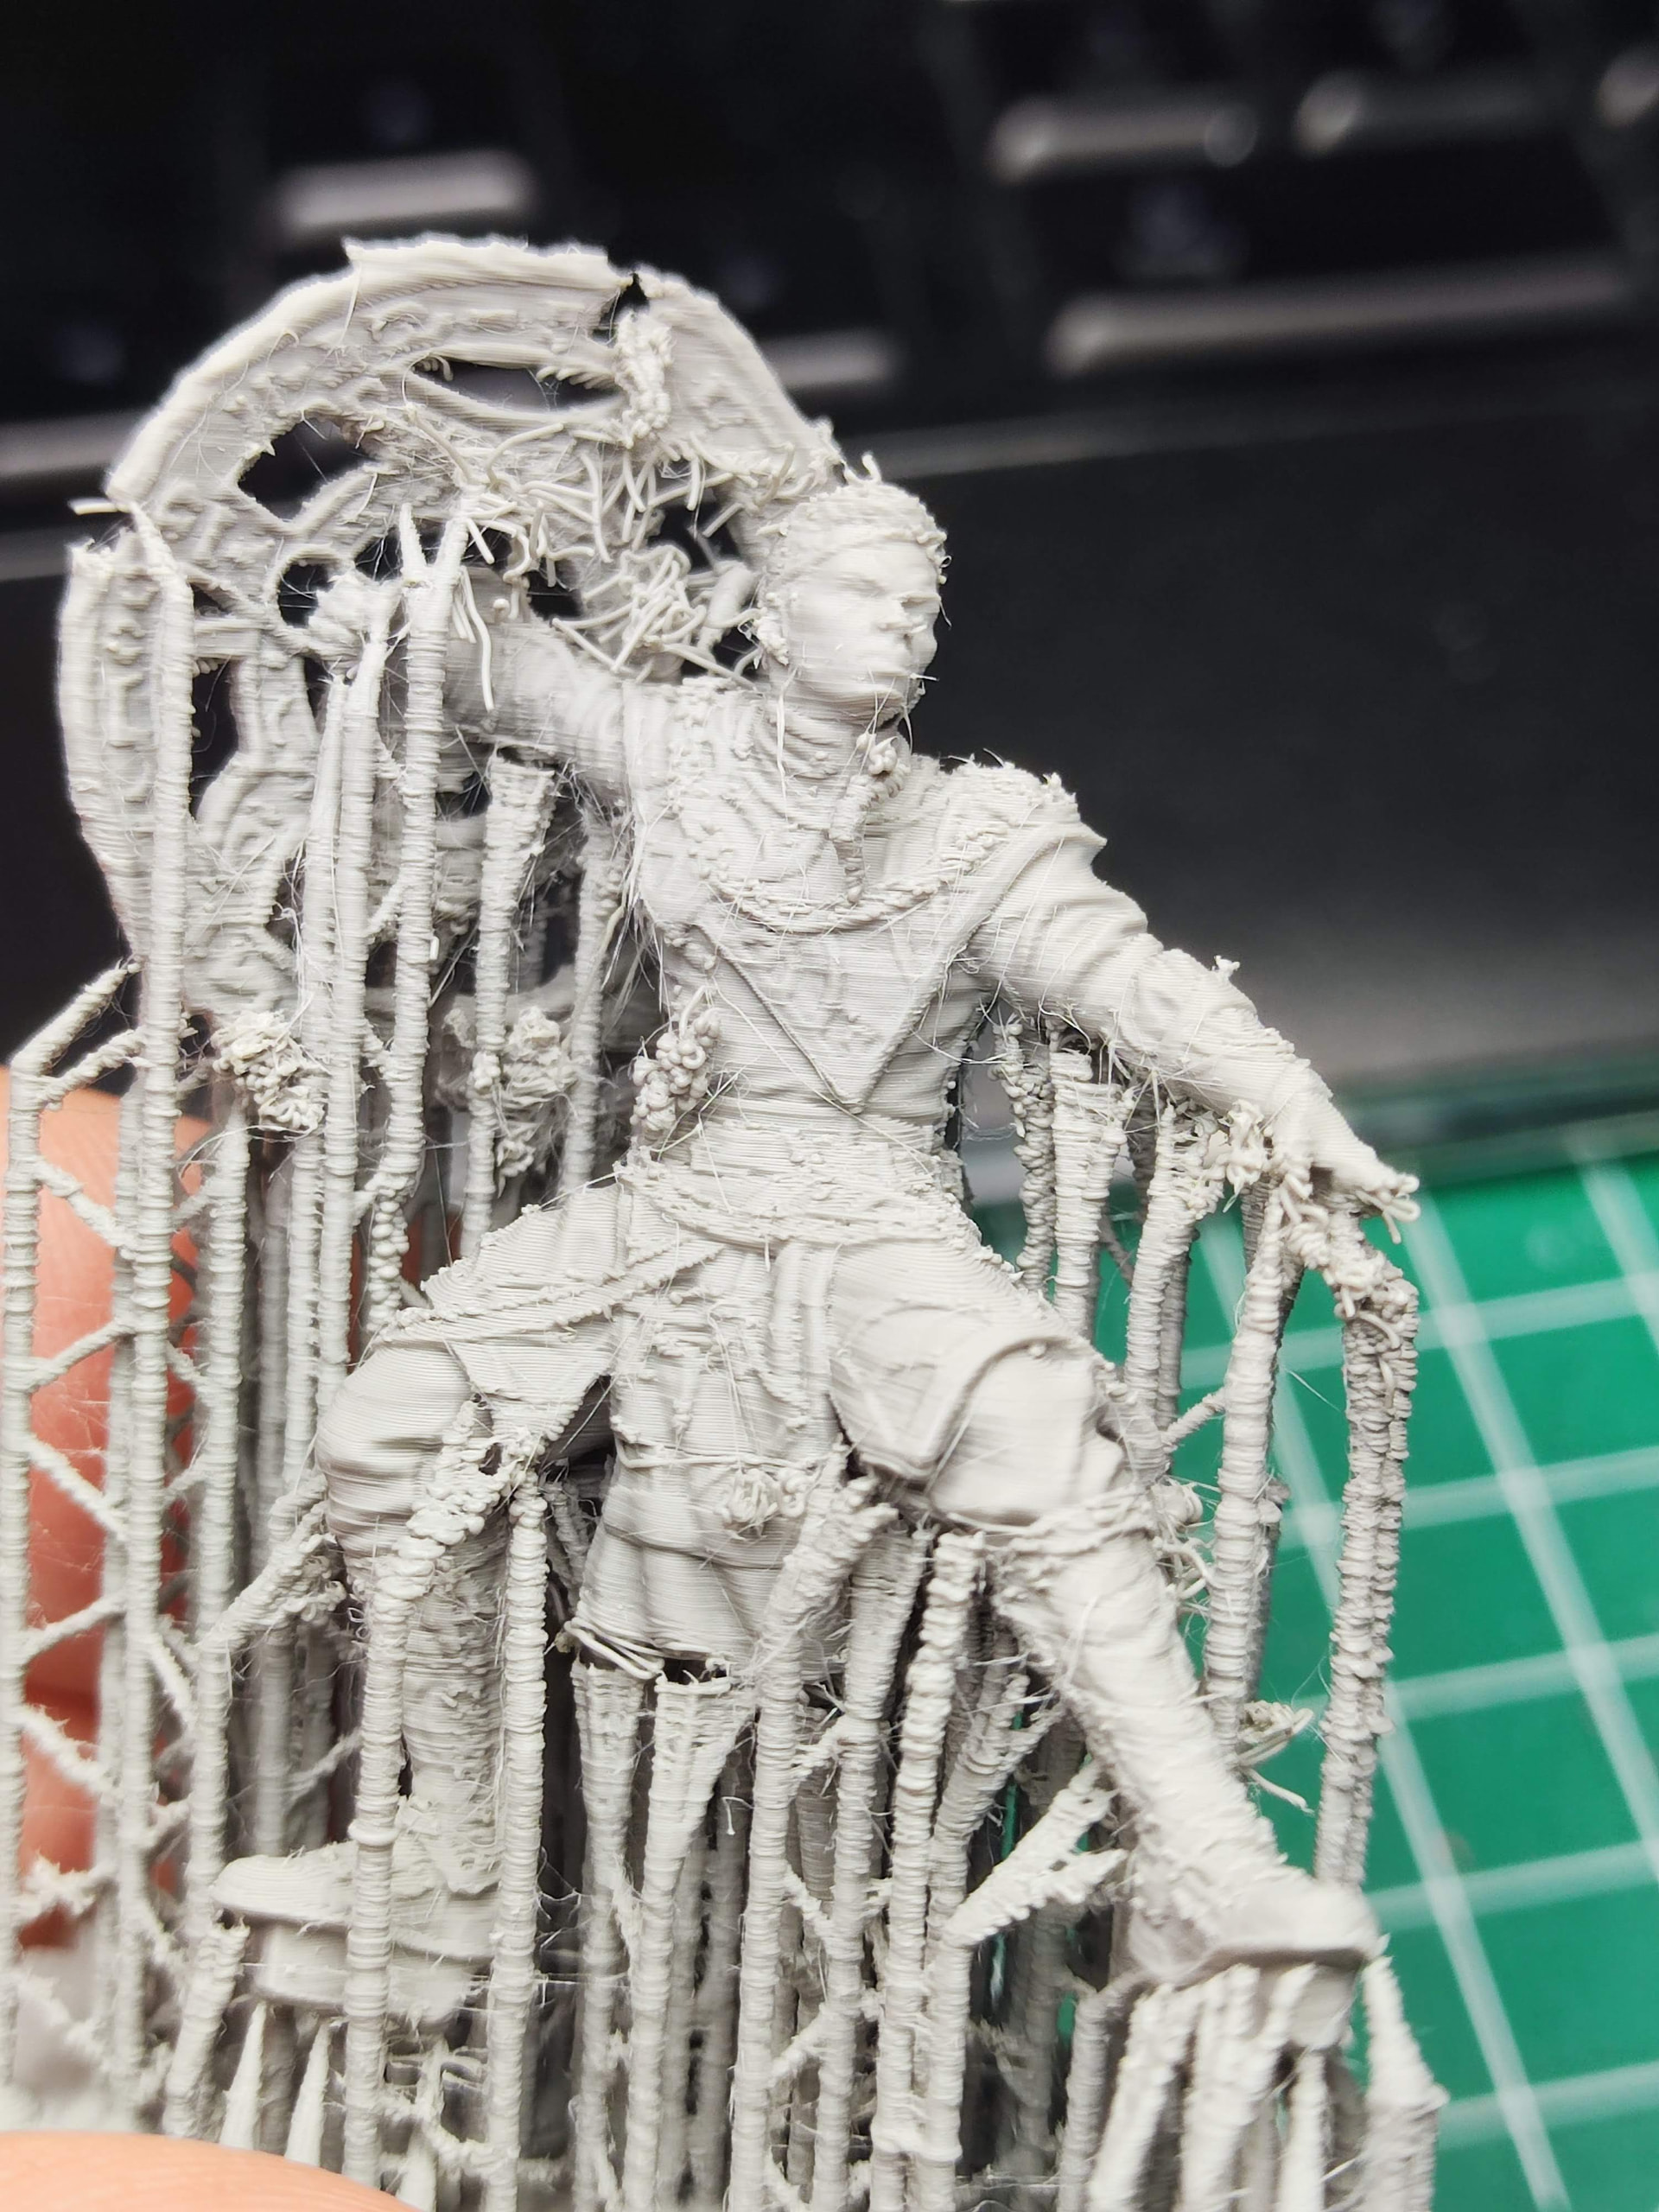
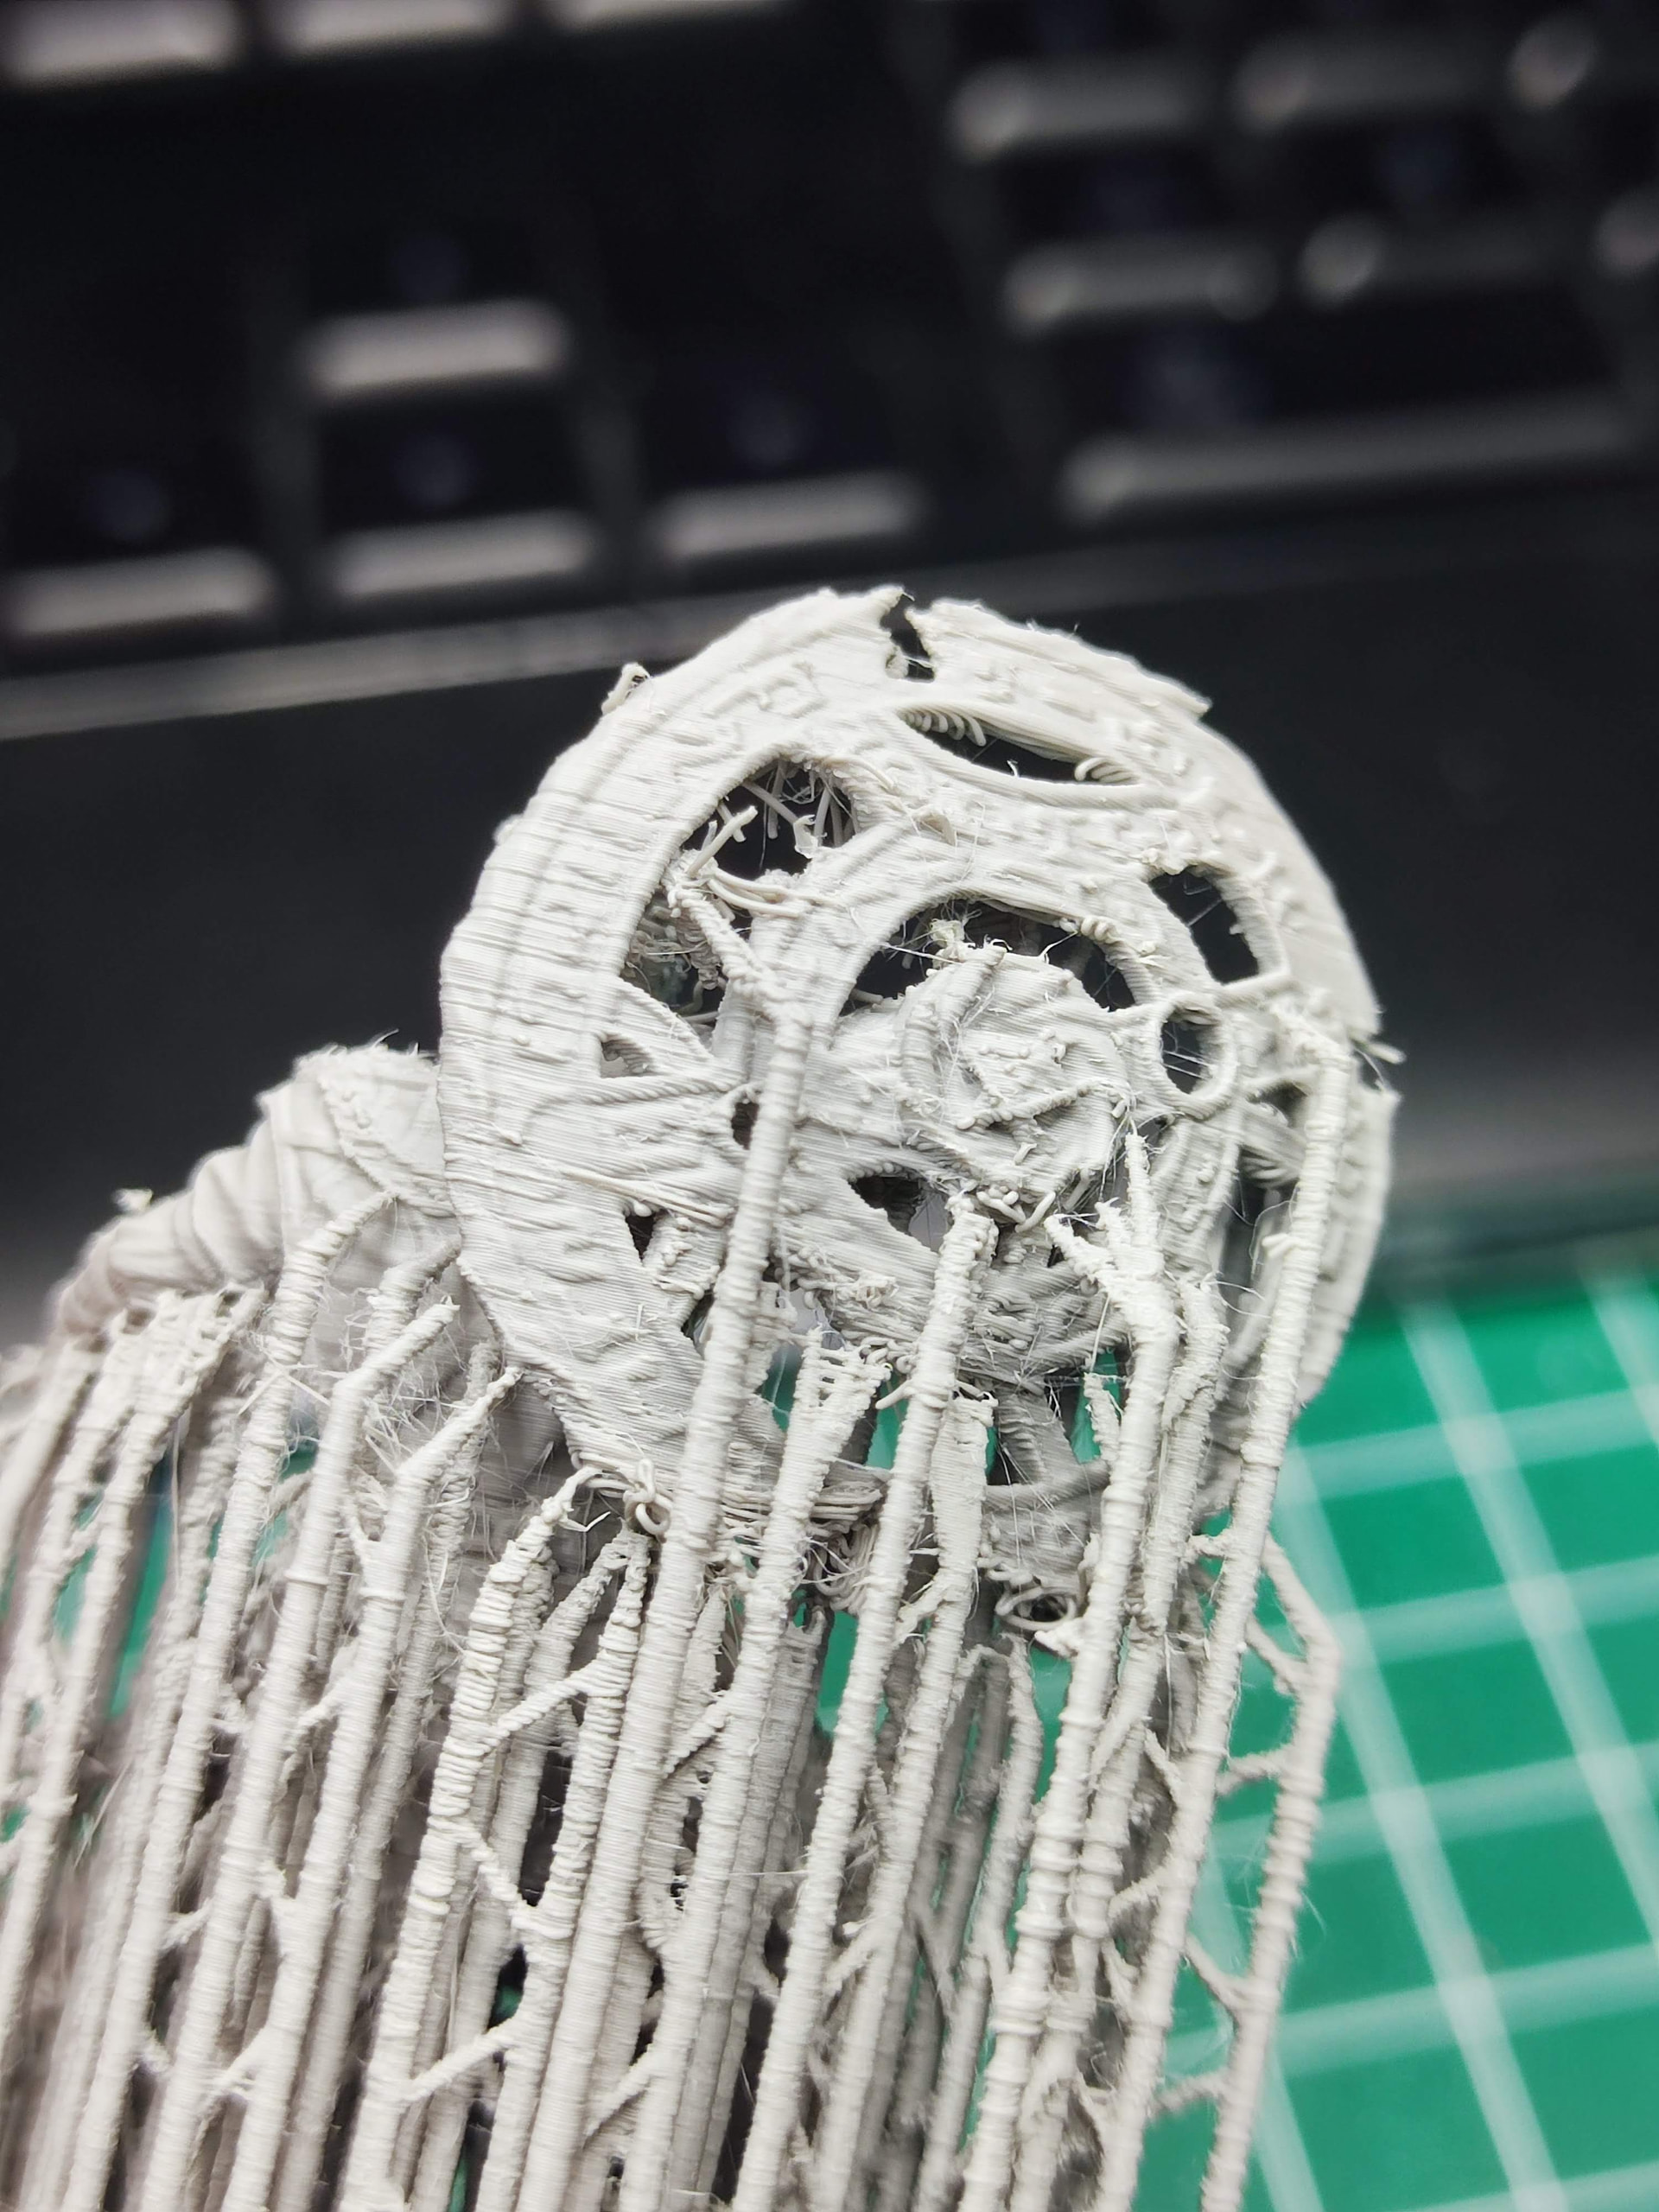
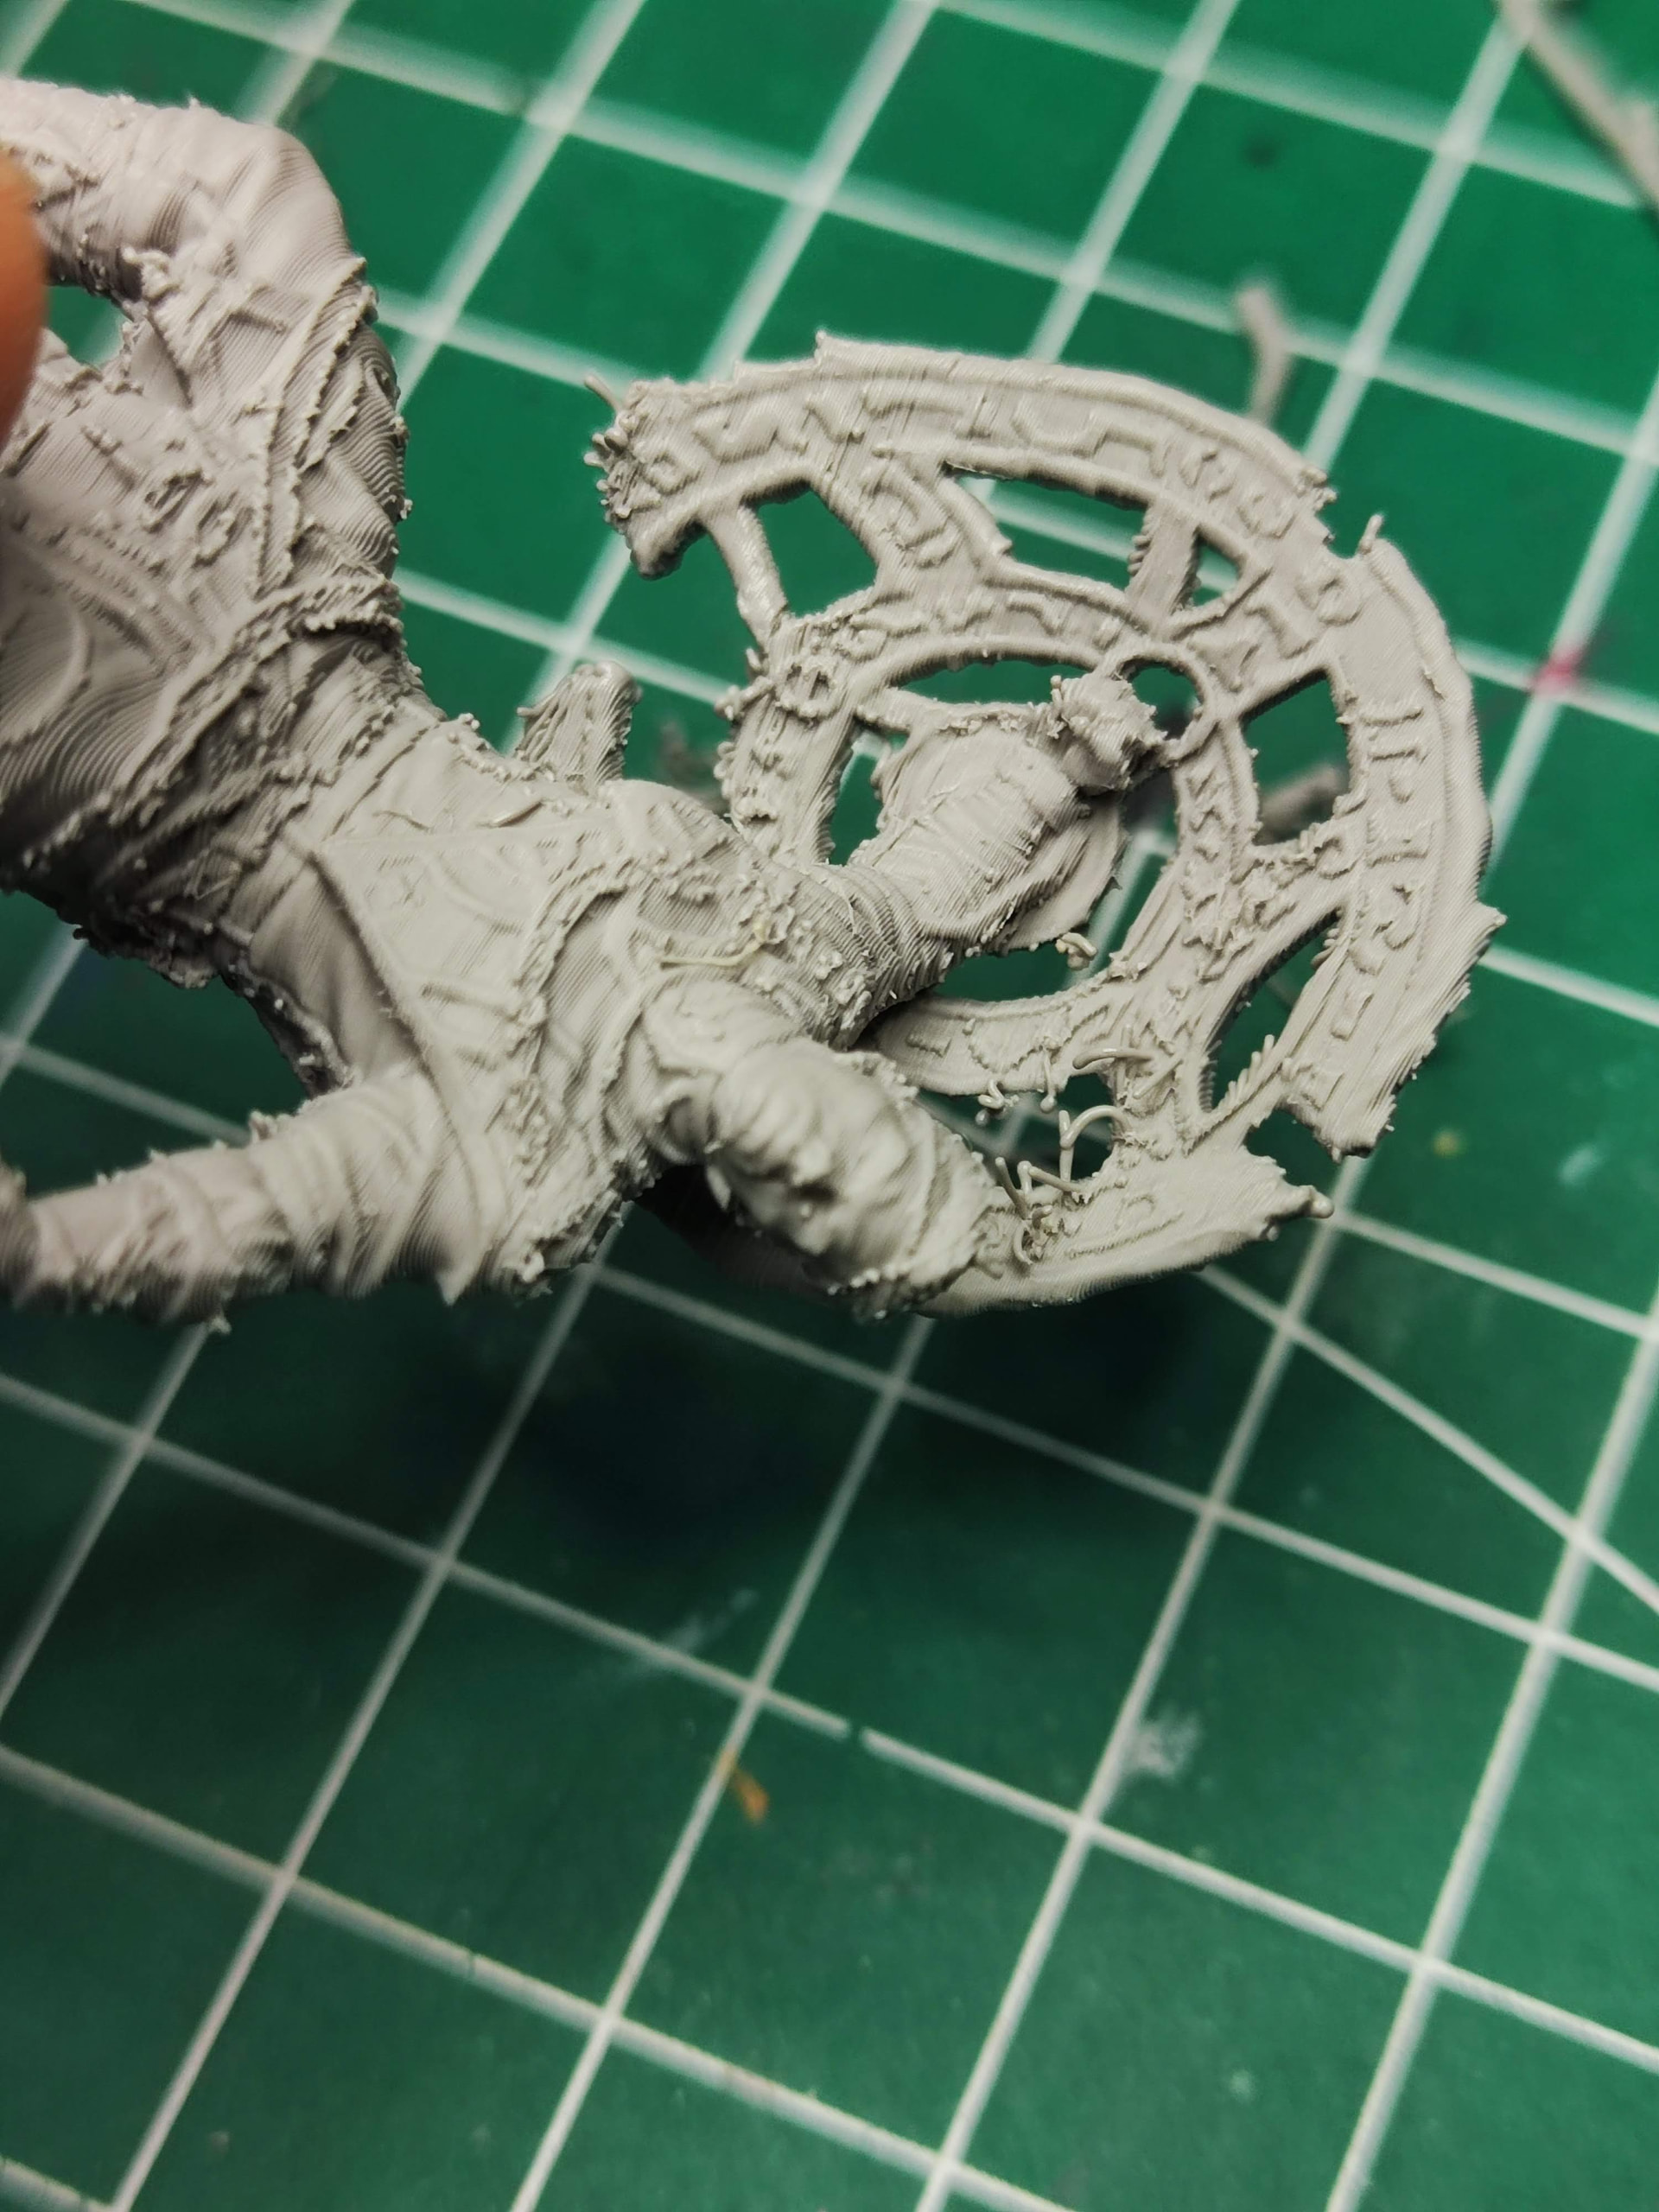
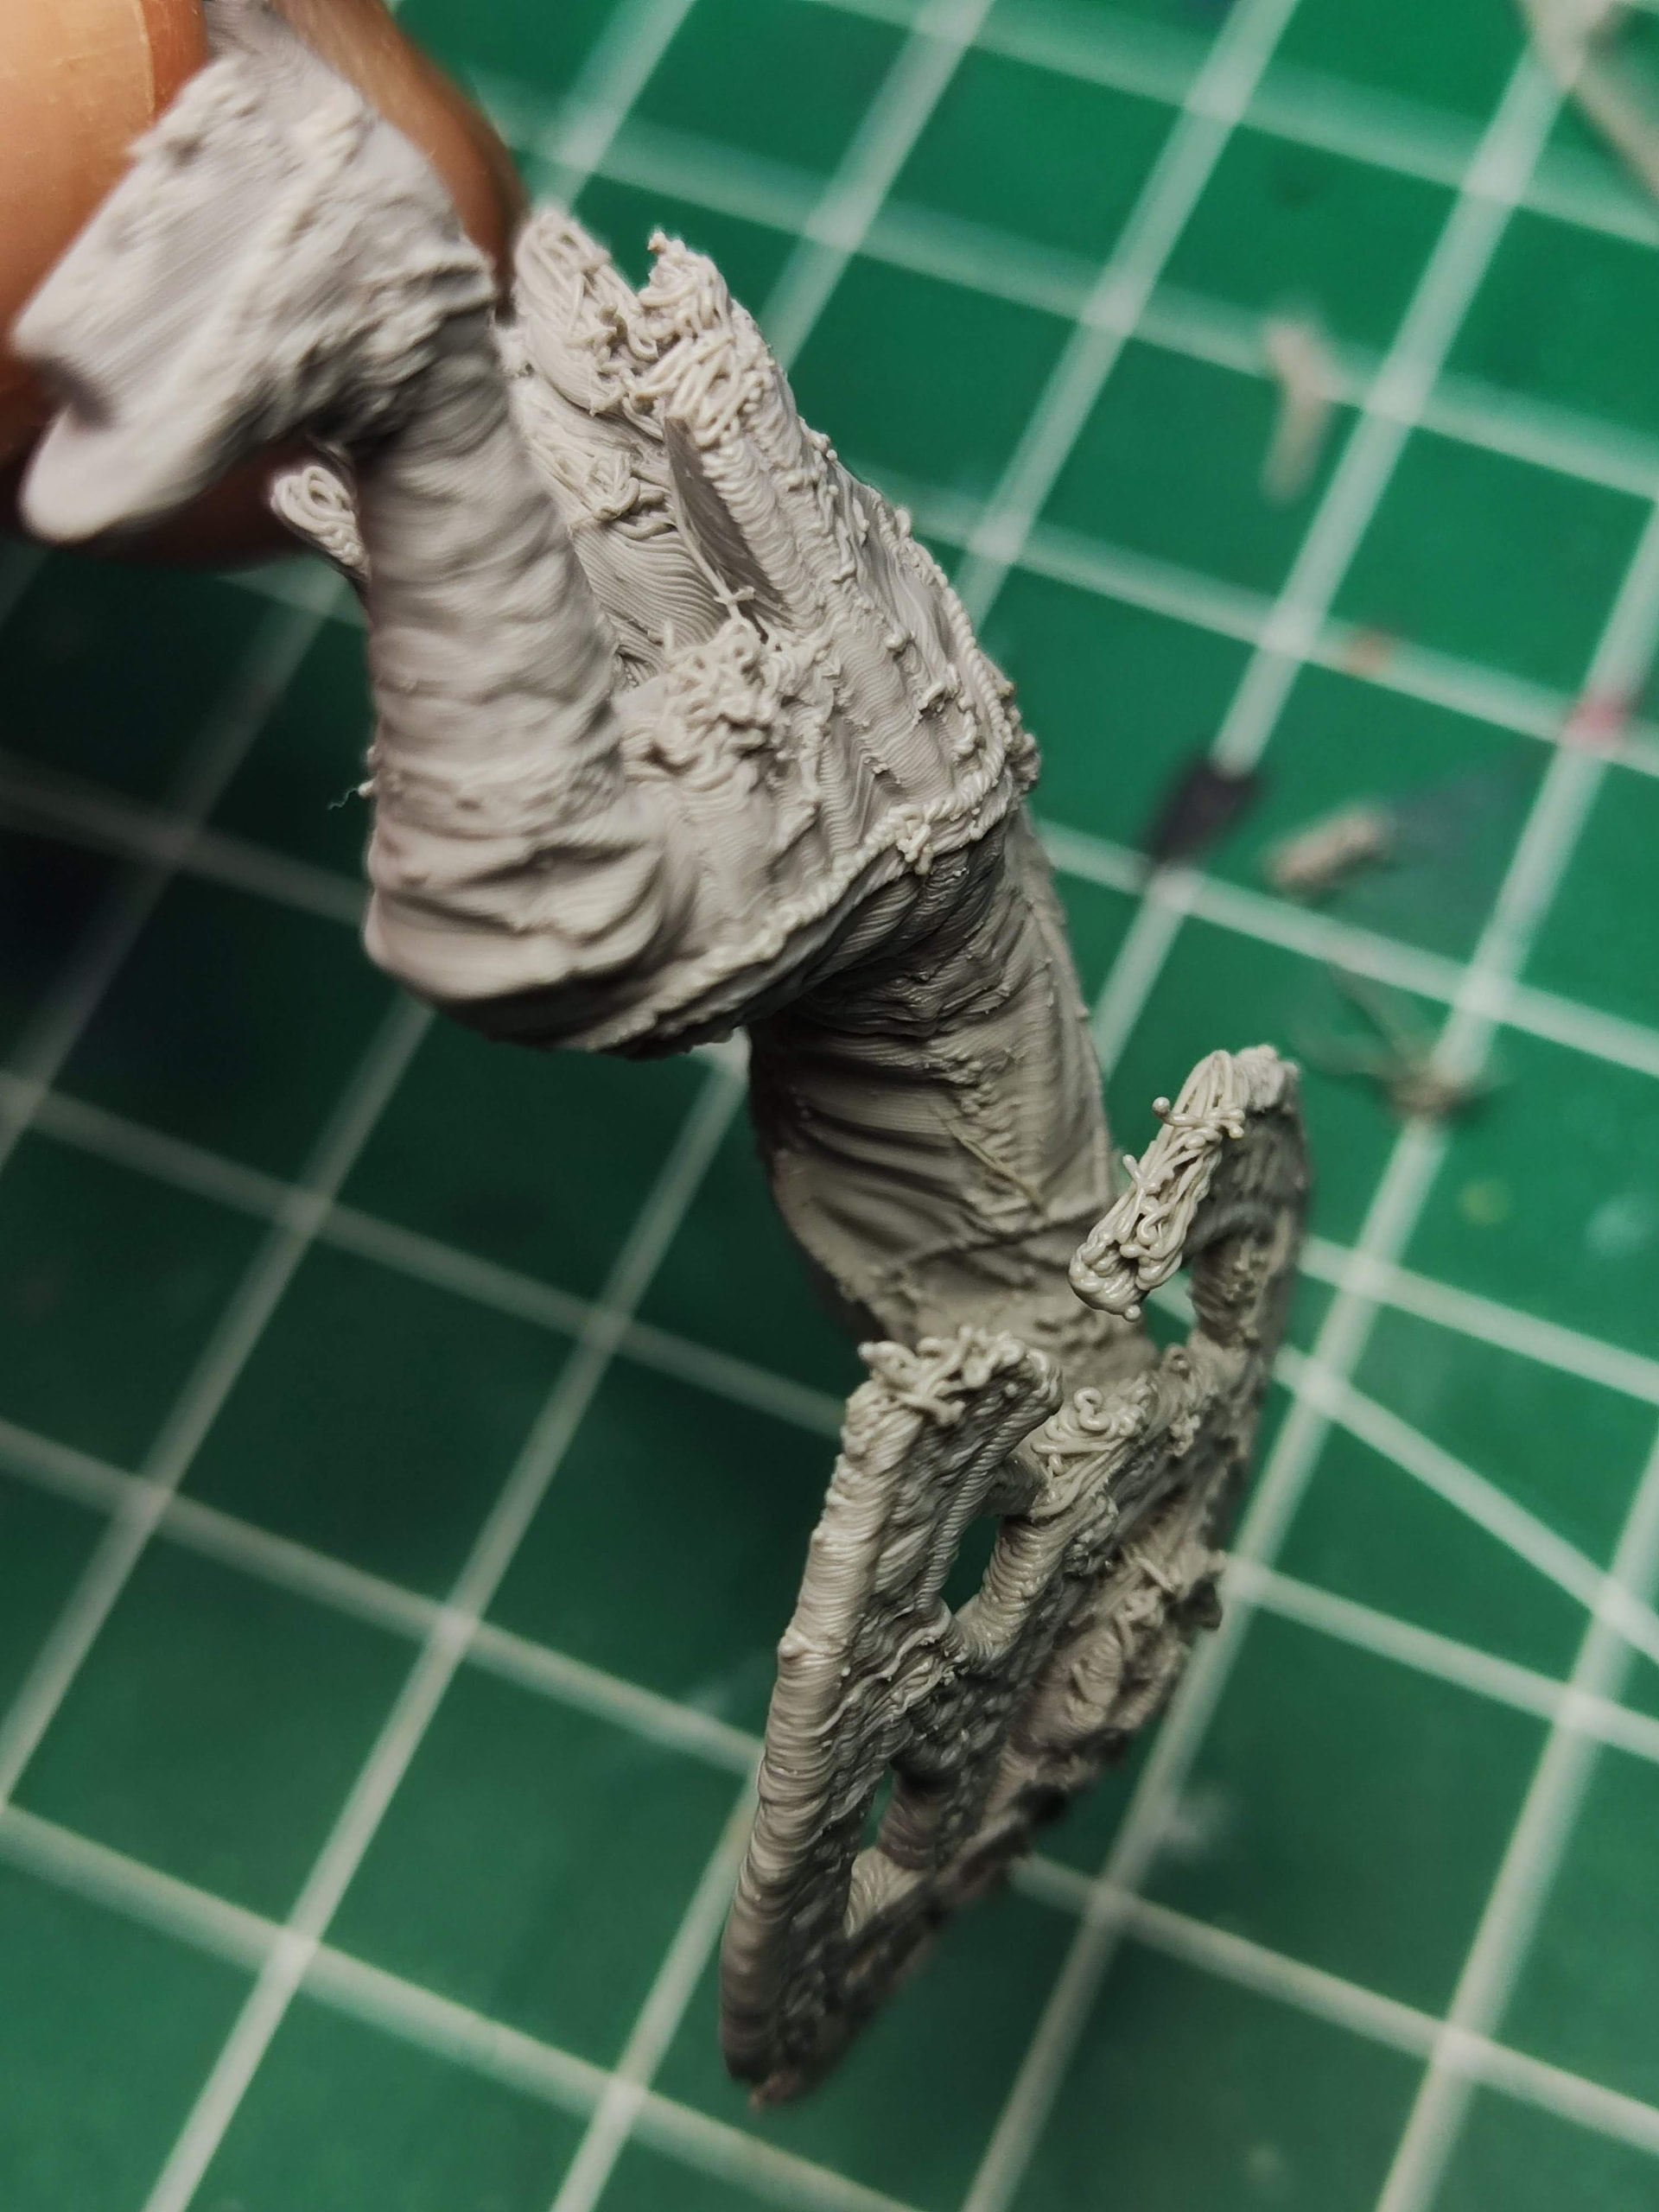
Resin2FDM (A1 Mini 0.2 nozzle), looking for feedback (quality,settings)

Hi everyone,

I finally completed my first Resin2FDM print and would like some feedback on the result and my settings.

Printer:

- Bambu Lab A1 Mini

- 0.2 mm nozzle

- Bambu PLA Basic

- Textured PEI plate

Resin2FDM:

- Supports generated with Resin2FDM

- No additional Bambu Studio supports

- Imported as a single object

Print settings:

Quality:

- Layer height: 0.08 mm

- Initial layer height: 0.10 mm

- Detect Thin Wall: Enabled

Strength:

- Wall loops: 3

- Top shell layers: 5

- Bottom shell layers: 5

- Infill: 5% Gyroid

Speed:

- Outer wall: 30 mm/s

- Inner wall: 60 mm/s

- Top surface: 30 mm/s

- Support: 50 mm/s

- Support interface: 30 mm/s

- Bridge: 30 mm/s

- Small perimeter threshold: 10 mm

- Slow down for overhangs: Enabled

Filament:

- Bambu PLA Basic

- Flow ratio: 0.98

- Flow Dynamics (K): 0.045

- Nozzle temperature: 220°C

- Bed temperature: 65°C

Observations:

- The print completed successfully.

- Resin2FDM supports remained stable throughout the print.

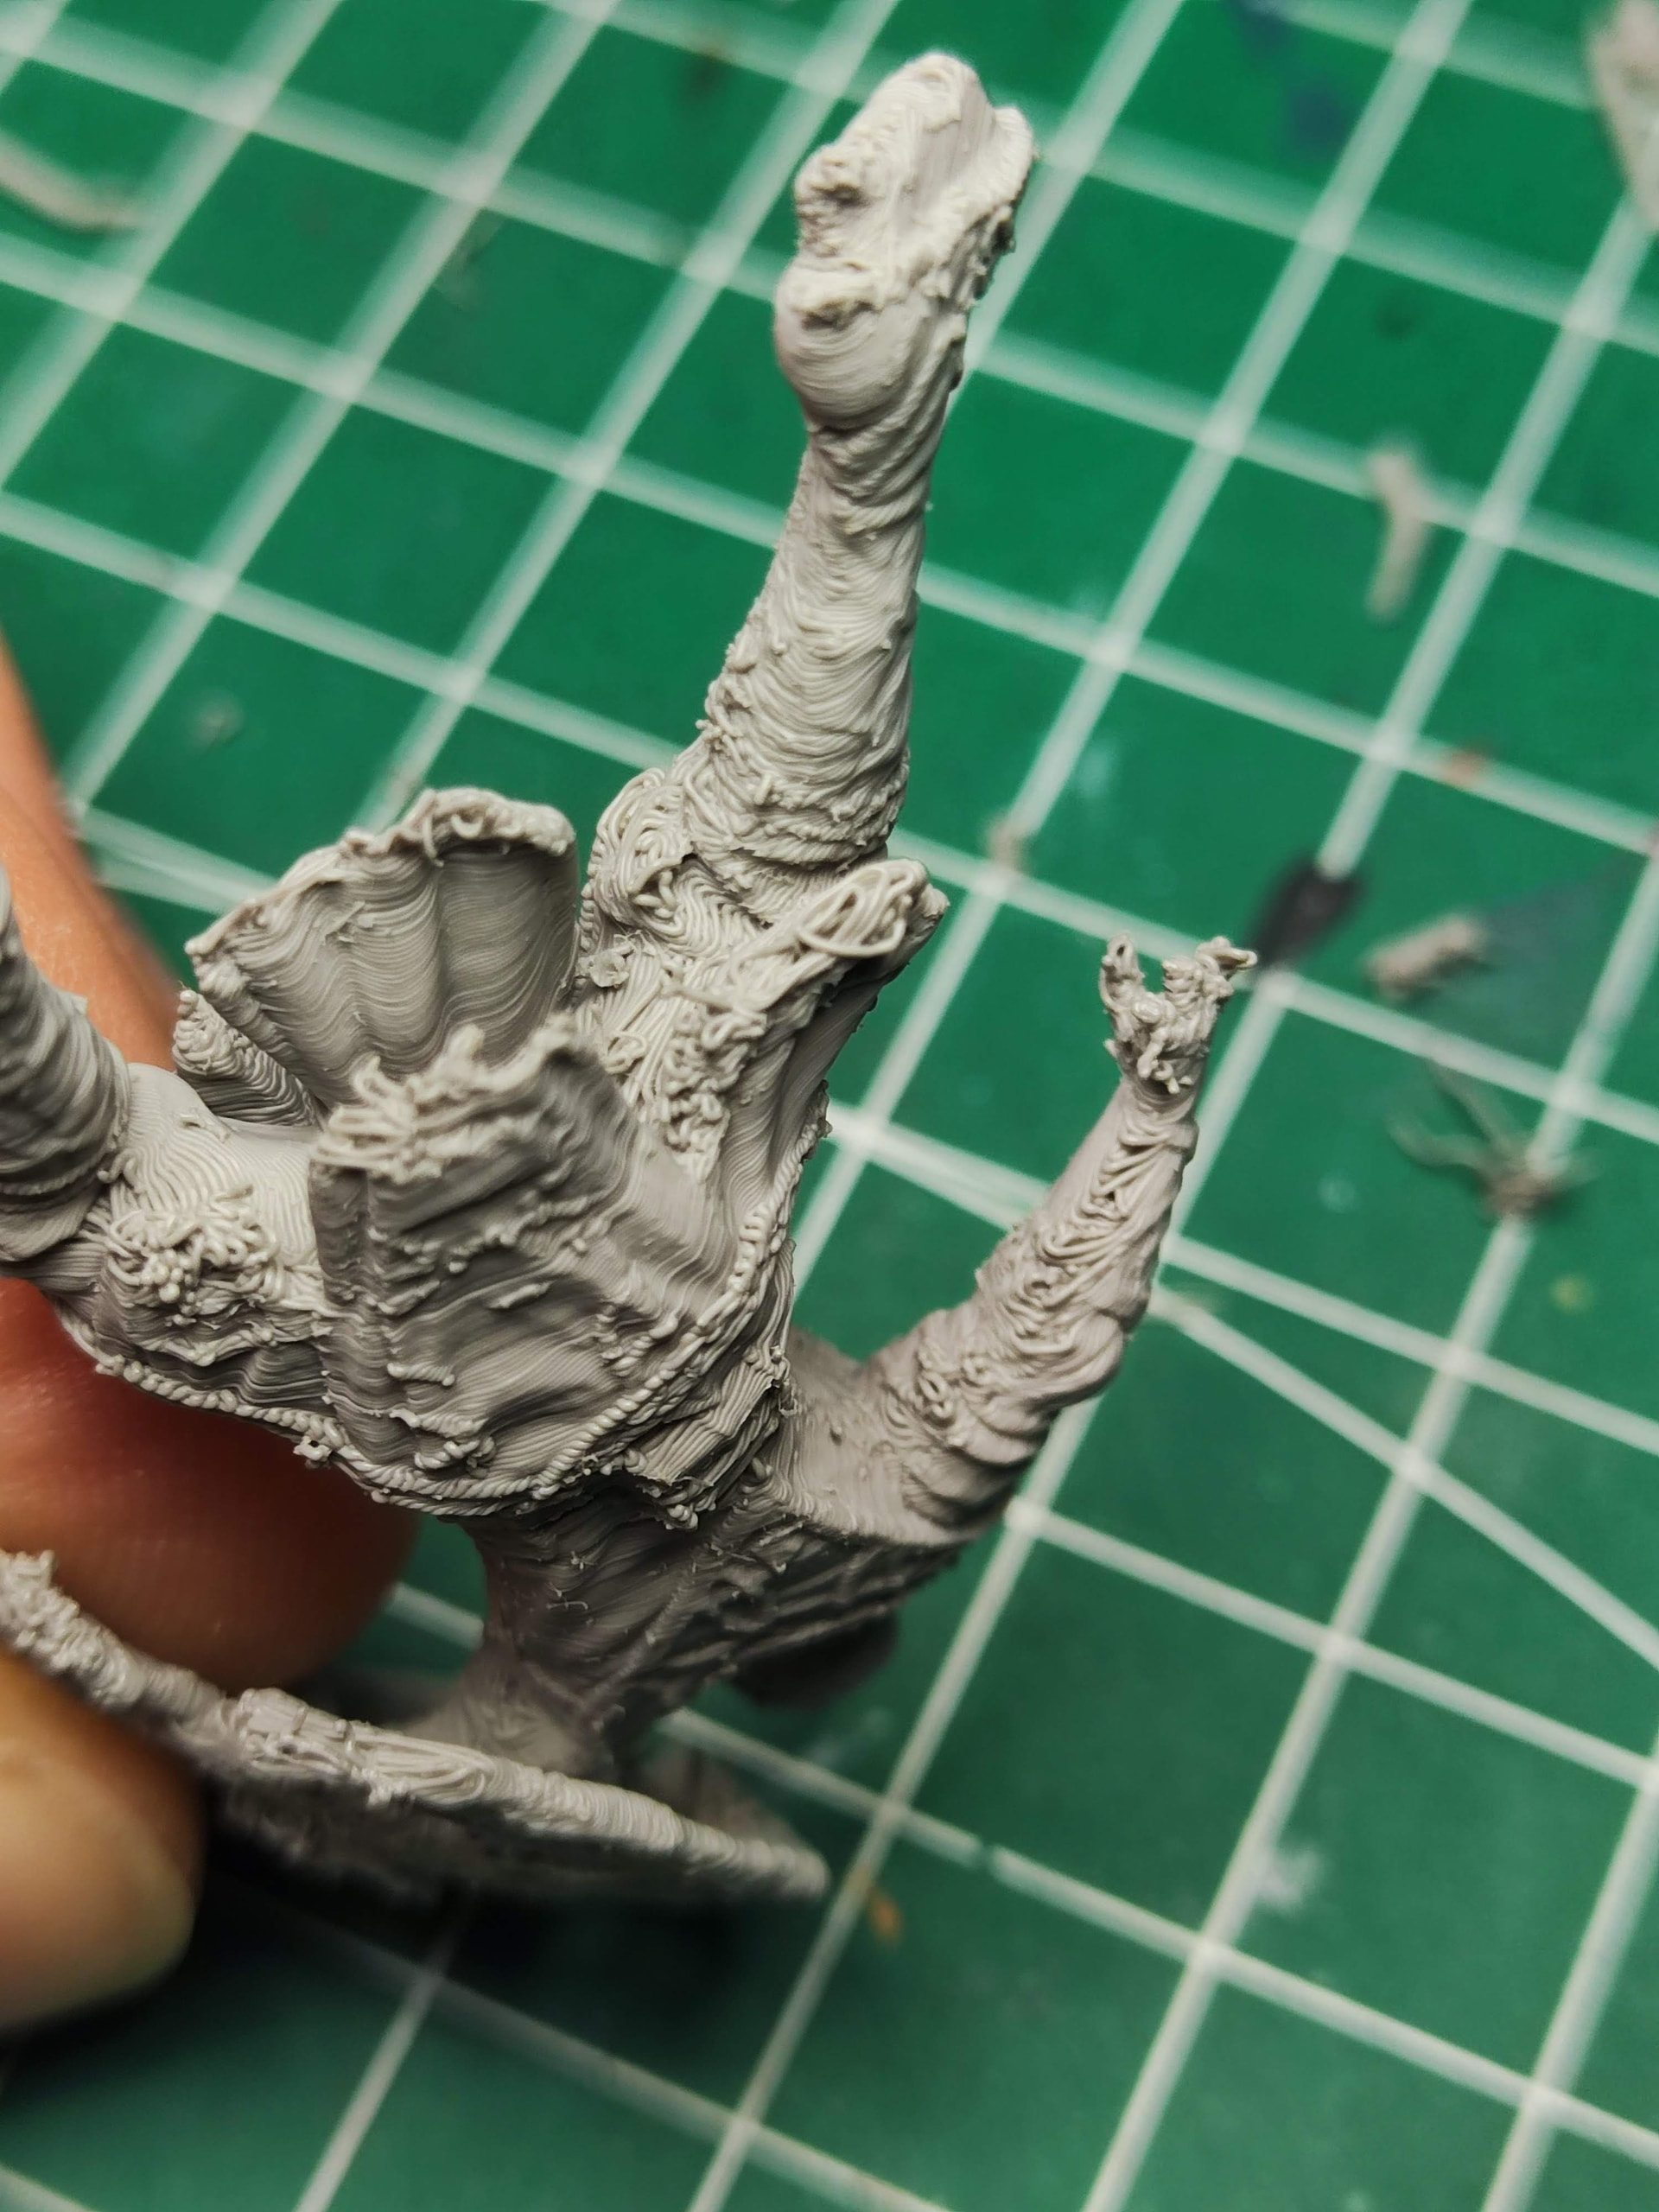
- The model is recognizable and most details survived.

- However, I’m seeing:

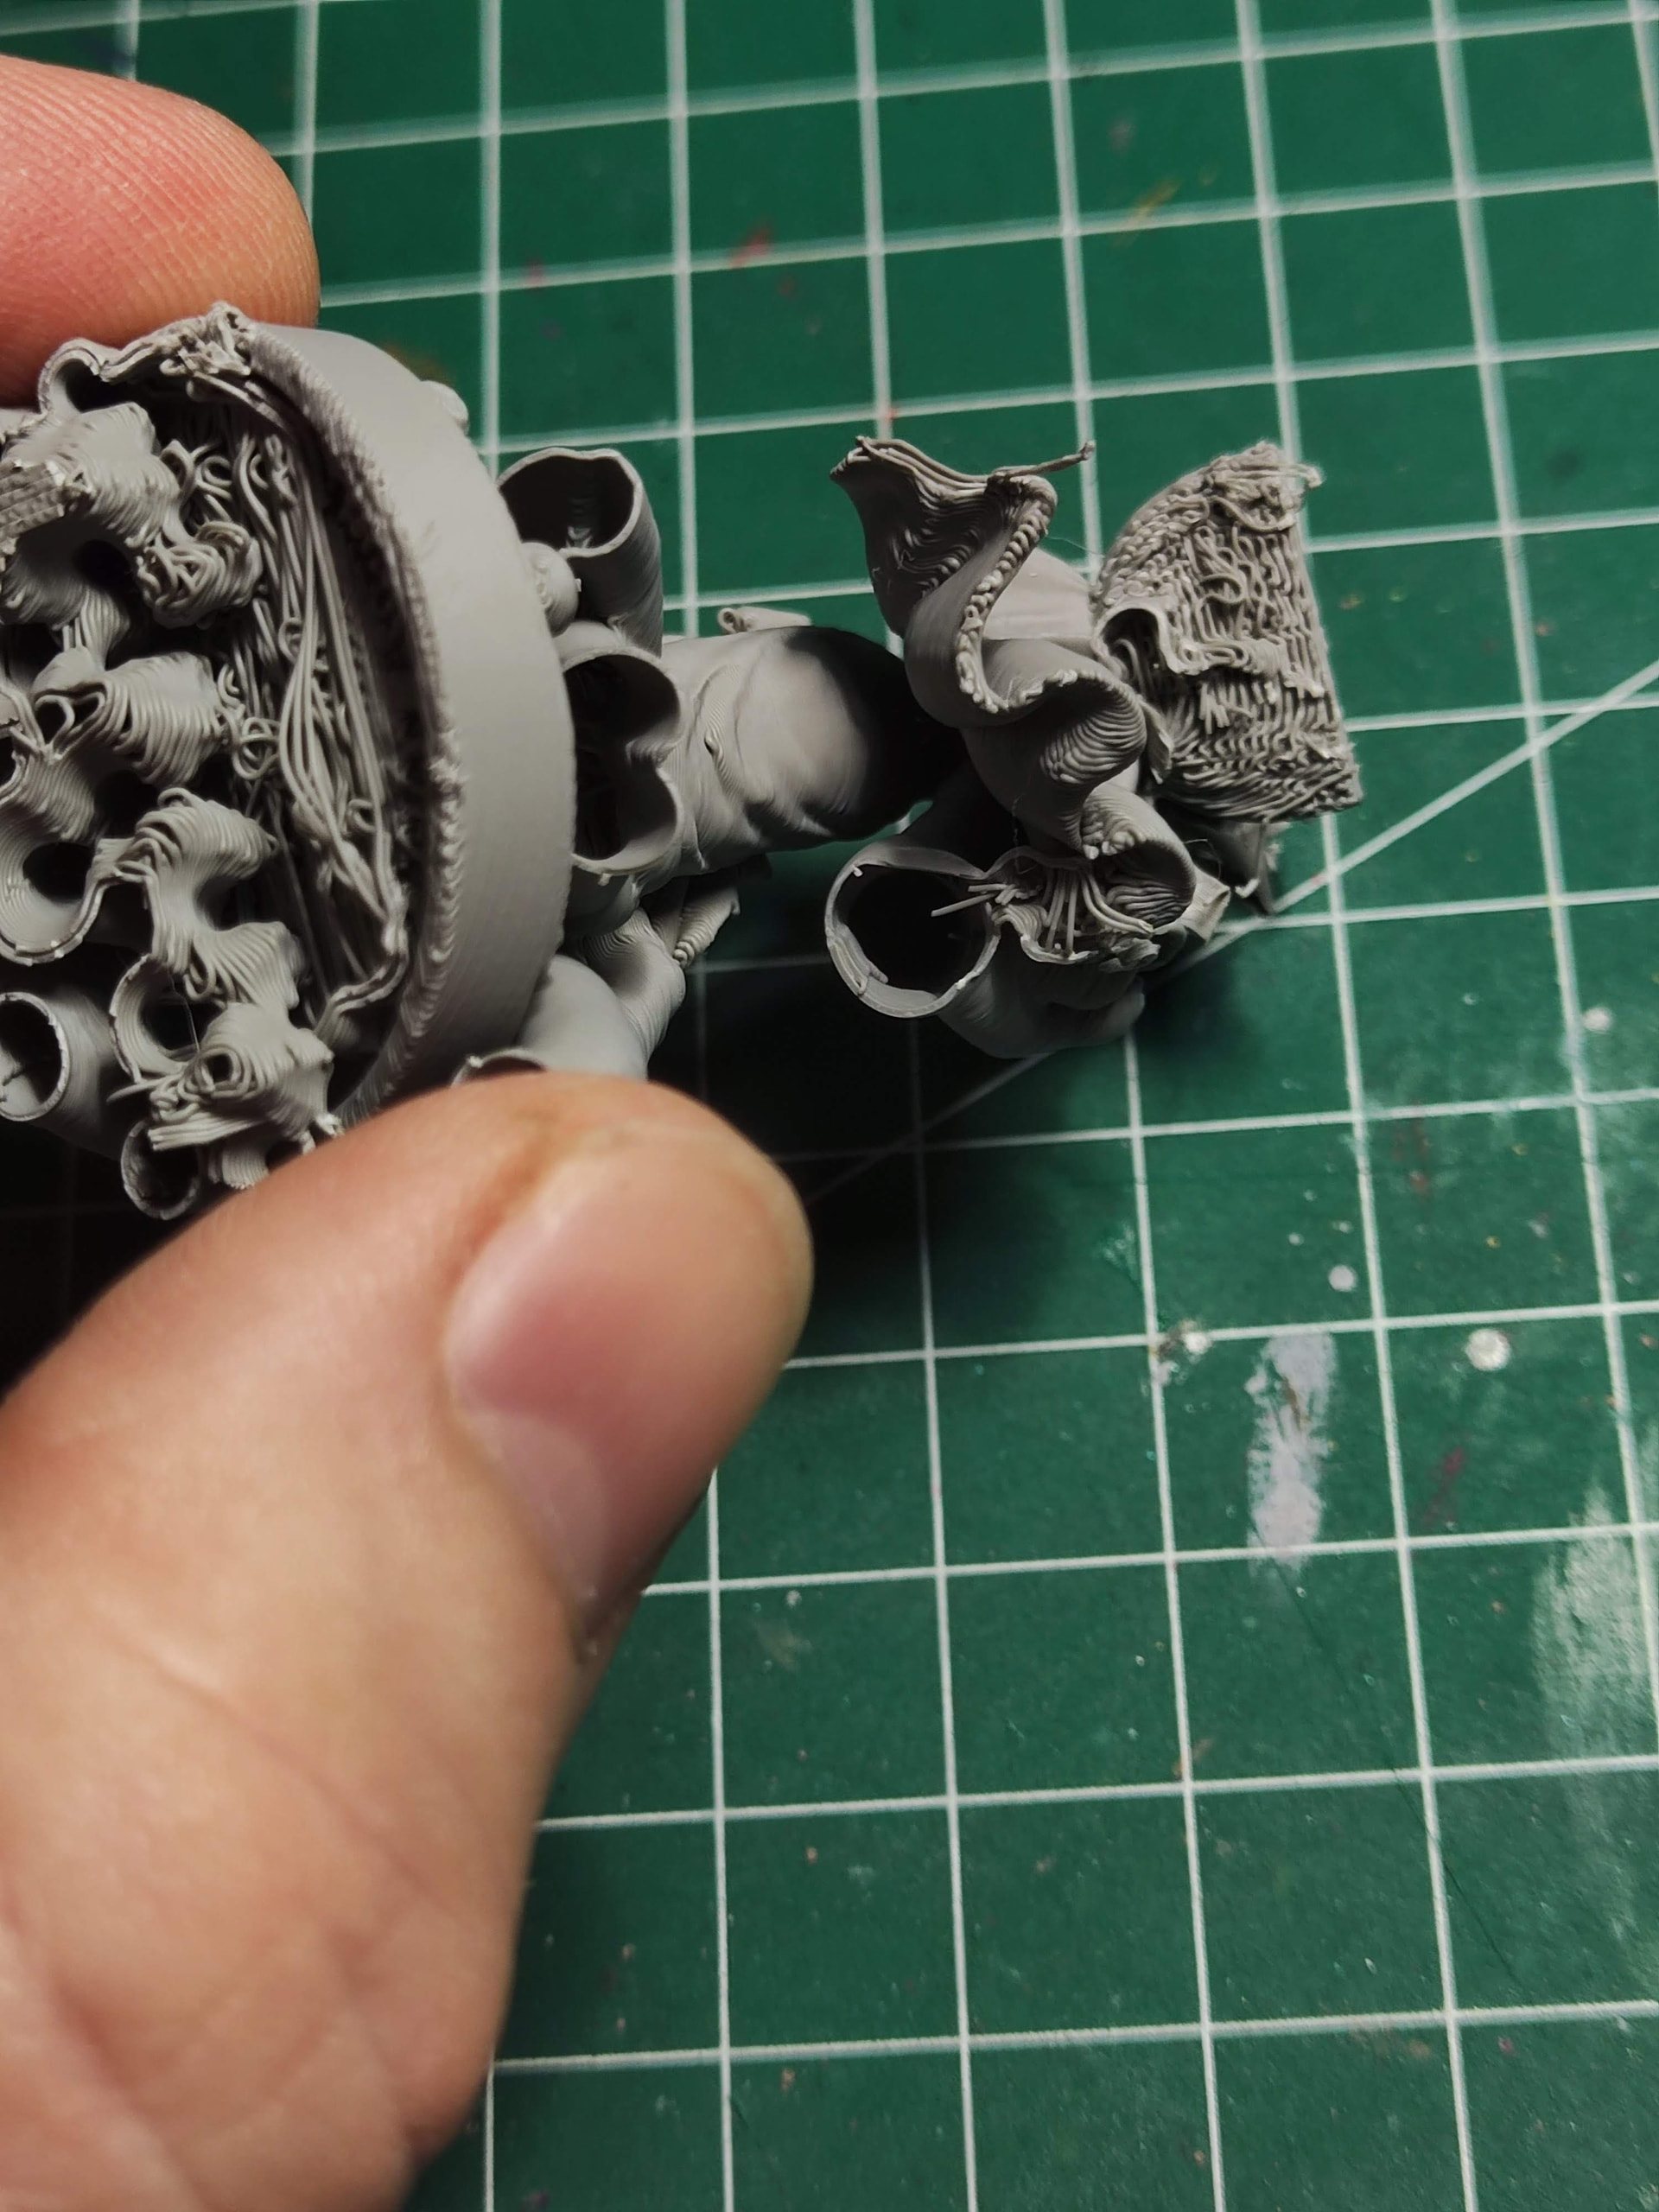
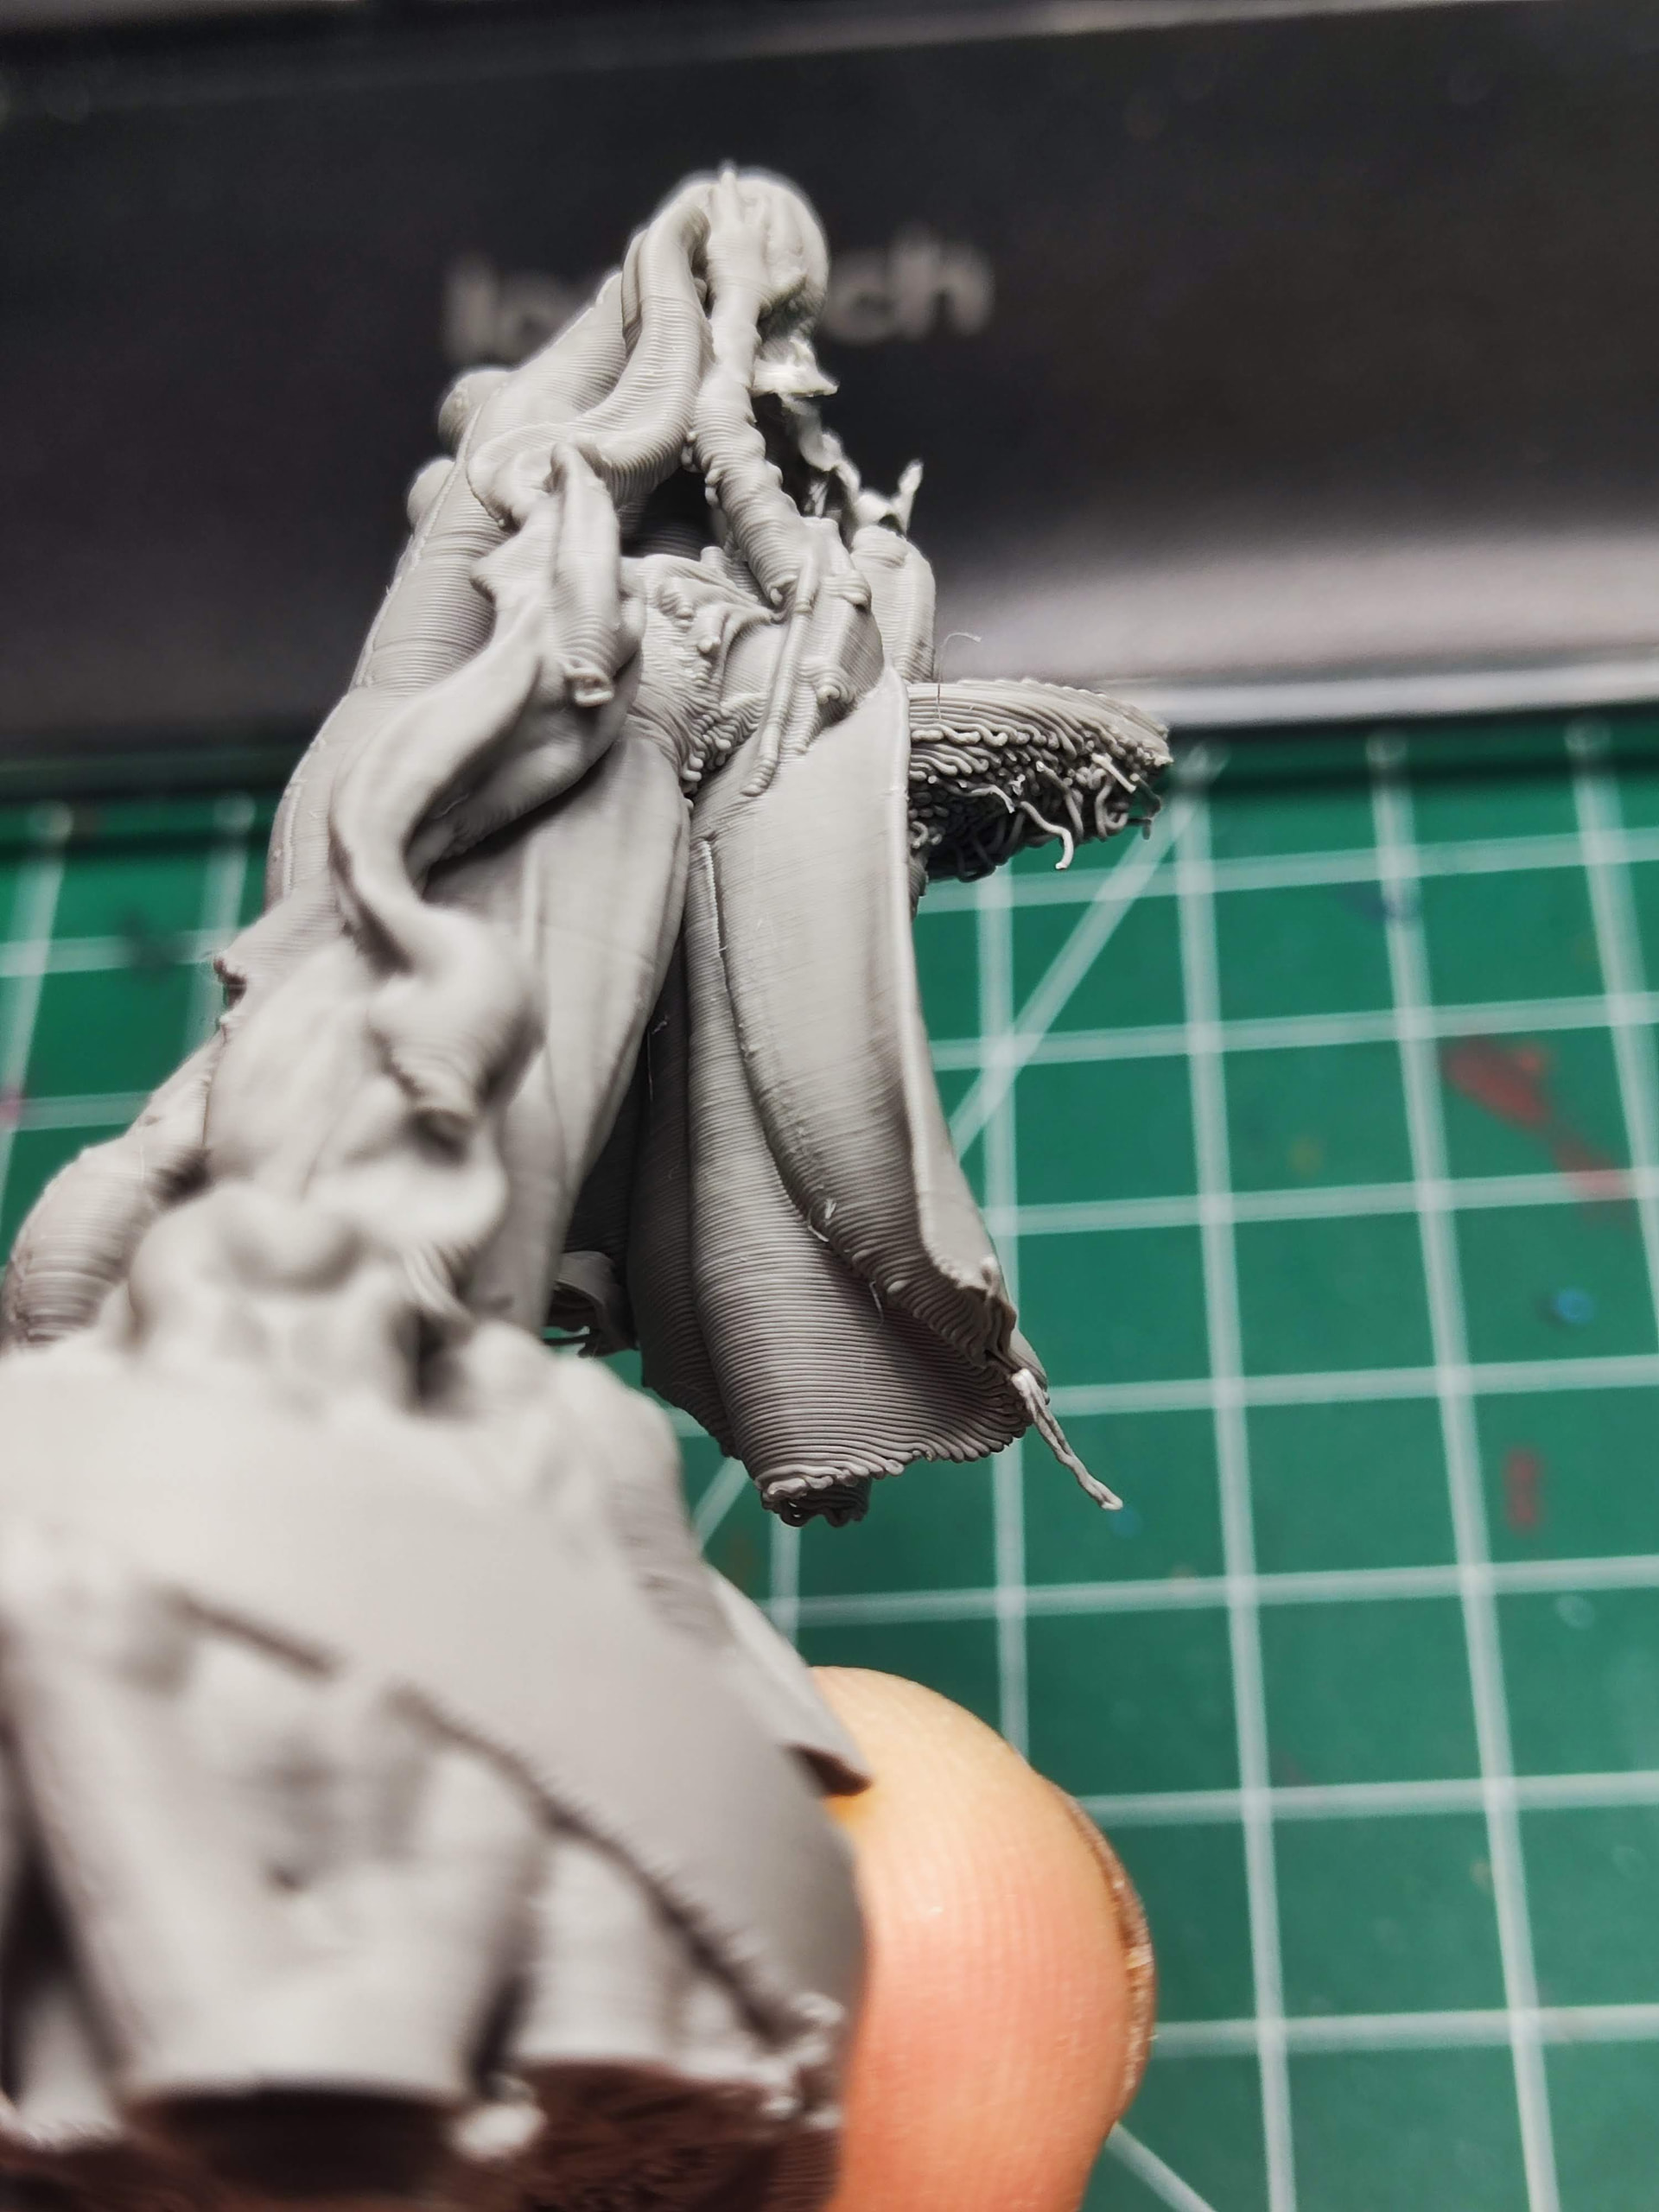
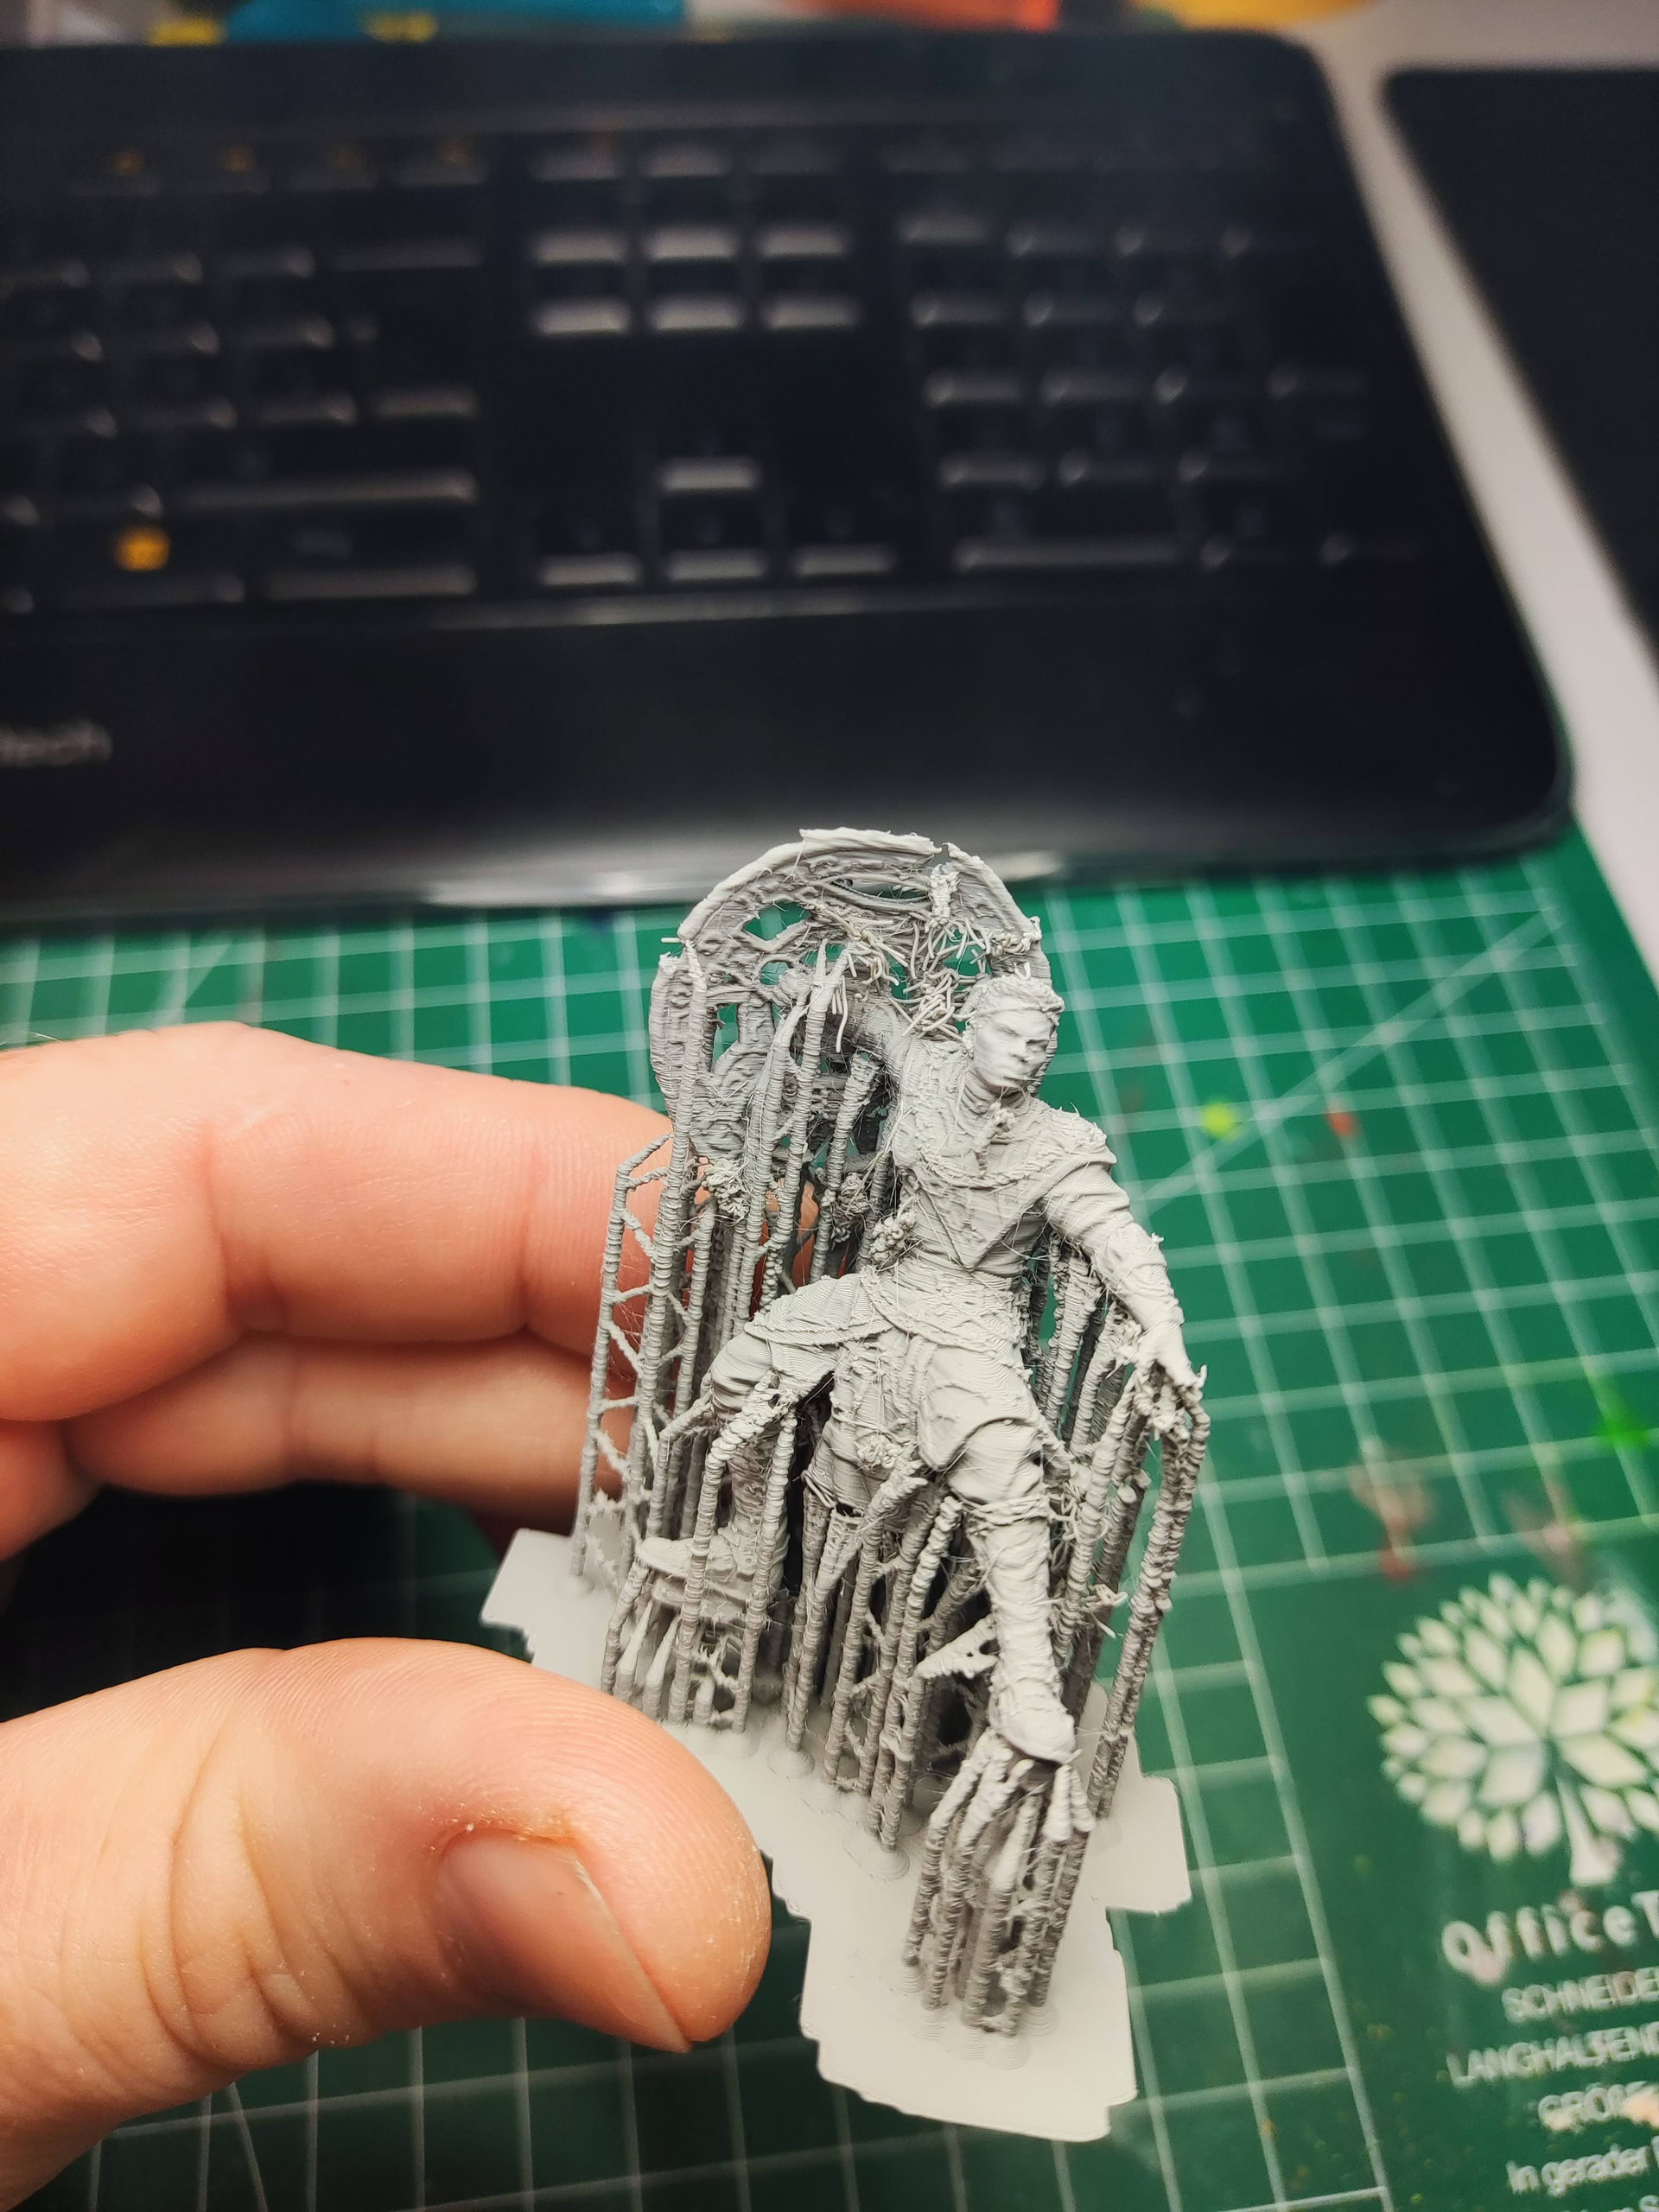
  • significant stringing/fuzzing

  • rough support columns

  • rough undersides in supported regions

  • some loss of detail on the shield and support contact areas

Photos attached.

What would you improve from here?

Would you:

- lower temperature (e.g. 215°C)?

- change support settings in Resin2FDM?

- change wall count?

- adjust cooling?

- change any other settings for a 0.2 mm nozzle?

Overall I’m quite happy that the print completed, but I’m interested in getting cleaner results before printing additional Resin2FDM miniatures.

Thanks!
The things I personally look at right now are Temperature and Acceleration speeds and Extrusion/Flow.

After cleaning up the model, I’m not as convinced as I was initially.

While I was quite happy when the print finished successfully, the result after support removal is honestly a bit disappointing considering it took around 15 hours to print.

The front-facing details are acceptable, but many of the supported areas suffered quite a lot. The underside of the cloak, parts of the shield, and several finer details lost a significant amount of definition due to support contact and overhang quality.

This makes me wonder whether the issue is primarily the pose and geometry of this particular sculpt, or whether highly detailed resin-designed miniatures simply remain a difficult challenge for FDM printing, even with a 0.2 mm nozzle and Resin2FDM.

I’m curious what others think:

- Is this mostly a bad candidate for FDM because of the pose, large shield, and numerous downward-facing details?

- Or is this roughly the level of quality that should be expected from FDM for resin-oriented miniature designs?

- For those with more Resin2FDM experience, have you had significantly better results on other character sculpts, or is this fairly typical?

I’d appreciate any honest feedback. At the moment I’m not sure whether I should keep tuning settings, choose more FDM-friendly miniatures, or adjust my expectations for what is realistically achievable with FDM.

Update:

I tried another test print using a standard FDM miniature tutorial with tree supports (not Resin2FDM).

Unfortunately, the result was quite disappointing.

The tree supports were extremely difficult to remove, and despite that, nearly every downward-facing surface still turned into a mess. Large parts of the underside look like spaghetti, sagging overhangs, or heavily damaged support-contact areas.

What I find confusing is that I seem to get the worst of both worlds:

- Supports are difficult to remove.

- Support marks are severe.

- Downward-facing surfaces still print very poorly.

- Many details on the underside are almost completely lost.

The visible outer surfaces look reasonably acceptable for a 0.2 mm nozzle and 0.12 mm layer height, but anything facing downward looks terrible.

Photos attached.

At this point I’m wondering:

- Is this simply a very poor model/pose for FDM because so much detail faces downward?

- Are tree supports the wrong choice for this kind of miniature?

- Should I be using normal supports instead?

- Or does this indicate that I still have a major settings issue somewhere?

For reference, this was a standard FDM printing approach using tree supports, not a Resin2FDM workflow.

I’d be very interested to hear from people who regularly print miniatures with FDM, because right now it feels like I am making support removal more difficult without actually getting acceptable underside quality in return.

TBH, if you get PLA Basic stringing with a .2mm nozzle, you need to very seriously consider the moisture content of your roll of filament.
The difficulty in support removal underlines this.

You may also want to loose the Resin specific support and only use tree (2 walls) or standard support.

Did you change anything in the filament settings?

:crossed_fingers: & :four_leaf_clover:

I actually dried the PLA Basic (original Bambu Lab) for about 12 hours at 55°C before this print.

That’s one of the reasons I’m a bit confused by the result. While there is definitely some stringing, I’m not convinced moisture is the main issue here.

What stands out to me is that almost every downward-facing surface looks significantly worse than the visible outer surfaces.

The cloak undersides, sleeves, shield underside and other supported areas are where most of the quality loss occurs.

The visible surfaces are not great either, but they are noticeably better than the supported/downward-facing areas.

Regarding settings, I did make some changes compared to the default profile:

- 0.2 mm nozzle

- 0.12 mm layer height

- Outer wall: 30 mm/s

- Inner wall: 60 mm/s

- Support: 50 mm/s

- Support interface: 30 mm/s

- Detect Thin Wall enabled

- Flow ratio: 0.98

- Flow Dynamics K: 0.045

Other than that, I used the basic settings for a .2 nozzle and PLA Basic.

At the moment I’m trying to figure out whether this is mainly a difficult sculpt for FDM, or whether I should realistically be expecting considerably better results from a setup like this.

It also troubles me that following a turorial in every detail gives such a insanely worse outcome than what is shown. Pretty sure the model also is not the ideal scenario for an FDM printer. A bigger model like a Space Marine probably would be easier

Ok, that should be plenty. I share your confusion to some extent. I do however expect, that some issues may be originating somewhere else and subsequently transfer to the print.

The Resin supports show wobble and potentially even overheating. That could be (partially) to blame also for the bad figurine print result.

  • If you have it, use the support free stl and instead use Bambu’s Support generation. I am usually OK with tree supports, but some report better results with classical support.
  • Also slow down accelerations to reduce wobble inducing forces.
  • If your print preview for layer time shows layer time being governed by the minimum layer time (filament cooling max fan setting time), print two (or more) at the same time. Otherwise, there’s a risk that the slicer logic keeps the nozzle close to thin structures, rezlting in the overheating this setting is actually intended to prevent.
  • Try to get three points of the figure solidly placed on the build plate and use 0mm distance brims. But do not expect miracles. This is indeed a challenging print.
  • You may also want to consider printing in another orientation to reduce wobble on too of the support.

Hang in there. It’ll probably take a few iterations and you need to compromize on quality versus resin, but it can be very rewarding once you get there. :heart:

:crossed_fingers: & :four_leaf_clover:

  1. Resin pre-supports will give bad results. Use the basic model, and use FDM tree supports.

  2. You want a filament with an off-white to mid grey and a slight gloss, as this will “hide” a lot of the errors, yet still show detail.

  3. Focus tuning on extrusion, pressure advance, and retraction.

  4. A resin printer is pretty cheap these days. For VOC, throw a cardboard box enclosure over it and vent it out of a window with a cheap fan and an air-conditioning duct.

To answer a question I forgot: Yes this is a difficult model for FDM. On places like myminifactory you can find “supportless figures” designed for FDM printing. They work much better.

I will dig into more details. Thank you guys for all your suggestions and ideas. I’m printing these minis because they belong to a game I bought called malediction and I have those stls. I also have supportless STLs. That was the last mini I tested with tree supports, but the supports are way to tight to the model and the down facing parts are still really bad

But I won’t give up yet!

So what I found out after a Lot of reading and more testing ist that somehow bambu studio does not generate the proper support interface in my minis and sometimes even when printing terrain. But mostly it’s minis with a .2 nozzle. When slicing the mini in another slicer i got a huge difference in time.on interface supports formless then 30s to almost 20min. This help alot with the problem of spaghetti on the underside of a model.

But I still struggle with supports… either they are to thick and snug or the break midway through.

A small update. I found a Solution for one of my Problems. I always had issued, that the underside of a model, which was supported showed spaghetti-lines. The issue was, that Bambu Studio somehow did not create proper Support-Interfaces. Switching the slicer did fix THIS issue. I don’t know how i can fix the Problem in Bambu, except of manual printing all the supports - which i won#t do :wink:

Next on my list was running a full calibration and as a guide I used ObscuraNox Video-Tutorial. After that i tested printed a supportless Miniature and i still have some issues with quality and especially with overhangs.

This is a link to all my settings and some pictures of the printed minis:

Something disturbing is, that I always have issue on the right side and towards the back. The front and left always prints nice. This issue persists before and after the calibration.

I will also attach the 3mf of my tests

Test_after_calibration2.3mf (4.2 MB)

I hope someone can show me the right direction, because right now, I really don’t know what to tackle next.

edit1: May it be possible, that i have slight underextrusion on the right side and back (doesnt makes sense tho) so the supports fail midway through? or what else could cause a support-fail midway through? The tail of the monster also looks like it got bumped off (or it didn’t print because the support was missing).

I did another test with a split model. What i discovered is, that the part on the right side facing backwards is smushed and lost details. This happens since day when on this printer. The .4 nozzle wasn’t that obvious but i was also struggling with failed print ALWAYS on the right side.

I will print this monster again but change the orientation 180°. So if i get the support problems again but on the other side, im 100% sure its not config related, but a printer issue. especially because i had this right side issue since the beginning, but not as print-breaking as with the .2 nozzle. the .4 was more forgiving, but i always had breakage and fails at above 50% print-level and ALWAYS on the right side.

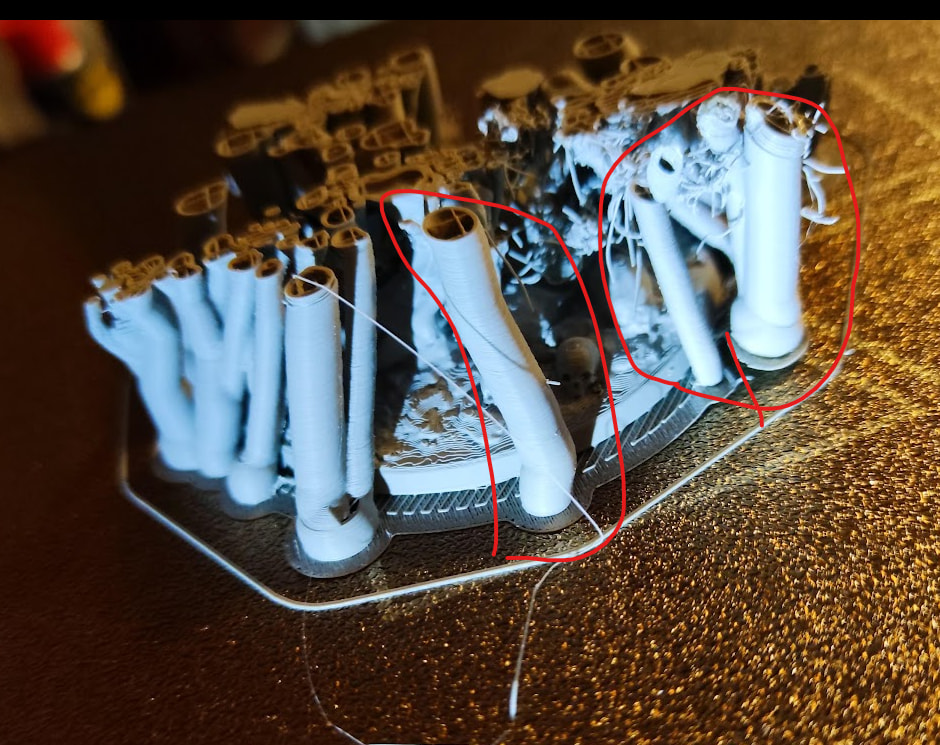
So I had to stop the print, because one of the support trees became loose during the print and caused spaghetti. I will provide pictures later.

This time it happened front with Tree Organic Rectilinier Grid and it’s kinda different, because a Support became lose. The question know is how came it lose and what should I change and try next?

Guys, im really lost here and I could really need some advice on what to do next? The printer is not even a month old and I had only problems yet. Where ist the “it just works” philosophy for Bambu products? I’m so ■■■■■■■ lost…

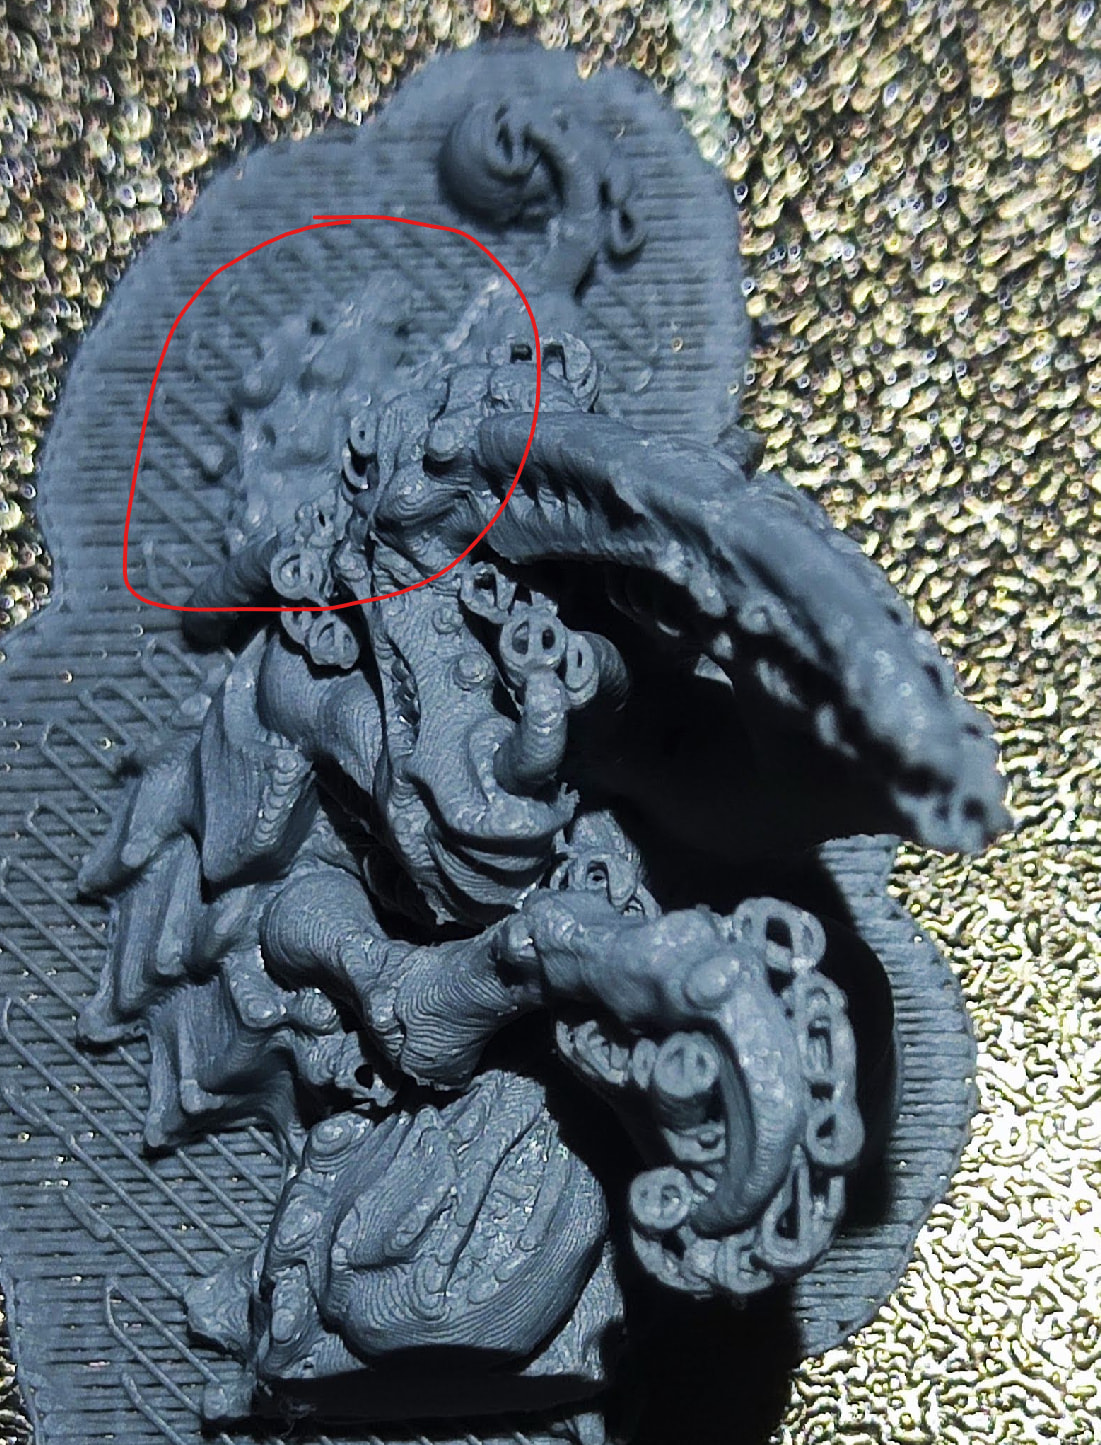
The highlighted area shows a localized brown discoloration exactly at the highest point of the support structure that later failed. This makes me wonder if the nozzle may have been repeatedly contacting or reheating that area before the support eventually detached from the bed. If this is the case, how can i prevent it?

this shows the once which got knocked loose and the right one is the one with those strange brown markings.

I’ve been printing miniatures for ages, and something immediately caught my eye: Do you use a textured print plate? If so, you should definitely get a smooth plate right away. It makes a huge difference, especially with miniatures, because of the fragile support.

By the way, I’m familiar with the Resin2FDM approach. Don’t let it confuse you if some people aren’t familiar with it. Most people think of resin printers and aren’t familiar with this tool, which was developed specifically for FDM.


That said, I’ve since stopped using that tool myself. The same goes for tree support in Bambu Studio: For miniatures, I now use almost exclusively regular support - yes, really. Why? Because if you’re going to paint the miniatures anyway, it doesn’t make any difference. Instead, I just adjust the orientation and mark the spots on the model myself where the support should be.


However, I’m not saying that one approach or the other is better. With Resin2FDM, you can achieve outstanding results on Bambu printers - no question about it; the tool is a masterpiece, even though I don’t use it anymore.


My journey with miniatures went like this: First, I used the profiles from FatDragon, who is truly a master at creating profiles for miniatures and Bambu and is known worldwide for it. Then came the tool you described, which I used to really achieve that last bit of quality - only to eventually reset everything to default and create my own settings: focused on the basics, because I realized that once they’re painted, you can hardly tell the difference.


If you need help, please briefly summarize the current situation and what you need help with; I’ll keep an eye on the topic and will be happy to help. :+1:


Here’s what you can do for now: Run a calibration - it’ll take about 15 minutes - and then post a photo of it. If you want to push your printer to its limits, everything should be calibrated.

Thank you for taking your time with me.

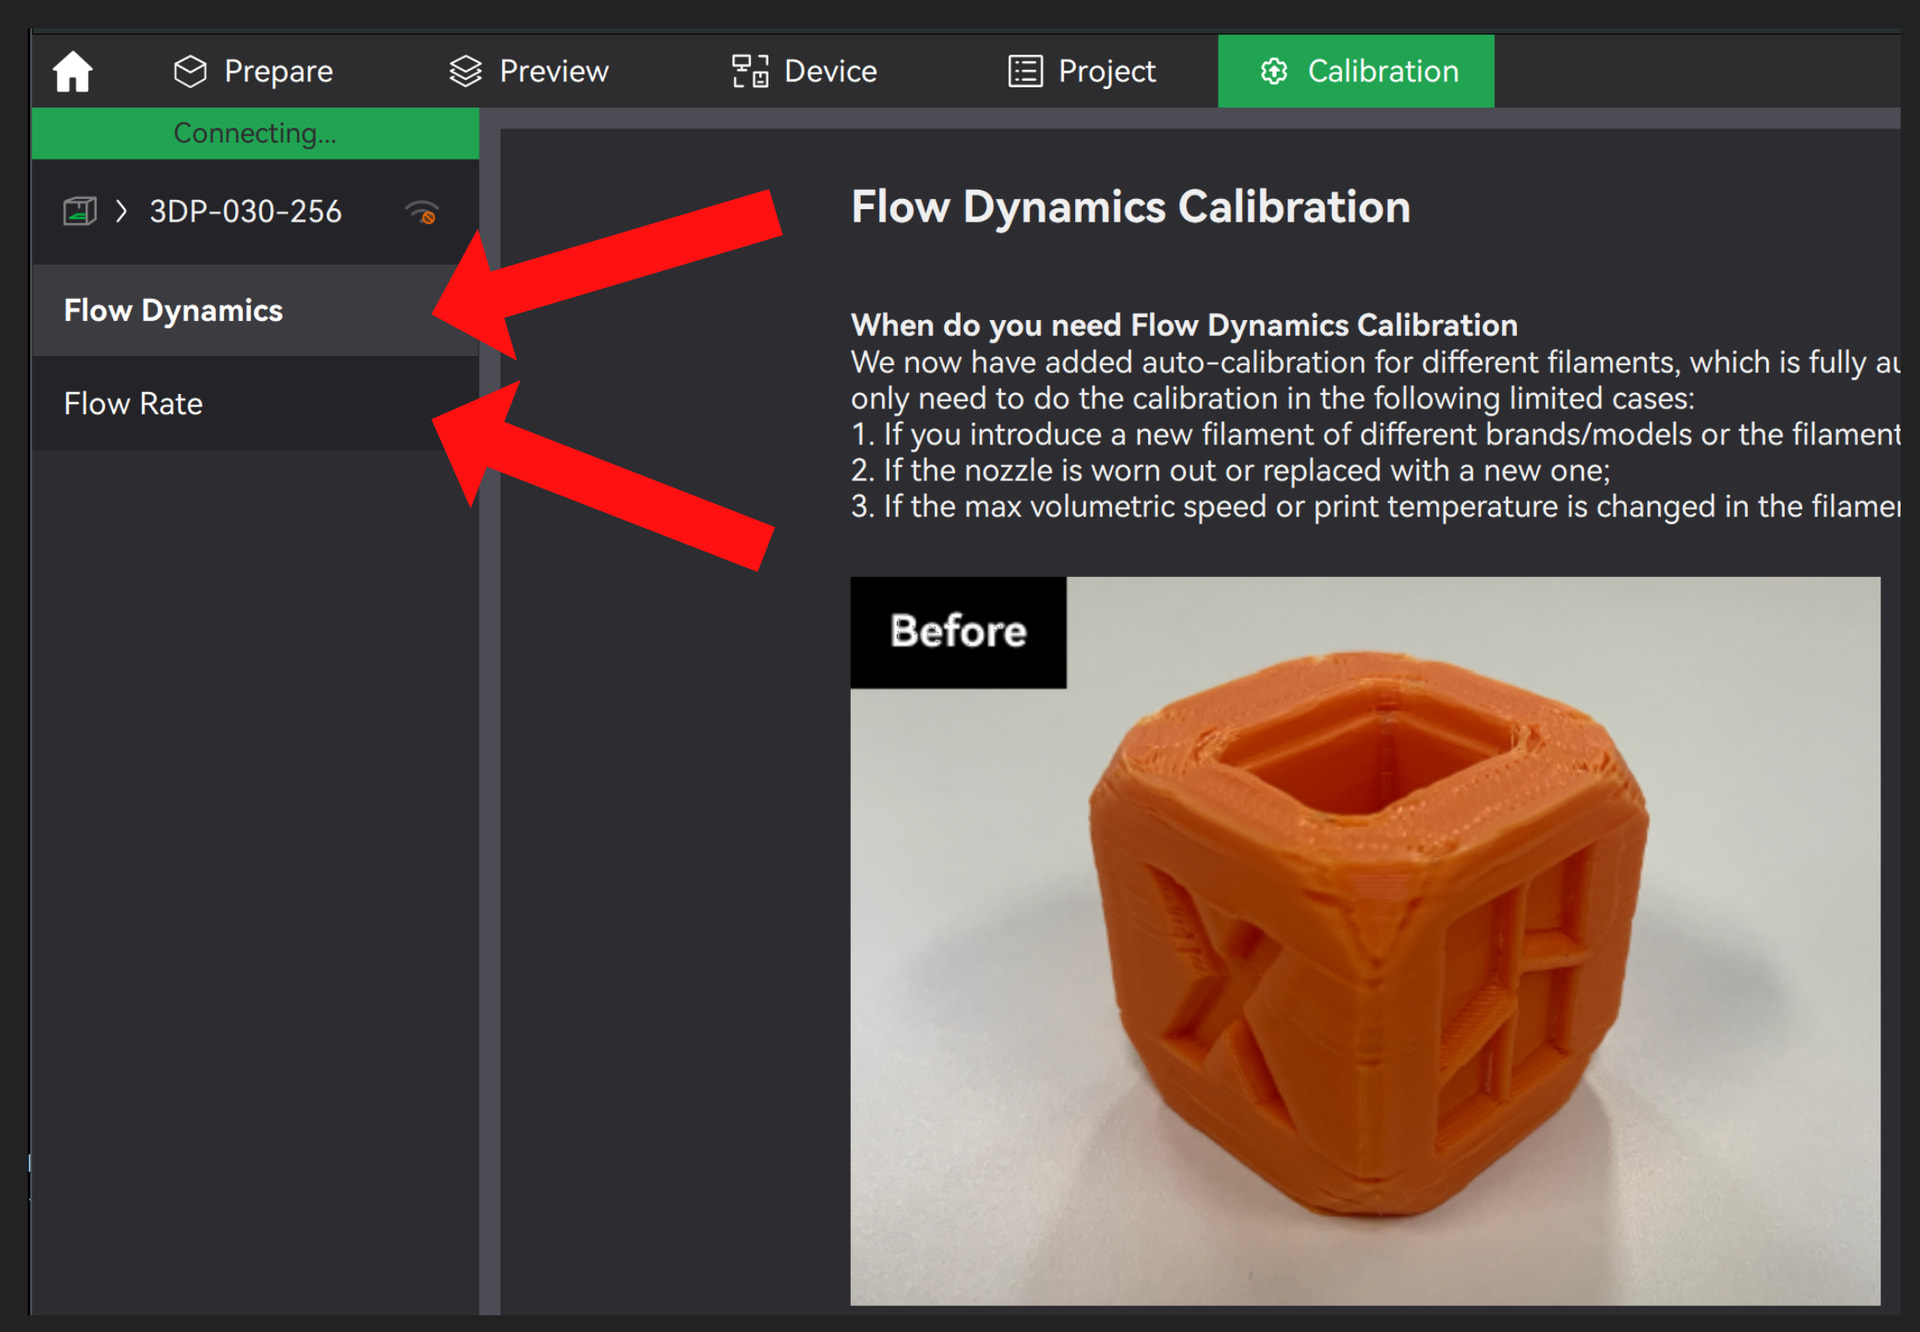
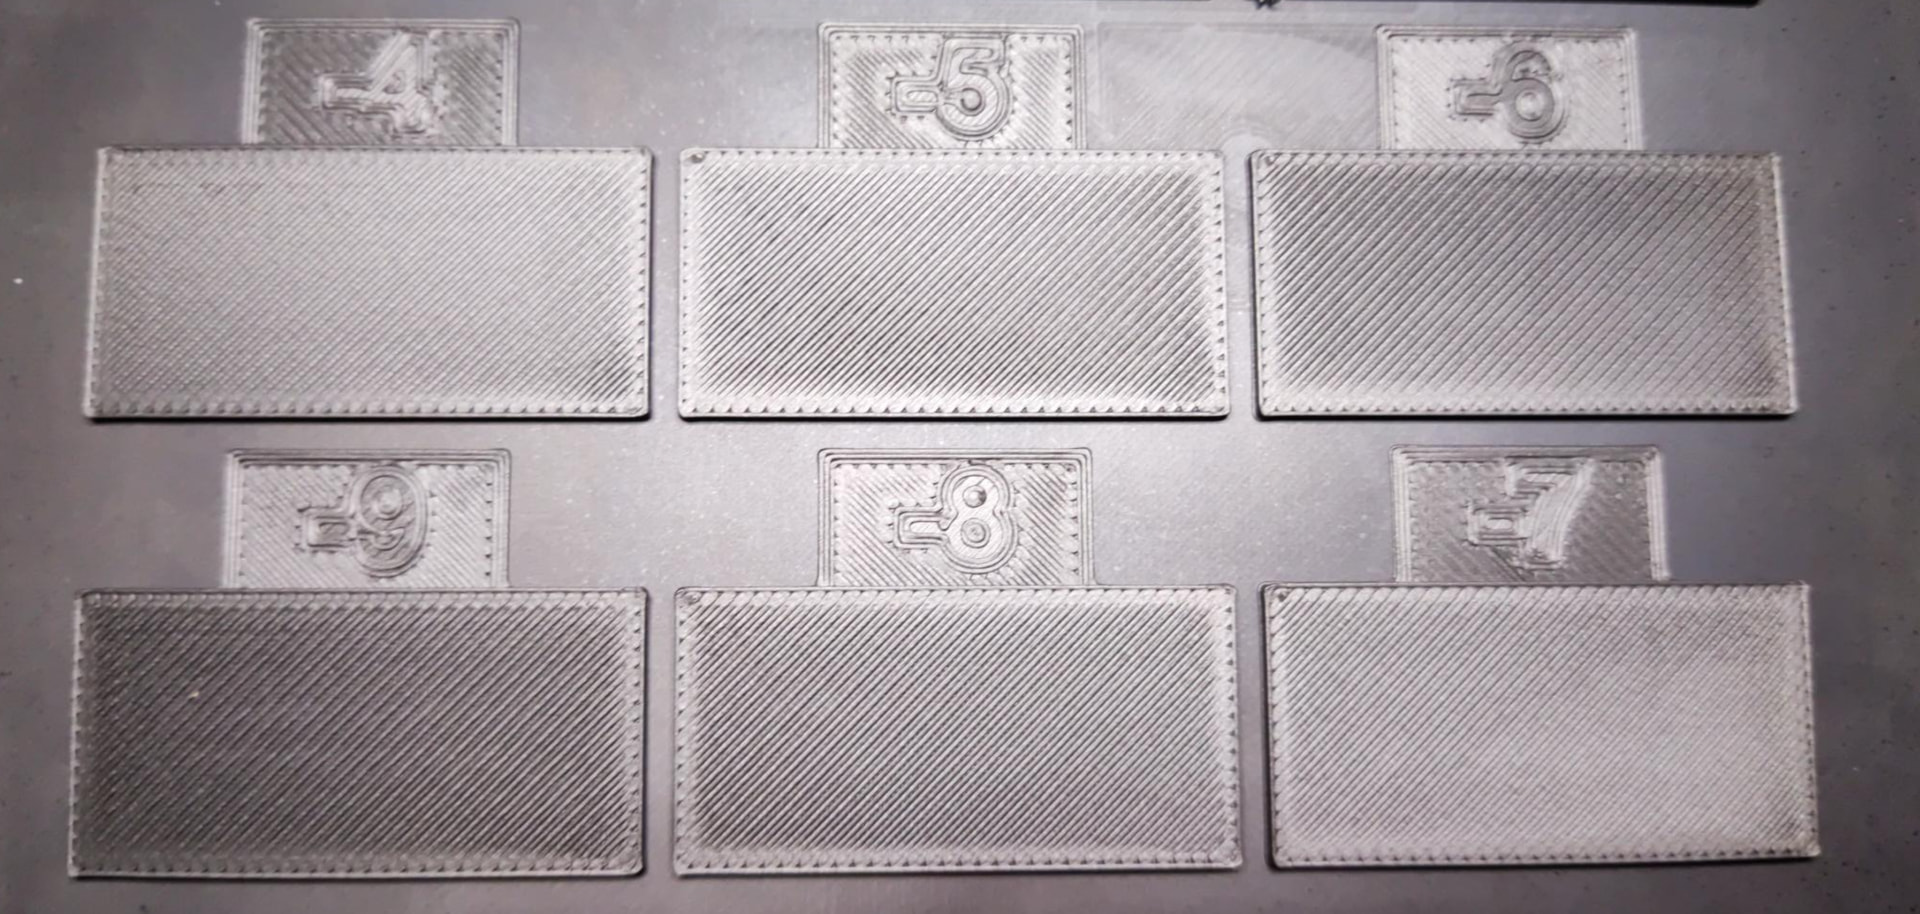
The last 2 days a run full calibrations and test on my printer, guided by the videos of ObscuraNox. I did a temp tower and the ideal temp was 205°C, i did a Flow Ratio Calibration and the best plate was “01” i did a pressure advance test and the best line was the .175 I did setup my profiles.

Then I tested prints with the Profiles of HOHansen and ObscuraNox. I tested their support profiles and added one of Terminus Bandit. I also tryied the FDG profiles. I found some support issues in Bambu Studio (Support Interface was not poperly created which caused several prints to melt with their supports). I switched to Orca Slicer and that helped alot with the Support Interface Problem.

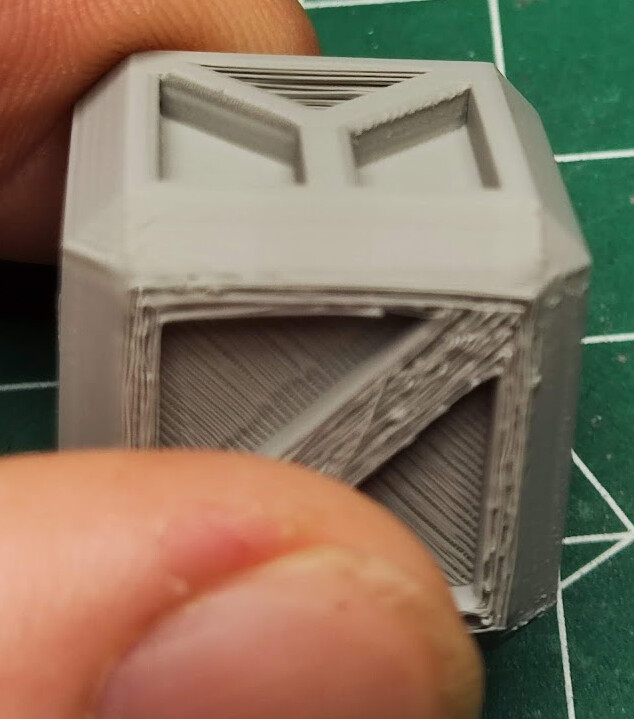
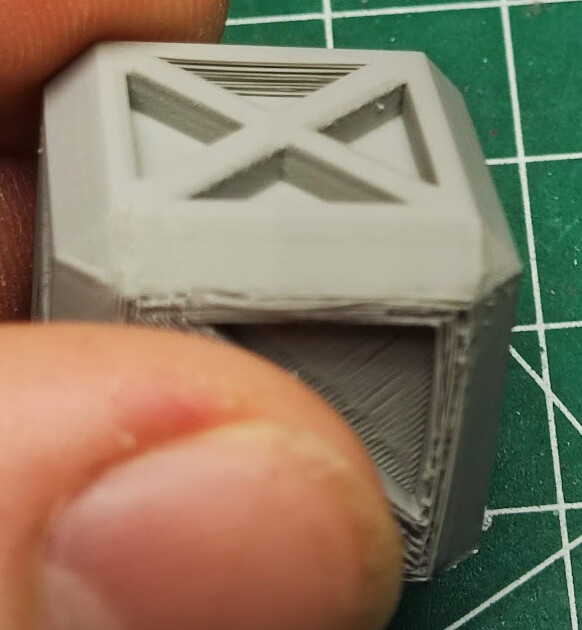
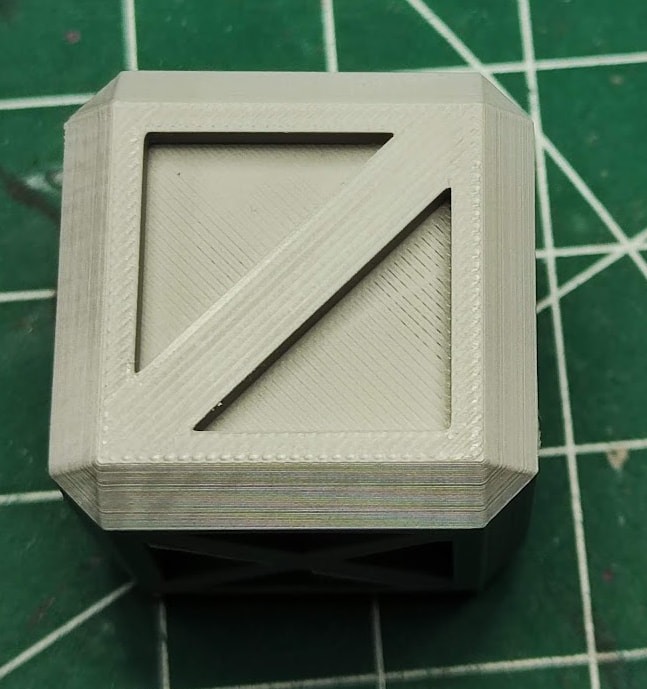
This is my calibration cube:

The cube looks ok, but all the bridges are an absolut disaster and its not comparable to the other printers I tested at a friends. Even his Ender3 manages the bridges better than mine. This print was done with a bridge speed of 30mm/s and a bridging/internal bridging flow ratio of 0.9

Right now I’m printing a benchmark mini (skeleton with sword an shield, which doesnt need support). Because of the 0.2 nozzle and my 0.06 profile everything takes a while. I will post an update as soon is I have one

Yeah, I’m familiar with those two profiles, but they really push your printer to its limits - almost beyond them. Everything has to be perfect: the filament has to be dry, ideally you should use a smooth print plate, and the room where the printer is set up should be draft-free, quality filament, clean nozzle, etc.

It’s not unusual for these profiles to fail from time to time.

Looking at your calibration cube now, I suspect that it doesn’t make sense at this point to use such demanding profiles when the foundation isn’t in place yet.


I think - and this is just a guess - that with all the adjustments, different profiles, and different calibrations from various sources, you might have tweaked so many settings by now that you’ve lost sight of the big picture?

Can your printer actually print just a regular cube at all - without errors - and without any special profiles? Is your printer even capable of printing properly, setting aside the topic of miniatures for a moment?


The reason I’m asking this, and why it’s so important, is so that you don’t spend weeks trying to find the problem, only to discover: ‘Oh well, it’s just bad luck - got a bad spool of filament, or it was moist, or 0.2 nozzle was faulty even though it was new.’

You won’t believe how often we’ve seen this happen - users getting lost in all the settings until they realize: the nozzle is defective, the filament is bad, the extruder is dirty…

You said it yourself: your calibration cube is far from acceptable. Maybe it’s time to really start from scratch - a complete reset - and just print a plain old cube to see if your printer can still handle it.