I’m relatively new to 3d printing but have had no difficulties with the hardware or software up until now.
I recently designed a model which features a raised triangular shape with a sharp point, with a very small interior angle.
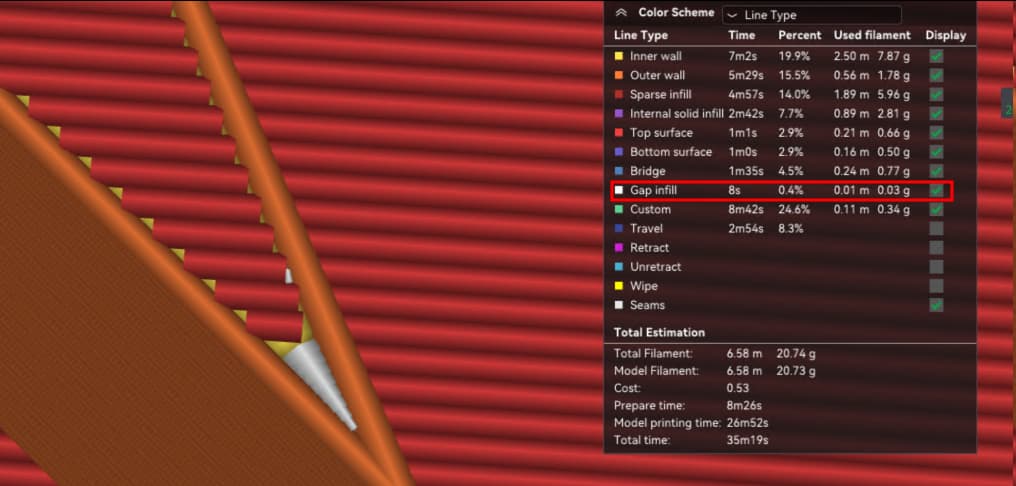
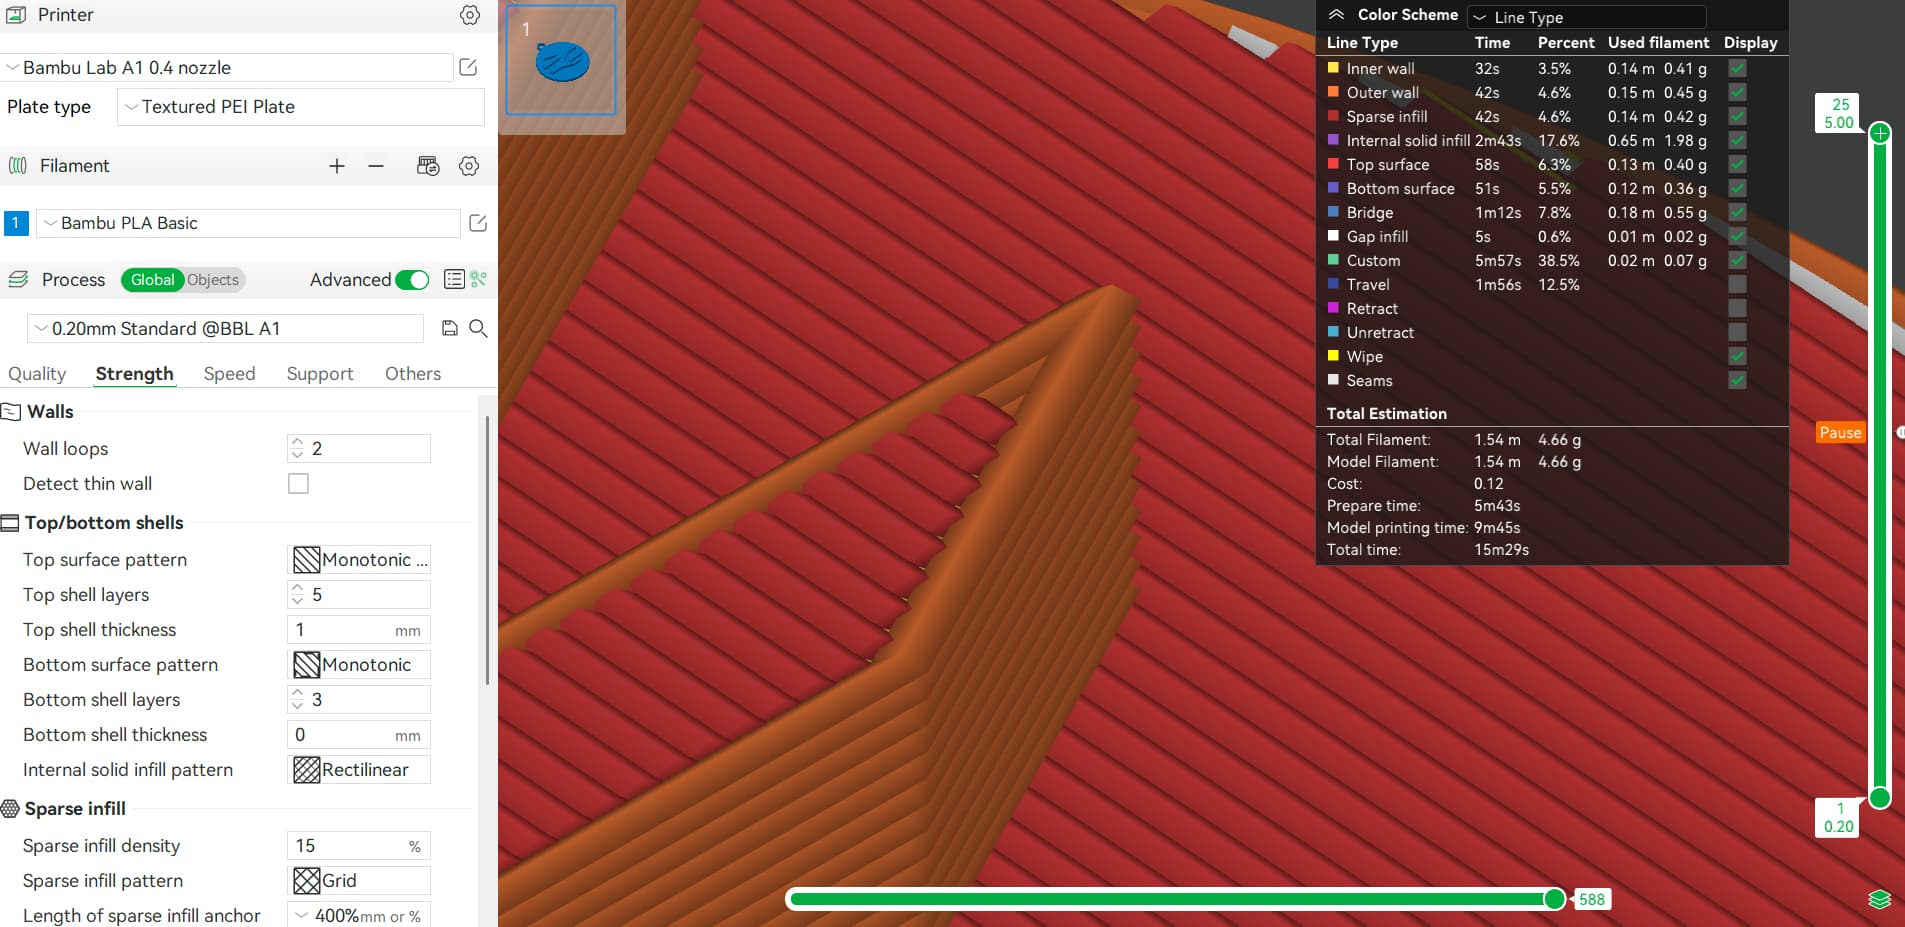
My problem arises with the top layer not filling in the entirety of the corner of the triangle, it leaves a small gap around 1mm long. This problem is difficult to picture in person so ill attach a screenshot of the slicer to show where it’s not filling in the top layer.
I tried adjusting settings, such as thickness of the top layer, and this did work to an extent but is not ideal as then it changes the ENTIRE top layer thickness which is not suitable or wanted in this project of mine.
Is there a setting or feature that allows me to tell the slicer that I want a specific section of the top layer
to be filled in, or make the print lines thinner for a specific section of a layer?
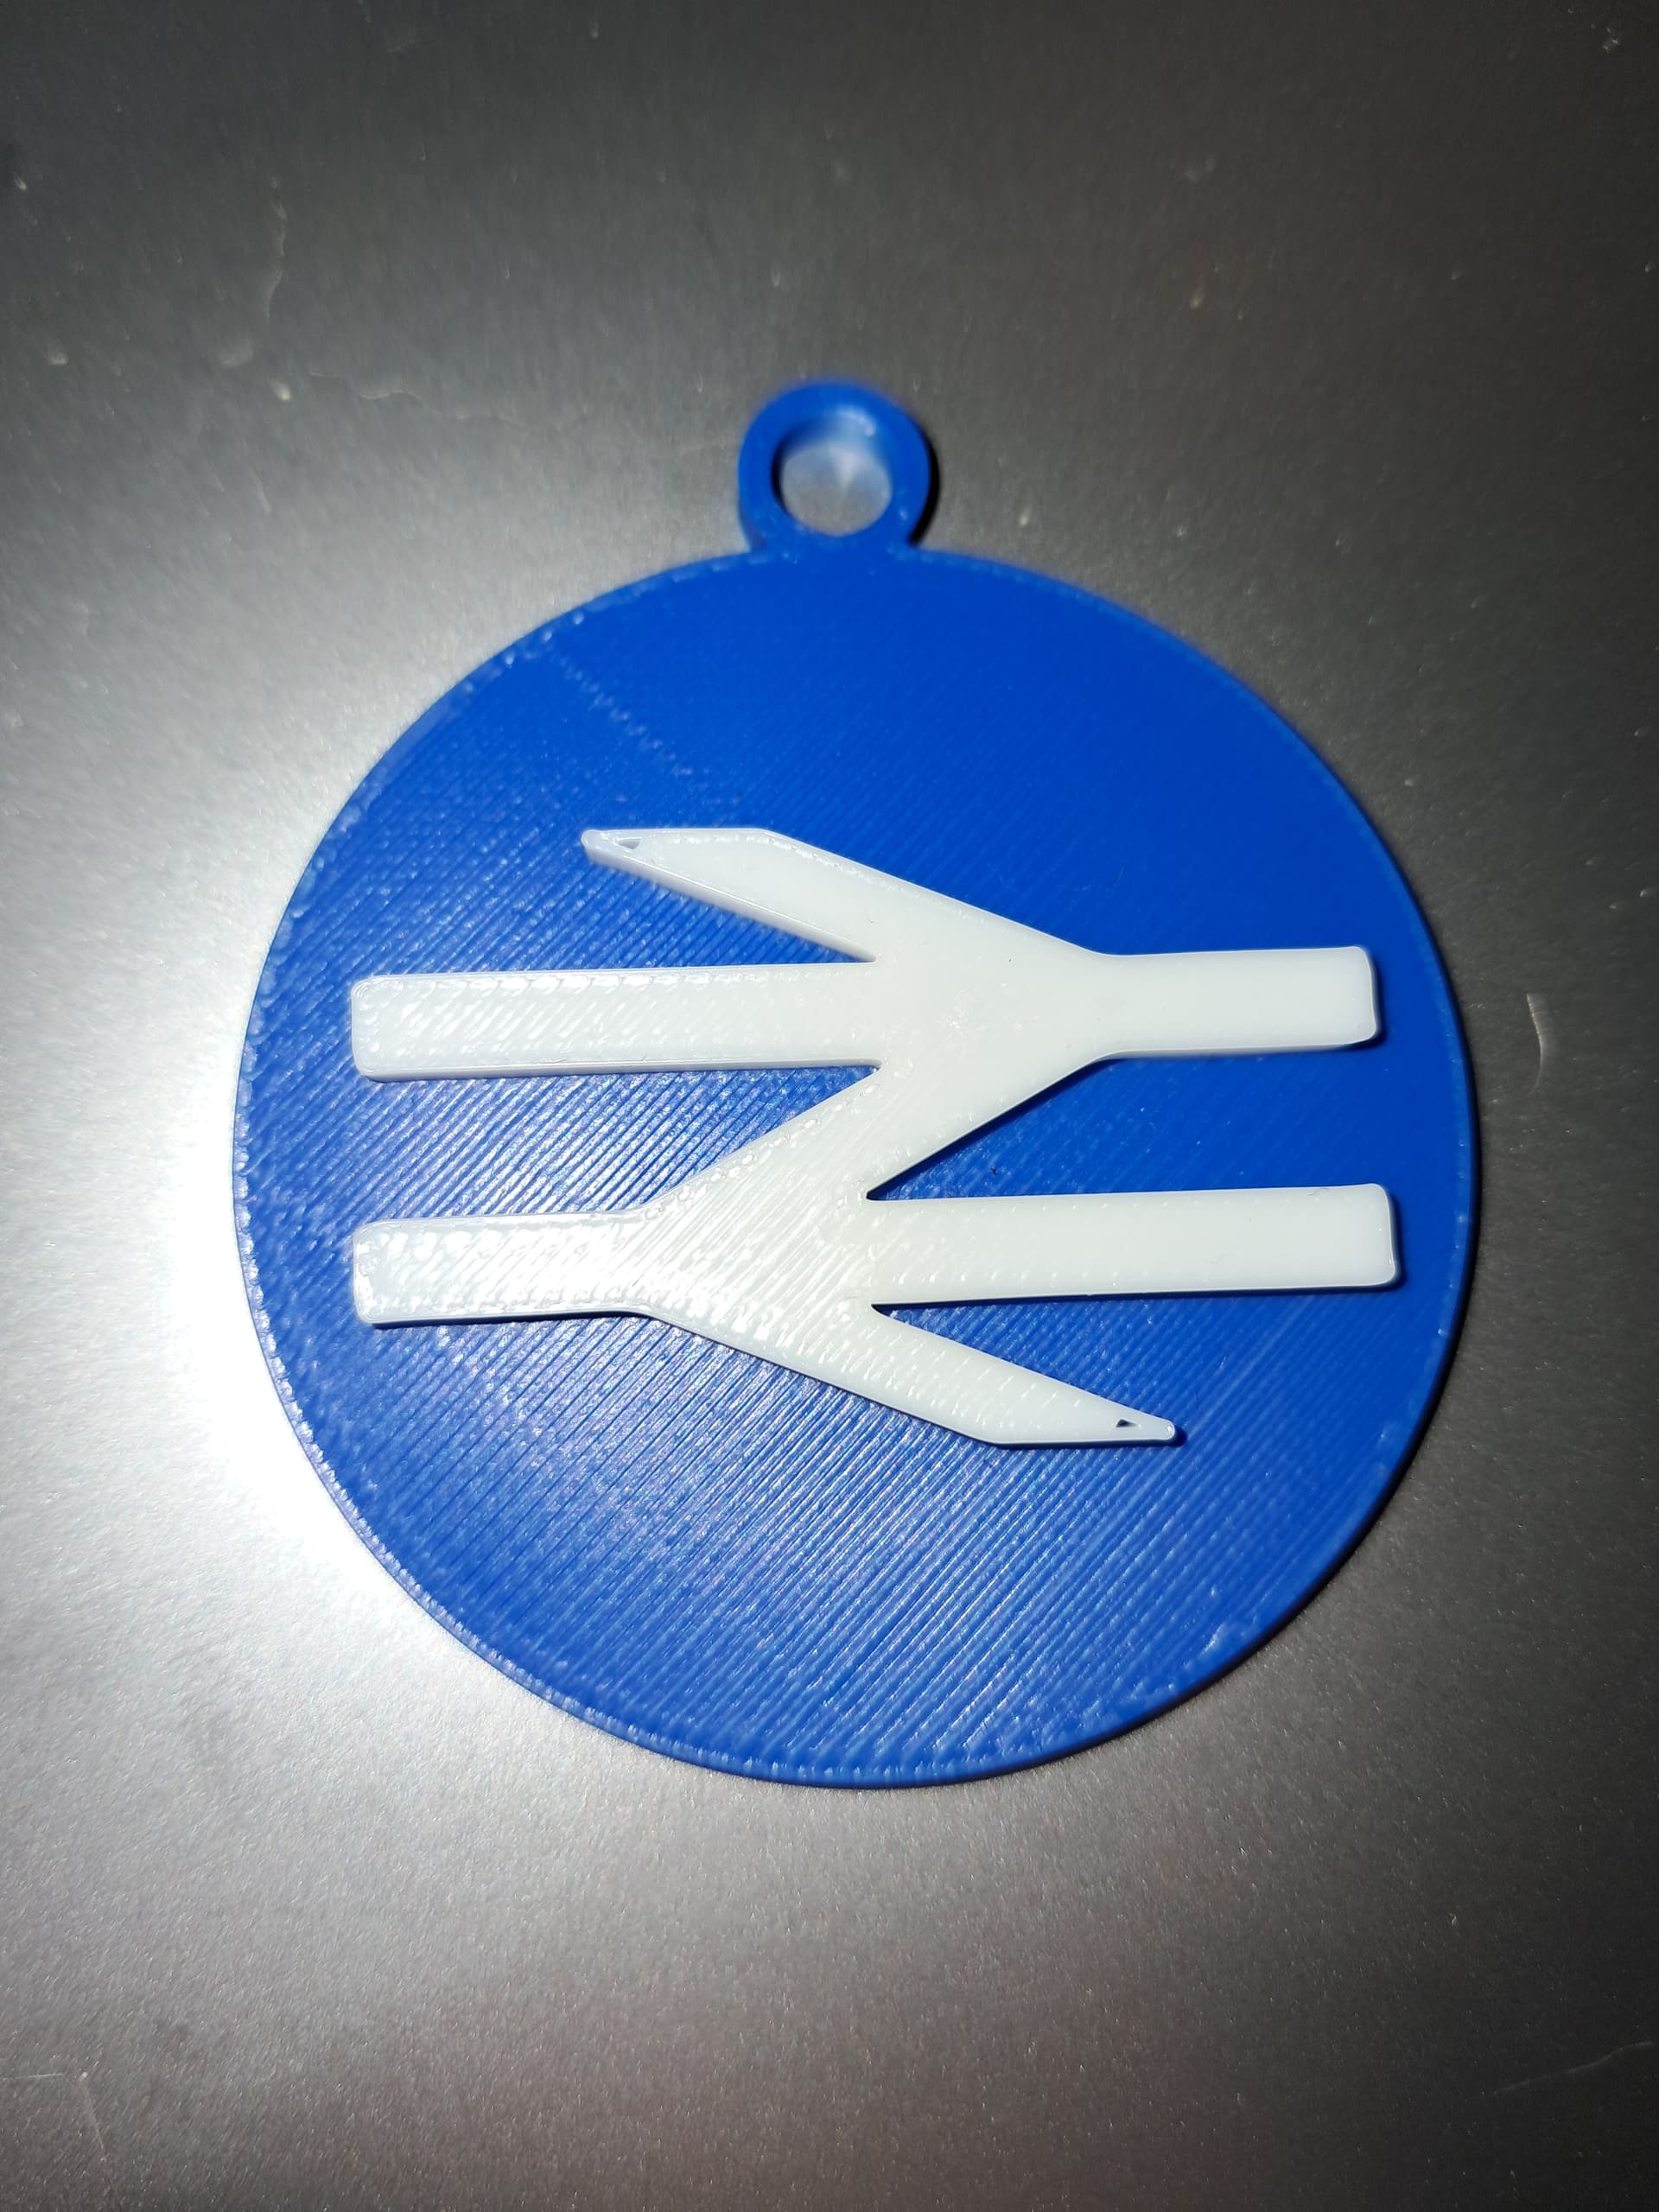
Are you seeing a gap there on the final printed part?
The slicer by default will try to fill gaps and it’s interesting to not see that in your screenshot. If you look at mine, you’ll see the white area that represents gap fill.
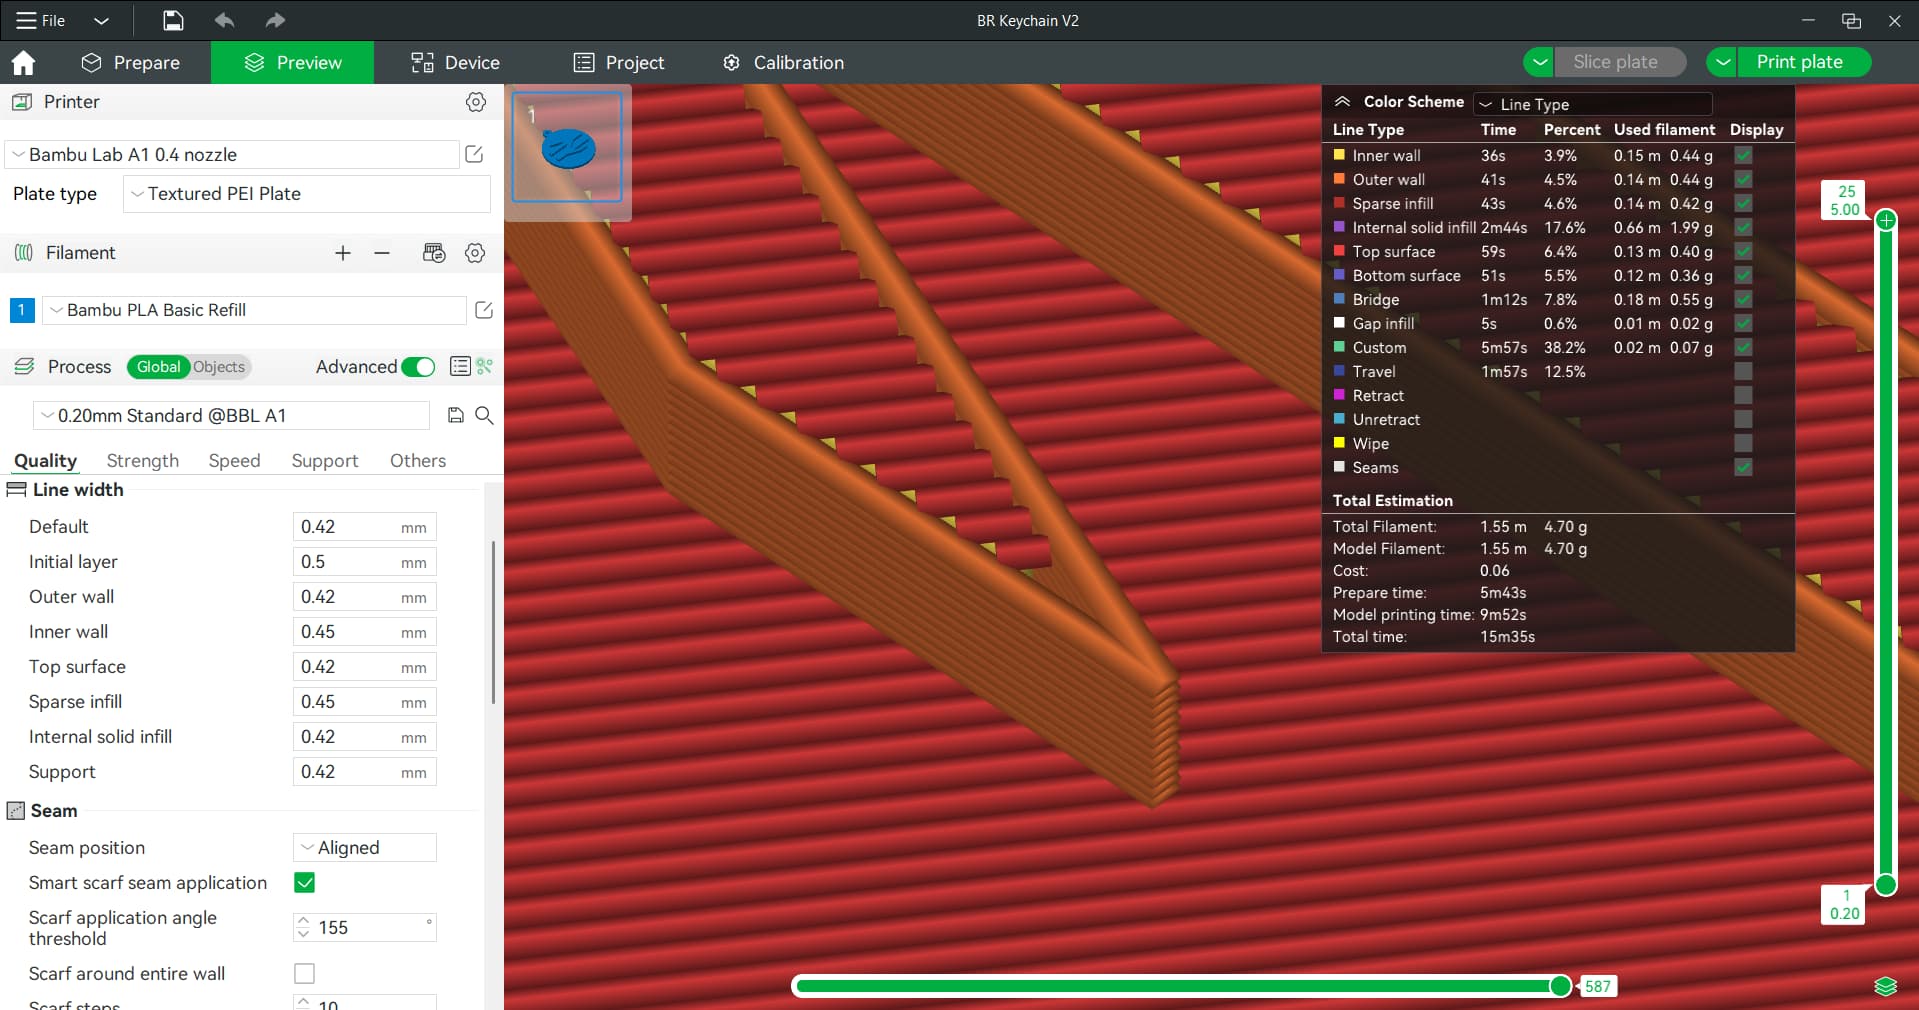
The Arachne wall generator might work better than Classic for this model. Also, you will get different results depending on how the model is rotated on the plate.
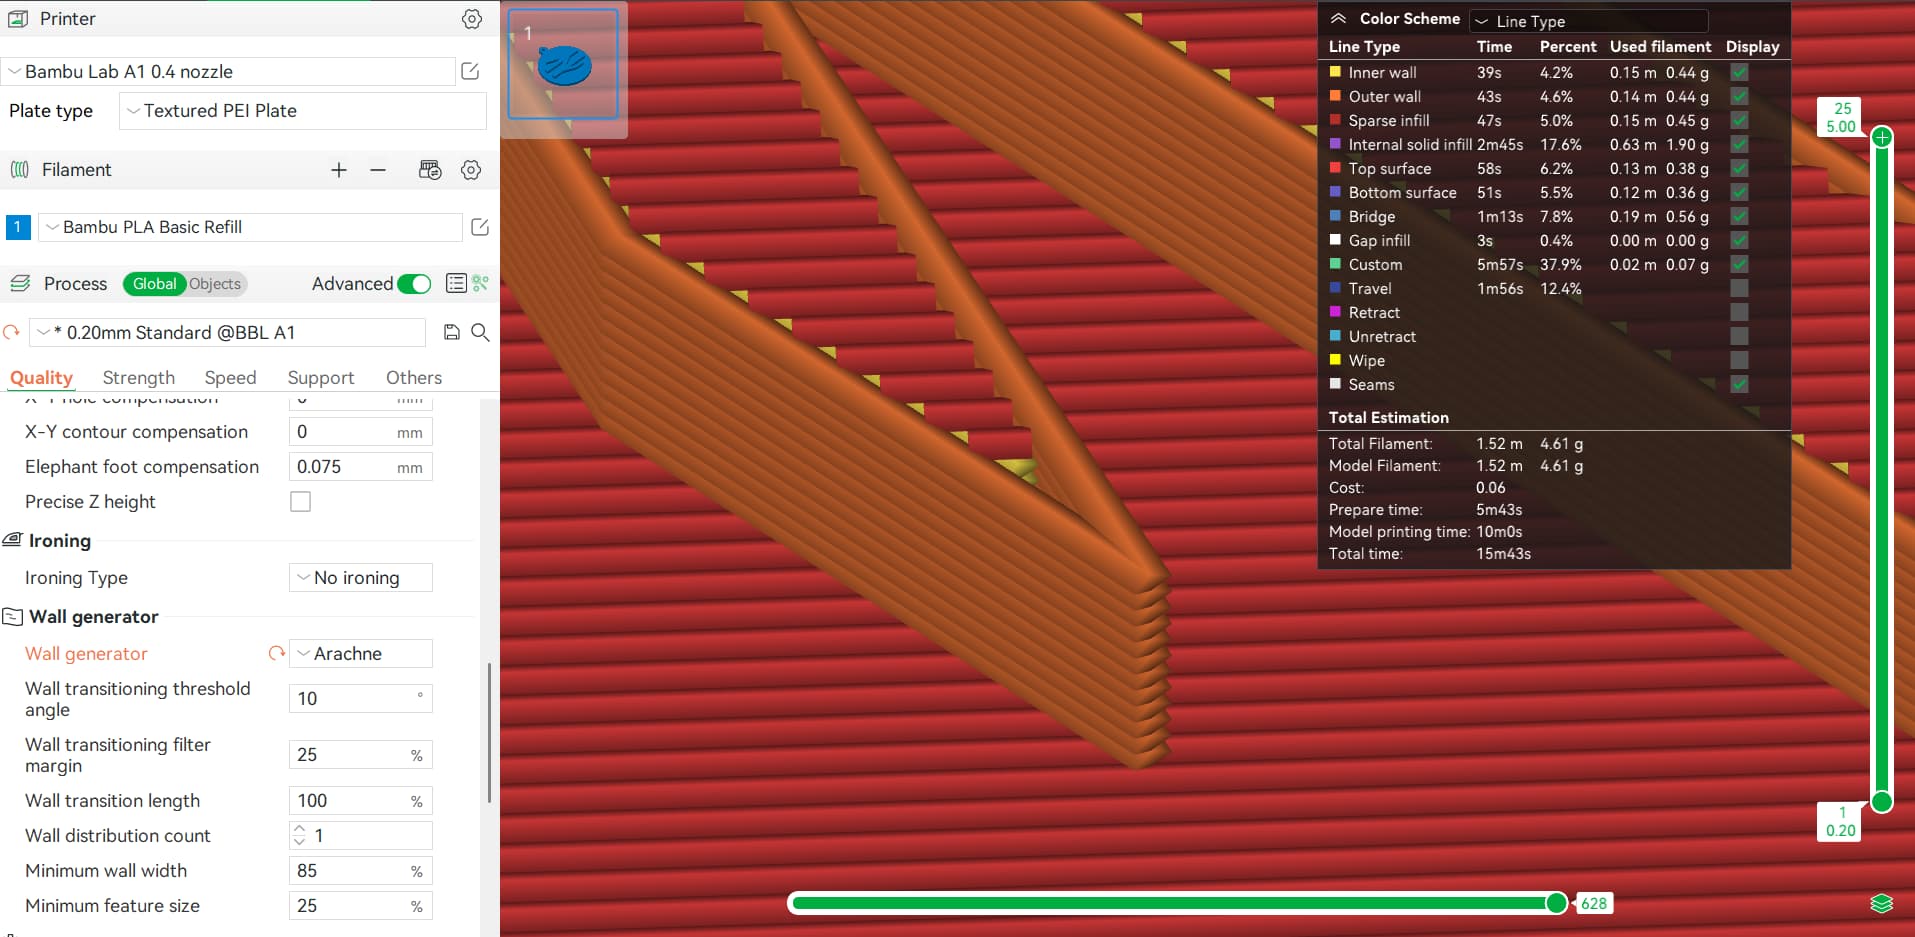
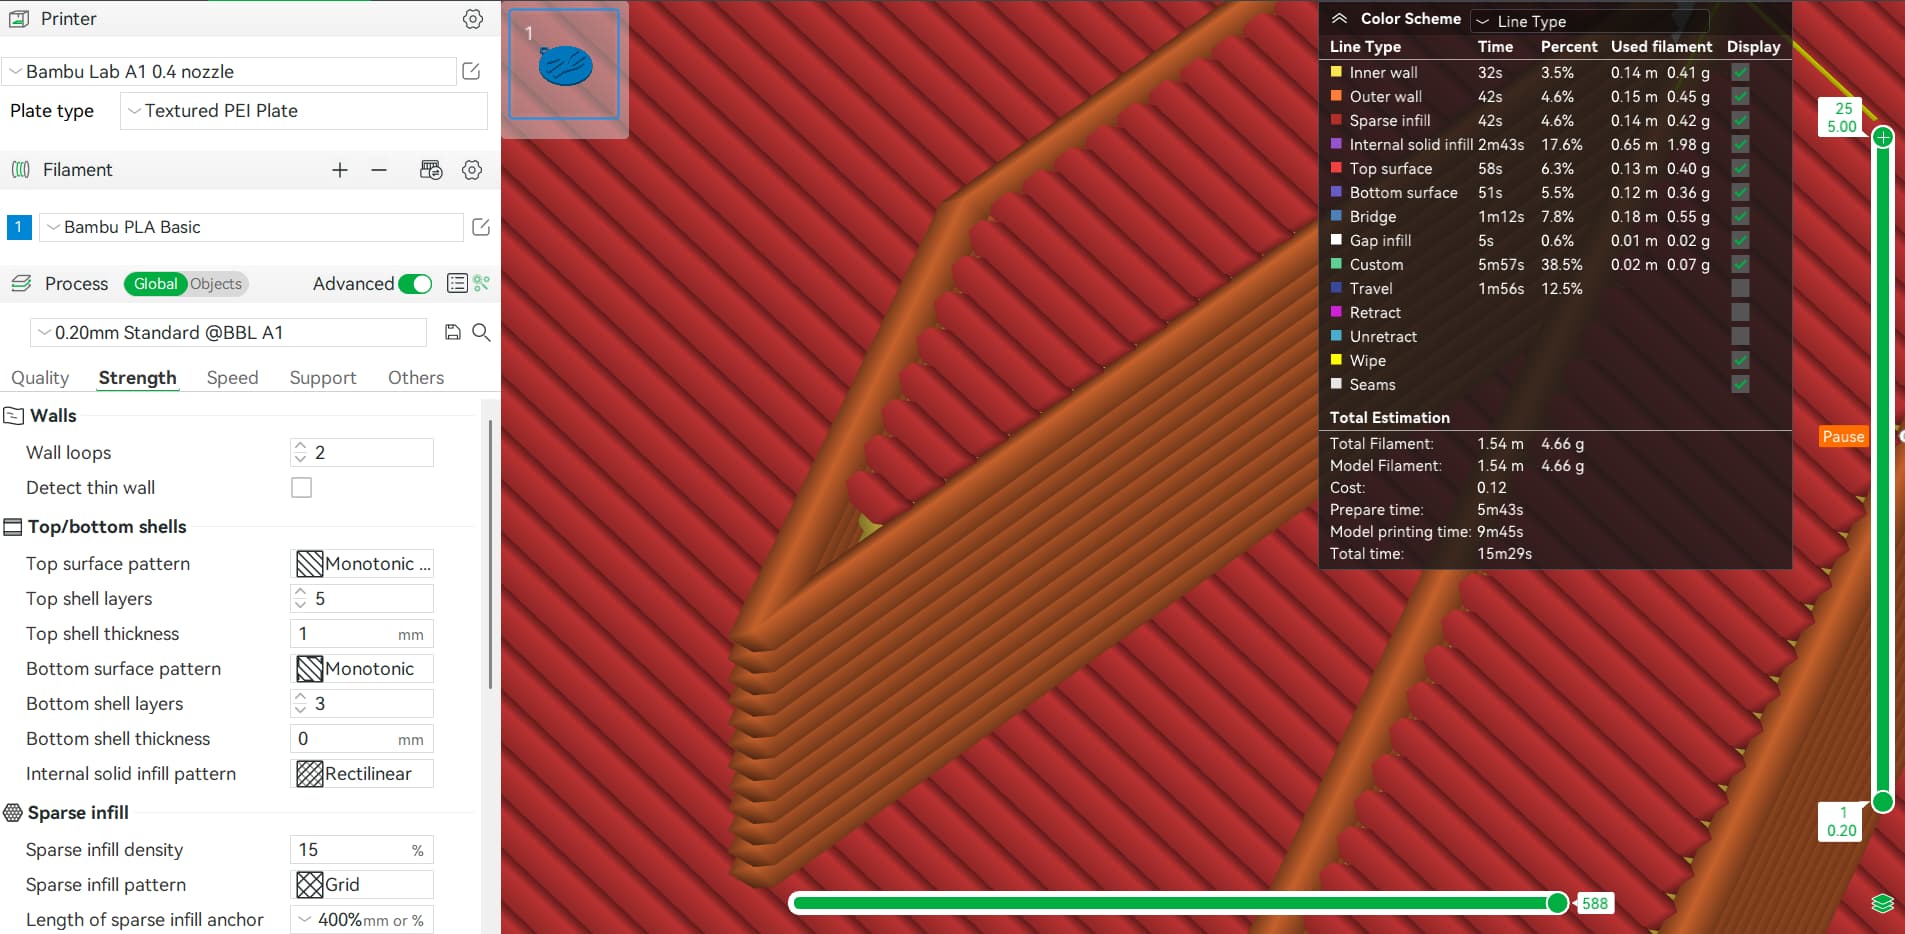
Yes there’s a clear gap on the printed part which also shows on the slicer. There are other gaps in the piece that the slicer has correctly used “Gap infill”, but it seems to be absent in this specific part of the model. I resliced everything with the basic default settings just to make sure but i still had the same issue occur. I’ll include a more detailed screenshot, perhaps I’ve made an obvious mistake in the process or settings.
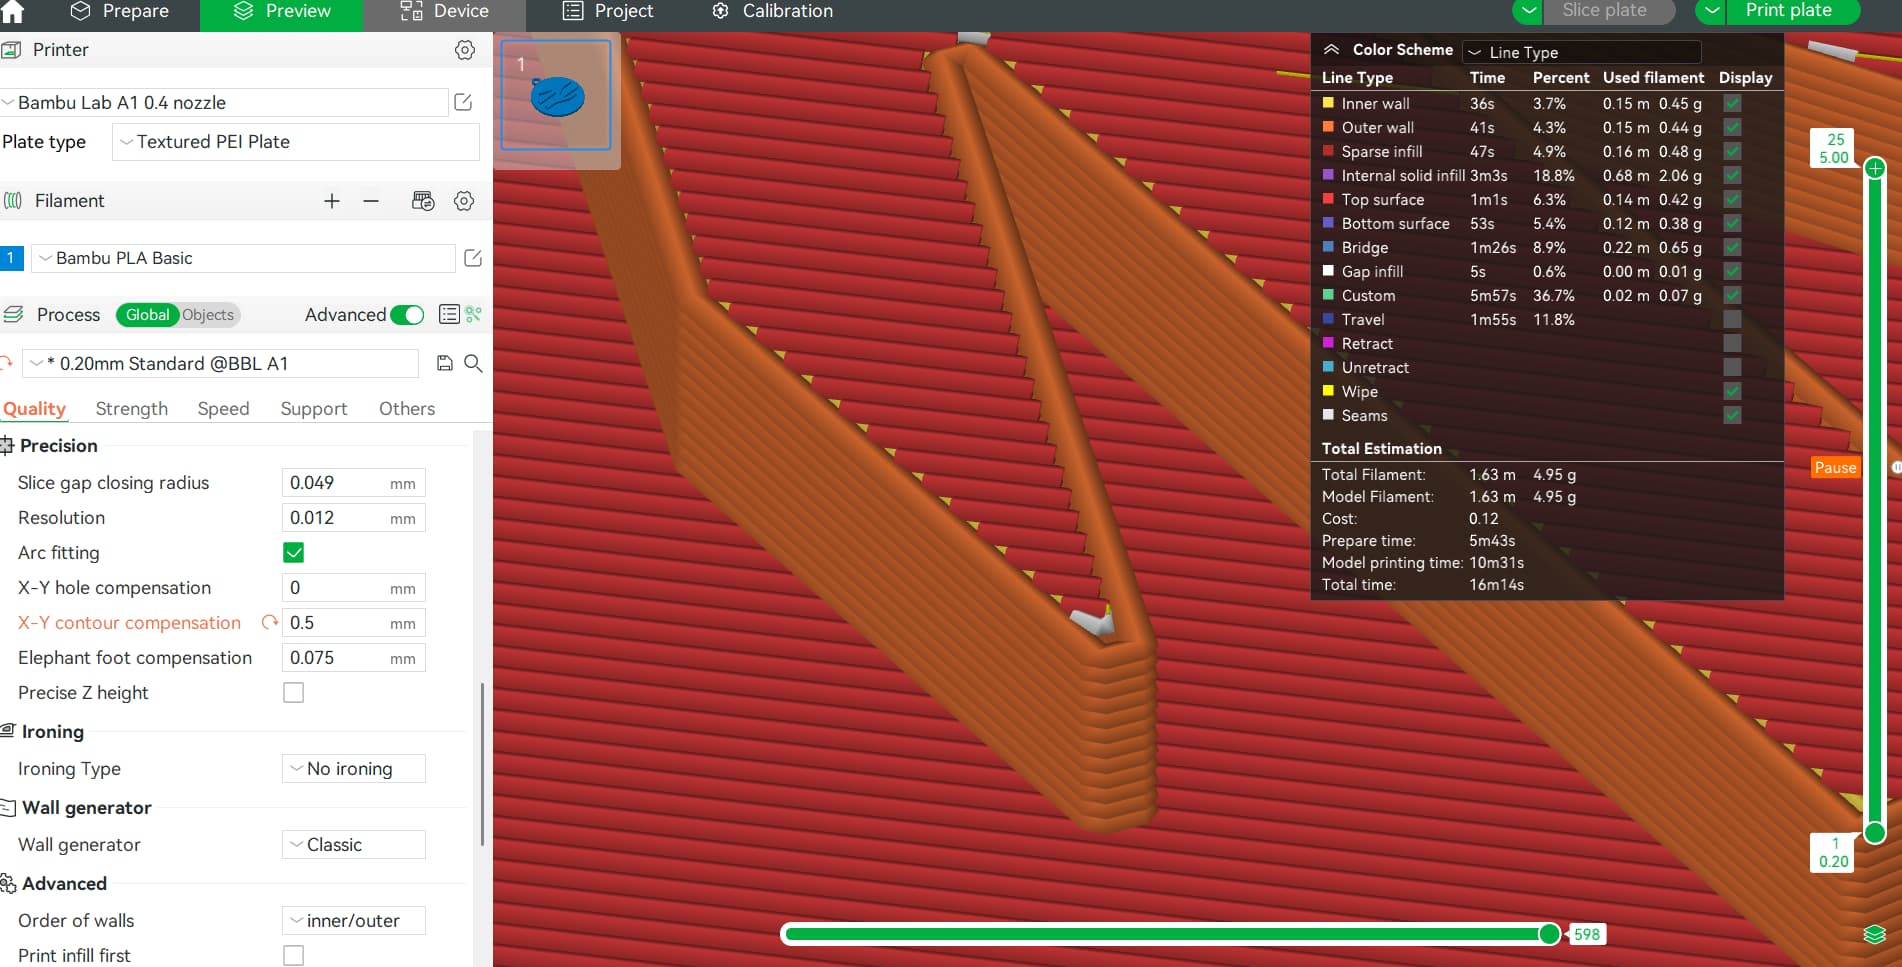
I just resliced the model with the Arachne wall generator as opposed to classic. I spotted some minor differences but a gap still seems visible, and I am yet to print the model to find out but when I do I’ll note the differences.
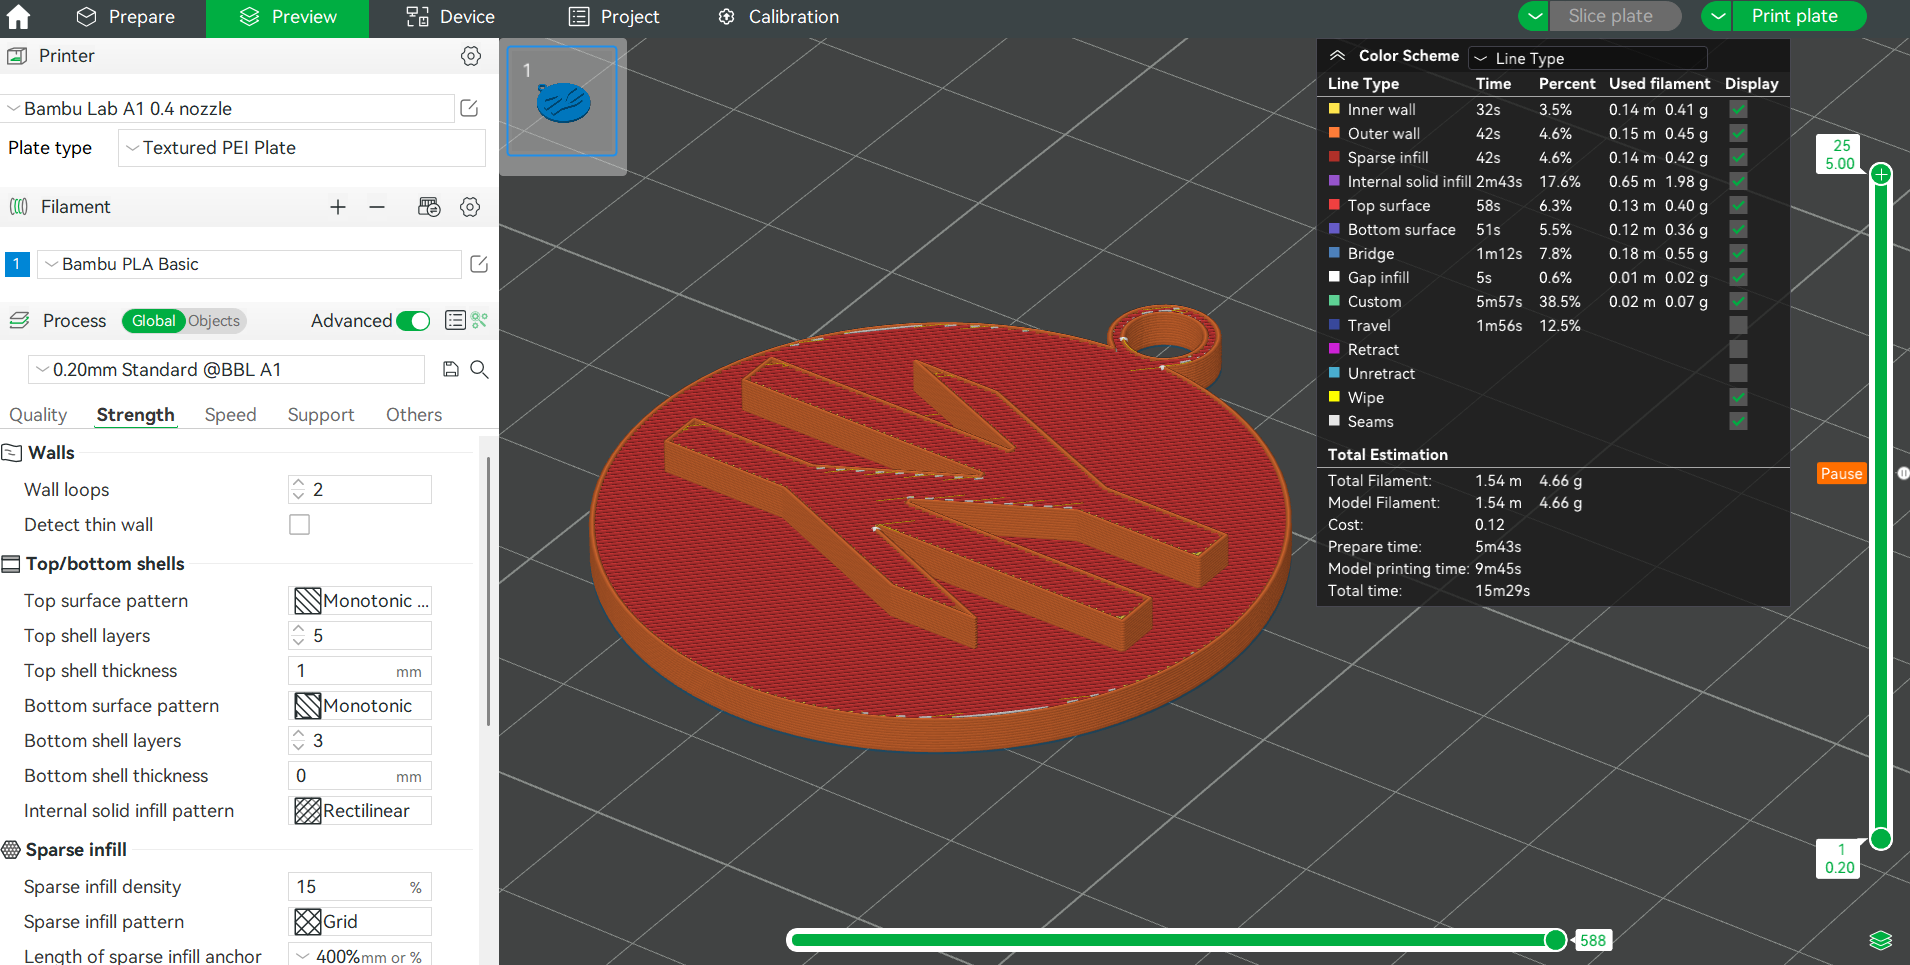
There might be a better way to do it, but you can reorient the top layer lines if you rotate the part. Play around with that and see if it closes the gap.
I didn’t even notice the gap on the slicer until after printing, which upon inspection of the print I noticed the gap in the model. I’ve never encountered this issue before with similar parts either, which is why I wondered if it was a setting on the slicer that needs changing.
This definitely seems to fix the problem, at the cost of adjusting the dimensions of the part. See the image shows each dimension is slightly larger, so the point is now slightly wider. Definitely a suitable fix for this part in particular where dimensions and scale can vary without affecting the functionality of the part, thank you.