To start I have an A1. I am using Grey Sunlu PLA Matte. I started using the stock software settings for Bambu PLA Matte. I am printing a 6" by 6" by 1/4" base for a modular terrain system. The final product is still functional but I really want to know what is going wrong. There is a lip around the entirety of the top layer or so of the print which is baffling because when I print a different 1" by 1" by 2" cube there is almost zero lip. Also the edges of the base piece try with all their might despite my many protests to curl up off the build plate.
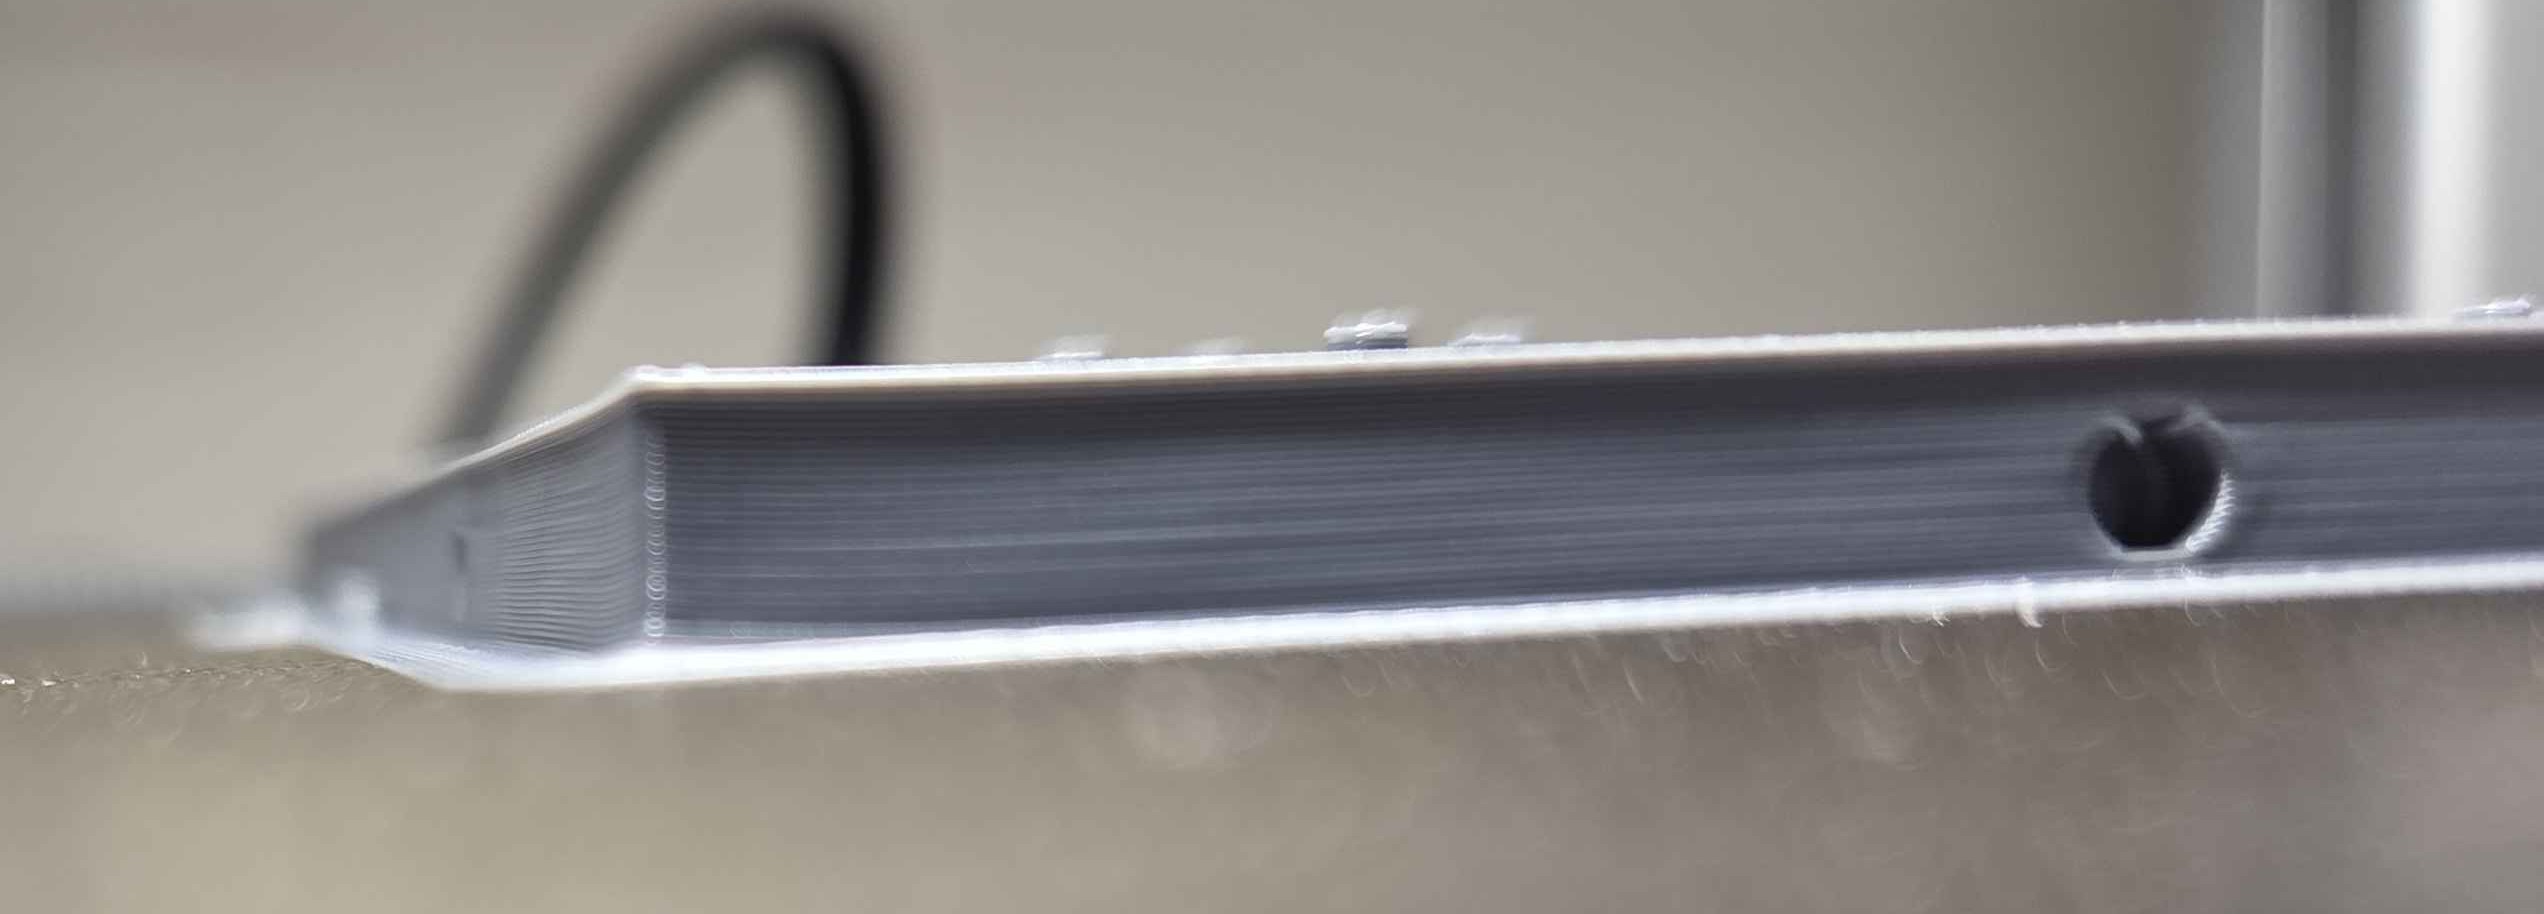
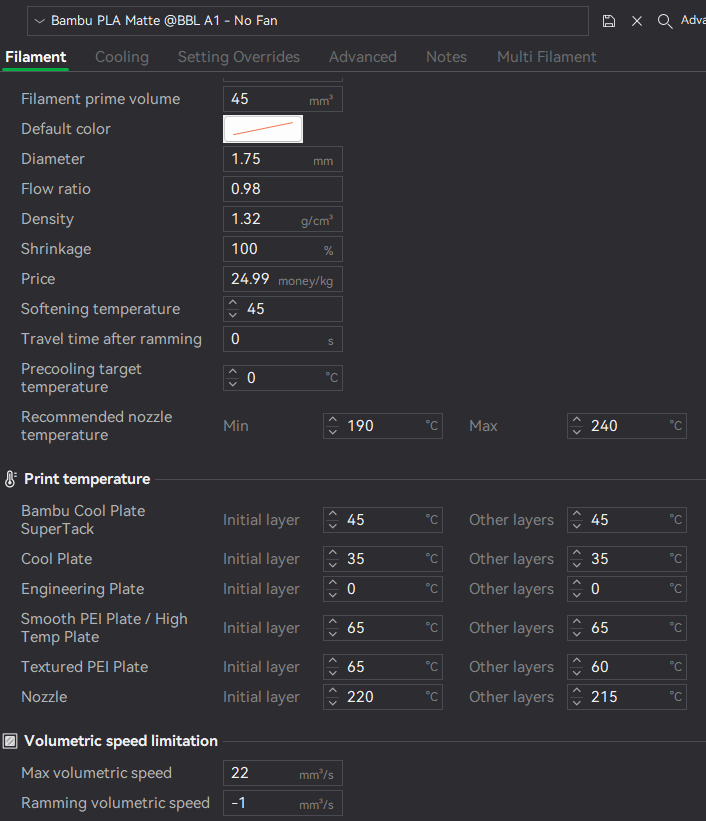
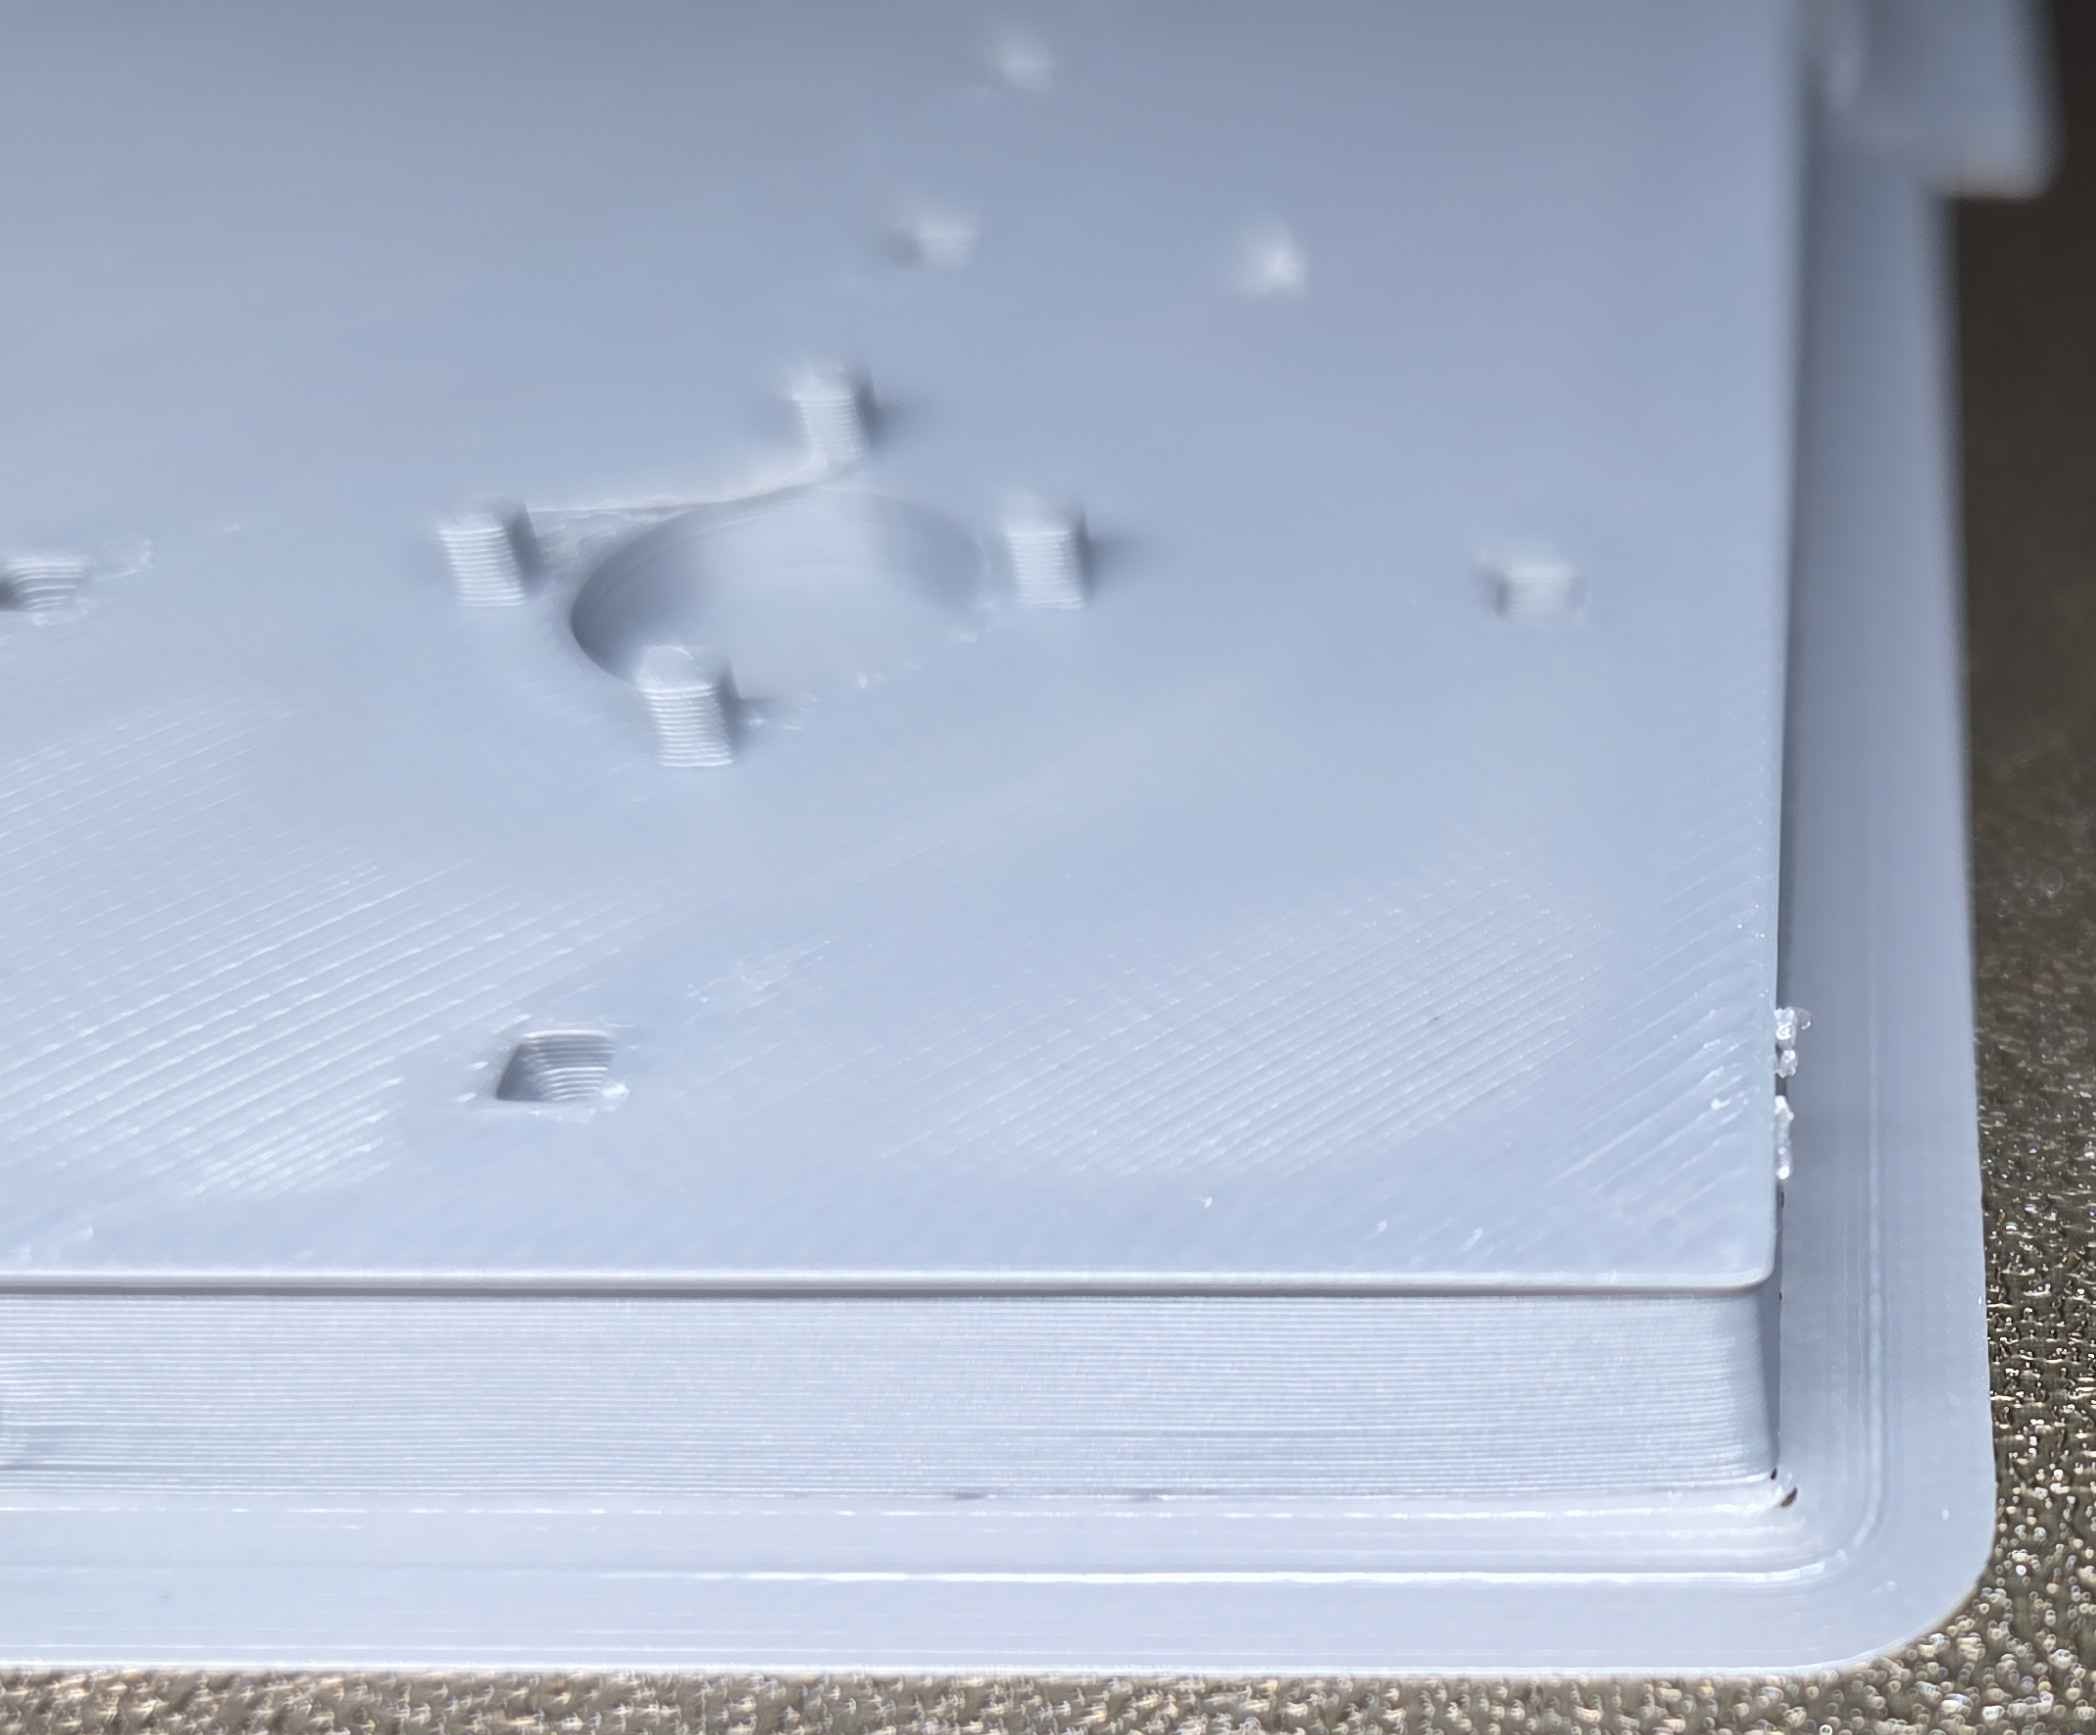
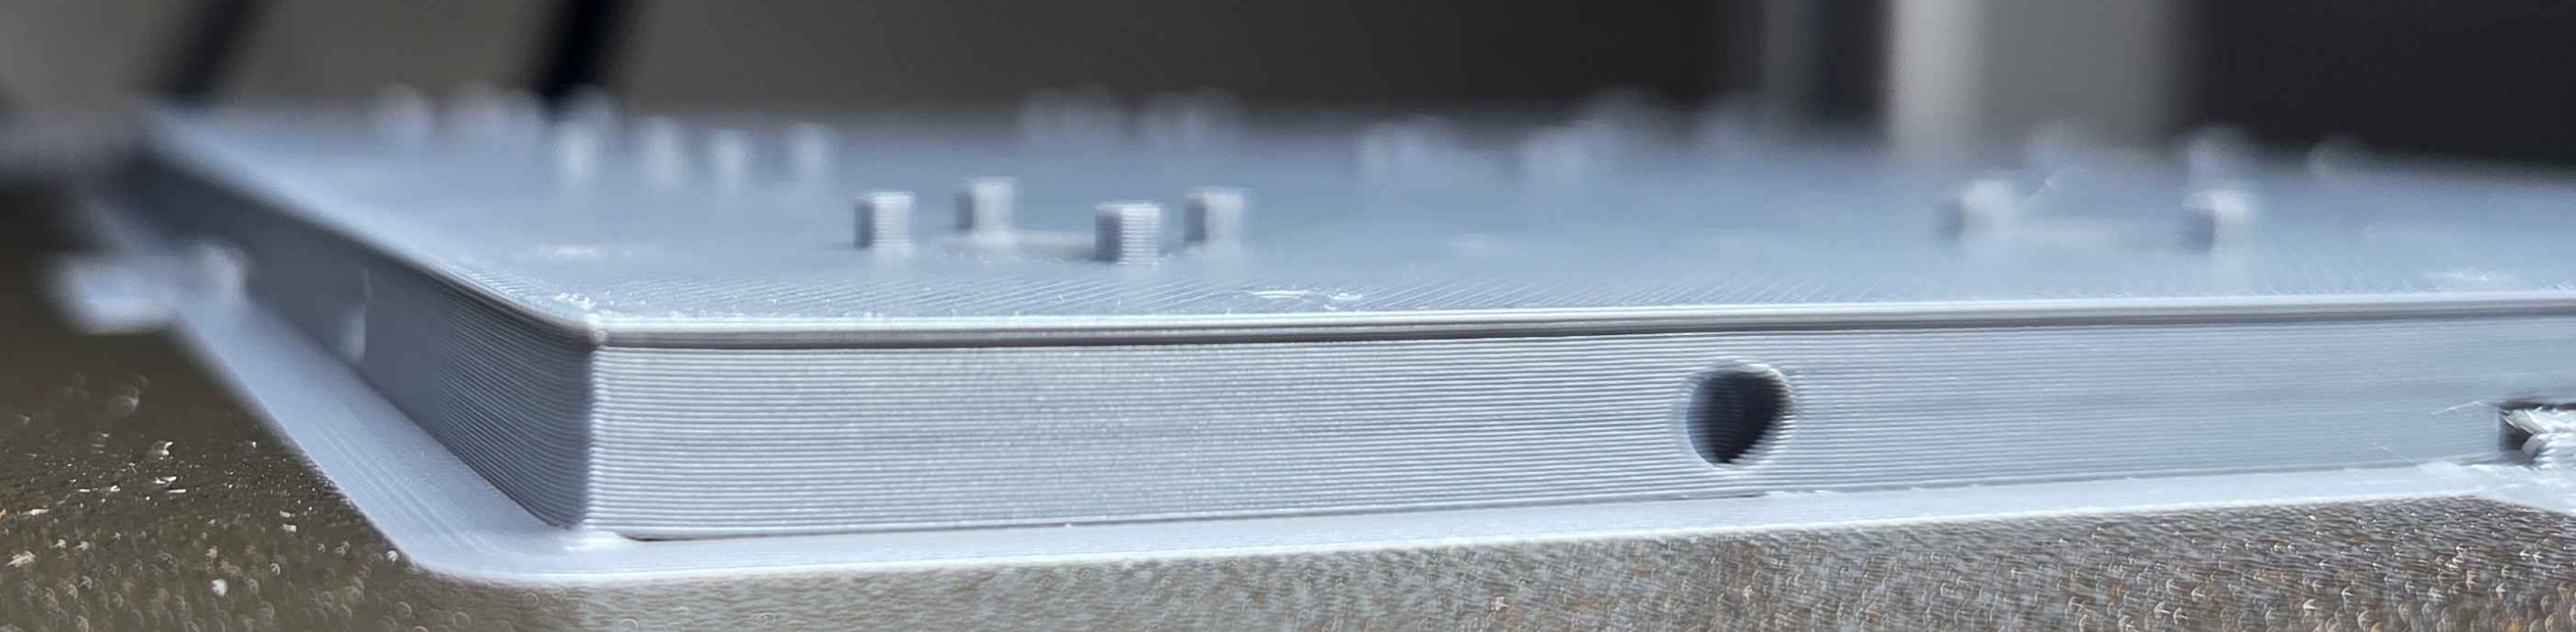
Enter: the Lip
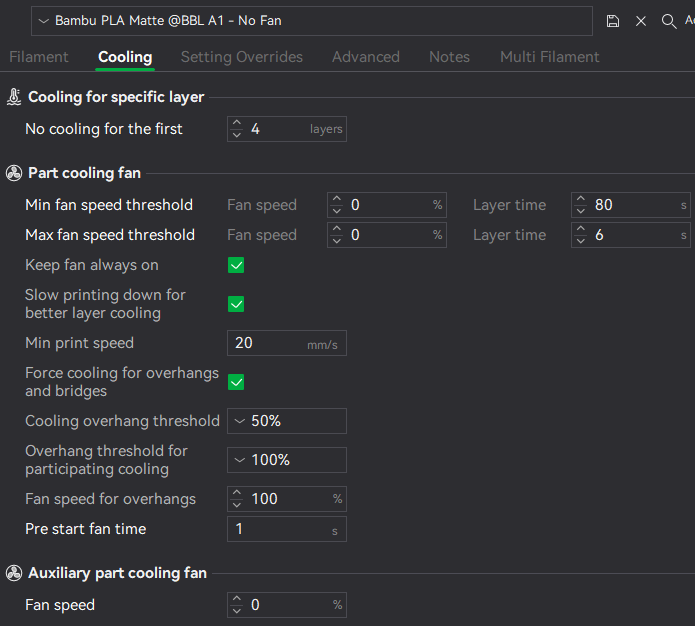
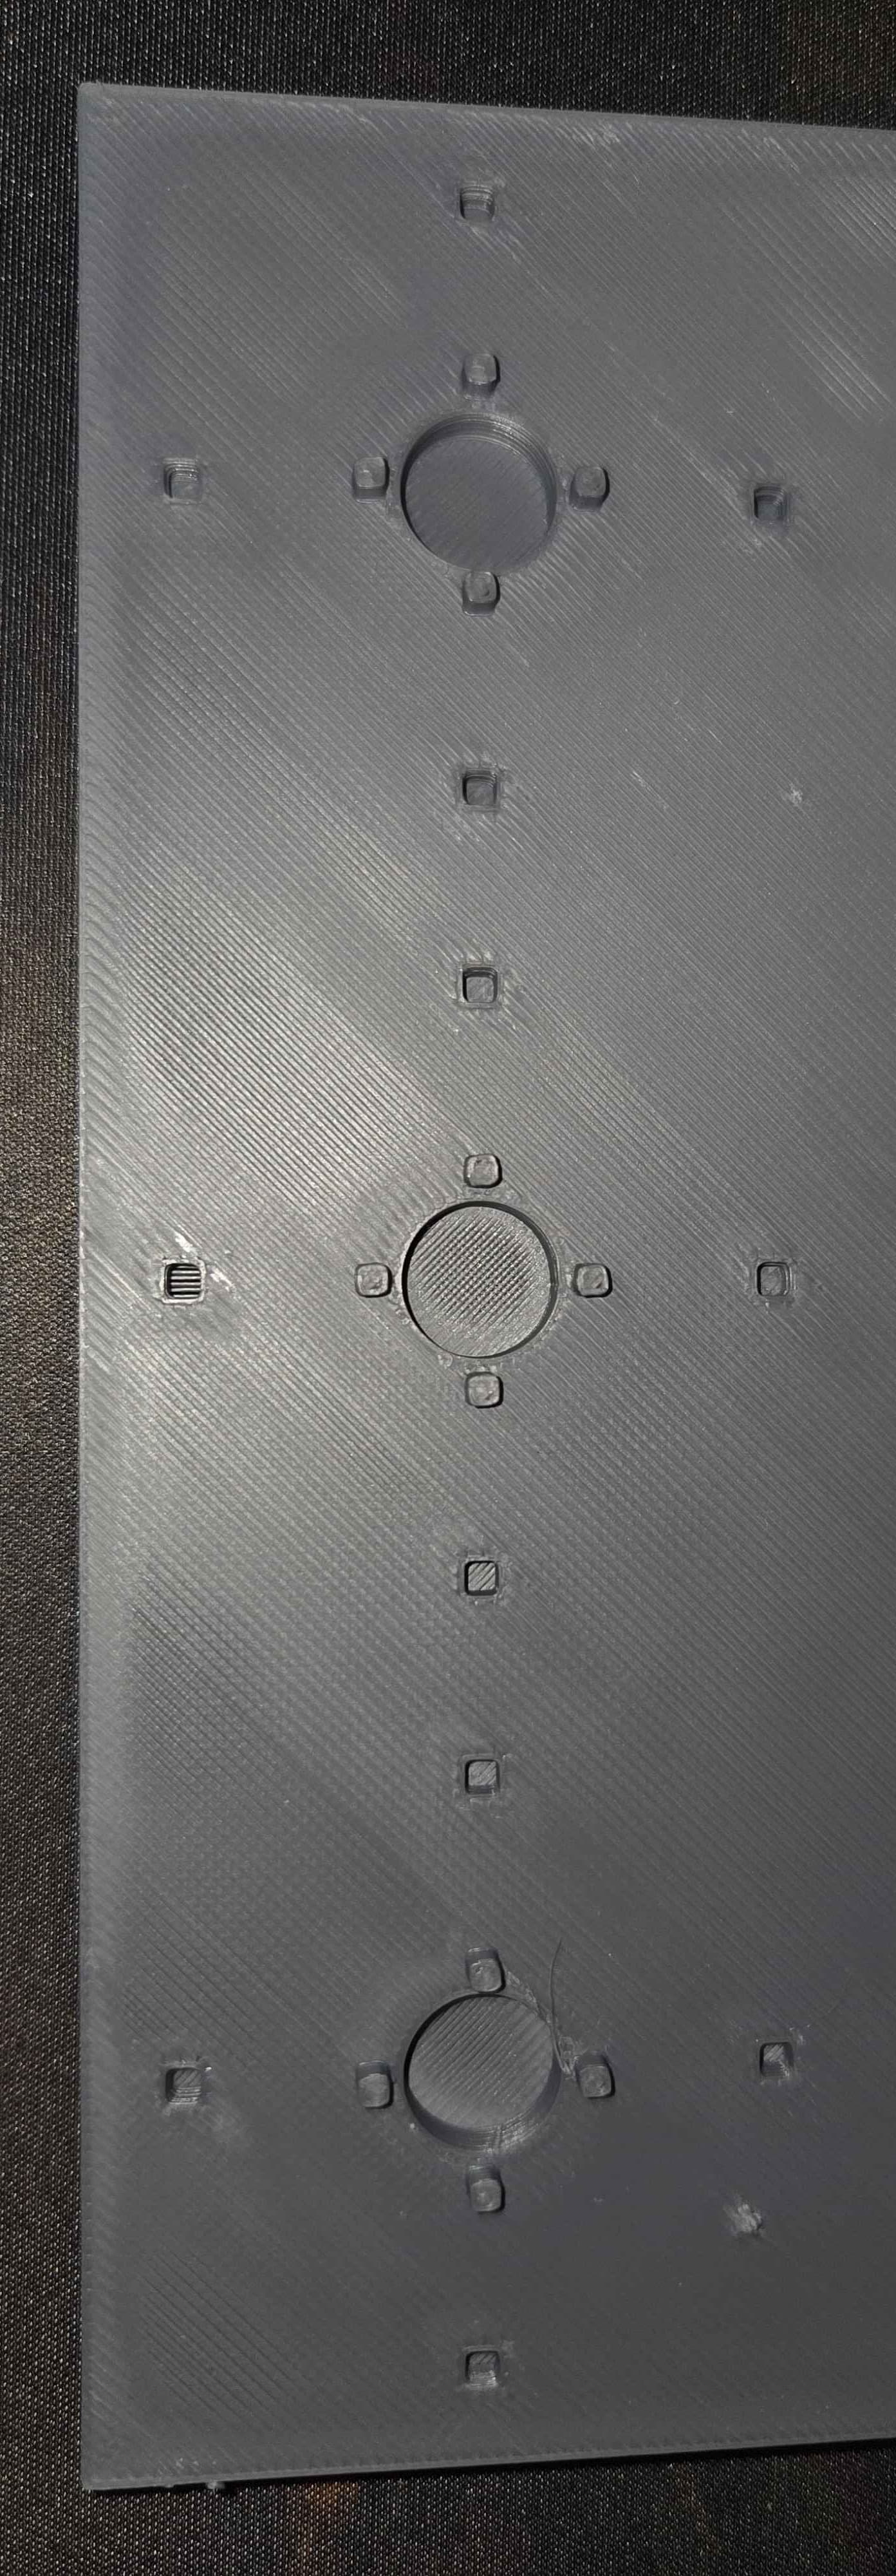
Enter: the cube with virtually no lip
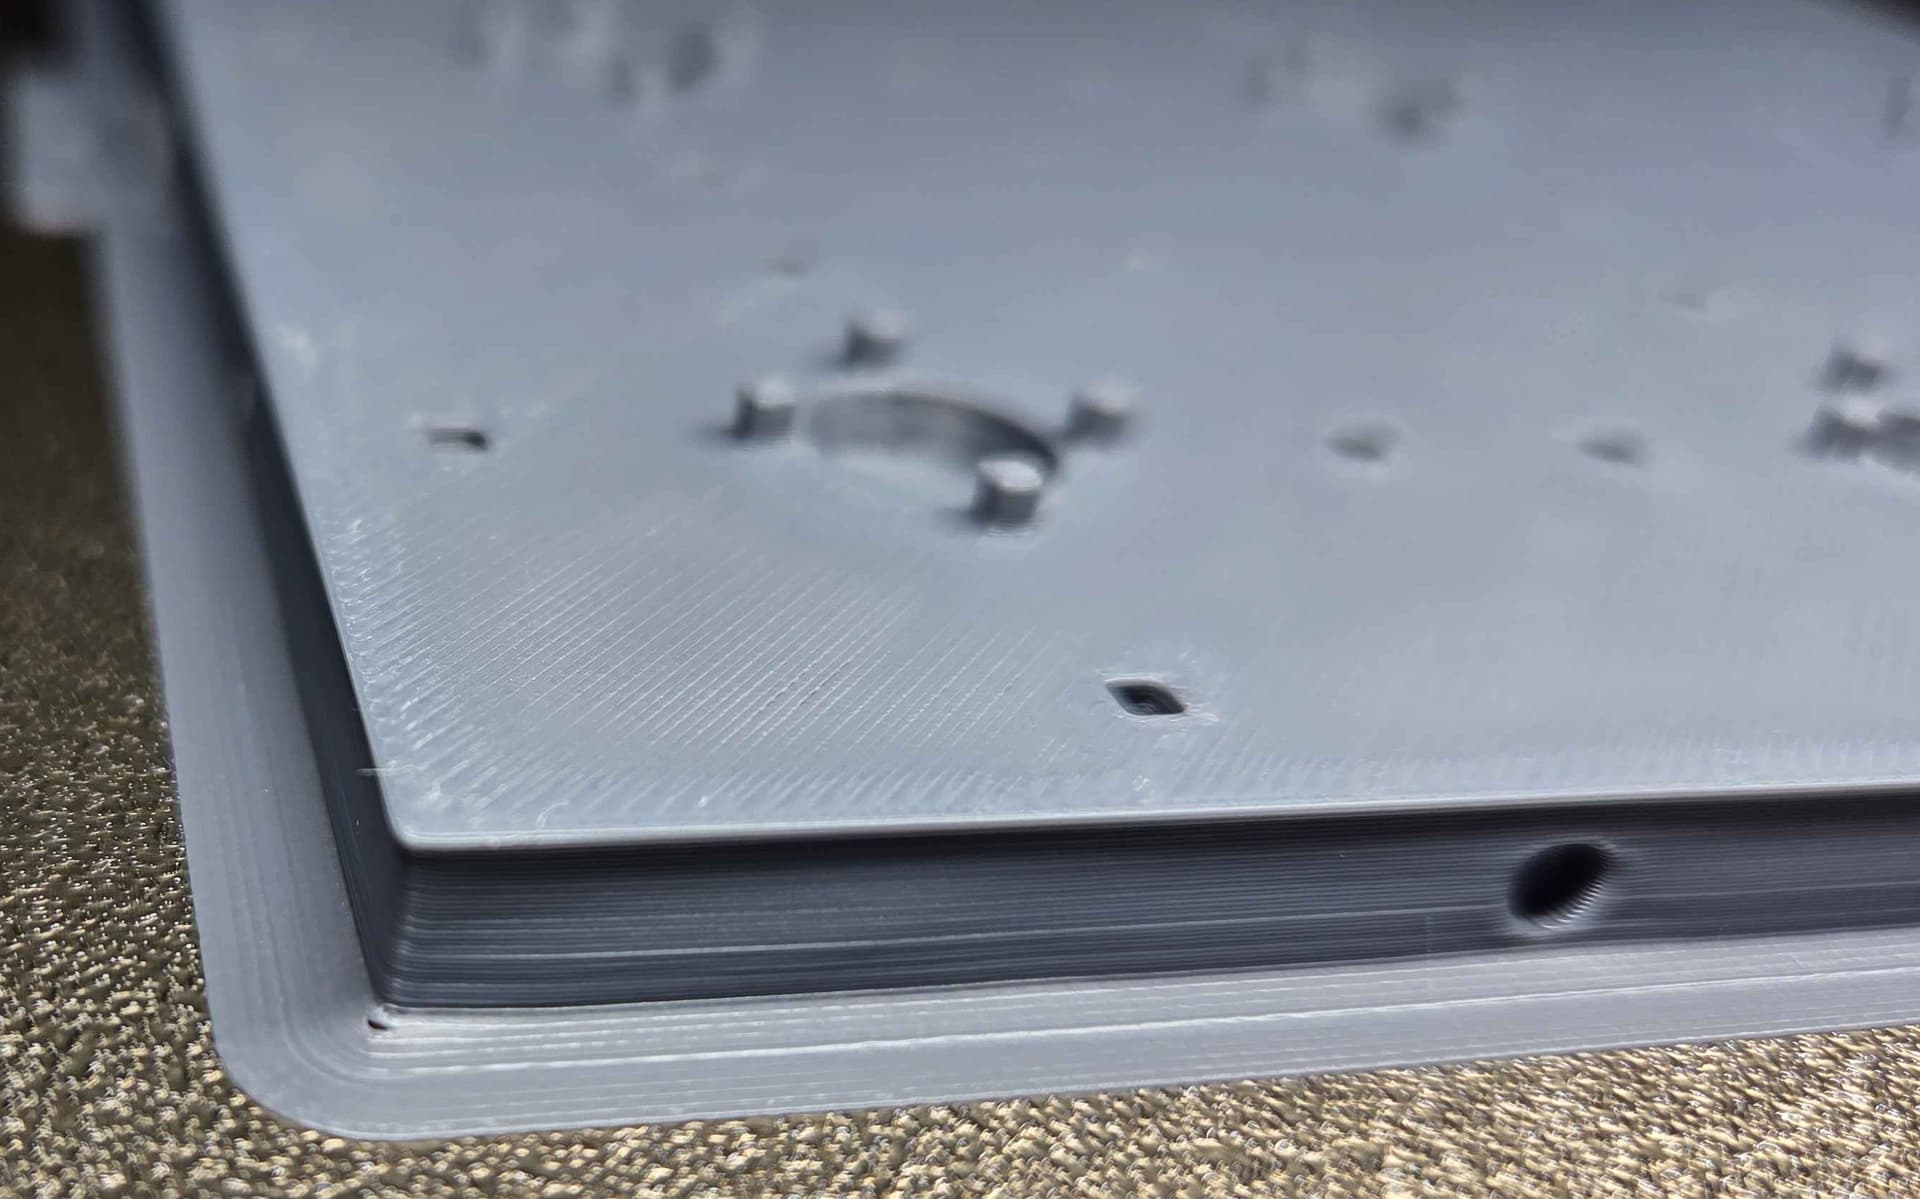
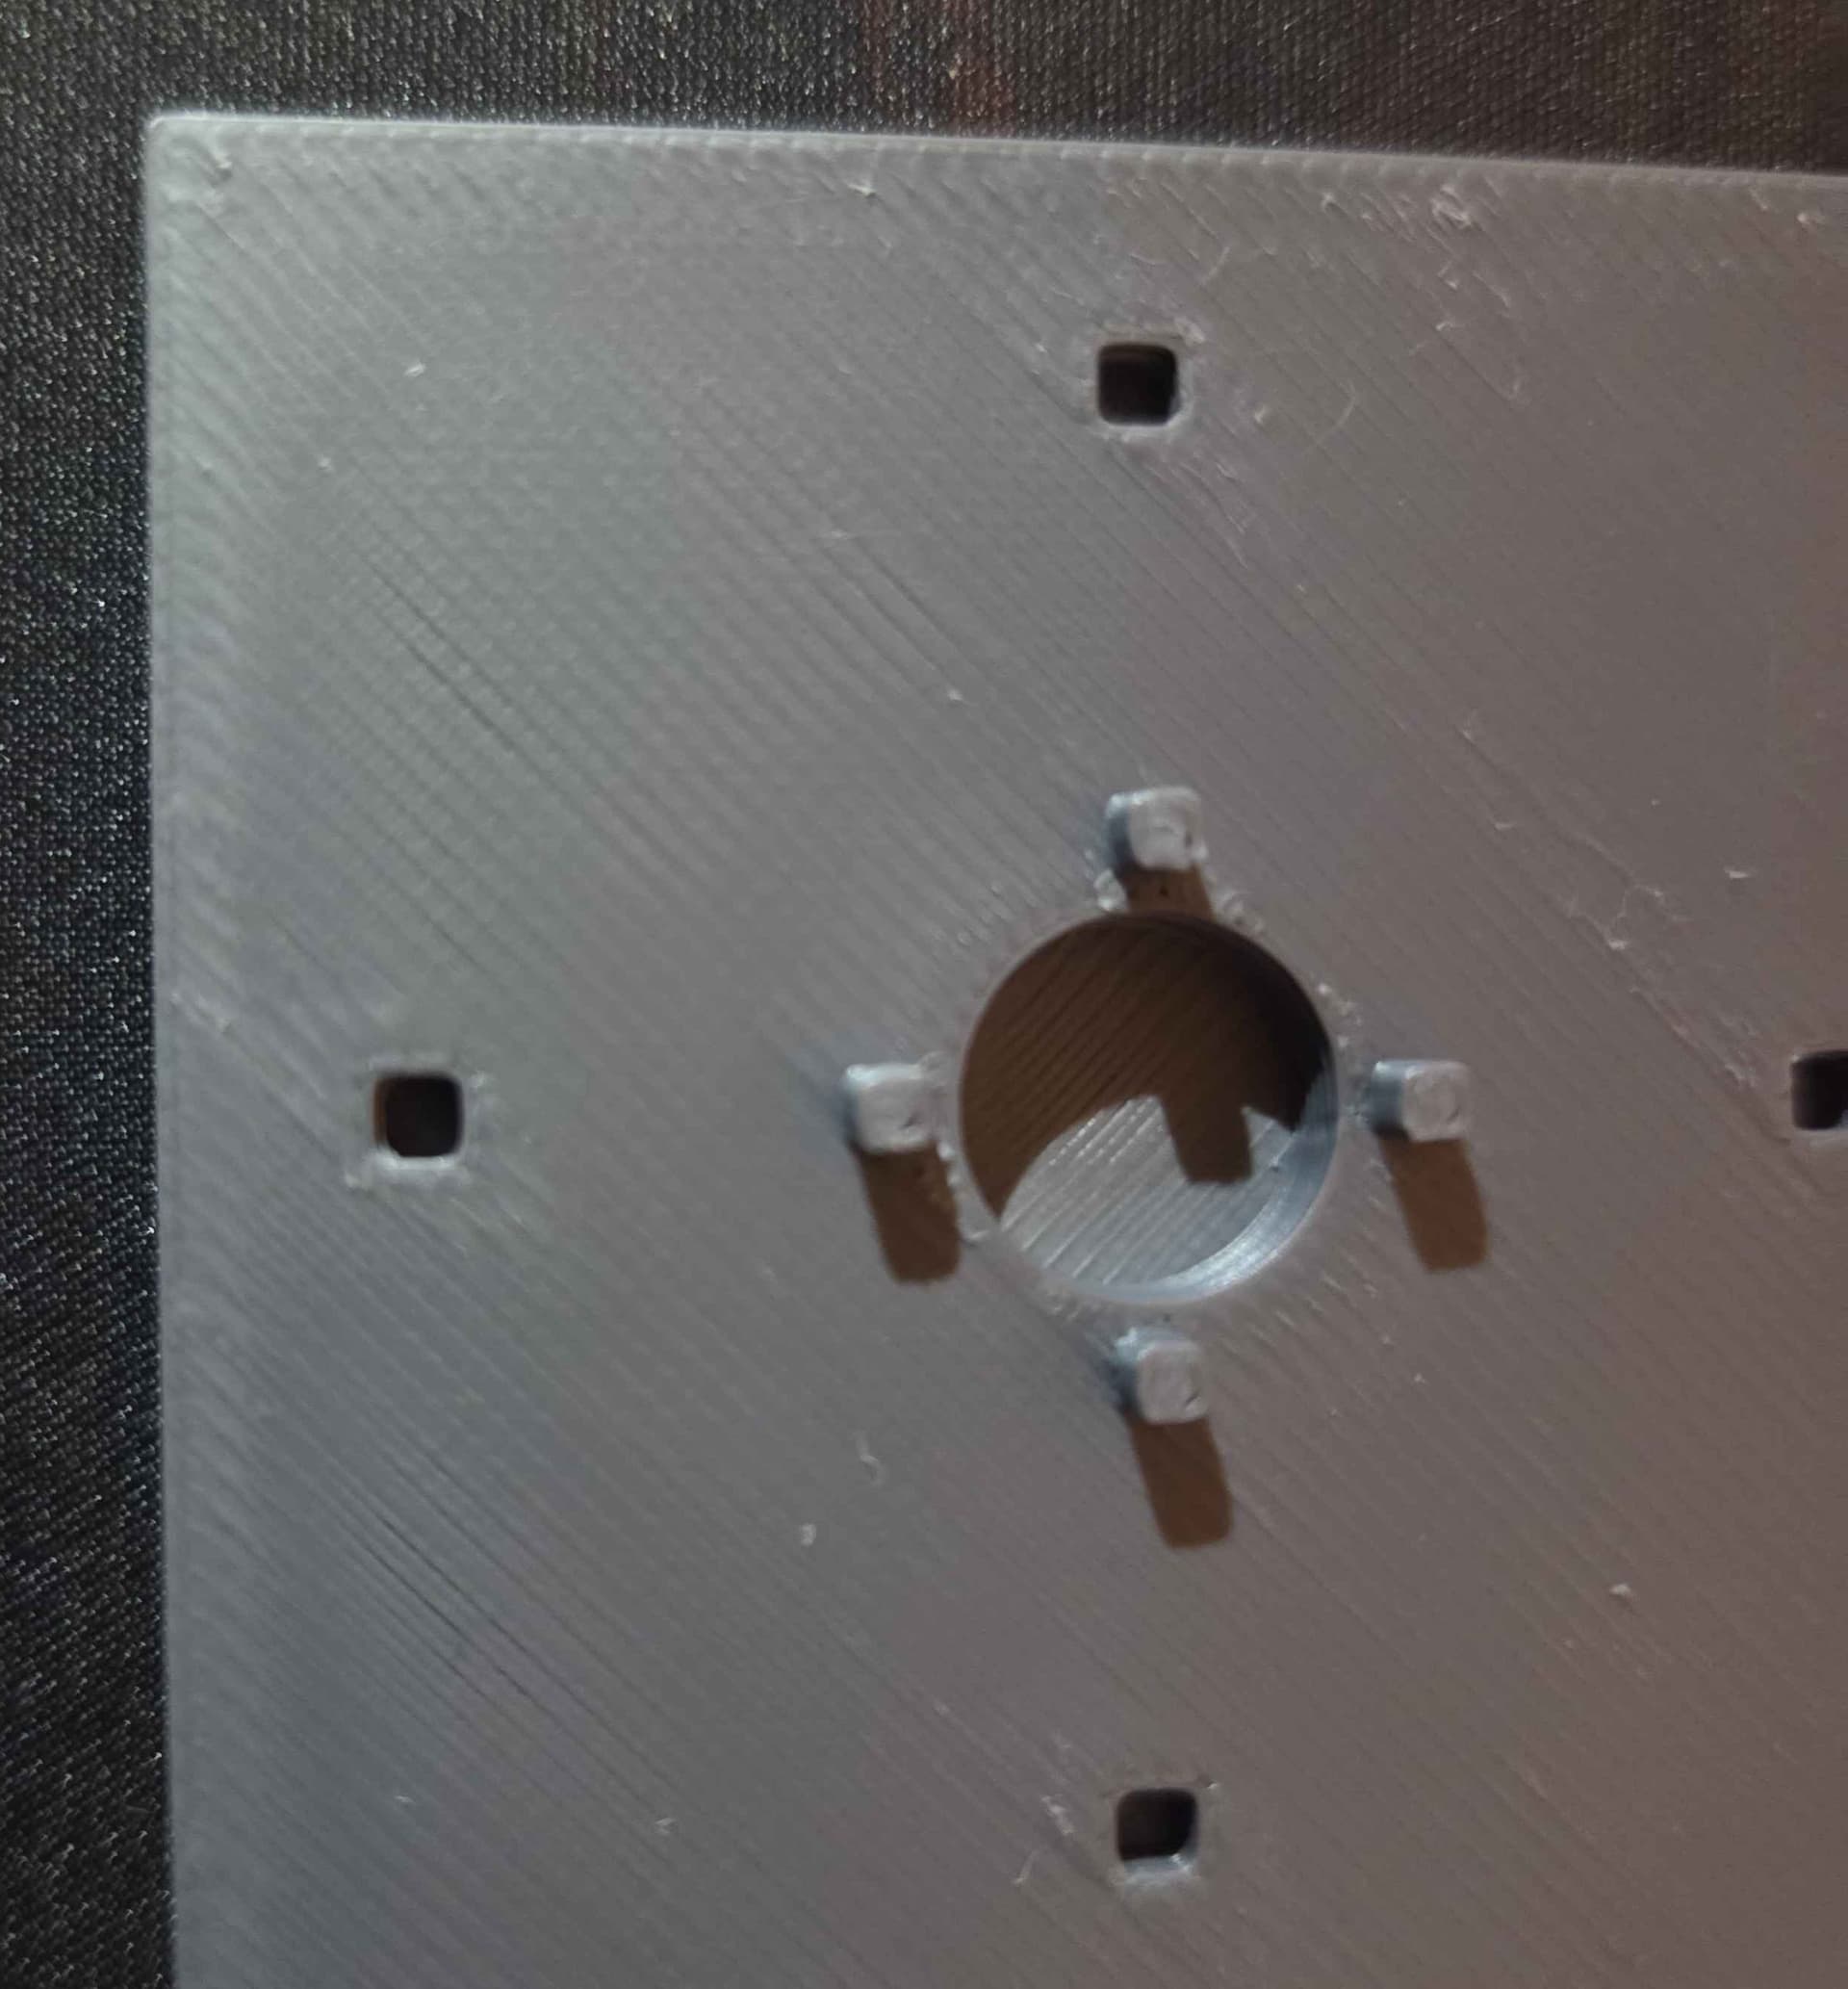
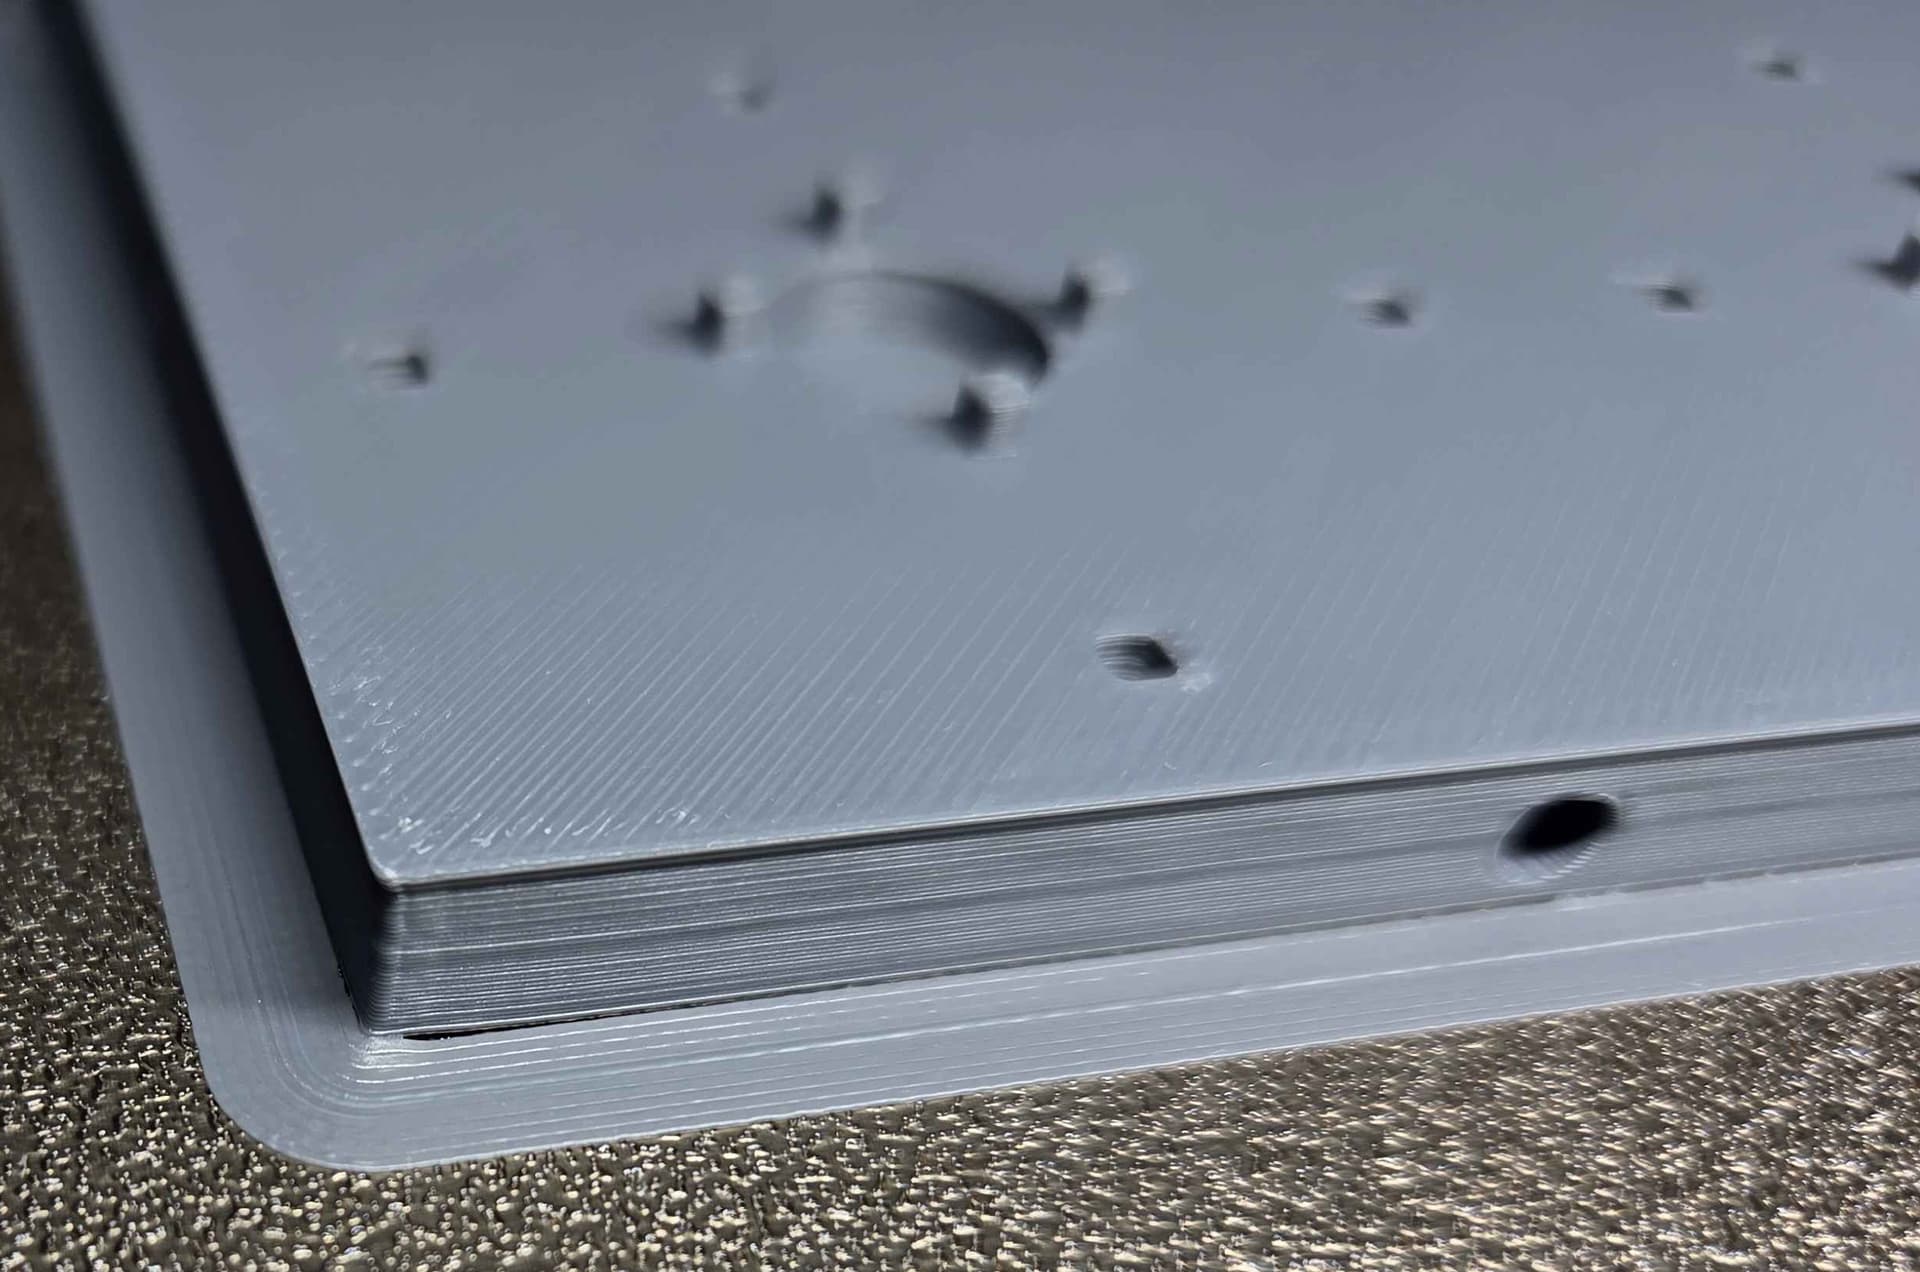
The base plate trying to pull up, with some mild success on its part
I have tried the following. Slowly lowering the fan speed, all the way down to ZERO fan (except on bridges), raising the bed temp, raising the bed temp followed by lowering the layer temps, adding the brim (which helped but did not eliminate the corner warping), adjusting the Z offset (within the machine code) a further -0.01, and increasing the top surface speed to match the internal solid infill speed (250mm/s in this case).
These did help a bit with the pulling up of the corners, but seemed even if only ever so slightly to make that lip around the edge of the part worse. I will give some of the basic parameters that I can think might be helpful in solving this issue. At this point I am pretty sure it has to do with temperature, but I am lost on what to do. Any help would be greatly appreciated!
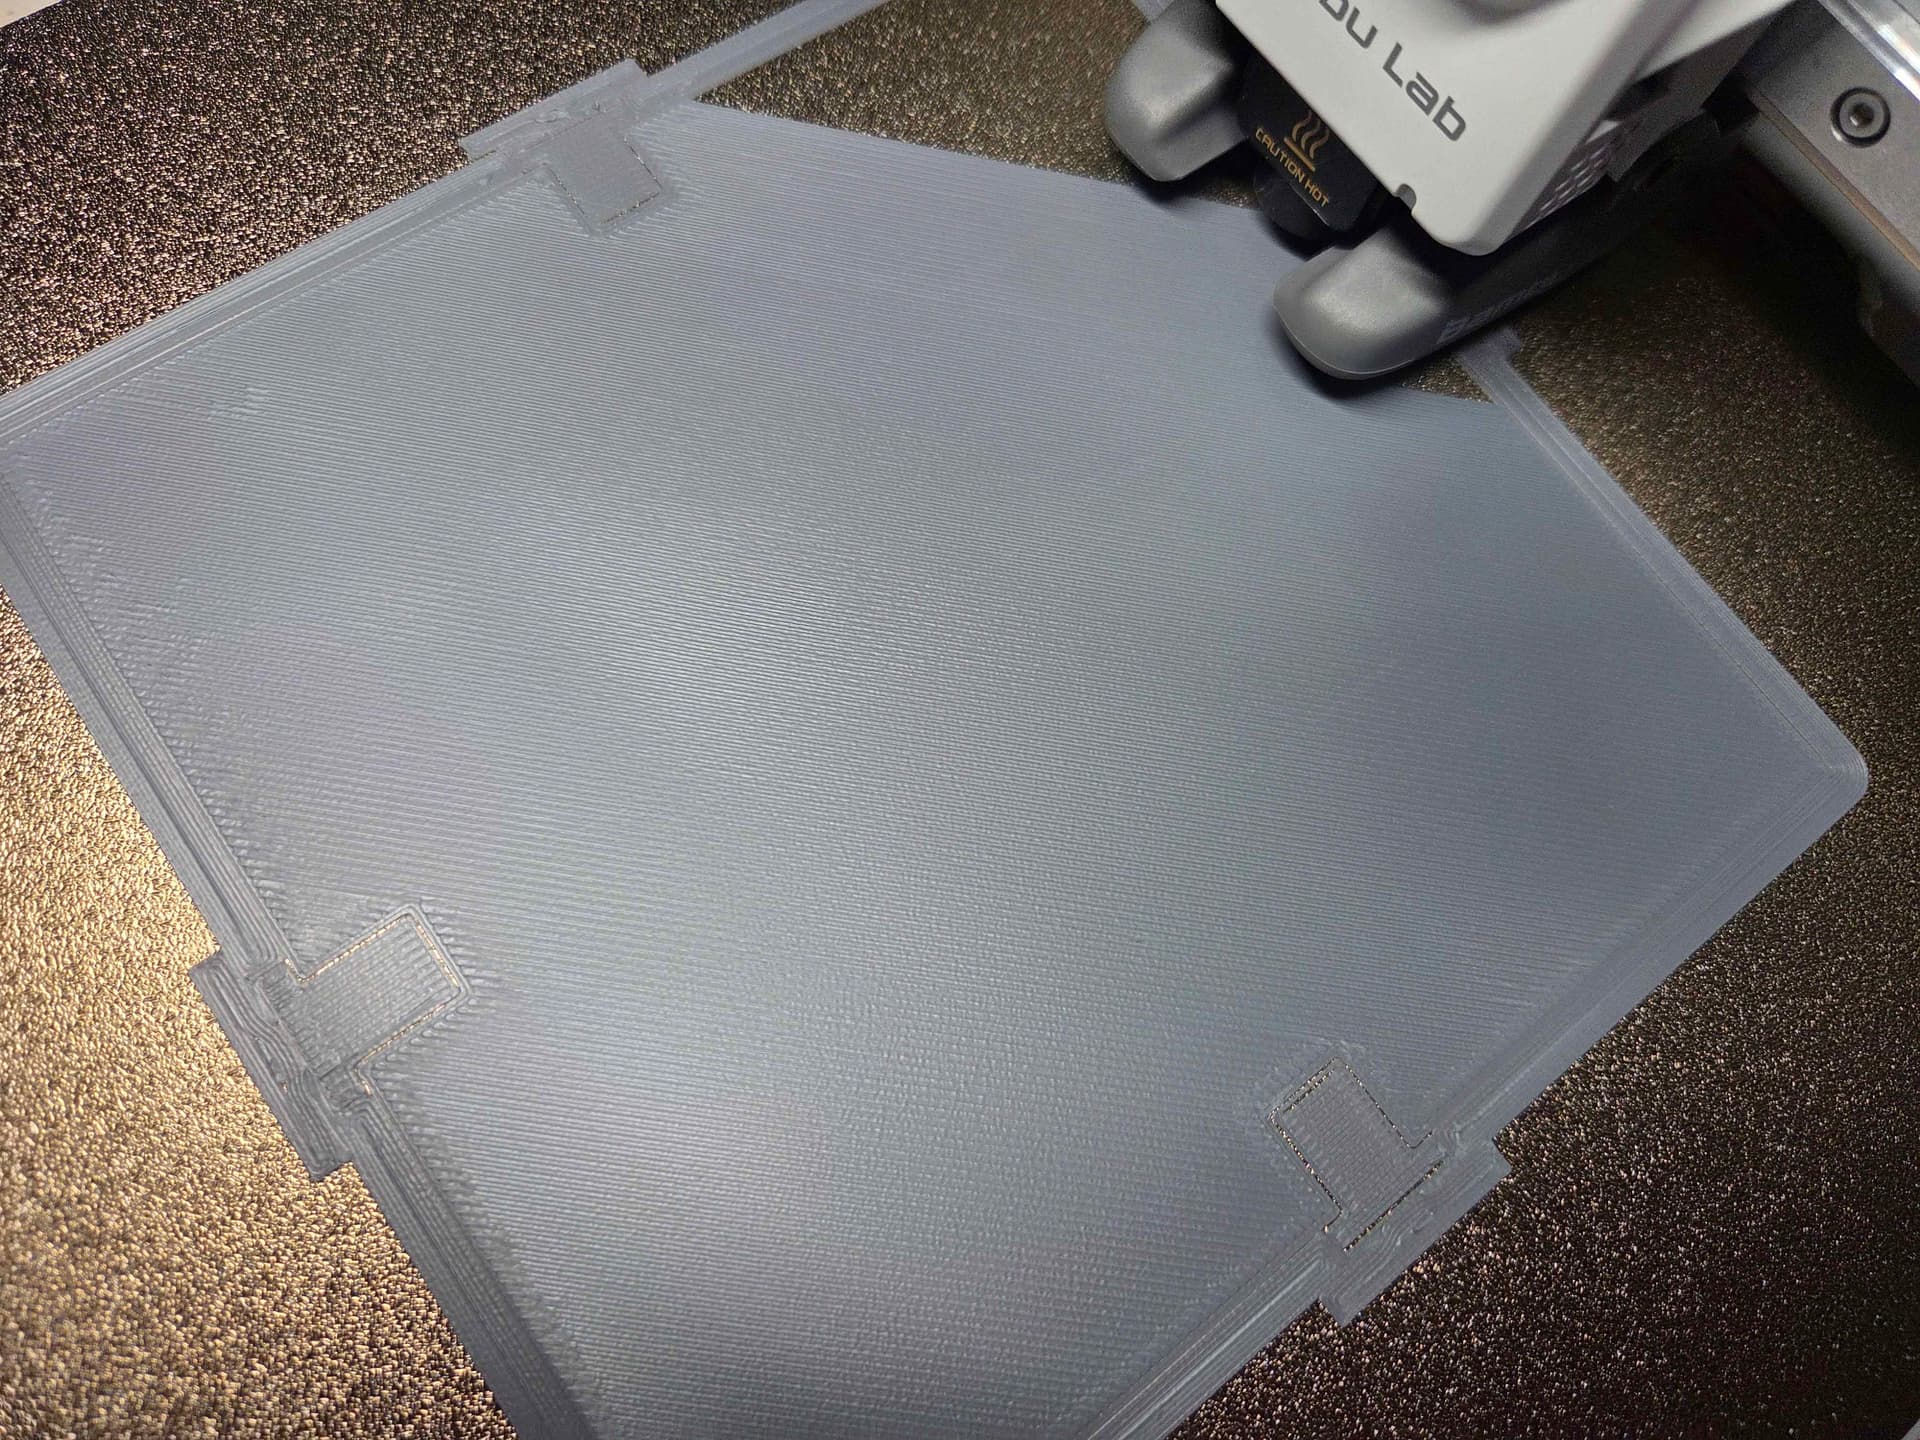
The base layer going on smooth as butter, and according to the charts is in the “perfect zone” for Z offset / extrusion.
Here is all the nitty gritty details of the parameters I used:
Bambu Labs A1 - Purchased this year, rails lubricated last week
Sunlu Grey Matte PLA
Ambient temp in my garage (where the printer is) between 88 and 94 F
Relative humidity is between 50 and 55 % (Measured with a hygrometer)
Bed Temp: 65 C
Filament Temp: 220 C
Low Fan Settings:
No Fan Settings:
Trench Crusade Modular Tiles Base and Connectors and Singles and Double.3mf (1.9 MB)
Final thoughts from me is to put the darn thing in a perfect temperature controlled vacuum and I am not convinced that would work haha! Thank you again in advance to any and all that read this way too long post and choose to provide some feedback. -May your prints never fail!
Thanks for providing so much detailed information with your question. That really helps 
What I assume you are seeing is basic warping. When the corners and edges lift up, the higher layers are no longer printed at their specified layer height. With less available height than specified, the printer will have a slight overextrusion at the top edges and in particular the corners. While this usually leads to wavy flow lines on the top, mild warping can lead to the excess material forming an edge.
The next question would then be why it predominantly occurs on large prints. Being caused by the uneven cool down of FDM prints, it is also dependant on the materials coefficient of thermal expansion and therefore a fractional value. And 15% of say a 20cm base is more than 15% of, for example, a 5cm base.
The next thing is, what to do about warping.
- To cover the essential basics, the filament needs to be dry. There’s not much point in tweaking things for filament that may be moist.
- In quite a few cases, the major problem is build plate adhesion. That does not seem to be the case here, but just to cover the basics it should be mentioned. Mouse ears and brims can help somewhat, but again, the plate needs to be clean.
- Next, we need to control the cool down. So we want to print in an environment that is warm while at the same time avoiding heat creep. With ironing or many retracts, <35°C seems to be good while without these 35-39°C is my sweet spot. With the A1 as-is, there’s of course little chance to achieve this without a print enclosure or printer tent. Just remember to use a warm room if you can and keep it away from drafts.
- Further cool down control can be done by not controlling the heat that goes put, but the heat input. This gives us the ability to trade print time with warping while maintaining stuff such as layer adhesion, etc. All we need to do is decrease the printing speed and/or layer height except for the first layer. Since both have volumetric effects, they are quite powerful.
BW,  &
&  ,
,
Eno
1 Like
Thank you very much for your well thought out, informative, and timely response! Thank you sincerely for the definition update “pulling” is “warping” in this case. If one is to join a community, one should know the lingo.
To start I cleaned the snot out of my build plate. Dawn soap with a good “scuz brushing”, followed by a generous wipe with 99.9% IPA and a paper towel. I am usually very good at keeping the plate clean, but I went a little extra for the test run.
From your suggestions I started a new print this morning with the following changes: I changed the layer height (I left the initial layer height at .2) from .2 to .16 (some additional research said that, that little of a change probably wont do much. However, I felt that with the addition of the other changes along with it, this would be potentially sufficient). I reduced all of the print speeds to 75% of their previous values, with the exception of travel speeds. Finally I turned the fans back up to 60% of their max speed threshold and 2% minimum speed threshold.
This run had the least amount of warping in any of my previous, but it still existed.
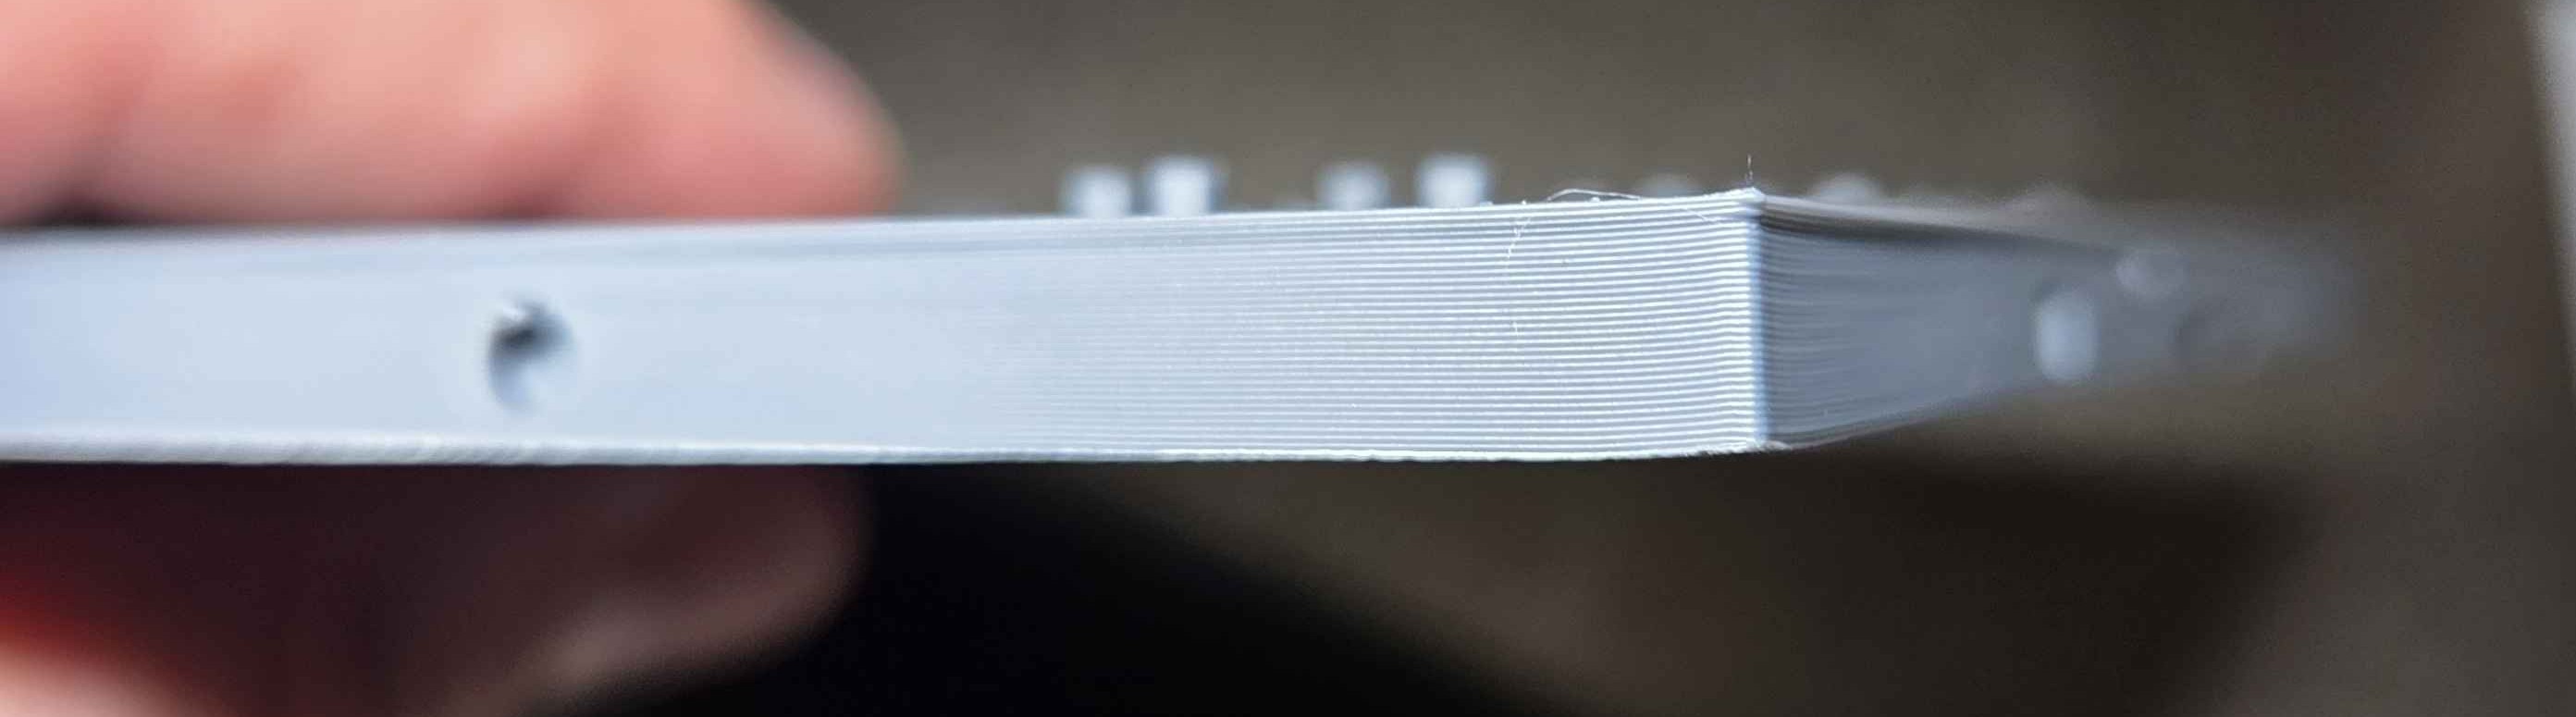
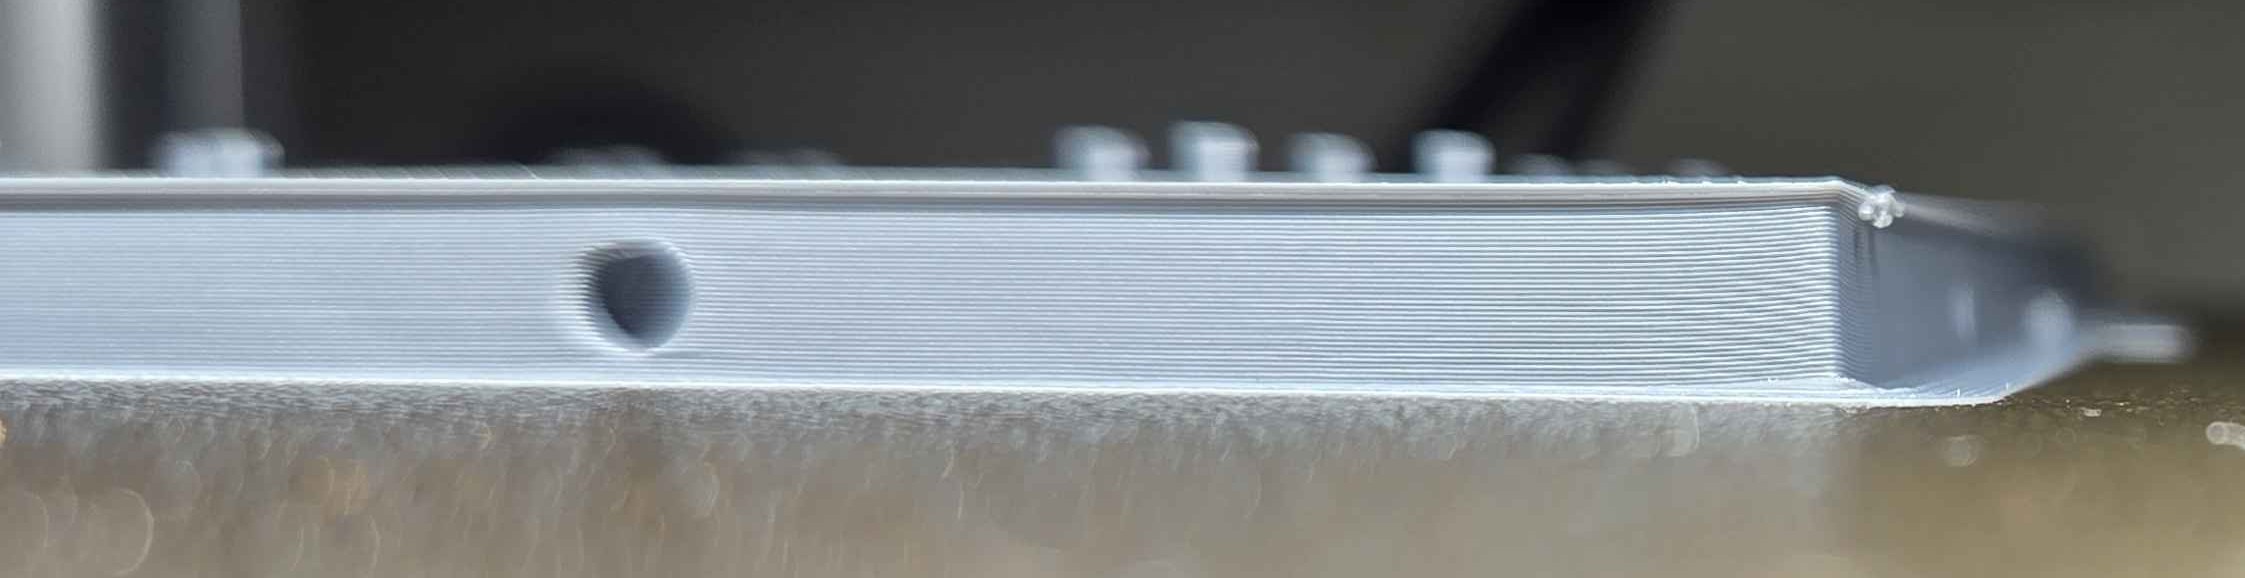
The lip is still very prevalent.
These are just a close up of the top of the print in case you can gain some info from it that I am clearly missing.
The search continues. Regardless, thank you for wisdom and guidance.
Mike
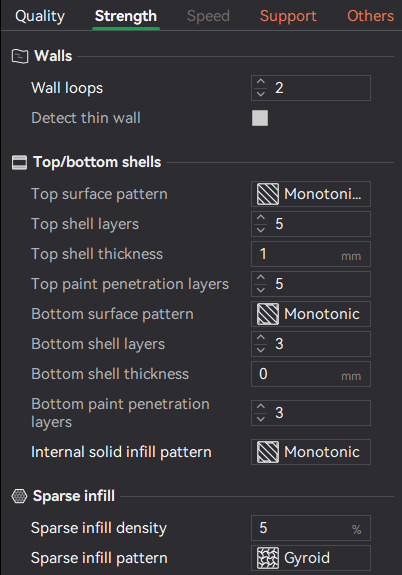
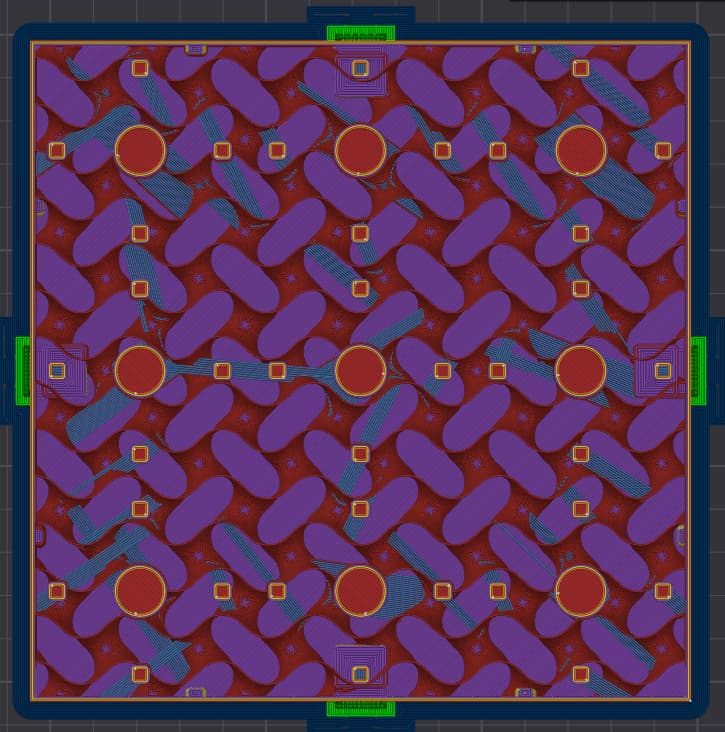
I think you may still have that problem with the top surface lip. I think your issue is a 5% infill and only 2 walls. The print shrinks as it cools. You’re printing layers pretty quickly until you get to the top layers. The top layer takes substantially longer time to print, and while the printhead is following the actual dimensions of the print, the layers below are getting smaller. If I’m right, you need to increase infill (or go solid). Doing that will reduce the time delta between the lower layers and the top layer so overall print times (and rate of heat loss) are closer to the same. Also, a higher density infill will stay hotter longer. More walls and higher density infill will also resist the shrinkage effect a little better (but may increase tendency to warp because more plastic = more force when it does shrink. You might need a brim).
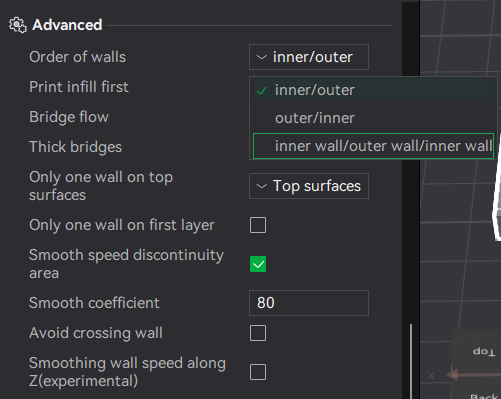
I don’t see wall order in any of your screen grabs. If you’re doing infill first, switch it to inner/outer/infill.
2 Likes
I think others are correct w/ the layer time analysis. This is basically a “benchy hull line” but on top.
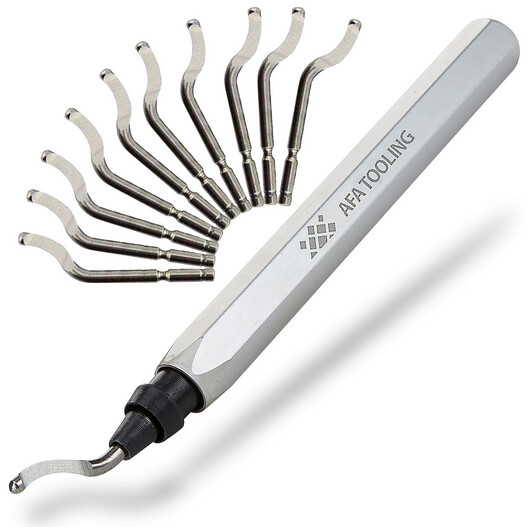
As for dealing with the lip on your alreadyt-printed pieces, use this “Deburring tool”, one quick zip across the edge will get rid of it (also helpful for brim removal)
1 Like
When I originally had downloaded the .stl and the person who created the file has the infill set to 5% I was very skeptical. However, after a few prints going well I left it alone. Then I got to the base plate. How much infill would you think to start? I am assuming quite a bit since you suggested solid. Most of my other prints are usually around 25% infill. Do you think this infill increase in tandem with the slower speed settings is optimal? Or just increasing the infill?
This was what the wall order was set at:
You think I should change it to “inner wall/outer wall/inner wall” setting?
Thank you sincerely for your help and wisdom!
Mike
Excellent idea! I do have one that I used on metal in a machine shop I worked for a while back, probably need some better blades at this point though. Thank you!
If what you’re already trying doesn’t work, I’d try turning on Infill First and Inner/Outer wall order, and I’d bump the infill up to 33% at first, see if things improve.
Okay, so at 15% infill there wasn’t a huge difference. However, using my fingernail it did feel like the lip was slightly lessened. Unfortunately I have run out of grey, but I do have black…so ill be switching to that, probably wont see the details as well though.
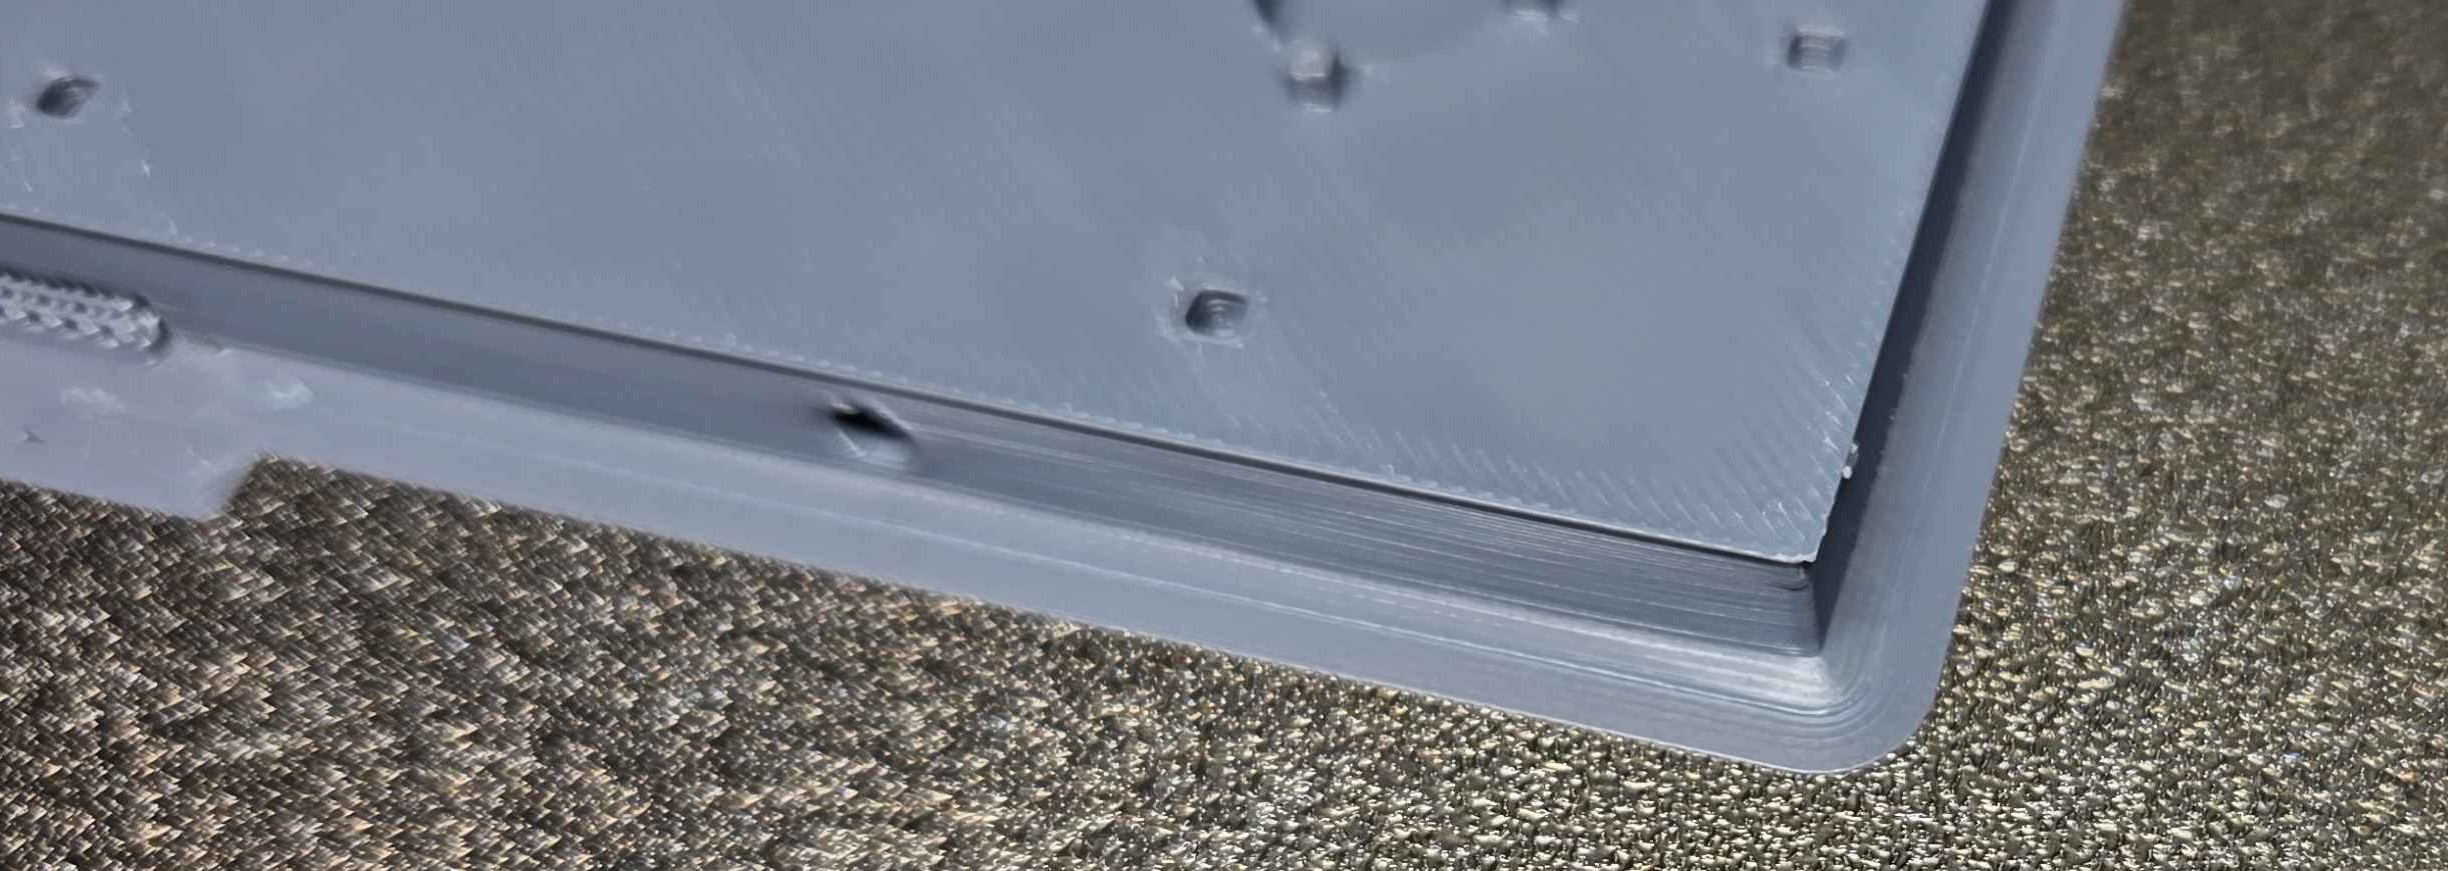
Lip at 15% infill:
I did notice it seemed to warp ever so slightly less than the others:
So I am going to give it another go, this time with your recommended 33% and printing the infill first.
5% infill
20% infill - just for reference
Thank you!
Mike
Yes, there’s still a little bit of warping present, but nothing that would explain such a massive lip.
So I concur with @RocketSled diagnosis and defer to his experiences.
Just two questions/comments:
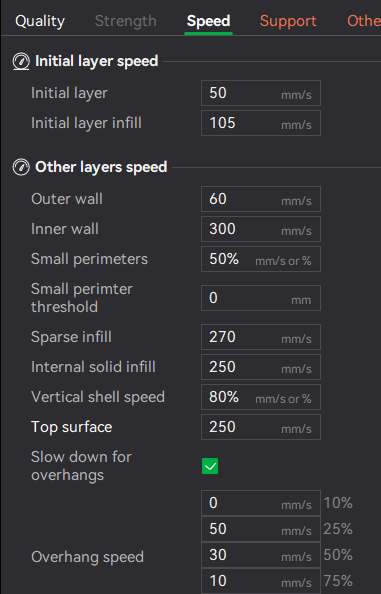
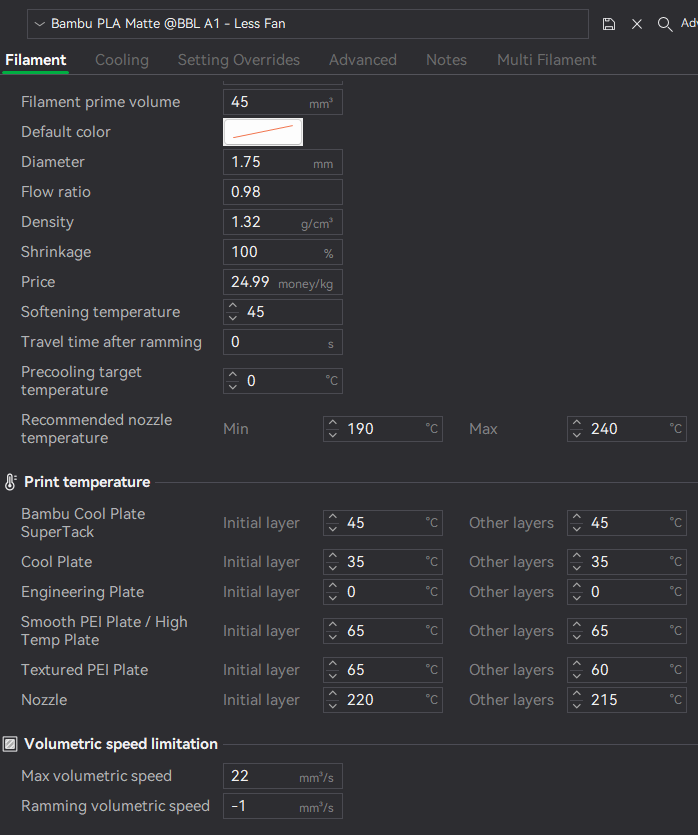
- What top layer flow do you have? I could not see that in the screenshots (or missed it). I doubt it is related to that as it would only explain a single top layer expansion.
- What is the temp in the room you are printing in? For PLA, I usually target 35-39°C in my X1’s build chamber which helps with a lot of issues. Not really practical for an A1 though unless using a print tent/enclosure.
- And a question for @RocketSled as I am trying to better understand this defect and workable remedies: Would it not achieve the same effect as increasing the infill density to slow down print speeds (i.e. increase layer times) below the top surfaces?
&
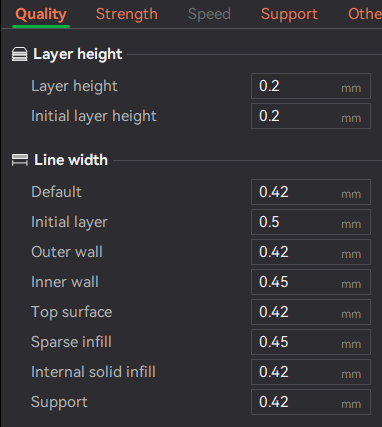
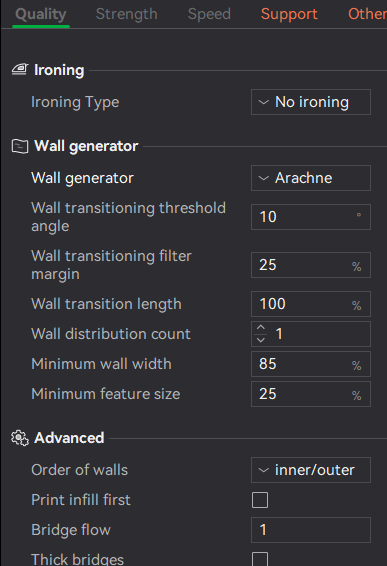
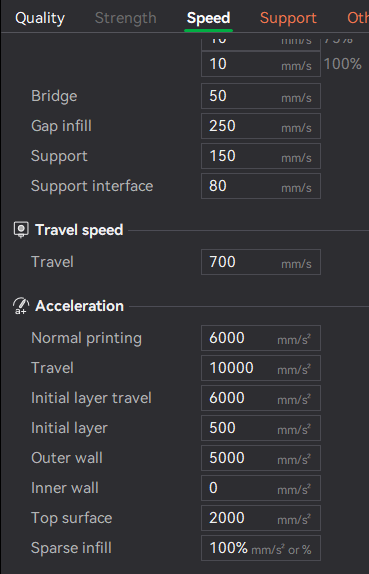
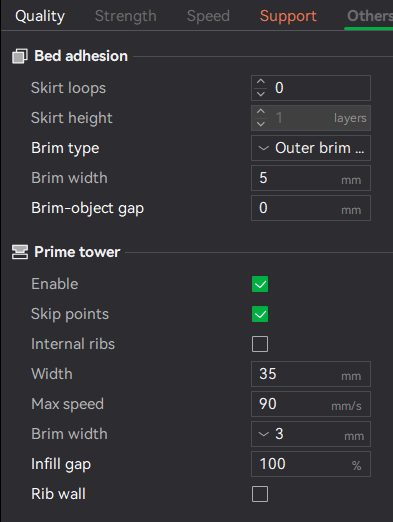
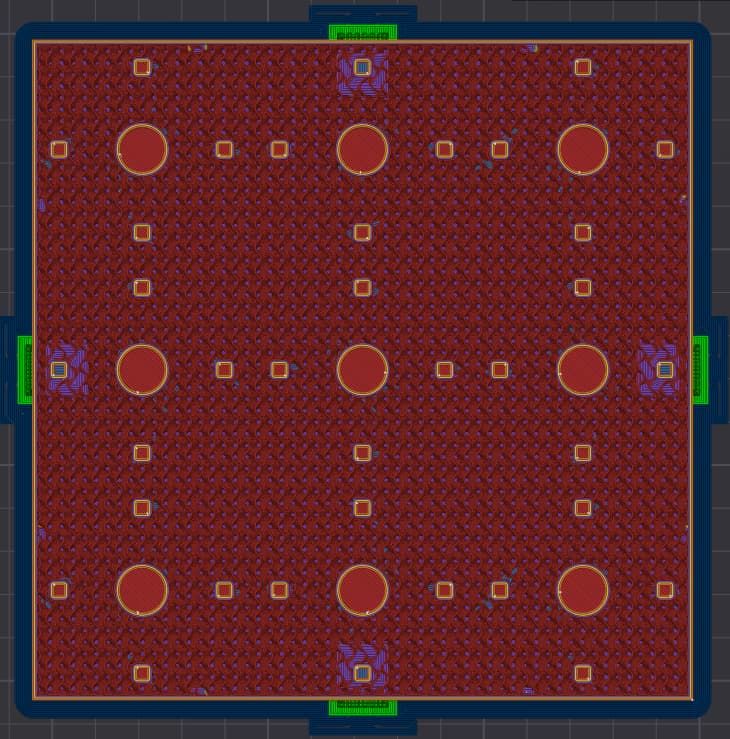
So as far as volume of flow all I can find is this:
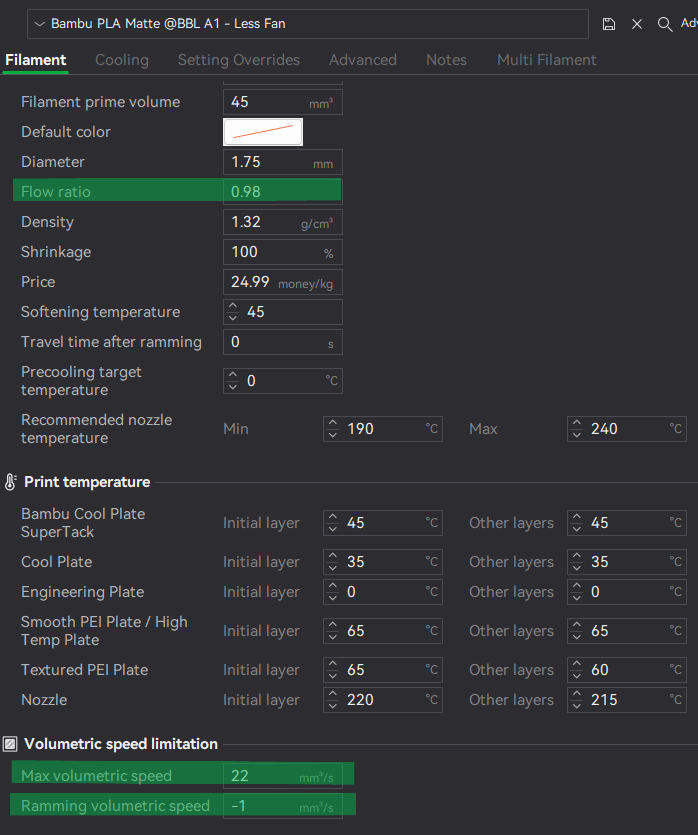
and this about top layer speed (though not really about flow):
The printer is currently in my garage, which fluctuates between 88F (31C) in the morning to just over 100F (38C) in the afternoon. Which it is currently. With the door remaining closed there isn’t any rapid temperature swings, however it is clearly a little hot.
I just ordered an enclosure on amazon and intend on moving it back into the house. Hopefully with the enclosure it will not suffer as bad from warping that it was previously. The entire reason for me moving out into the garage anyway.
1 Like
The goal is to make the layers below the top surface take more time and retain more heat, so the time is closer to the time required to print the top surface(s) and the thermal contraction is reduced… Speed alone probably won’t do it.
1 Like
That brim is doing some HEAVY lifting there, wow. Something about that print wants to curl up quite badly.
I’d be curious how “reverse on even” would affect that. But changing filaments, you may have fixed it already, we shall see.