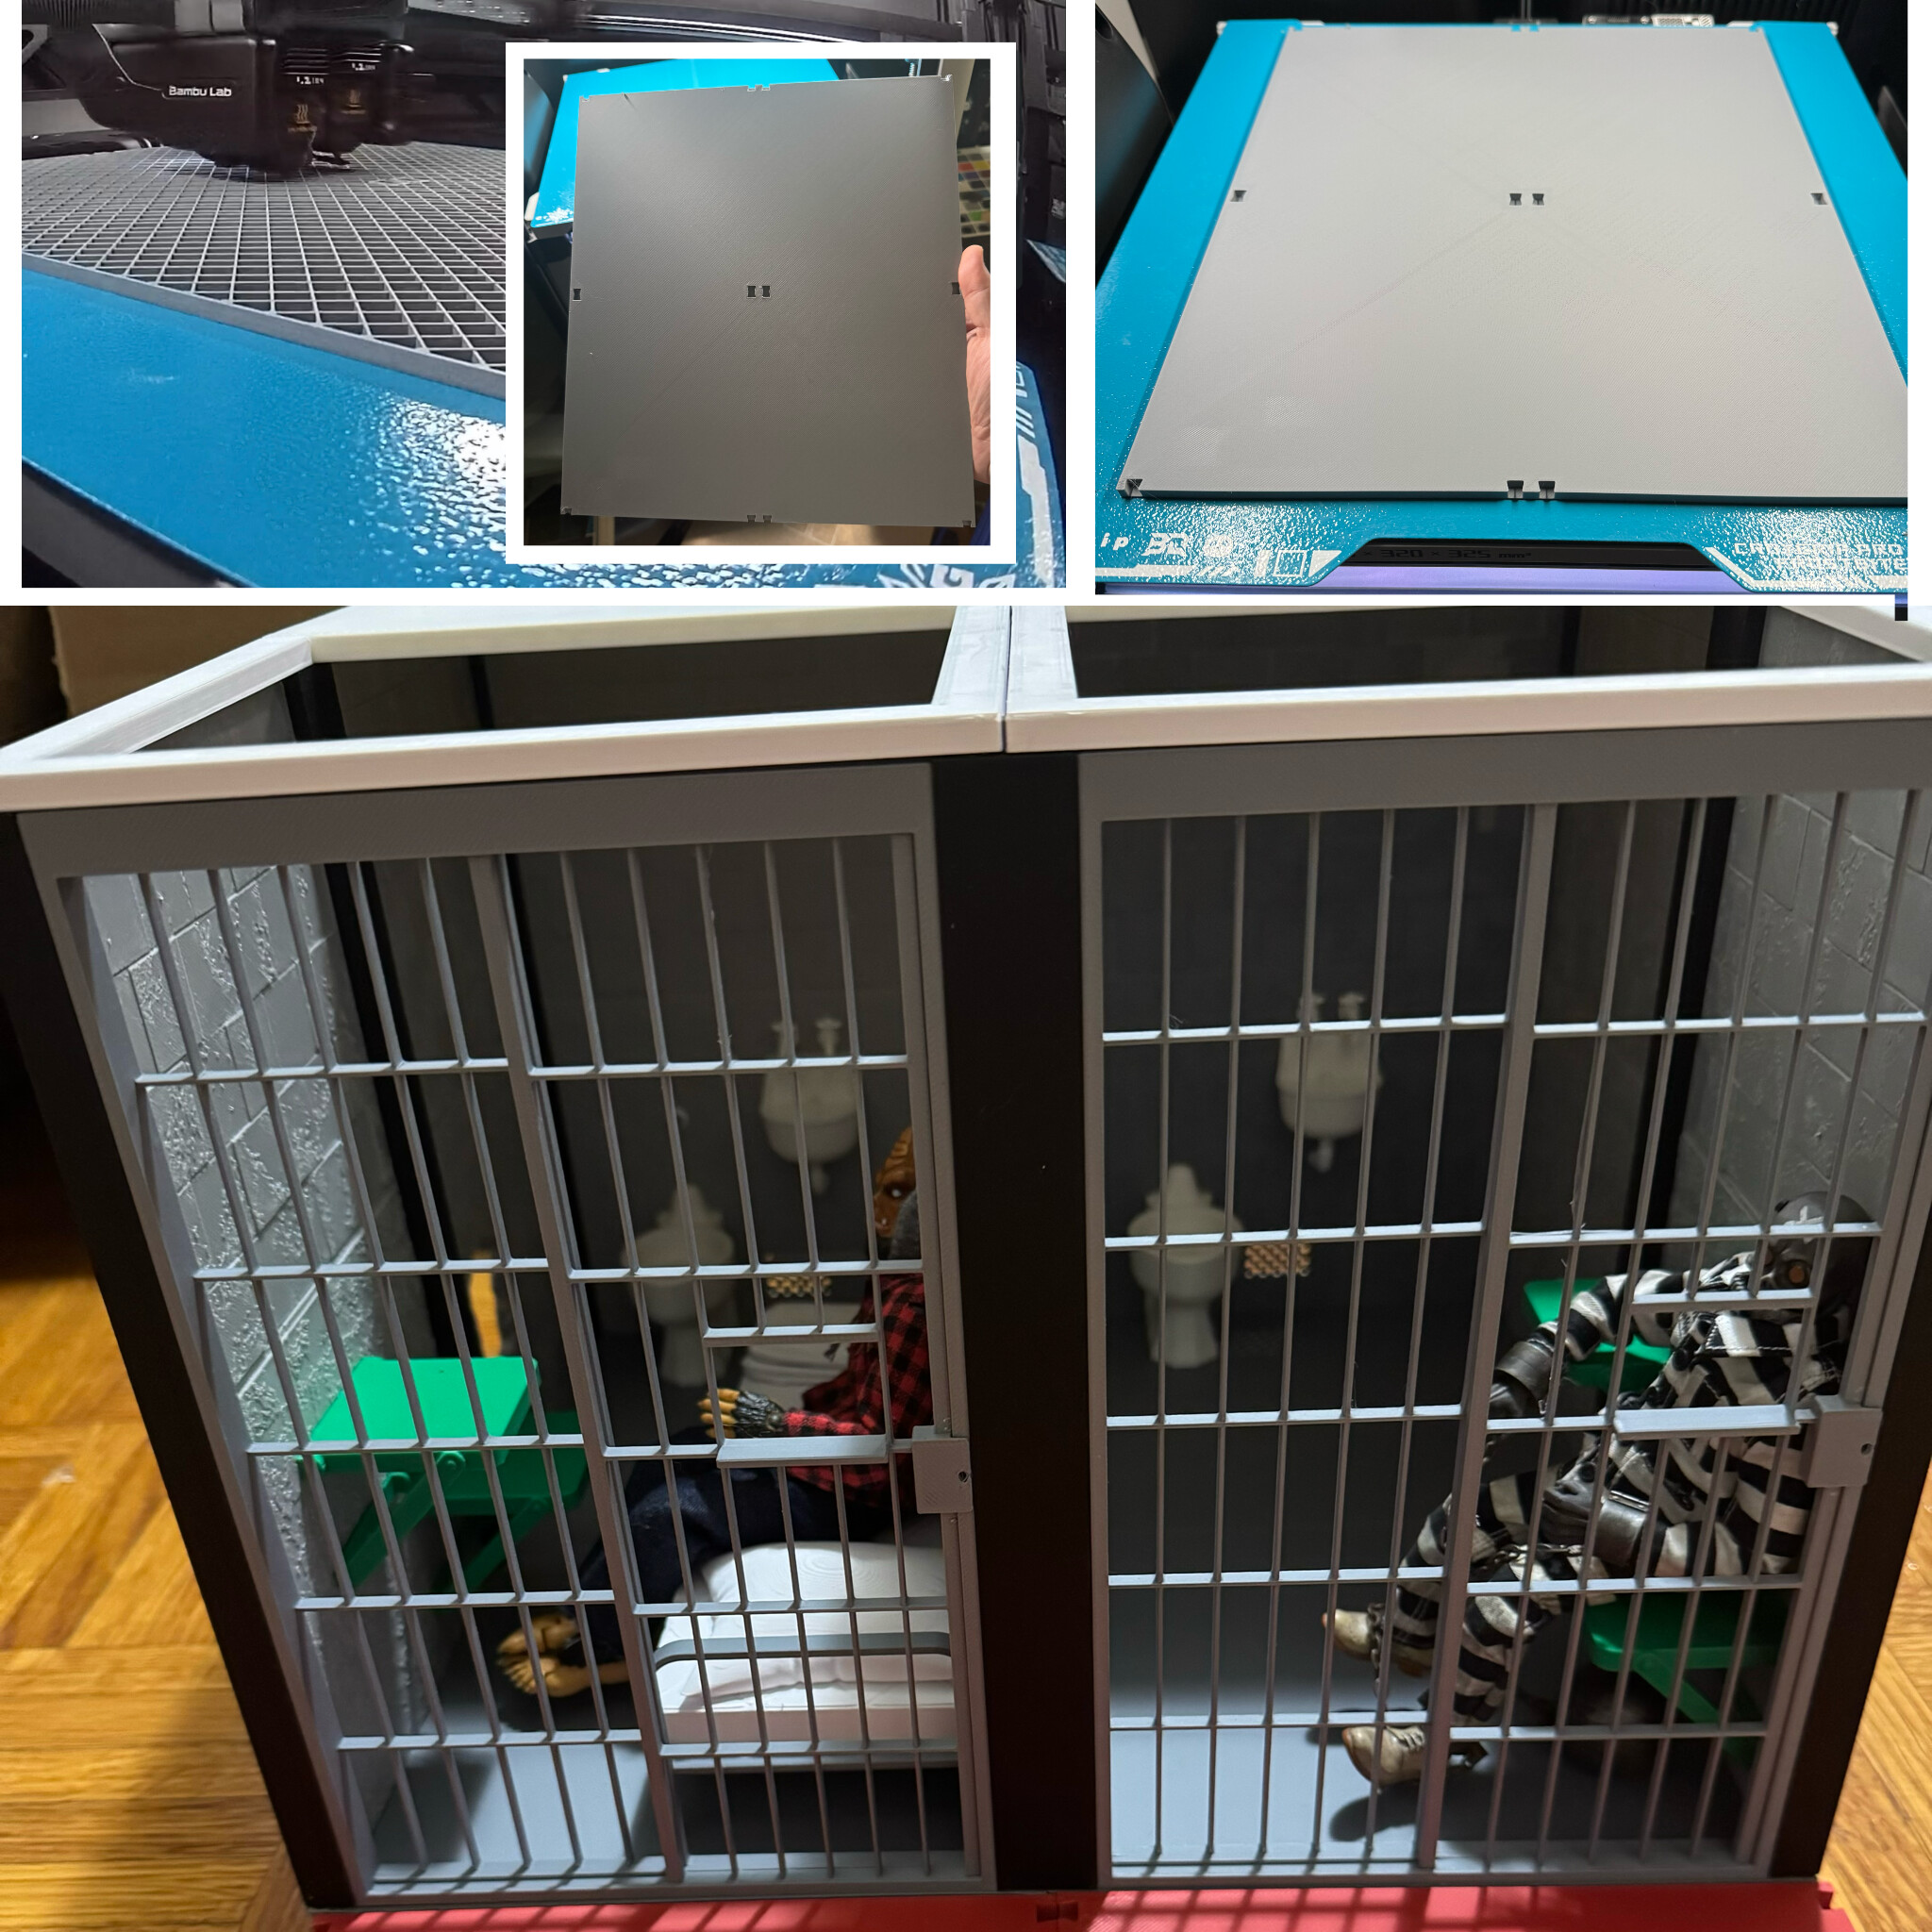
TLDR: One of the things I said I’d do if I got the H2D is make my one panel-at-a-time printable 1/12 scale jail floor square and CAD together 4 floor panels to make 1 huge floor! And I did it! The modular jail assembly structure is now more stable using 1 giant floor instead of 4 panels joined together.
Long:
I have this 1/12 scale action figure modular jail I sell in my ebay store and on instagram via paypal. It’s pretty awesome I get the same people buying multiple kits to assemble into one huge jail. It works by using square floor panels w/walls that slide between columns with square ceilings to match. (Open ceilings for toy photography is called the Toy Photographers Expansion pack. I have other expansions like the escape pack that comes with a wall that has a hole in it, a wall w/tally chalk marks, and a back wall w/window.
You can buy and assemble a one square tiny jail with all bars or you can make a 2 long jail cell using the bar walls or cement walls. It’s kind of like Lego bricks. You can make a row of cells. There’s over 60 parts in all to choose from. The first version I sell is a small 1 square all bars. When I started I began by shipping promos to influencer friends and my favorite toy photographers on instagram. I haven’t sent any to youtubers with hundreds of thousands of subscribers though because I don’t believe I can currently handle the orders that might come.
The second version I sell is a 9” x 5” wide Alkatraz replica prison cell and the deluxe has 2 prison cells and is 4 square floors. It was fully researched and has features the same table, chair, bed, sink and toilet, wall shelves, etc. Well now since I have the H2D I’m not limited to printing 1 square at a time. I just finished printing 1 big floor the size of 4 squares!
(This forum is really particular with images so I ended up just editing a bunch of photos into 1 lower quality pic because it wouldn’t except the large images separately and I didn’t want to have to convert each one.)
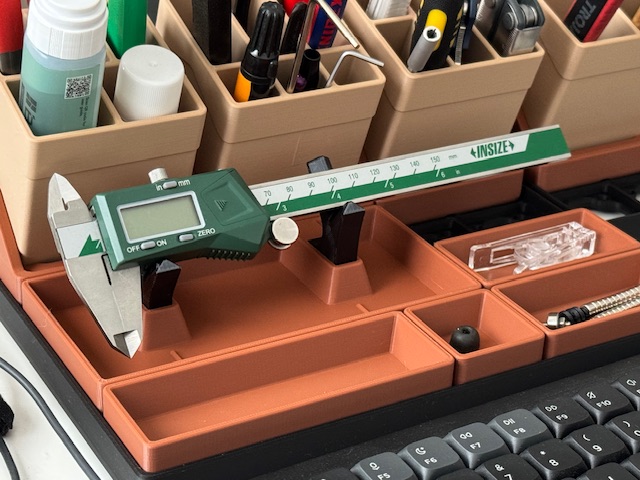
That’s cool. I’m trying to organise my workspace so I can more efficiently organise my other workspaces. It involves positioning my calipers at the perfect height angle on TPU stands for the optimum grabbing experience.
I don’t have pics yet, but I’m printing a cover for the top of my Dell server. It was originally rack mounted and now it’s sitting in a tower configuration. It’s literally printing the first of 3 panels as I type this.
I’m addicted to the light box maker in Makerworld, you can pump out really cool signs super fast. Everyone wants one so it keeps my printer busy during downtime.
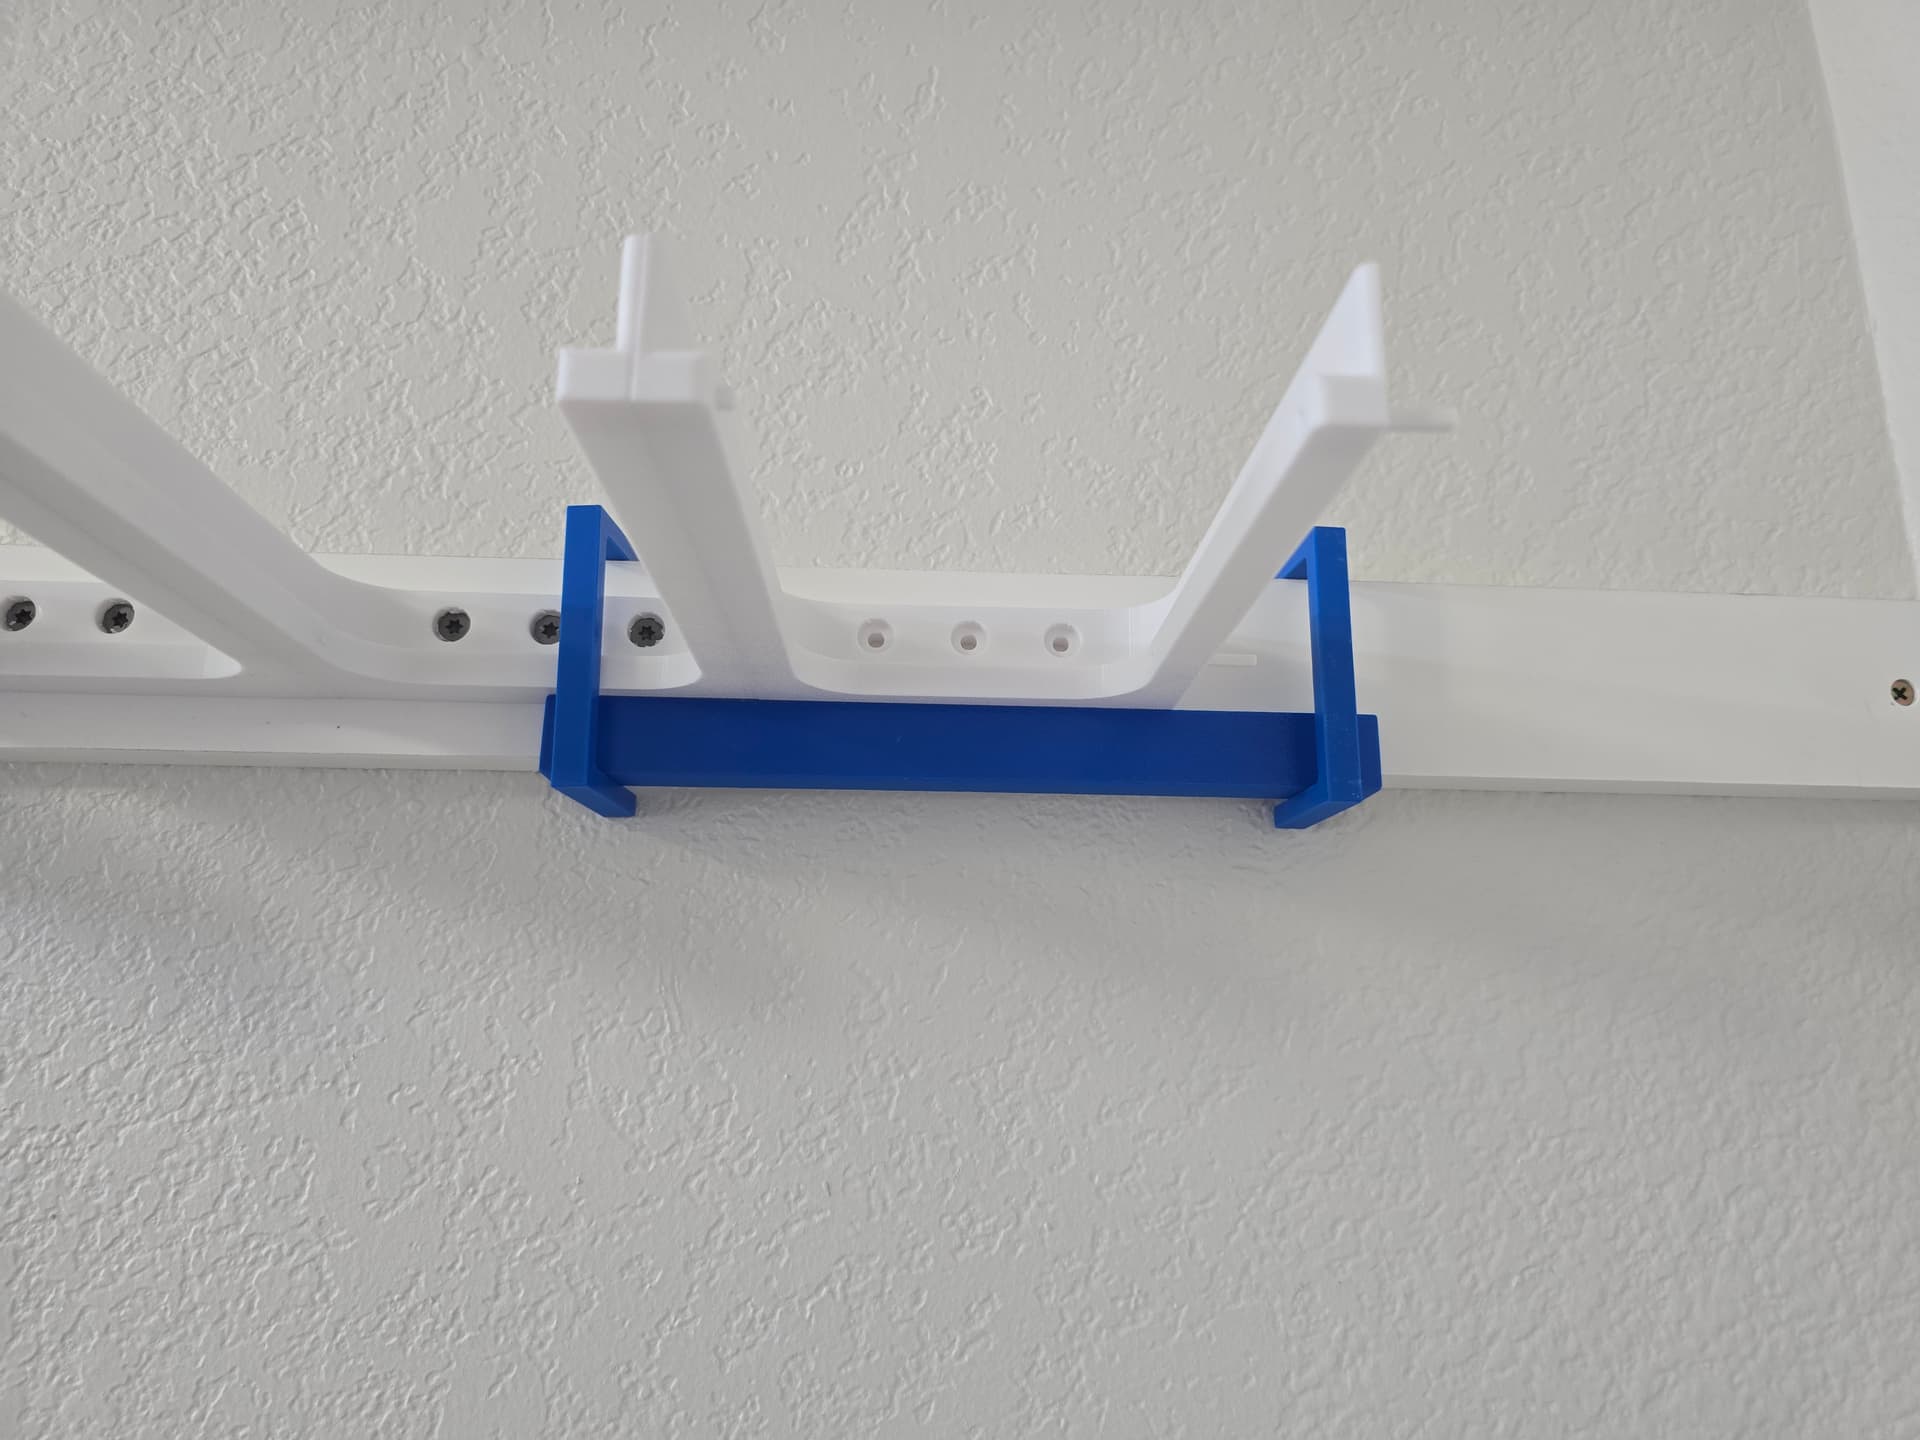
In between a bunch of my other stuff I kept printing out these brackets to try to organize my filaments better. It’s someone else’s design, but I made some little tools to help center the labels and mount the brackets easier. One alignment tool helps Center the labels on the container, and then some other brackets to hold up the pieces while I screw them onto the wall. Keeps them centered and holds them in place.
A modular air filtration box. Not quite done with the design, but it can either be a standalone unit or inline. Everything is attached with magnets so any part but the main housing can be replaced with a different attachment.
What kind of tolerances do you add for the magnets and the fan to fit? Normally on my P1S I would add .15 and for the z .1. So a 6x3 magnet would be 6.15x3.1. But I’m finding the H2D is more accurate so my prints are coming out with looser holes and parts. Like when I put the magnet in it comes back out. I superglue it though.
If your print orientation is such that the magnet hole is on the bottom of the print, I would add multiples of layer height plus account for bridging sagging. So for a 3mm magnet hole, and as I always print 0.2mm layer height, I’d make it 3.4mm deep. 0.2mm is to ENSURE that the magnet can be installed slightly below-flush and the slicer won’t do some rounding to fit the layer heights and 0.2mm is to account for the bridging layer to sag a bit.
If print orientation is such that the magnet is facing up, I’d use a depth of 3.2mm.
Diameter depends too much on the filament stiffness and flow ratio, and how crisp it prints, whether the flow ratio is tuned or not, etc - but I typically add 0.2mm to the diameter for stuff I upload which leads to a snug fit for my usual settings.
Yup that’s true I forgot about that. When on the bottom I noticed the bigging of the holes are tighter and also bridging comes to effect it. Good reminder there.
I did 0.12 all around excluding the sides. I believe I went to 0.16 or something like that due to the sag. All the magnets fit perfect. I did use supports for the ones on the bottom though, so bridging didn’t really affect it.
Probably worth mentioning that I used 10x3 magnets everywhere except where the lid attaches to the main body. Those are 6x3.
Edit: Oh and the magnets I have measured slightly small on the depth. So the 10x3 magnets were actually like 10x2.76 and the 6x3 were somewhere around 6x2.8.
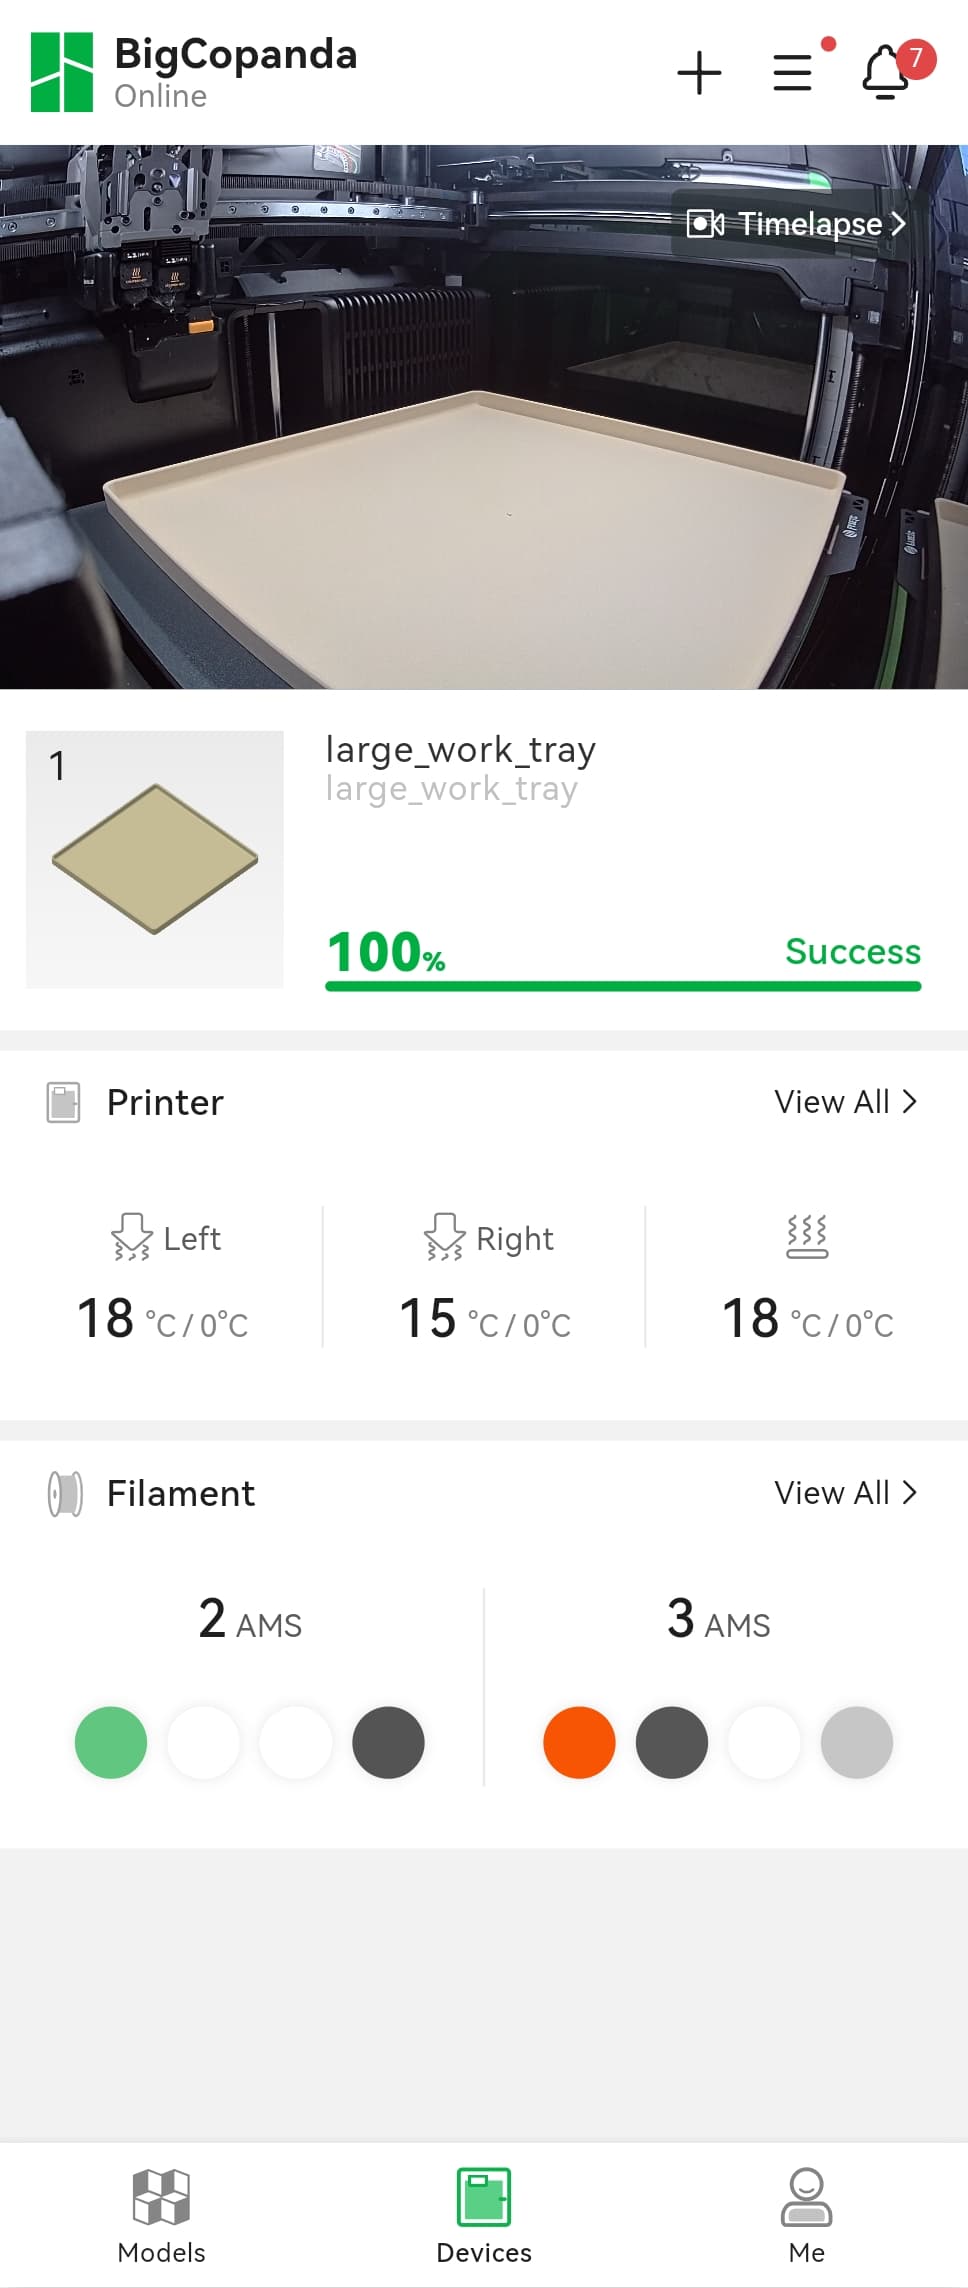
A large work tray I designed to fight my ADHD when doing assembling. Basically you can assemble things on this tray, put all the small parts on it, and even if your desk is a hot mess you can still ignore it by using this tray.
.
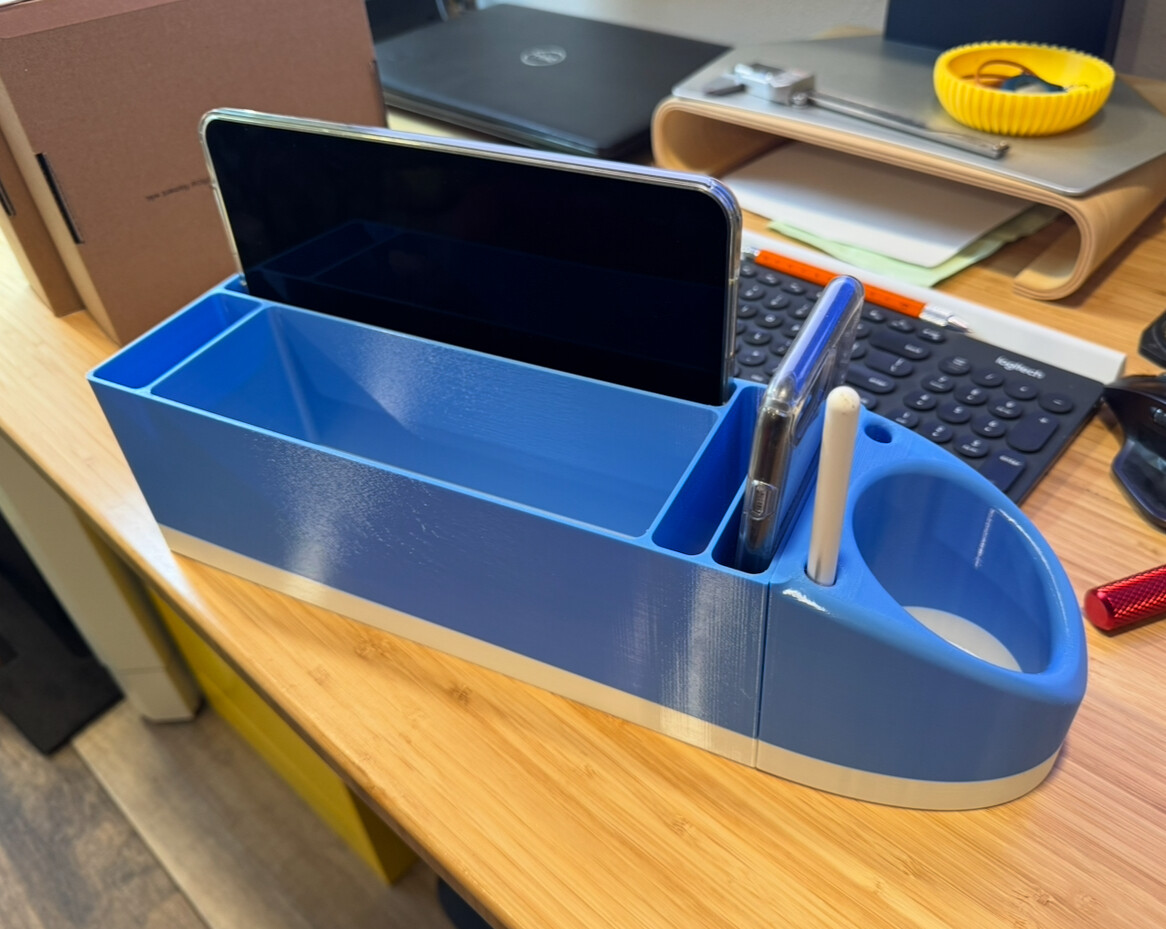
I’ve been home sick this week, so I worked on a new center console for my airplane. There’s a narrow area between seats, and this holds my ipad, phones, and stuff… plus a cup holder! TPU for AMS on the H2D, took about 18 hours.