Arch tip repeatedly fails despite heavy Tree Strong supports (terrain model)

Hi everyone,

I’m trying to reprint only the upper arch section of a terrain piece on an A1 Mini and I’m running out of ideas.

Printer:

- Bambu Lab A1 Mini

- 0.4 mm nozzle

- Matte PLA

- Textured PEI plate

Background:

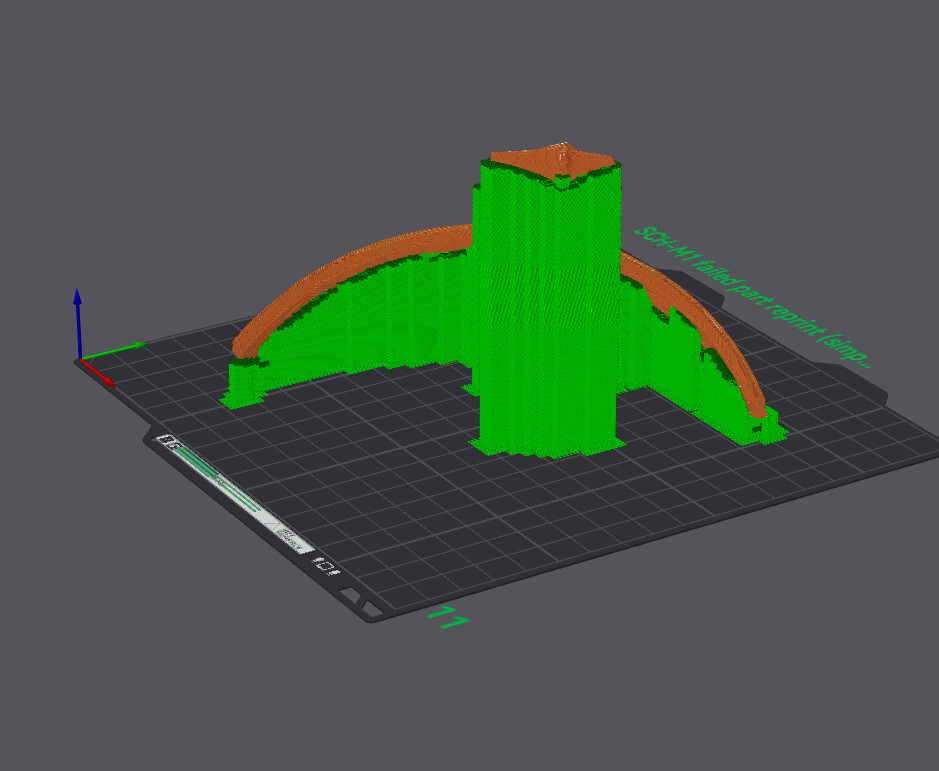
The original model mostly printed successfully, but the upper arch section failed. Instead of reprinting the entire piece, I cut out only the arch and am trying to print it separately and glue it back onto the finished model.

What confuses me is that the failure keeps happening near the same tip of the arch, even though the support structure looks substantial.

Things I’ve already tried:

- Different orientations

- Tree Hybrid

- Tree Strong

- Branch diameter increased to 3 mm

- Support wall loops 1 and 2

- Threshold angle 35°

- Support critical regions only on/off

- Different support densities

- Different support layouts

- Brim object gap fixed (0.1 → 0.0 on previous prints)

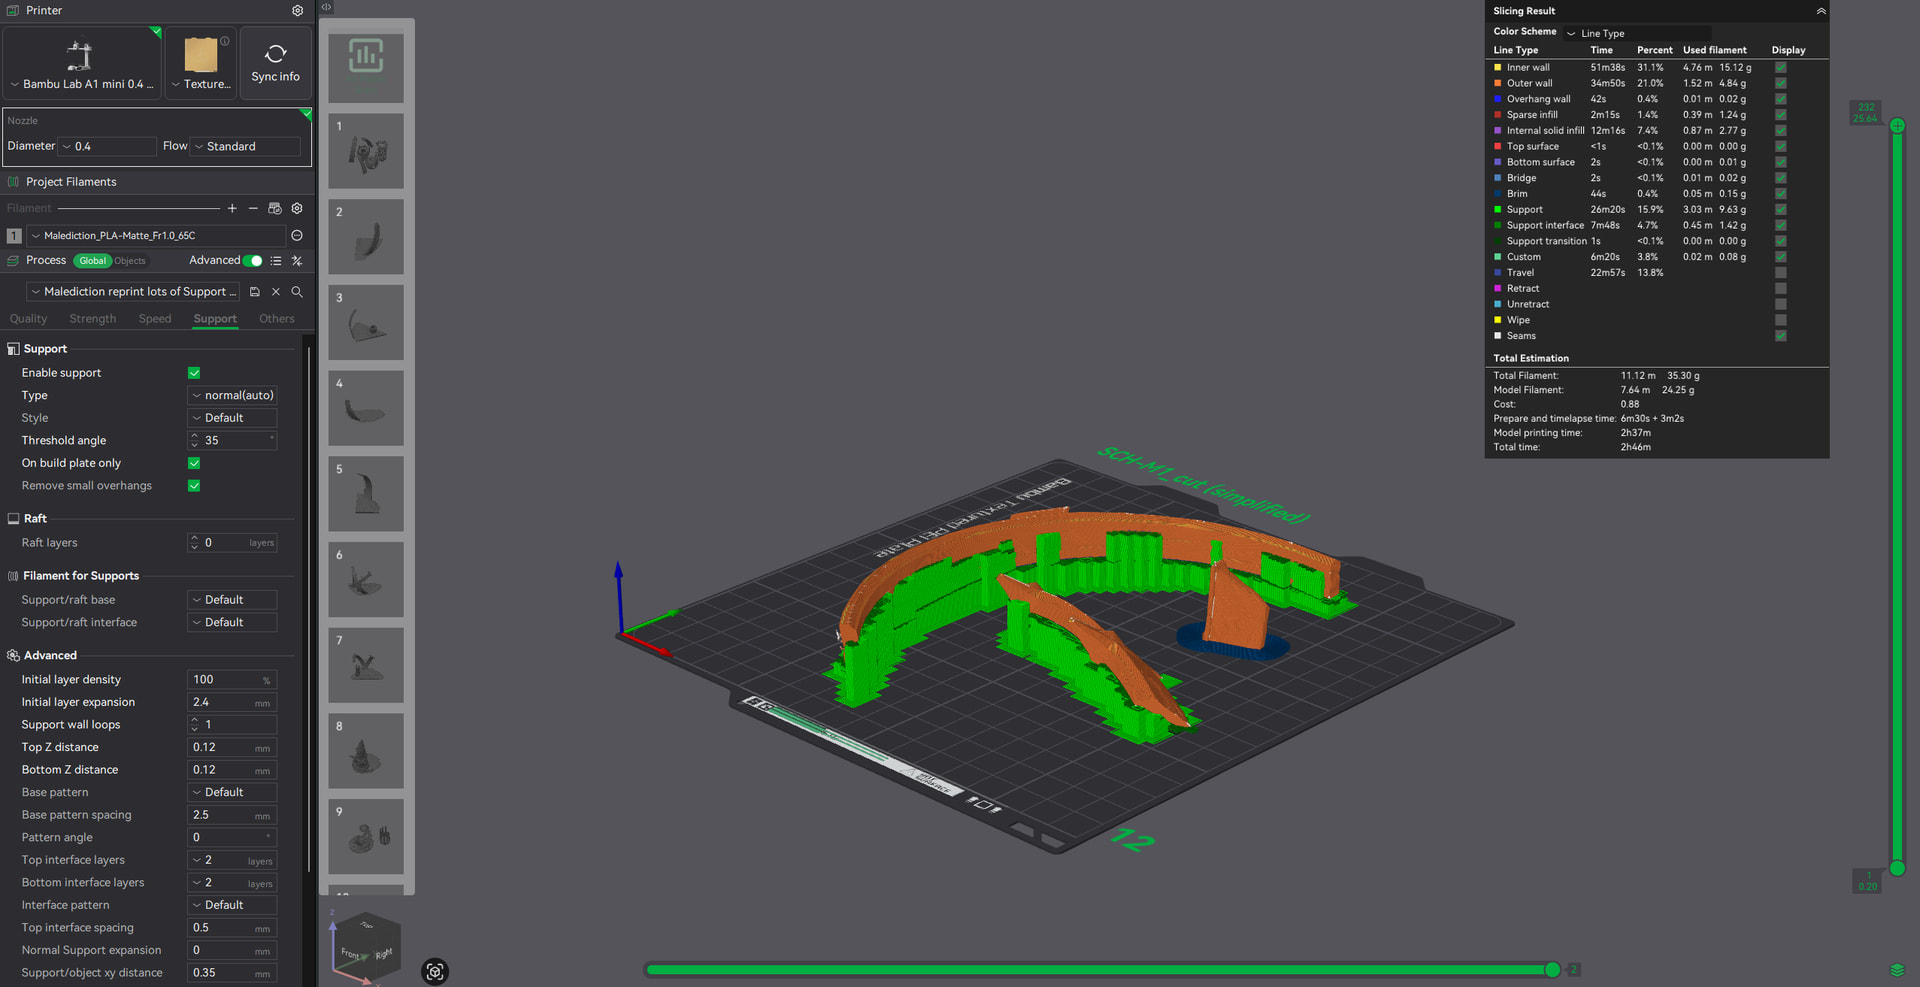
Current support setup:

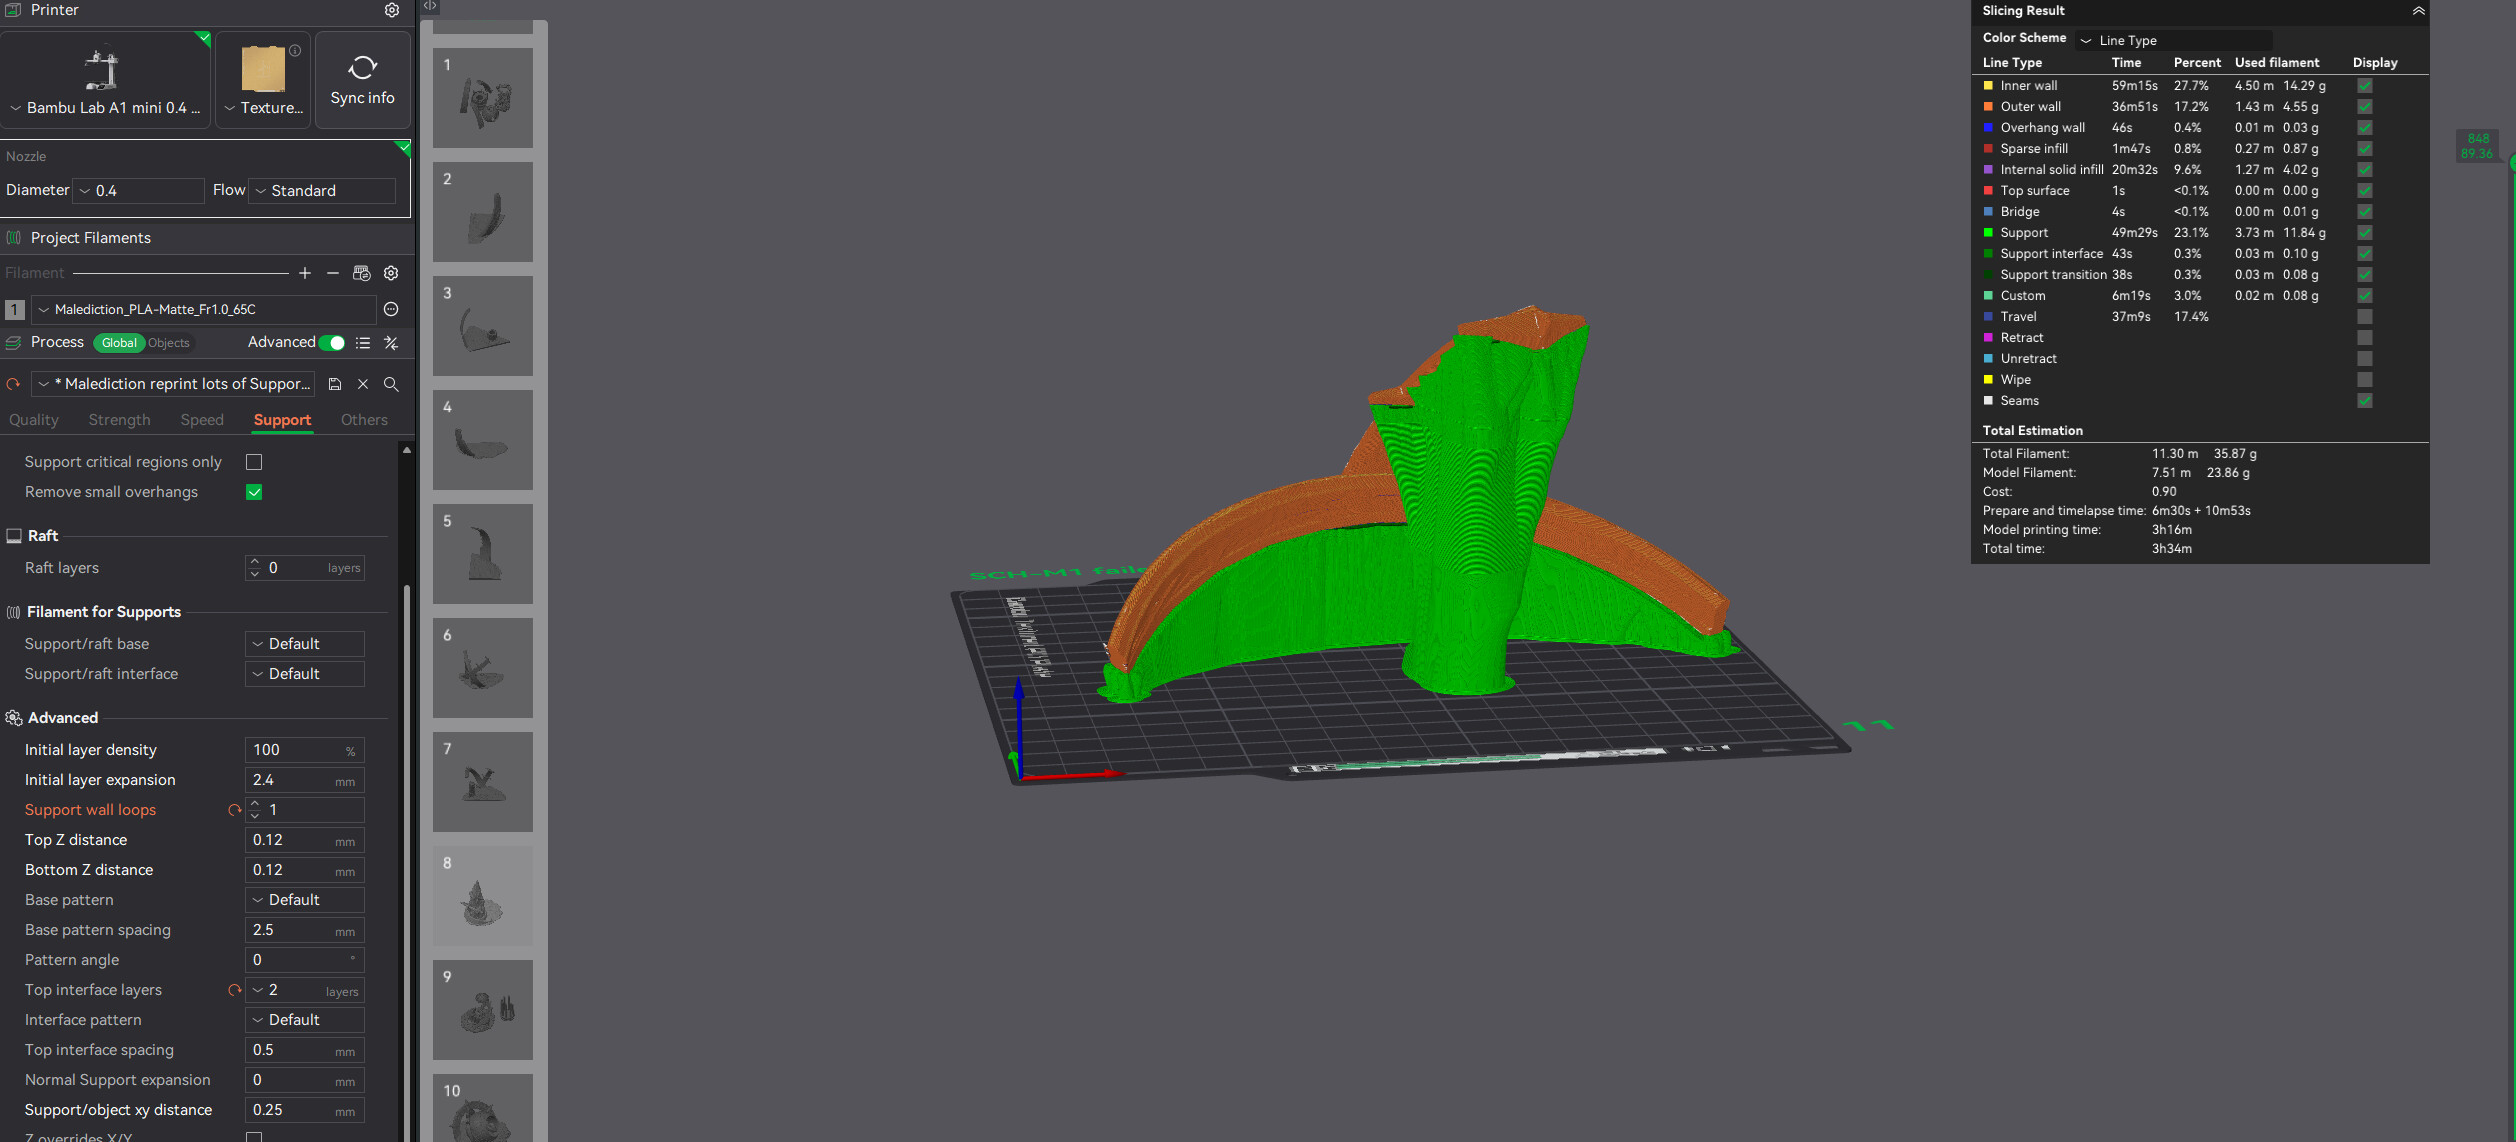
- Tree Strong

- Branch diameter: 3 mm

- Support wall loops: 1 (also tested 2)

- Support threshold angle: 35°

- Support/object XY distance: 0.25 mm

- Top interface layers: 2

What I observe:

- Bed adhesion is fine.

- Support feet remain attached.

- Main support trunks remain standing.

- Failure happens near the same area of the arch.

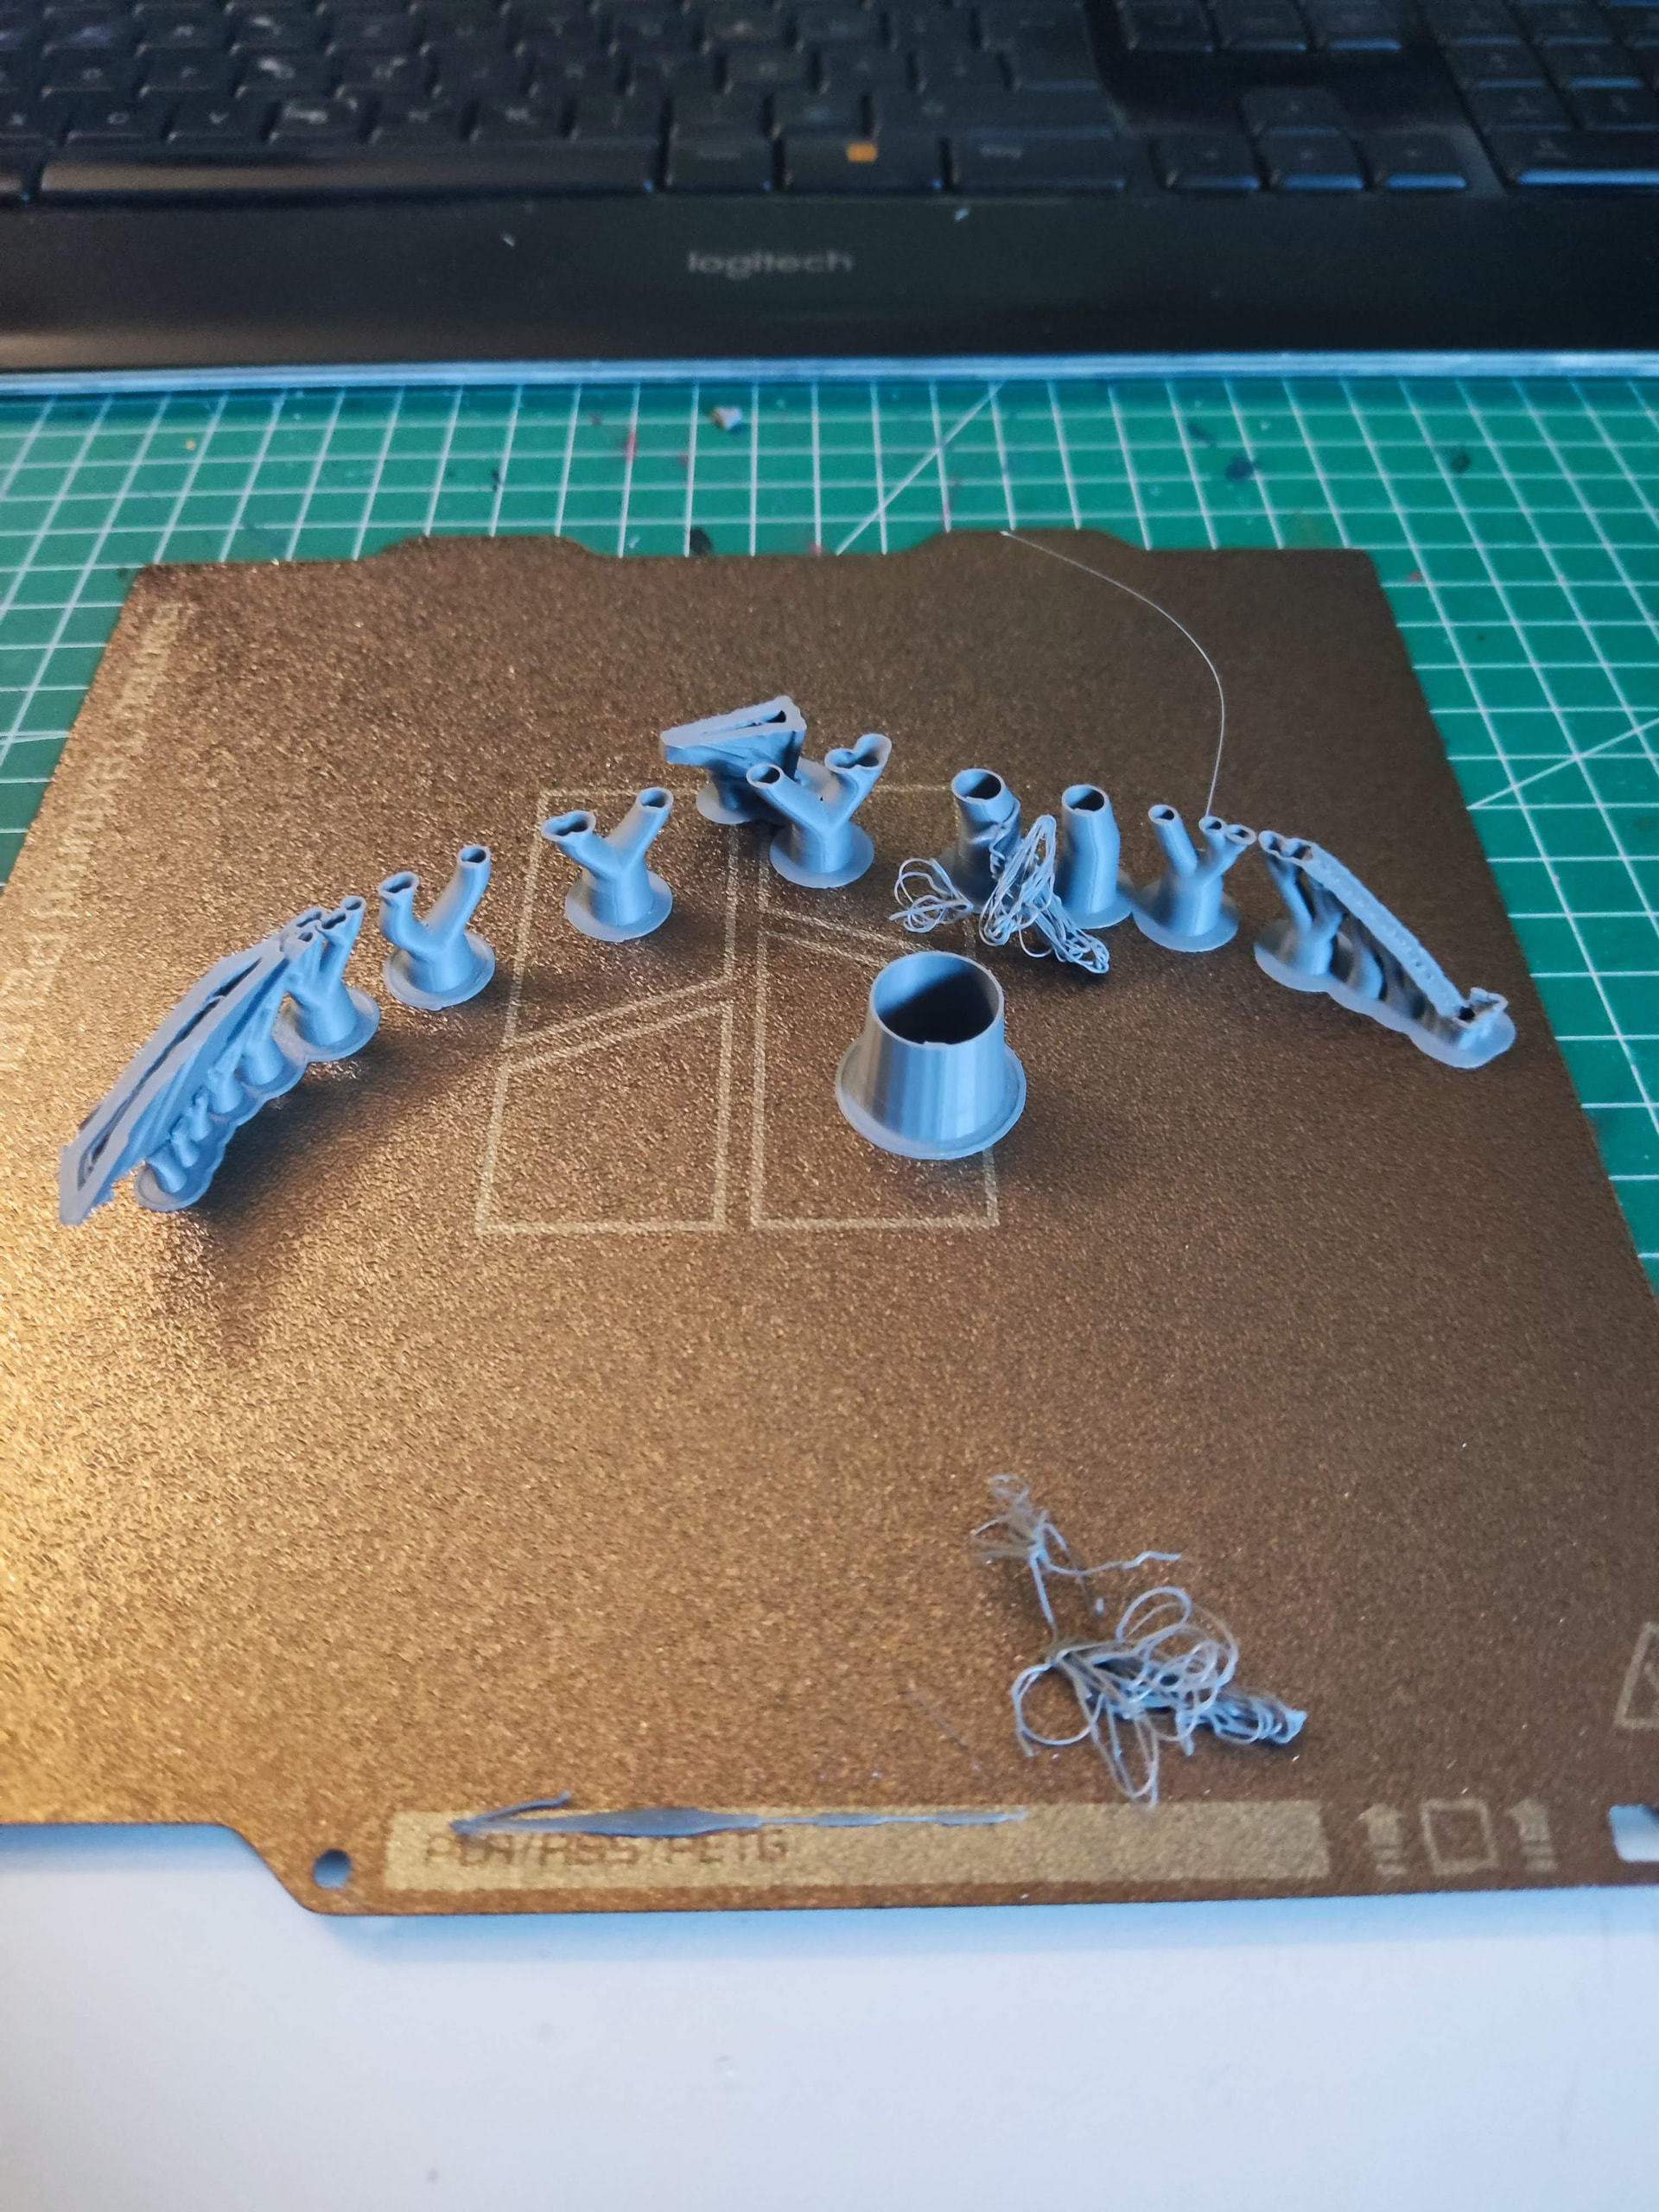
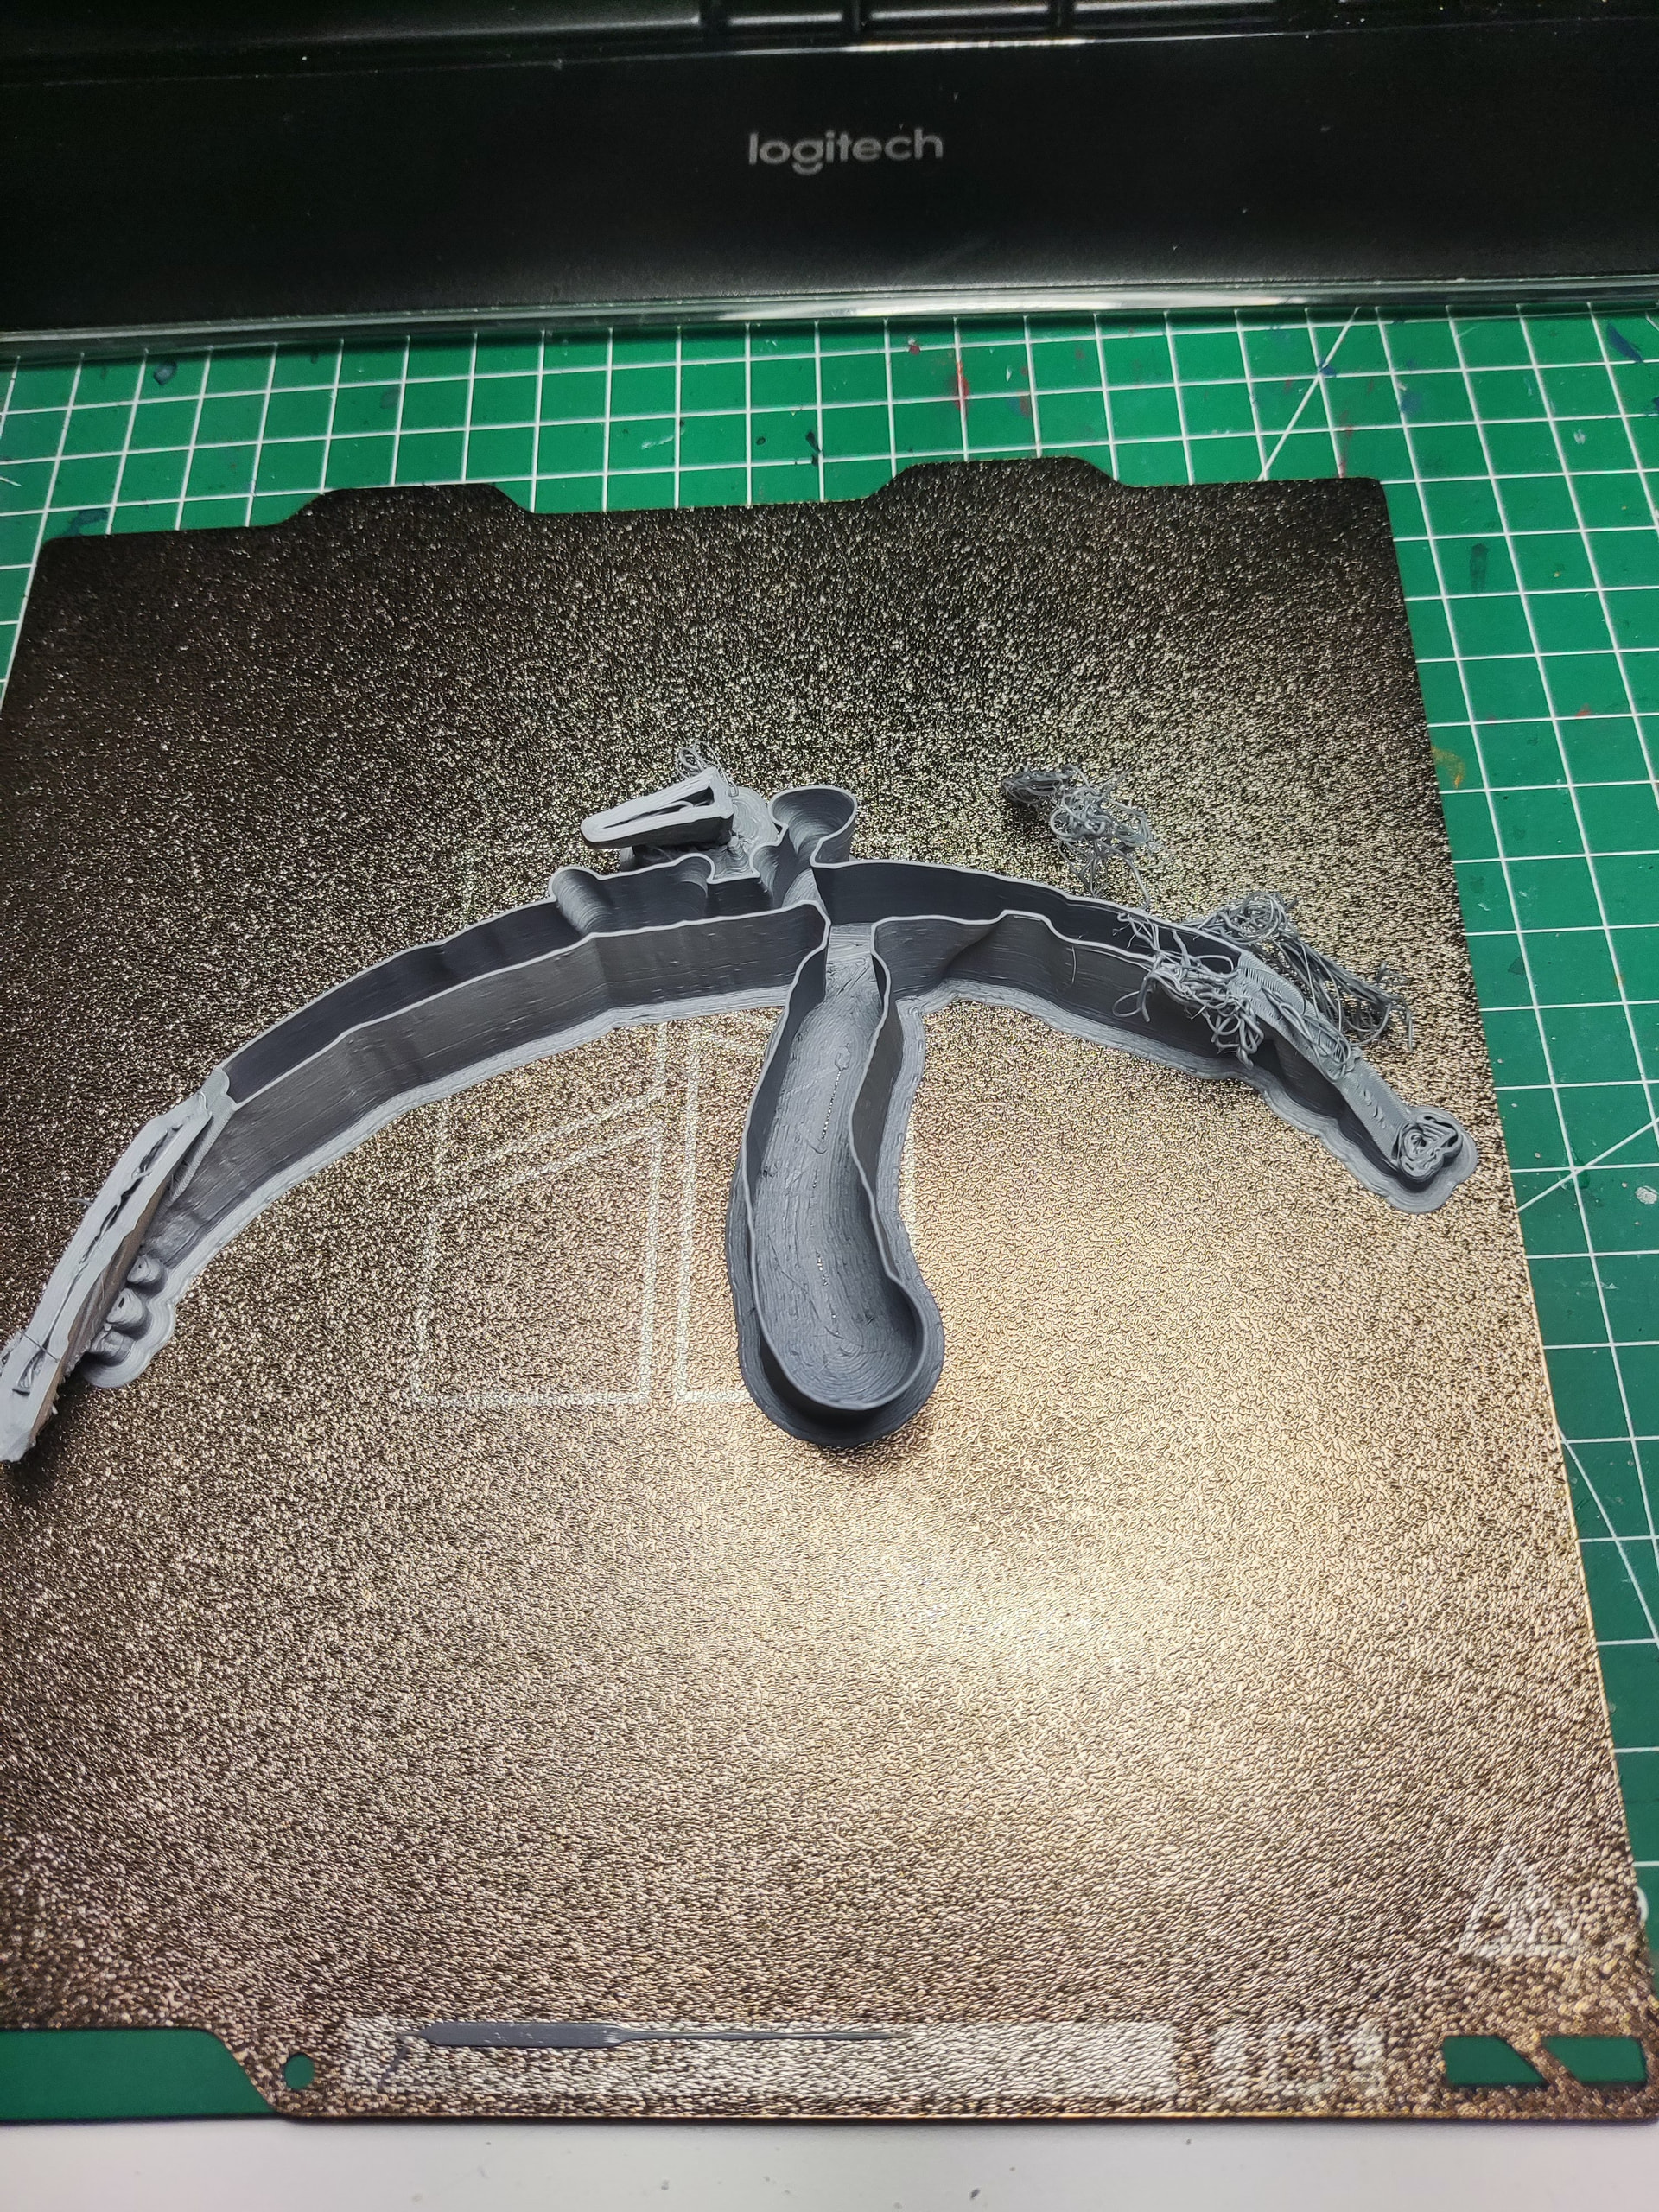
- The print turns into spaghetti after part of the arch fails.

- It doesn’t look like a simple bed adhesion issue.

My question:

Does this look like:

- insufficient support contact?

- nozzle collision / nozzle strike?

- curling on the arch tip?

- support instability?

- something else entirely?

I’ve attached:

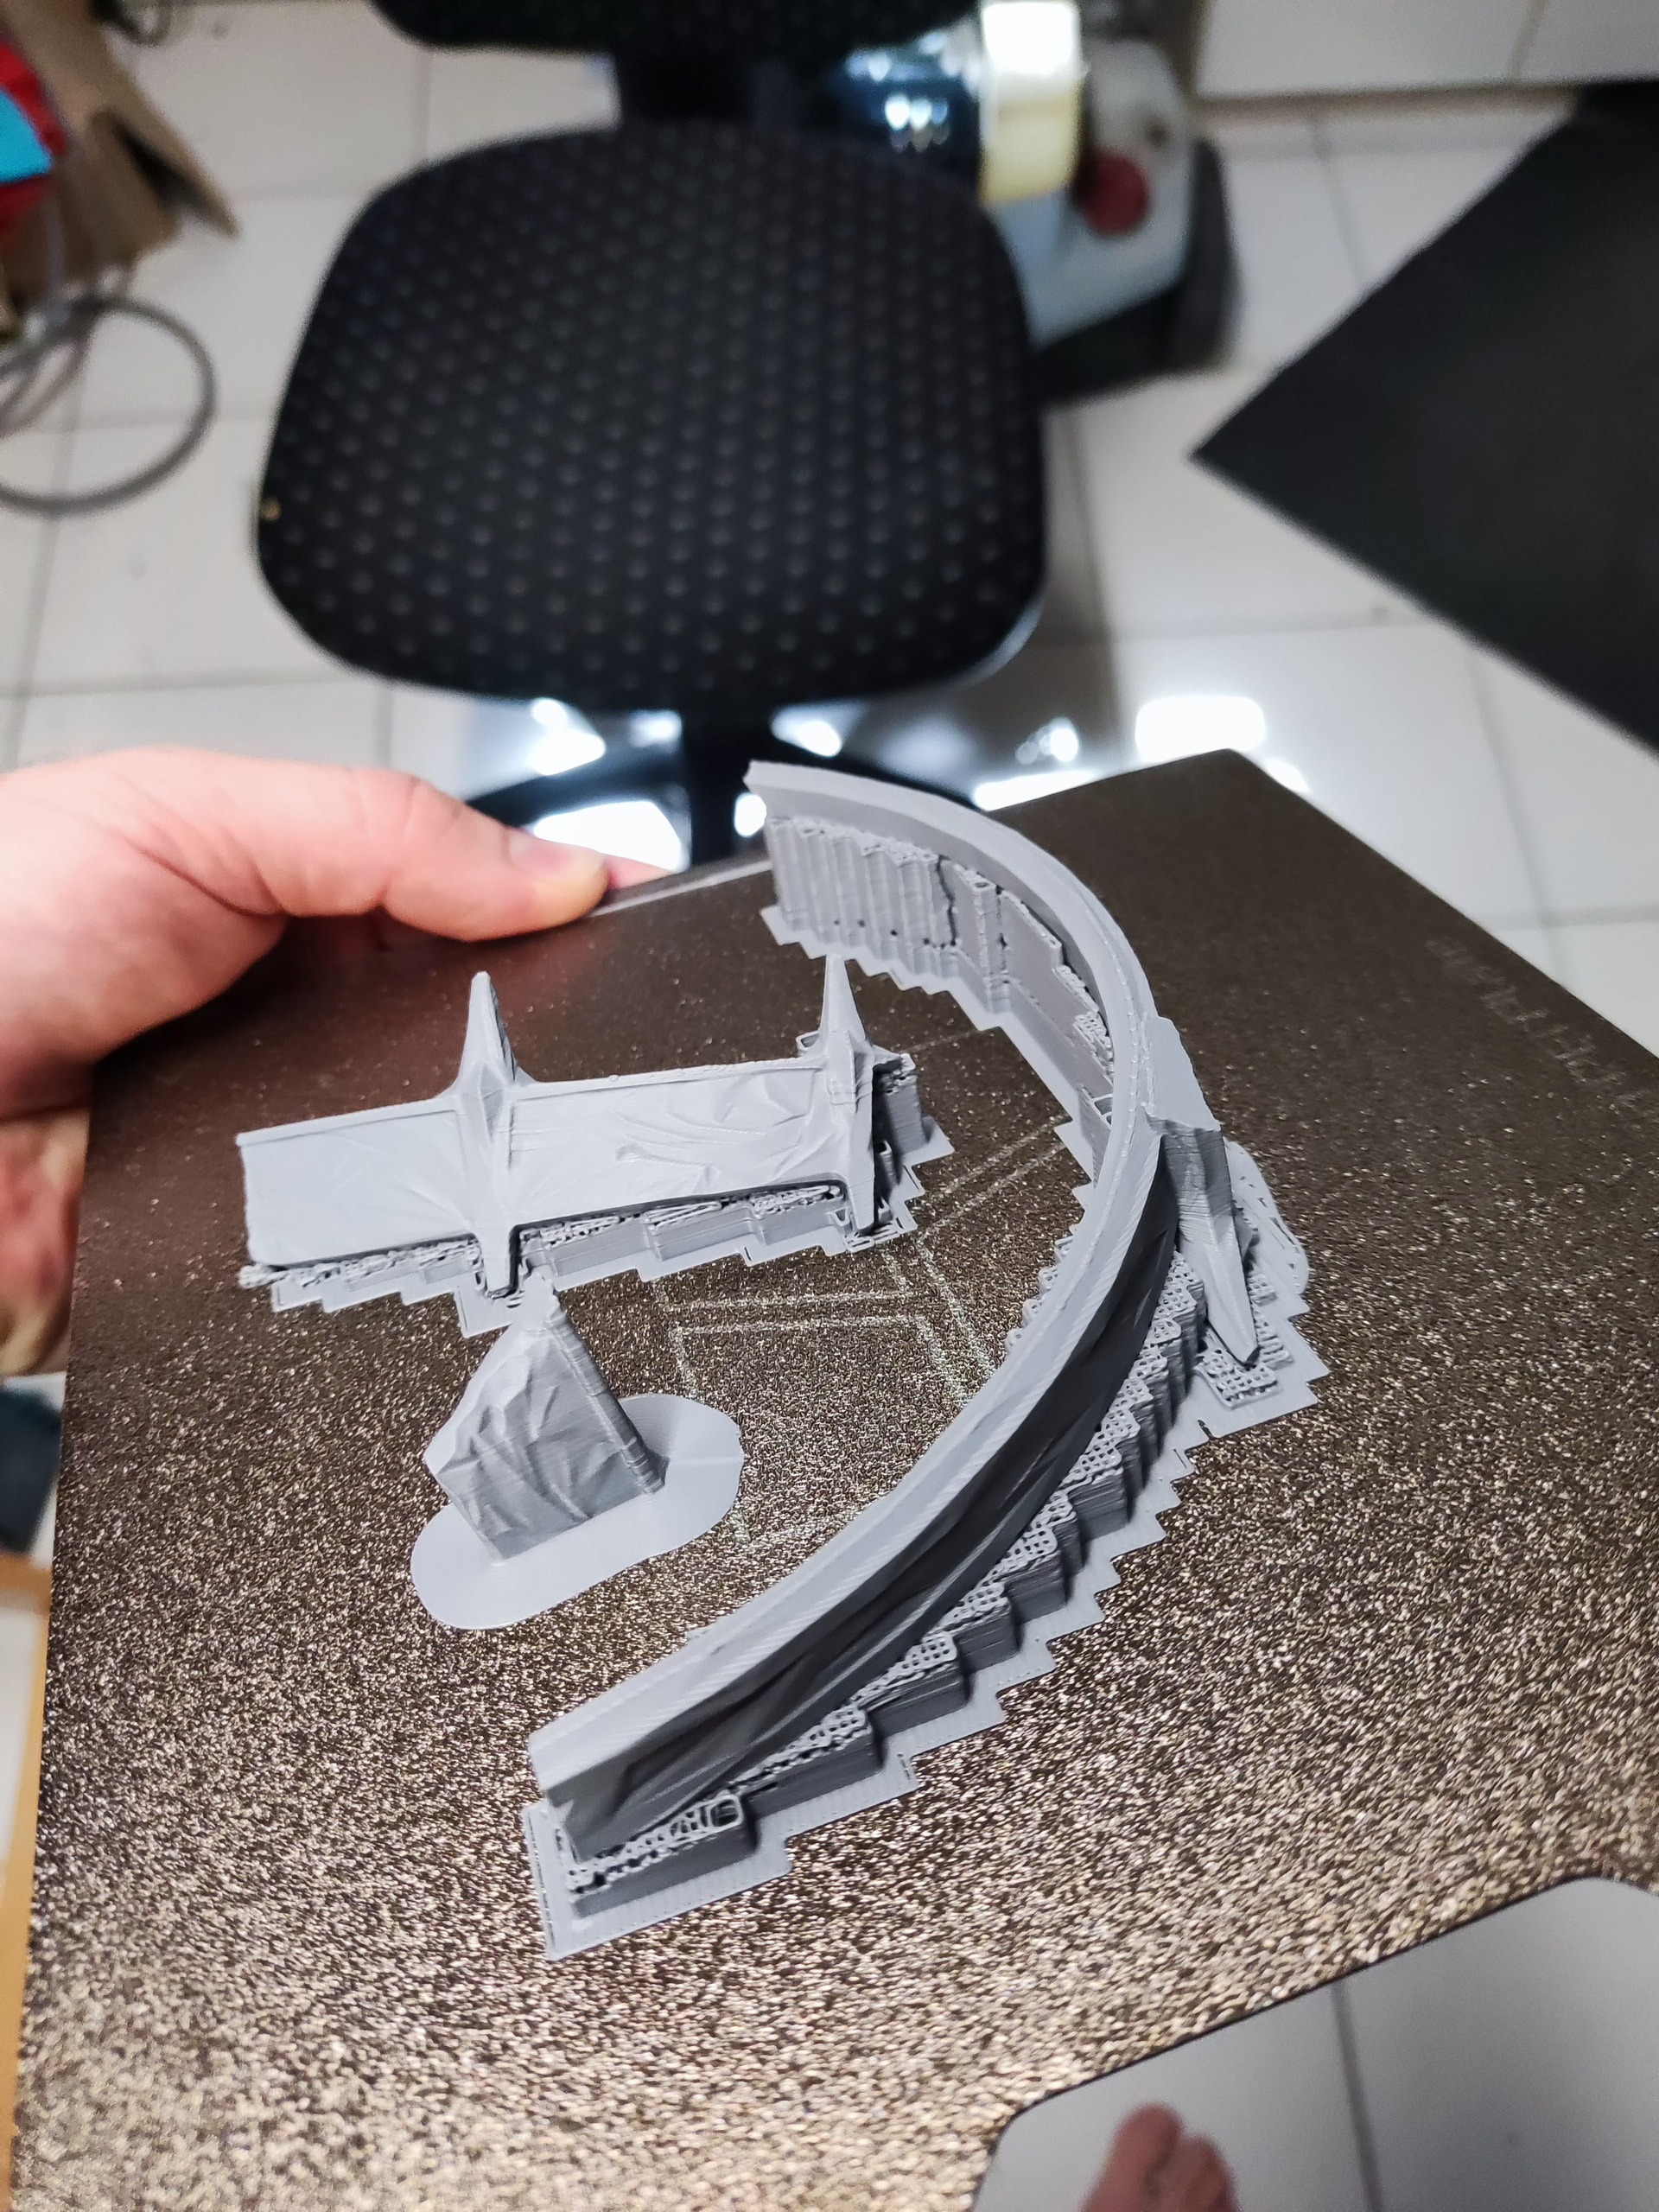
1. The failed print photos.

2. Bambu Studio previews of the support structure.

3. The current orientation I’m testing.

At this point I’m especially interested in whether experienced Bambu users think this is actually a support problem, or whether I’m chasing the wrong cause altogether.

Thanks!
2 Likes

Put the settings back to their defaults and try normal support

The blue pic looks like support failed and reattached itself

1 Like

Do you mean all setting back to the standard bambu ones or only support? Im just starting an need detailed Infos. Thank you.

1 Like

If support is your issue then start there , yes

1 Like

The slicer preview looks a bit like the entire arch sits on supports? I.e. it always has a z-distance of 0.12mm?

In this case, I’d expect low stabilization to lead to arch wobbling on the supports throughout the print. To stop that, you’d probably want to let the arch touch the build plate on at least three points (better, flat areas) that stabilize the different sections before they merge.

Or you’ll want to look at dissimilar support interface materials. That will take much longer though.

:crossed_fingers: & :four_leaf_clover:

1 Like

Supports are probably not the issue

That sounds logical. The whole thing is in a support because it’s only this arch that got ■■■■■■ during the first print. There is no good way to orient the print in a way, that there is a lot of surface it will sit on. So the problem is, that the whole build starts on supports? I can not rotate it in a way that it has enough surface are. Is there any way to print it or am I forced to repeat the whole print itself?

1 Like

That image appears to have additional parts , to the one posted above , did you go back to the original model ?

2 Likes

I agree 100%. The design of the part is actually more suited for standard support, since tree support is pretty much pointless in this case and introduces an additional source of error.

No question about it: Tree support is great, but for massive parts like this, standard support is clearly superior.


Other settings only introduce more potential errors into the print. Most often, the mistake is trying too hard to adjust every possible setting. Especially when you’re just starting out with this hobby. Sure, there are other important settings, too, but often the problem isn’t the print itself - it’s that you’re trying to change too many settings at once.


By the way, kudos to you for describing everything in such detail right away and including photos.

2 Likes

Thank you guys for your help. So if I get everything right is, that I should change the supports to default/normal and not tree for this instance and then print again?

Should I keep the settings for the supports with 2 walls, etc.

I’m kinda flattered now. I thought it’s normal to describe as much as possible and give as much detail as possible for a proper error analysis :slight_smile:

2 Likes

No, that was the first print I did which failed. Then I only wanted to print the part that failed, because I can glue it to the rest. I mean I remove the failed part, print only the failed part (which causes me so many problems), glue it together

I added normal supports and not it looks like this. I dont find a way to get it flat without cutting it in several pieces. mb thats what i try next.

1 Like

This is how it looks, if I cut it into small pieces. This will be more work with gluing, and sculpting to make it look good. If i do it like this. do I use normal supports or tree? From what I have learned, i would use normal supports, because the print object lies on the support. Using Tree in this case would only save me a few minutes.

1 Like

This will be very difficult to print. Try to use the “lay flat” function to get 3 points attached to the build plate. And then move the entire Arch down by another 0.2mm to get some contact area. It’ll still be a nightmare though…

It may be worth posting a pic of the entire model (slicer, preview) so that we can give some better guidance.

Manually cutting a model and hoping to get a good fit with a print of the remaining part will leave ungainly marks. At least by my skills :sweat_smile: . You can probably get a much better look by reprinting either the entire model, or by using the cut tool to strategically break the model into joinable sections.
Connectors or Swallows tail are good options for this. A bit limited in the slicer, but better than trying to match failure locations to print bases.

:crossed_fingers: & :four_leaf_clover:

I tend to choose Normal type when there are wide, flat-ish, open areas that need supporting. It just tends to come off easier.

You’ve got those little edges and stuff flying off the top that need supports too, so I dont think its as cut and dry of a selection. :slight_smile:

In all cases with lots of support, I would increase your “Interface Layers” to 3-4, and use “Top interface [pattern] spacing” of 0. This creates a real solid chunk of plastic directly underneath your part, and it really helps in gripping that solid chunk with pliers, and rotating your hand to apply a lever-assisted torque that breaks off all the little attachment points like a zipper in one go. It obviously inflates print time and wastes a little more filament, but [imo] more reliable

Small update:

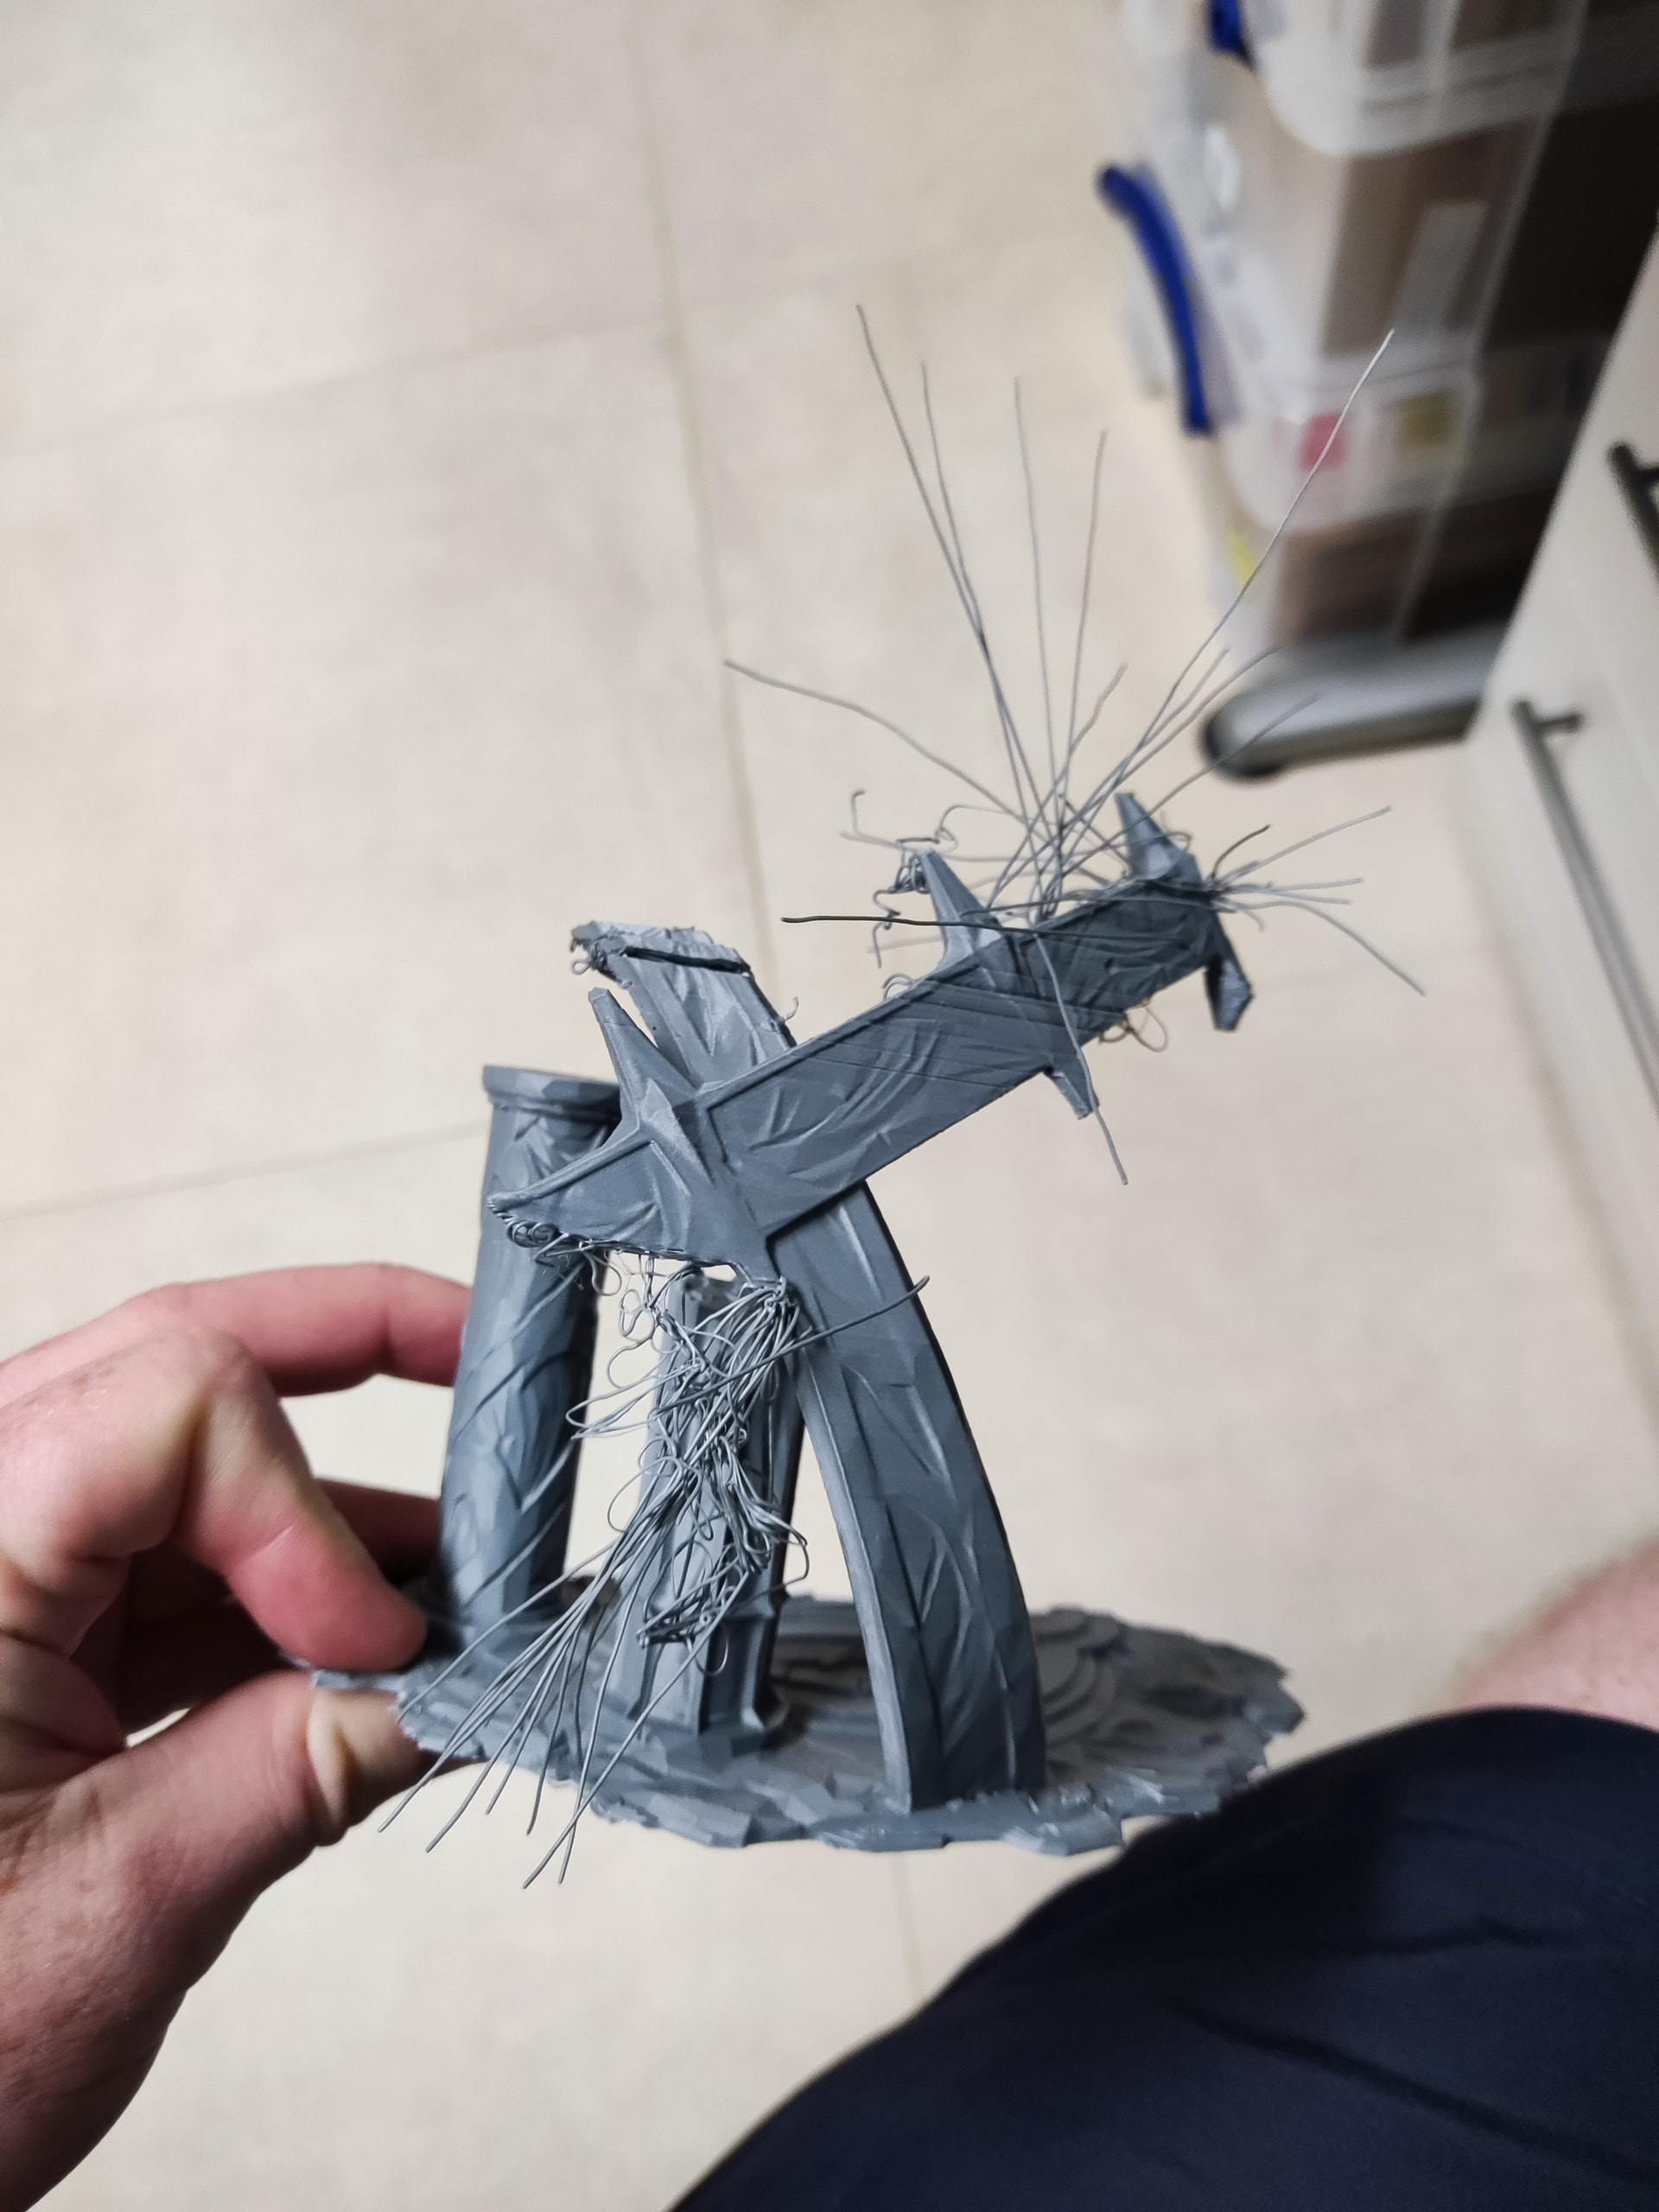
I now observed a very similar failure on a completely different terrain model.

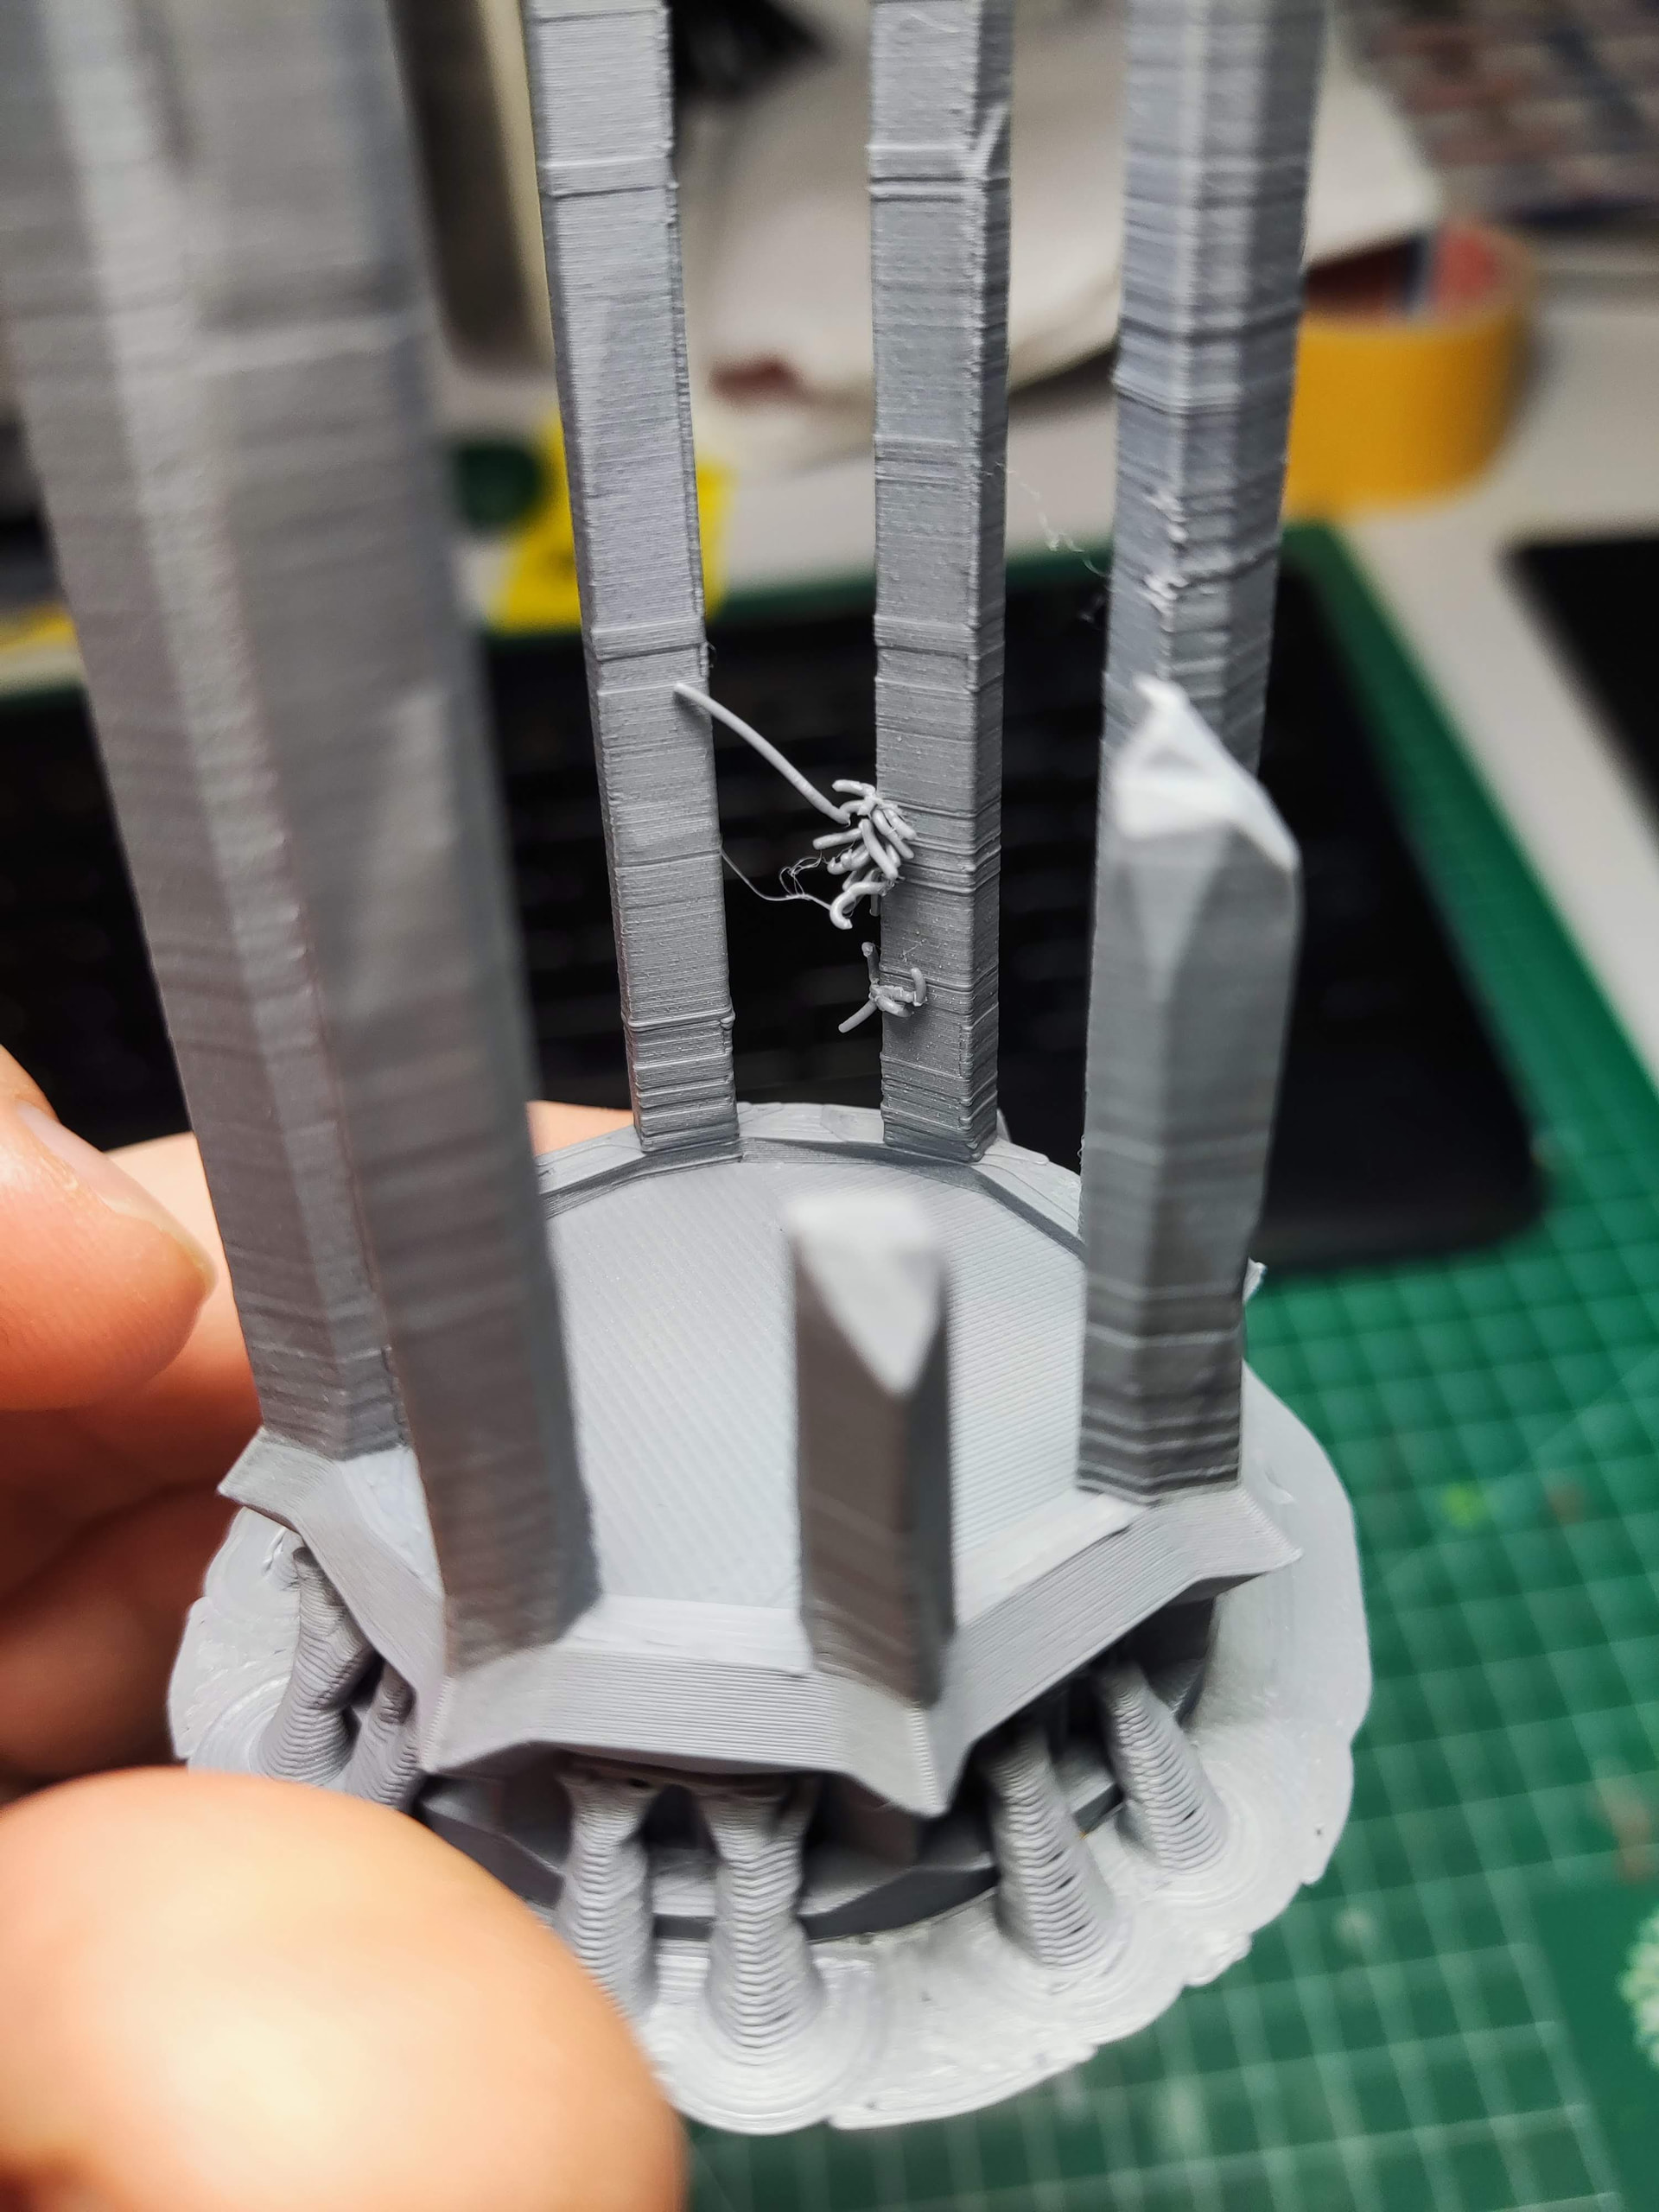
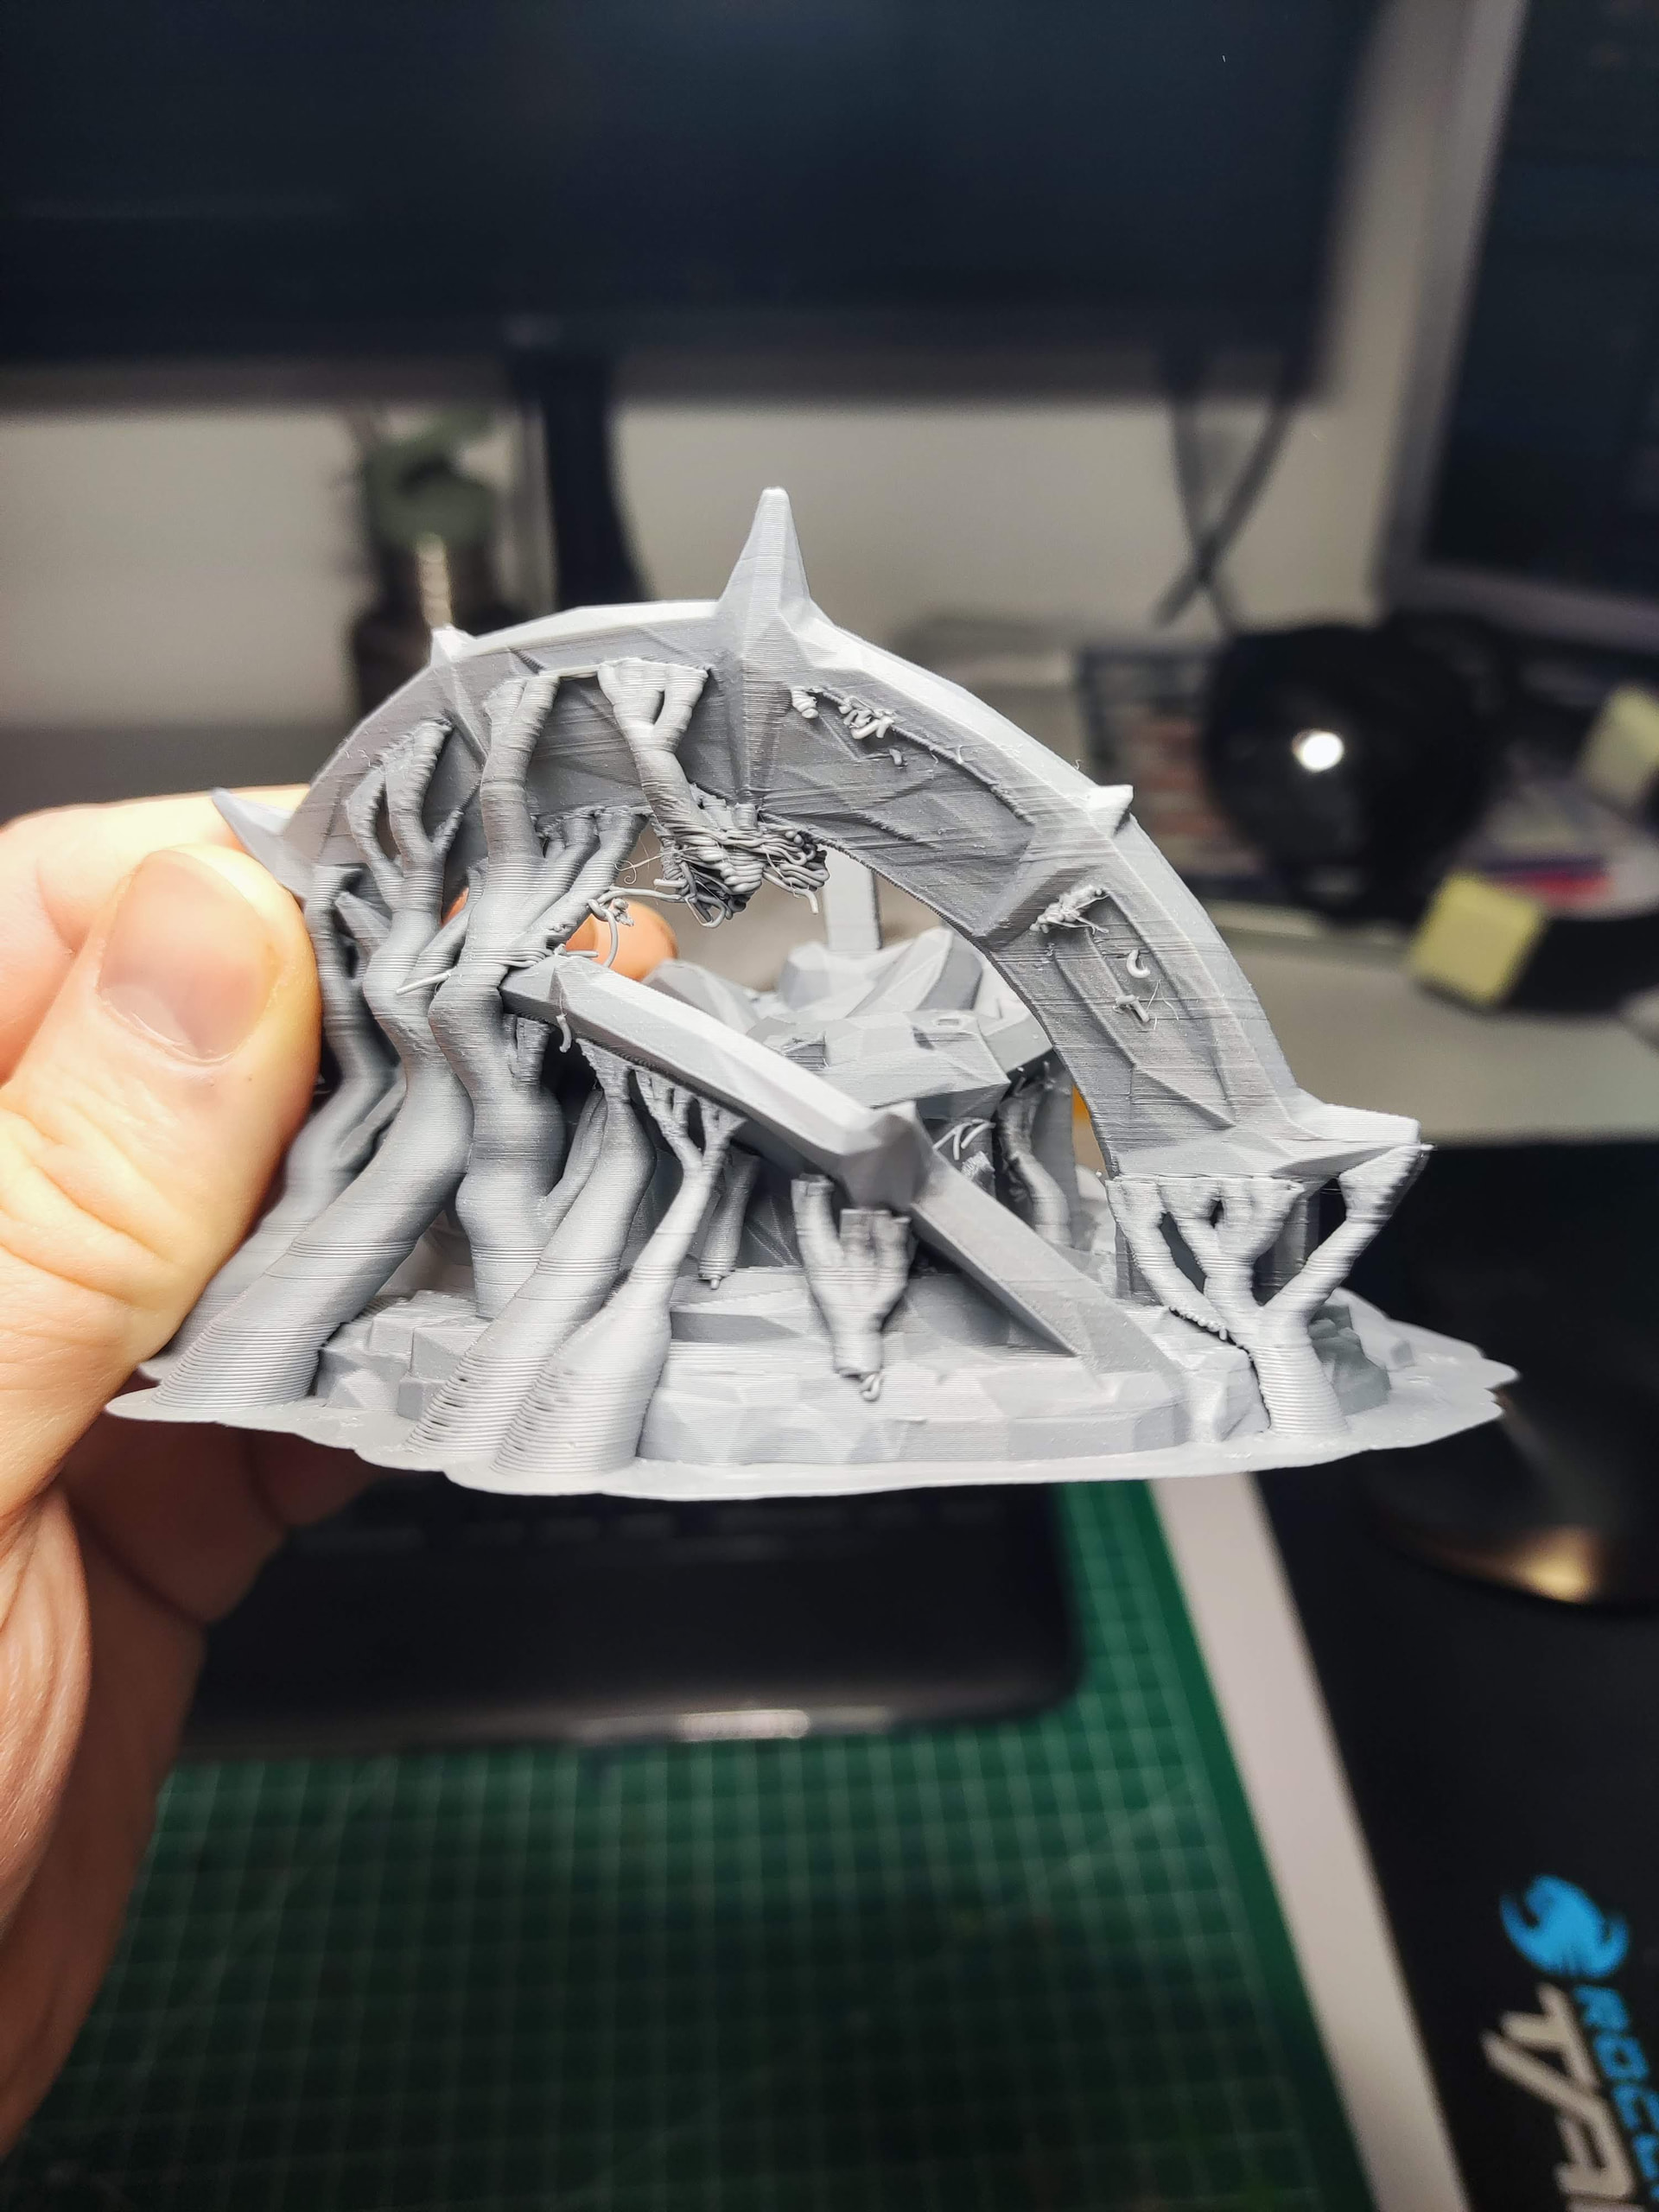
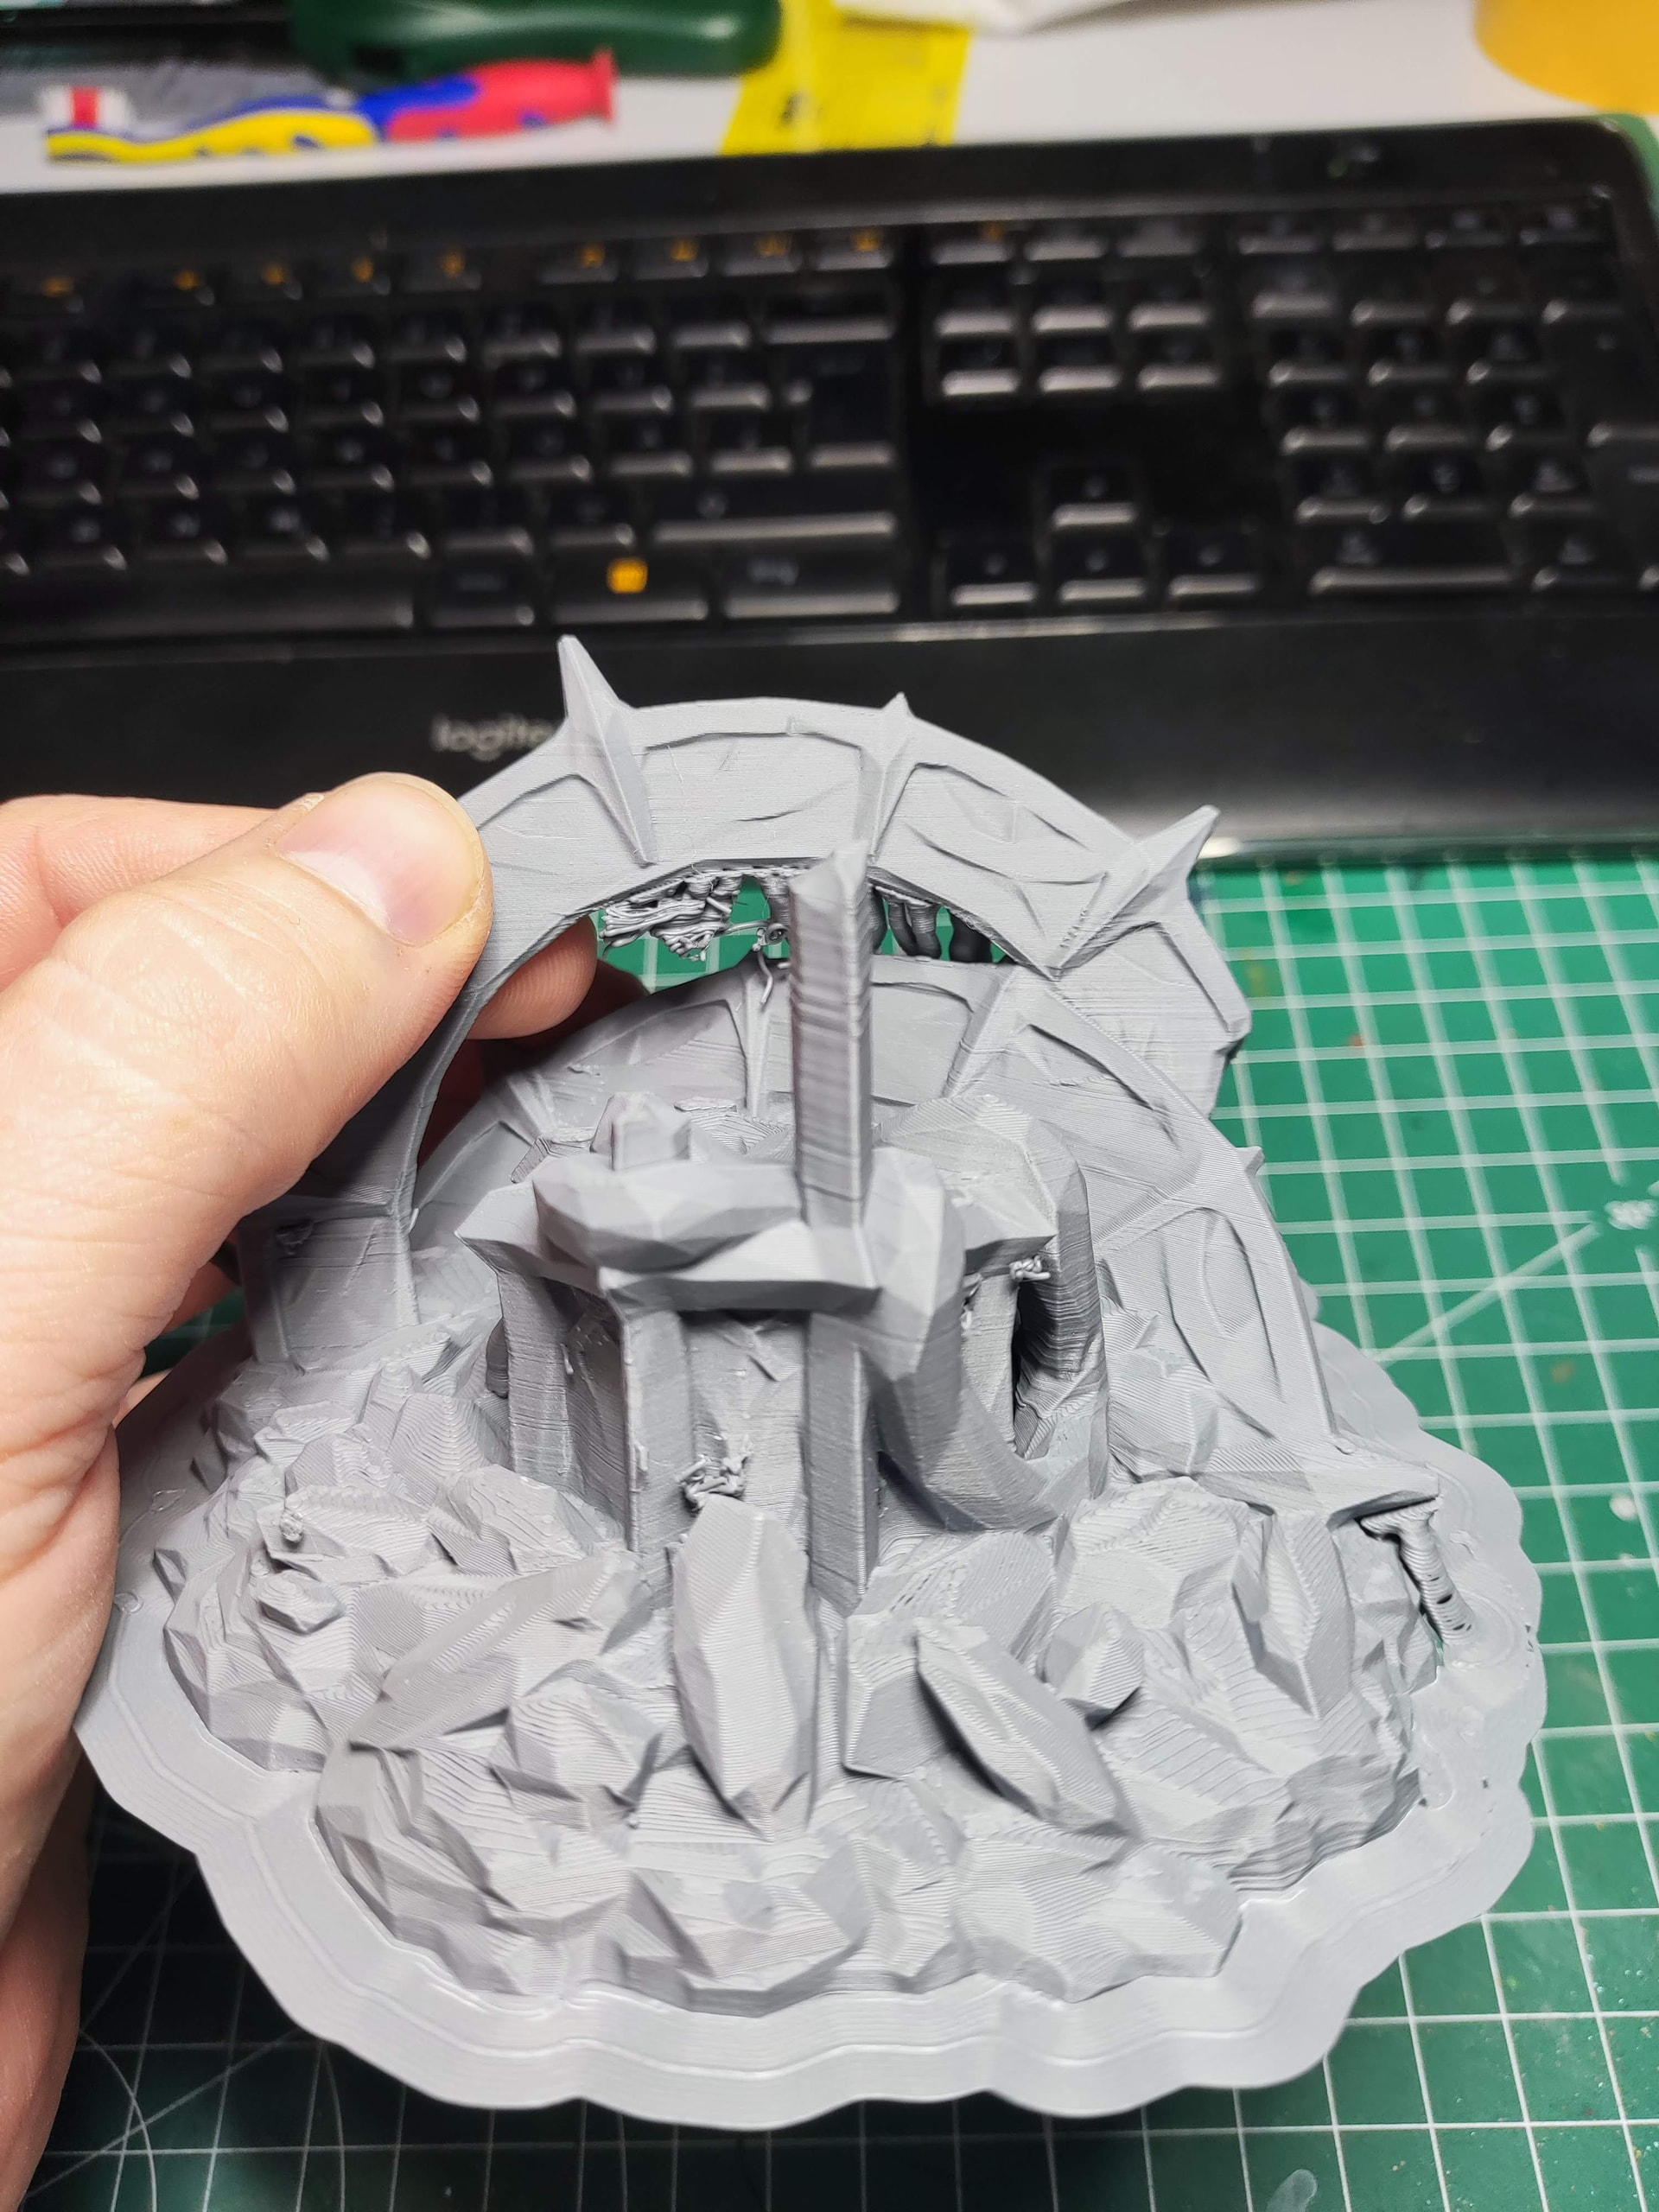
The support bases remain attached to the build plate and the main support trunks stay standing, but upper support branches/fingers appear to break off during the print. The print then continues in mid-air and creates local spaghetti.

Because I am now seeing similar failures on multiple different models, I am starting to doubt that this is simply a “not enough supports” issue.

Current setup:

Printer:

- Bambu Lab A1 Mini

- 0.4 mm nozzle

- Bambu Matte PLA

- Textured PEI plate

- Bed temperature: 65°C

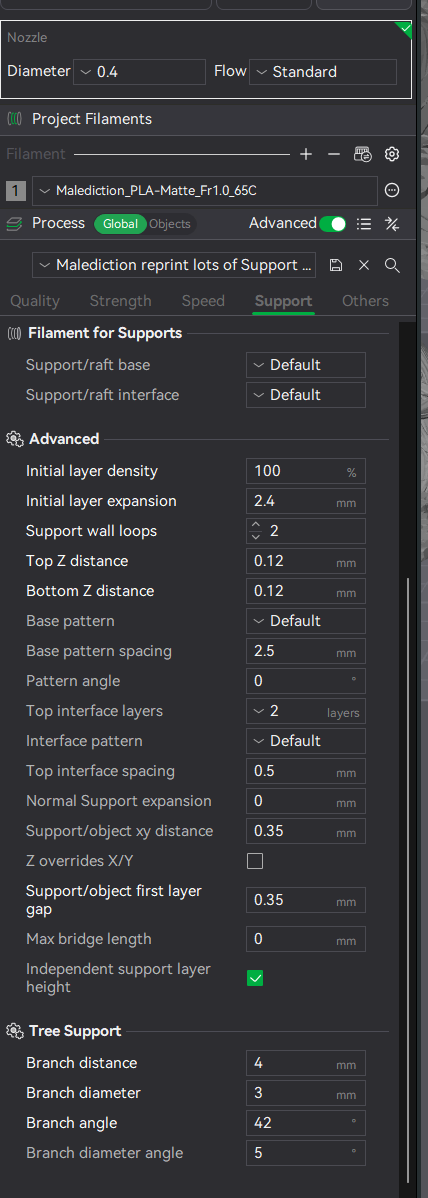
Support settings:

- Tree Strong

- Support Threshold Angle: 35°

- Branch Diameter: 3 mm

- Branch Distance: 4 mm

- Support Wall Loops: 1

- Support/Object XY Distance: 0.35 mm

- Top Interface Layers: 2

- Top Z Distance: 0.12 mm

- Bottom Z Distance: 0.12 mm

- On Build Plate Only: Enabled

Speed:

- Support Speed: 150 mm/s

- Outer Wall Speed: 60 mm/s

Other:

- Avoid Crossing Walls: OFF

Things I already tried:

- Tree Hybrid and Tree Strong

- Different orientations

- Support Wall Loops 1 and 2

- Threshold Angle 25° and 35°

- Different support layouts and densities

- Additional supports in problem areas

- Support Critical Regions Only enabled and disabled

What confuses me is that the supports themselves do not seem to fail at the base. The trunks remain attached and standing, but upper support branches repeatedly fail on different models.

At this point I wonder if this could be:

- nozzle strikes/collisions

- curling near supported overhangs

- support interface/contact issues

- support speed being too high

- something else entirely

I attached three additional photos from another model showing similar failures.

Any thoughts would be appreciated.

@Bullocks Would increasing Top Interface Layers from 2 to 4 and setting Top Interface Pattern Spacing to 0 make sense in this situation?

Right now I’m printing the problem-part separated with normal supports and it looks promising.

1 Like

Thanks for this extensive write up and pic’s. That really helps.

From what I can see in particular in the second pic, there are a few further items.

  • The rocky base shows regions of the classical flow waves
  • Support contains wobble lines
  • Very large brim despite a large bottom surface
  • Layer lines appear consistently

=> To avoid chasing rabbits, I’d first get everything into pristine condition:

  • Dry the filament (again)
  • Clean the plate really thoroughly and repeatedly if I had the feeling I’d need it
  • Run through the recommended maintenance, in particular anything regarding tightening

=> I’d then

  • Loose that massive brim for the object, keep support brims
  • Lower outer wall speed or max flow by 10-15% to reduce/eliminate flow waves
  • Use 2 wall loops for support to reduce support movement
  • Use Variable Layer height not only for improved optics, but also to reduce layer height at support interfaces to reduce curling
  • Double check infill types are anything but grid
  • Consider the use of speed reduction with increased print height
  • But probably run a test case with “wipe on retract” enabled

:crossed_fingers: & :four_leaf_clover:

1 Like

I will do that and report back. I probably should have said, that the printer is only 7 days old.

Printing with normal supports worked marvellous for the “reprint-arche”. thank you very much. Right now im drying and recalibrating.

2 Likes

Just wanted to post a final update and thank everyone who took the time to help, especially @EnoTheThracian, @Bullocks, @Neiljt and @RetroSharky.

I worked through the recommendations, including checking support settings, adjusting support wall loops, reviewing speeds, and generally taking a more careful look at the support structure rather than just adding more material everywhere.

In the end, the solution was actually the one suggested in the final part of the discussion: cutting the model into a more manageable section and using normal supports instead of trying to force the original orientation with tree supports.

The replacement part printed successfully and I was able to repair the model without having to reprint the entire piece.

I also learned quite a bit throughout the process about support interfaces, support stability, orientation, and where tree supports are great versus where normal supports are simply the better choice.

Thanks again to everyone who helped troubleshoot this. I appreciate all the suggestions and the time you spent looking at the screenshots and failures.

Special thanks to @EnoTheThracian for sticking with the thread and helping me work through the problem step by step. Much appreciated!

4 Likes