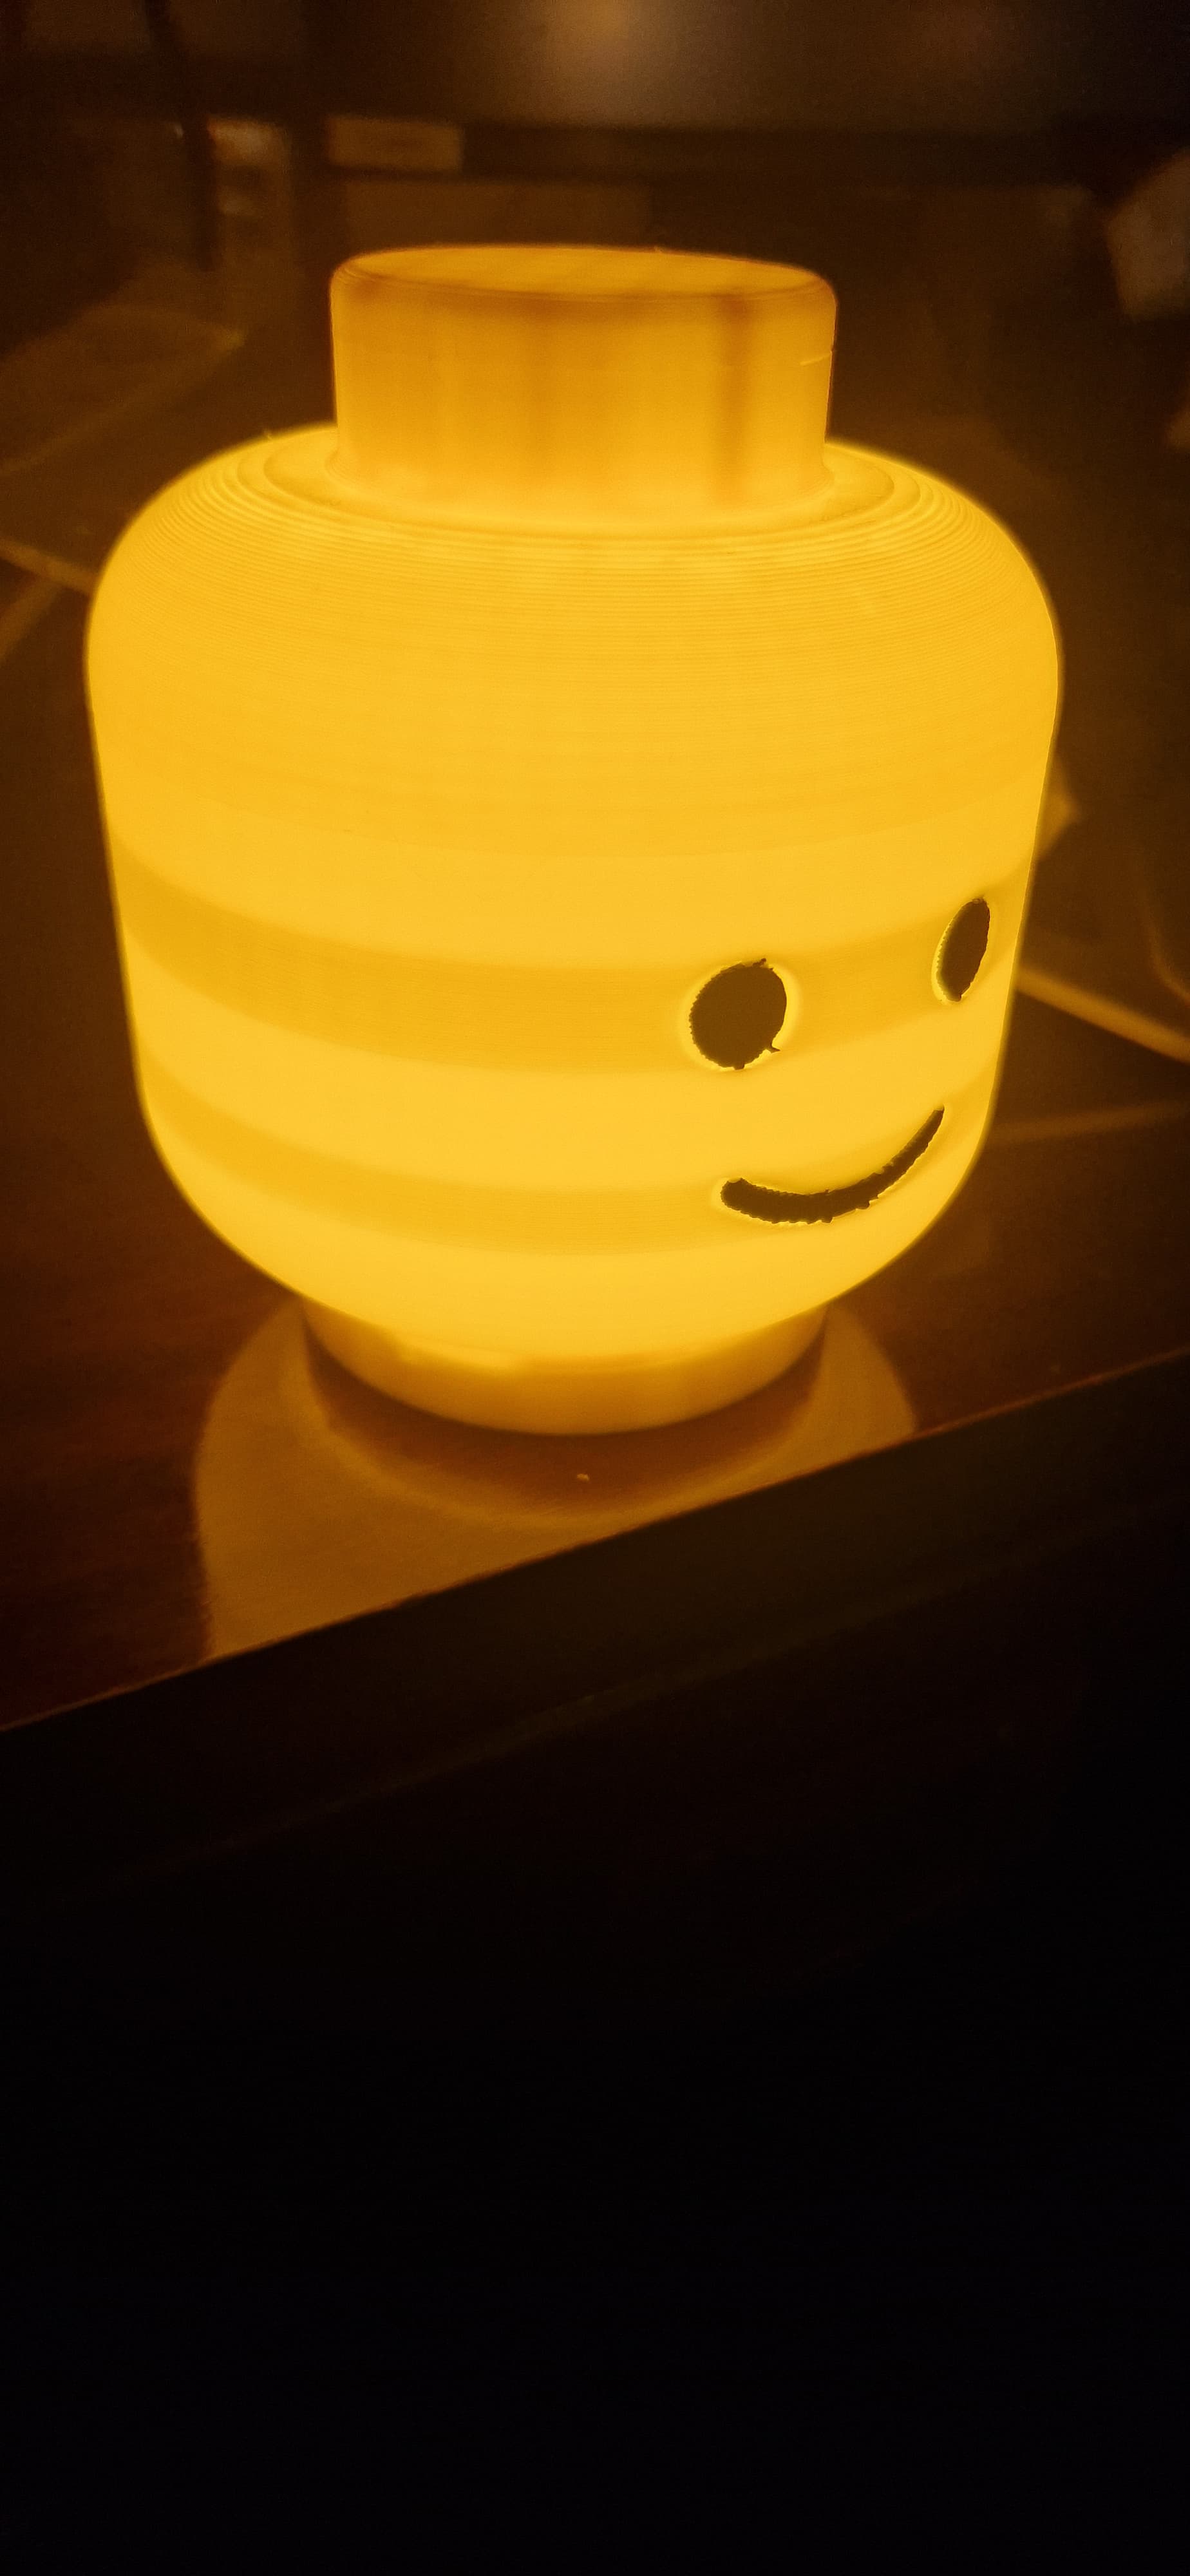
This was printed with a P1S with 0.6 nozzle and 0.3 layer line. (Tried with 0.4 nozzle and nothing changed) As you can see, in the areas where the black face features are present there is a darker shade along the whole cylinder surface as if black was being flushed in the object (the option is not ticked in bambu studio).
I tried to see in the timelapse but on a p1s i cant see anything.
Can you explain me what (and why) is happening? I really would like a more consistent finish on the external surface.
Thanks
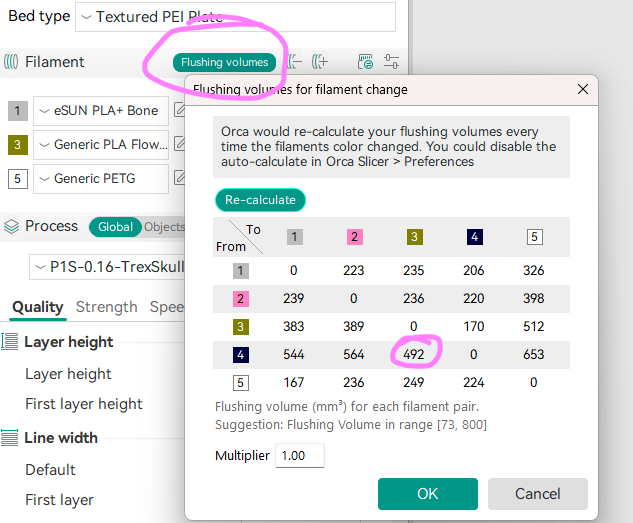
@Bullocks 's answer was spot on, increasing the flush vilume when switching from black to yellow solved the problem.
@MalcTheOracle I tried to change the order of color printing but print time skyrocketed… maybe you can give an insight on why would
it happen? (Newbie still learning here…)
@cesare.tanassi in CAD I did some experiments but was not getting the depth I wanted so i took the shortcut of painting. I don’t get your last comment though, the face features cannot be flat since they should be applied / glued to a cylindrical surface. (Unless you mean to print very thin objects and then bend them in place when glueing…)
Select the initial filament sequence option and customise
Change the order so black is last, ideally order the colours from lightest (left) to darkest (right), drag to swap colours (not a great UX)
Repeat for the subsequent layers option
This will make sure the darkest colours do nit get printed before the darkest. If the darkest colour prints after the lighter one, it could introduce imperfections like smears on the lighter portions of the same layer and the layer immediately below.
It looks as if the eyes and mouth were painted in Bambu Studio and the infill behind them is being printed the same color. Changing your flushing settings or print sequence won’t fix it.
The ideal fix is to model the object so that the eyes and mouth are modeled as individual bodies embedded in the main body. Then assign the filament to the bodies in the object tab in Bambu Studio. Doing it this way contains the color within the individual bodies without bleeding into other bodies in the object.
Maybe you could print the eyes and the mouth separately so that you don’t have a color switch in the printing process. Later you may superglue the eyes and the mouth.