Hi… I’m a total newbie to Bambu Labs but it seems like an impressive application. I have an .stl file I downloaded from Thigniverse and I;d liekt o add text to that .stl file by making that text curves so it curves from left to right 1st curving down and then up. I learn best from screenshots accompanying instrcutional text and wondered f there might be any such explanation? I’m not even sure how one imports the .stl into Bambu Labs? It appears you can use all sorts of font styles which is so helpful. I very much appreciate your kind help.
1 Like
Welcome to the forum!
To open the STL in Bambu Studio you can either use the file menu or click here:

About curving the text around an object take a look at this:
2 Likes
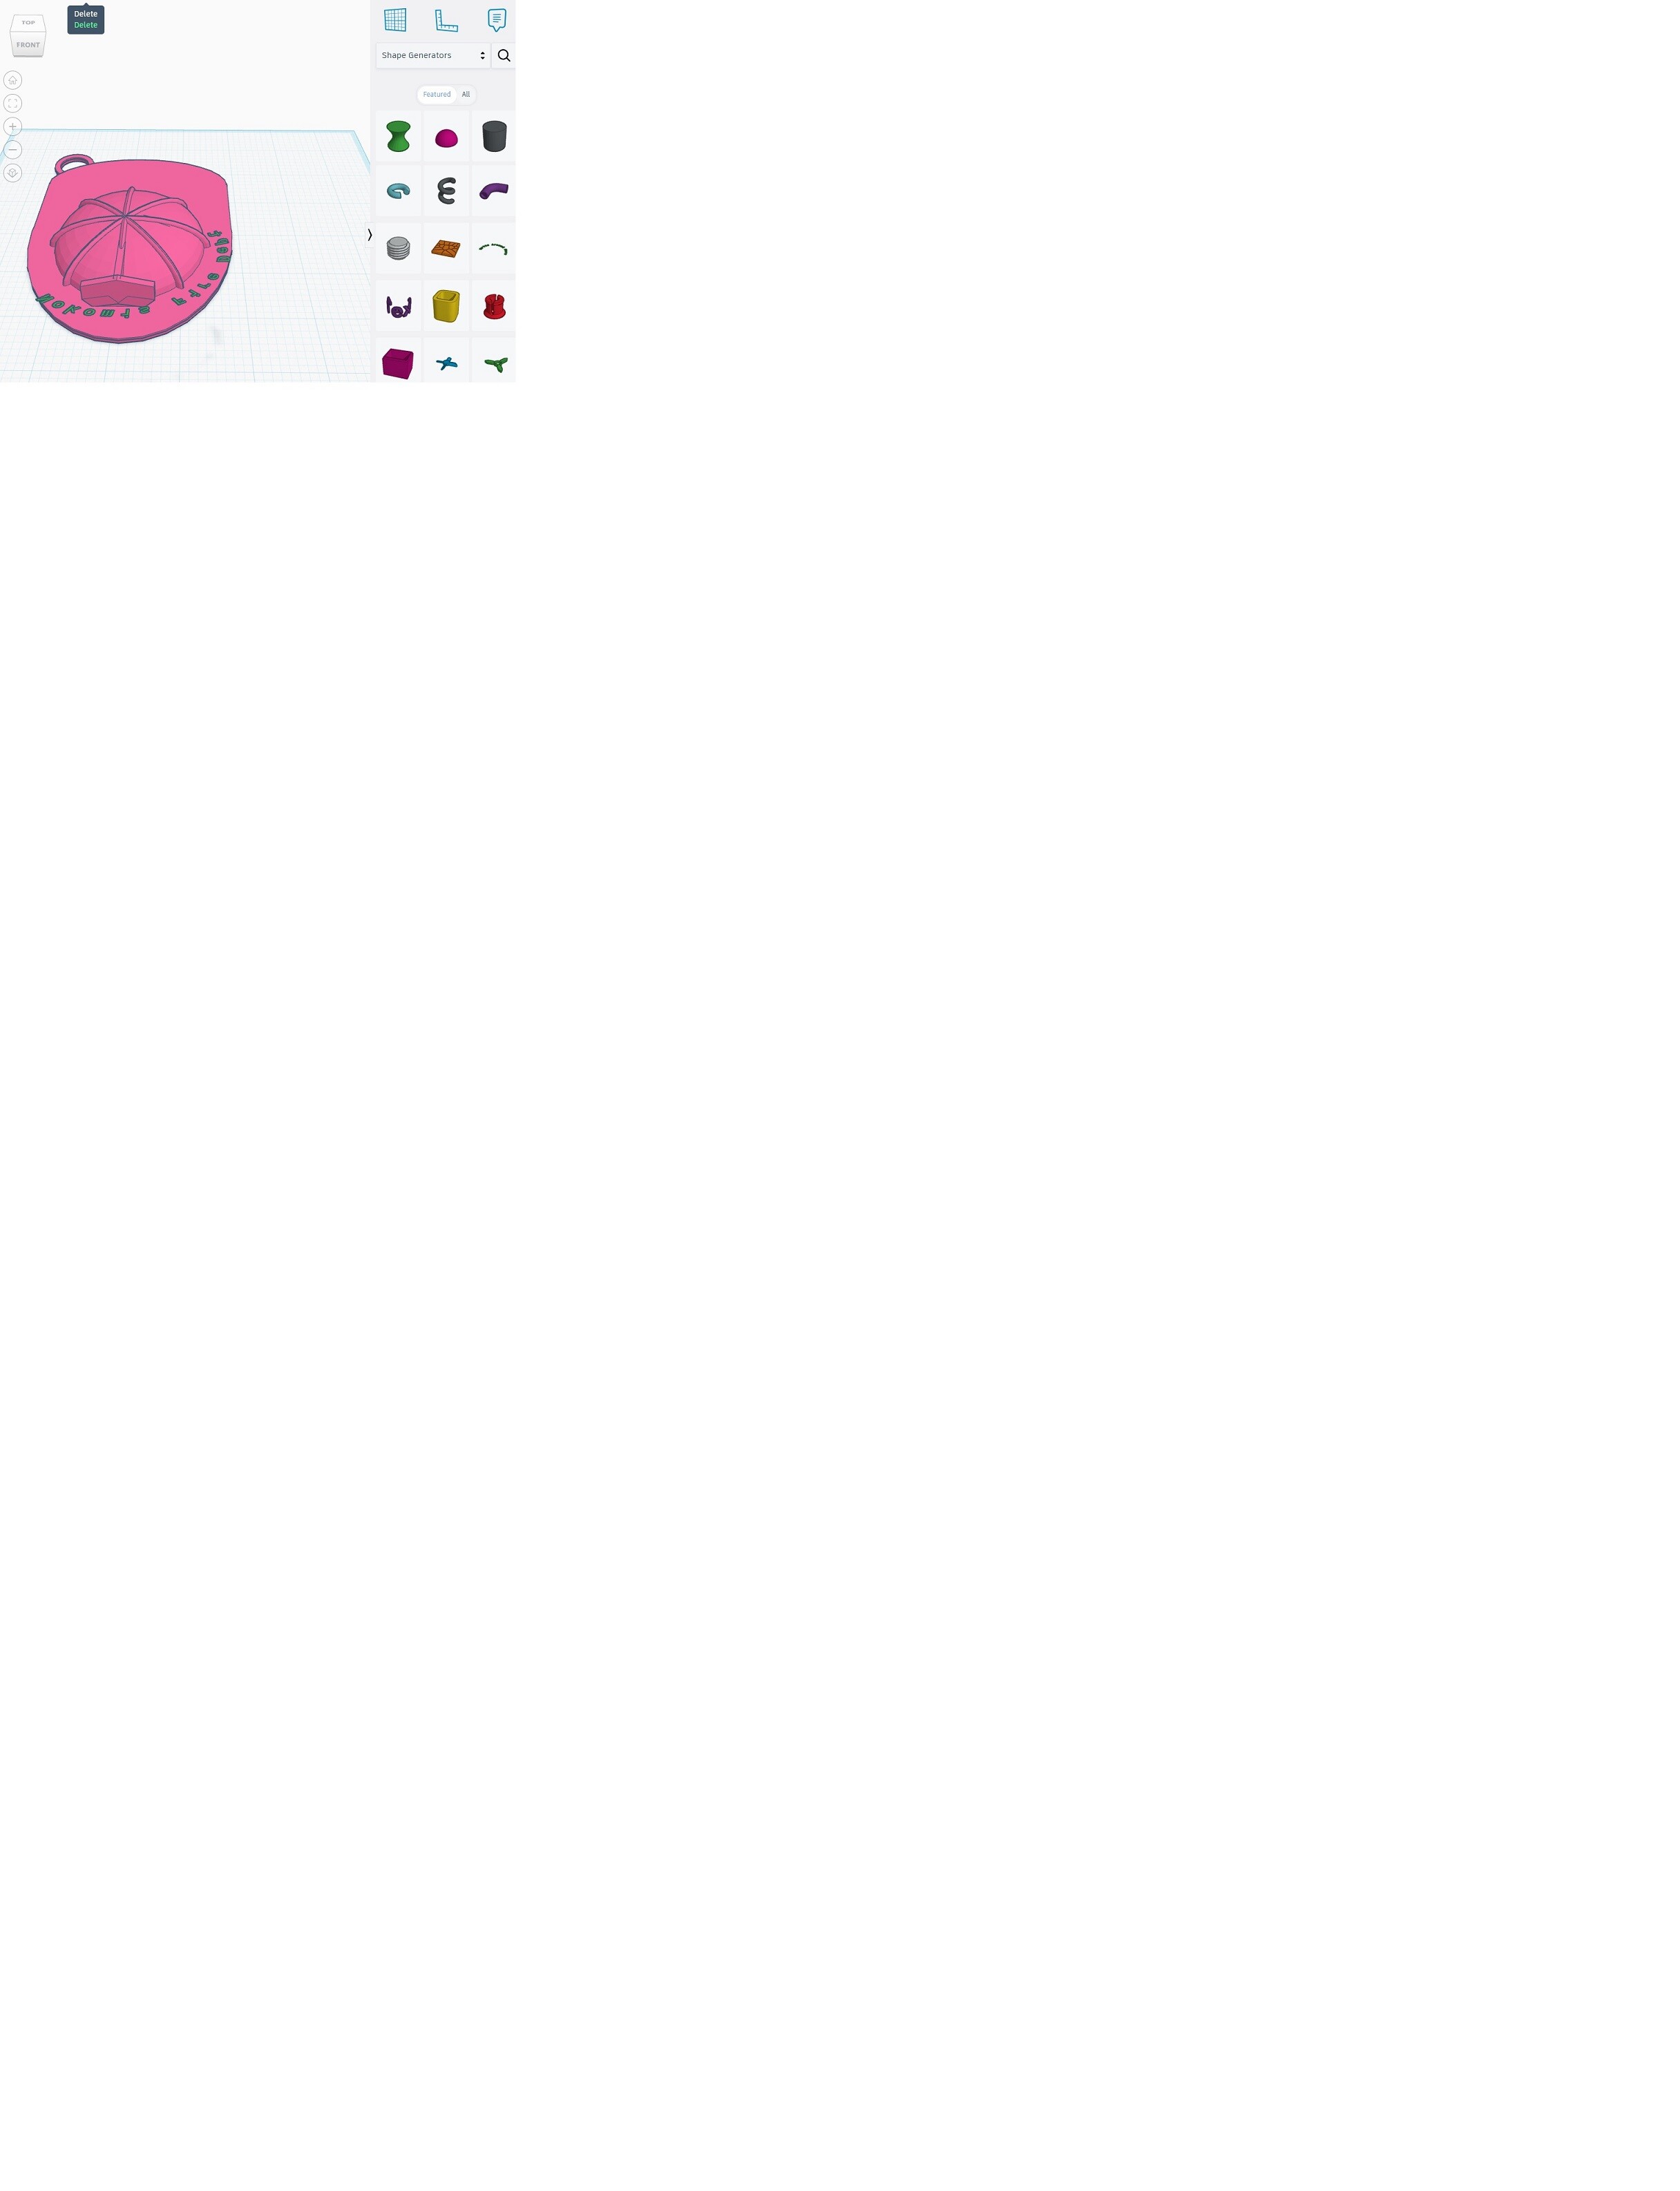
Thank you for replying. I managed to import the firehat, scale it and input text using the Text icon but it doesn’t seem I can do both Surface and Horizontal at the same time? I’m trying to write the text to the name of the fire dept along with the words Fire Dept. - so it would read - Nokomis Fire Dept. along the brim as curved text. I have the firehat with the text Nokomis Fire Dept “sticking” upright perpendicular into the hat brim but I’d like it horizontal on the hat brim curved around. Hopefully I’ve attached a photo of my lame attempt in Tinkercad. We’re trying to thank these wonderful firefighters with key chains
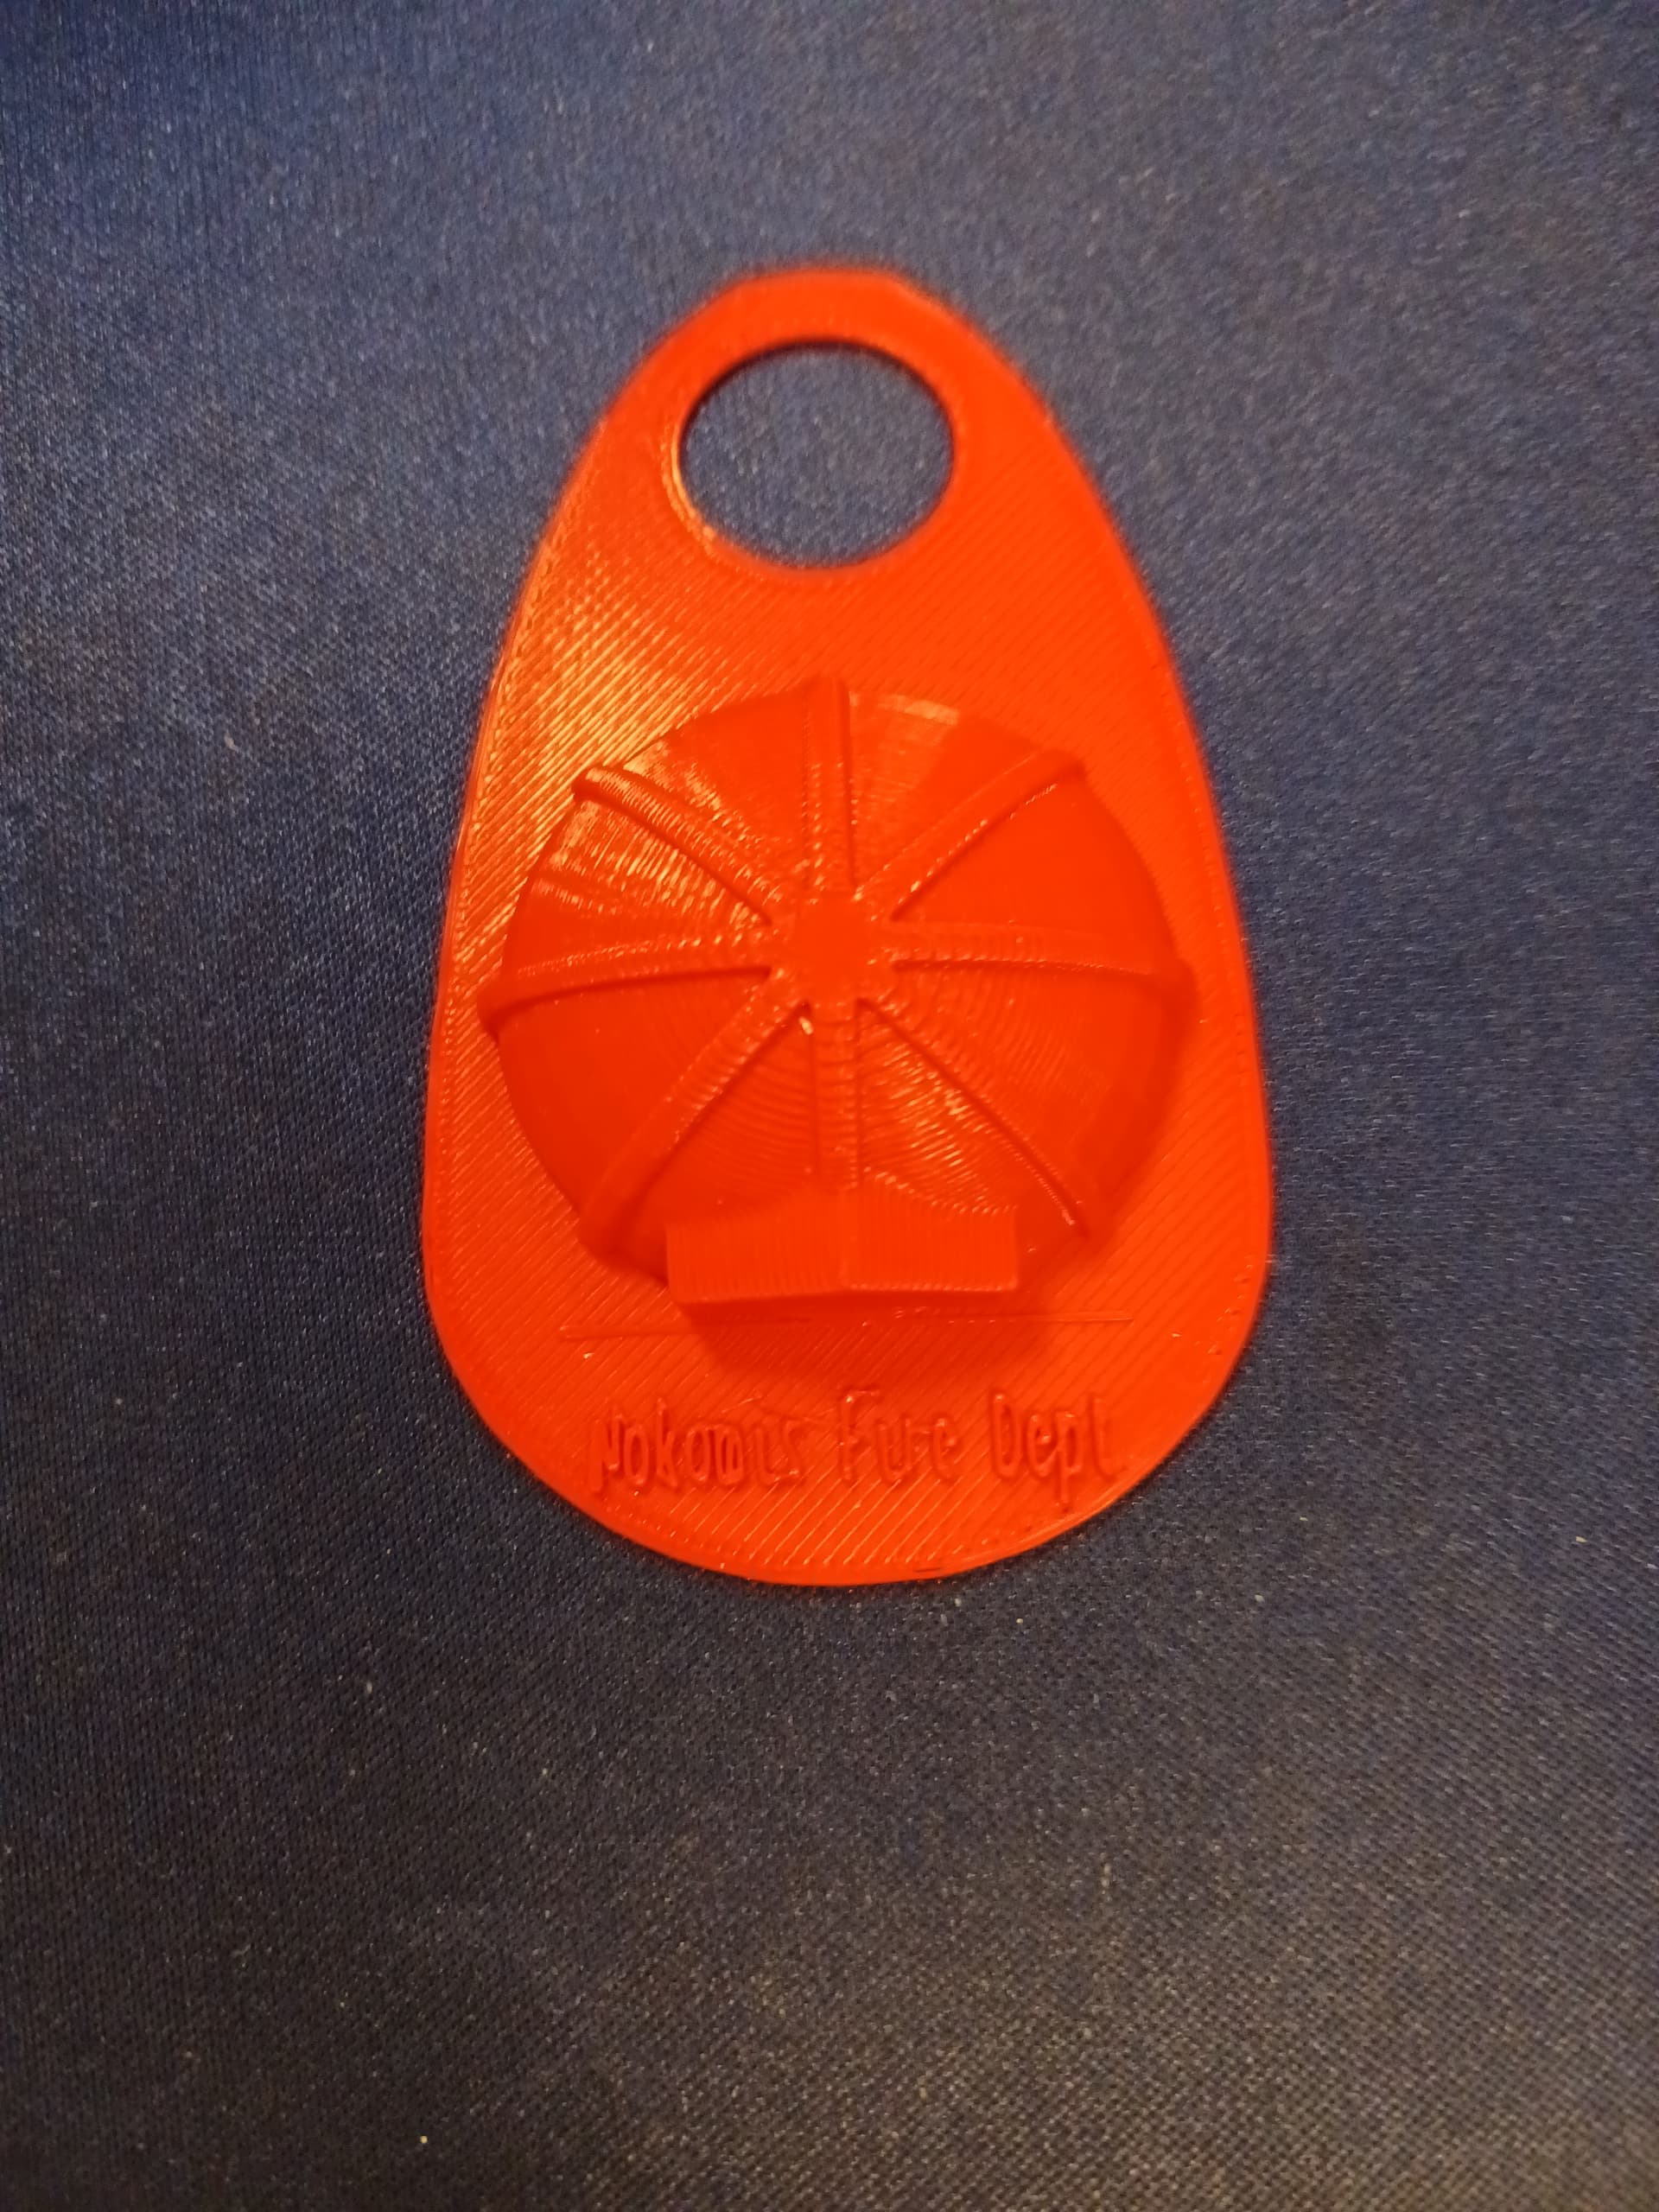
made with our library 3D printer. Thank you so very much for all your help.
2 Likes
You’re welcome! That is a very thoughtful idea and I know they’ll appreciate it. So I can definitely help you do it in Tinkercad.
It’s not easy to find but there is actually a curved text function in Tinkercad.
If you click “basic shapes”
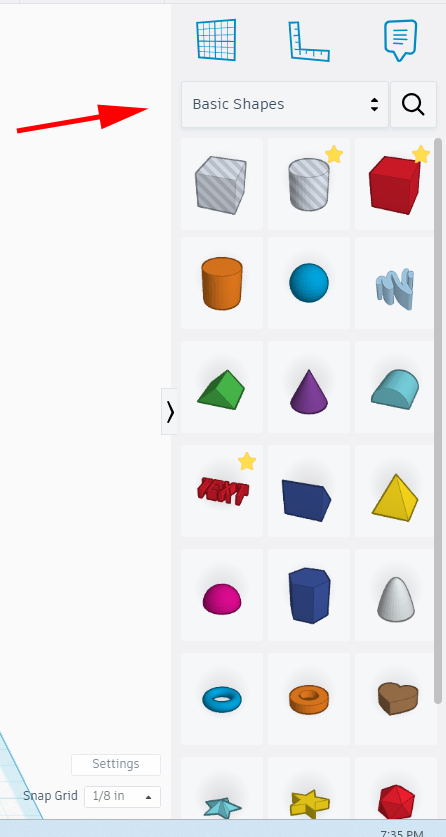
Then “shape generators”
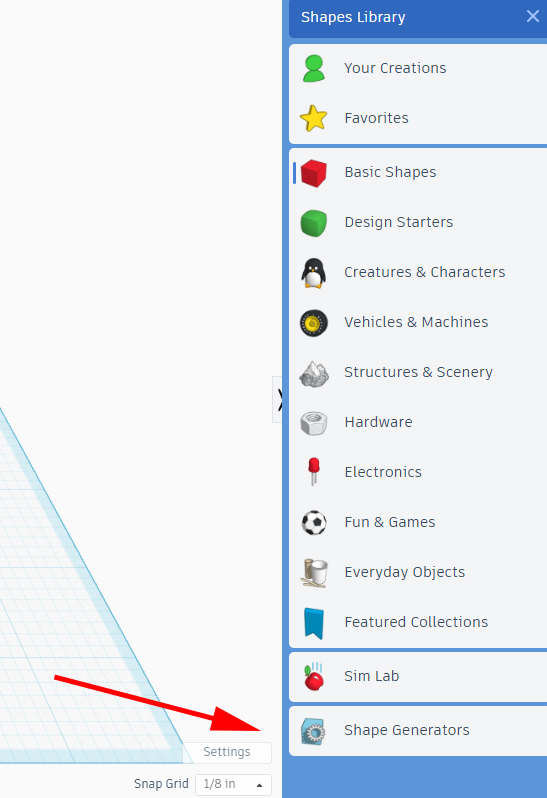
Then drag “curved words” to the work area.

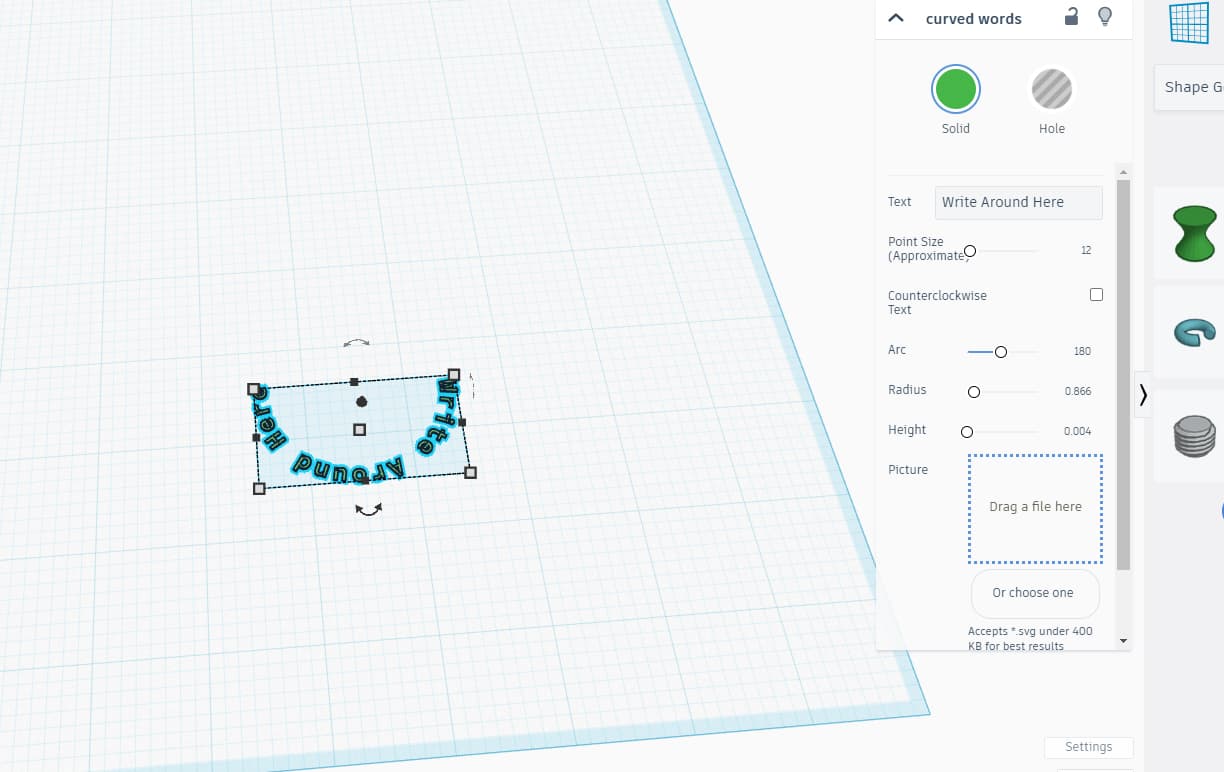
Now you’ll see all sorts of options to rotate it and orientate it to exactly where you want it…
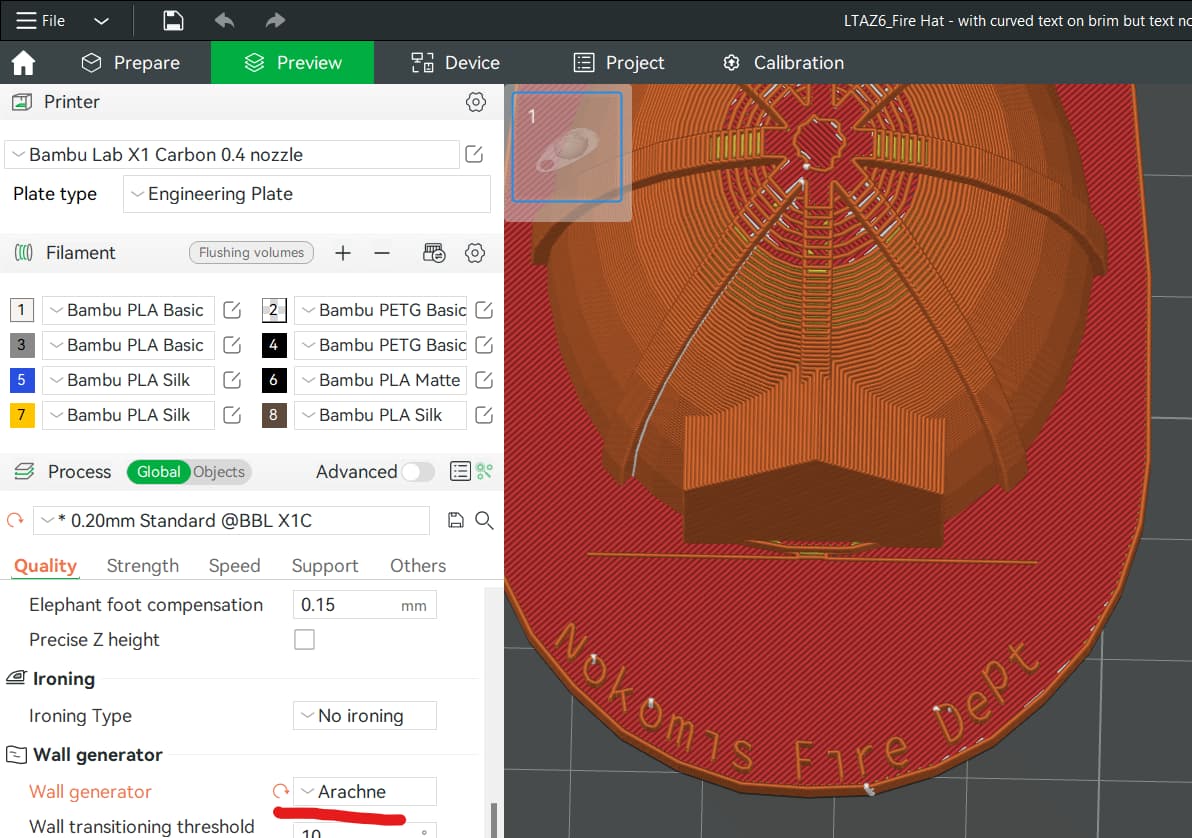
One thing to keep in mind, the smaller the text the harder it’s going to be to print so that it’s legible. You’ll know as soon as you slice it if it’s too small. Make sure to set “wall generator” to “Arachne” under the quality tab to get as much detail as you can.
Give that a try and let us know how it looks.
4 Likes
I forget how useful tinkercad can be for those nifty bits
2 Likes
Thank you for sharing that shape generator.
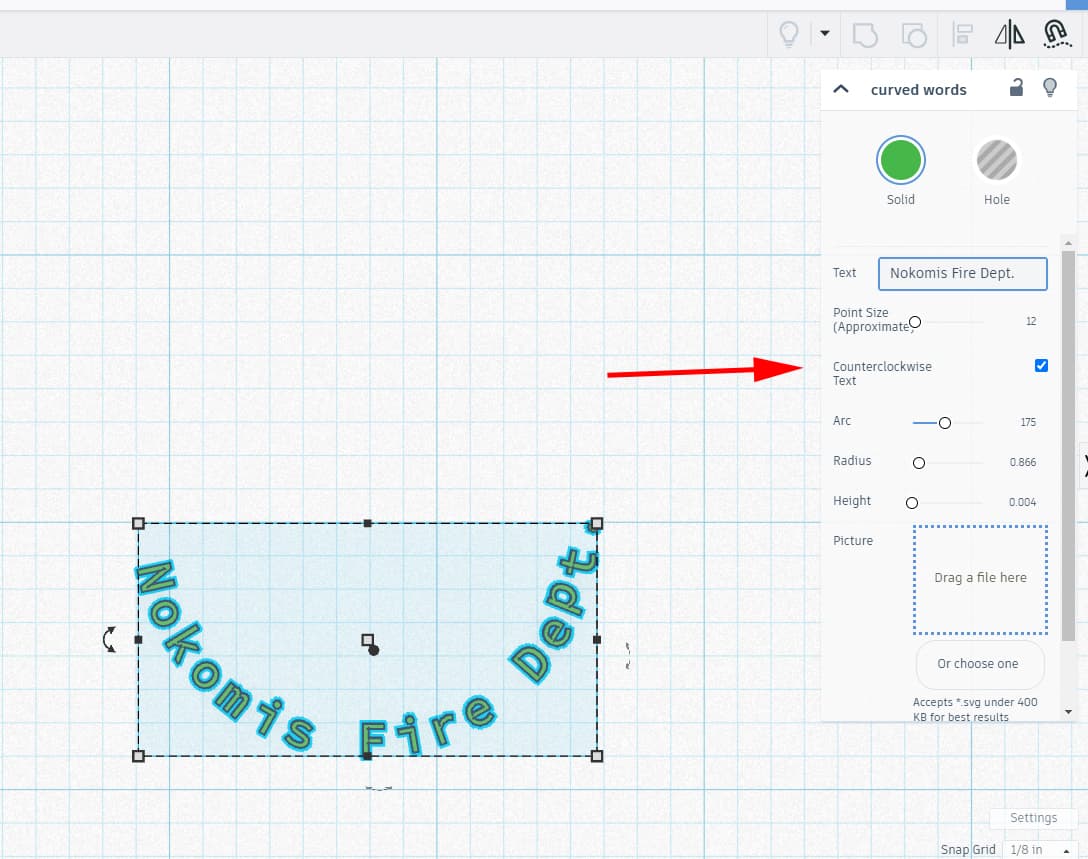
I took the sample shape generator text and typed in my preferred text and tried to " flip it" so the text would read from upper left to upper right but I may be missing an “anchor” or step in the Tinkercad process. I’ve attached a screenshot of that. Thank you again for your kind help.
2 Likes
You’re welcome. You’re almost there. When you type in the text make sure to check “Counterclockwise Text”. That will flip the arc and it should read left to right.
1 Like
Hi Printer McGee,
Thank you for those directions as they were spot on.
I placed the curved text on the firehat and then Grouped them in Tinkercad abd then saved that as an ,stl file and when I opened that firehat .stl file in Cura I could see the curved text so I then cut the gcode but when it printed with the Lulzbot Taz 6 it never printed the text on the hat.
Did I miss a step?
BTW, I LOVE the easy to follow screenshots with red circles - so easy to follow.
Thank you so much,
Charles.
1 Like
Was the text still visible after you sliced it, before you printed it? Normally if something is too small it won’t show up after the model is sliced, or only parts of it will show up. Try scaling the model up a little and see if the text prints.
1 Like
Here’s the rub. ![]() I see the curved text in Tinkercad and in the Cura Slicer but when it prints the gcode, cut in the Cura 3.6.7, in the old Lulzbot Taz 6 it doesn’t print the text. I then looked at that gcode in the Prusa Slier and you don’t see any text. I’ve scaled it to 109 mm - still no text. I would use my Prusa MK4 but I only have the PLA color needed in 2.85 so I have to use the Lulzbot Taz 6. A friend created the text in Inkspace and then exported as svg and then imported that in the Prusa Slicer but that has so many different settings for the Prusa MK4) by category and numbers than the Lulzbot Taz 6 and since the Lullzbot is not well supported I’m trying to be resourceful. I had no idea curved text was such a challenge. Thank you for any further thoughts.
I see the curved text in Tinkercad and in the Cura Slicer but when it prints the gcode, cut in the Cura 3.6.7, in the old Lulzbot Taz 6 it doesn’t print the text. I then looked at that gcode in the Prusa Slier and you don’t see any text. I’ve scaled it to 109 mm - still no text. I would use my Prusa MK4 but I only have the PLA color needed in 2.85 so I have to use the Lulzbot Taz 6. A friend created the text in Inkspace and then exported as svg and then imported that in the Prusa Slicer but that has so many different settings for the Prusa MK4) by category and numbers than the Lulzbot Taz 6 and since the Lullzbot is not well supported I’m trying to be resourceful. I had no idea curved text was such a challenge. Thank you for any further thoughts.
1 Like
Would you be ok uploading the exported stl from Tinkercad here? If so just rename the file from .stl to .3mf and it should let you attach it to a post. I would like to take a look at it in Orca Slicer.
1 Like
Hi Printer M… Hopefully I’ve attached the stl file saved as 3mf in Cura 3.6.7
The Lulzbot Taz 6 prints the fire hat well but not the text on the hat’s brim at all. Thank you for your kind help.
LTAZ6_Fire Hat - with curved text on brim but text not printing.3mf (65.6 KB)
1 Like
- The 3mf has non-manifold edges. Right click on the Object in Studio and “Fix model”.
- The letters are finer than a typical .4 nozzle. I measure .33mm. So you’ll definitely want to use Arachne and/or maybe even a .2 nozzle. Or make the letters fatter to ensure that you can squeeze in 2 wall lines (even if they are below nozzle diameter using Arachne). That should give a decent print quality.
Thank you for your help.
I followed your advice and clicked Fix model and then it displayed that it fixed it.
I’ve never used Bambu Studio so I’m not following re: Arachne. Do I just press the tab named Arachne? I’m not sure how I would make the letters fatter in Studio using Arachne? Thank you.
1 Like
Arachne is the type of wall generator which allows wall lines that are thinner than a nozzle diameter. So line quality can be impaired but in practice, it works surprisingly well (within limits of course).
I marked it in my last screenshot to make it easier to find in the Quality settings.
Hope this helps,
Eno
holy i wish i saw this before doing the whole facebinding/project on face workflow in freecad.
1 Like
I’m truly a noobie so I don’t see how you reach elephant foot compression. I see .20mm Standard @MK3S and then I just see Arachne. I don’t see how this thickens the text to be printed? Thank you.
1 Like
Elephant foot compensation is a first layer thing and not really relevant to this issue which occurs on top.
Arachne concerns line width rather than height. So you can print a 0.33 mm line with a 0.4mm nozzle. But for quality, it is best to have 2 walls. With Arachne, you could use a .2 nozzle to get 2 lines into the 0.33mm wide letter lines.
In order to thicken the letters, which would be ideal, you do however need to do that in Tinkercad as Studio only imported a stl file. CAD work cant’t really be done in Studio.
1 Like
OK, so once I press Arachne then that creates 2 walls? Do I then export or save those changest the file as .stl and then import that adjusted .stl file into Tinkercad to enlarge the text? I recall enlarging the text in Tinkdecad and then it wouldn’t fit on the brim. I’m still learning how one curves text on a hat so that text prints and all the software needed for that. Tinkercad seems to require a delicate touch. Thank you so much for all your help.
It is not quite so easy. You’ll get one line with the current file and Arachne.
Here's a longer breakdown:
If the Line to be printed is too small for the nozzle, the slicer will regard it as too small and ignore it. For a “classic wall” generator, that is usually the line width. “Archne” enables you to have thinner lines than the nozzle diameter. It also has quite a bit of leeway upwards.
The slicer then determines how best to print a wall with the given thickness. As for what it regards as “best”, that is usually print speed, i.e. as few lines as possible within its constraints.
- Slizing a 0.3mm wall with a 0.4mm nozzle setting and “classic” wall generator will give no line.
- Printing a 0.3mm wall with a 0.4 nozzle setting and “Arachne” wall generator will give one line.
- Printing a 0.3mm wall with a 0.2 nozzle setting and “Arachne” wall generator will give 1 line.
- Printing a 0.6mm wall with a 0.4 nozzle setting and “Arachne” wall generator will give 1 thick line.
As for the workflow, I am not proficient in Tinkercad. But that is where you may want to see if can use your initial file (should be saved and visible in the opening dashboard) and find a different font or make the existing font bold to increase the wall thicknesses. Then you export as before as an stl file and load it into Bambu Studio.
Pick your nozzle, set wall generator to “Arachne” and you should see in the preview what the line widths will be (there’s a dedicated preview option for that).
But of course, there’s also nothing stopping you from just using the current file with “Arachne” and try it out. It may just work ![]() And that is where the fun is
And that is where the fun is ![]()