Been following for a while, loving the LED’s in the Virgin Cruise ship.
Defiantly need to find myself some time to get some of these printed myself.
Keep up the great work!
Been following for a while, loving the LED’s in the Virgin Cruise ship.
Defiantly need to find myself some time to get some of these printed myself.
Keep up the great work!
Thanks - the Arvia 1:500 model on Makerworld does have channels in it for some basic individual LEDs.
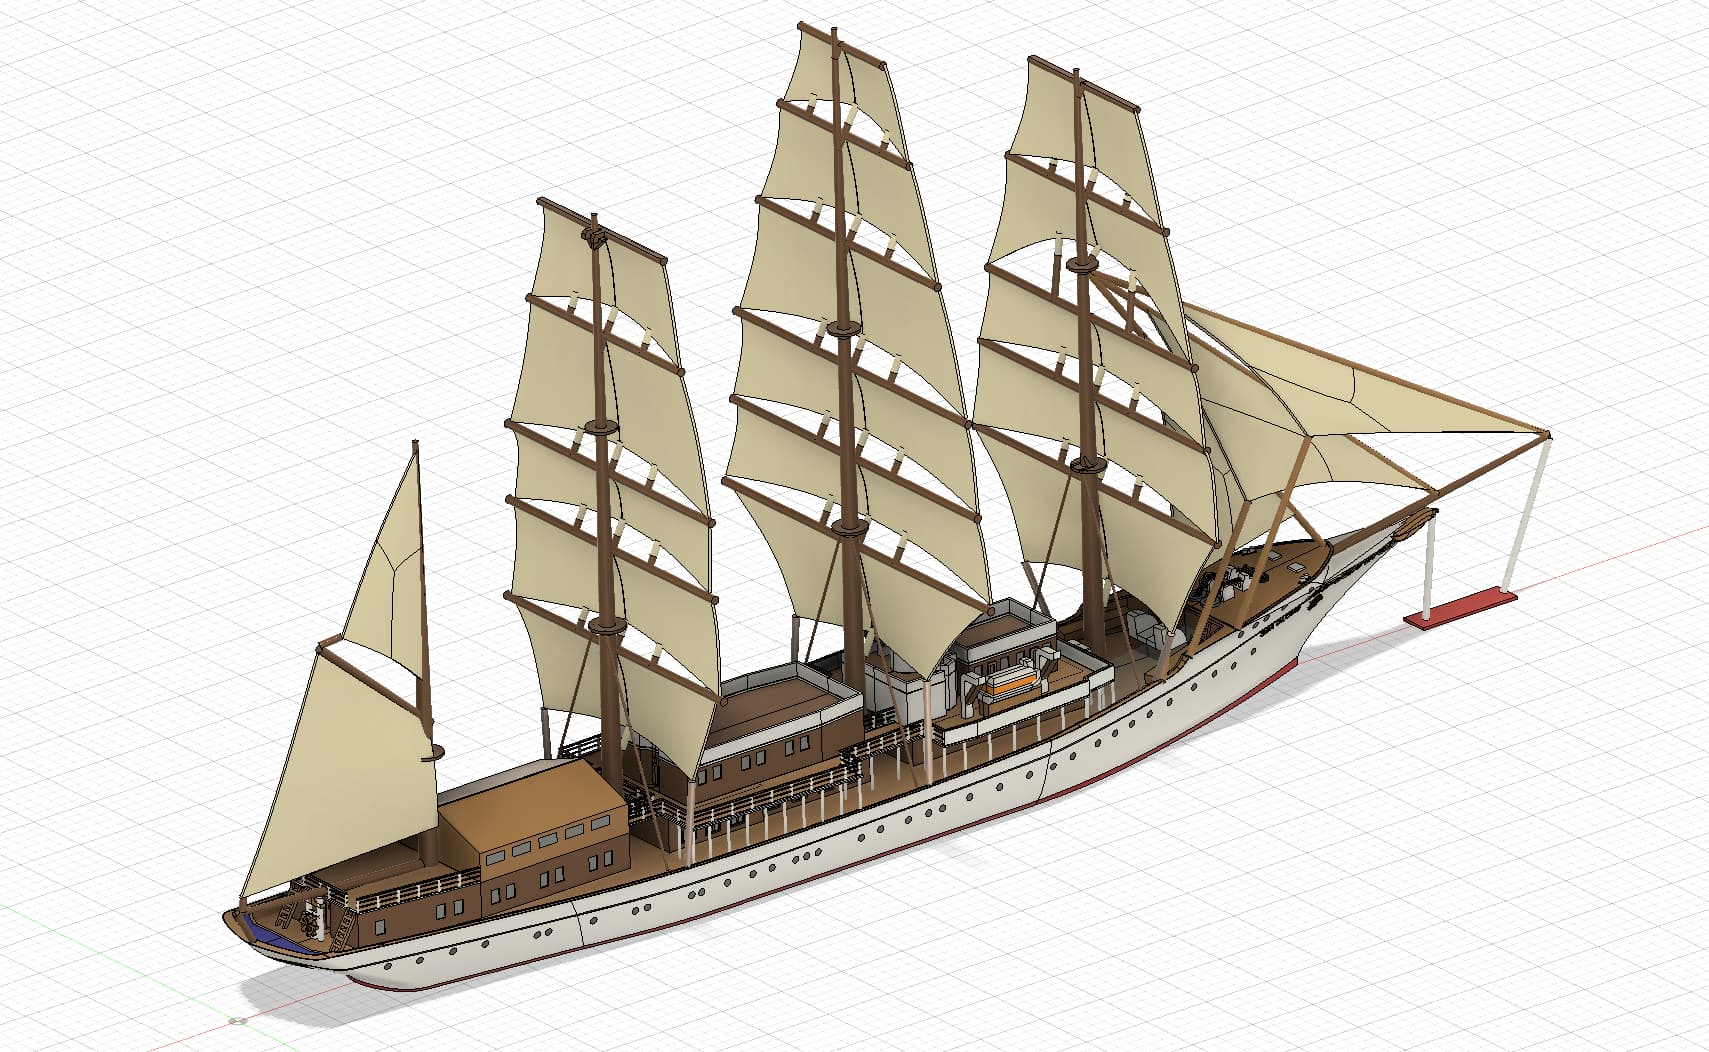
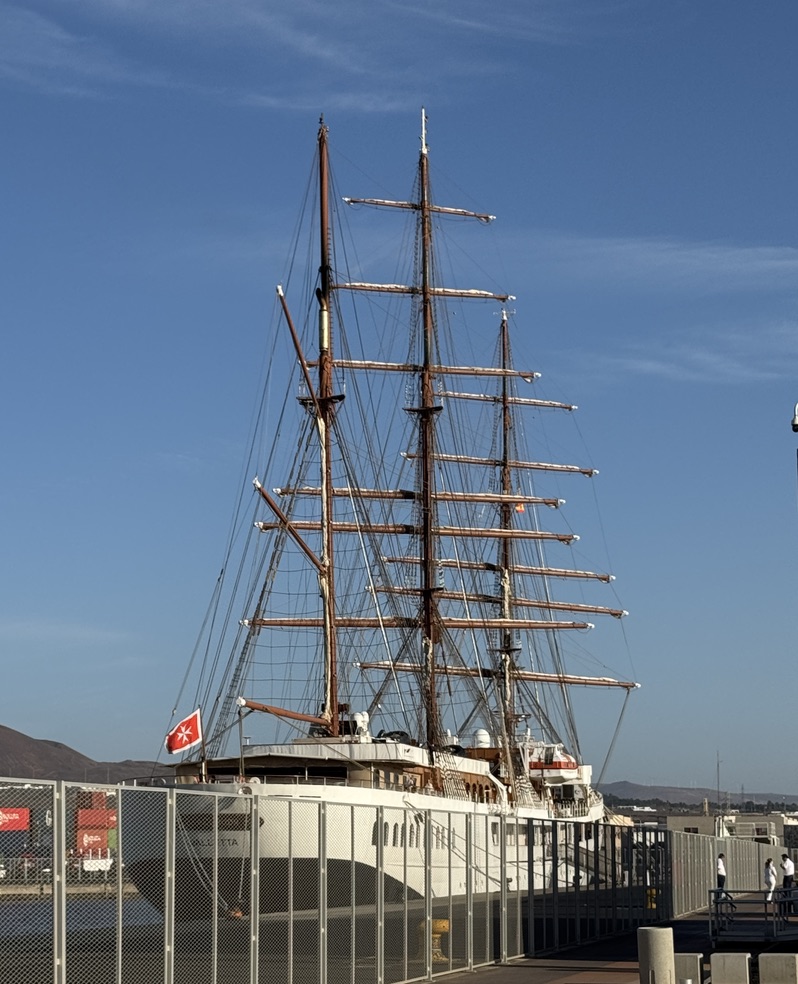
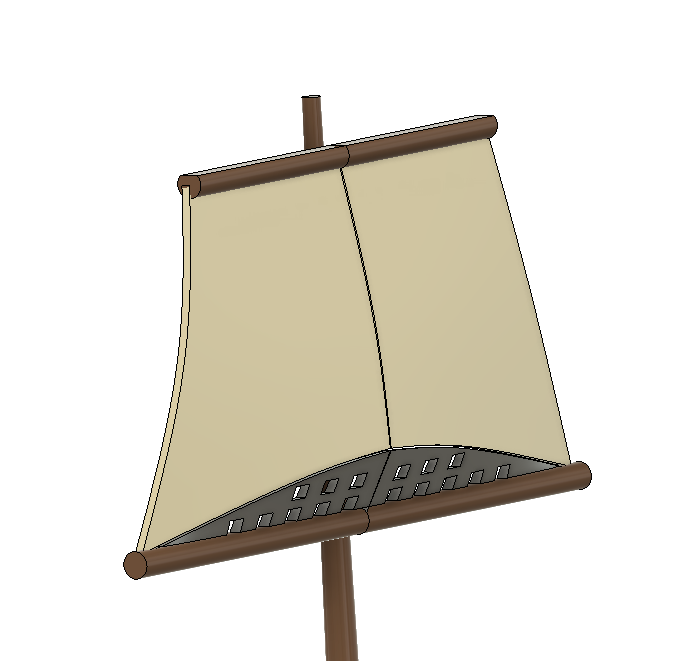
Sea Cloud design progressing quite nicely - going to be a challenge to print some of the detailed stuff like ropes etc.
Just had a hopefully good idea about what to do about the strings. Rather than trying to print them, or add thread I was thinking of using thin wire.
Then I should that if I am running wires I might as well have some LEDs on them - something like these silver strings with LEDs build in.
Day time
Night Time
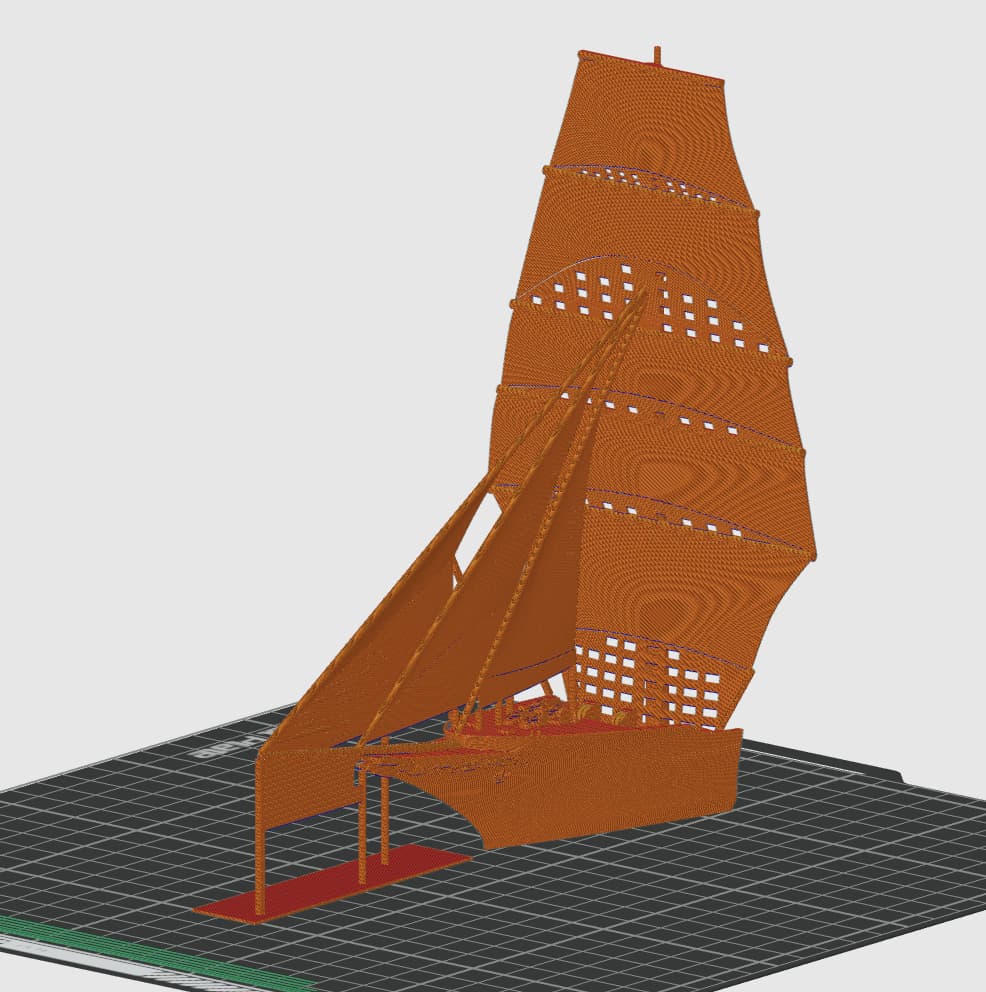
Sea cloud getting closer to being ready for a test print.
It was designed for 1:250 scale - but if I scale it down slightly to 1:300 it will actually fit on a single build plate - and looks like it might print with a 0.4mm nozzle in one go single colour.
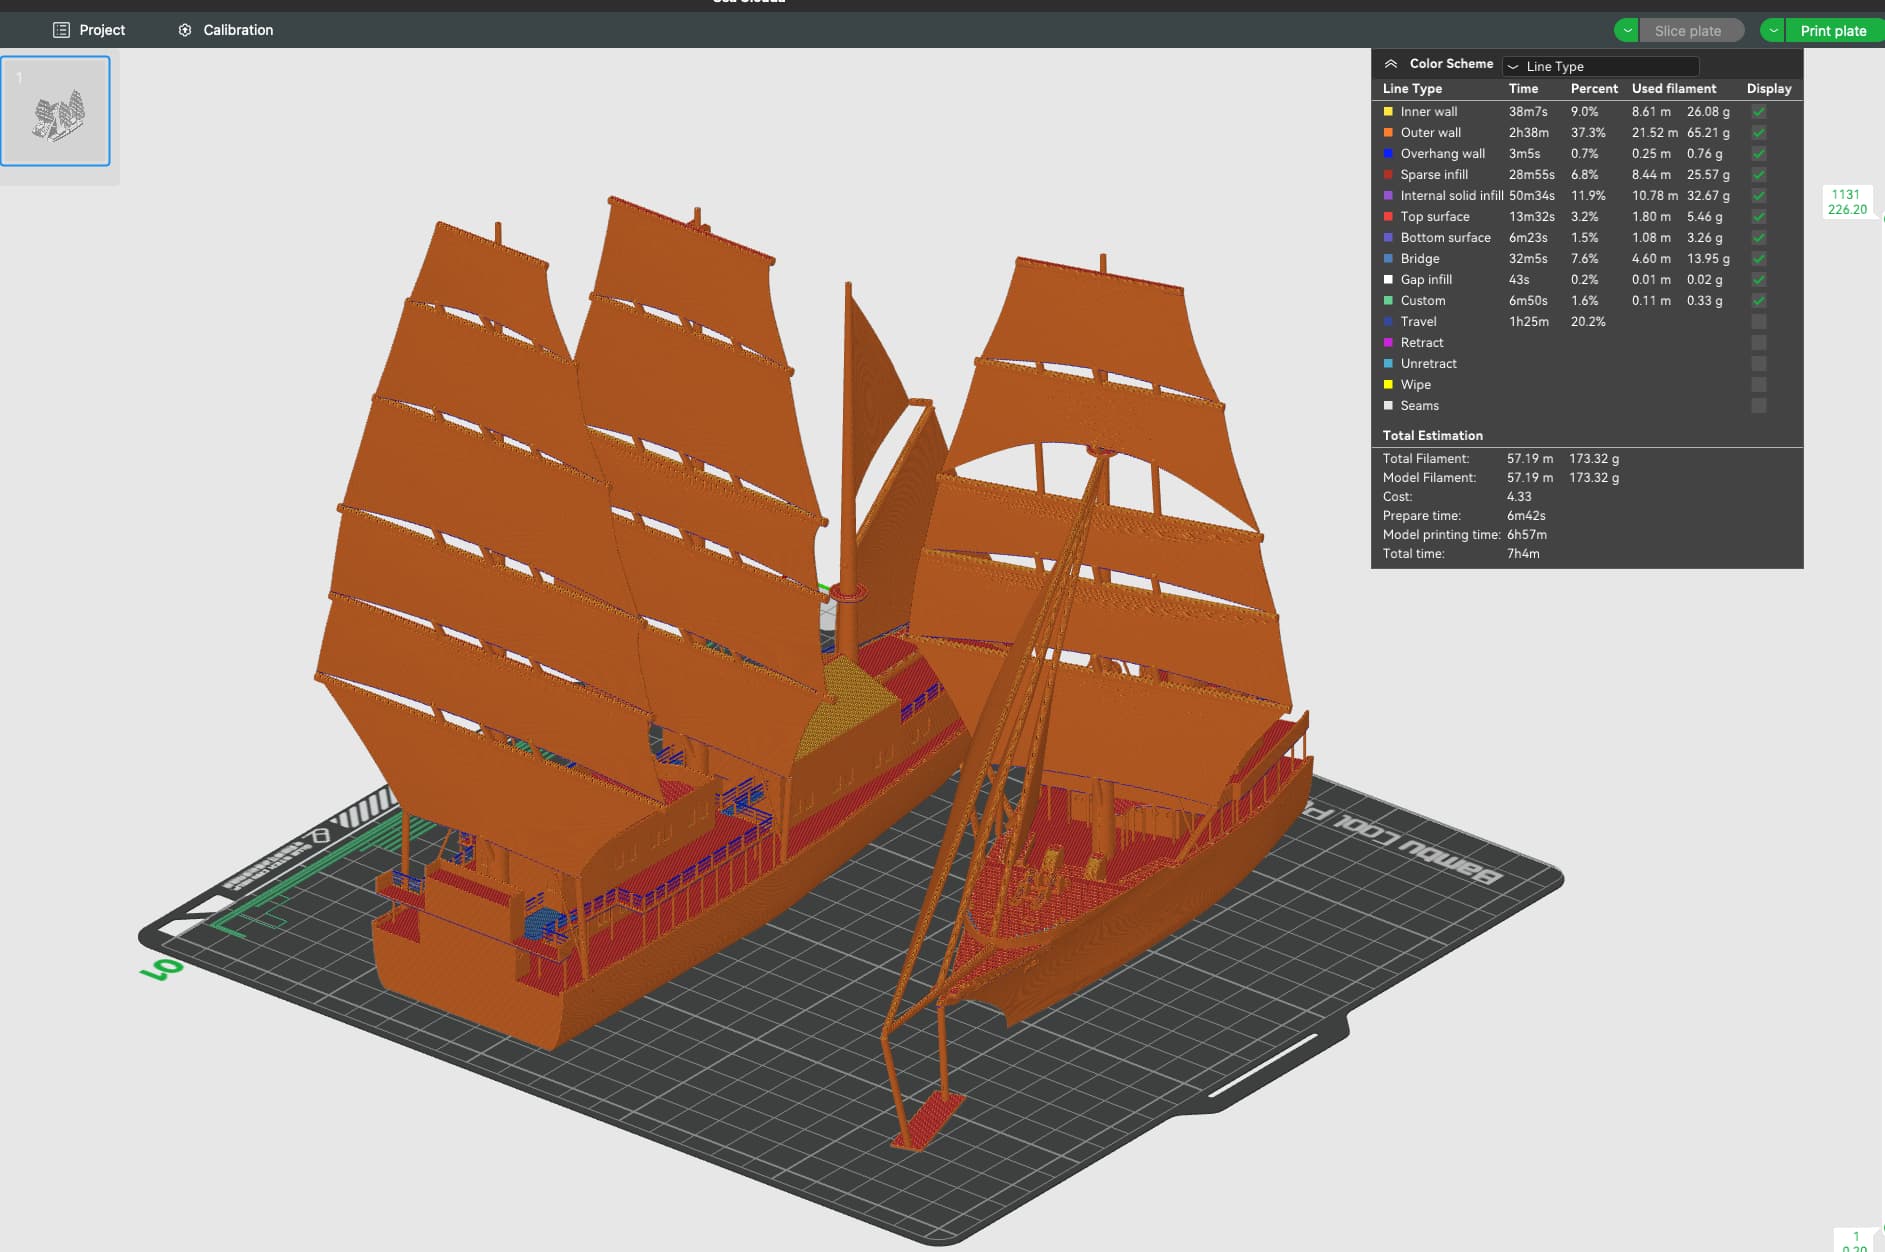
Just need to add quite a few more supports, plus also ways to hold the ropes/led cables.
Not really practical though to print multi colour in one go due to the really inefficient printing of the masts and sails - with 1550 colour changes. You can see by the height of the prime tower.
Could you not print the sails separately and just have a hole they pop into within the main body?
Next stage of adding detail to Cruise ship models now underway.
I think the windows on my ships won’t ever be transparent enough if they are 3d printed - even if I try really thin PETG.
So decided to use acetate instead - like most of the models in Museums seem to use.
Bought a Cricut Maker 3 for cutting and marking the Acetate, and so far really impressed with the level of detail it can go with the cuts.
Started on one of the top decks.
Remodelled the windows using the F360 sheet metal capability
Then flattened them out and exported the outline profile
Plus some lines added for decoration as DXF’s
Imported in Cricut design studio -
Then used the Cricut to write on the lines (with pens) and then cut out the outline - pretty impressed so far with the quality of the cuts
Pretty impressed that the X1C can reliably print 0.2mm wide slots.
Quite pleased with final results
Update - tried various different types of acetate and different thicknesses. Decided that normal thickness folder over seems to be the best compromise for rigidity and looks.
On the Cricut you can annotate the Acetate with different colours, score it for folding and then cut it.
Looks really nice. Please be sure to post a photo or three of the final product. Is this just for personal purposes or something else?
Thanks - mainly for personal purposes - but also I have published a few on Makerworld. Adding extra detail (like the longers and proper windows) was motivated by a visit to the Ship Model Museum in Hamburg - I did contact them to see if they were interested in showcasing 3d printing as a way to create models - but so far they haven’t responded.
Well good luck. I hope it turns out better than expected.
Not much progress recently on cruise ship designs - but managed to get a fairly nice comparison between my next to be released model and the real ship. Cunard Queen Victoria
Came across this quite long, but also really interesting video from Engineers Grow today https://youtu.be/wjNQ7pUC6R8?si=TEkvbuJzViakrSed
Via Teaching Tech’s latest tool changer video.
I really hope the BL 1Q25 release has something like this hot end changing approach.
I really like this concept to avoid a fair bit of the wasted hardware in most tool changer designs - and also the removal of the need to cut filaments to get them to correctly feed into the extruder. (As per the BigBrain3d Swapper3d).
The additional cost and electronics involved in each nozzle having its own heater is balanced out by the benefit of being able to keep/preheat each hot end at an appropriate temperature to facilitate fast tool swaps.
My biggest concern is whether the size and weight could be scaled down to a) allow really fast printing and b) allow room for at least 12 hot ends to be loaded - to really complex multi colour prints - such as the 10-11 colour cruise ship models.
To me the ultimate solution would have 2-4 fully independent print heads (with extruder motors) for parallel printing, with each print head able to colour swap using something like this engineers grow approach.
Perhaps backed up by some shared across multiple printers, cheap AMS type multiplexer too for access to a larger library of filaments than it would be practical to have a dedicated hot end for each one.
The solution would need to have a fair number of sensors in it, plus some type of auto calibration/alignment of the nozzle positions in 3 dimensions - perhaps with some sort of load cell arrangement in an alignment pin on the bed somewhere which could be checked at the start of each print, or maybe even after every tool change.
Also of course the solution would need to allow for big prints - maybe up to 500mm in at least the X or Y direction.
I would estimate that the hot end changer approach could reduce print times by 2-4 times and reduce waste by at least 95%. Then adding multiple independent print heads could reduce print times down by a further 2-4 times. Therefore overall reducing print times for large, complex multi colour models down by between 4 and 16 times.
Made some slight improvements to Queen Victoria following comparison with real ship, and also took quite a while to scale the detailed 1:500 version back down to allow for 1:1000 printing. Ready to do test print tomorrow.
Have started a dialogue with Engineers Grow about the potential benefits of tool changers vs the X1C nozzle multiplexer approach. I am comparing PrusaSlicer with a XL with 10 Tools (which I know is not possible, but might be with an EG solution), compared to the 10 colour X1C print.
Looks like a tool change would bring the 21hr X1C print time down to about 16hrs - which is a reasonable benefit - but nowhere near as high as I expected.
The second comparison attached is a more interesting one - it is comparing mixed nozzles - with a 0.25mm nozzle for the detailed parts of the print, with a 0.4mm nozzle for the rest. Maybe is the 1Q25 BL is some sort of tool changer or IDEX then this scenario could be relevant. This is compared to an X1C with 0.2mm nozzle for the whole print. This solution would require the EG or XL to have 15 tools which is getting a bit impractical - so a small number of tools with colour multiplexers on some of them would probably be more practical.
This is where the really big savings in print time would come though - reducing the X1C calculated time of 51hrs down to only 15 hrs.
Interestingly comparing a simple single colour print - shows the X1C as being twice as fast as an XL
Plus down colouring the model to 5 colours so that it would fit into an XL
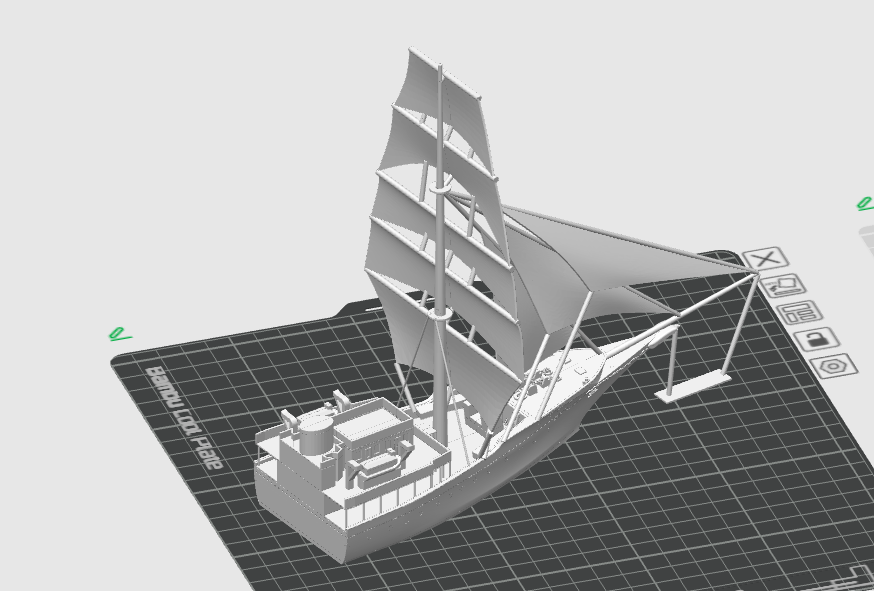
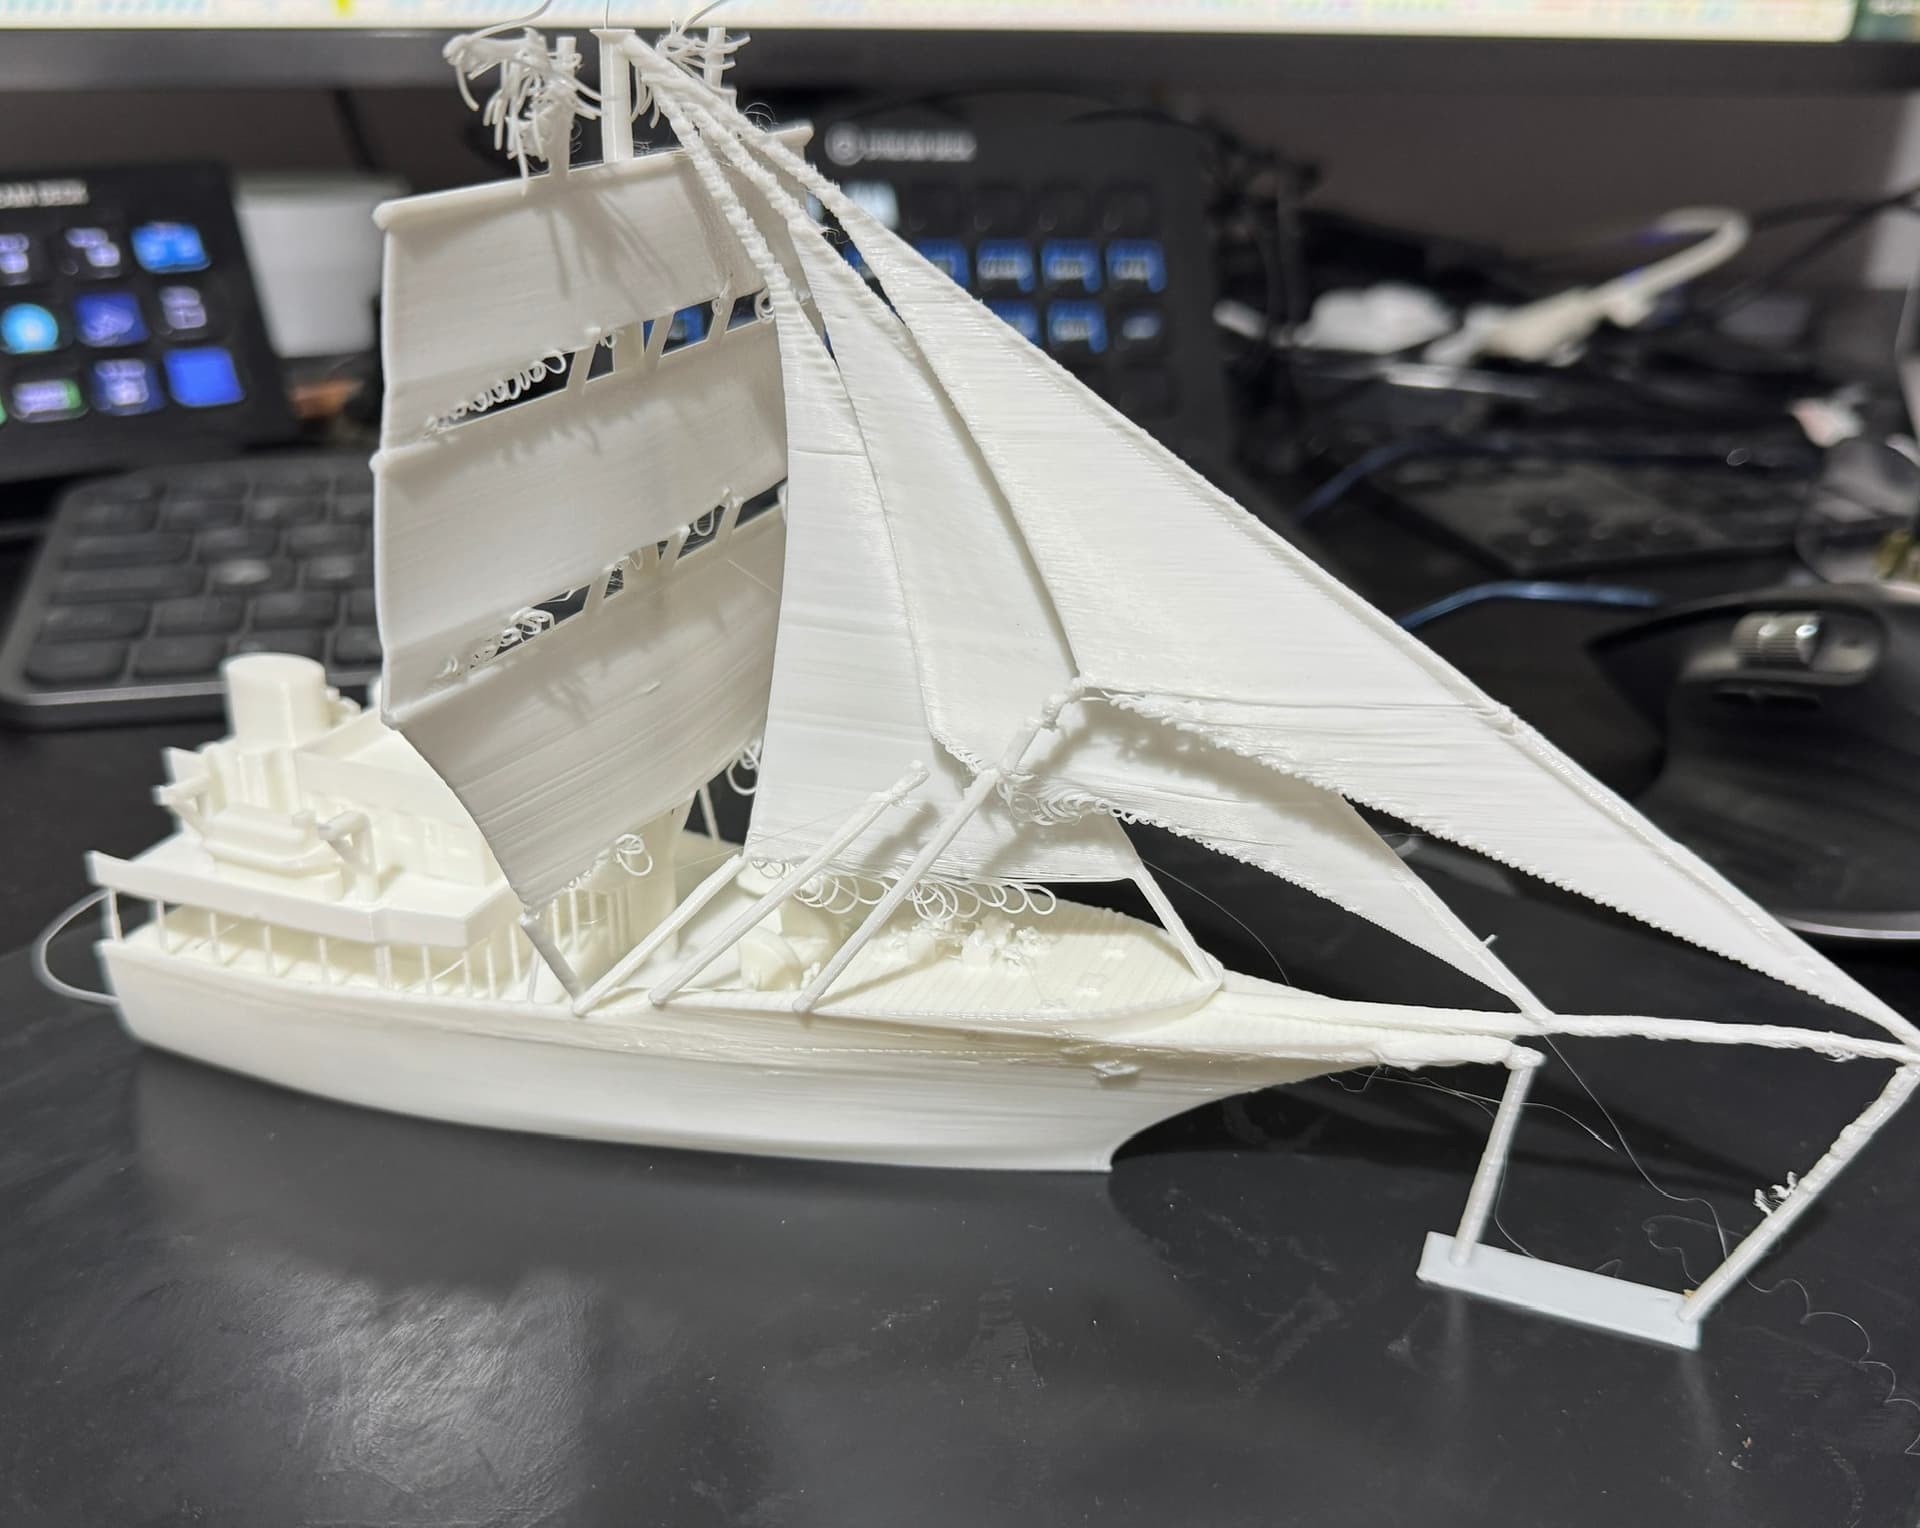
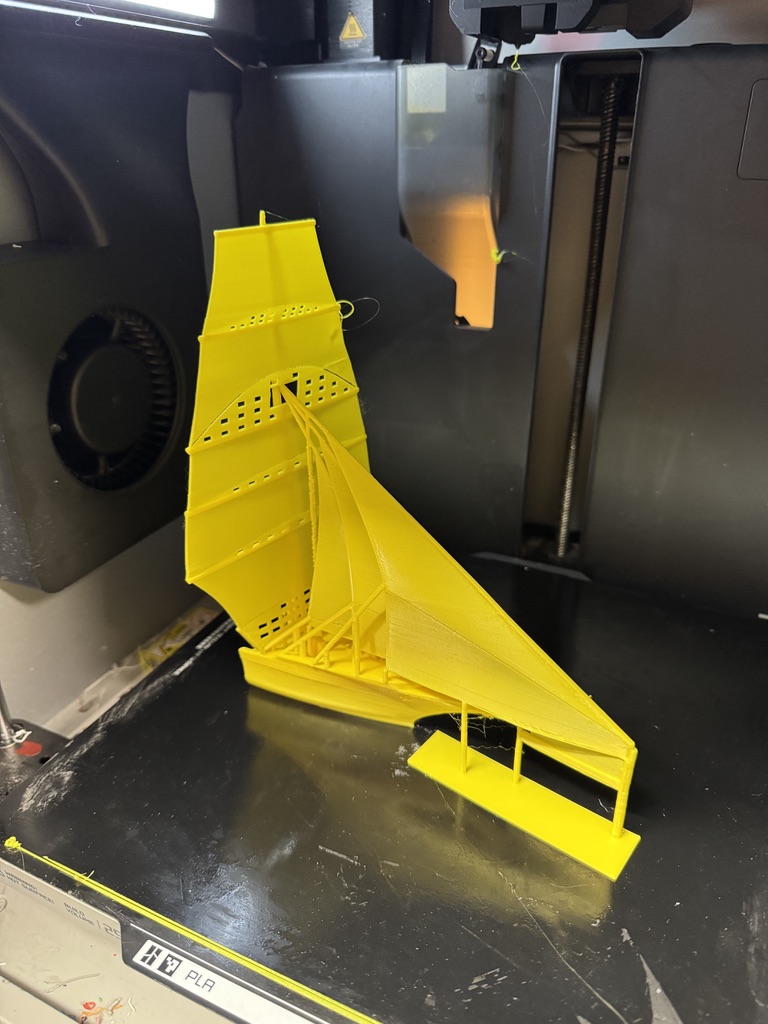
See Cloud first print now ready to go - will print it at 400% scale (1:250) single colour, and will probably just print one half first.
Need to do it this large as some of the parts like supports are too small - and will need to be scaled up in order to work at smaller scales.
Had to add quite a few extra supports to hold the sails up.
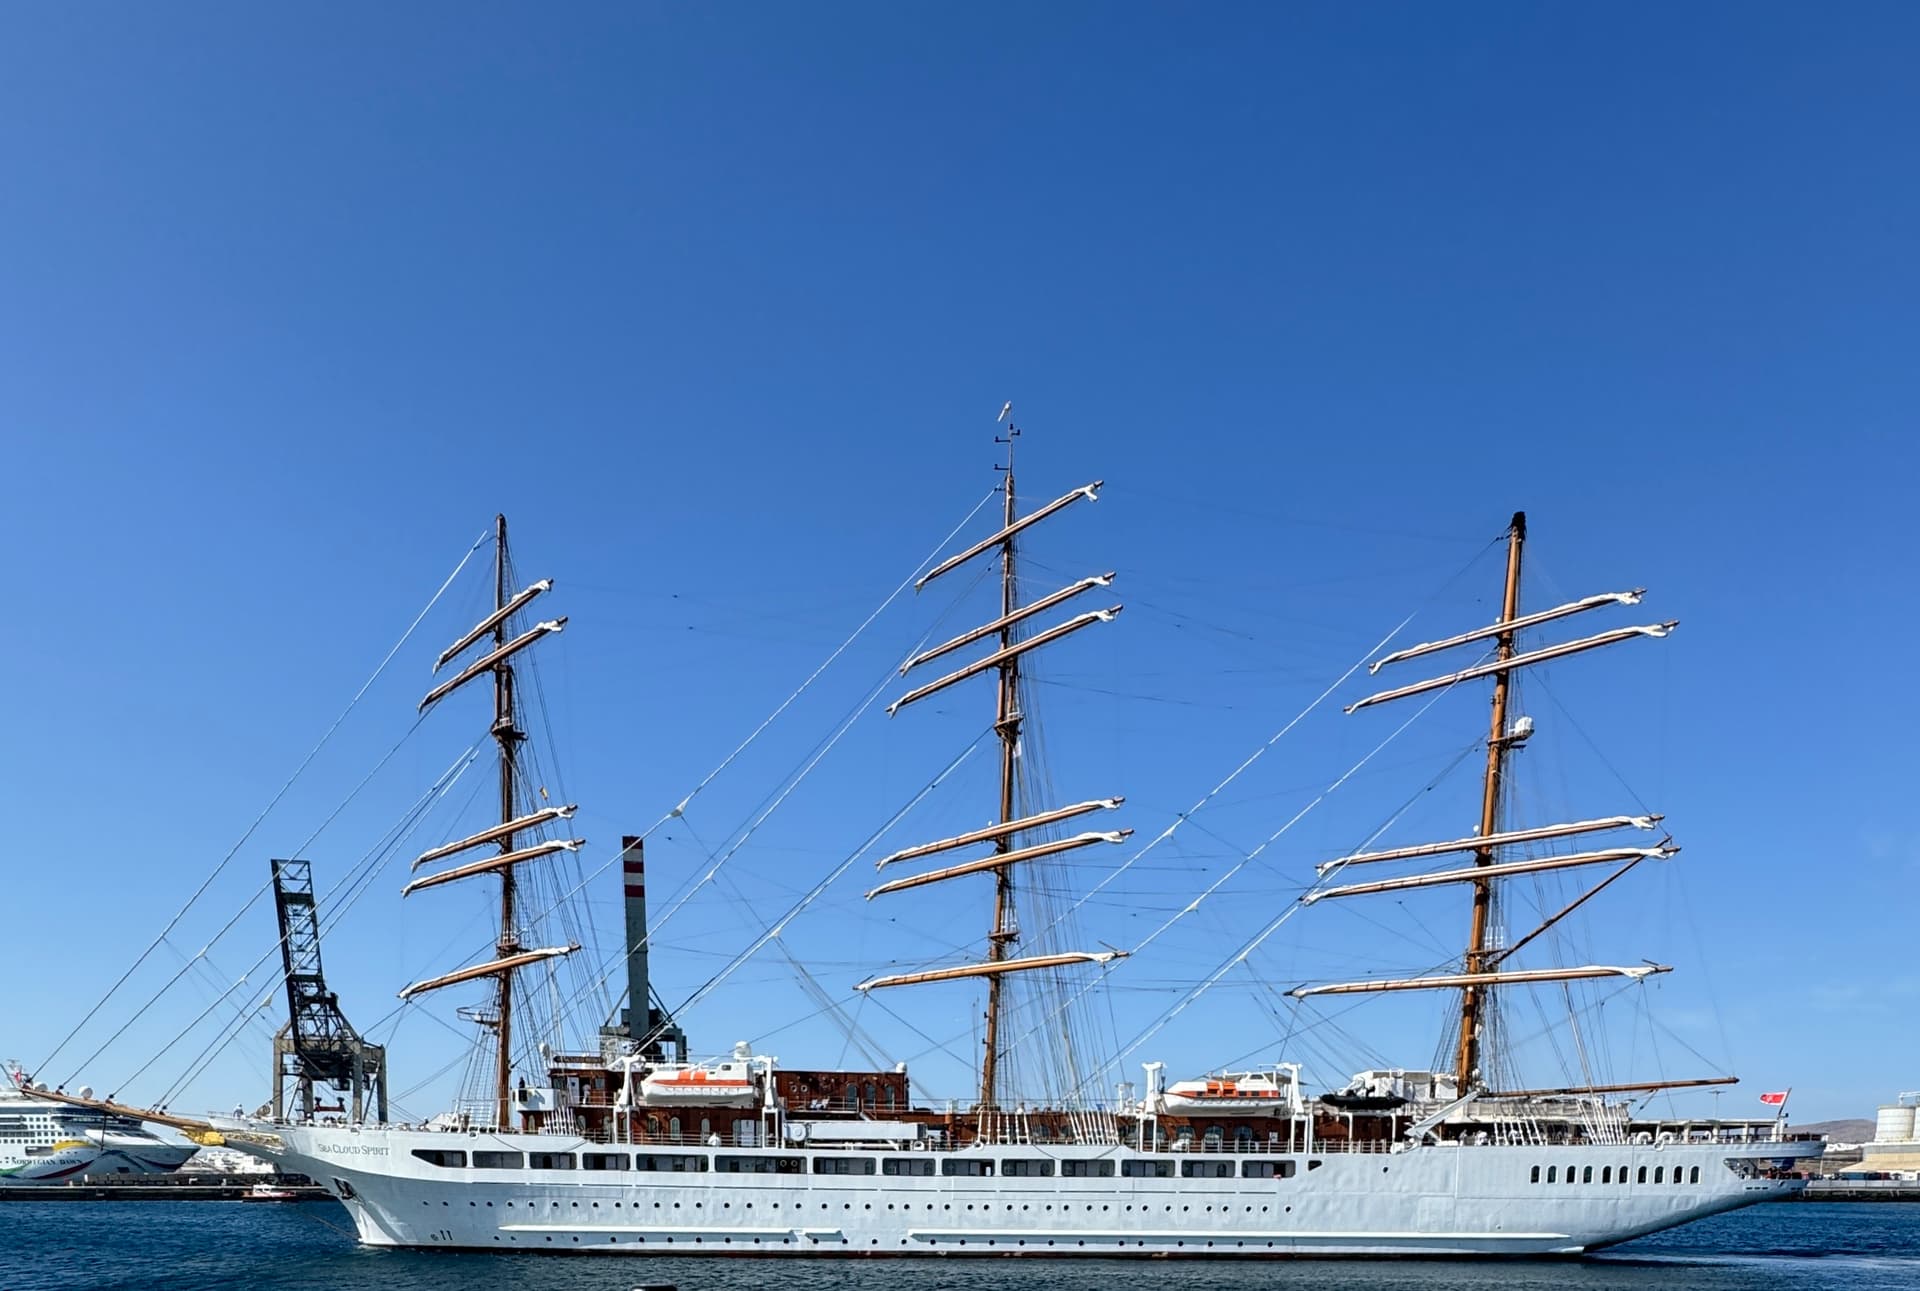
Also came across the other 2 ships in the sea cloud fleet recently at Lanzarote - see may do them too at some point.
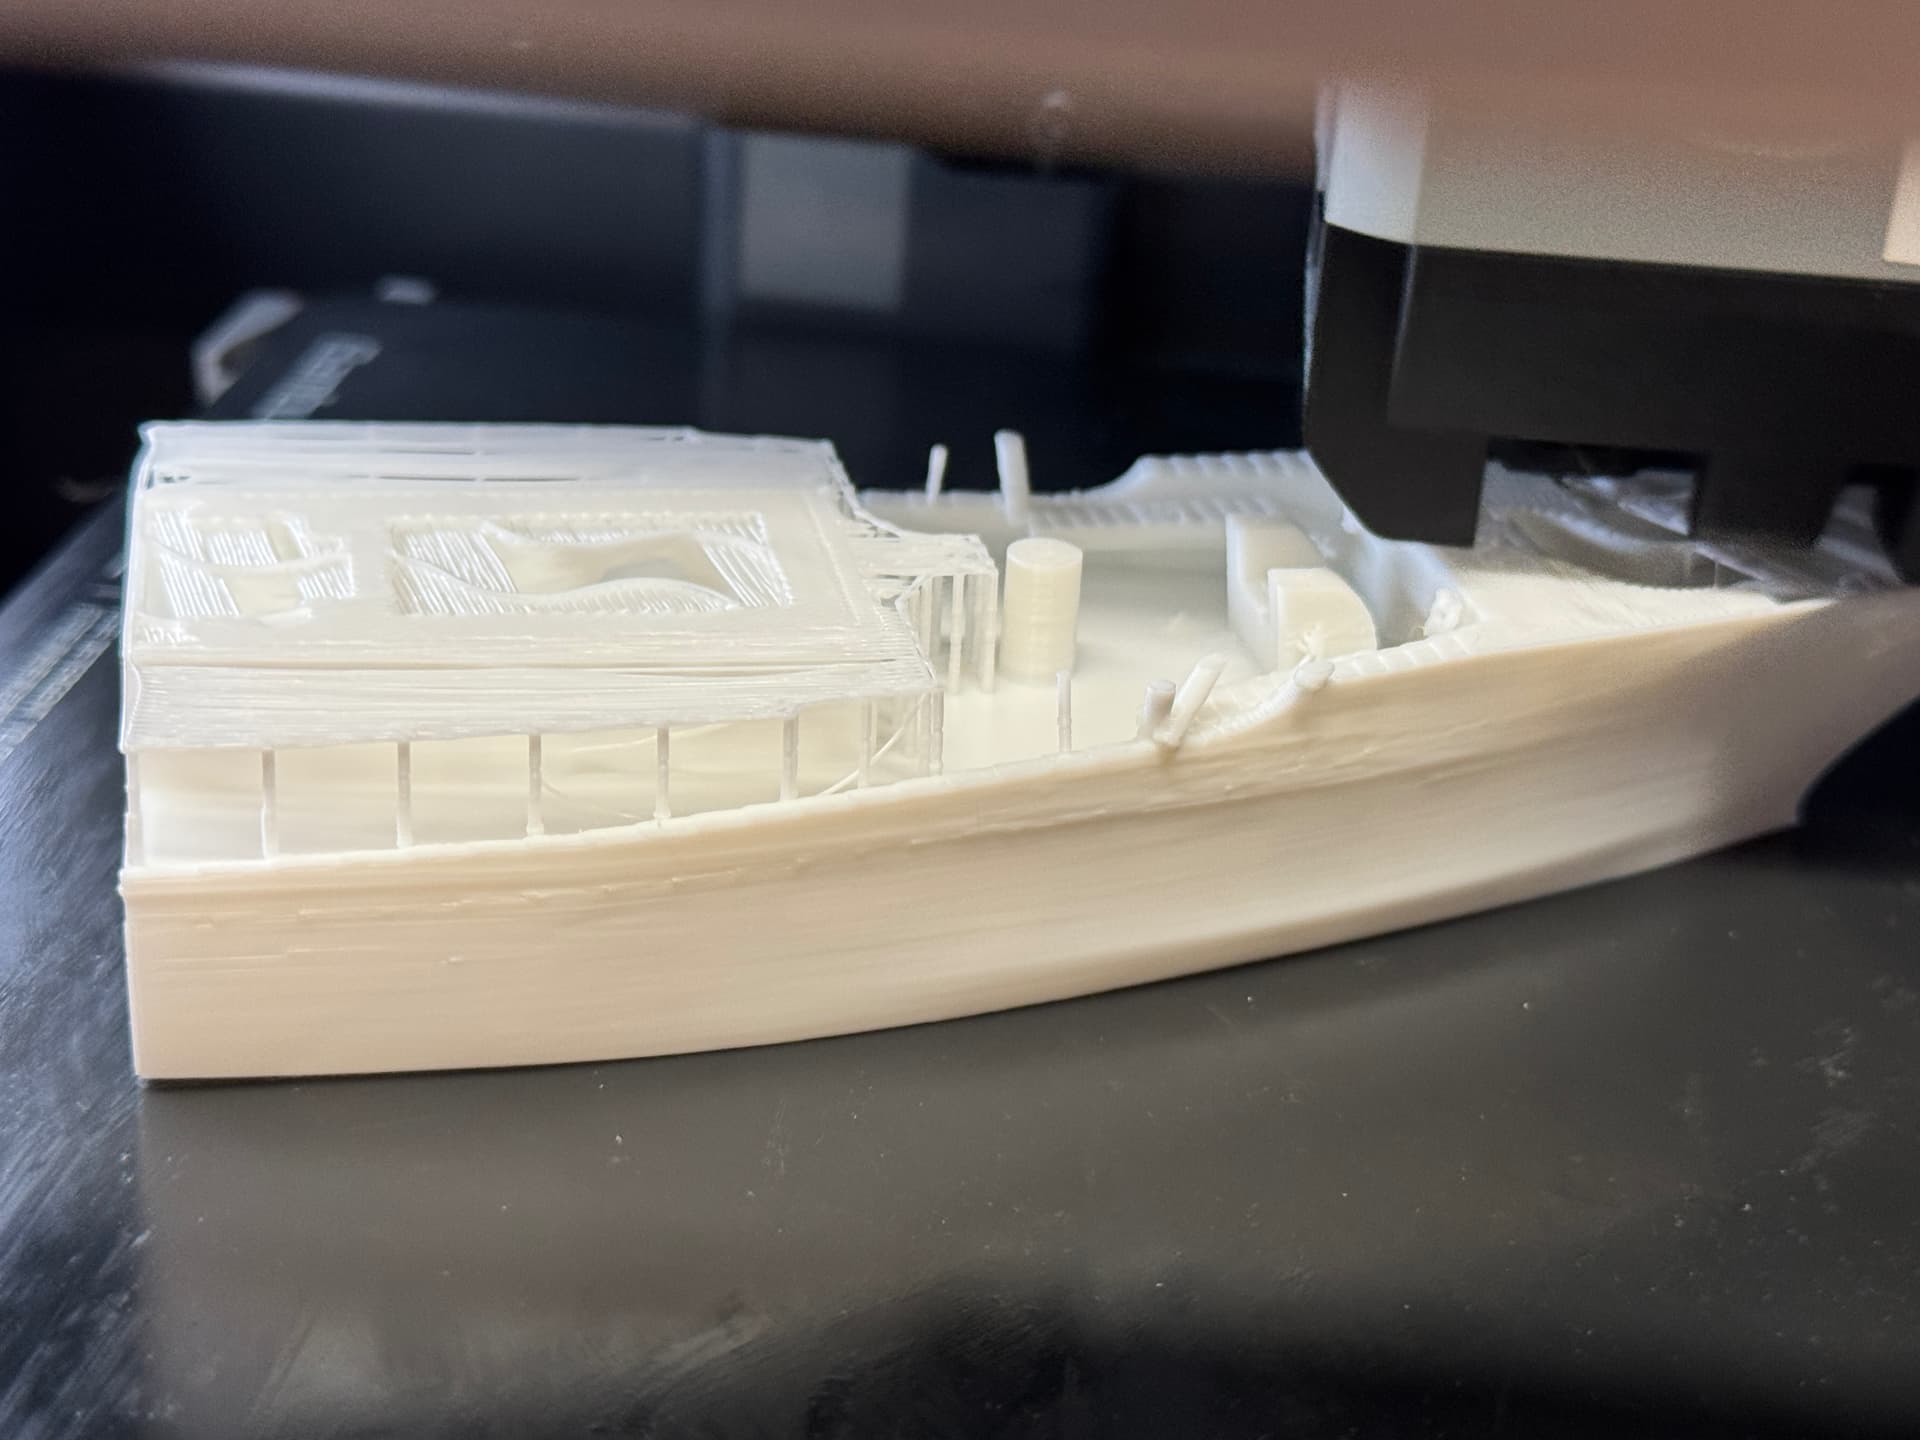
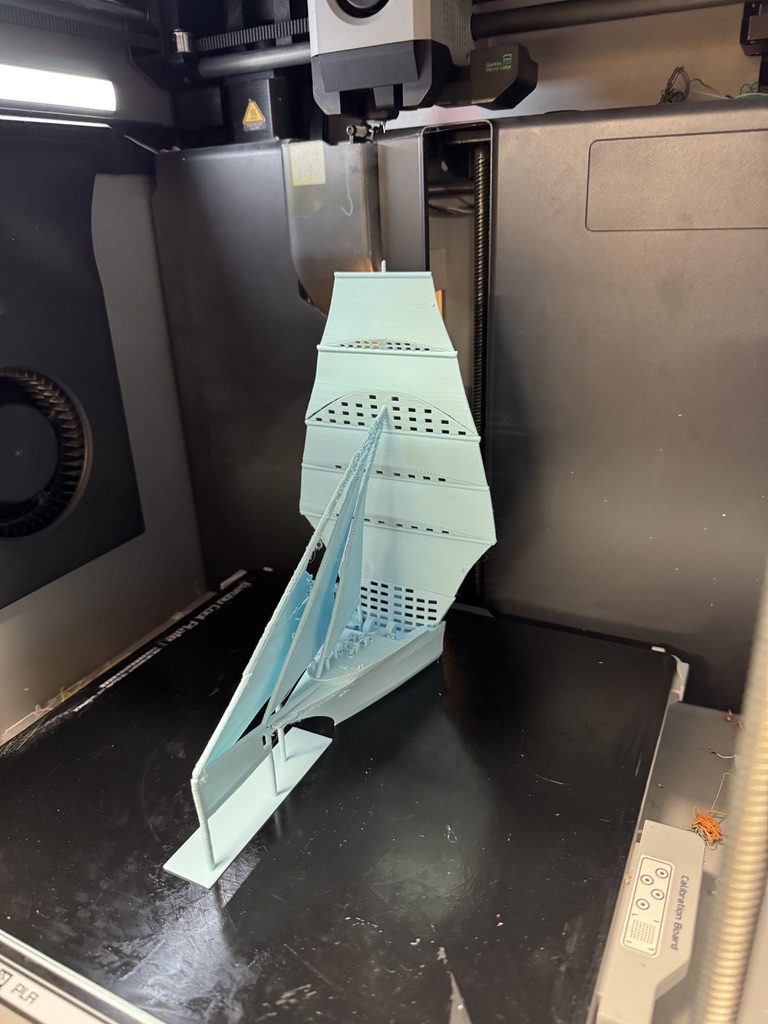
Update - print progressing
Came out a bit of a mess - but I think it has potential - I guess those curved undersides of the sails were never going to work unsupported.
Got loads of AMS Assist and Potential Clog messages. In the end took the AMS off top of printer and removed glass which seemed to help.
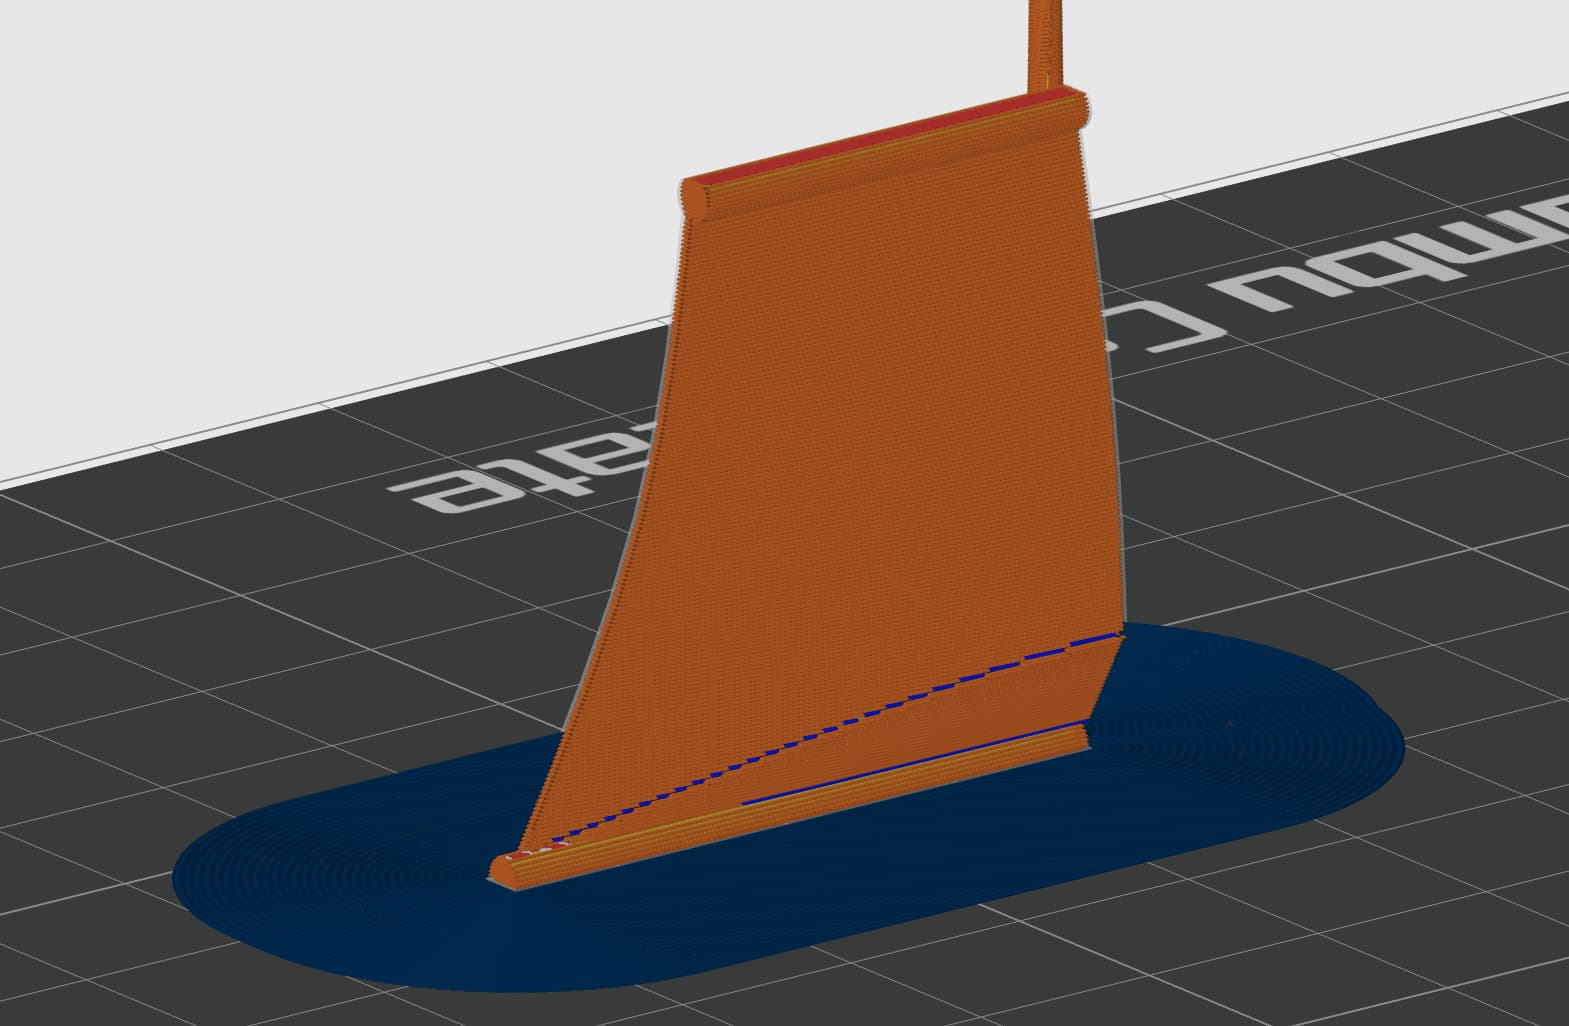
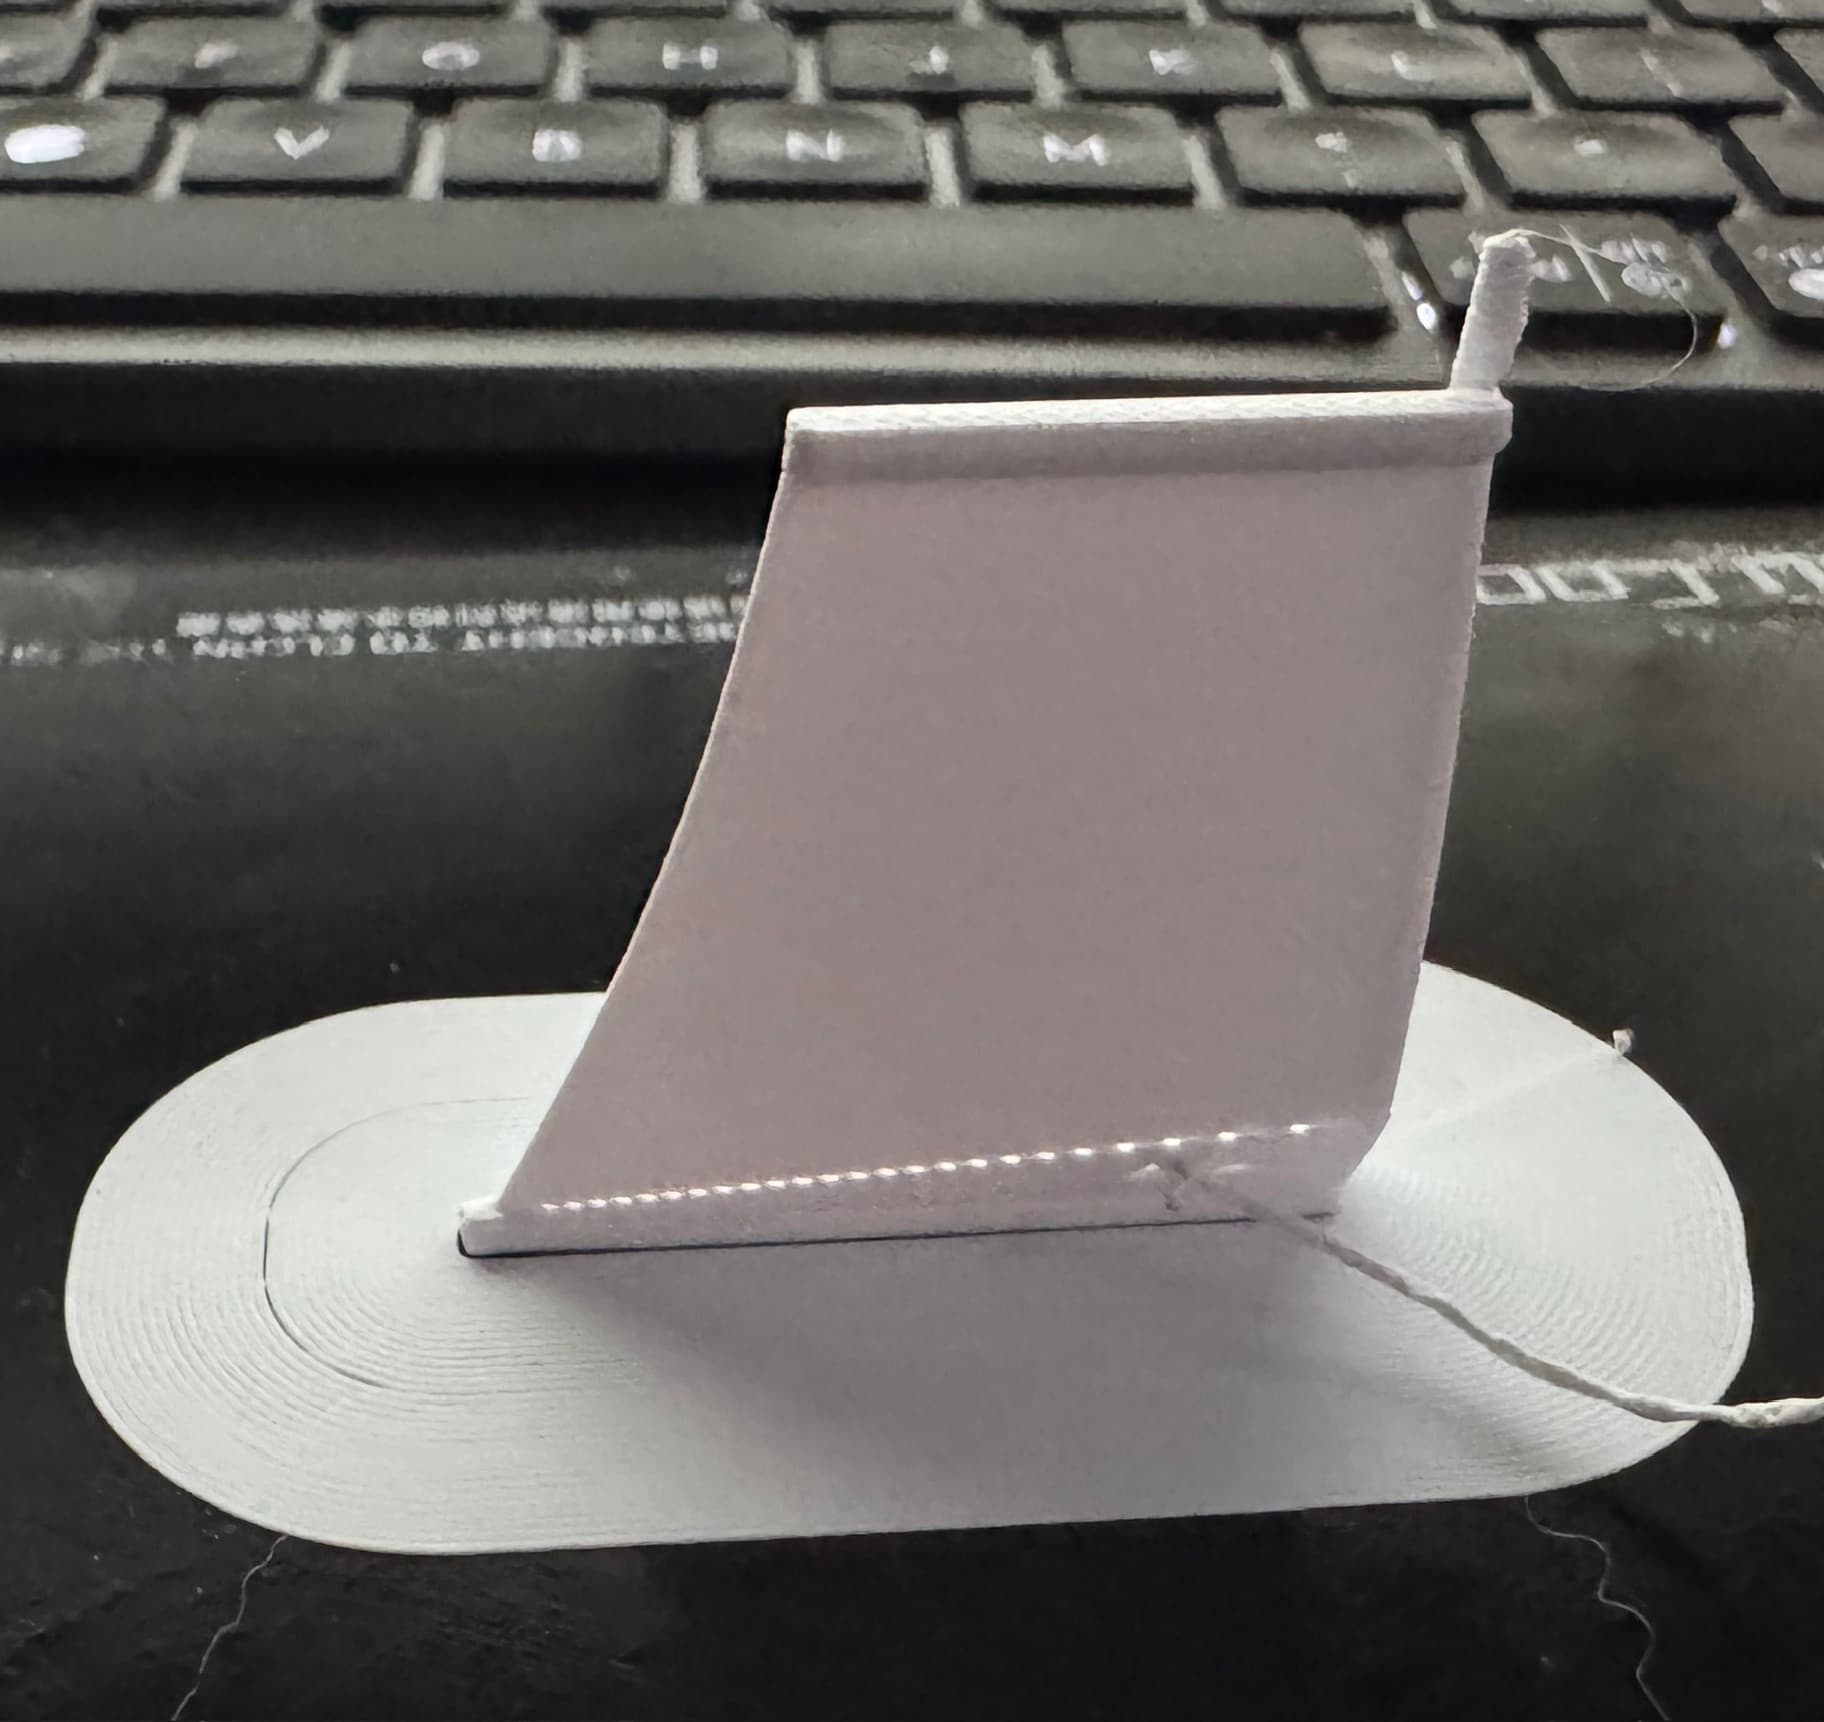
Going to try a more complex manual support structure - with a loft from the bottom of the sails down to the lower spar. With loft then moved down 1 layer and sliced off at the bottom. Doing test print
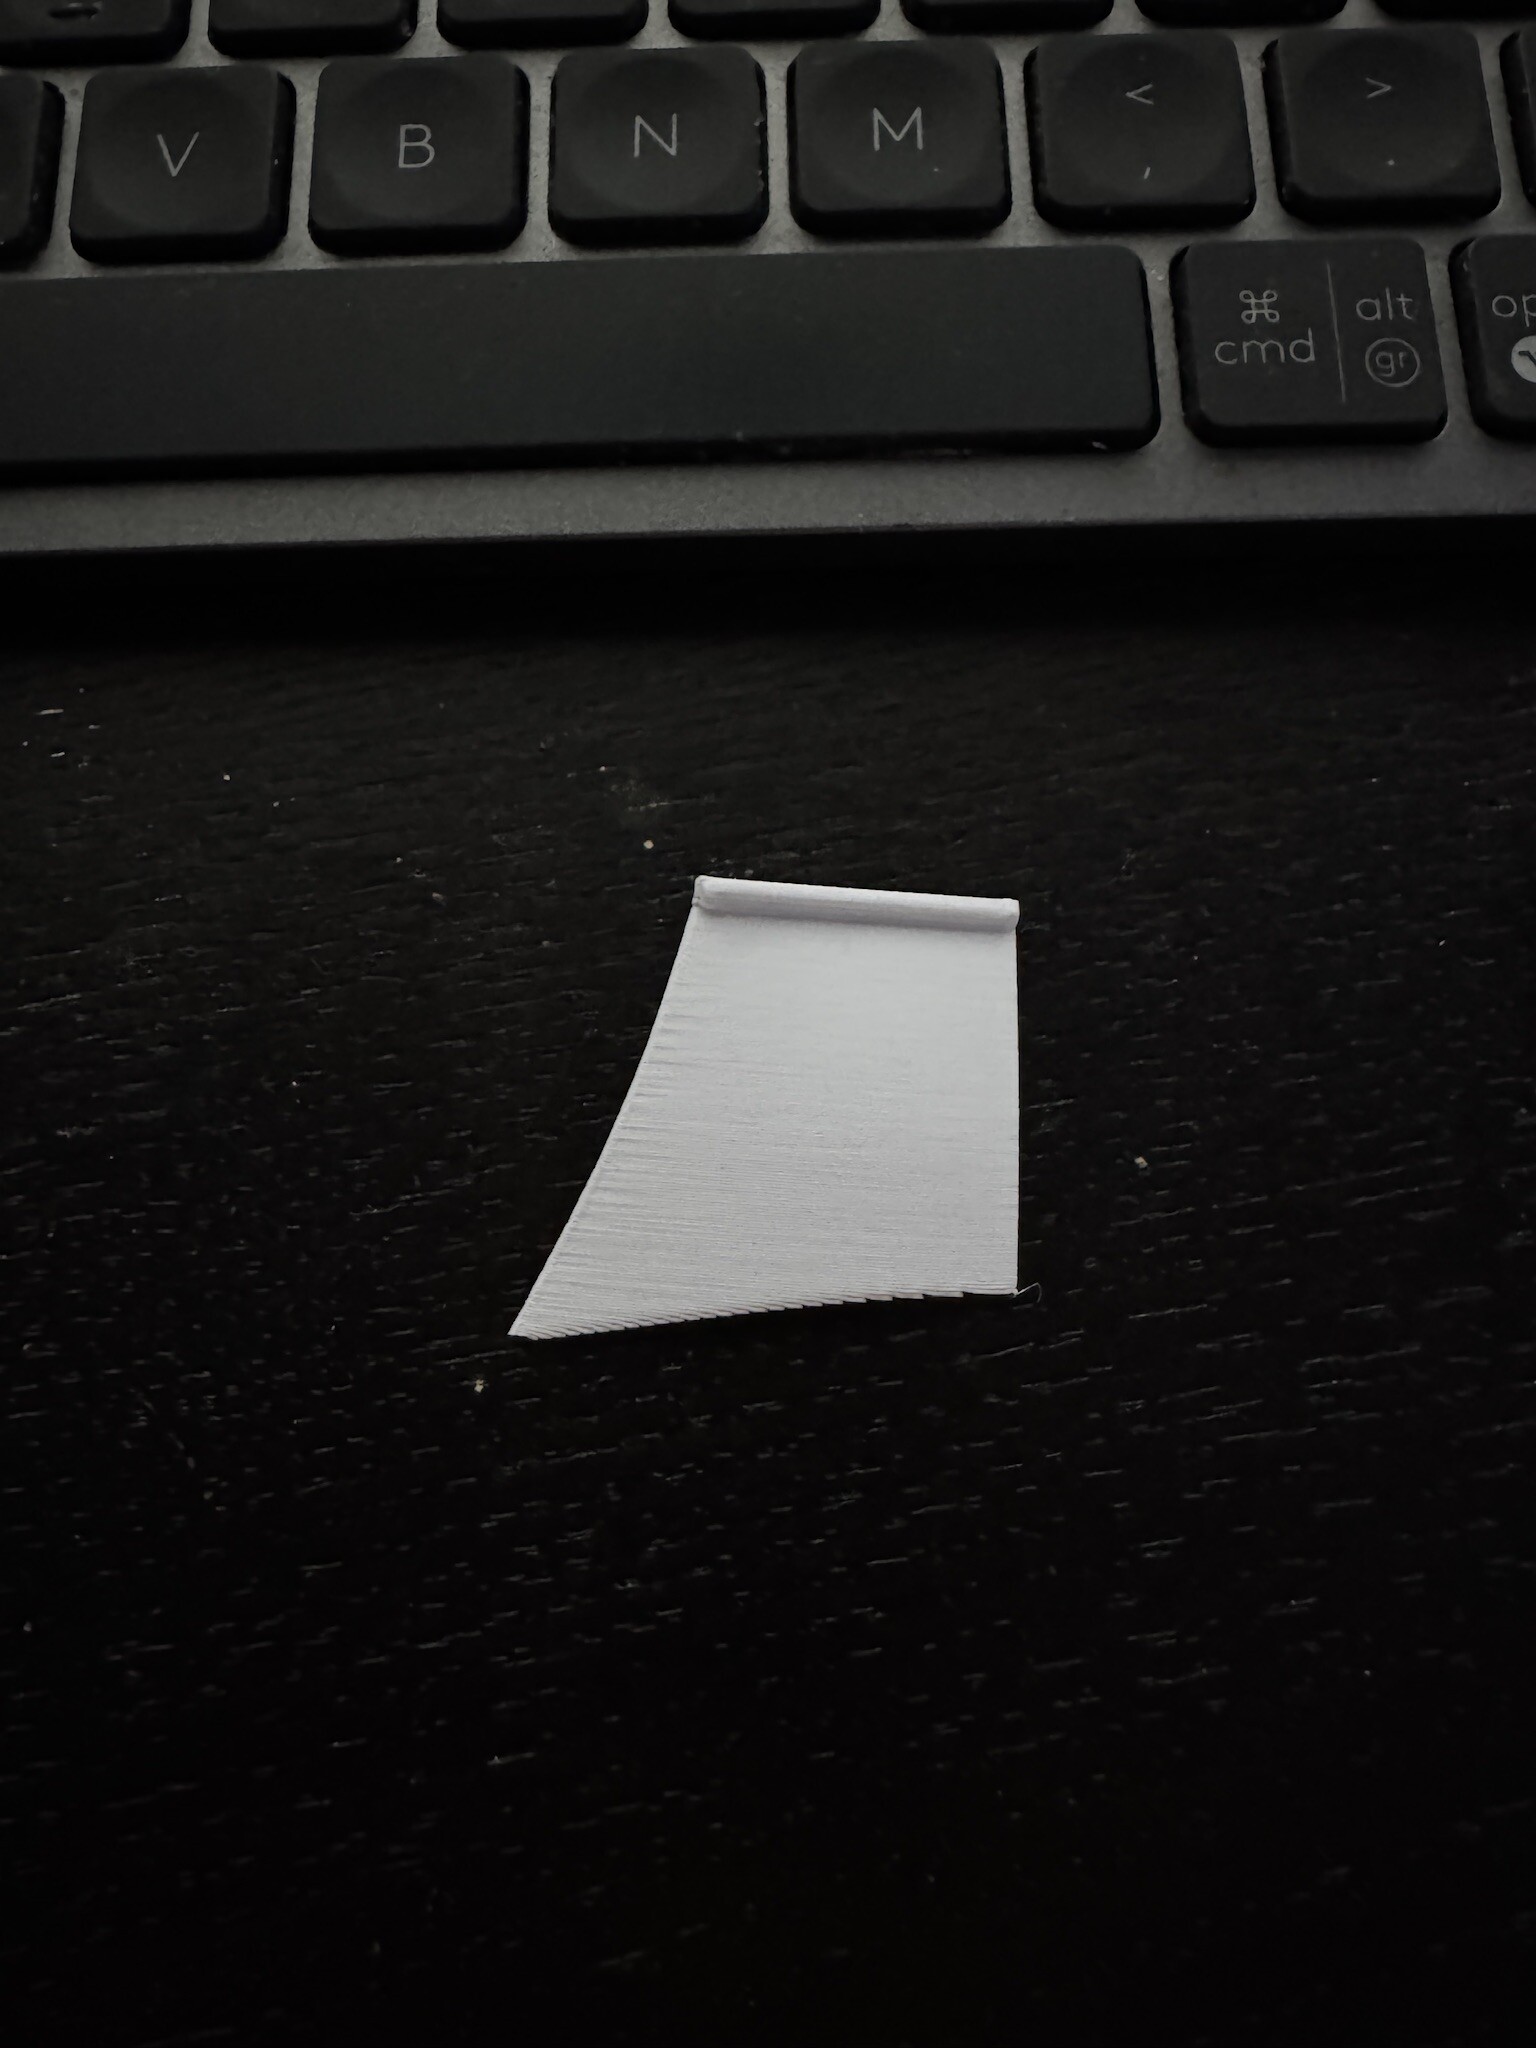
Separated quite nicely
Improved version with holes for easier removal and mirrored
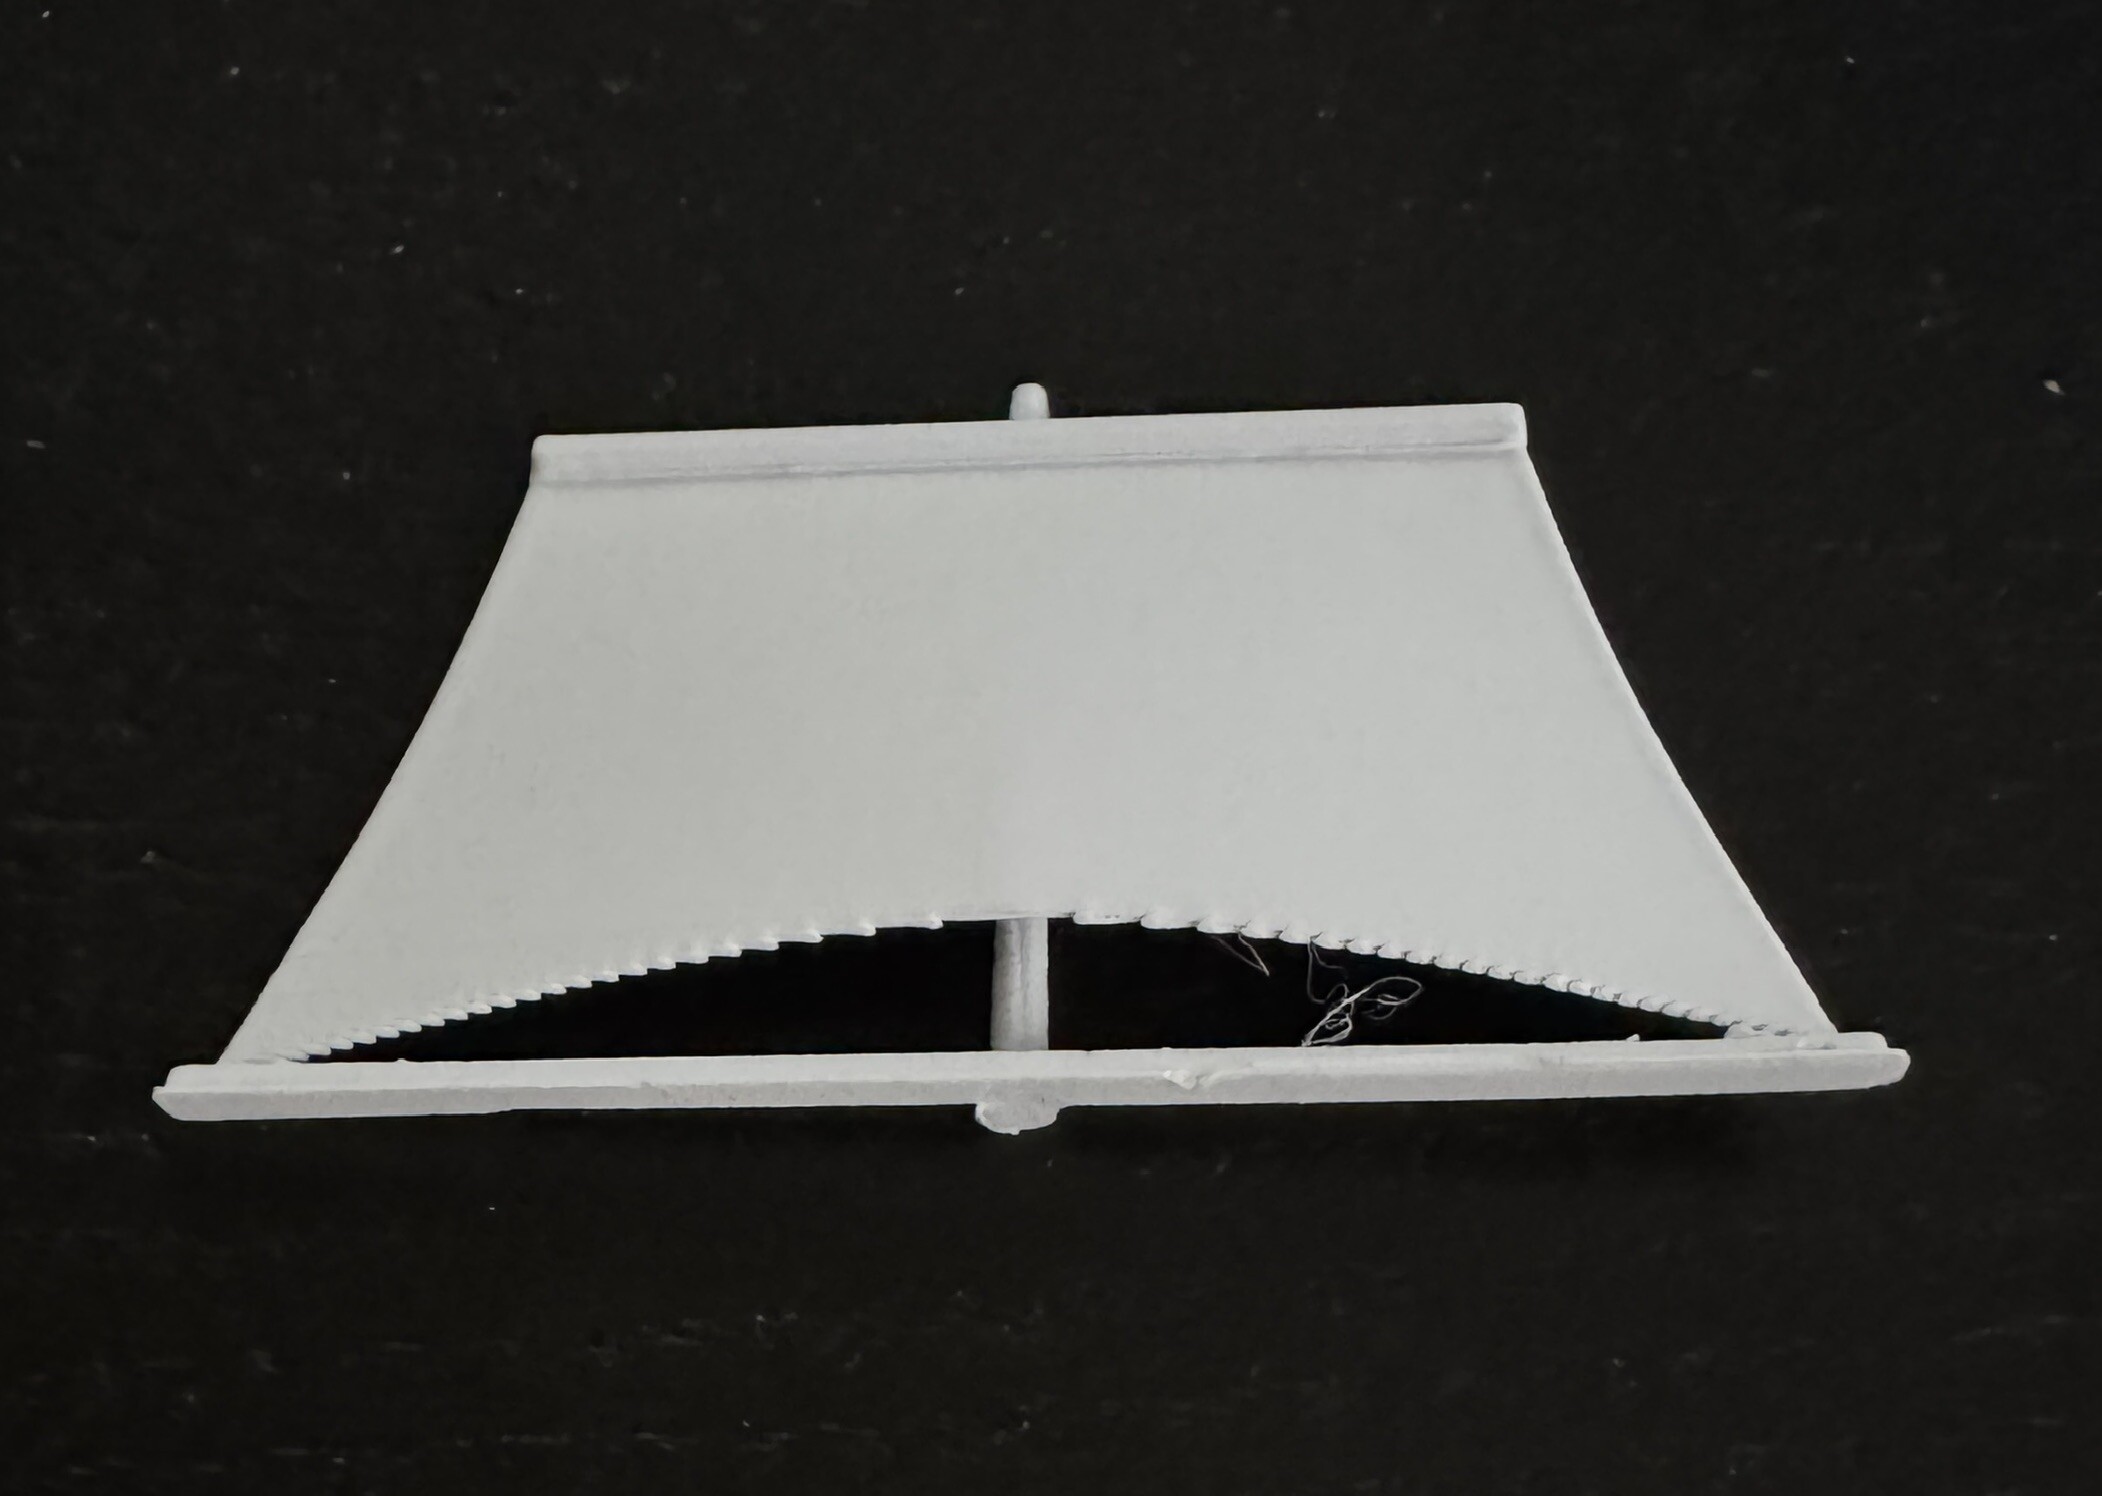
2nd attempt at front half of ship
Some of the spars a bit messy - but sails worked pretty well with the new supports
Test Print 3 - almost there - just need to make supports a bit easier to remove
Queen Victoria print finished - took about 24hrs including a 6hr overnight stop.
A few faults unfortunately - so will need to reprint
Pictured next to earlier less detailed version
Crazy respect for these projects, wel done!
Sea Cloud supports now added to all sails and ship properly split into 2 sections for 1:250 scale printing.
Single Colour test print of back half now underway
Came out fairly well
A few more tweaks added for next test tomorrow - also added in some temporary horizontal stabilisers in - to stop masts swaying while printing - might be a bit of an ambitious bridge though.
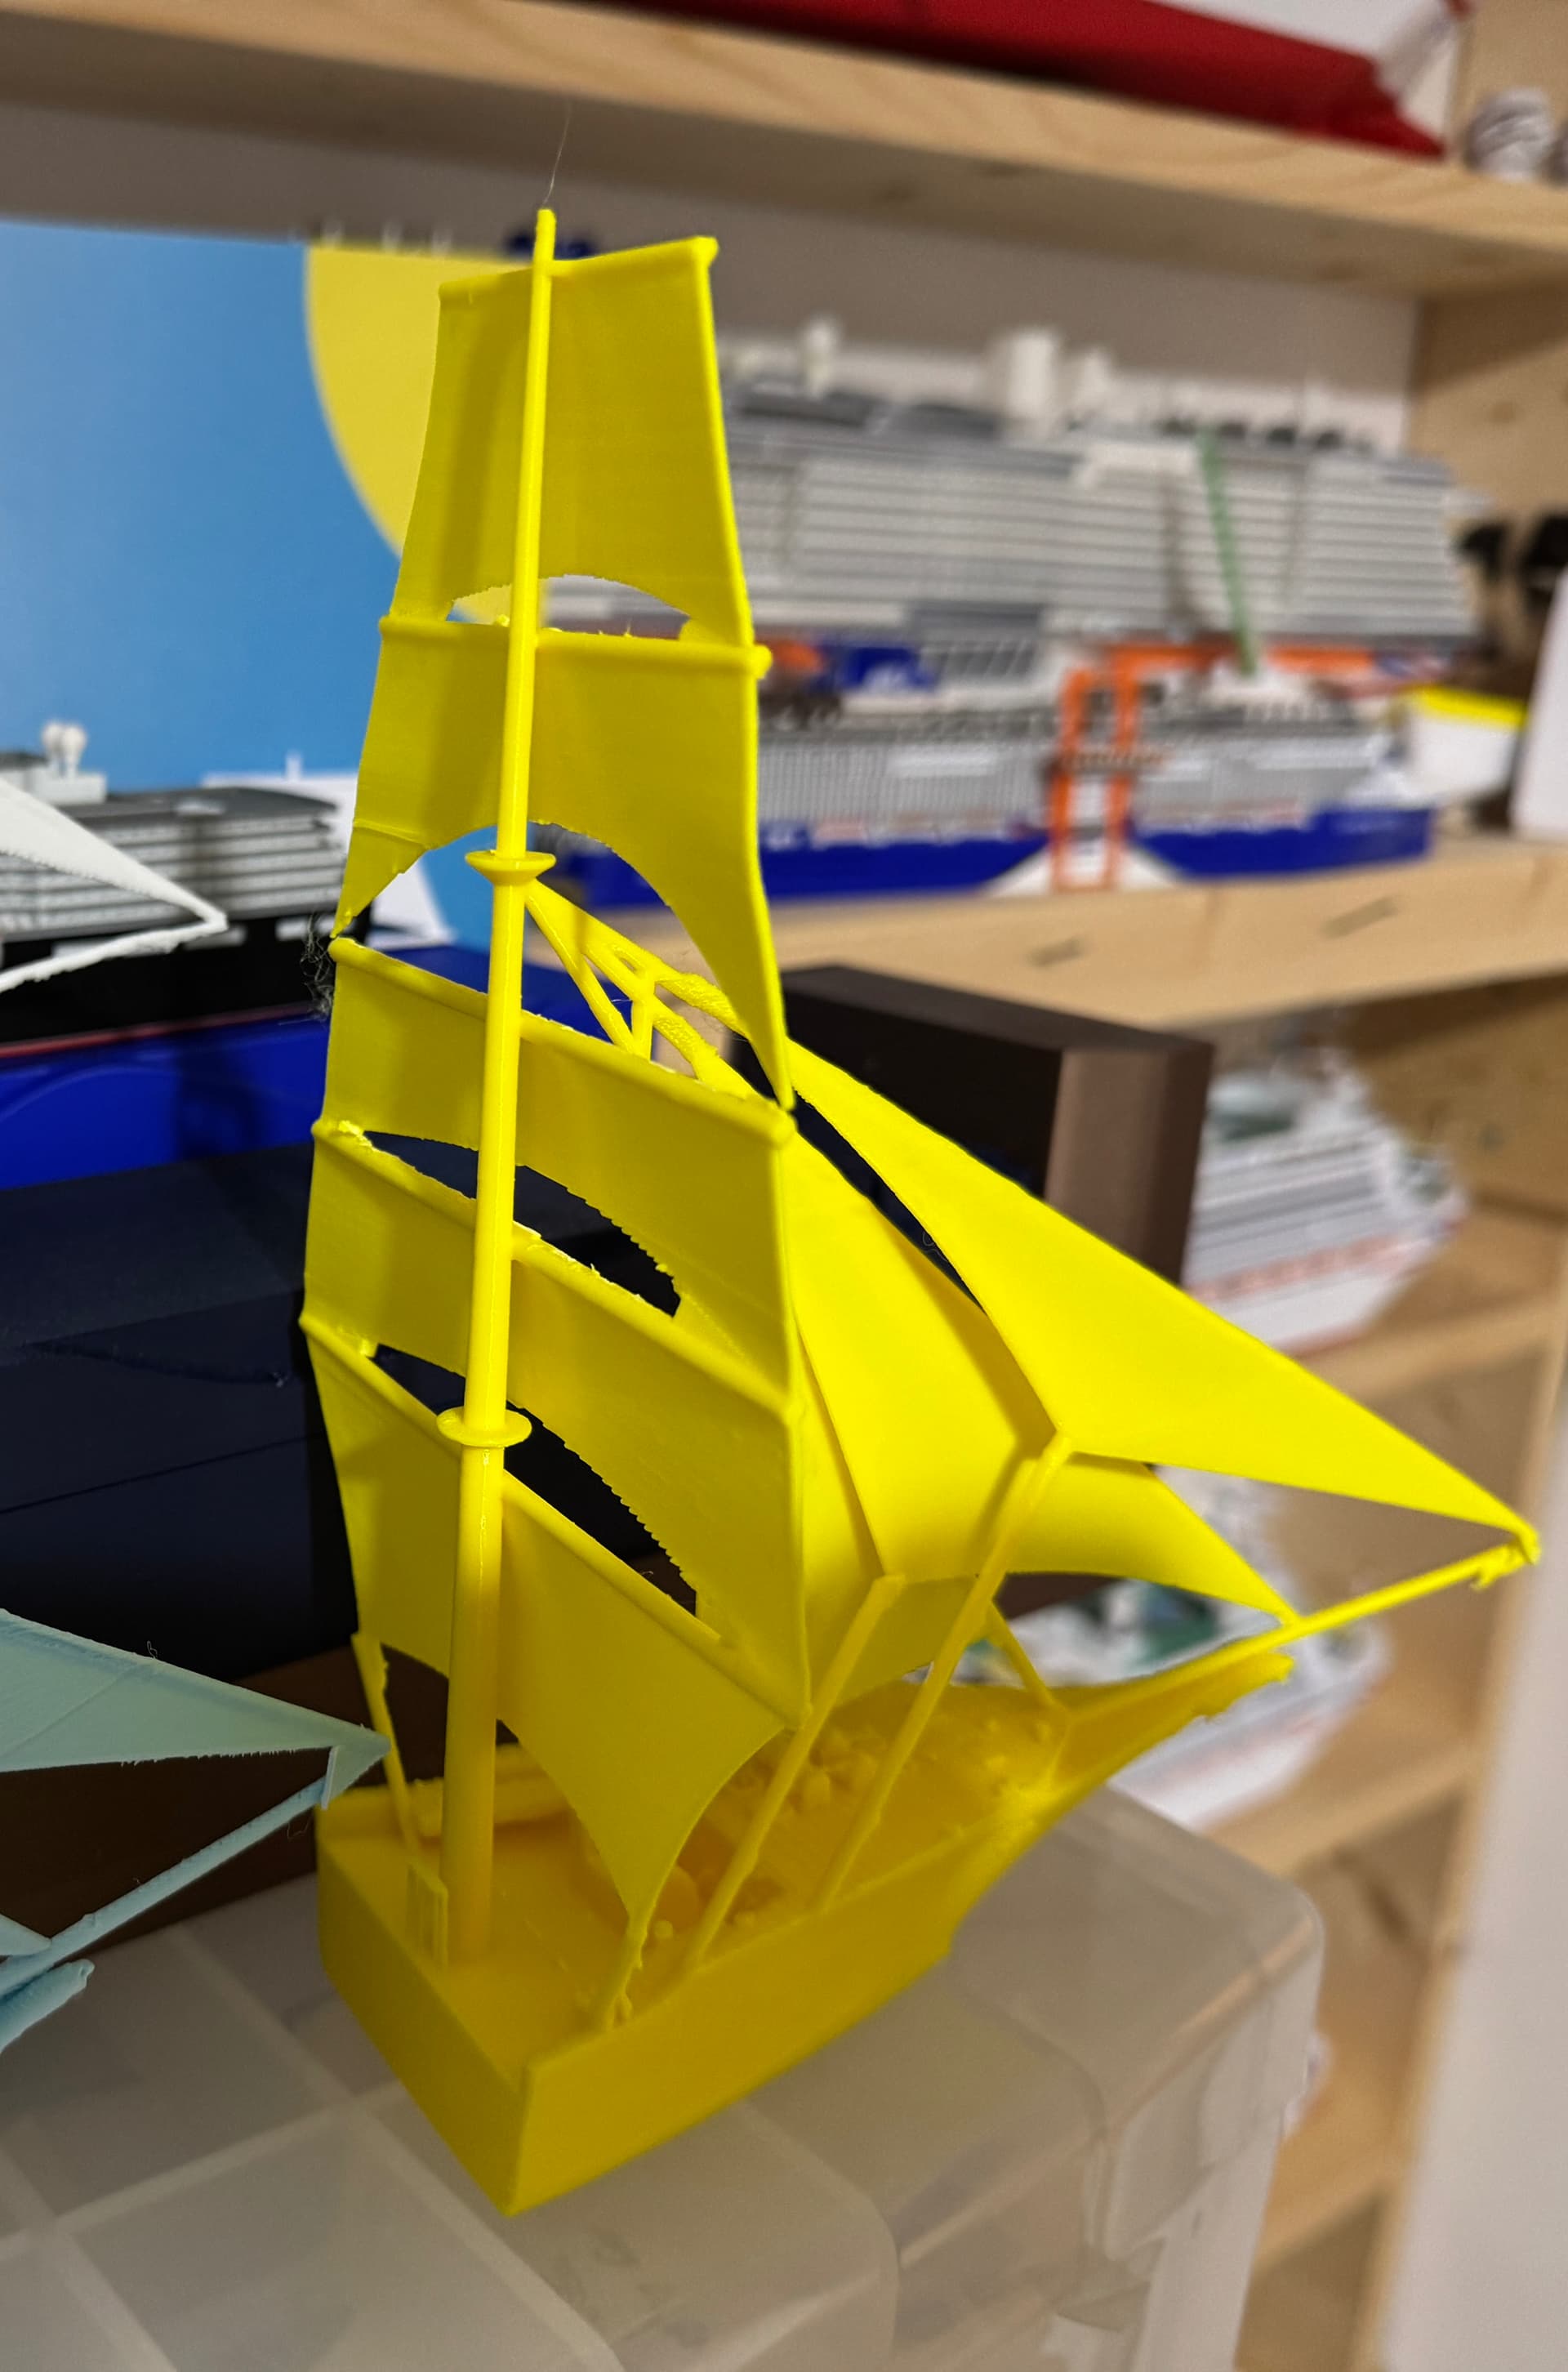
Starting full single colour prints of both halves
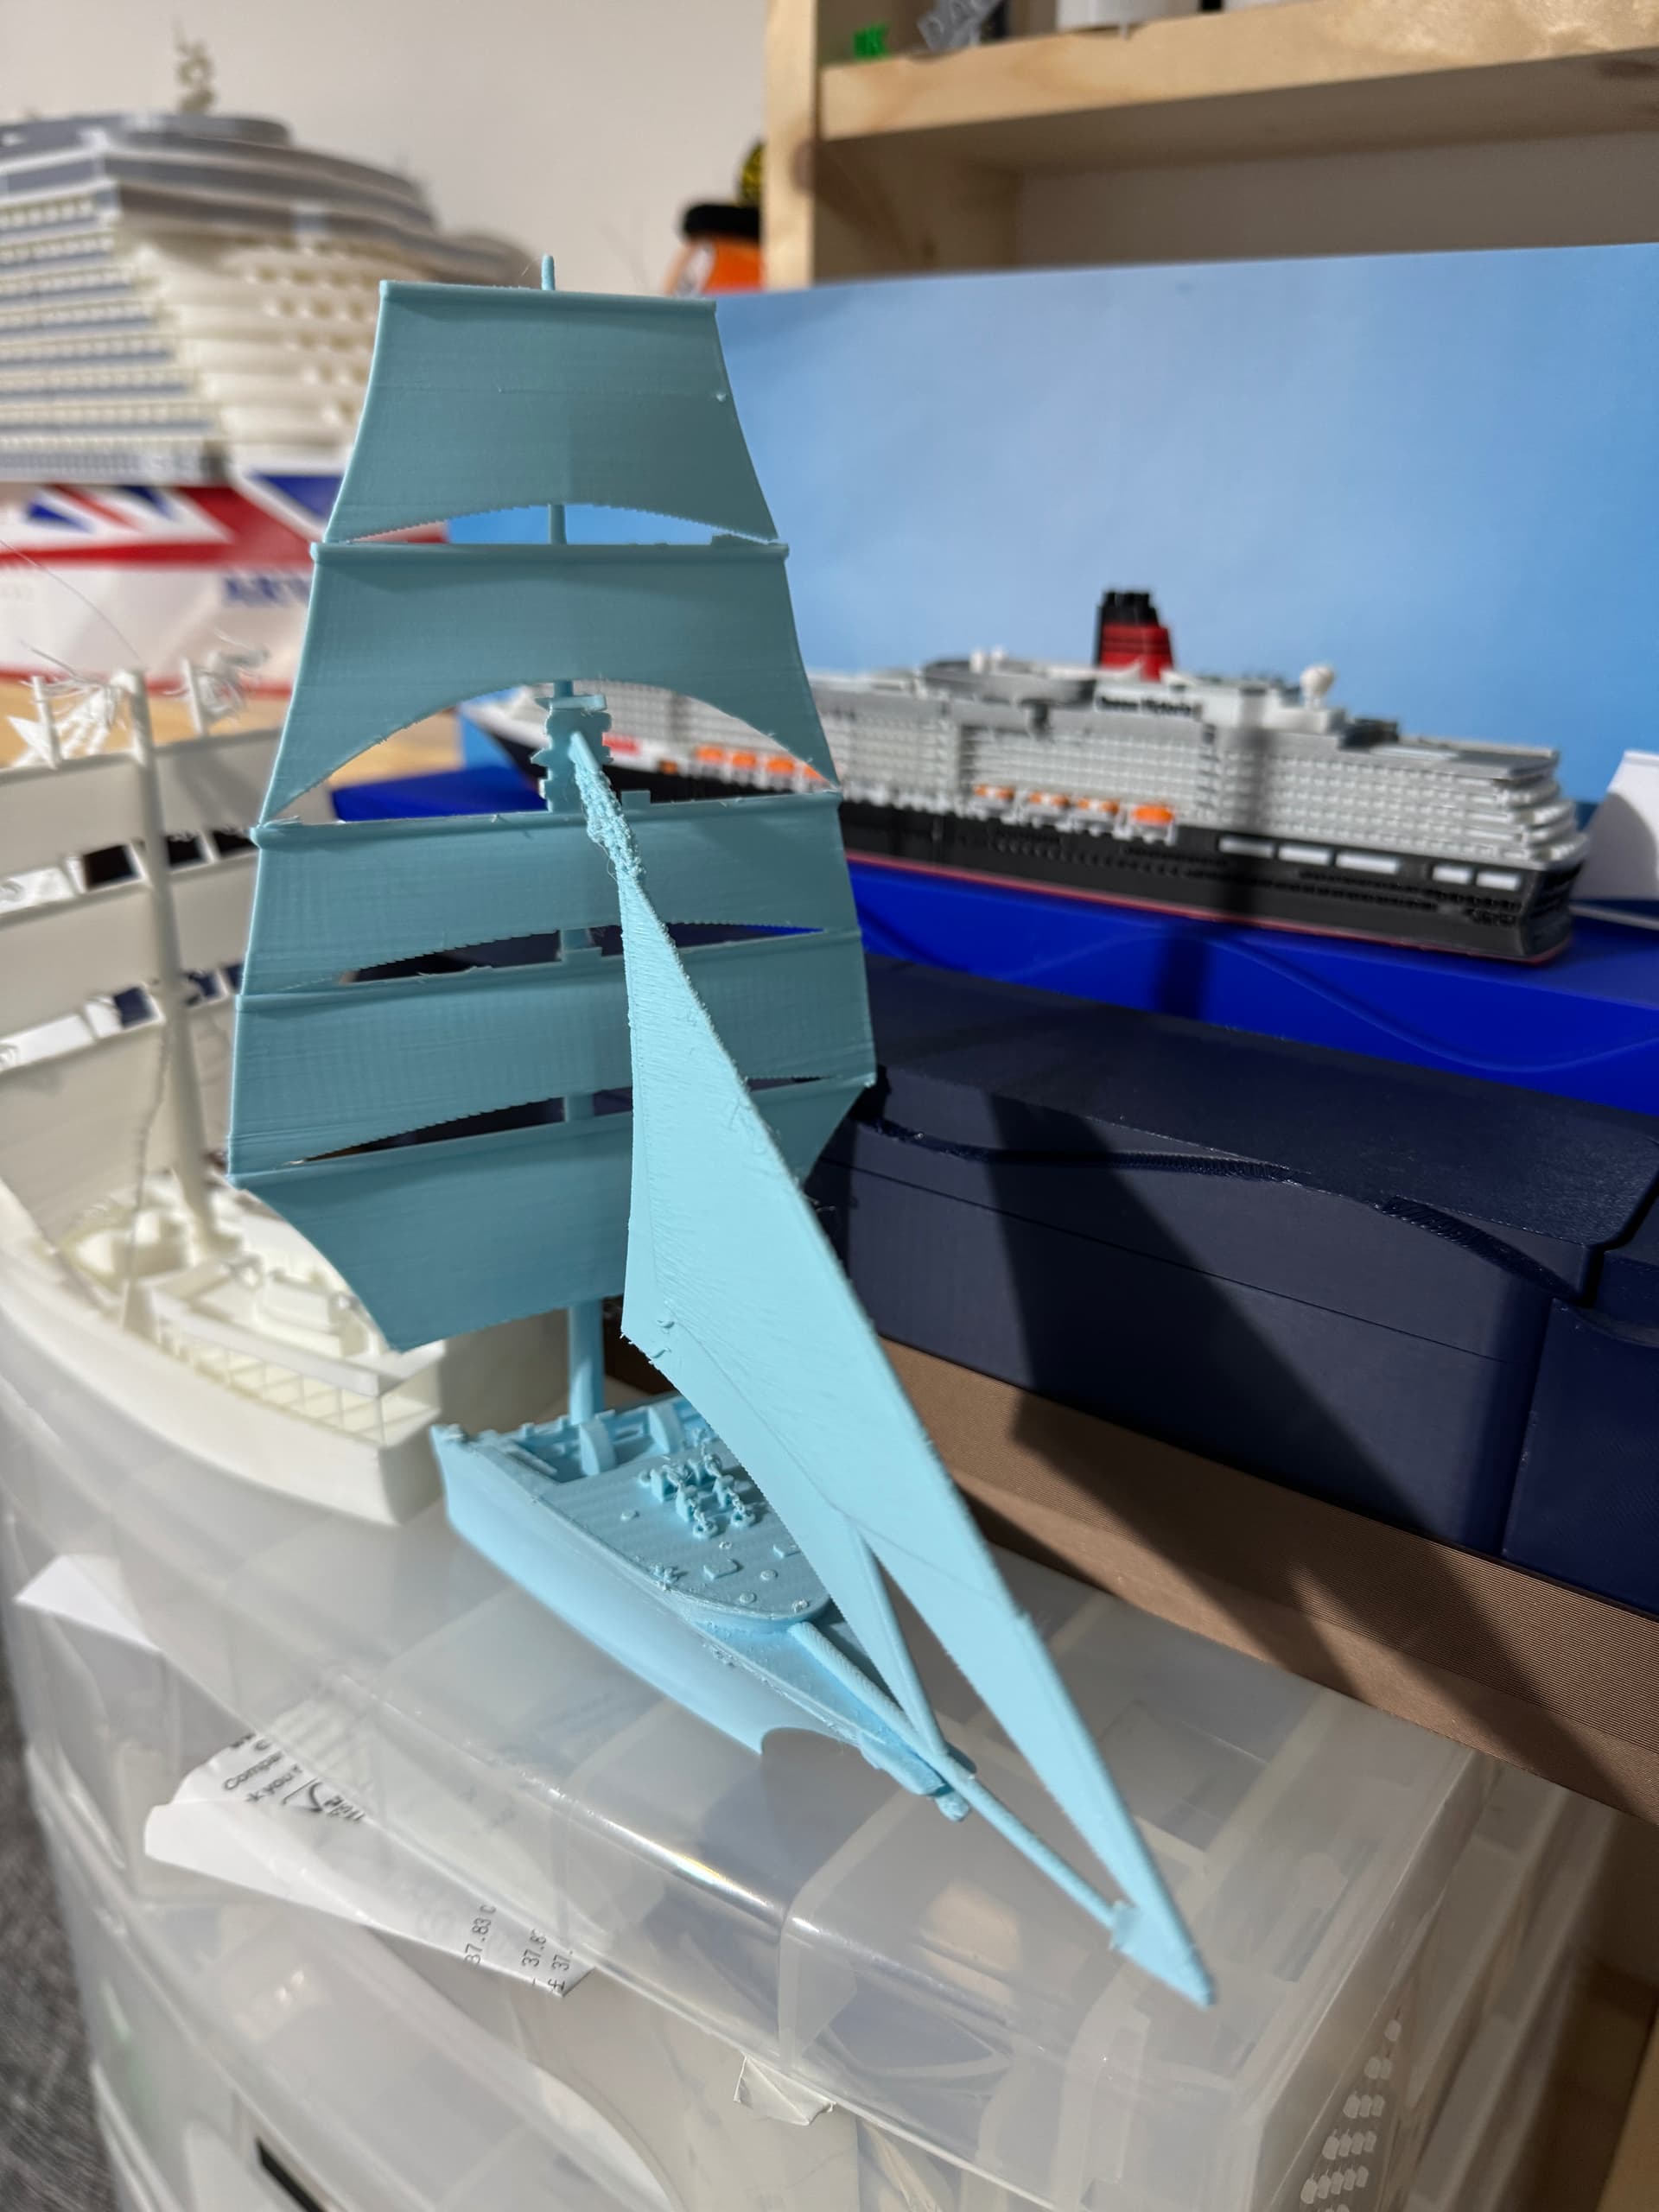
First complete print of Sea Cloud - more work required - but nice the ship is in one piece.
Hopefully final refinements made to Queen Victoria 1:1000, plus a further update to my Single Colour Sea Cloud Model - to fix some of the issues, make supports easier to remove, plus add some mounting points for ropes (which I will probably try making out of led strings).
QV will take about 15hrs - probably more than 24 hrs with ‘cool plate pauses’ overnight etc.
Both prints looking very good so far