I am trying to add an object on top of an existing object. I select the front panel and then choose Add Part - Load. I can then move the new logo to the centre and above the front panel.
How do I snap the logo flush to the first object without manually trying to land it there?
I had this problem when creating a plaque with a military crest on it and a plate for inscriptions. I needed the crest on top of the plaque as well as the plate. What I found was that splitting the crest assembly into individual objects and then merging ALL objects together allowed me to place the crest on top of the plaque and to lay the plate on top of the plaque as well. It becomes EXACTLY as you would imagine it should act before splitting and merging. This works incredibly well although you lose the ability to merge assemblies to keep things straight. You just need to name the bigger objects something appropriate to keep organized. I hope this helps.
From the bottom of my heart, Thank you. Ive been tinkering and searching and trying to figure out how to word my question. THREE DAYS TO MAKE THAT POTATO SALAD!! THREE DAYS!
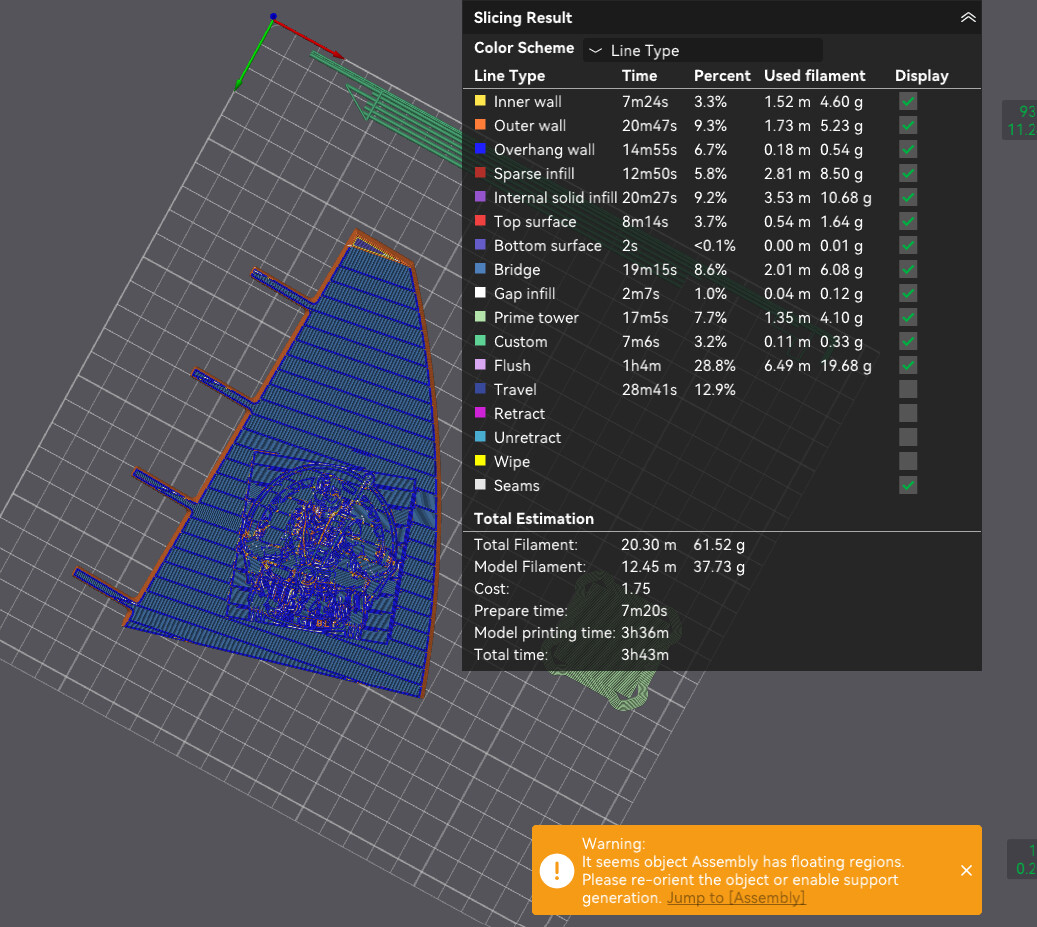
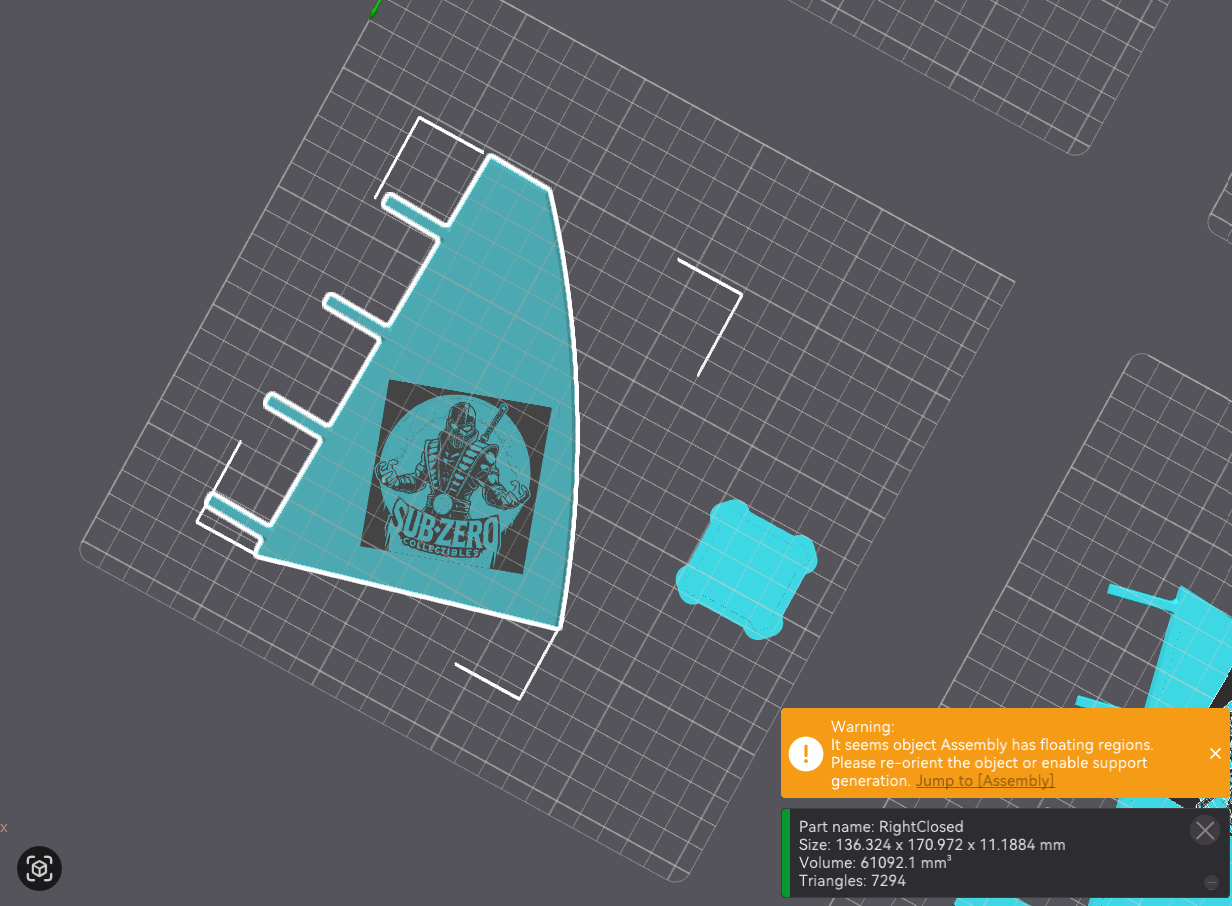
Did you ever get this resolved? I am having the same issue where import my stl logo as a part or modifier, which works perfectly to have the logo on the primary object. However when I flip my object (including the logo) to lay on the build plate the slicer keeps showing the logo not flush so it causes majority of the bottom to be floating region cases print issues. I have
When wanting to print flush, I always change the object type to a modifier. In that way, there’s no other option but for a flush surface, regardless of orientation.
Yes, i have done many attempts of this. When BS considers it flush you can no longer see the logo on the front side. In going to keep trying, based on the responses i am on the right path.
Yeah, it does that.
Just right click the logo object, change its type to modifier with changed filament being the only mandatory change (although Arachne wall generator can help fine details) and it no longer matters how much it portrudes (as long as it does).
You can then concentrate on getting the depth right to give good coloring with minimal filament changes. I usually use 0.4mm but extremes (white on black) may need more.
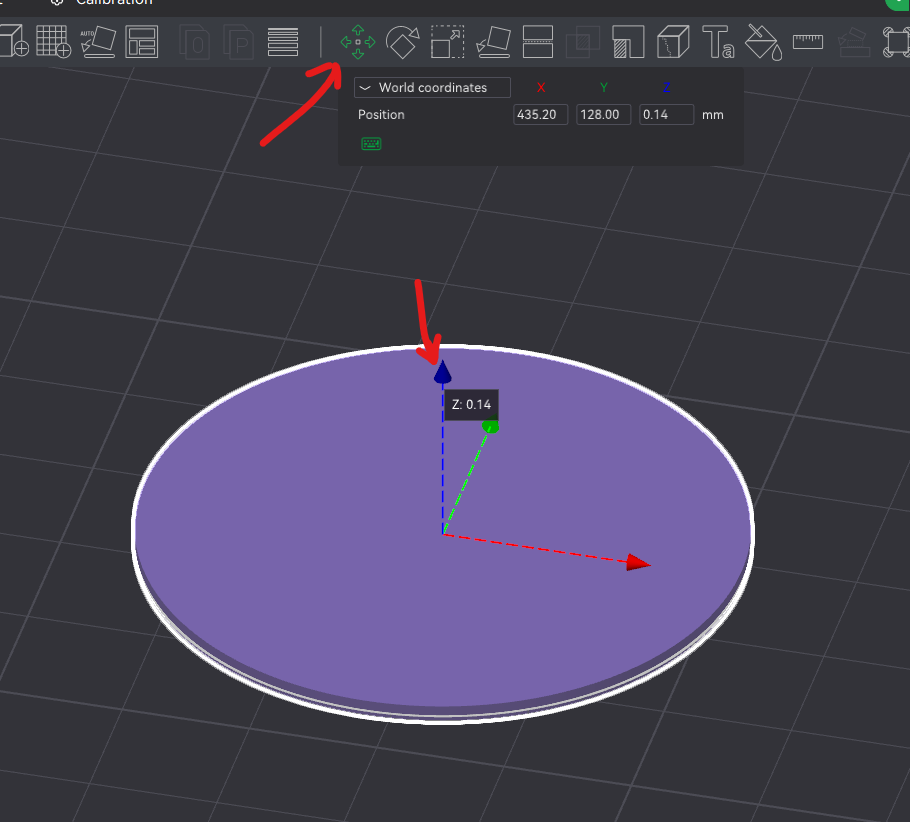
load main STL, switch to Objects, right click to the loaded model and add part, load and load teh other mdel. now ehn you click the individual model, you can move them wherever you want
I have it moved correctly now the floating region msg is gone. My next issue is the logo uses 3 colors and are shown on the prime block but are not shown when going to print. How can I tell BS to use all 3 colors for that part of the assembly? TYIA
I have it moved correctly. Now the floating region msg is gone. My next issue is the logo uses 3 colors and are shown on the prime block but are not shown when going to print. How can I tell BS to use all 3 colors for that part of the assembly? I can certainly share the .3mf. KnifeStand_BlueGlowSolid.3mf (3.6 MB)
In the “Other” settungs, you need to disable “Flush into objects infill” and “Flush into this object”. Then, it works (albeit with a prime tower).
But do not expect too much as there are limits as to what you can do with a nozzle of a given diameter. Enabling the “Arachne” wall generator in the Quality settings will allow you to print details down to about 60% of the nozzle diameter. “Classical” only does 100%.