This recommendation resolves the multi-color issue? @EnoTheThracian thank you for taking time to help me!
1 Like
Yes, I was able to get a colored slice by disabling those.
Always a pleasure,
Eno
1 Like
@EnoTheThracian I tried to print but I am still only able to print 1 color versus the black,blue,and white. My end goal is to have a nice logo on my knife stand. As you can see in my file I have a plate just for the logo as well. I am good with just printing the logo and glue it. I have not been successful with a good print as it just falls apart. Sorry for the long reply.


Try this:
KnifeStand_BlueGlowSolid.3mf (3,6 MB)

- Disabled Flush into object
- Changed logo back to an object
- Split parts, laid logo flat, shrunk in z (so it only shows on the outside), re-orientated, re-merged
- Enabled Arachne
I did loose the white though. But you should be able to repaint with it not being a modifier.
 &
& 
1 Like
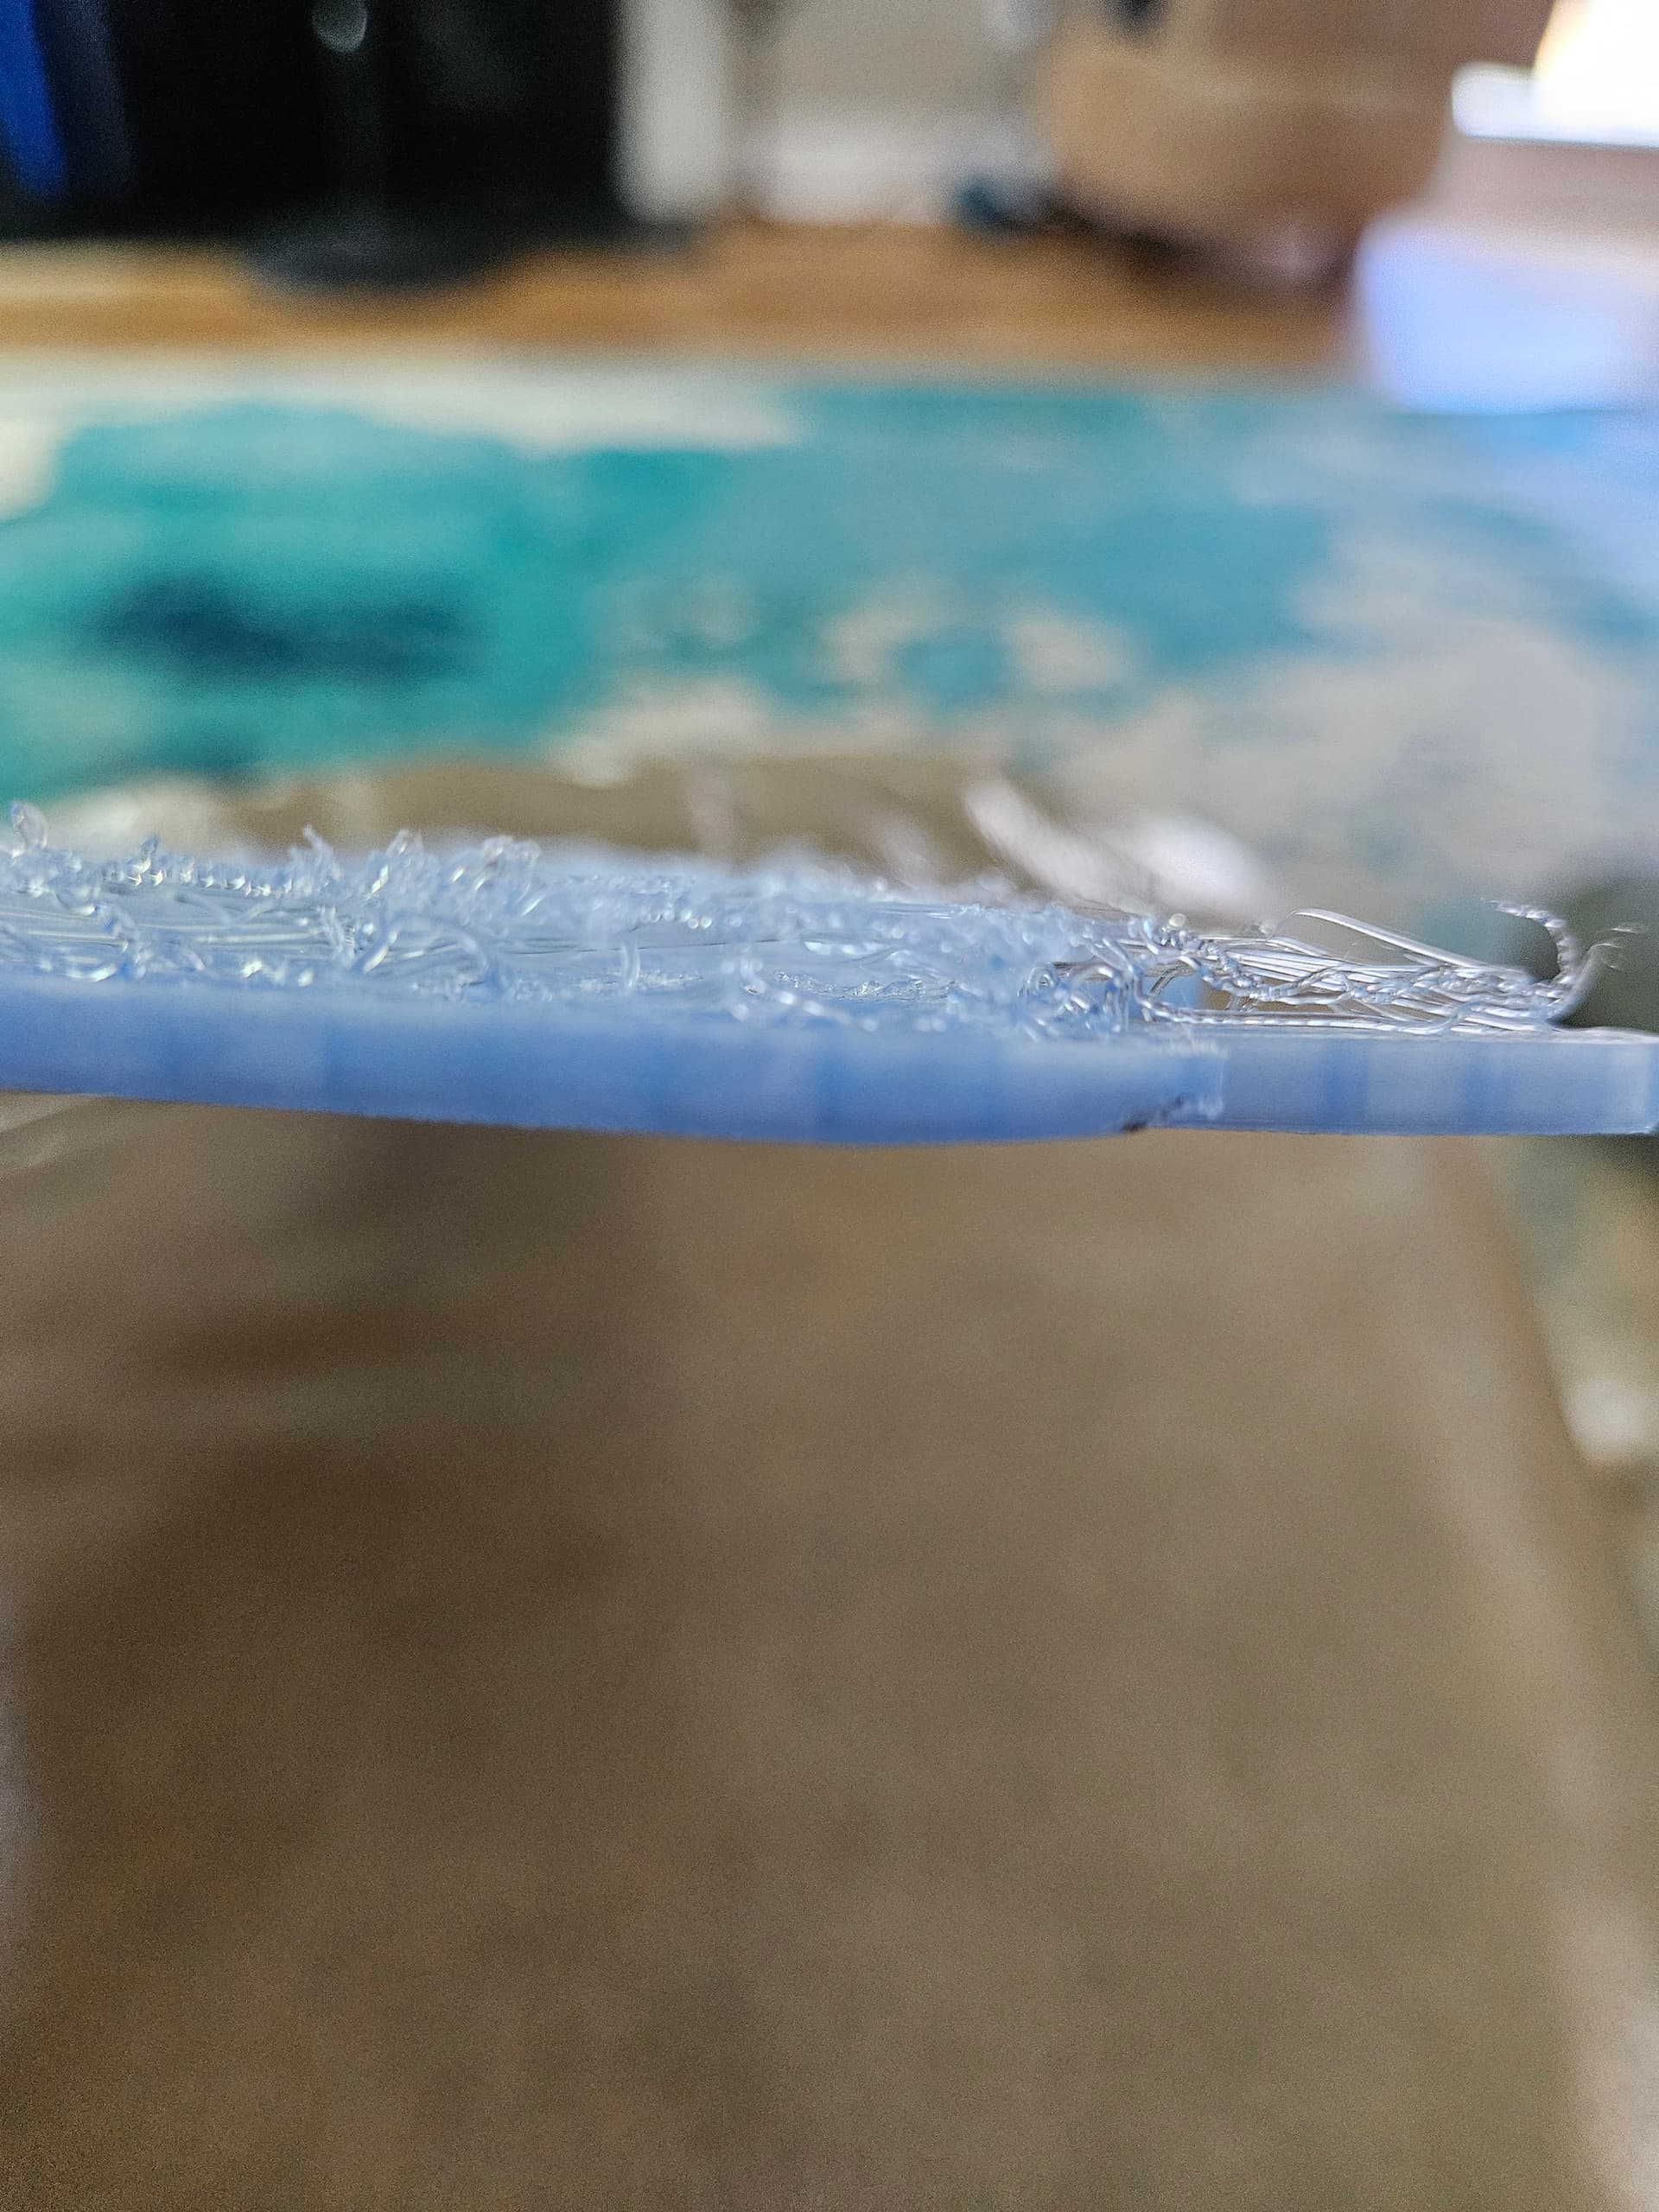
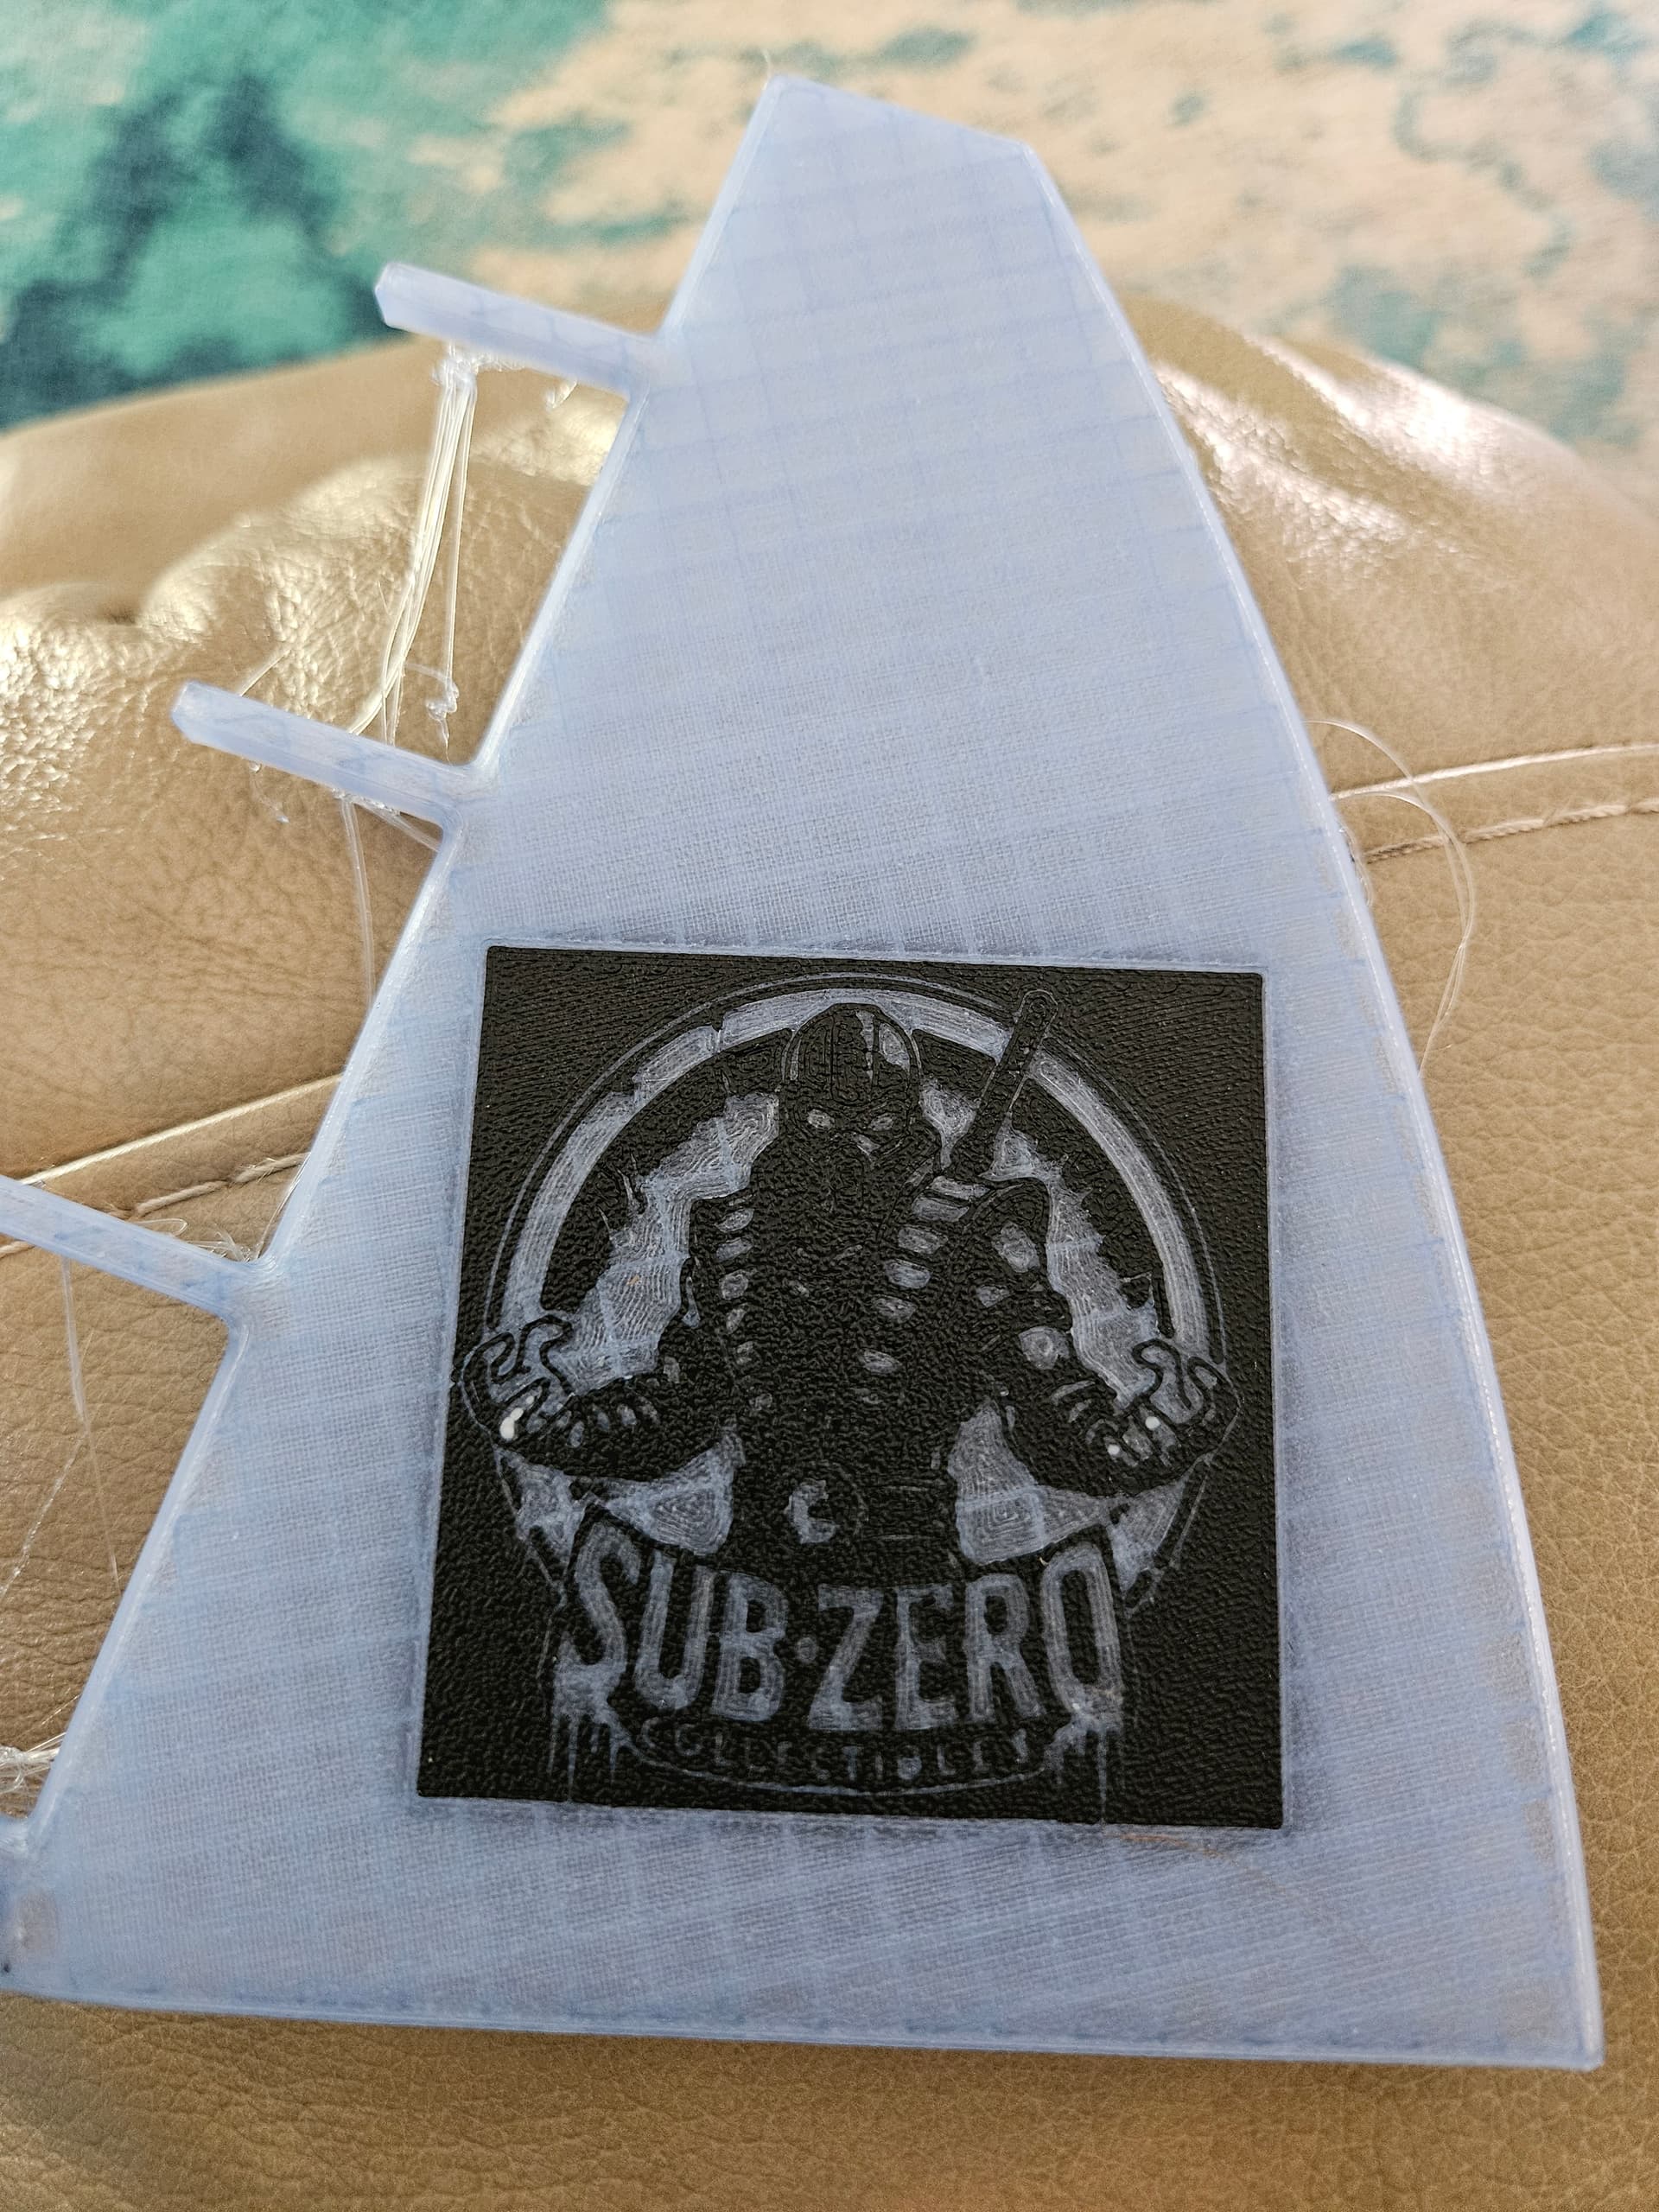
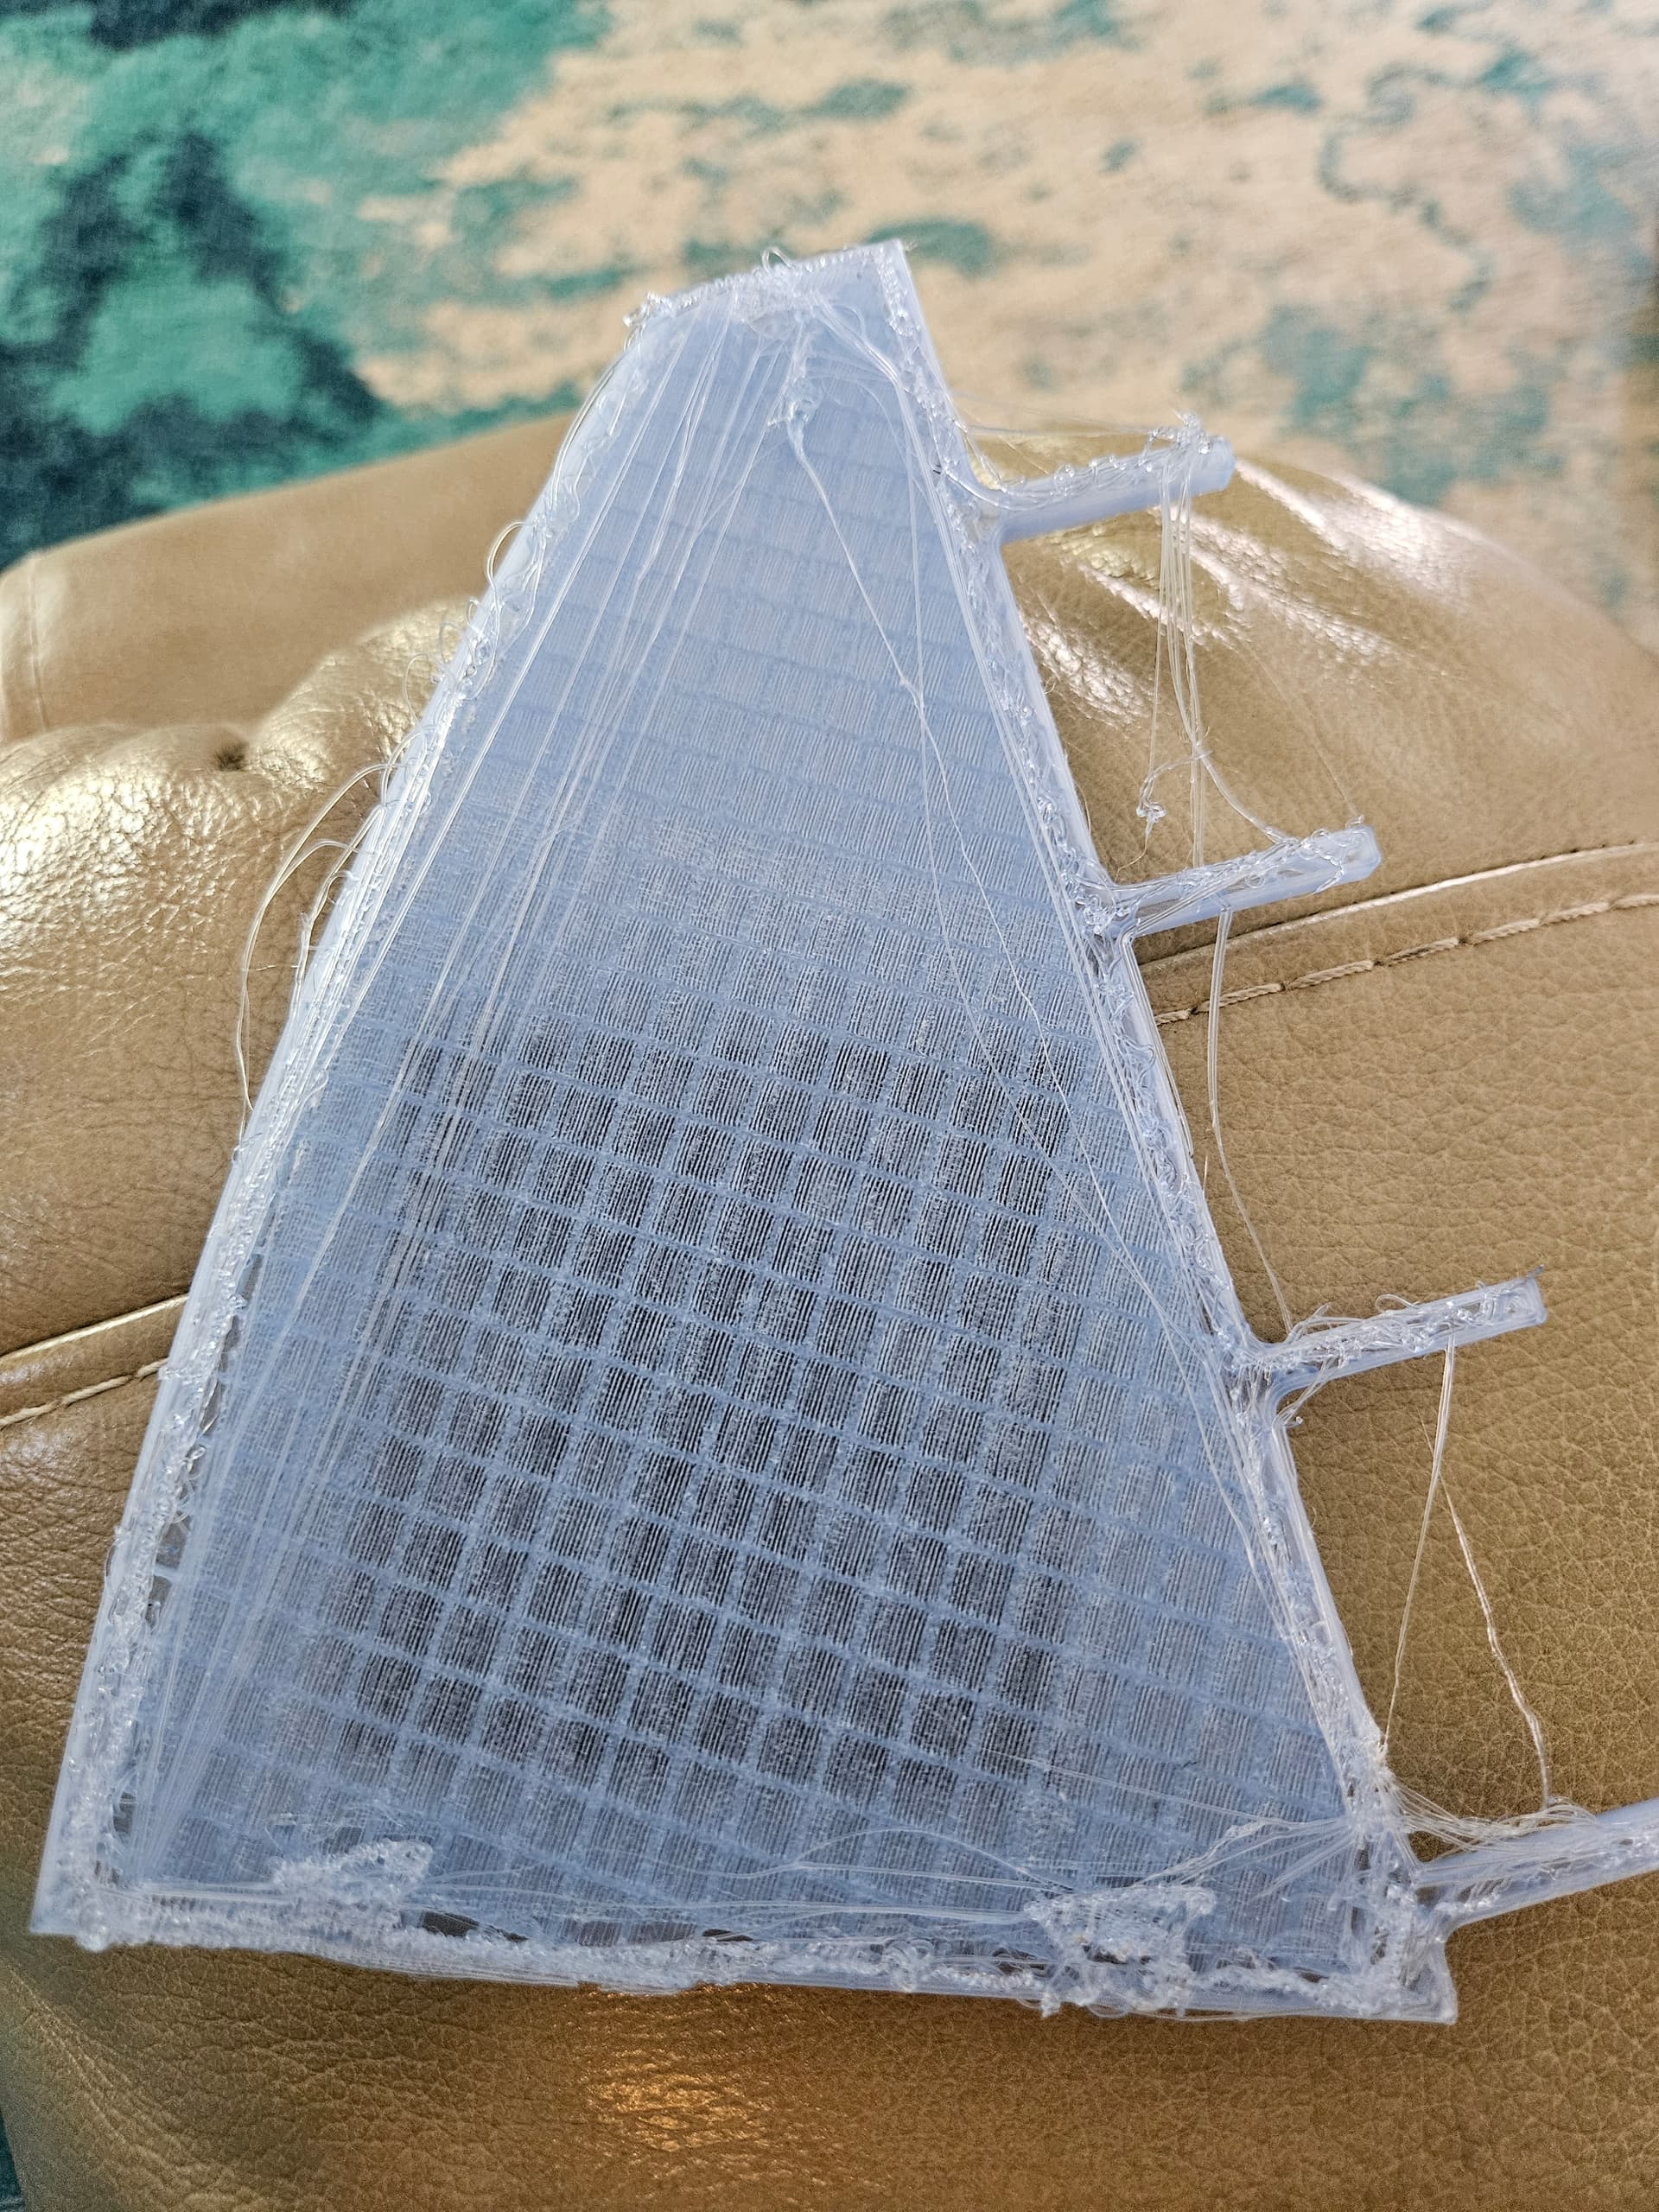
The logo came out perfect! The entire stand did not finish for some reason. It is half finished. No errors generated prior to successful print message. We are getting close which is exciting. Could it be when shrinking the logo, the stand object was shrunk as well?
1 Like
Mhm, that looks like both heat creep and warping. Maybe even curling.
- What material are you printing?
- And what kind of chamber temps do you see?
- Is your nozzle (still) straight?
To avoid warping, we need a really dry filament and clean build plate (water, dishwashing liquid, clean brush (dishwashing or nail brush) for a textured plate, microfibre cloth for Smooth PEI => thin smooth coat of glue by spreading around the PVA stick with a small paper towel).
Also, I was focusing on the colors and did not check the other settings. I always use honeycomb infill (non-crossing infill) to avoid speed bumps.
For PLA, I usually target 35-39°C chamber temp unless there’s ironing, many retracts or a prior heat creep like failure. In those cases, I try to stay below 35°C by just propping open the lid a bit more.
&
PS:
https://wiki.bambulab.com/en/filament-acc/filament/dry-filament
1 Like
Prior to the logo change the stand piece printed just fine. The main model filament is a glow in the dark which i know has its challenges however it’s printed successful several times. I will dry the filament regardless and try again. I have the ams pro so i will do a dry cycle. I also have a standalone dry box. I am leaving town today but will work on it in a week. Thanks 
1 Like
Argh… Glow…
My own trials with Glow filament were rather disappointing. Picks up moisture almost as fast as BVOH (=> oozing, stringing, warping, curling,…), loves to clog (even when slightly damp => better use a .6 nozzle which is not good for fine detail and/or dry just before each print) and the glow effect was only really satisfactory under UV-light…
Did you consider a 3-filament print yet for the knife block yet? Only the logo circumference and insides in PLA Glow with the remainder in PLA Silk/Metal/Wood?
Or first do a trial with PLA Basic before doing the jump to PLA Glow. It is rather temperamental in my experience…
Best wishes and safe travels,
Eno
1 Like
Yes I am printing a 3 color stand where the blue glow filament is only on the top and back PLA is used for the frame and supports. This has worked in the past vs all GID filament. I have had several issues with GID regarding clogging, spaghetti, issues. I have cleaned several clogged hot ends and extruders. I do have a .6mm hot end I am looking to replace my current .4mm.
I also ordered the following that just was released! The site states it will help with clogging.
E3D High Flow ObXidian™ Hotend X1C / 0.4 mm / Complete Hotend is available now from Bambu Lab US
For others reading the post, here is the link reference - ObXidian High Flow Hotend | Bambu Lab US Store
1 Like

I was able to mimic your solution for the other side of the stand. Using basic PLA on the structure with glow in the dark filament in some areas worked like a charm! I did dry the filament as well.
1 Like
Hey, that looks like a really nice glow 

Is that fuzzy skin? The pic is a little blurry.
It is called blue ice gid. I think it looks really cool 
1 Like
actually worked really well
I would like to do this in X, Y and Z. Flip a switch that says join of something and drop or move it and have it stop moving when it hits the other part. I am 82, and my visual acuity is not what it once was. I want it to just touch, so it will print together without overlapping. One has to magnify the heck out of it to do this.
A way to do this might be to merge them then move and have it stop when it gets to the other object. Then if you want them to overlap, push again, or even type in the amount of overlap you want, like a modifier or a negative. Help lining up edges would be nice too.
For symmetrical item like a skinny negative cylinder to pierce a larger square, center both items individually then do your operation. Like making a hole for an axle, or a modifier to strengthen the area around the axle hole you just made.
ive tried this and am failing miserably and getting fussy…help please?
When working with parts, do not select things visually on the rendered plate. Select which objects or assemblies you are manipulating from the object list, on the left, then select the tool you want to use from the strip at the top. Selecting with the mouse in the viewport is not specific enough and will often select the whole assembly.
2 Likes
Hi
Im having the same problem with the this, perhaps someone could help as ive tried and tried but it just doesnt seem to work!
I am trying to design a keyring. I have the two parts, the base with a hole in it and another is the logo. For the life of me i just cant make it work! I have merged them, Positioned them and they sit and stay where I want them but then when I preview it the logo doesnt show up.
Its the first time designing something like this so any help would be much appreciated.
Thanks
Peg
Welcome to the forum.
I’ve run into this issue before and it has always turned out to be an issue with the original model file. Sometimes a “fix model” will correct it so you might give that a try. To verify it’s a model issue right click and add a primitive (circle or square) and add your text to that and see if it will slice correctly.
1 Like
Many thanks Jon, Is there any way of emailing you the file and see if you can see where im going wrong?