I have a thin wall TPU part that I need to print sideways because the gasket surface works best this way. I want the overhang to stich sideways or 45deg at the topmost overhang layer. Instead Bambu Studio creates the overhang along the length of the part.
I tried the bridge direction setting with 45 and some other settings and saw no change with classic or arachne. Am I missing a setting or is there another way to get the overhang walls here to stitch?
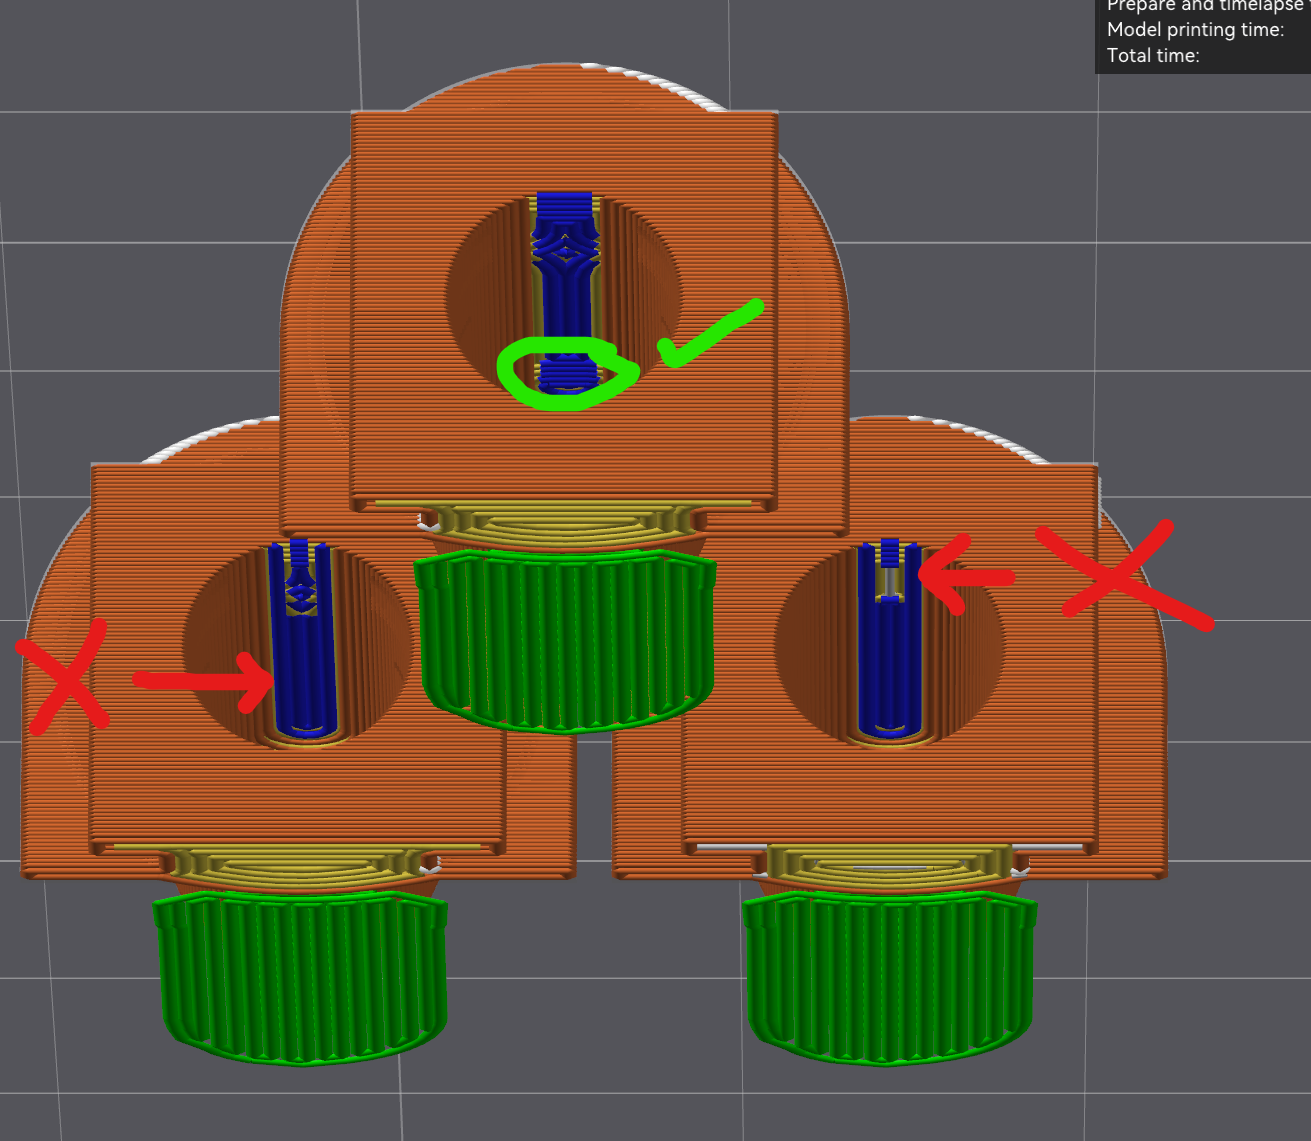
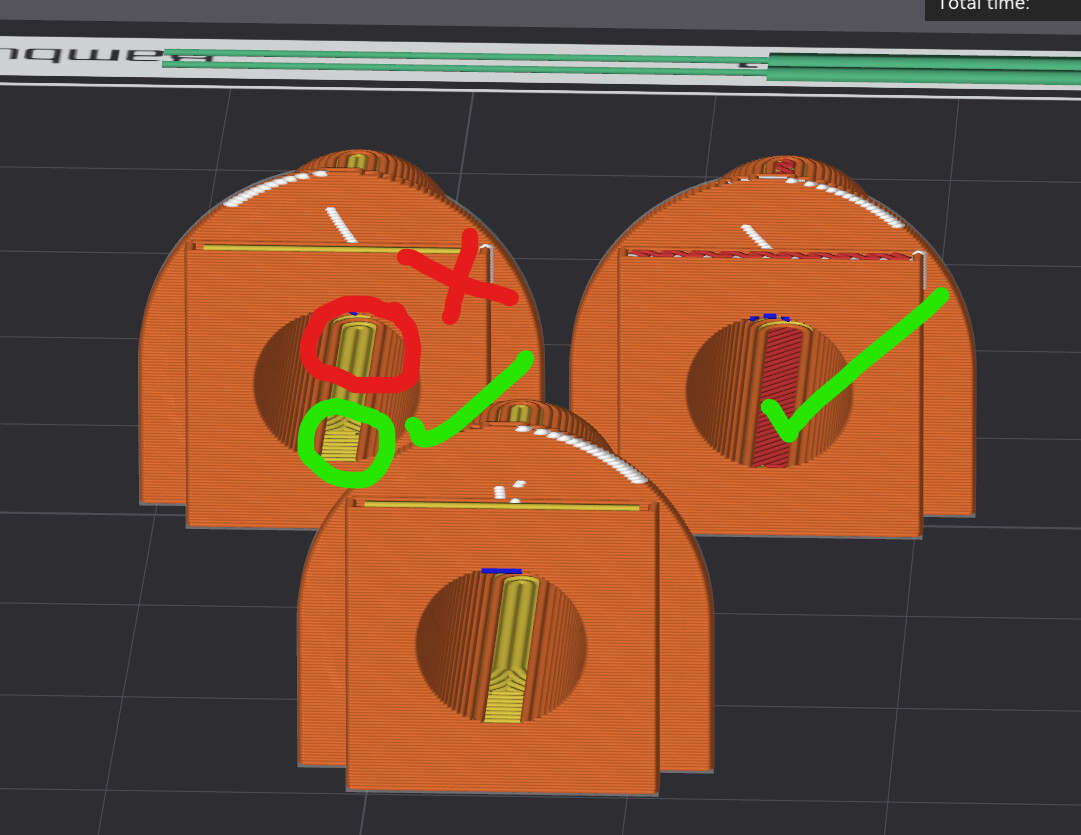
The hole is smooth all the way through but Bambu Studio segments it into different overhang directions where the standard classic slicer ends up creating a gap as seen with the red X on the slicer image below. In all cases, the overhang is mostly along the length of the part where I really want it sideways or at a 45deg angle like the top surface lines.
Unfortunately I can’t change the geometry to add a teardrop easily. I did try adding a small shelf to flatten the top of the circle in the image with a green checkmark in the front center when looking at the overhangs. I don’t want to add supports here as it adds extra time and complexity with a single material.
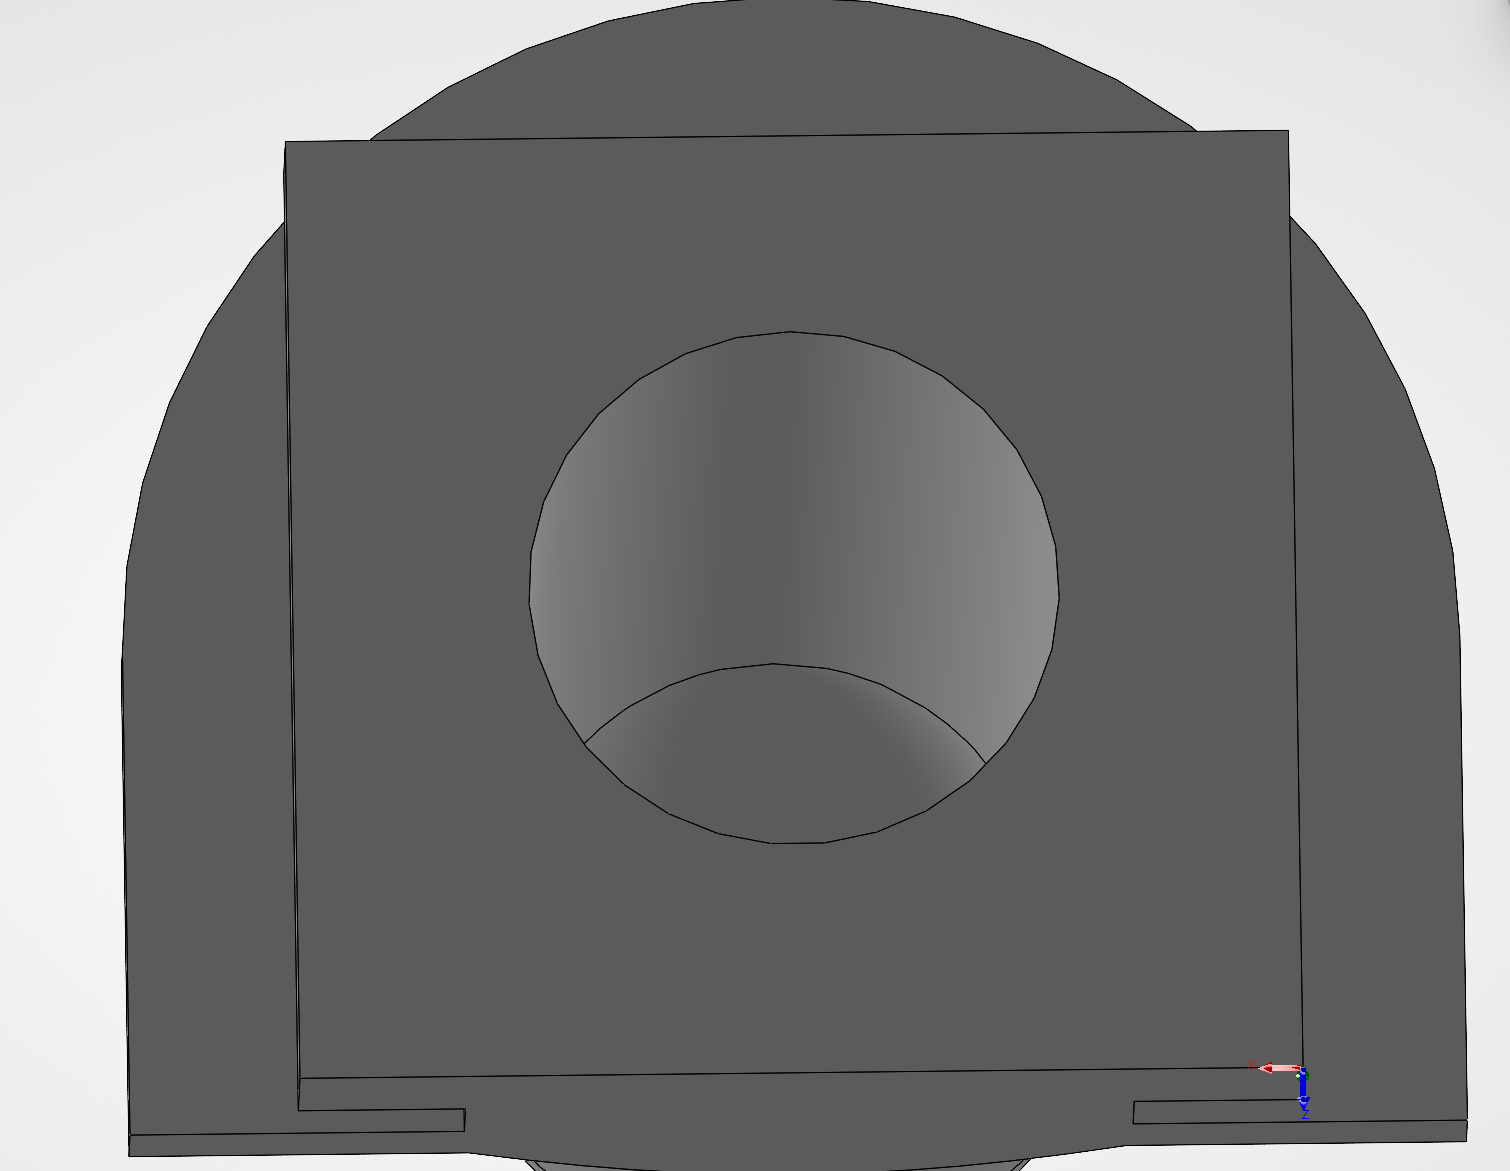
I saw this pop up when searching and I’m hoping to achieve the same but it seems to be an interior vs exterior overhang setting difference.