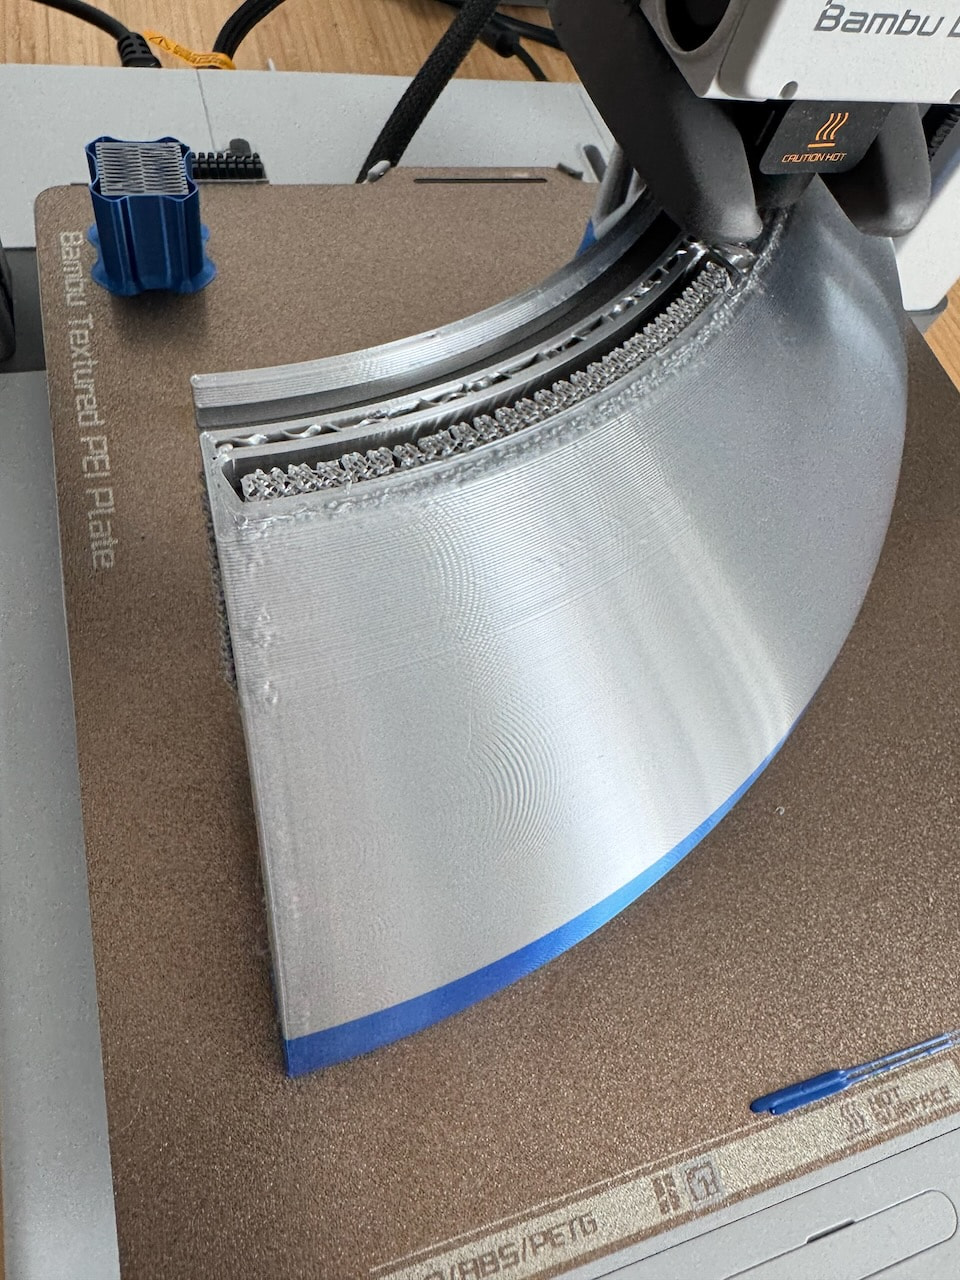
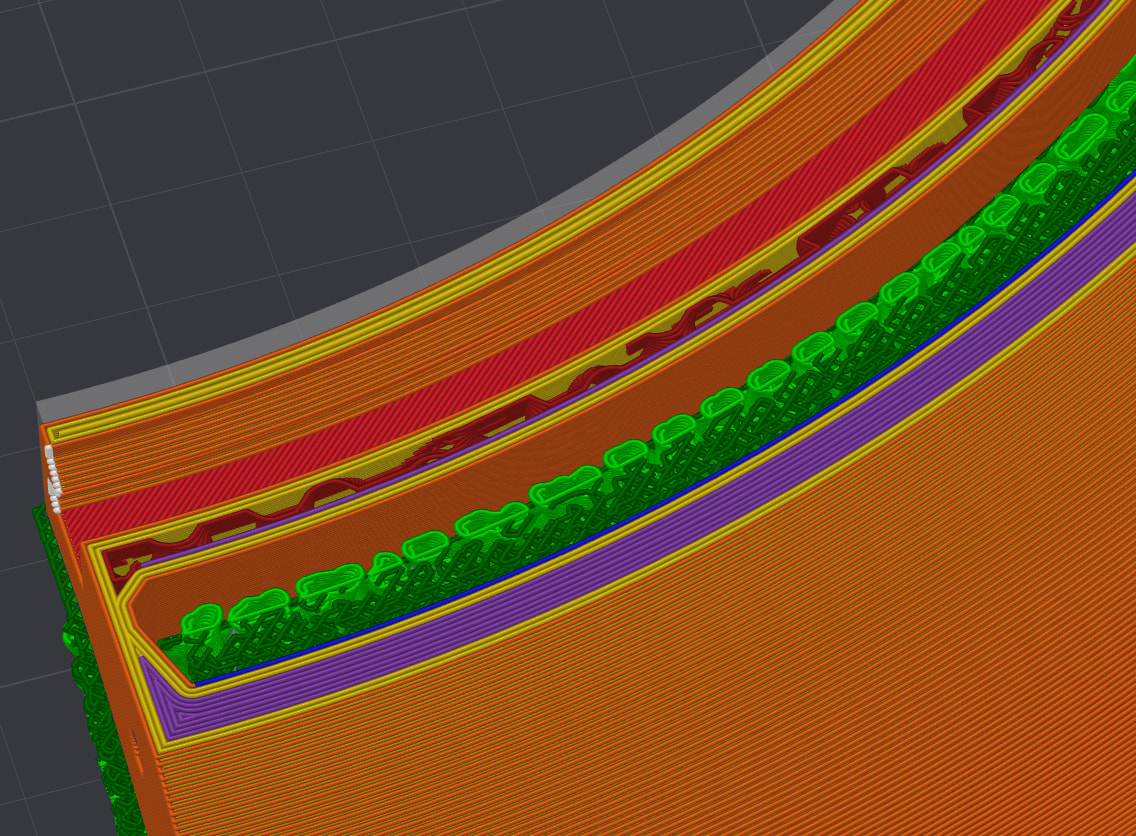
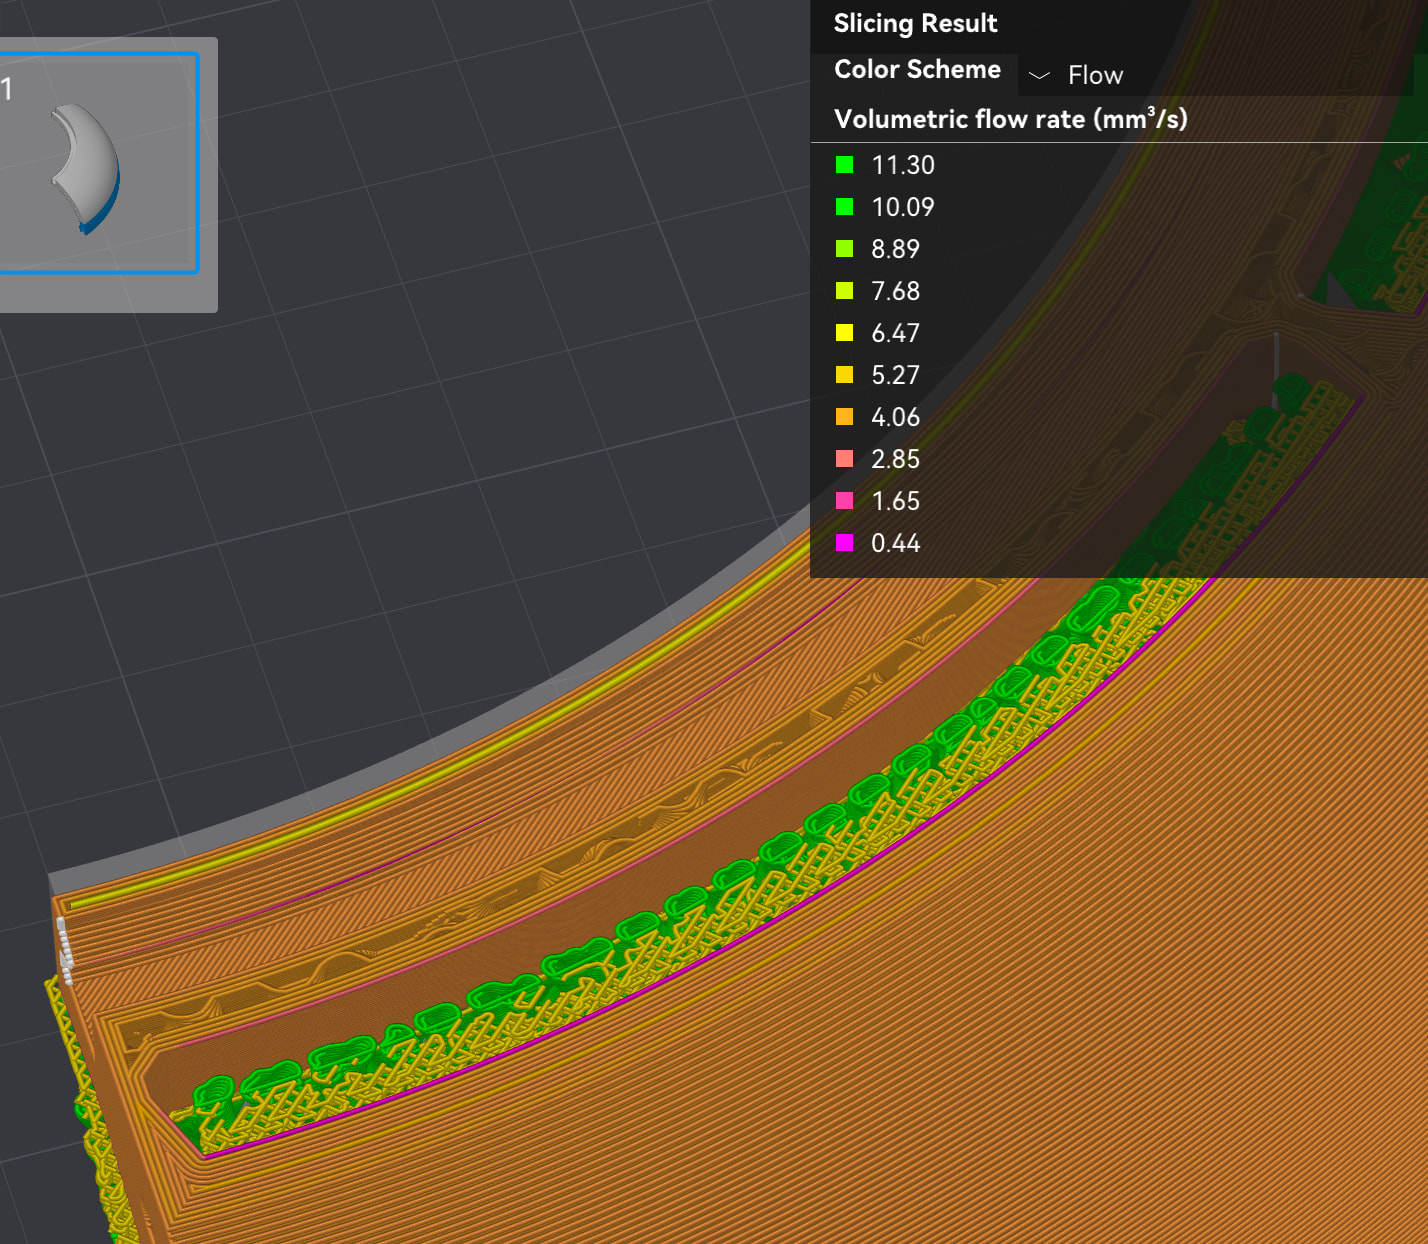
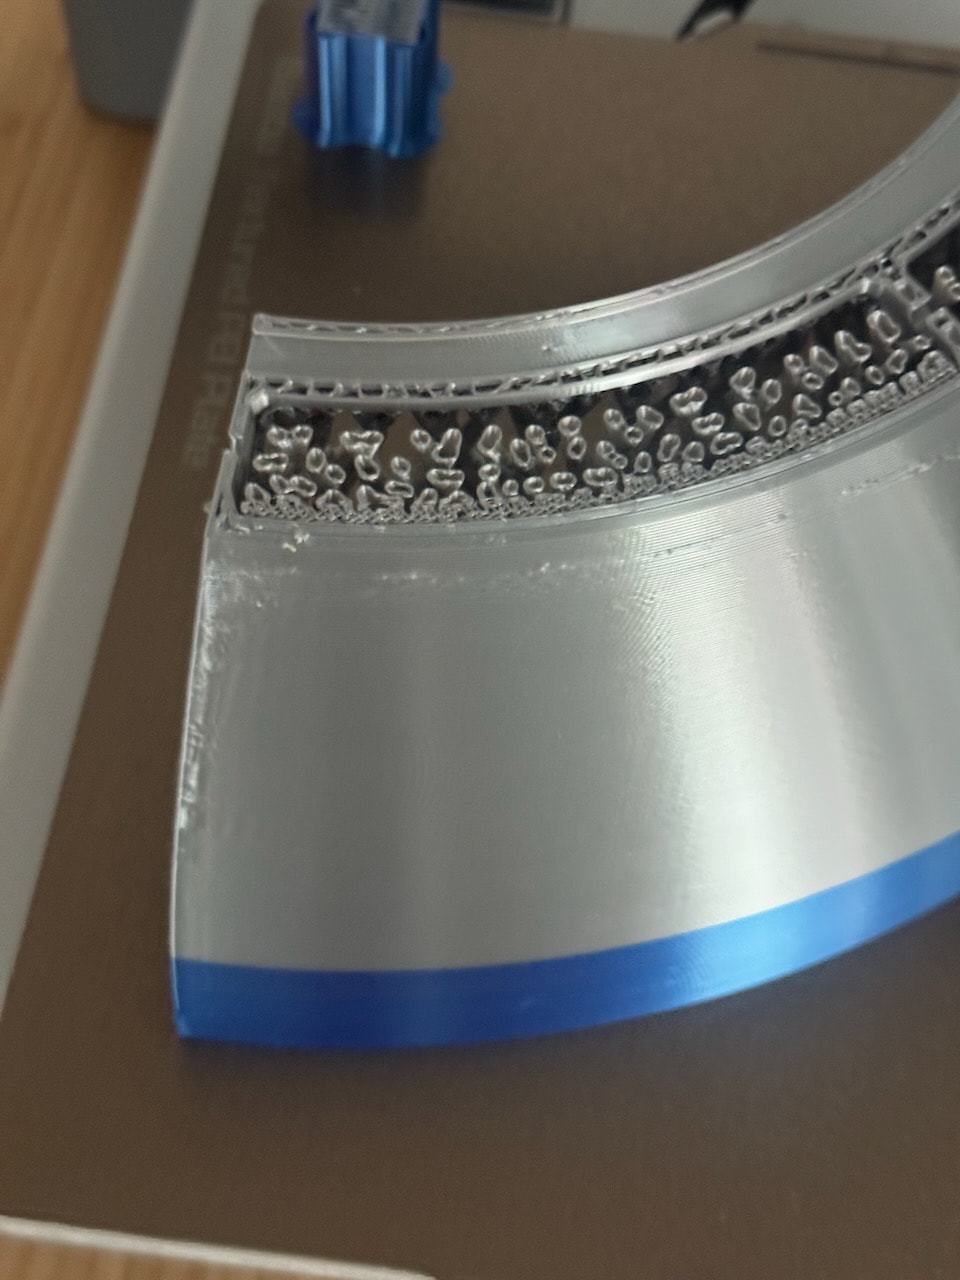
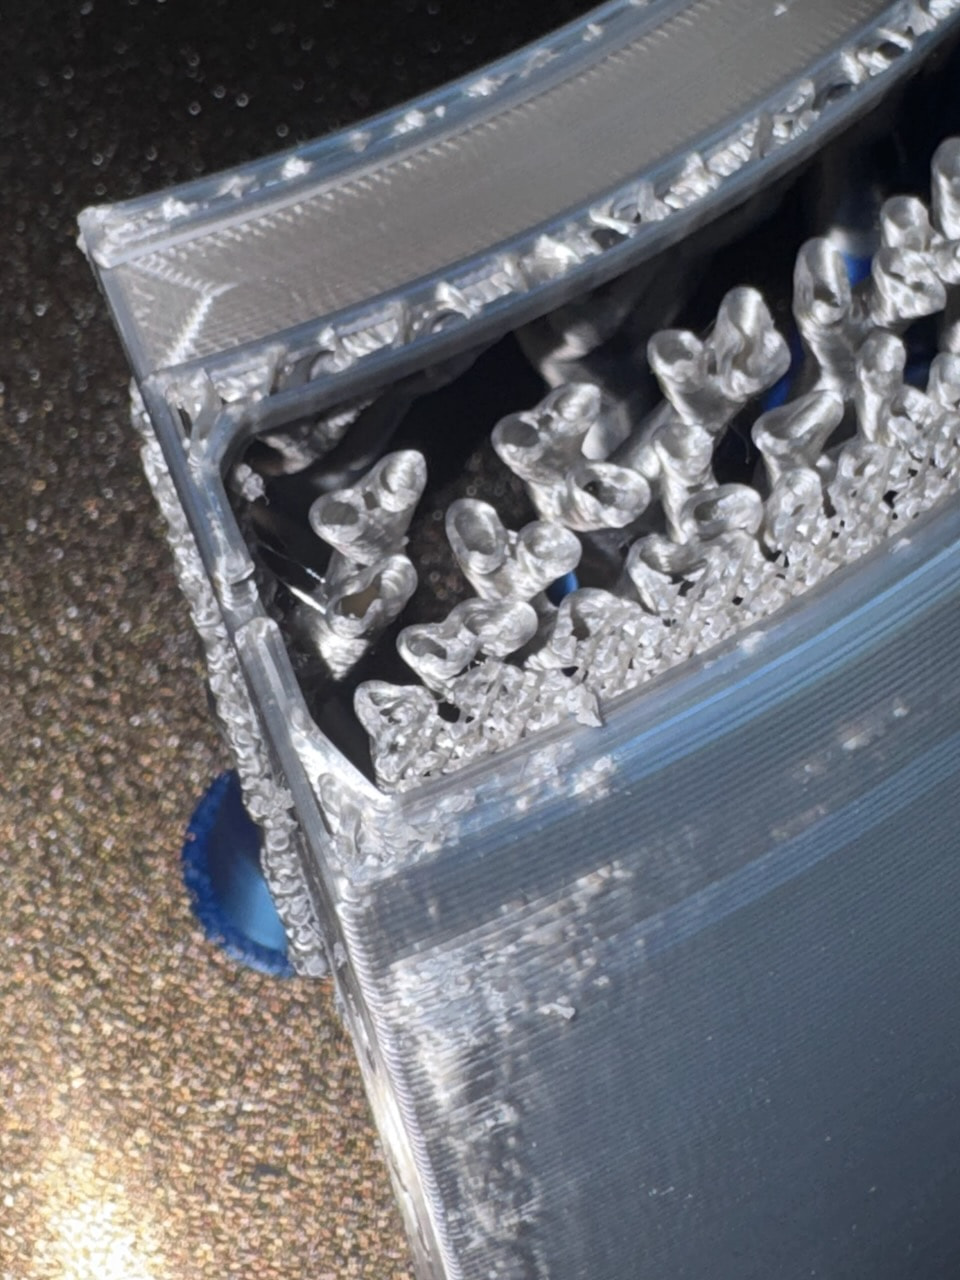
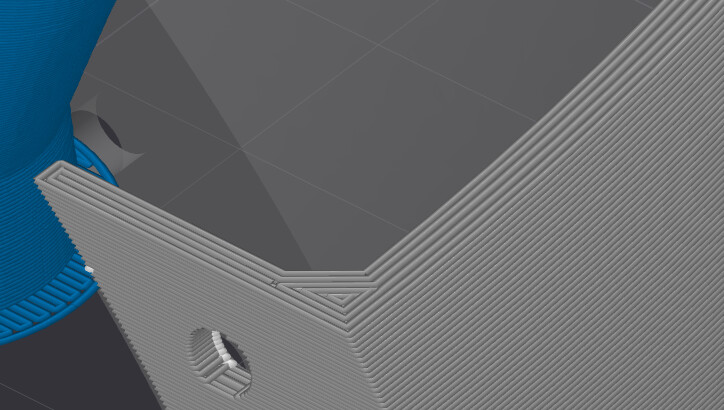
I’m trying to print a part that is roughly a quadrant of a sphere, and regardless of the filament (PLA, PLA Silk+) and printing speeds I used (I’ve went down to 50mm/s) I’m getting some serious surface artifacts when reaching certain Z height that disappear right after it.
Because the part is a spherical shell the wall thickness gradually increases in x-y (although it is a constant 2mm otherwise). Could that be a factor at all? Am I doing something wrong, or can I do something to workaround it?
From the first pic, it looks like the issue starts much further down at the edge and may be linked to Flow Dynamics/Pressure Advance.
I would try to:
Dry the filament (again)!
Ensure the Auto-calibration is enabled (or even run a dedicated calibration for flow dynamics)
Check previews for line type, flow, fan and speed (unfortunately, there’s no acceleration preview)
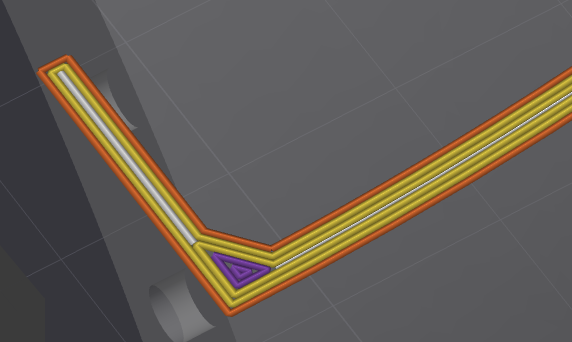
=> Line type: Do the really bad layers correspond to an area with significant solid infill? If yes, dry the filament and consider a lower minimum shell thickness.
=> Flow: Is max Flow the speed limiter for the walls? Or is it Speed?
=> Fan: Unlikely but possible: Do the fans change at the layer/edge? Lag can affect print performance but I would not expect it on this geometry. I’d expect that to potentially be observable on the inside though.
Same here. Although I do find my H2C’s auto-cal (same principle as A1) to be slightly worse than my X1’s auto-calibration.
Unfortunately, I am not at my Laptop. So I can not double check.
The “Ensure vertical thickness” adds solid infill if a wall angle leads to lower than acceptable shell thickness. IIRC, this can be set below the checkmark.
Since this adds a wide solid layer, the edges can warp up. Especially for silk and if residual moisture is present, layers are thin and fans are running. Or any individual cause
That is good but you may want to go a bit lower still with the Outer Wall. In your first pic, you can see a slight bulging at the corner already in the blue. That bulge indicates flow dynamics being slightly off.
In your first pic, is the outer wall print direction from left to right? That would indicate a need to first focus on flow dynamics calibration. IIRC, it may be a little high.
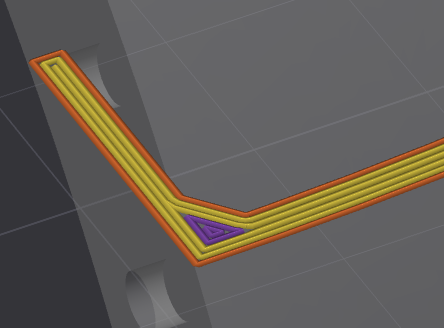
That may be a case but I have not come across this failure chain myself. Of the two pic’s, I’d prefer the first path planning for a nice smooth print. But that is probably just me.
The “Ensure vertical thickness” adds solid infill if a wall angle leads to lower than acceptable shell thickness. IIRC, this can be set below the checkmark.
Huh, that sounds like a likely potential cause. I can try disabling to see if it helps. Thank you!
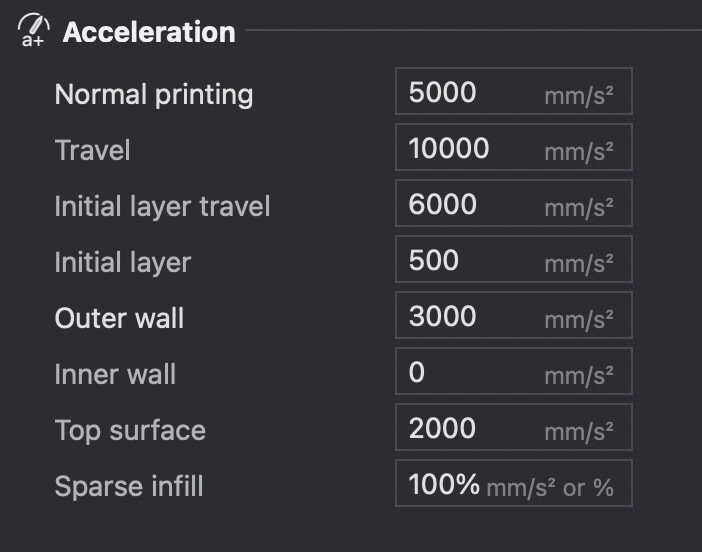
That is good but you may want to go a bit lower still with the Outer Wall. In your first pic, you can see a slight bulging at the corner already in the blue. That bulge indicates flow dynamics being slightly off.
I’ll give a try to 2000mm/s, same as top surface!
In your first pic, is the outer wall print direction from left to right? That would indicate a need to first focus on flow dynamics calibration. IIRC, it may be a little high.
It is left to right indeed. Do you mean the manual calibration?
I think that we are seeing two defects here which combine.
First, excess material from too high a Flow Dynamics calibration. I hesitate to truly recommend trying a manual calibration as I am not very good with that But with my H2C, I occasionally get a bad print which turns out better after a new auto-calibration. I usually dry the rolls beforehand again though, so that may be the true culprit in my case.
I would not eliminate the solid infill entirely. Just reduce the minimum thickness.
And another thought: Do you use adaptive layer height? That can also help for some type structures.
I’m still not entirely sure what “minimum thickness” refers to, but I’ll try calibrating the flow again and reduce speed on everything to 50mm/s (+ reduce acceleration). Most of the time is spent printing supports anyway so I can afford to go low.
Are you using a brim, glue, or is there any evidence the print is coming loose from the build plate?
Reason I ask is you mention it’s a 2mm thick wall so at the build plate that’s not much surface area to hold it down and steady. If it’s starting to come loose it can cause problems with the filament not being deposited quite where the printer thinks it is.
Just noticed one tree support on the build plate. Those will provide lots of stability so this might not be a good tip.
If it’s tight on the plate this likely isn’t the issue. I just saw the bit about 2mm walls and have had that happen myself where the footprint is just not enough to resist the tugs of printing.
But especially with you saying it’s down solid, this probably is a bad lead. The supports add a lot of extra stability. A shot of the other side with the trees would have told the tale.
I’m on hol’s atm, so not able to check in Studio directly. While this wiki article shows it in the pic’s, it is not actually explained.
But thinking about it a little, there’s another option that may be more elegant but will only work up to lets say 60°.
You could enable the Arachne “Wall Gemerator” in the Quality settings, increase the wall number by 1 in the Strength settings and disable the “Ensure vertical shell thickness”.
If the dome goes beyond 60°, you will however need the “Ensure vertical shell thickness”. Otherwise, the shell thickness follows cos(local wall angle), i.e. 0mm at 90°.
Do you have Developer Mode enabled in the Studio preferences (CTRL + P)? This shows more options but I am unsure atm as to the ability to set a minimum shell thickness. I may confusing options between Orca and Studio atm.
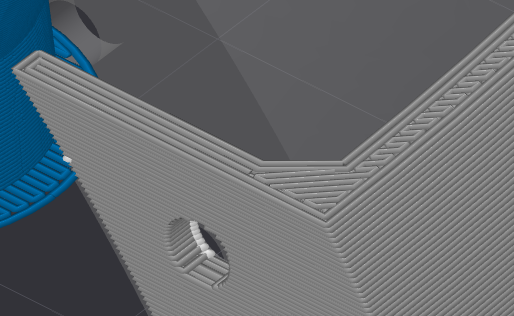
Update, I’m getting much better results due to either speed, wall loop count, or Arachne line types, but the issue still begins to appear although much later than before. This time however, one of the corners has detached from the build plate during the print so maybe I can blame everything on it….
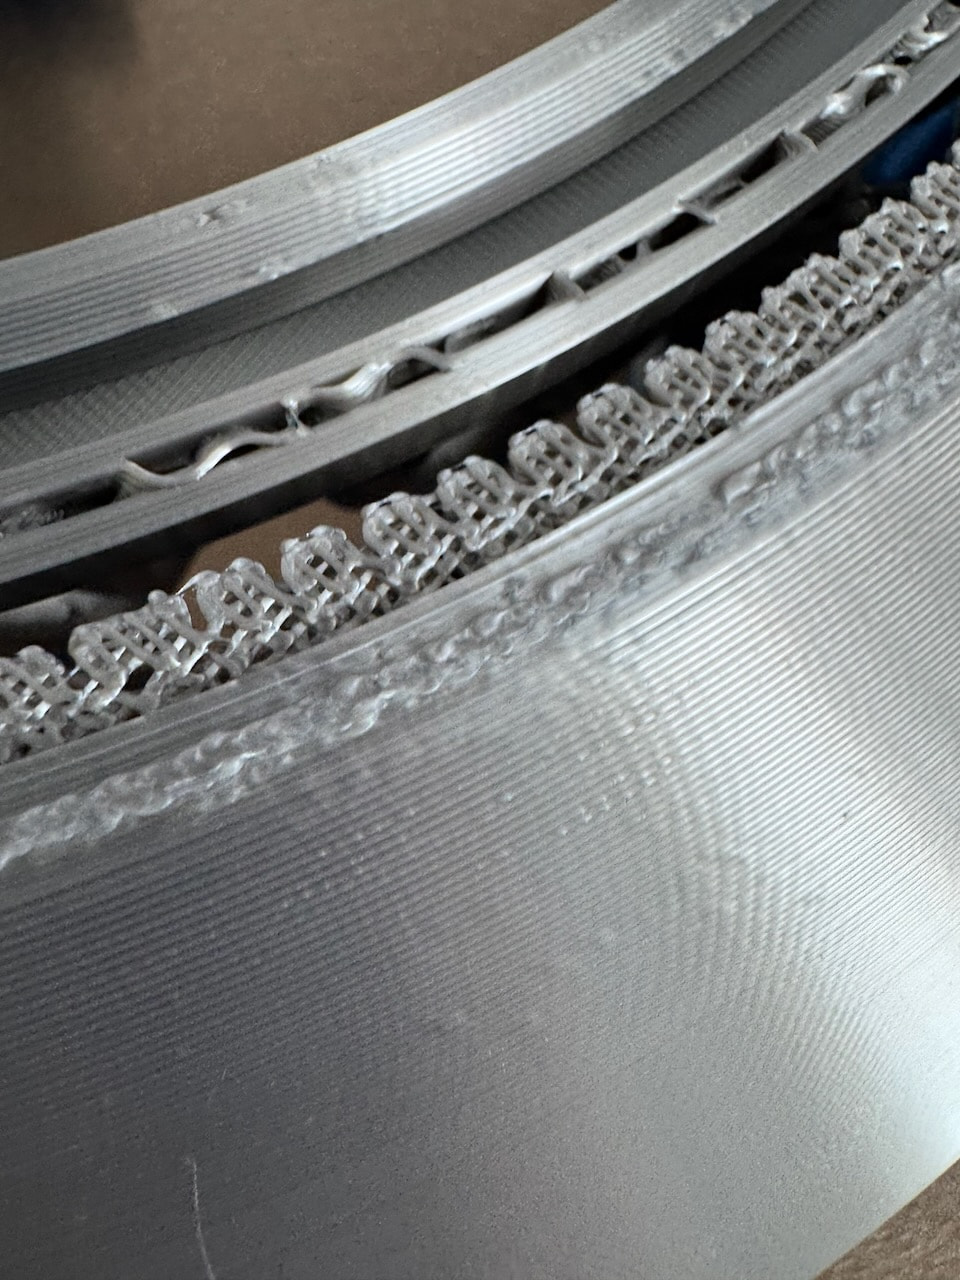
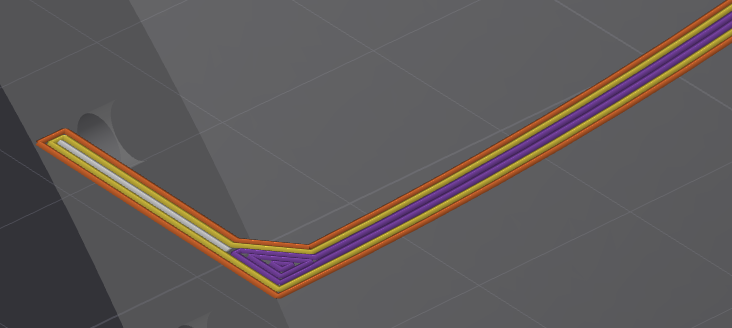
It is interesting that solid infill seems to be overextruded, even though it looks like it should have been printed exactly like the walls and with the same speed:
OK, some improvement, but warping. I am afraid that with reduced speeds, the warping is a clear indication of either a cold print environement (what is your room temp and can there be drafts?) and/or still too much moisture in the filament as well as a need for renewed plate cleaning.
In facts, this warping may also explain the flow dynamics defects appearing higher up.
As for the solid infill, the print looks like “Monotonic line” but the preview shows “Concentric”?
A common solid infill issue at shallow angles is edge curling. It lools a bit like overextrusion, but is actually due to a wide sheet cooling on top of the previous layer. As it cools, it shrinks, pulling the edges up. A lower layer height (variable layer height!!!) can help a lot.
Thank you for the response! It is actually pretty hot where I am right now (80F) so I don’t think it is a cold room issue. I also wash the PEI plate before doing long prints so the plate should be clean. I didn’t dry filament before printing this time (because I’ve been printing other parts non-stop), but I’ll give it a go after another print finishes.
I’ll try variable layer height, but right now printing a similar part (another quadrant) with “Ensure vertical shell thickness” disabled.
80°F is plenty.
In my experience, PLA has a sweet spot at 86-94°F, but that is usually not achievable with an open printer.
Also, PLA is usually quite benign regarding moisture. But Silk filament is much more temperamental. I assume it contains more and smaller fillers/additives/pigments which greatly increases moisture uptake due to a massive increase in internal surface.
Once dried, you may also want to add mouse ears at the sharp corners to help a little more regarding warping. Beware though, warping can also lift the build plate off the heat bed with good bed adhesion.
So it is much more important to be certain that the filament is very, very dry.
 &
& 


 But with my H2C, I occasionally get a bad print which turns out better after a new auto-calibration. I usually dry the rolls beforehand again though, so that may be the true culprit in my case.
 ).
).