I bought the printer close to its release date. While it took me a couple of weeks before I had time to unpack it, I have now been printing with it for two to three months, long enough to get a solid impression of its strengths and weaknesses.
Background
I’ve been 3D printing for three to four years now. I cut my teeth on low-end Ender machines, which made you feel more like a mechanic than a maker. Eventually, I graduated to an early P1P right when it was released, added an AMS, and upgraded it to a P1S over time. That machine ultimately logged over 5,000 hours, pushing me into the gritty side of maintenance, replacing various components and culminating in a full timing belt swap that took an entire weekend. Finally, I upgraded to the X2D a couple of months ago.
In general, working with Ender printers felt like being a mechanic who occasionally got to print a model. The P1P, by contrast, felt like using a microwave: you start it, and it just works. Adding the AMS did increased the failure rate tenfold however. That is somewhat expected, the more complex and longer the mechanical pathways, the higher the chance of failure. To be clear, single-color prints (even through the AMS) still “just work”. Most print issues only arise during multi-color jobs.
The New Flagship: Bambu Lab X2D
I mostly print multi-color items: toys, figurines, and creatures, primarily for fun. I currently have three AMS units attached to the printer, allowing for up to 12-color prints. Occasionally, I charge people when they ask for large, complex, or custom pieces, so I consider myself a “hobbyist-plus.” My prints are usually not very large, but due to their multi-color nature, they take a long time and typically generate significantly more waste than the weight of the actual model.
I originally intended to buy a P2S, but when the X2D dropped, it was enticing. It was only $100 more and featured many more sensors to reduce mid-print failures, a crucial factor given the duration and complexity of my jobs.
As for time and filament savings: I didn’t go in blind. I watched every hands-on review I could find, and they all made the same promises: massive time savings (up to 50% faster multi-color prints) and significant reductions in purged filament. It seemed like a win-win-win.

The reality couldn’t be further from the truth. I saw a post here claiming the X2D is a well-designed printer held back by bad firmware. I disagree. It feels like a poorly designed printer where the firmware is desperately trying to compensate.
The Initial Promise vs. Reality
The core promise from Bambu (and the many YouTubers promoting the X2D) was simple: drastically lower print times and far less waste.
Let’s dispel those claims. As I detailed in a forum post the X2D frequently takes the same time, or longer, to print while offering only marginal filament savings. In the example I posted, a two-color multi-nozzle print took three hours (15%) longer while saving a whopping 20 grams (3%) of filament.
This isn’t a bug; it’s by design. The secondary nozzle is inherently slower, so anything it prints increases total time.
The waste reductions are equally misleading. Model waste falls into three categories: supports, the wipe tower, and purge material.
-
Supports: Cannot be eliminated.
-
Purge: The X2D reduces purge volume, but that depends on color count. If you use more than two colors, you still require color swaps and purges, even if reduced.
-
Wipe Tower: This was the biggest surprise. The tower exists to stabilize extrusion pressure when starting a new filament. I expected it wouldn’t be needed once filaments were loaded into both nozzles (e.g., in a two-color print). Yet the X2D still prints a wipe tower, and actually uses more filament on it. Bambu claims this stabilizes internal nozzle pressure, but competitors like Prusa achieve the same result using a micro-purge of approximately 13 milligrams (0.013 g).
The Filament Switch
For the X2D to be genuinely useful, you need the Filament Track Switch. It shouldn’t be optional; it should have been included by default.
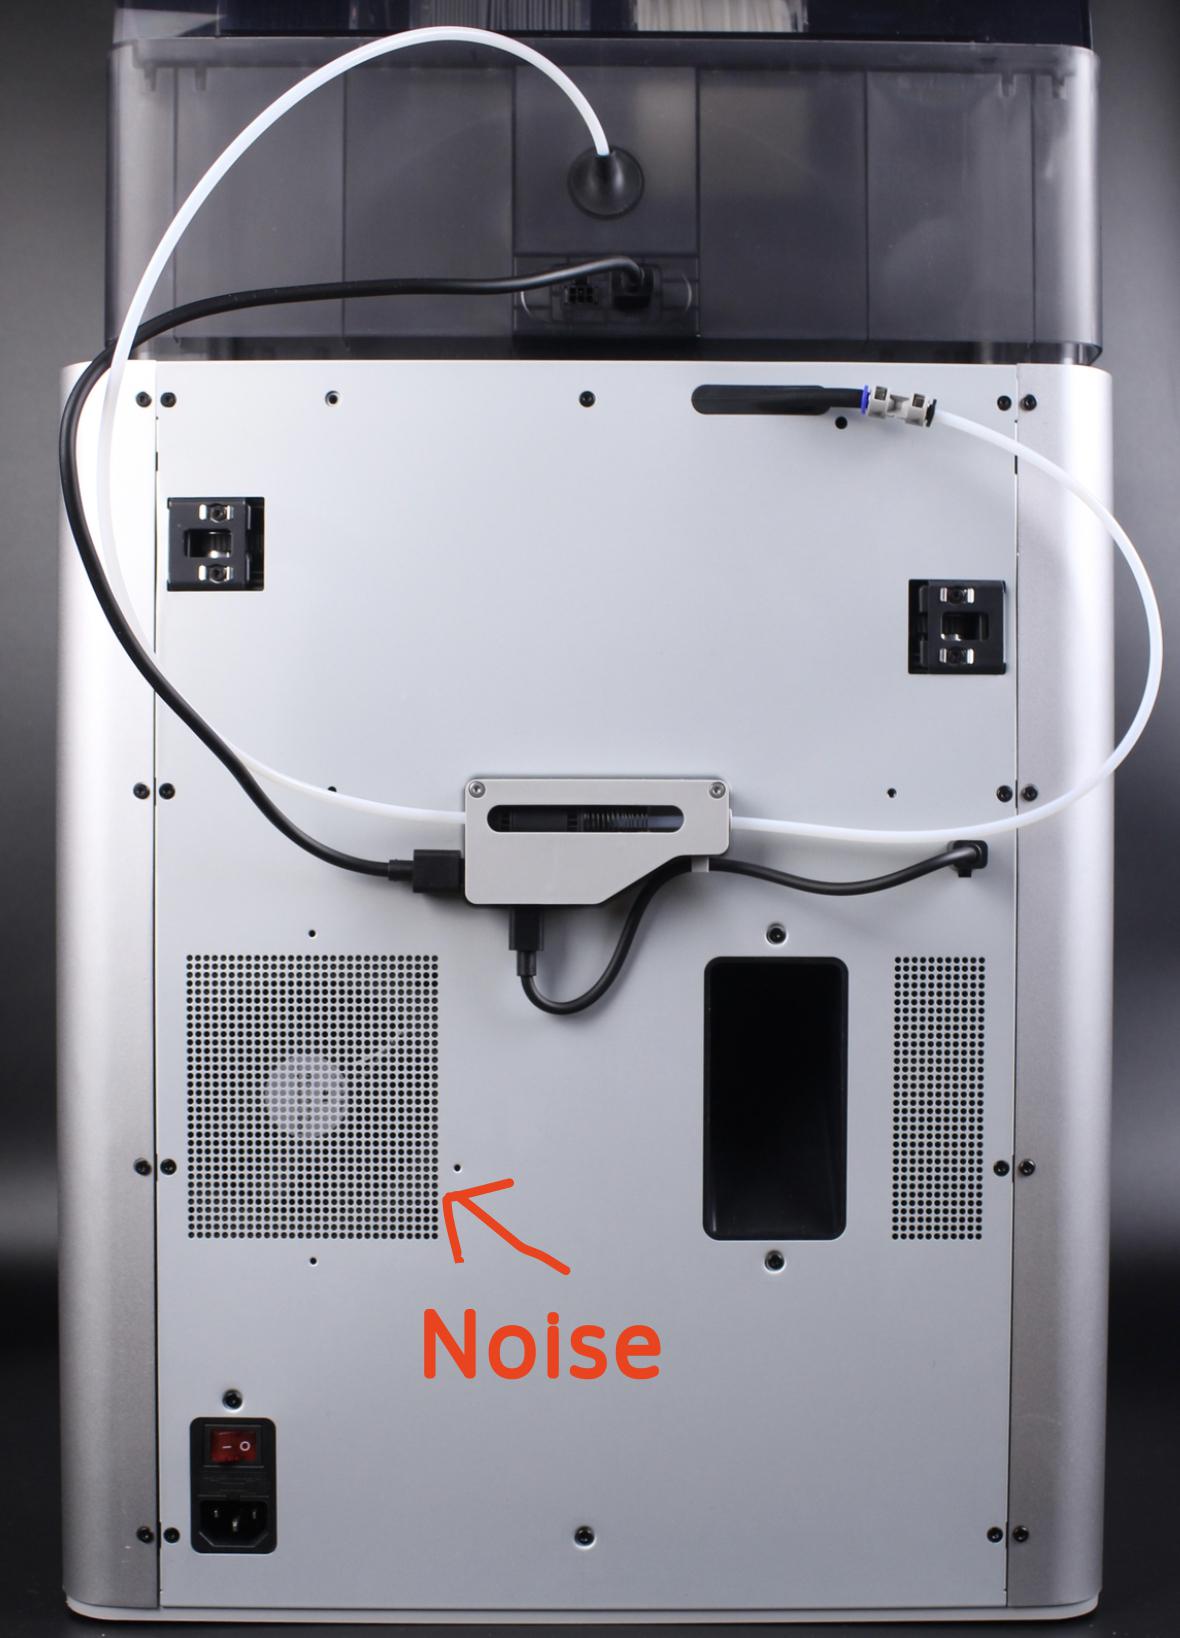
The main problem is that the X2D is already a mechanically complex machine. Adding the filament switch makes it even worse. Compare the rear profile of the X1C to the X2D.
X1C
X2D

Every extra mechanical component or PTFE tube represents another potential failure point that requires clearing, repairing, or replacing.
Furthermore, the filament switch does not support Silk PLA, a basic filament type that existed long before Bambu started making printers, rather than a niche new material.
Maintenance Pains
Remember how Bambu printers initially felt like microwaves compared to old Enders? That is no longer true with the X2D.
One of my first issues was a “clogged extruder” error message, which turned out to be a clogged nozzle. But I tried to follow the (Bambu-provided) instructions to actually disassemble & clean the extruder as the manual suggest. The toolhead is extremely complex, not-well-documented (looking at you filament cutters), and full of delicate connectors that must fit precisely. Parts are easy to assemble incorrectly and fragile enough to break during maintenance.
On a P1P or P1S, replacing the entire extruder takes about 30 minutes once you know what you are doing. On the X2D, replacing a single component of the extruder, without even fully disassembling it, took me over two hours.
The difference shows in Bambu’s official instruction videos: the P1S extruder replacement video is two minutes long (granted it skips most of the process), whereas the X2D video takes 12 minutes (again, most of the process skipped).
The Secondary Extruder
The known trade-offs with the secondary extruder are slower speed and slightly lower print quality. Most online comparison videos struggle to show quality differences because they use small test models. The issues with the secondary extruder take time to manifest.
Once you attempt a significant multi-hour print using the secondary extruder, the flaws become obvious:
-
Under-extrusion & Misalignment: You initially notice minor under-extrusion, occasional missing filament, and slight layer misalignment.
-
Structural Failures: Over long prints, under-extrusion creates tiny gaps and compromises layer adhesion.
-
Cascading Print Failures: Weakened layer adhesion causes sections of the model or support structures to break mid-print. Because supports are structurally thinner by design, they break easily, ruining the entire job.
Since Bambu Studio does not allow you to specify which nozzle prints support structures, you cannot mitigate this risk. Once you slice a large multi-color model, chances are some support layers will be assigned to the secondary nozzle, and those are precisely the layers that fail.
It is ironic that Bambu advertises the secondary nozzle as ideal for printing supports, when using it for supports might be the worst thing you can do.