Instead of that, here’s a better way to think about it: lettering looks better with a 0.2mm nozzle, but who wants to print their entire print with a 0.2mm nozzle just so you can get good lettering in only a few areas? Well, you don’t have to if you can switch nozzle diameters.
2 Likes
Why can’t you directly compare additive to subtractive manufacturing processes? Addition and subtraction are inverse functions. Mathematically, removing material is the same as adding negative material and adding material is the same as removing negative material. 3D printers are an outgrowth of the manufacturing machines that have been developing for more than a hundred years. Manufacturers of NC machines began using what became g-code in the fifties. 3D printers follow some of the same basic rules of thumb that one uses when milling. A nozzle is very analogous to an end mill. For instance, one can not perfectly cut a vertical rectangular hole with a milling machine just as one can not 3D print an object with a perfect vertical rectangular hole. A radius that matches the end mill or nozzle size will always occur at the inside edges.
During the manufacture of printed circuit boards there are several steps where something is added then subtracted to arrive at the final board. In injection molding, material is removed from blocks of steel and material is injected in to fill the void left behind.
2 Likes
Here are a couple of advocates for a particular system yet when questioned respond with condescending insults, as if to hide what they do not know.
I have a lathe. It uses a tool changer mounted on a turret. The tools are cutting bits that are mounted at the end of a small steel bar. The different bits have different shapes allowing for different types of cuts. It is convenient to have several tools available on so as not to have to change tools while working.
On milling machines there is a tool head that can grasp and use a variety of tools which includes end mills and drill bits of various sizes. There are sheet metal stamping machines that cut shapes in sheet metal using an array of dies of various shapes and sizes. The dies are the tools the stamping machine uses.
Technically, a ratchet is a machine and the sockets are the tools. I suppose one could argue that machines are tools but it is rather silly to argue that sockets are not tools.
2 Likes
I just had a look at the multi nozzle size solution in Orcaslicer, but it is quite limited.
Unless hidden somewhere very deeply, the only thing I could find so far is that you can set the path width in percentages of the nozzle diameter, and by assigning a certain material to a certain path type, like Infill, Inner Walls, Outer, Walls, Top, Bottom, etc. you have some control over which nozzle does what.
Maybe with coloring you can expand that behavior a bit.
However, what I cannot find is the layer height per nozzle. So if it’s there, It is hidden very well.
I can try to play with a custom layer height for top and bottom layers, but the capability is very limited, and requires a lot of tweaking.
With that limitation, I believe it is indeed an experimental feature.
Combining 0.2mm and 0.4mm is already a challenge, because 0.12mm layer height is quite good for a 0.2mm nozzle, but already, quite limiting for a 0.4mm nozzle. I don’t even dare to think about 0.6mm or 0.8mm in combination with 0.2mm nozzle.
A combination of 0.4mm and 0.6mm or 0.8mm is similar or better than 0.2mm/0.4mm combo, but the benefits are quickly fading then also.
And printing my entire part on a relative small layer height because my smallest nozzle requires that on for instance the walls, is not a very optimal solution, but might gain some time due to the increased flow rate of the larger nozzle.
Don’t get me wrong here. I do encourage the developments that are going on, and I hope we get a better implementation soon.
However, I think we should minimally have the possibility to for some control over the layer height per nozzle size. Possibly something like a multiplier of the smallest nozzle layer height.
Pure individual layer heights per nozzle and possibly optimized layer heights is something for later.
Unfortunately that introduces a new challenge, and that is the ordering of the layers.
Smaller layer heights demand to be printed before the higher layers, otherwise the nozzle collides with the neighboring paths. Therefore other settings like wall ordering (inner/outer, etc.) and infill before/after boundary are conflicting with that ordering.
It are all those border cases that need to be considered when implementing a proper solution.
I am sure we can find solutions/compromises for all the challenges, but there is a long way to go.
ps. I wonder if Creality will introduce some control over layer heights.
1 Like
I think that we should not overthink too much. For me, it’d already be good to use a larger nozzle for infill only.
With Orca allowing a user controlled maximum for the combined layer height, all that is needed for that is already there.
As for the lower bound, don’t get me started on “minimum” layer heights 
Large nozzles can go lower than smaller nozzles before reaching the actual flow control limited, physics based minimum layer height. 
 &
& 
PS: Disclaimer: Haven’t looked at the current H2 support in Orca myself though. Too many interesting things to look at and do atm 
1 Like
Does it really save anything? Having a 0.2 nozzle print my primeter, then a nozzle change for the infill then back to 0.2 for the next layer with an additionnal priming between those changes requiring a prime tower and back again at each layer seems it wouldn’t save any time or filament, quite the contrary.
I wasn’t saying that lower layer heights are an issue with a larger nozzle, but more that one of the benefits (speed) is greatly reduced due to that low layer height.
1 Like
Your comment suggests that you have never even researched this topic. The same applies to print times and strength when using multi-size-nozzle printing. The miniature / D&D / Warhammer printing community has been asking for this feature for a long time, for example.
Why should I explain this to someone who has already made up their mind and denies that the whole community has been asking for this feature forever? I suppose everyone must be wrong… except you. I’m here to discuss features, not your willingness to be open to new technologies, which you apparently aren’t.
Instead of making assumptions, it would have been a perfectly reasonable question on your part to ask why this feature could be important for certain communities.
It’s not just about infill; it’s also about, for example, being able to print the base at 0.6 - the body at 0.4 and the head in high detail at 0.2. You failed to take that into account in your argument.
Edit: Proof in the second comment:
Yes. That is why “combine infill” can help with that. It is a bit of a shame that unlike Orca, Studio does not offer the chance to define an upper bound for the combination though.
1 Like
Now I’m going to do what I do best: present facts, because anyone can measure this for themselves in his slicer. Here’s a 15-cm-tall Warhammer sculpture as an example:
That doesn’t even take into account the time savings that could be achieved by using a 0.6 infill throughout the entire model.
In 0.2, it would take two days:
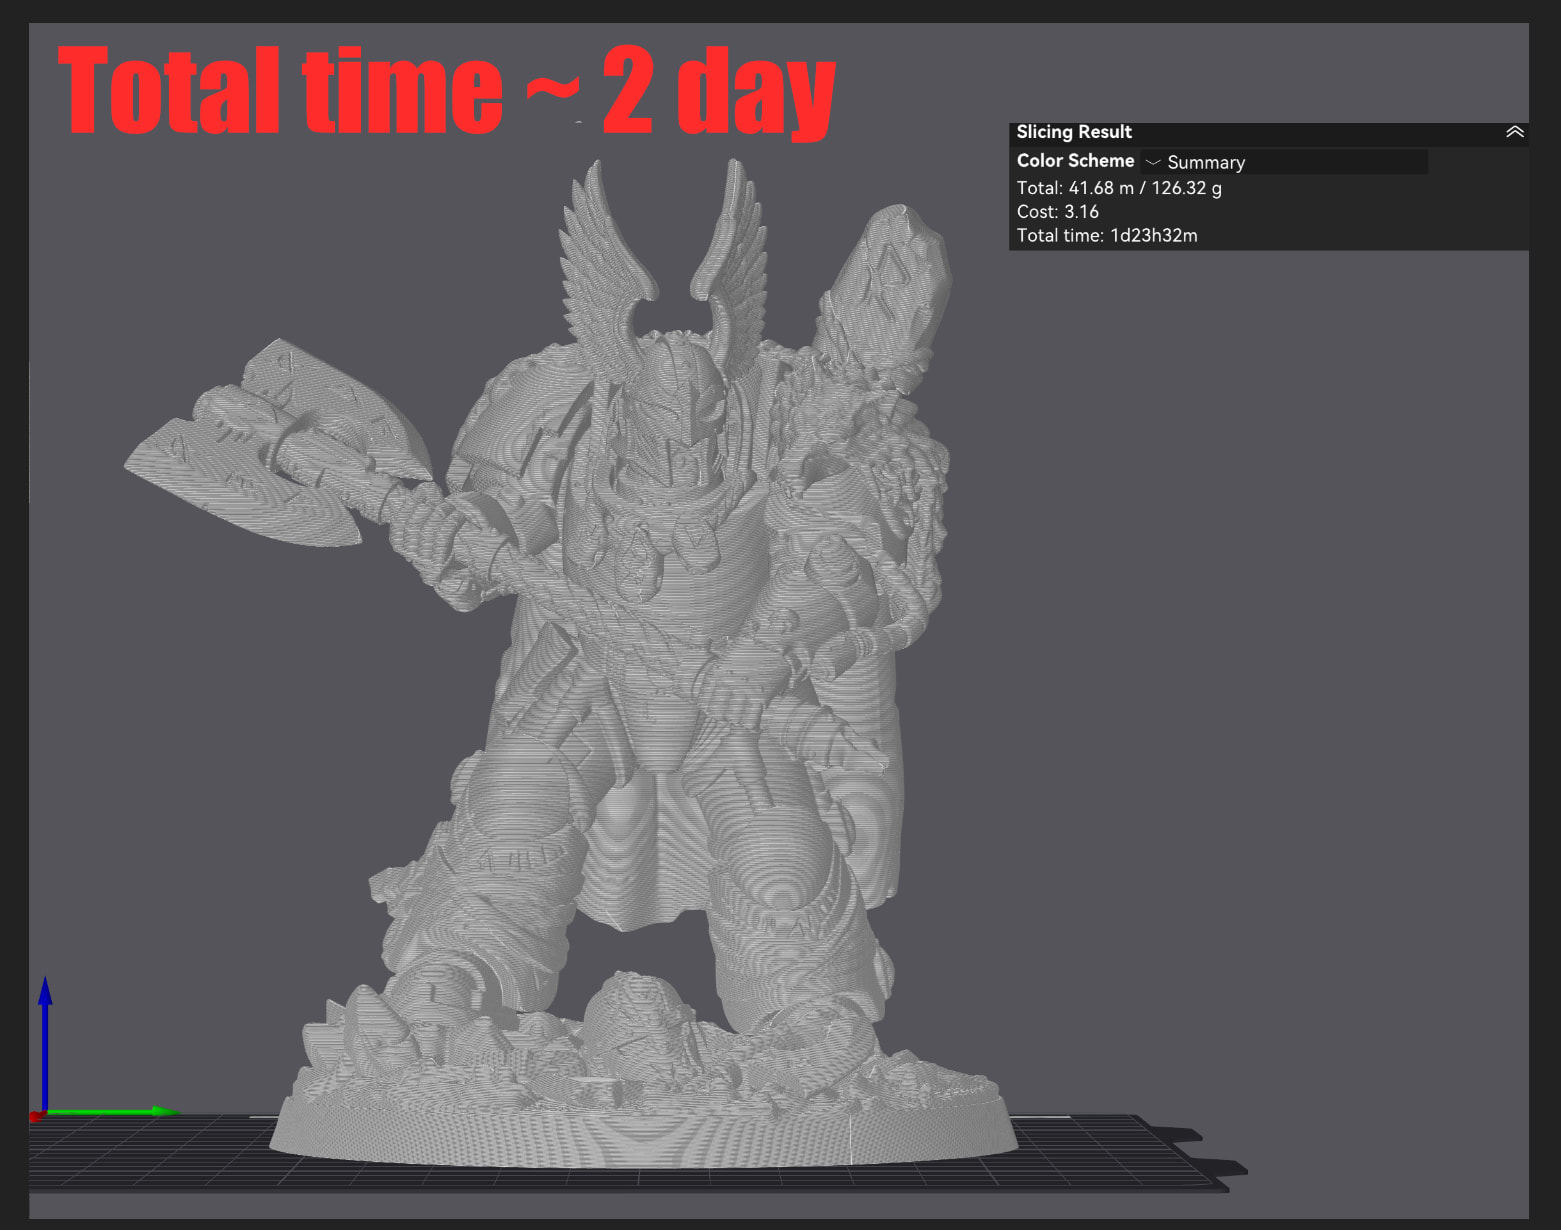
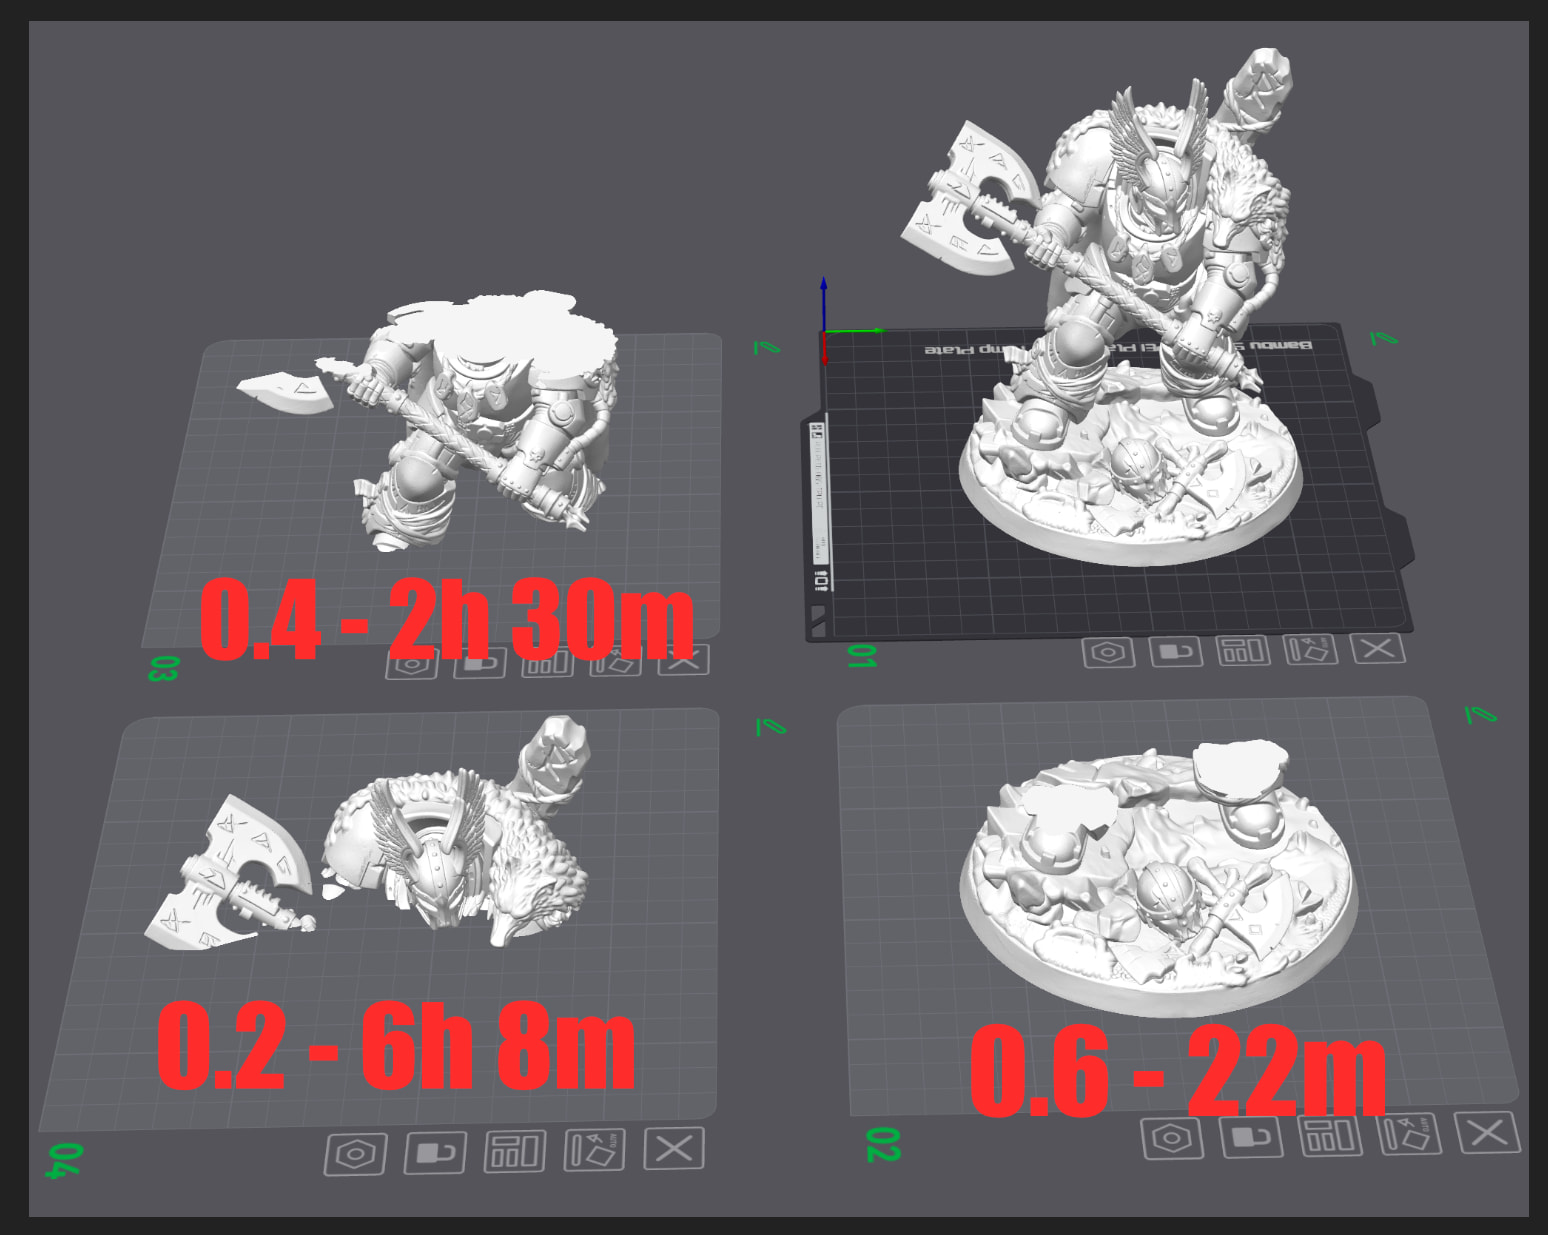
Multi-nozzle-size print: 0.6 to 0.4 to 0.2 - Not optimized, but the simplest calculation so that anyone can try it out for themselves in their slicer. Again: That doesn’t even take into account the time savings that could be achieved by using a 0.6 infill throughout the entire model.
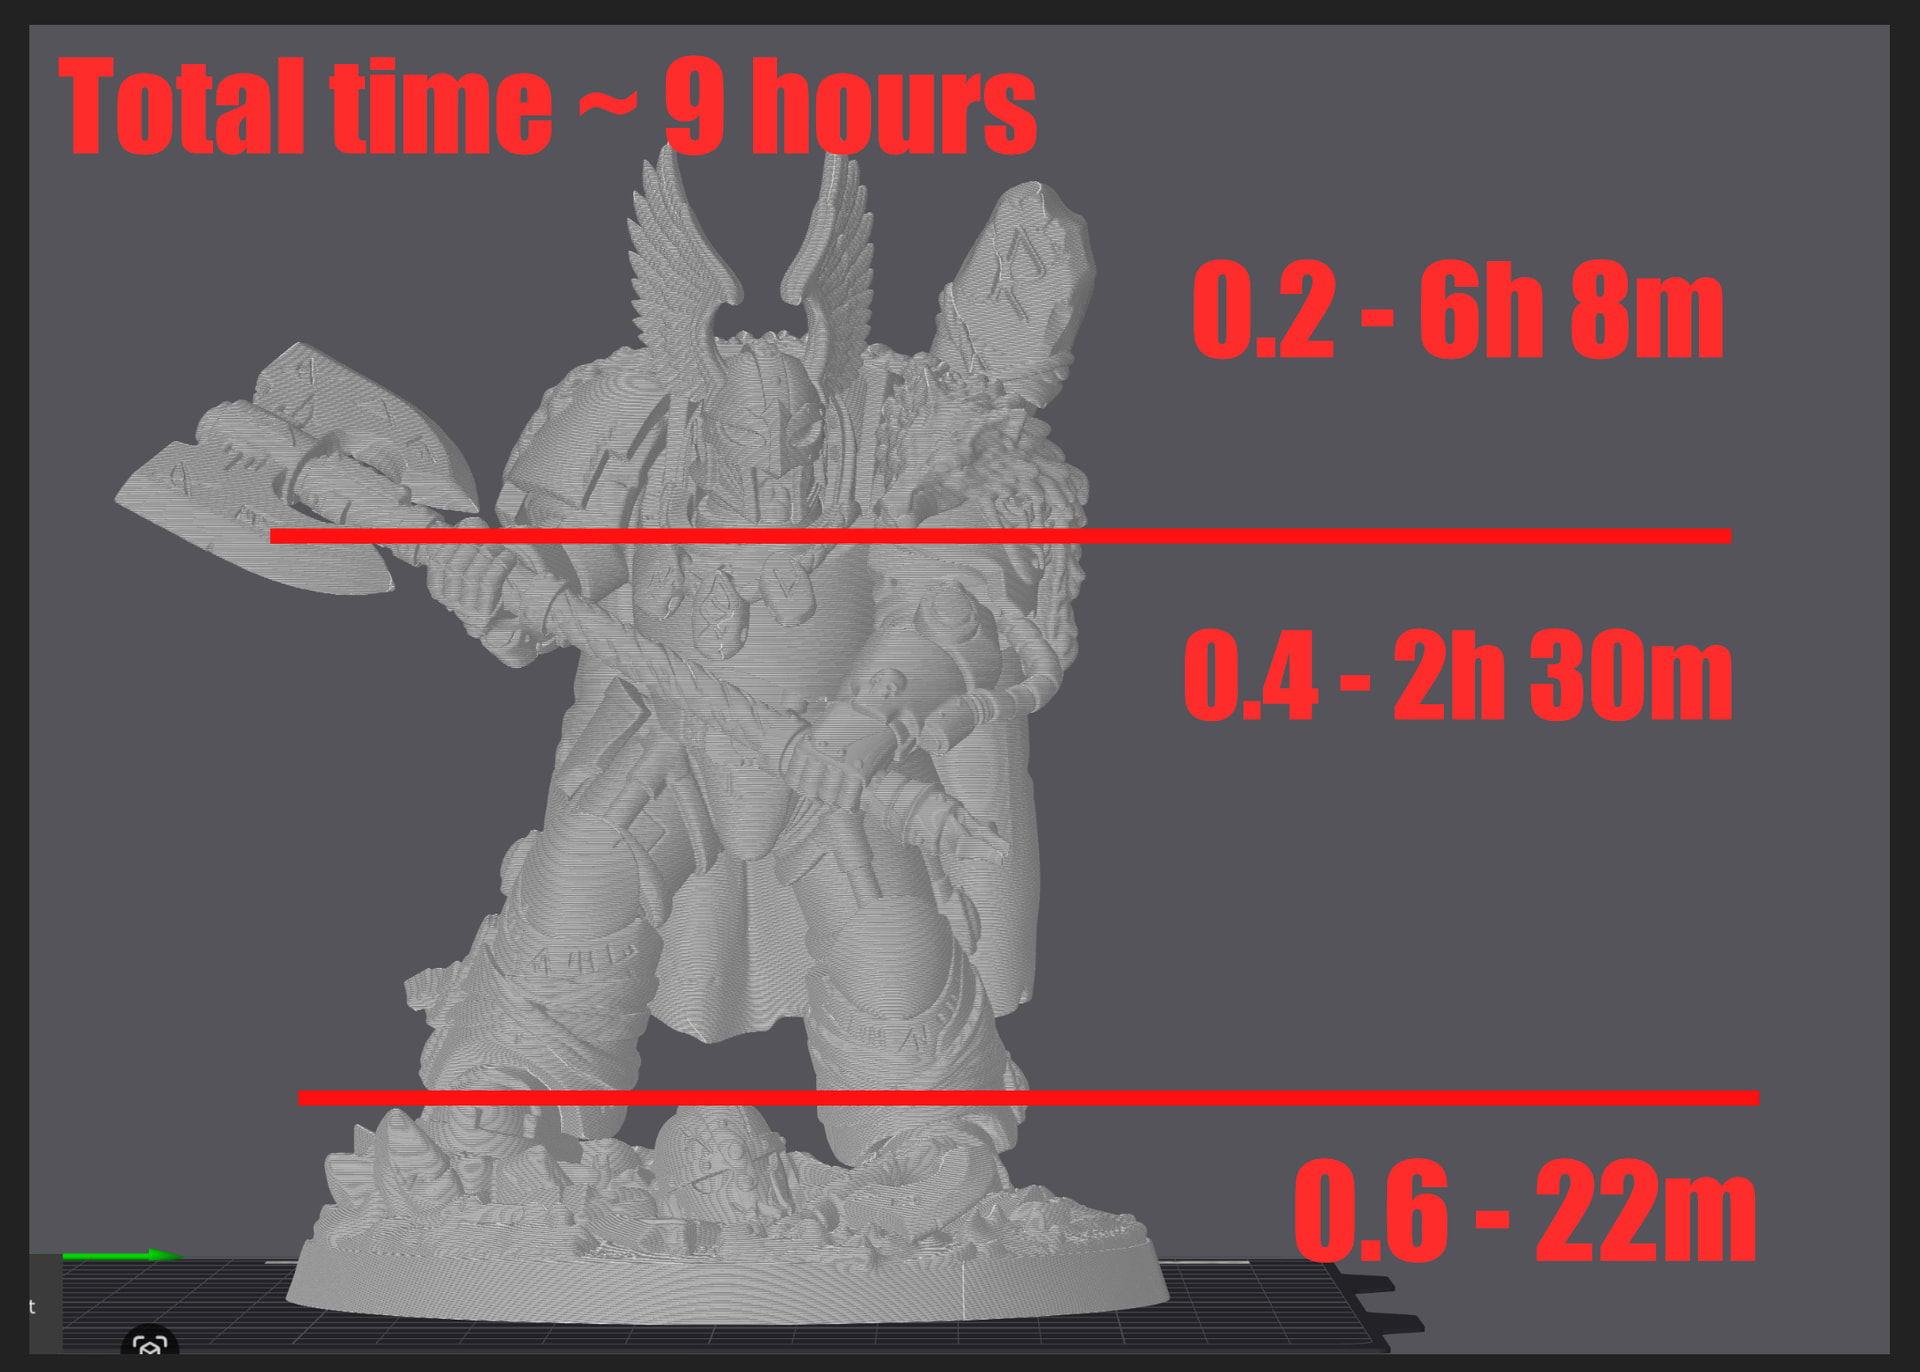
I deliberately chose a model that doesn’t sugar-coat my argument; otherwise, I would have picked one with a narrower head. Depending on the model, the time savings could be even greater. However, I also don’t want to give critics ammunition to claim that I’m cherry-picking.
Here’s the test setup to try this - it doesn’t have to be perfect to understand the point:
1 Like
Probably little on a single color print.
But for a multi-color print, I expect at least a 20% time saving (as long as we do not forget that the .2mm nozzle max flow defaults to 1mm³/s and needs to be corrected for the larger nozzle before slizing).
Furthermore, prints can be expected to be stronger due to the stronger lines.
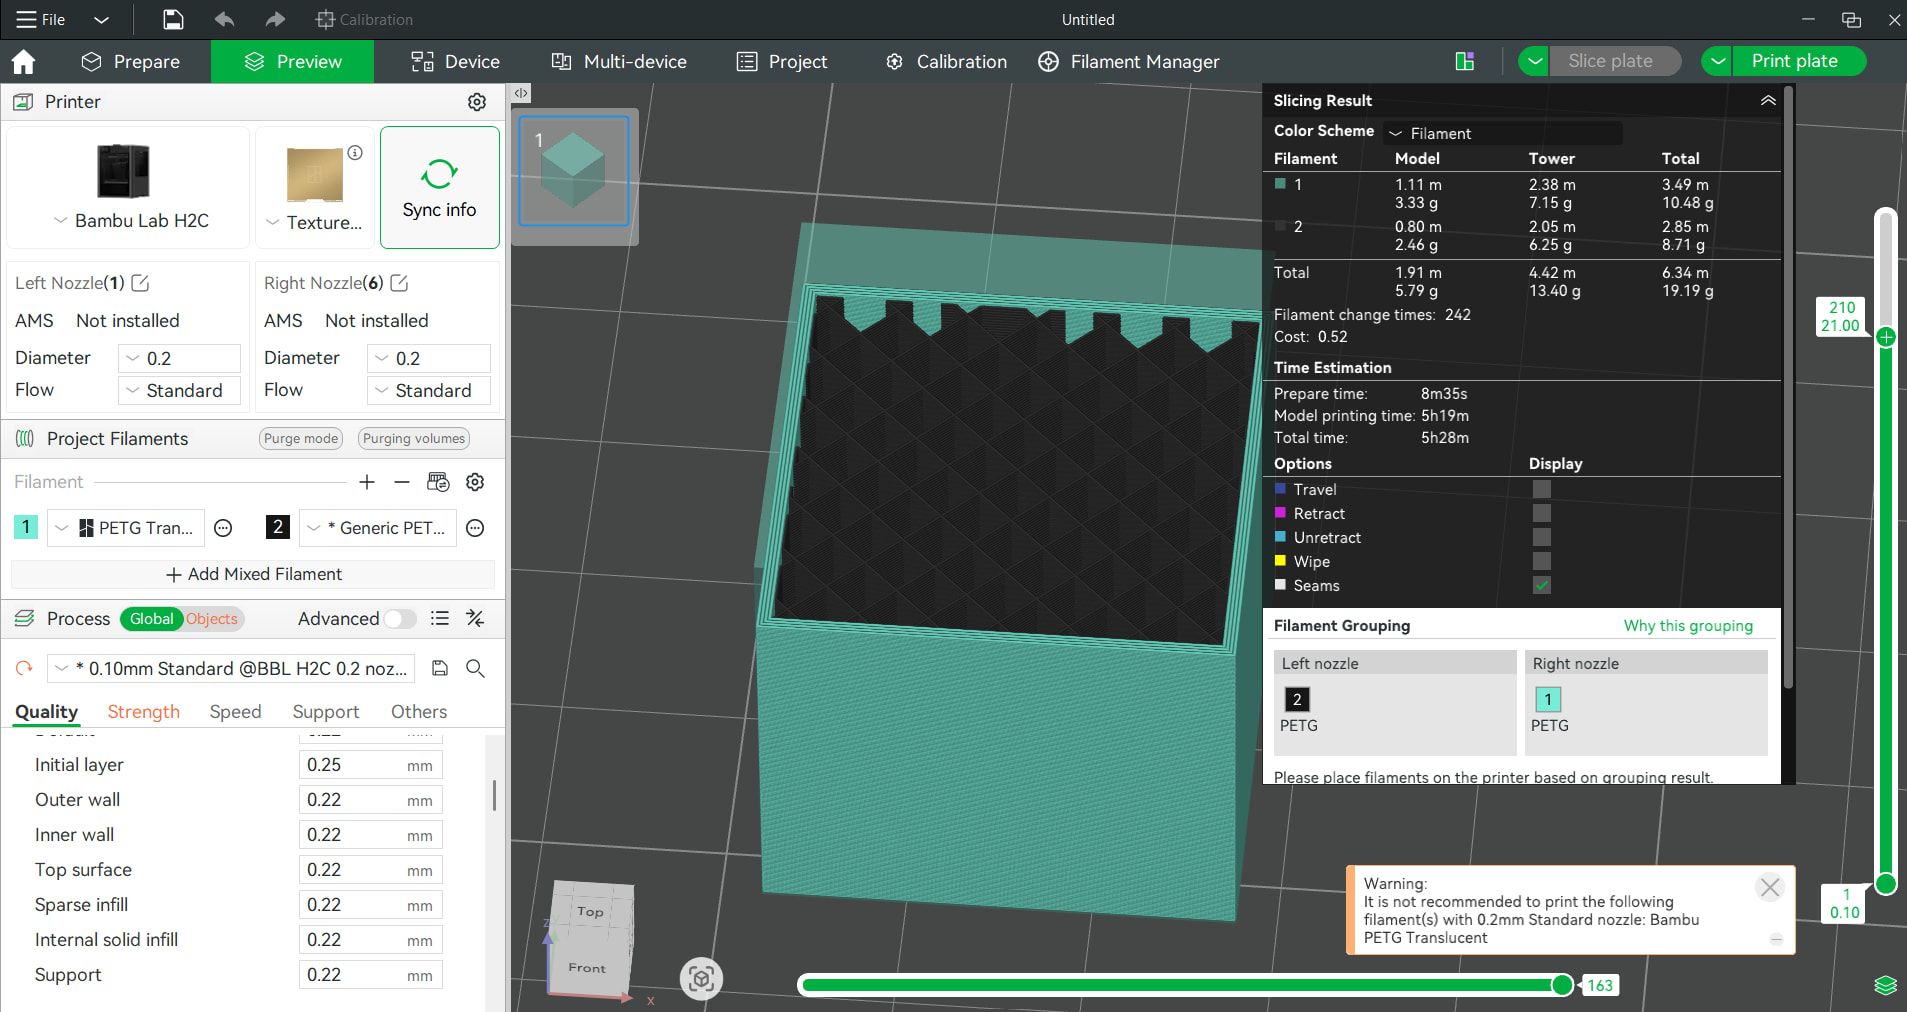
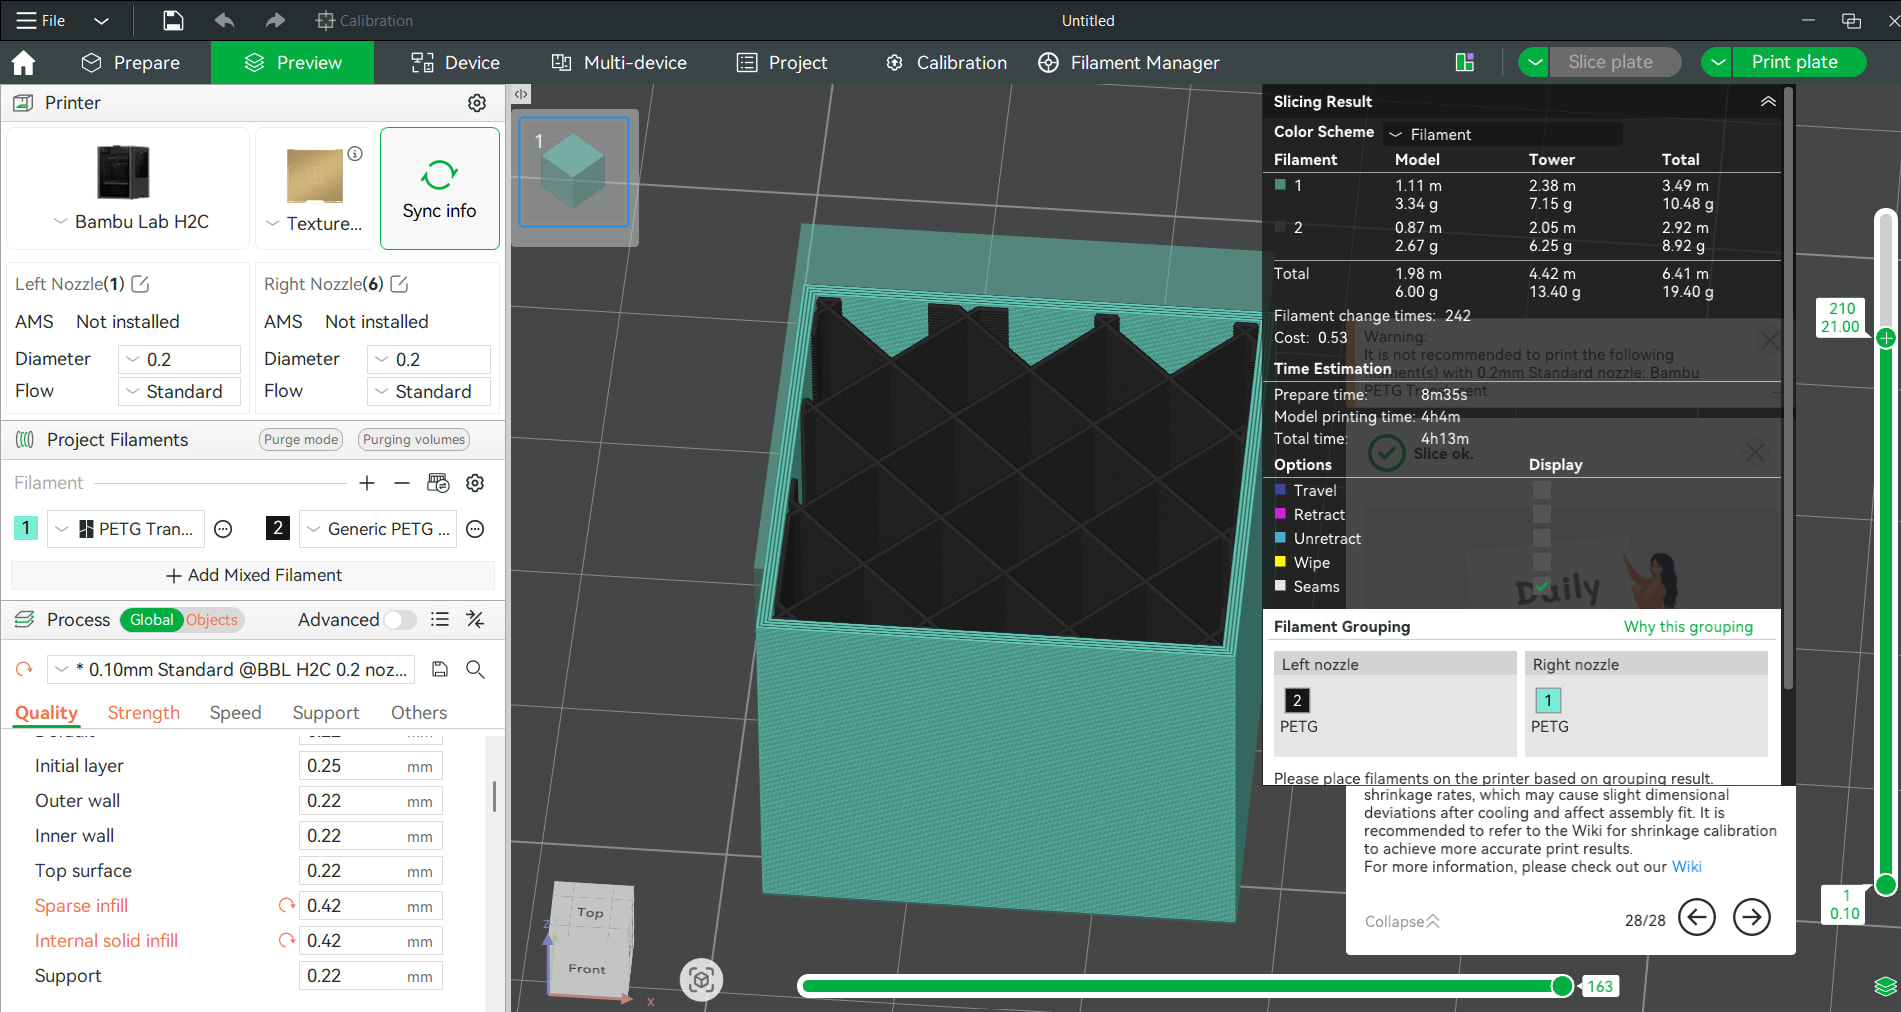
But I am getting really annoyed at Studio atm. This is only the 0.2 to 0.4mm nozzle difference as Studio now even tries to “save me from myself when” going for even thicker lines…
&
1 Like
Because additive and subtractive manufacturing share only a few common design and share similar legacy of the gantry (in case of Core-types) and g-code… It is similar as comparing cars to helicopters just because they both have engines, both controlled by similar ECU/PCM and both transport person/cargo to a destination. You can compare them as a “what is a better tool to do X", but you cannot compare FDM X vs CNC Y
2 Likes
Why?, Why? Why?
You absolutely can compare them, if you dont compare them how can you know their differences.
Which part of the helicopter is the engine? which part of the car is the engine? well you see you cant really compare cars to helicopter so it isnt that easy?
That’s like someone saying “you cant compare apples to oranges” What does an orange taste like, what does an apple taste like? Do you prefer the tase of the apple or do you prefer the taste of the orange, Well you simply cant compare apples to oranges.
You absolutely can compare apples to oranges , otherwise we would never know they are different.
WHY cant we compare FDM X to CNC Y? are they different? how do we know they are different if we didn’t compare them. Are we sure it isnt CNC FDM ? Is all FDM CNC?
Well what I have learned from this form about the differences and why the terminology used is used is because, Im am stupid and shouldnt ask questions.
I think at least that is already solved: BS has the option “independent support layer height” which does exactly that for support vs part. Of course wall order wouldn’t work anymore.
Even having the option to print different parts with different nozzles would already have a lot of use. Just take the case of some text on the first few layers, that you want to print with 0,2mm nozzle while you print the part itself with 0,4mm.
Because a lot of the people that pretend to be smart around here have little to no experience in other forms of manufacturing.
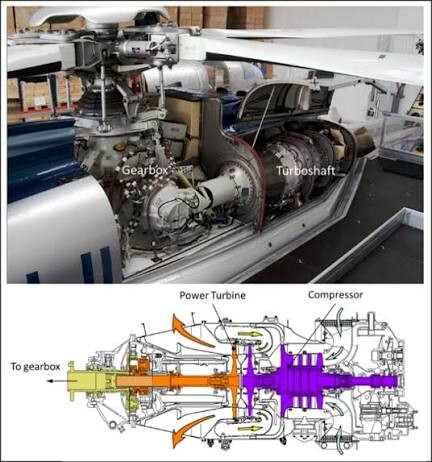
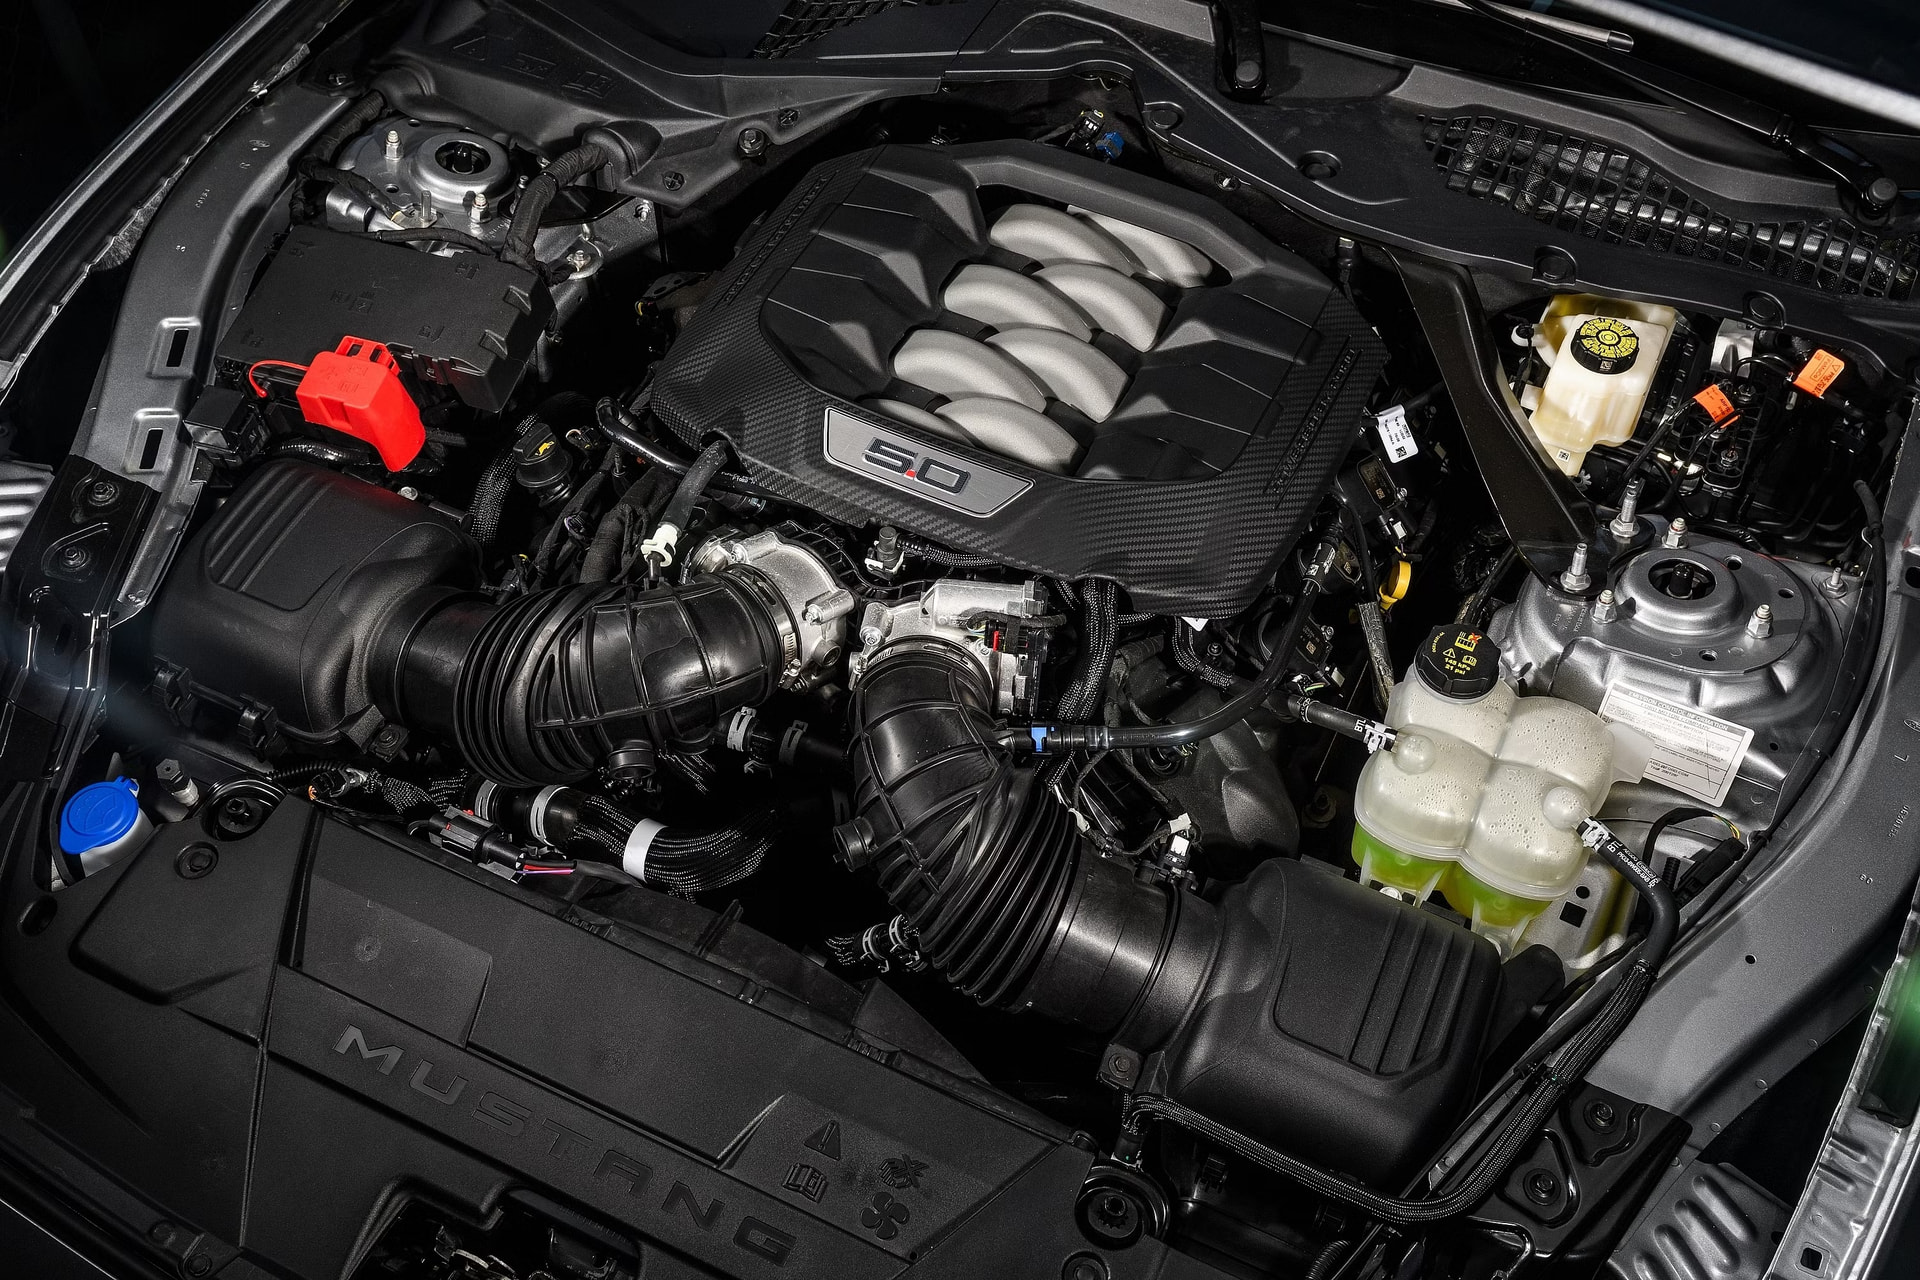
At least we can answer that one.
Or that you should delete your forum account
I don’t have a dog in this fight, dont have H2 anythings, but if marketing/customers is all-consumed by and obsessed with speed of prints, one of the easiest way their smart programmers could make more speed [leveraging existing hardware capabilities] is to be able to use diff nozzle sizes in the same print. Assuming defaults, A 0.8 nozzle produces the same plastic as 4 passes from a 0.4, in a single pass. Take every line that doesn’t ever see the sun, convert it to those. Subtract time taken to nozzle swaps and you very likely have a huge speedup. “Fast Chunky Interior Mode” Where’s their smart programmers at? 
Bambu [et all] have been using a flavor of this logic for a long time w/ infill combination. Just instead of using a proper nozzle size, its on the inside and who cares if its messy
Having an off-topic discussion like this and comparing FDM to CNC doesn’t make much sense. Certain geometric shapes aren’t possible with FDM, and vice versa.
However, a better way to put it is: When I need apples, I use CNC for this and that reason… and when I need oranges, I use FDM for this and every reason.
Because this isn’t about taste or personal preferences, but about the right tool for the job - and the main topic is still FDM - or, to be precise: “Is Vortek already obsolete?”
After all, you use a screwdriver to tighten screws, not a hammer. It’s not a matter of personal preference like it is with fruit; it’s about using the right tool for the job.
In short, forget about fruit. Replace the image of an apple and an orange in your mind with that of a hammer and a screwdriver.
I dunno how more stupid this conversation can be.
This idiom means that the comparison is meaningless. Different tools for different jobs, serving different tasks.
Thanks for the acknowledgement. Not everyone can admit their own flaws.  Kudos.
1 Like

When I read through the discussion again, and I don’t mean you right now, it really is on the level of:
- “Next time, I’m going to use an orange to hammer my nails into the wall.”
- “For breakfast, I’ll have cereals with nails…”
Now at least I know how it can happen time and time again that people actually swallow nails and end up in the emergency room. 
1 Like