This is a general question and I am hoping someone can advise.
I had an issue a while ago where every print was failing to adhere to the bed. So I decided to tram the bed and downloaded the tramming gcode from Bambu. I used a sheet of paper as a gauge to see if the head was close to the bed. I found that there was a massive gap, so I adjusted it so the paper was just starting to resist between the head and the bed. When I printed, it was perfect.
Since then I have checked using the same method and every time when I check there seems to be too big a gap, so I keep raising the bed slightly to close the gap and the printing is fine.
But, what I cant work out is why it always seems too big a gap and obviously if I keep raising the bed, there will come a point when there is no more adjustment.
Does the printer ‘self-calibrate’ the head to bed distance each time? I am wondering if it is wrongly self calibrating and needs a more detailed adjustment/fix?
I realise that unlike Creality, etc, the X1C shouldnt need regular bed tramming and so I am keen to fix this apparent issue?
Everytime I run the tramming gcode, it there seems to be a massive gap to the bed and the paper is certainly not slightly pinched between the head and the bed… so the gap always needs to be closed up - then if I run it a while later the gap is massive again and it needs to be closed more. Very odd in my opinion as it seems that my regular first layer failure to adhere issues seem to be caused by the gap being too big.
It definitely calibrates before each print. During preparation, that is when the bed vibrates quickly and then touches the nozzle a few times (3x ? 5x ?).
So the height you set during tramming doesn’t really matter. You could as well use something thicker as a gauge so that you don’t have to turn the adjustment screws so much.
Tramming only is necessary to make the bed parallel to the gantry.
That leaves the question, why you have adhesion problems. Can you show a picture of the bottom of a failed print?
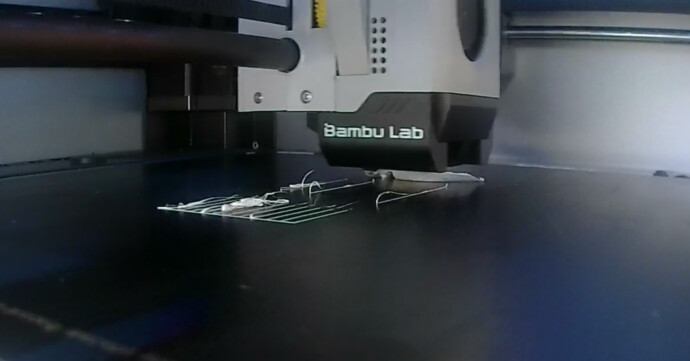
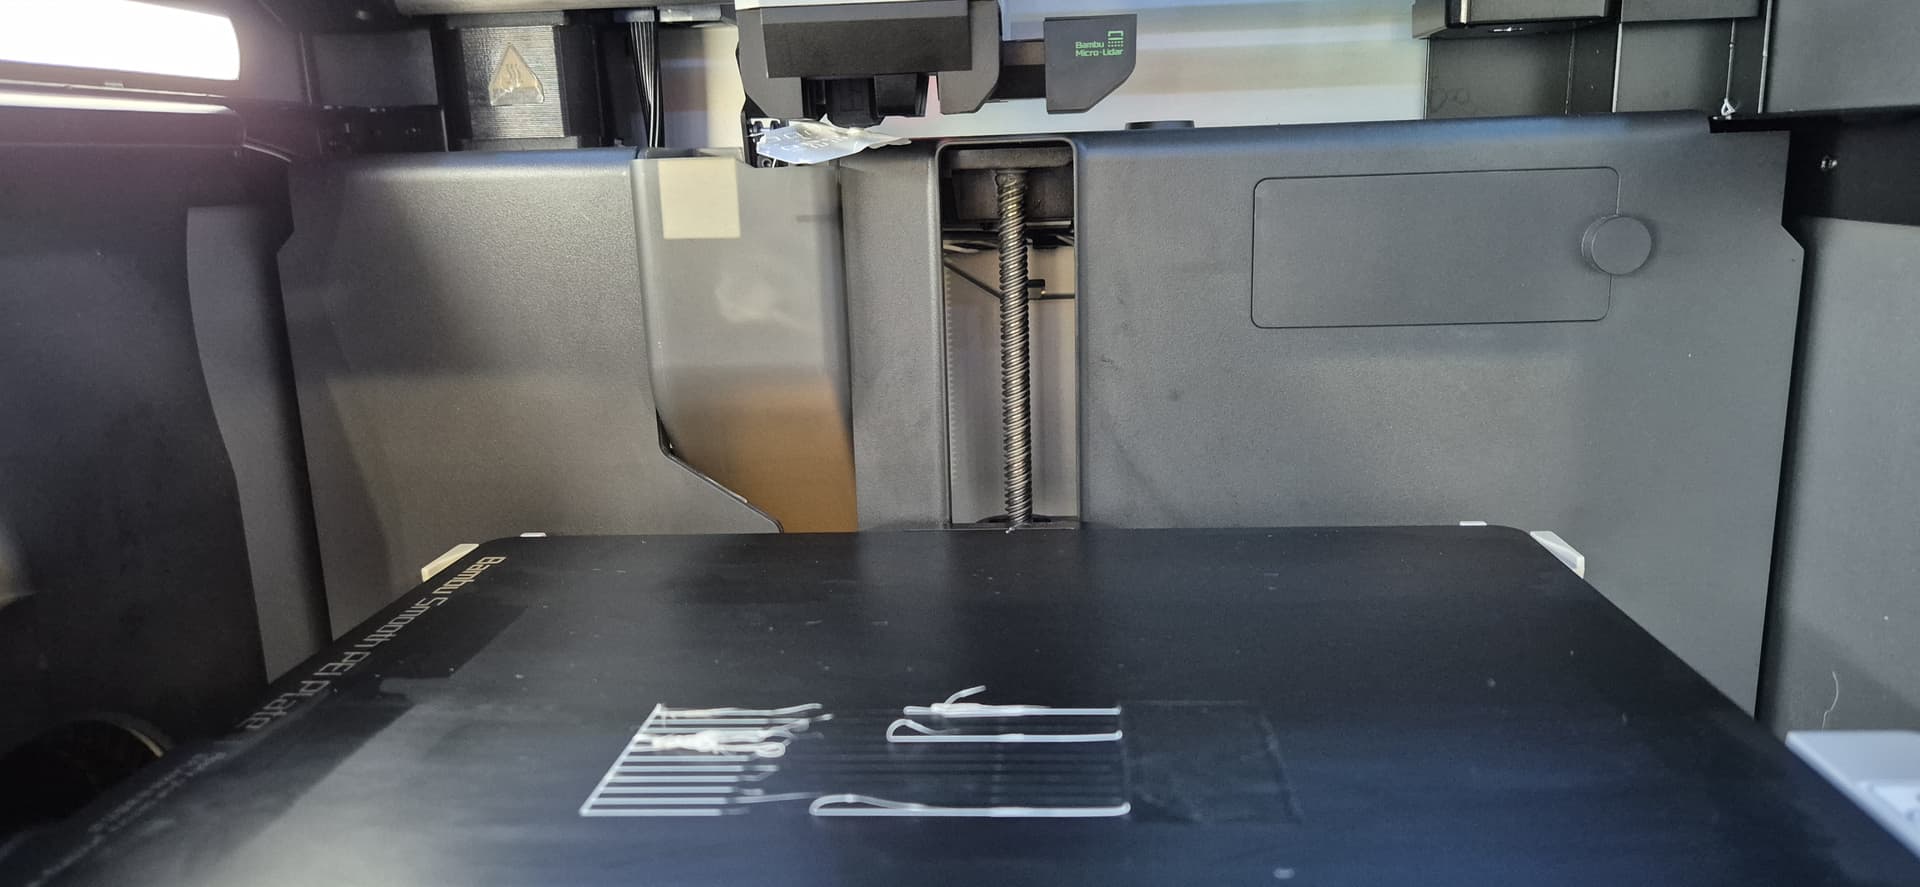
Thanks @Alex_vG - OK, this is an example of a print which I have been trying to finish all evening. This failure is on a brand new Bambu Lab Smooth PEI plate and I have also used the Bambu Lab glue stick. I am using a 0.2 stainless steel head and am printing in PETG. The print is a 3 colour print (red, black & white), but as you can see it has failed before it even attempted the white. I wasn’t watching when it actually failed, but the print order is red, black then white - so it looks as though it failed during the black filament printing…
Previously when I get failures like this, I run the tramming gcode and close the gap between the head & bed and it will print fine… but clearly this isn’t right as you shouldn’t need to ‘tram’ every time you print on the X1C.
Also, my filament is dried using a Sunlu S4, and in the AMS the humidity is at 10%. The black & white are genuine Bambu Lab PETG HF and the red is a generic PETG filament (Overture).
For perspective, the diameter of this print is about 40mm.
First, you can’t tram like this—automatic bed leveling will always determine the correct height. The real purpose of tramming is to ensure the bed is 90° to the nozzle. I’m not sure why so many people think you need to tram your bed whenever you have adhesion issues with a Bambu Lab printer; there’s actually some important information missing from your question.
What is your bed temperature?
What is your nozzle temperature for the first layer?
What is your nozzle temperature for subsequent layers?
For example, on my carbon fiber plate from WhamBam:
PETG HF: Bed temperature at 80°C and first layer nozzle temperature at 260°C.
This setup gives me a flawless first layer and a perfect finished model. As you can see, the bed temperature is quite different from the standard recommendation, but it works exceptionally well.
The printer does a “homing” operation to locate the build plate. Right after it cleans the nozzle, it moves to the center of the plate and does this tap-tap-tap thing with the nozzle. That’s the printer figuring out where the build plate is.
It does this every time it prints. It can’t have too big a gap unless it didn’t get the nozzle tip clean and there’s a blob of plastic sticking out when the plate is probed.
So every time you raise the bed, the printer finds it at the new, higher position and does exactly what it was doing before. This can’t really be fixing anything.
As stated, tramming really serves just one specific purpose - to ensure the build plate is perpendicular to the nozzle. If it isn’t, while the build plate leveling will compensate for the slope on a layer by layer basis, the sides of the model will be skewed by whatever the angle of the plate is. You print a cube, you get a parallelogram.
You need to do MANUAL calibrations for the .2 nozzle. I found this information by accident on the WIKI. They state that for the .2 nozzle automatic calibrations are not accurate.
Thanks @L0rdS474n some really useful information there. I have to be honest that I typically use the default settings which Bambu Studio sets - on the whole, when it works, it works well. I usually use a 0.4mm nozzle, but for some like this model it has fine details and needs a 0.2mm one.
The settings for this particular model are;
0.2mm nozzle
0.1mm layer height
nozzle temp (initial layer) - 230°C
nozzle temp (other layers) - 245°C
Smooth PEI plate temp (initial layer) - 70°C
Smooth PEI plate temp (other layers) - 70°C
I think part of the problem is that as a long time Creality user, I used to get good results with PETG at lower temperatures than the default temperatures selected by the Bambu, so I have just accepted them and never considered going higher - but will read the link you posted and try higher temps.
You mention a first layer nozzle temp of 260°C, do you reduce it for subsequent layers, or leave it set the same?
The first time I did the tramming there was a massive improvement in quality, but reading all these comments I now realise that was because the centre rear screw was massively lower than the two front ones, so the bed was not level and I suspect that the printer struggled to compensate for the difference - and so, since then I have, wrongly, assumed that like with other makes the tramming is making a difference.
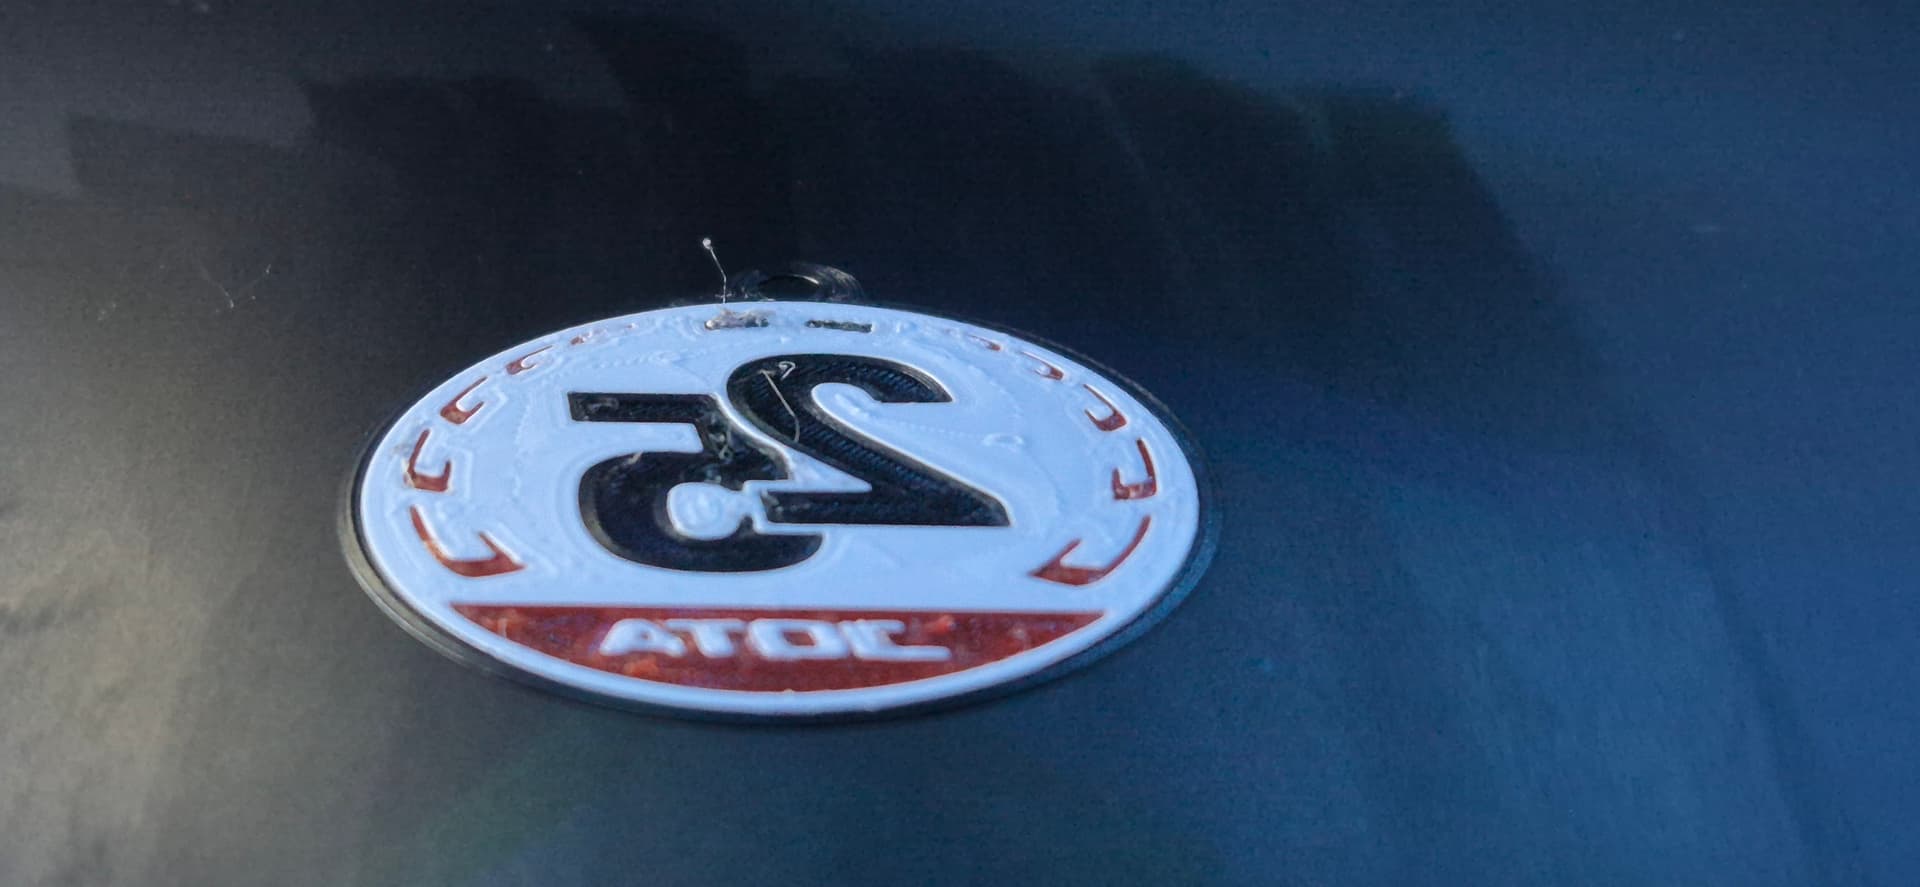
The pictures you posted (including the “25” medallion) make me 95% sure you need to wash your plate. Extrusion and adherence is OK in the clean areas.
Use warm water, grease cutting dish detergent, thorough rinse, dry with clean towel, do not touch the surface.
My X1C PETG temperature calibrations all resulted in values between 255 and 270. Print results in that range were mostly judgement calls and most of my profiles are at 260 for all layers.
Tramming is not a common maintenance task. I think I checked my bed last June, just because I was performing an overall clean/lube/adjust - not because of any problems, and it did not change my print results. Usually, I even have bed leveling turned off to save time. The printer still does a quick check just in the area of the print.
I can confirm that the plate is clean… I washed it in exactly the way you described then applied some gluestick as previously I have had issues with prints using the 0.4mm head sticking too well. So far, am impressed with the improvement the Bambu gluestick makes.
I am running a new print at 260°C / 80°C as suggested by @L0rdS474n and it seems a lot more promising, so will wait a few hours and let this one complete and see how it turns out…
May tweak a little more to improve it - perhaps slow the initial layer down - I did also increase the initial layer from 0.1mm to 0.16mm to see if that would help!?!?
I just came back to the topic because I was browsing Github and found what may have been a related bug causing PETG to print at 220 instead of the selected temperature. (That 5% uncertainty about the plate).
Thanks - I’m still not 100% sure that this will look how I need it to, but will know in about 3 hours!!
One interesting thing I have noticed is that a lot of people have posted that they are struggling with bed adhesion when using Bambu PETG HF Light Grey… which I have big issues with this one too - so wonder if its not particularly good quality… also have struggled with Bambu PETG HF White - had better results with Overture white to be honest.
But I guess I just need to play more with temperatures to start with as 260/80 seems to have made a marked improvement