X2D: Issue with printing large ABS part, reproducible failure

Hi folks,

I’ve started my journey of 3D printing two months ago when I bought the X2D combo. I printed a lot of stuff out of PLA, PETG and some smaller ABS parts, all without noteworthy issues. I also got myself into designing stuff in Fusion which worked out quite well in the print. Here I’ve been a silent reader so far but now I ran into an issue where I get to the end of my ideas and would like to ask for your assistance.

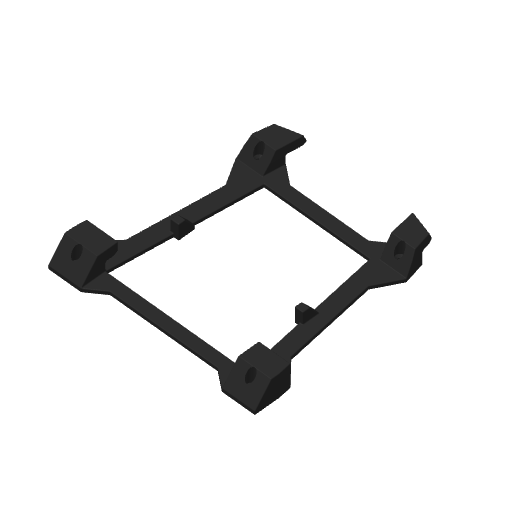
A couple of days ago I started designing a wall mount for a top case of my motorcycle. It’s basically a trapezoidal frame with a hook at each corner.
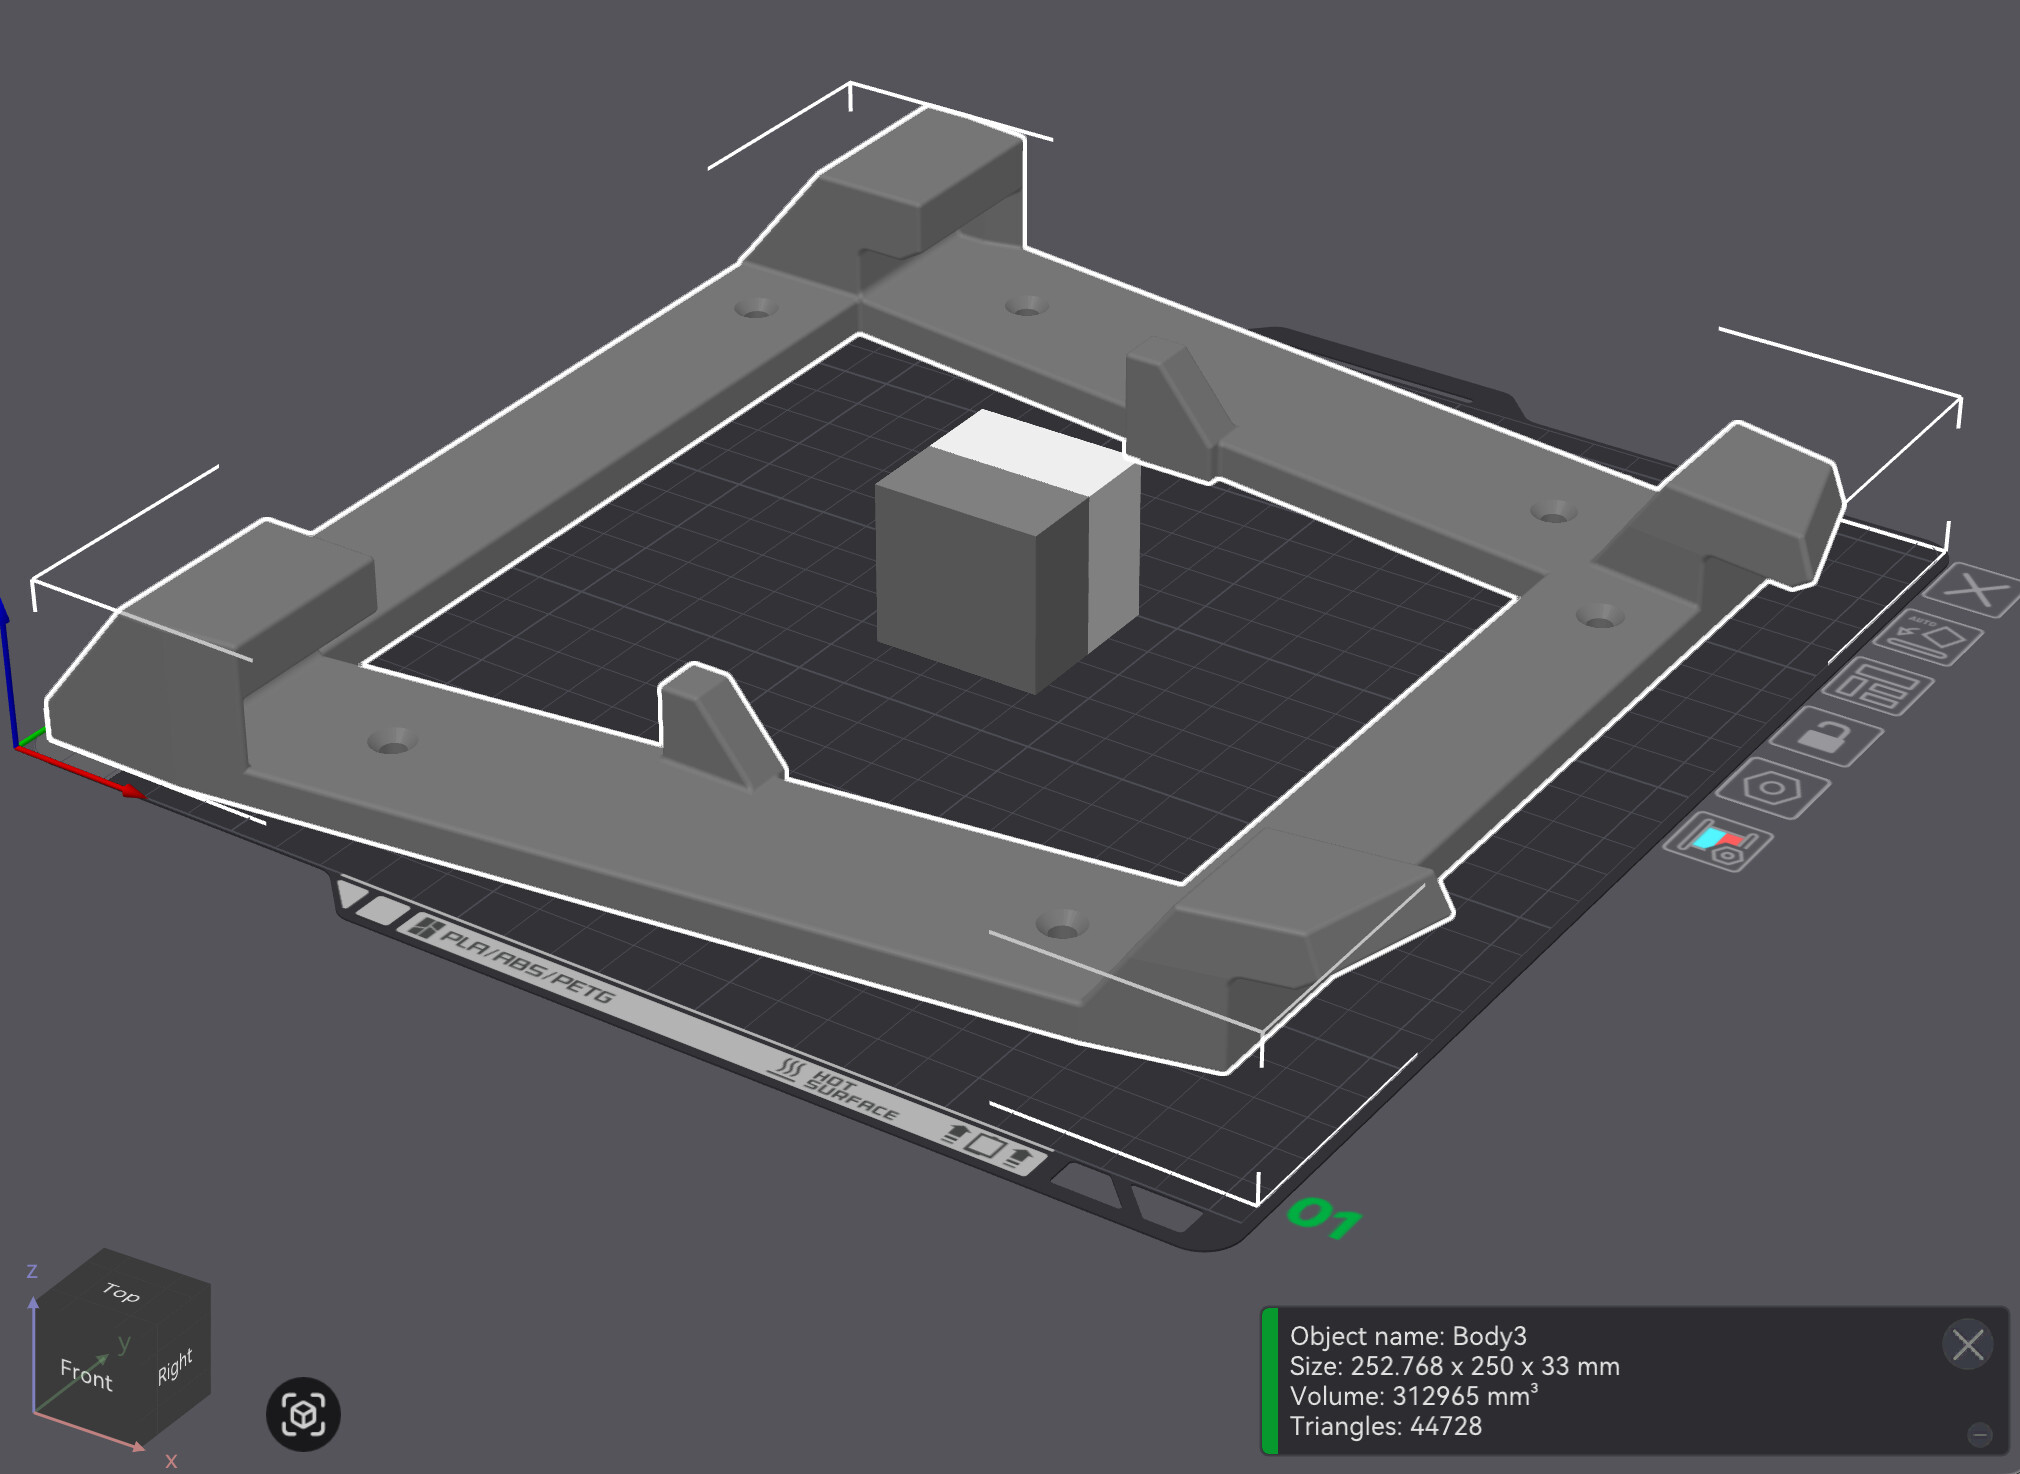
It’s a tight fit on the bed but the first prototype out of PLA turned out great. Only after some minor adjustments on the design I went ahead and attempted the final print out of ABS.

I have a spool of ABS+ from a German manufacturer I used for other smaller prints before. The quality of those has been great and the printer had no issues with it. The manufacturer even provides optimised profiles for Bambu Lab printers. Those profiles only show minor deviations from the generic ABS profile though. My only initial adjustment was raising bed temperature from 90 to 100°C to improve bed adhesion on the textured PEI plate since I had some minor issues there before.

Getting to the point:

The print runs fine at the beginning. Bottom layers and infill of the frame look consistent at all directions up to the point where the top layers of the frame begin and the infill continues for the hooks. On the left counters (back and front) of the part the printer begins to mess things up. I had 2 attempts and that issue seems reproducible as it happens only on the left side corners.
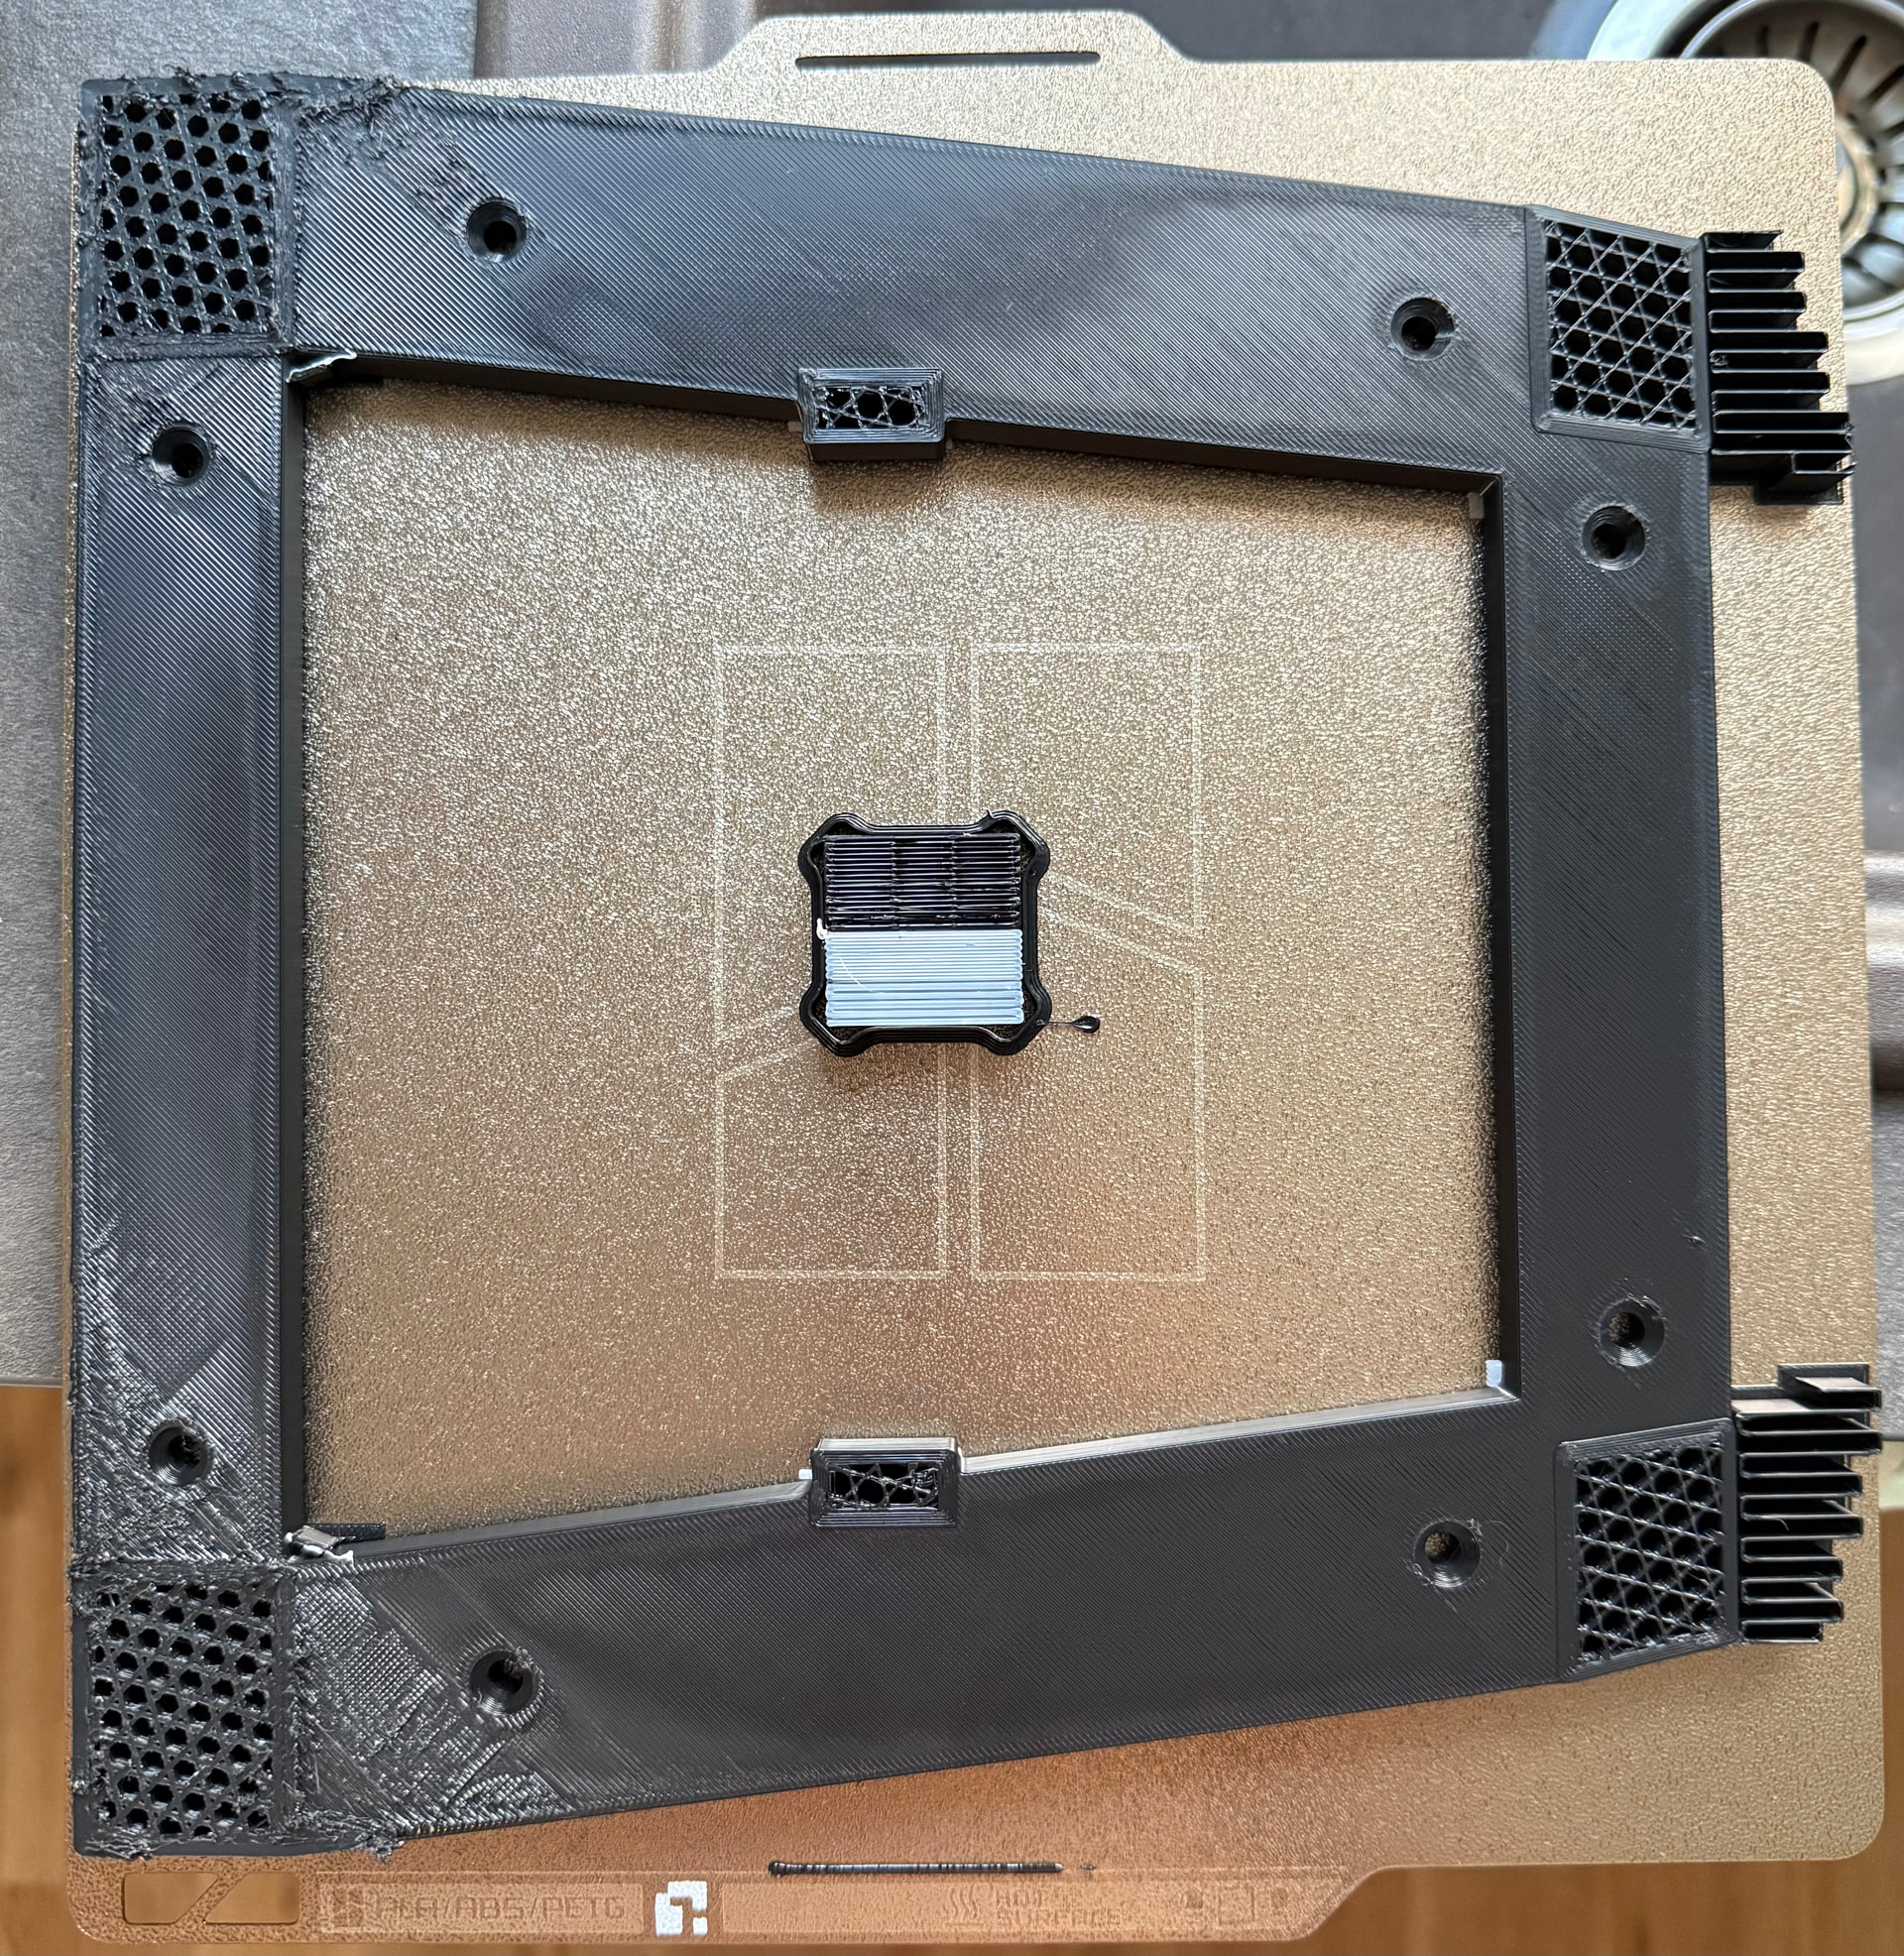
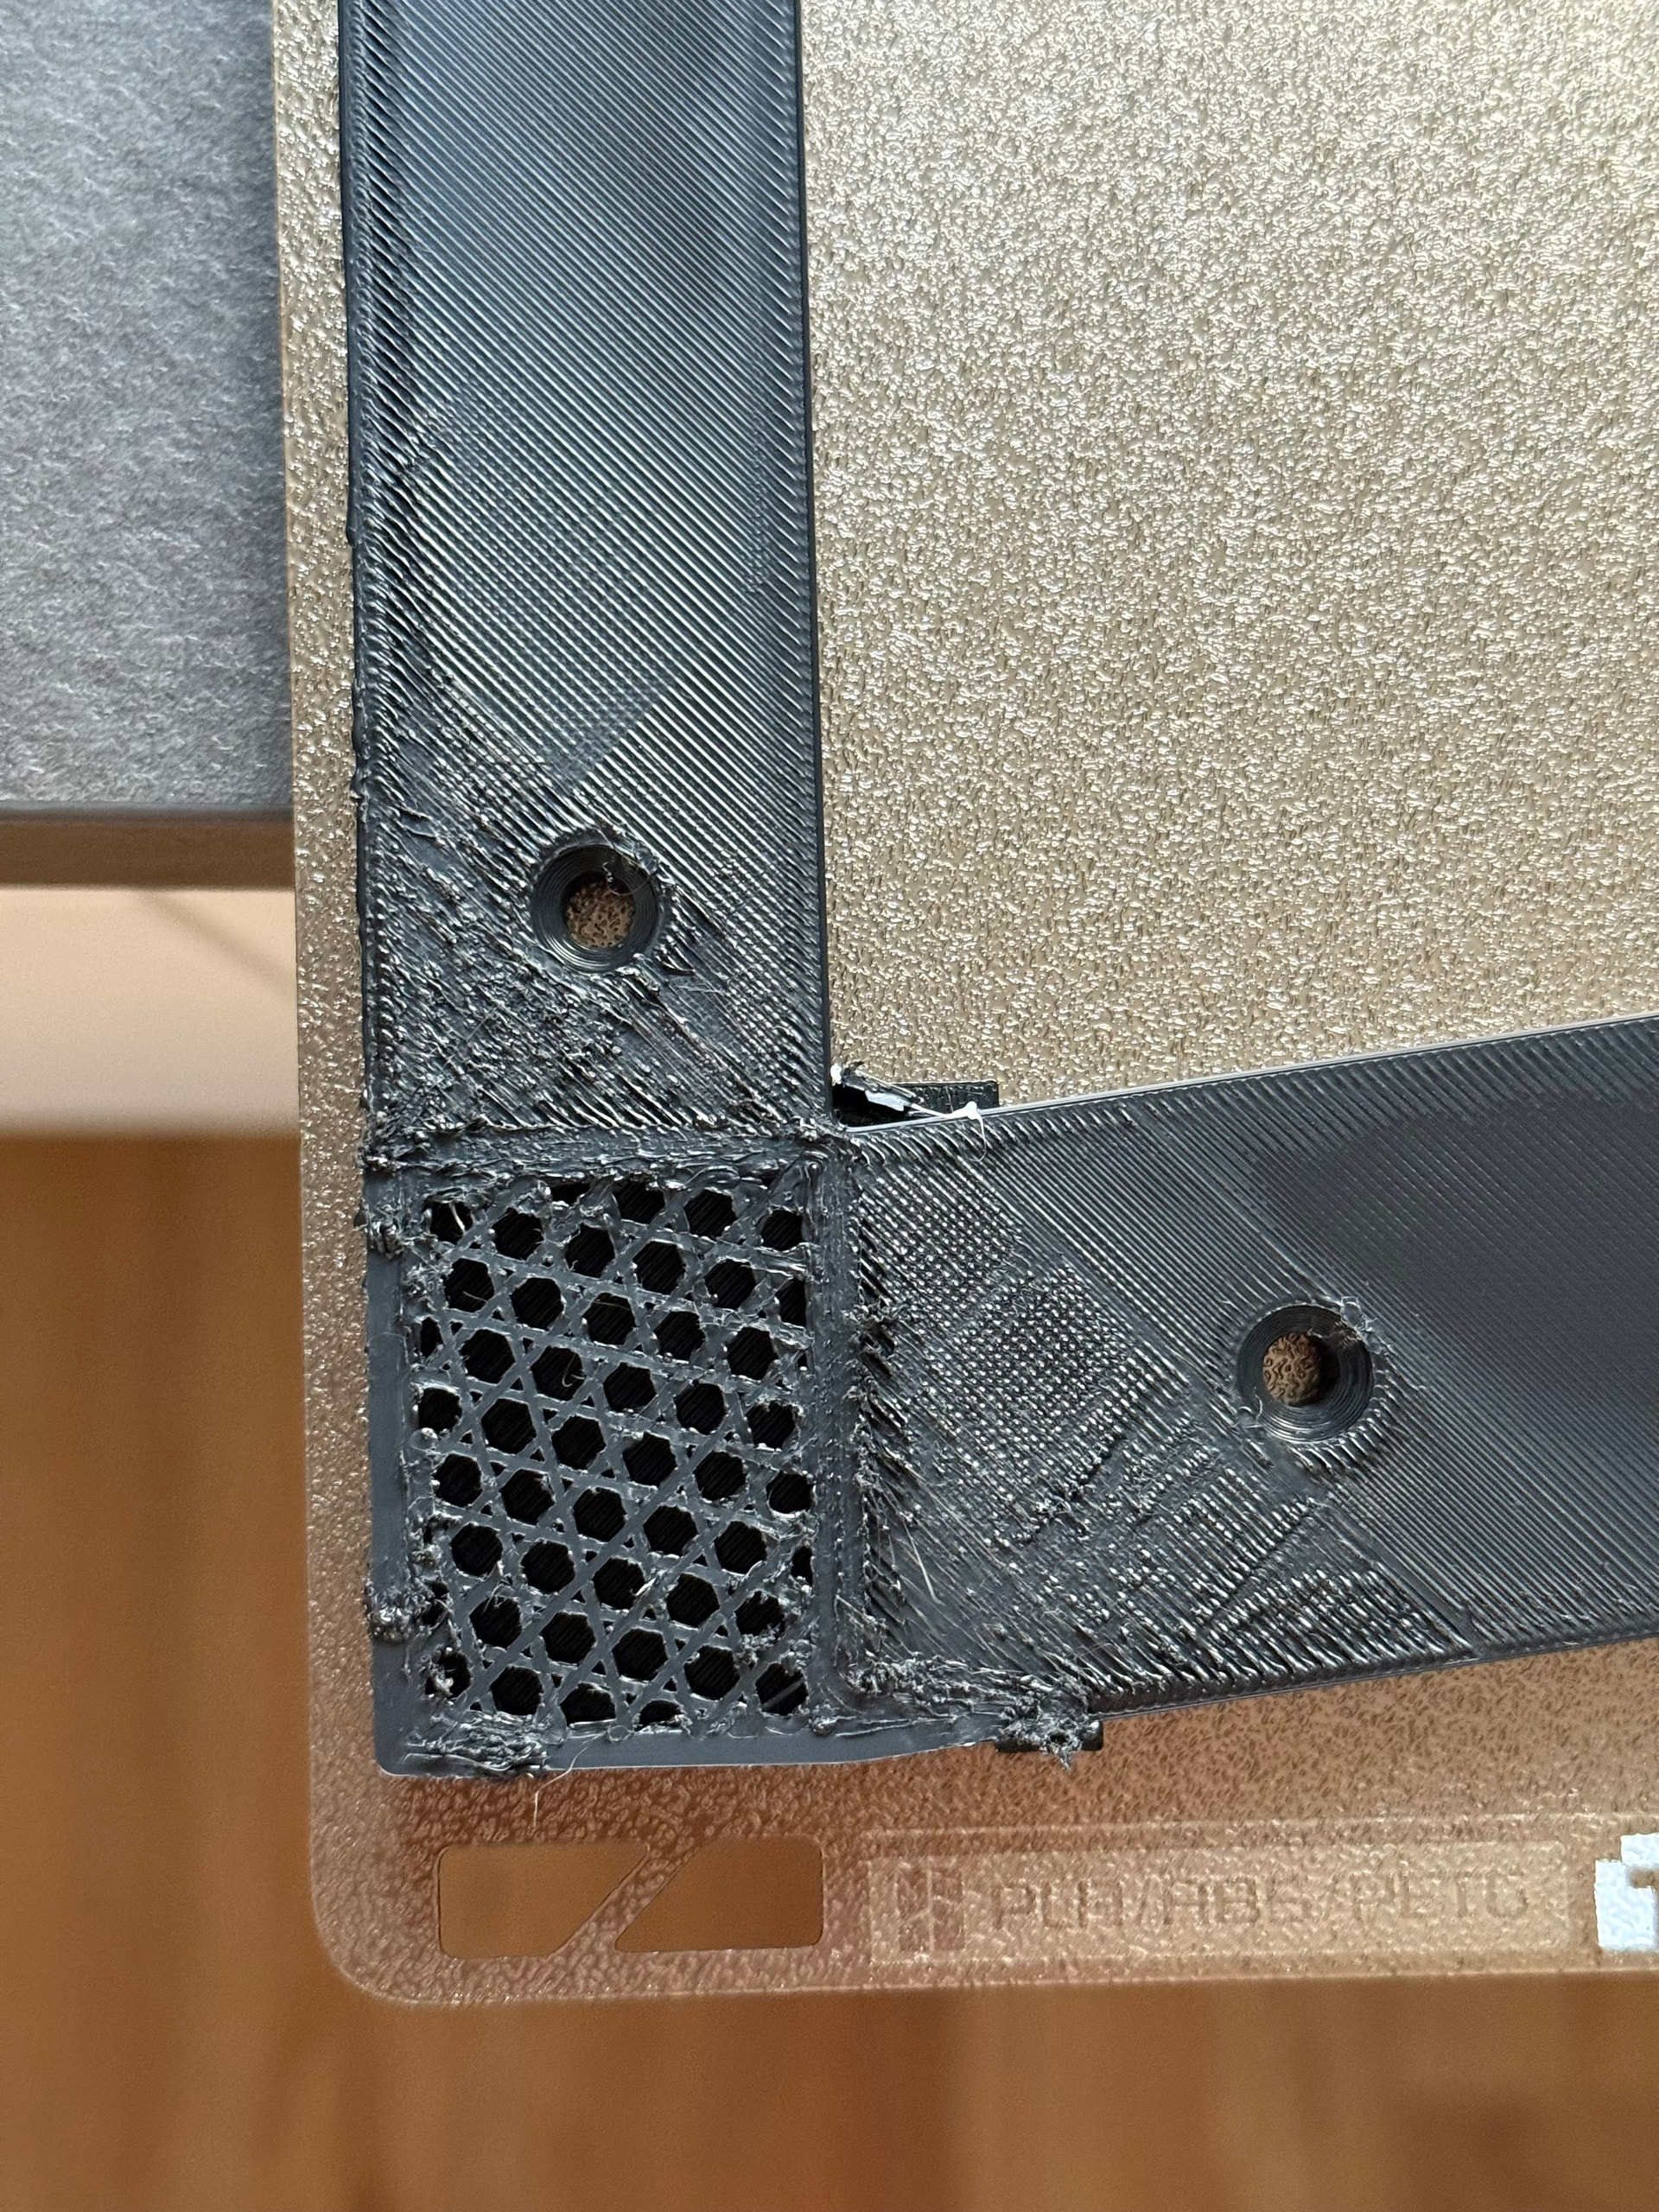
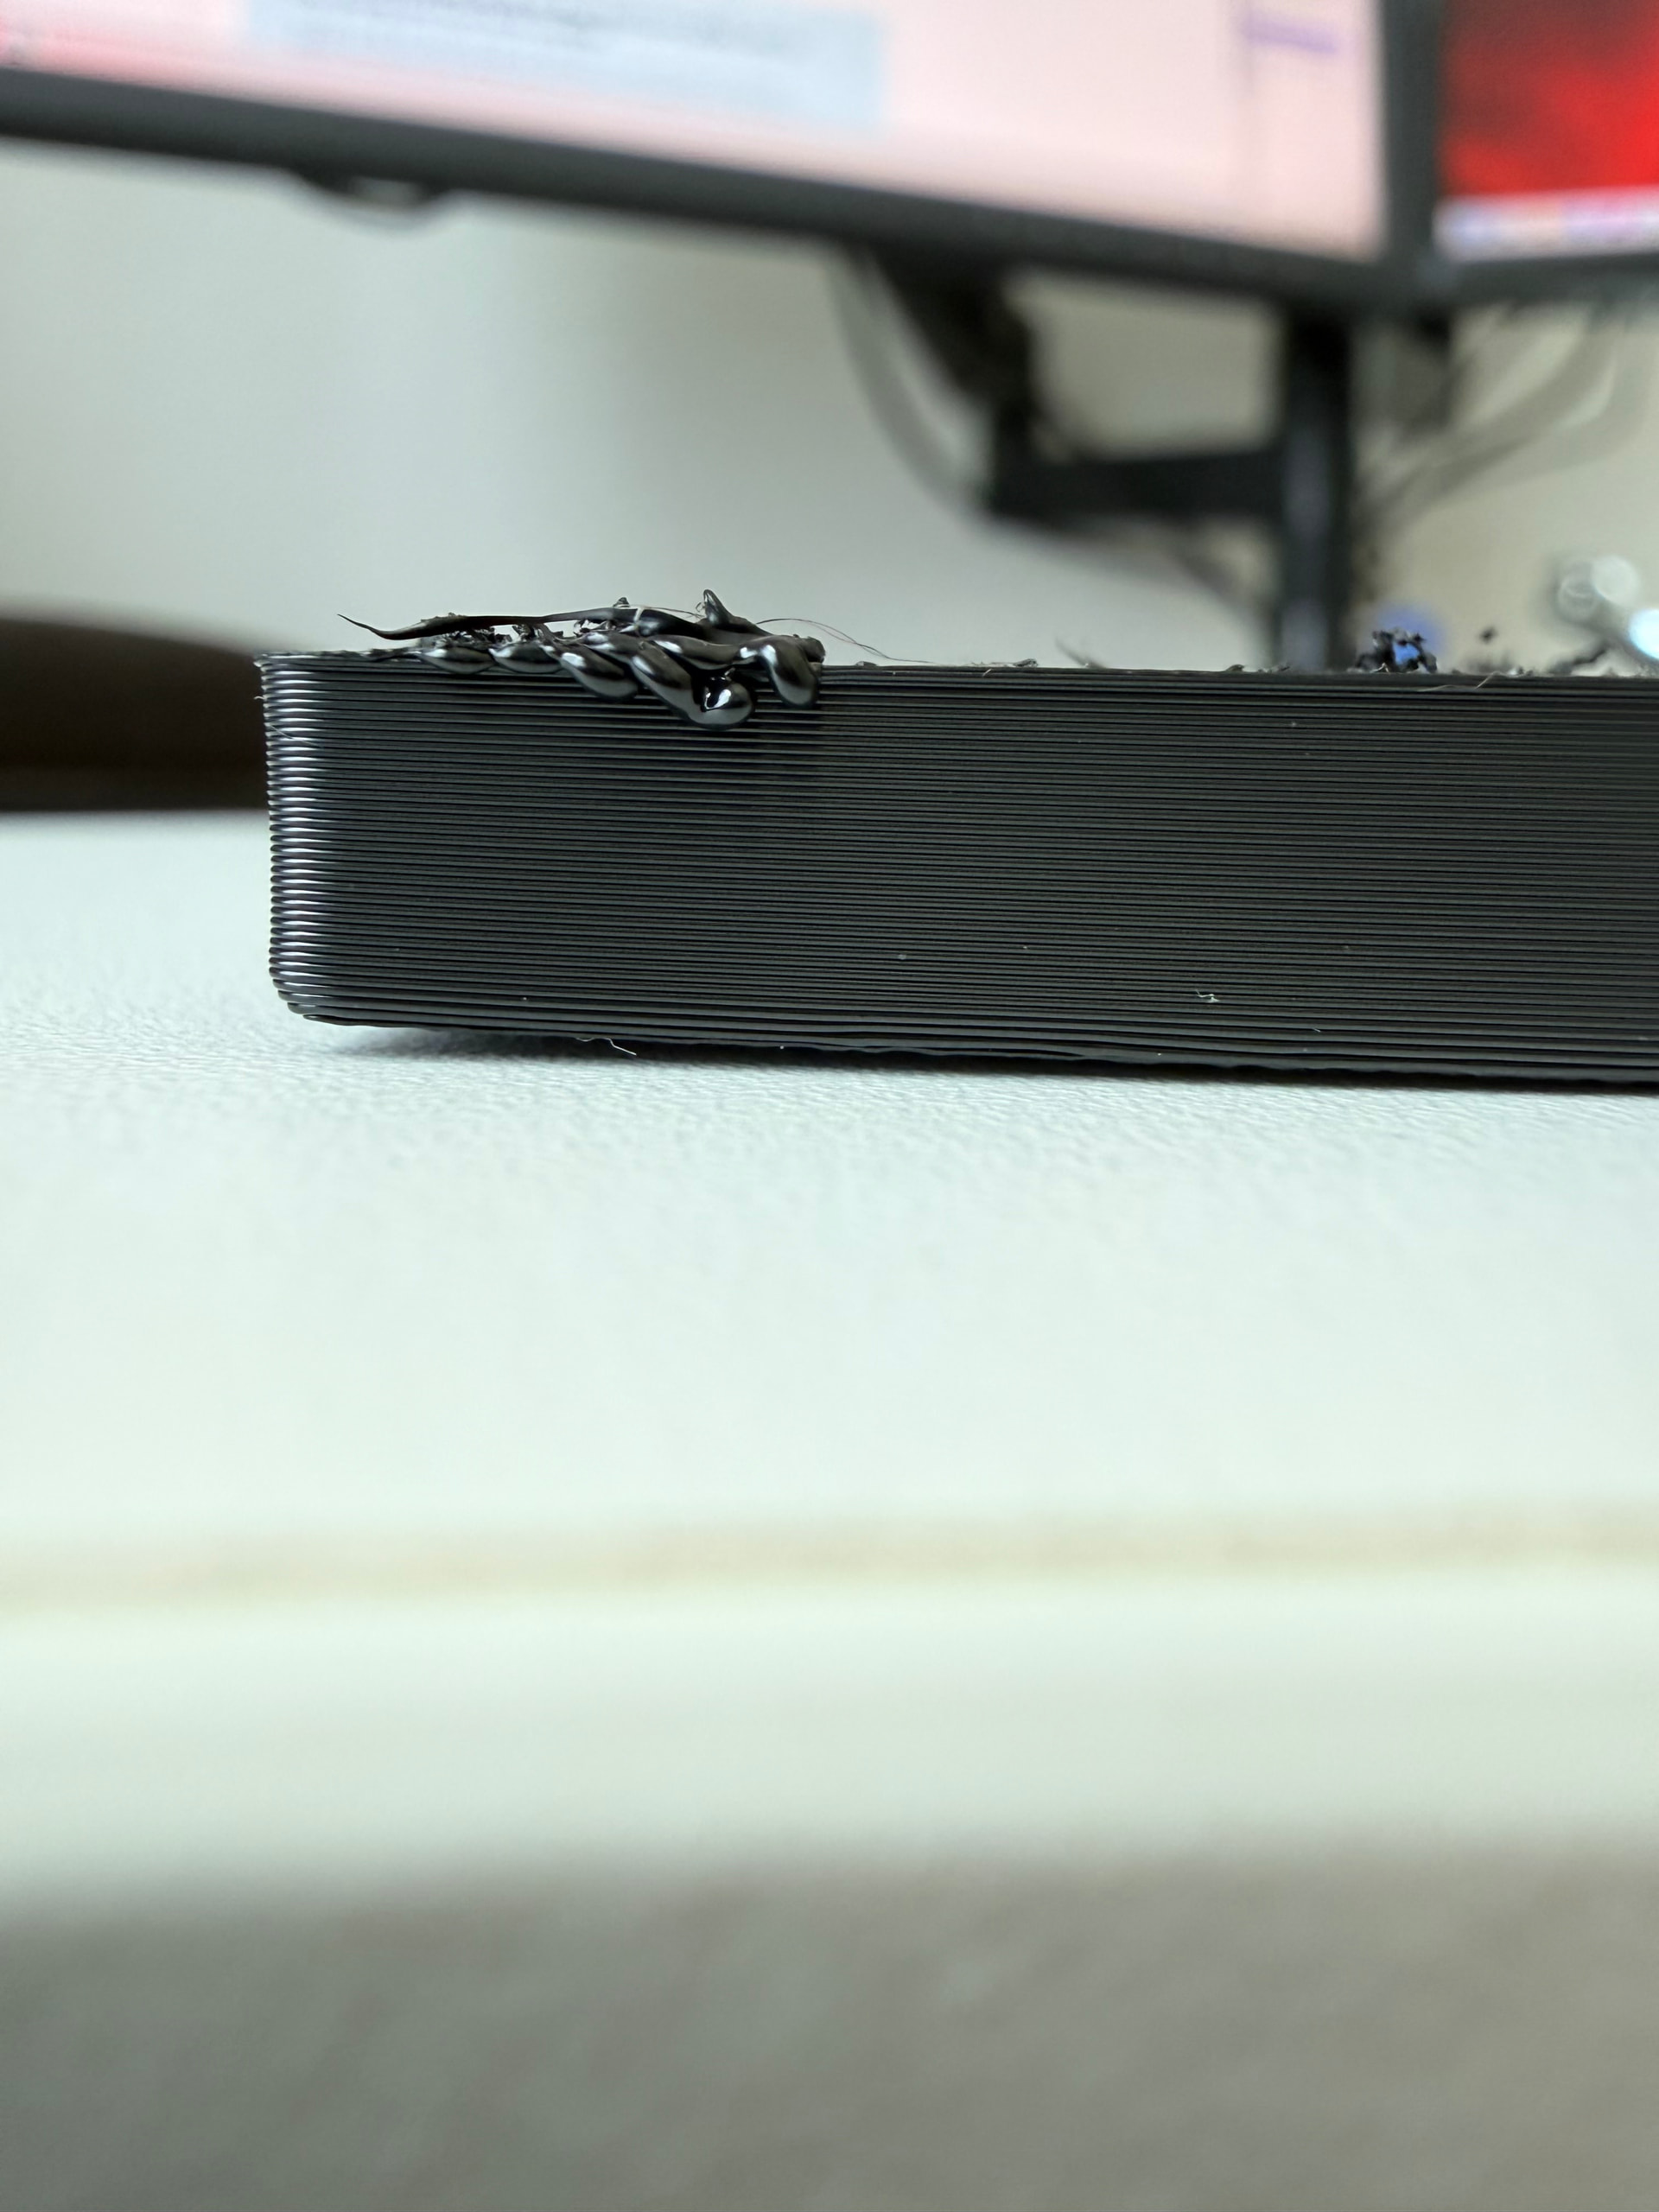
You can see how thick the lines of the infill get on the affected corners and how the printer smeared around the material on the surface. The right side of the model looks fine though. At both attempts the printer stopped at this stage with error code HMS_0700-2000-0002-0009 “Failed to extrude AMS A Slot 1 filament; the extruder may be clogged or the filament may be too thin, causing the extruder to slip.”

The AMS pulled back the filament and I checked the ending. It looked deformed:
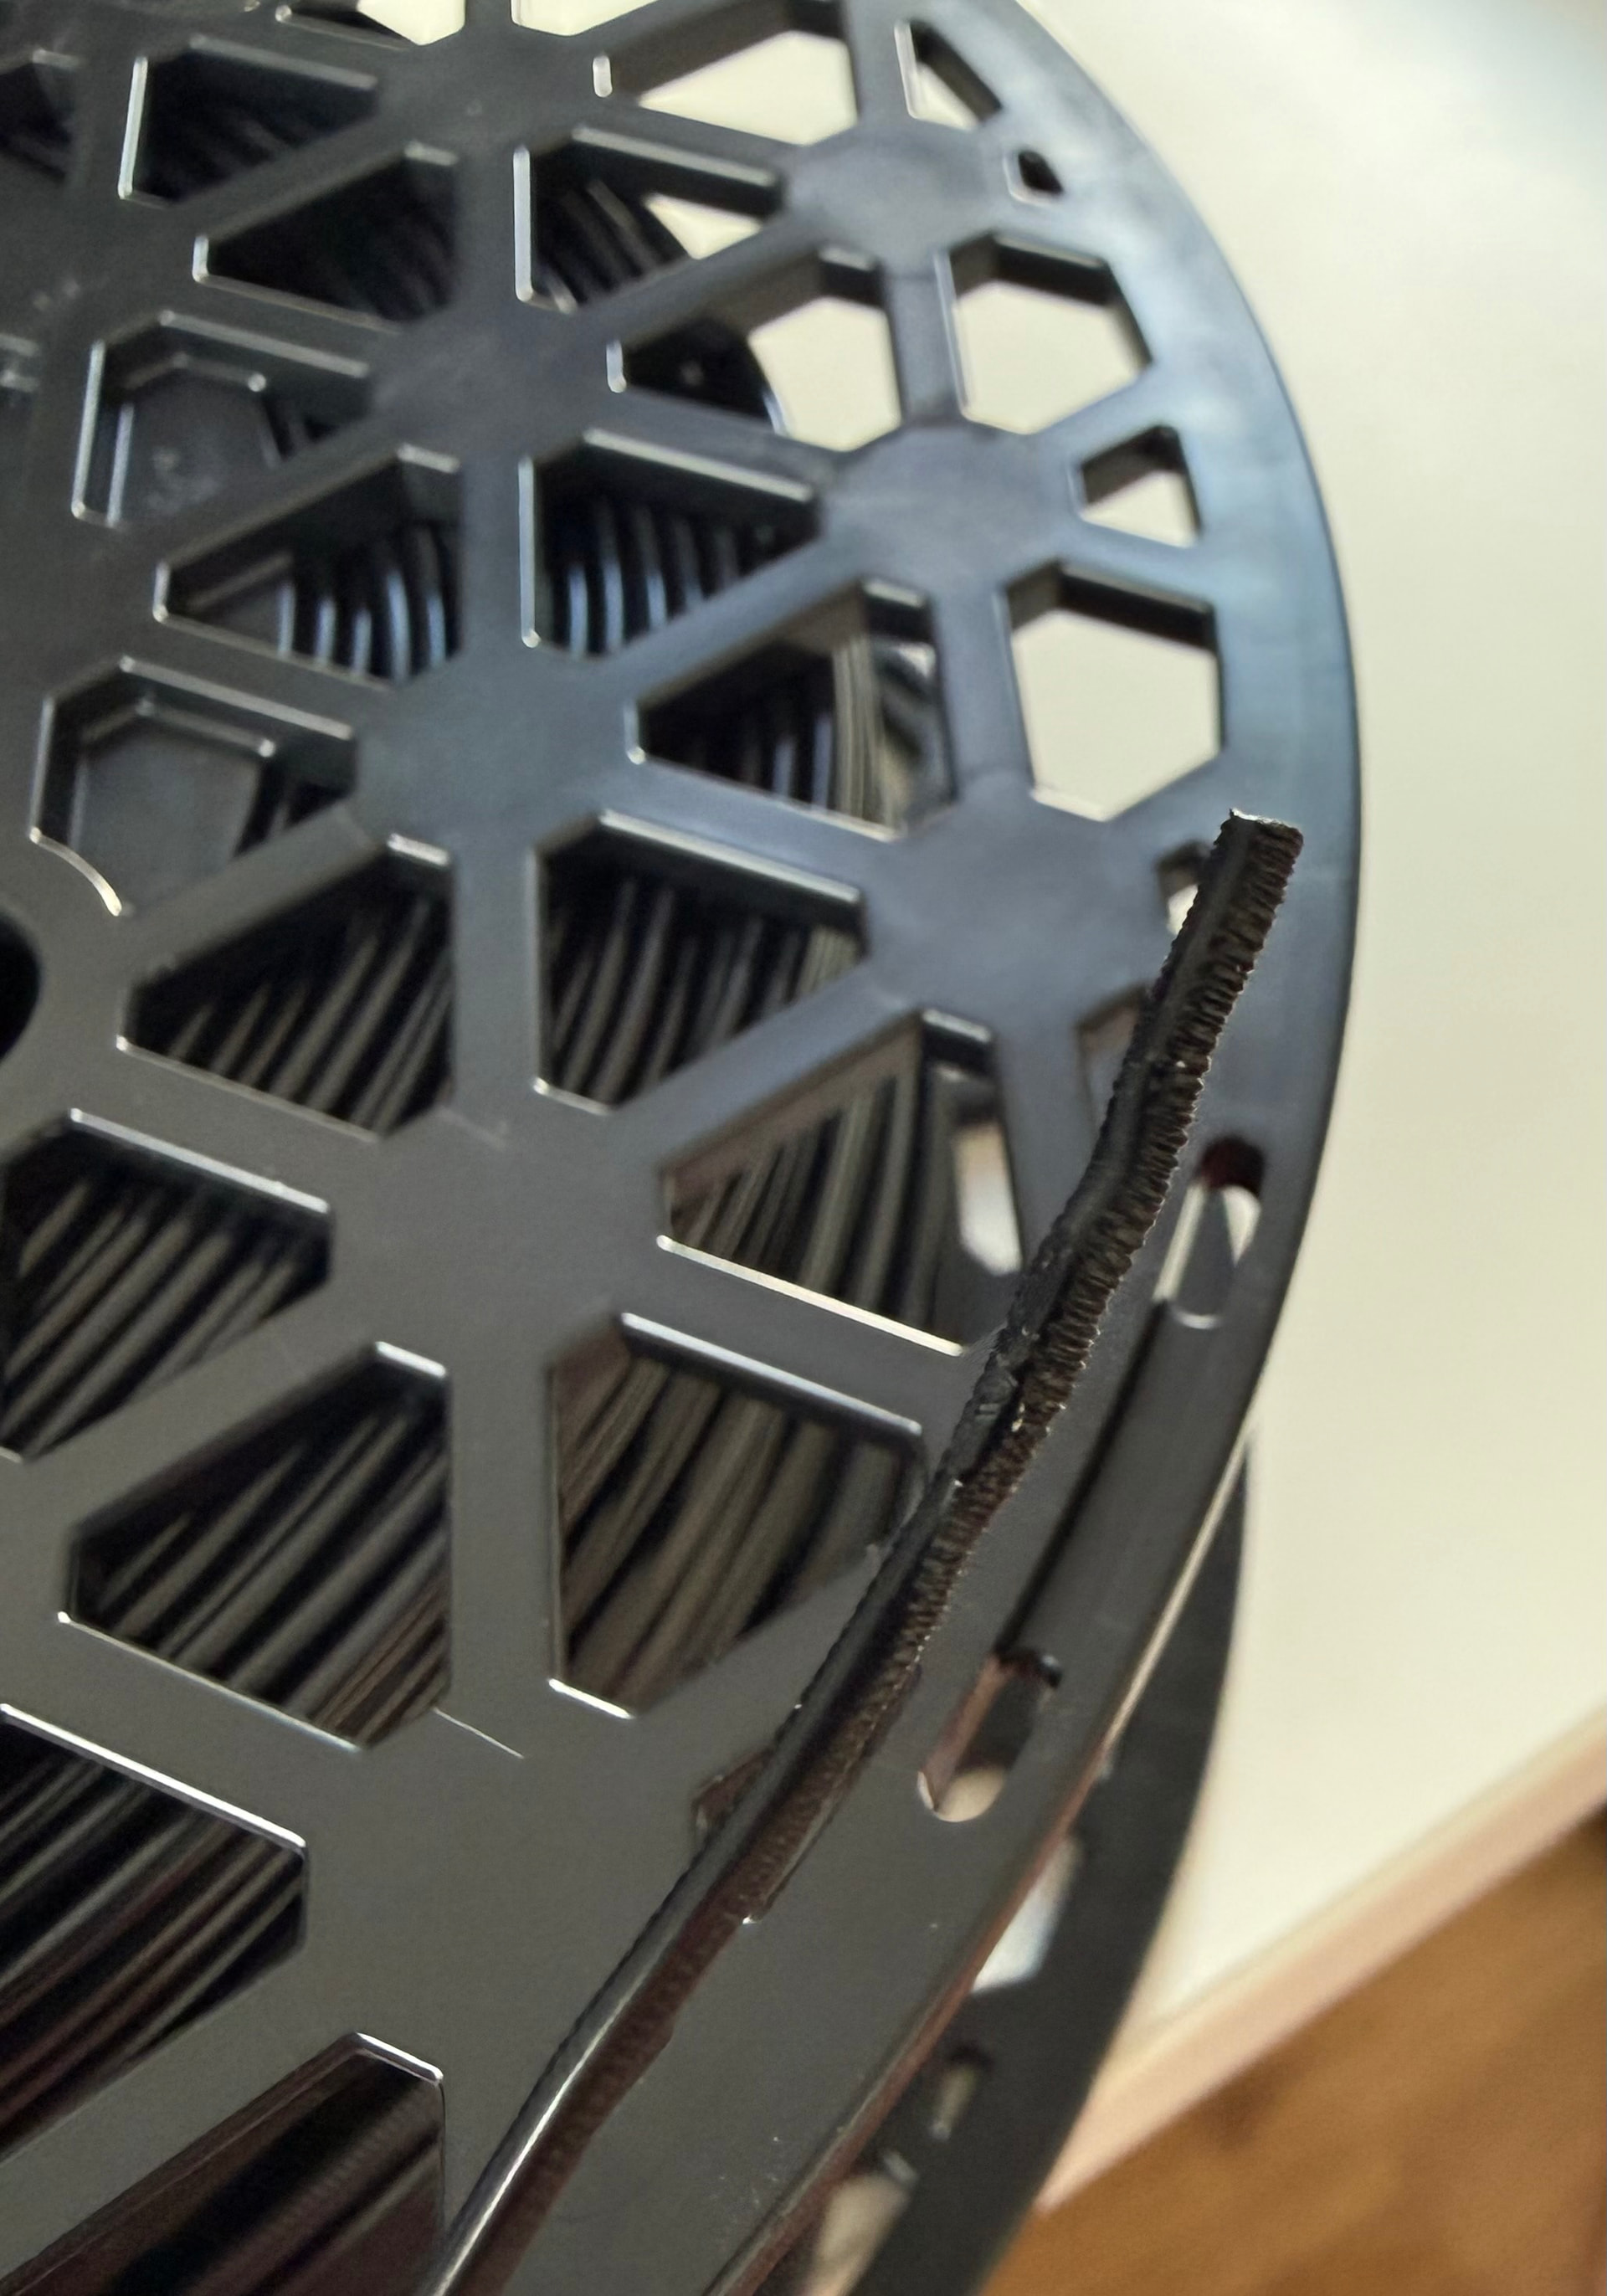
I completely took apart the extruder only to find very, very little debris. I wouldn’t have expect impact from that.

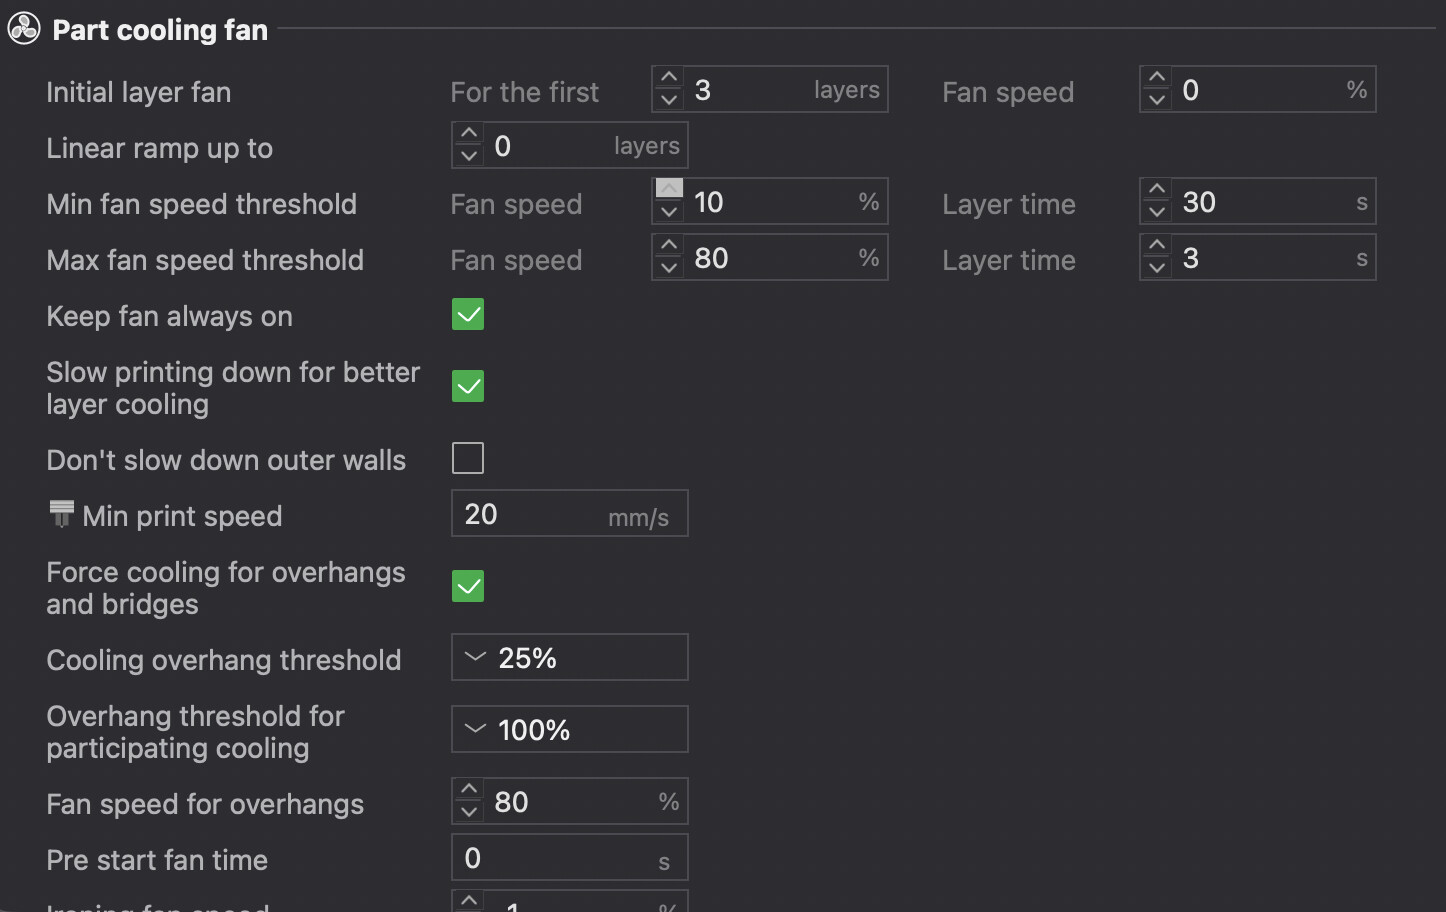
On my first attempt I printed the model with 5 walls and 30% tri-hexagon infill. Support interface layers on the Aux nozzle with support for ABS. Profile settings for the first attempt were (except bed temperature which was 100°C):
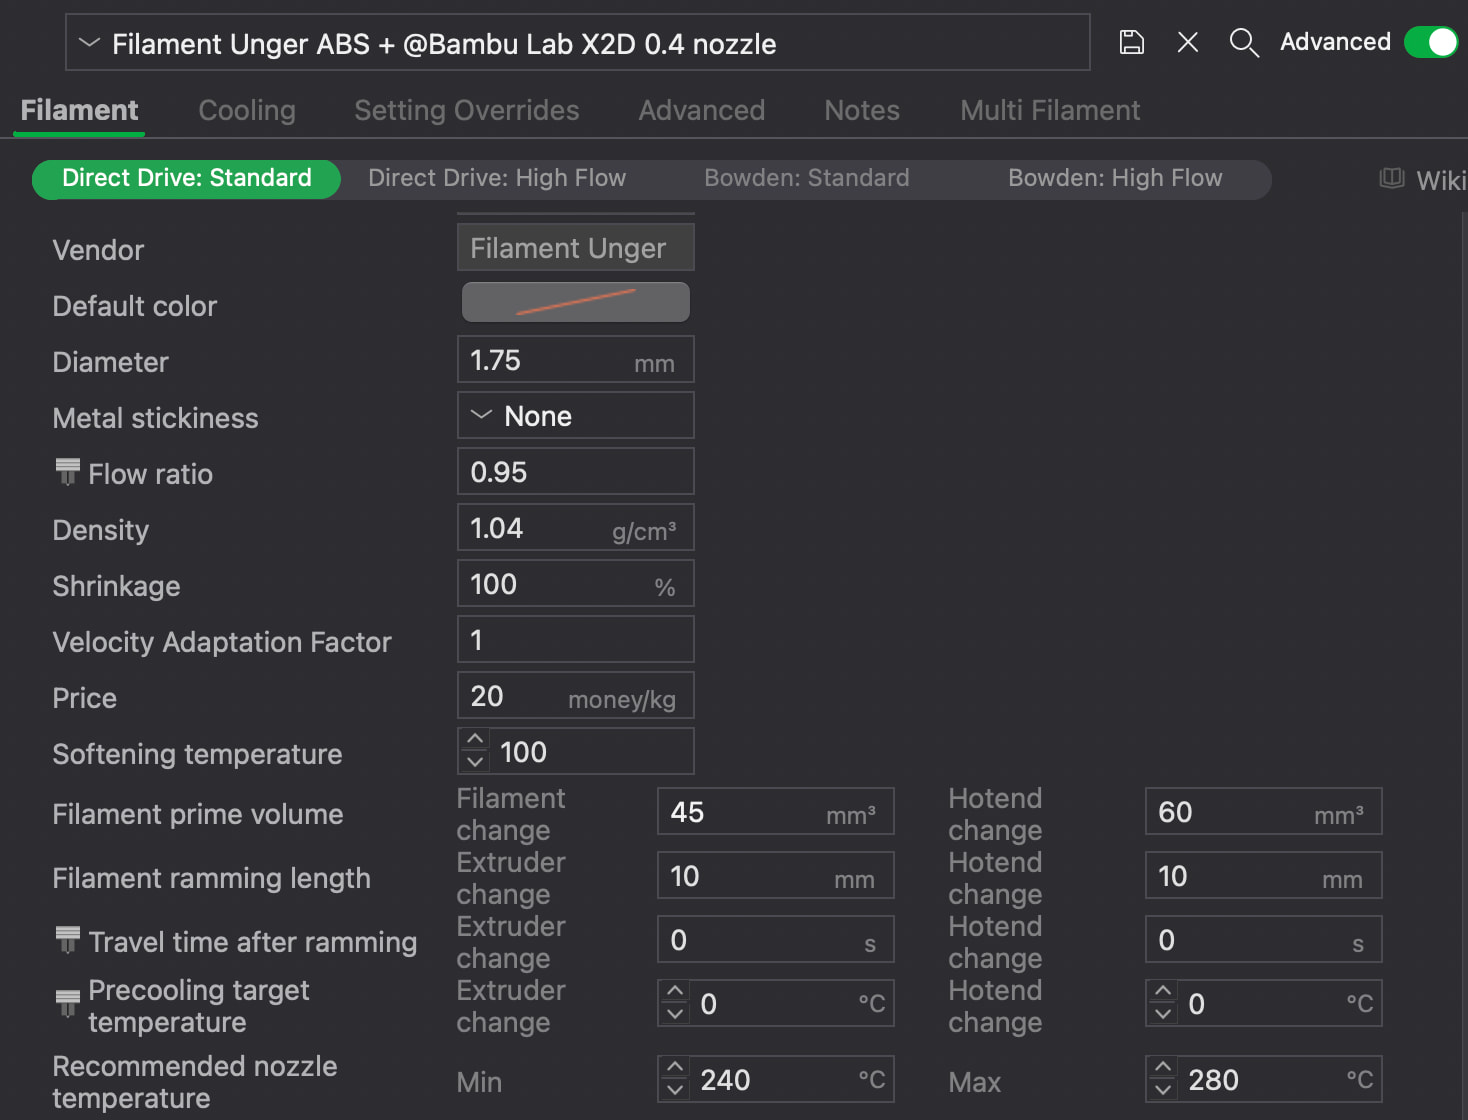
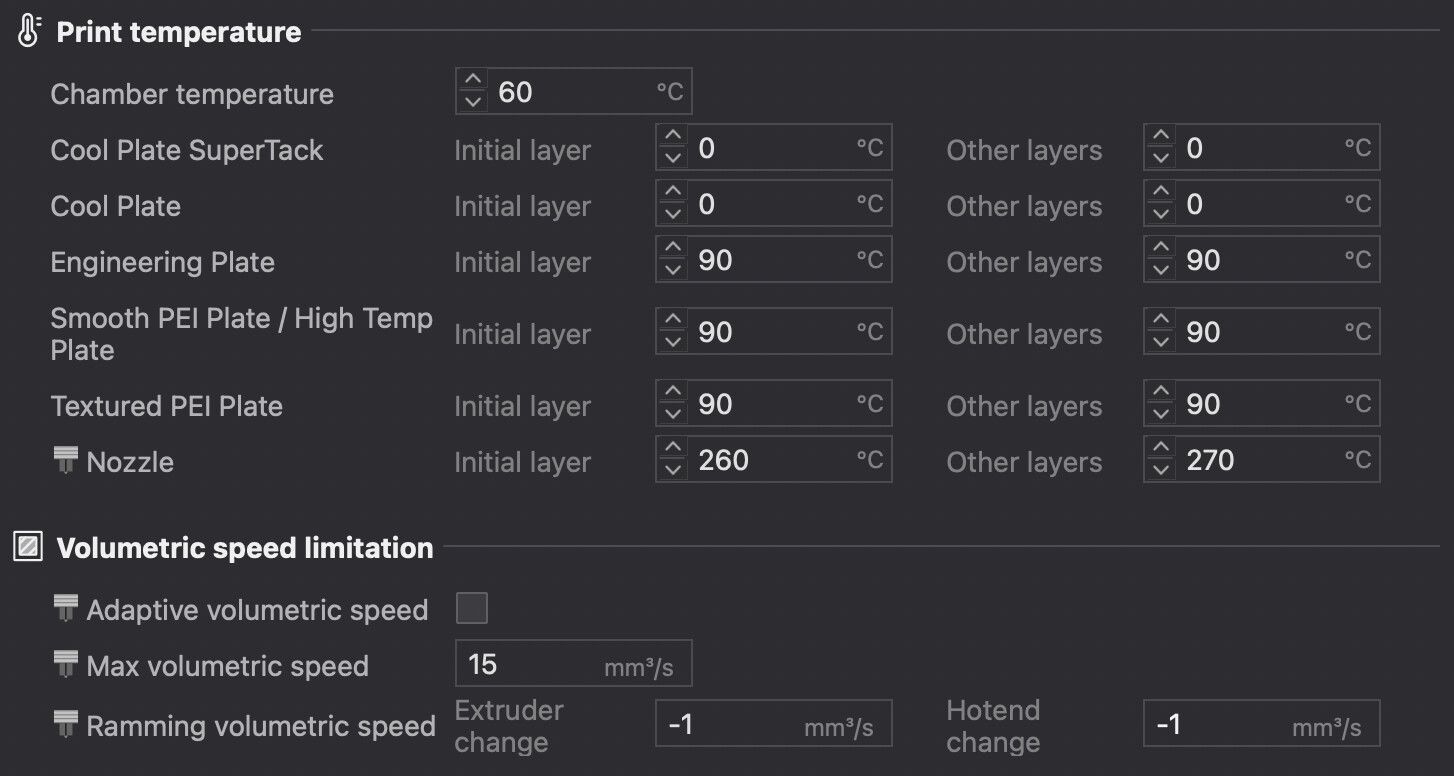
For my second attempt I cut the deformed ending of the spool, dried the filament for 12h at 65°C (went down form 28% to 8% humidity), reduced noozle temperature to 255°C after the first layer, chamber temperature down to 50°C and minimum print speed 30 mm/s after consulting my little friend Claude. The result however looked exactly the same. The print starts great without issues but ends with the same problem with again the extrusion error.

I’m lost on what I can do next and why this happens only at this point of the model and only of the left side of it.

Is there anyone with an idea what I could try next?

Thank you!
I have an idea - I could be completely off the mark, but it’s a lead you can follow: If it’s only happening in one specific spot or side on the print, it could be due to uneven heat distribution in the chamber, head bed and/or a fan in the printer itself.

As a result, the material is unable to maintain the temperature in certain areas when considered its entire surface. This can cause it to lift slightly off the printing plate, or it may contract unevenly and warp. Or a fan from the printer on the side is blowing too strongly.

Like I said, it’s just a hunch. This is a common problem, especially with such large prints. Is that the case for you, too? I can’t say - as I mentioned, it’s just an initial suspicion and maybe a clue.

1 Like

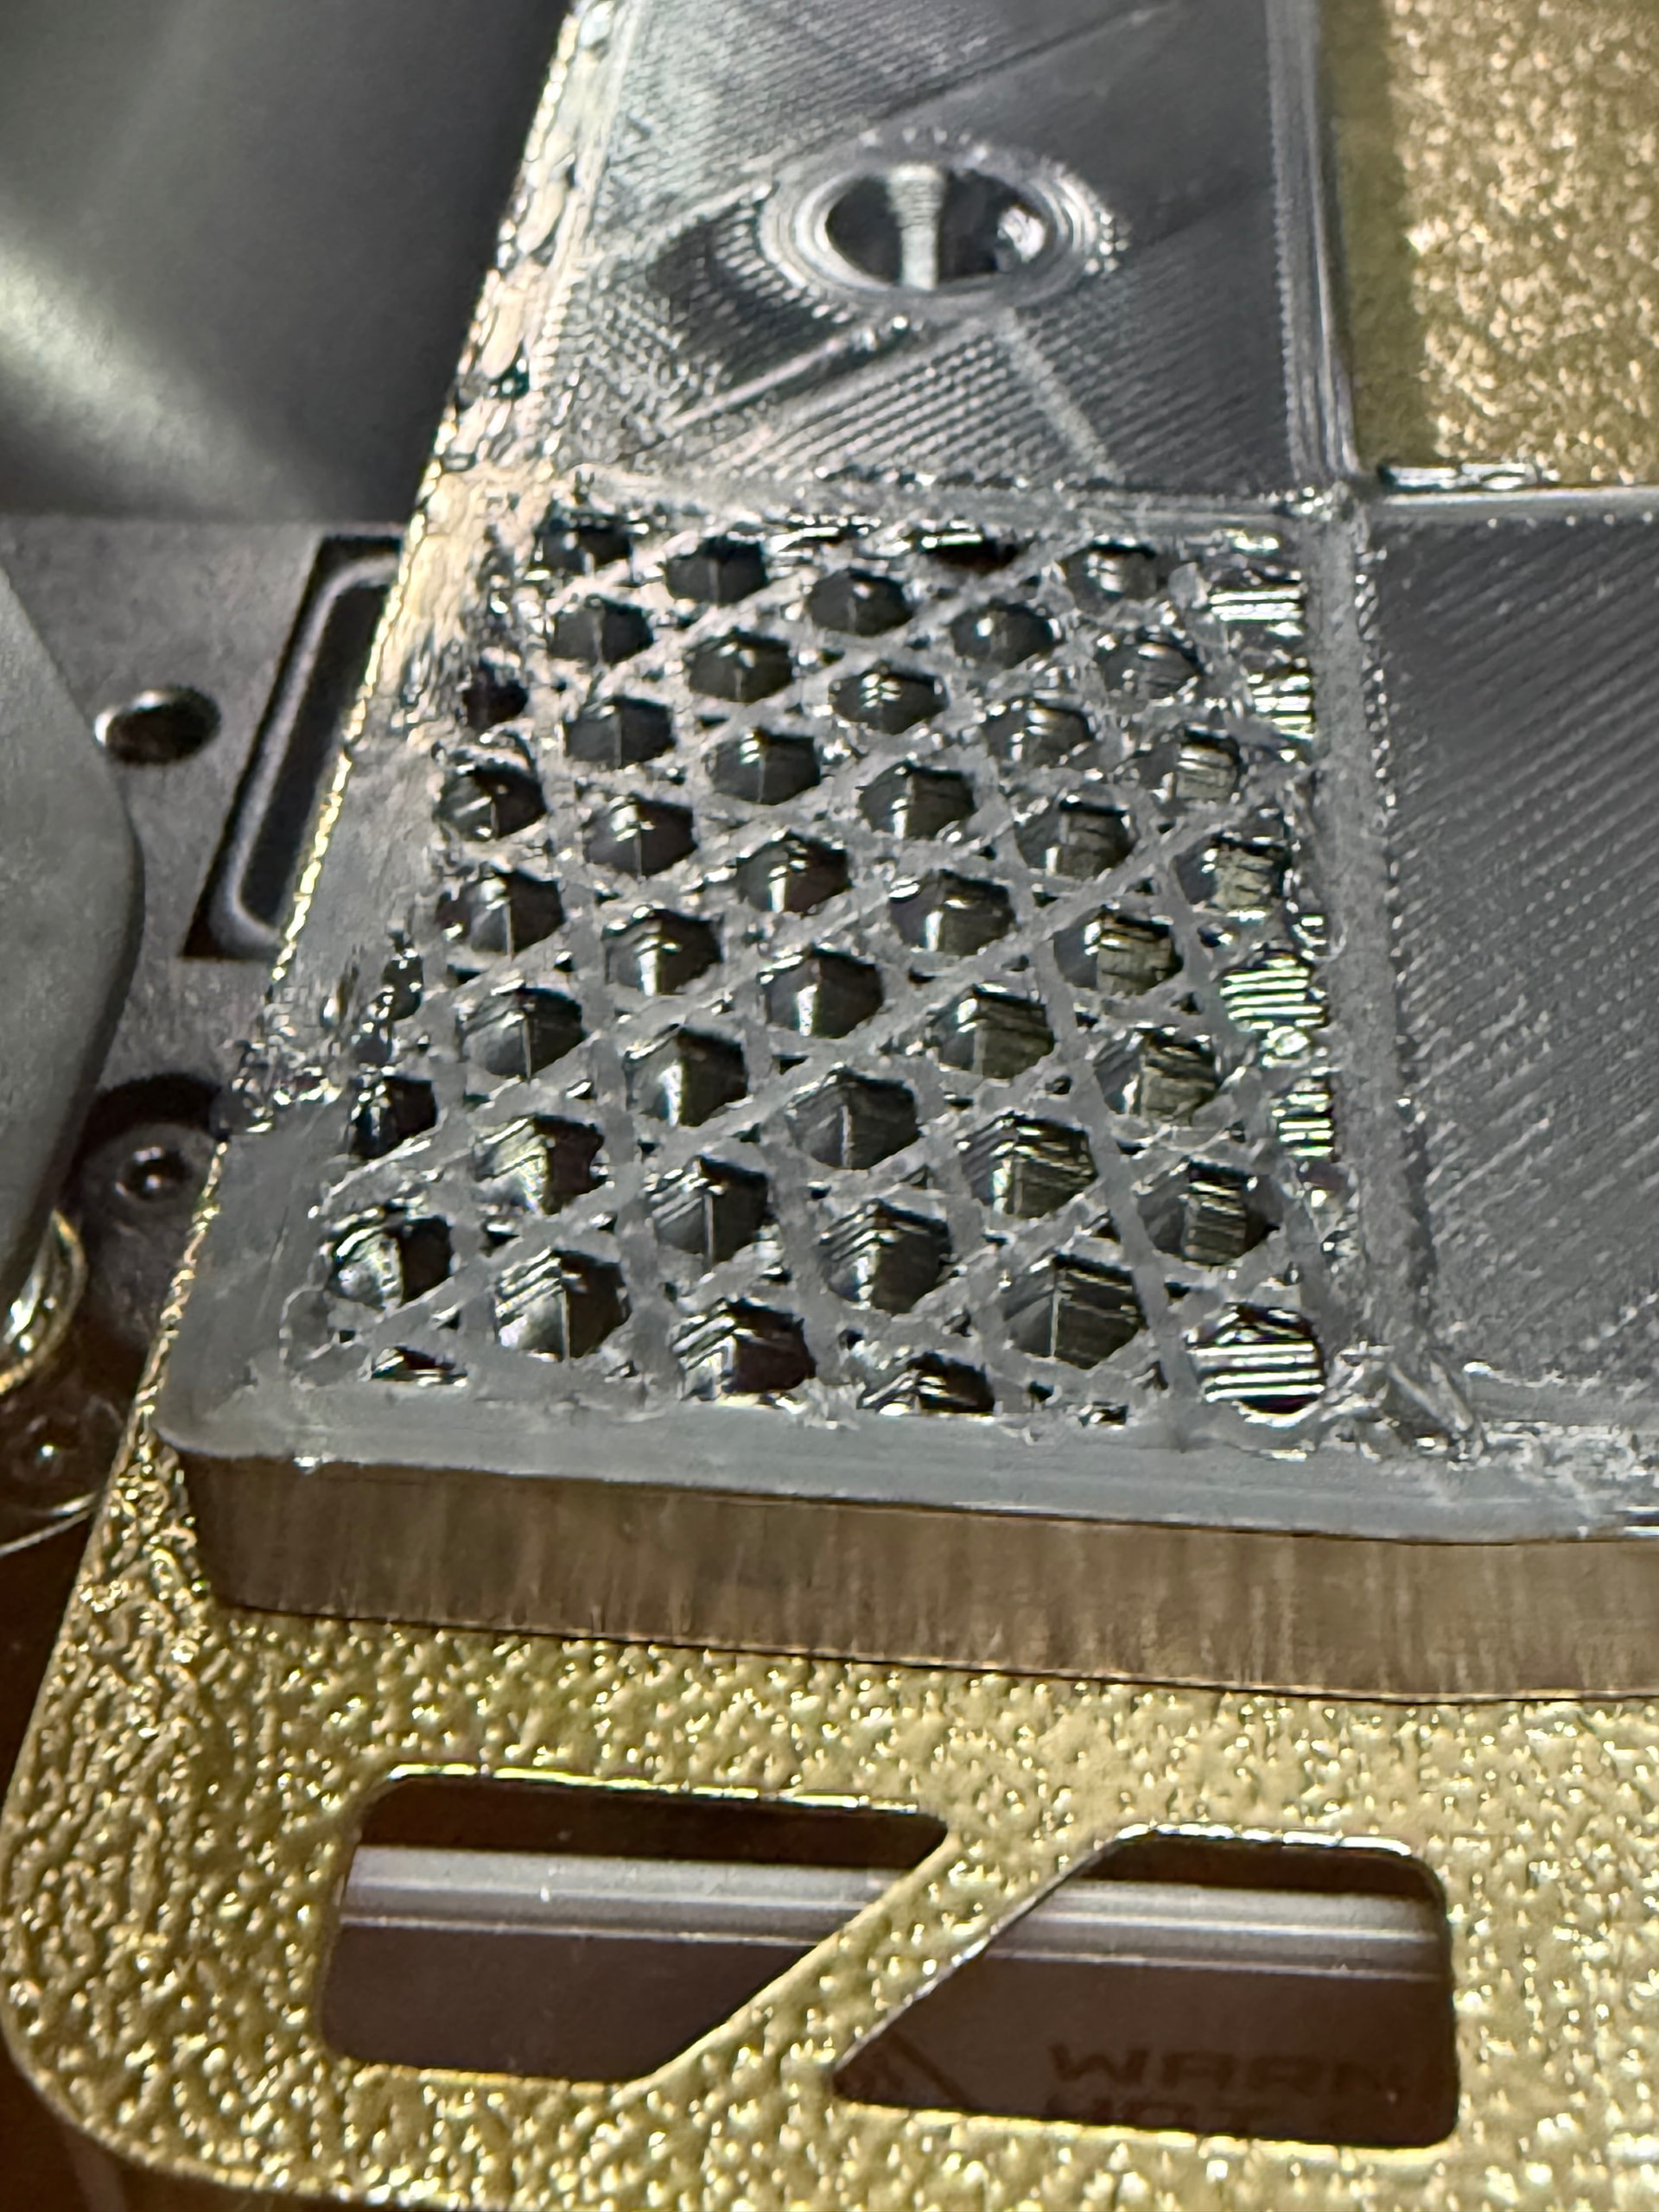
Thanks for your thoughts! I actually think you’re on the right track with your assumption. I had a closer look at the pictures I took during the print and that seems to confirm your theory about warping.

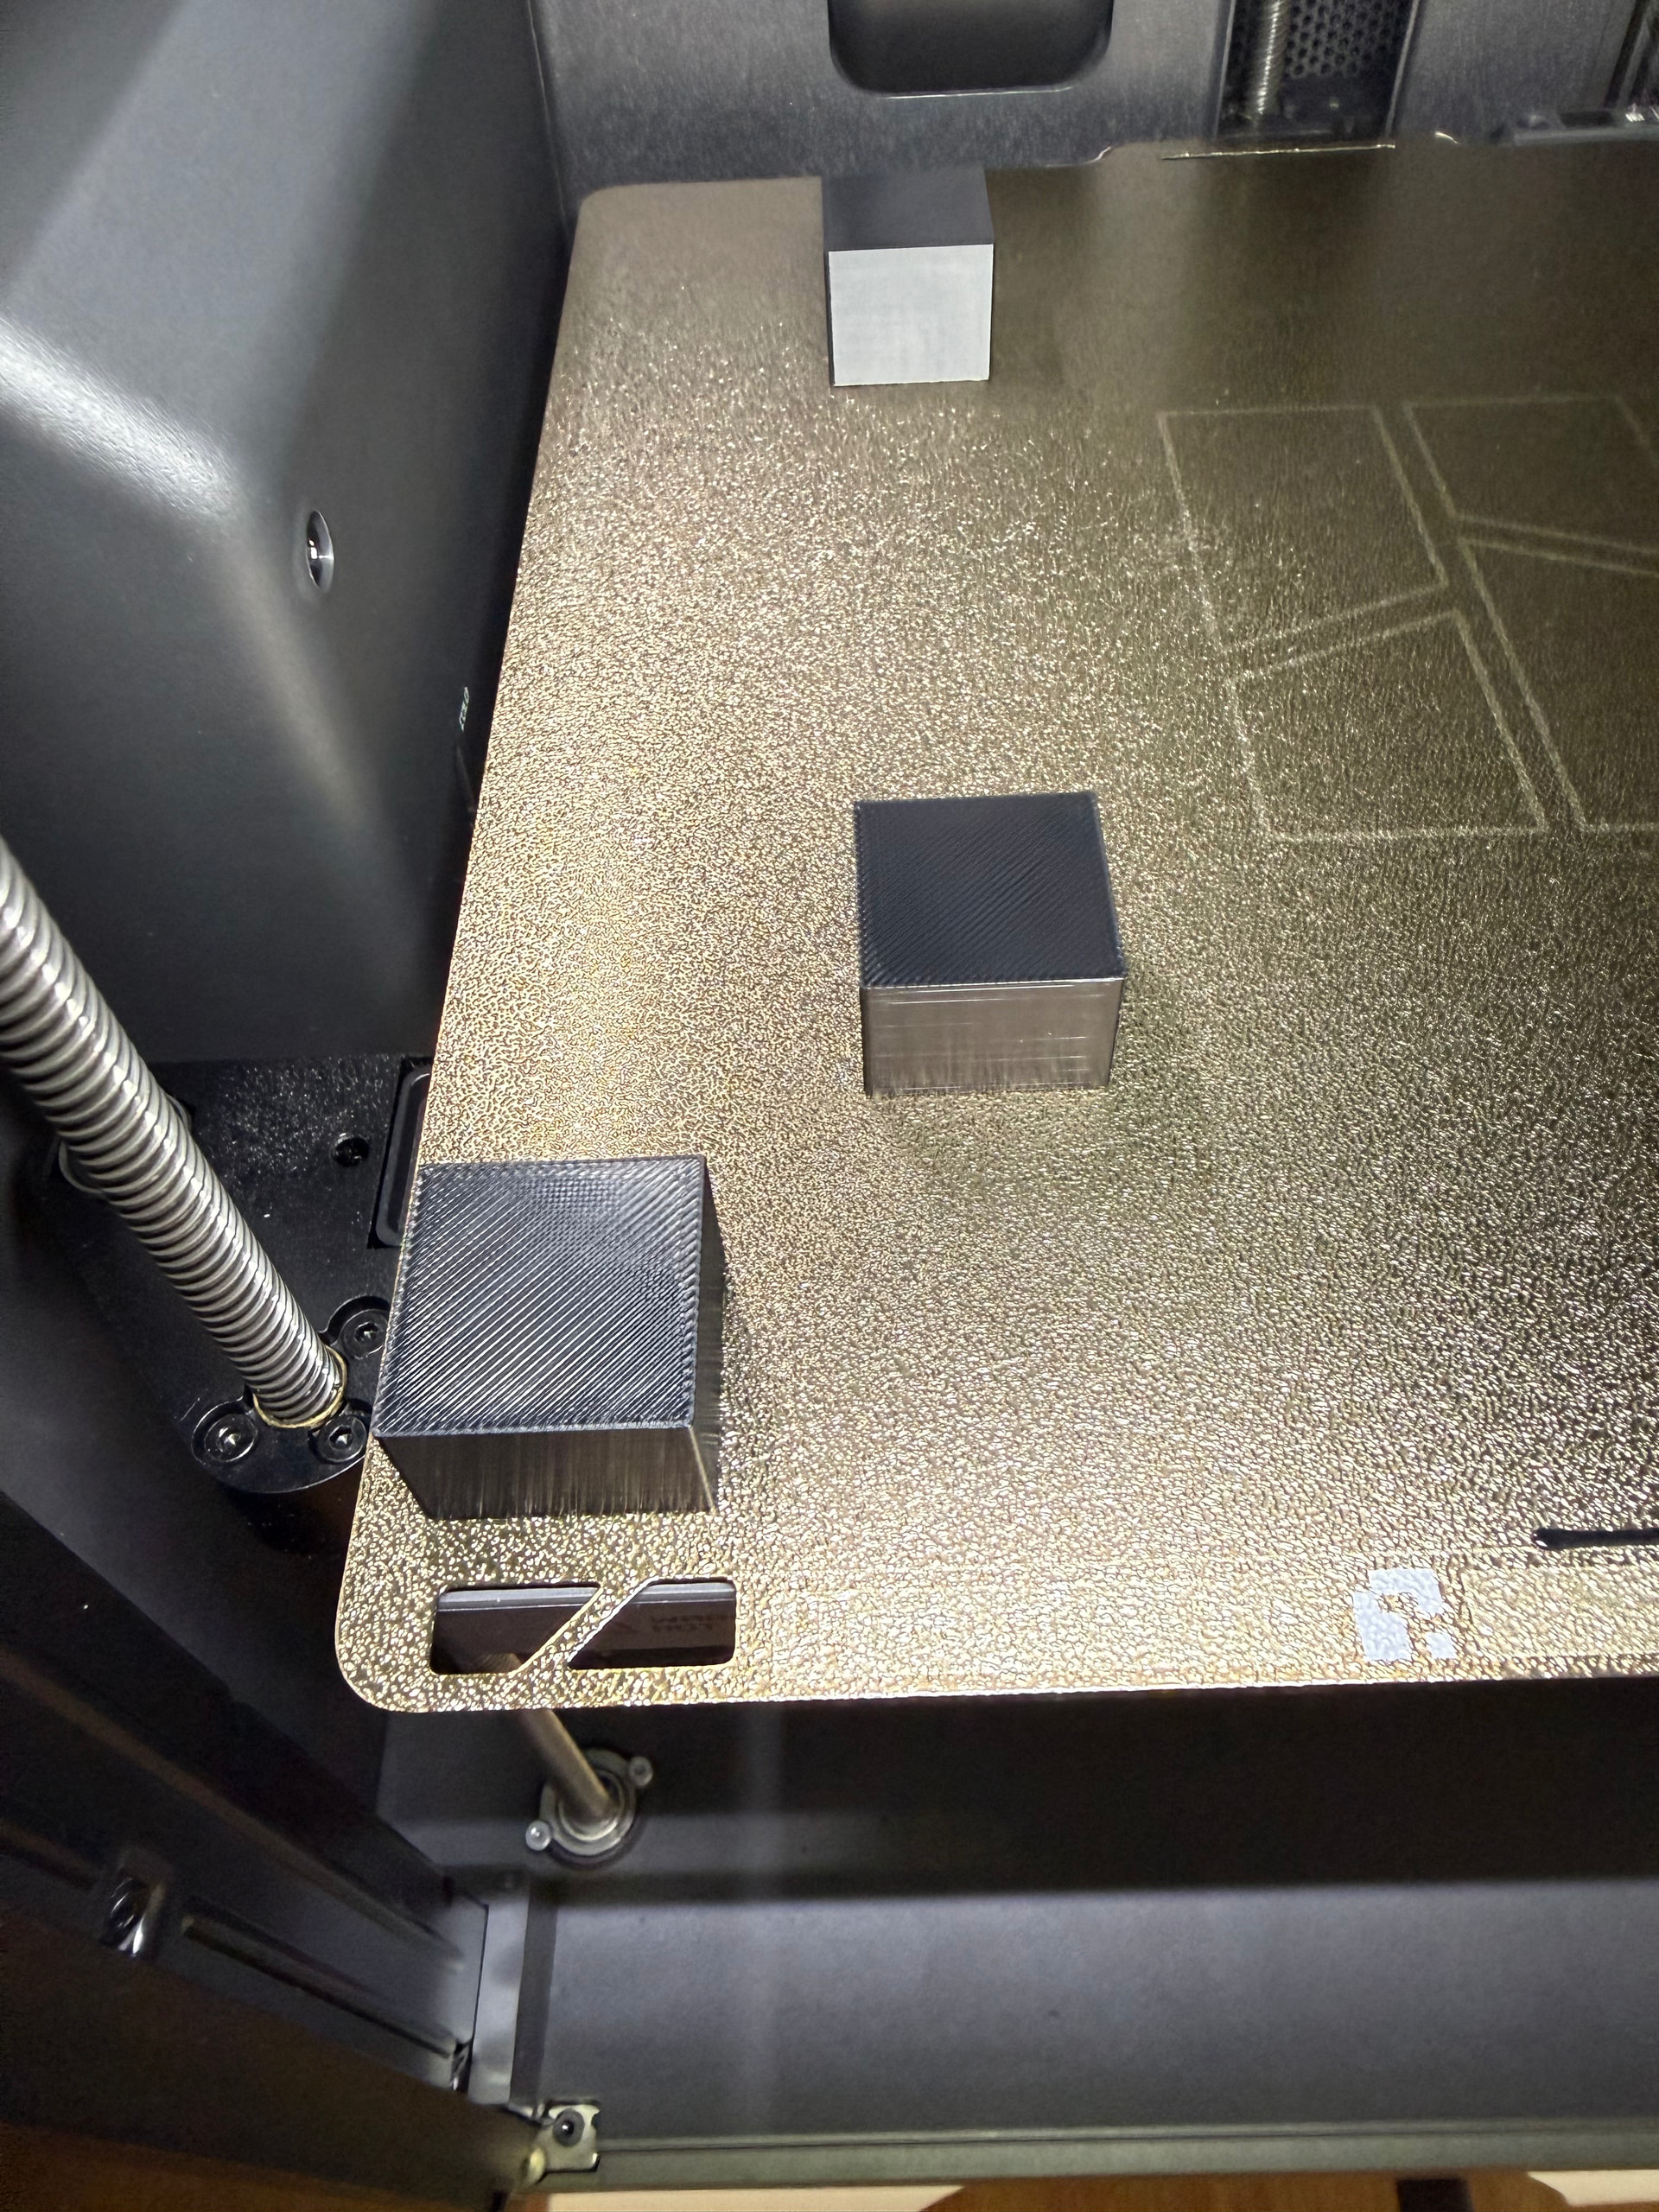
You can see that the model pretty much sticks to the plate. The thin shadow below the edge comes from a 1mm radius rounding so that’s ok. But look at the uneven gap between the plate cutout and the heat bed. Looks like it lifts the plate from the bed. :face_with_peeking_eye:

Looking at the part on a flat surface it doesn’t look like much but it seems to be enough to cause this mess and the clogging of the hotend.

Any tips how I could prevent it or should I switch to a different material with similar strength that is not as likely to warp? I unfortunately don’t have any experience besides the three materials I described earlier yet.

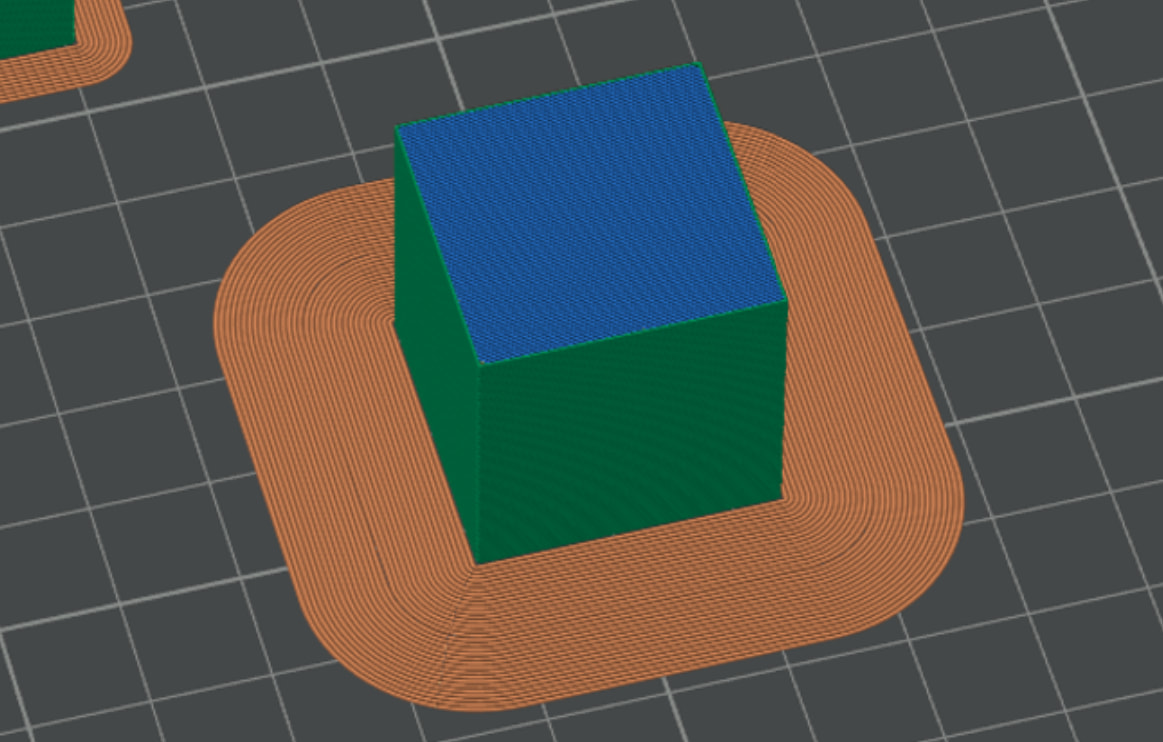
Confirming the conclusion I just printed small cubes to remove leftover brims from the plate. One very close to the front left corner and they expectedly turned out all well.

General tips - you’ll have to try them out to see what works for you:


The wiki has some useful tips:


You could add brims - a sort of outline - but the downside is that you’ll probably have to cut them off after printing. In your case, inward - since there’s no room on the outside - won’t solve the problem, but it will maybe reduce it - in your case, that probably won’t help much.


Change the print plate. Use a print plate with stronger adhesion - even that won’t completely solve the problem. But as I said, there are a lot of little things that add up.


Here are a few more tips, summarized by Bambu:

Based on the properties of ABS, it’s strongly recommended to consider the following tips to realize best performance:

1. Enclosure

An enclosed chamber helps maintain a consistent temperature around your print, reducing warping and improving print quality.

2. Use Brim

Adding a brim can significantly reduce warping by increasing the adhesion surface area.

3. Dry Your Filament

Although drying ABS is optional, it’s strongly recommended to dry it to prevent poor layer adhesion and brittleness.
Drying Condition:
Blast Drying Oven: 80 °C, 8h
X1 Series Heatbed: 90 - 100 °C, 12h

4. Other Settings

Build Plate & Bed Temperature: Smooth PEI Plate (90-100 °C); Textured PEI Plate (90-100 °C)
Printing Speed: < 300 mm/s
Nozzle Temperature: 240 - 280 ℃
Part Cooling Fan: 0 - 80%
Annealing: 80 - 90 ℃, 6 - 12 hours

1 Like

I had originally intended to write a more detailed reply, as I have printed several hundred kilograms of ABS, ASA, and other warp-prone engineering materials for parts used in fairly harsh real-world conditions.

However, since there is roughly a 100% chance that RetroSharky will object to the wording, the content, or both, I’ll save everyone the detour and keep it brief:

  • Preheat the build plate and heat-soak the chamber for at least 30 minutes before starting the print.
  • Keep the actual chamber temperature around 60–65 °C. Lowering it to 50 °C is moving in the wrong direction for a part of this size.
  • Use a thicker and stiffer spring-steel build plate.
  • Consider reducing the amount of material in the model where the structural requirements allow it. Five walls, 30% tri-hexagon infill, and large continuous cross-sections all contribute to the contraction forces in a frame this large.
  • Use a proper bed adhesive formulated for ABS/ASA, particularly in combination with the stiffer plate.

The important distinction here is that this does not appear to be an ordinary first-layer adhesion problem. Your own photos indicate that the part remains bonded strongly enough to pull the flexible build plate away from the magnetic bed.

A brim or simply using a surface with stronger adhesion therefore does not address the complete failure mechanism.

1 Like

Thanks, that sounds reasonable and I’m happy to hear it’s not a me-problem but a general challenge with that material.

I’m now considering moving the screw holes of that model. They are the primary reason I made the frame this strong since I didn’t expect ABS to be this flexible in first place. Since the topcase has quite a strong lever when attached to this wallmount I assumed it would bend the frame between the hooks and the screw holes. Hence I thickened the frame and increased support. I might just run the screws through the hooks directly to catch the load at its origin. That should allow me to drastically reduce the material for the frame and hence the risk of warping.

Thanks a lot for your help!